


Stash Your Stuff in Style With This Hanging Rope Shelf
Keep your bathroom essentials (and more!) organized with this adorable and perfectly imperfect hanging rope shelf.

Brian Patrick Flynn, FlynnsideOut.com

Materials Needed
- 1" x 8" x 6' primed pine board
- 3/8" rope
- (12) plastic grommets (3/8" inside, 1" outside)
- #4 3/8" screws (for grommets)
- 1/16" drill bit
- #6 1/4" countersink drill bit
- 1" spade drill bit
- 3/8" drill bit
- cordless drill
- circular saw
- utility knife
- measuring tape
- level
- speed square
- sanding block
- pencil
- drop cloth
- painter's tape
- 1 quart of paint in desired color
- paintbrush
- hanging hardware
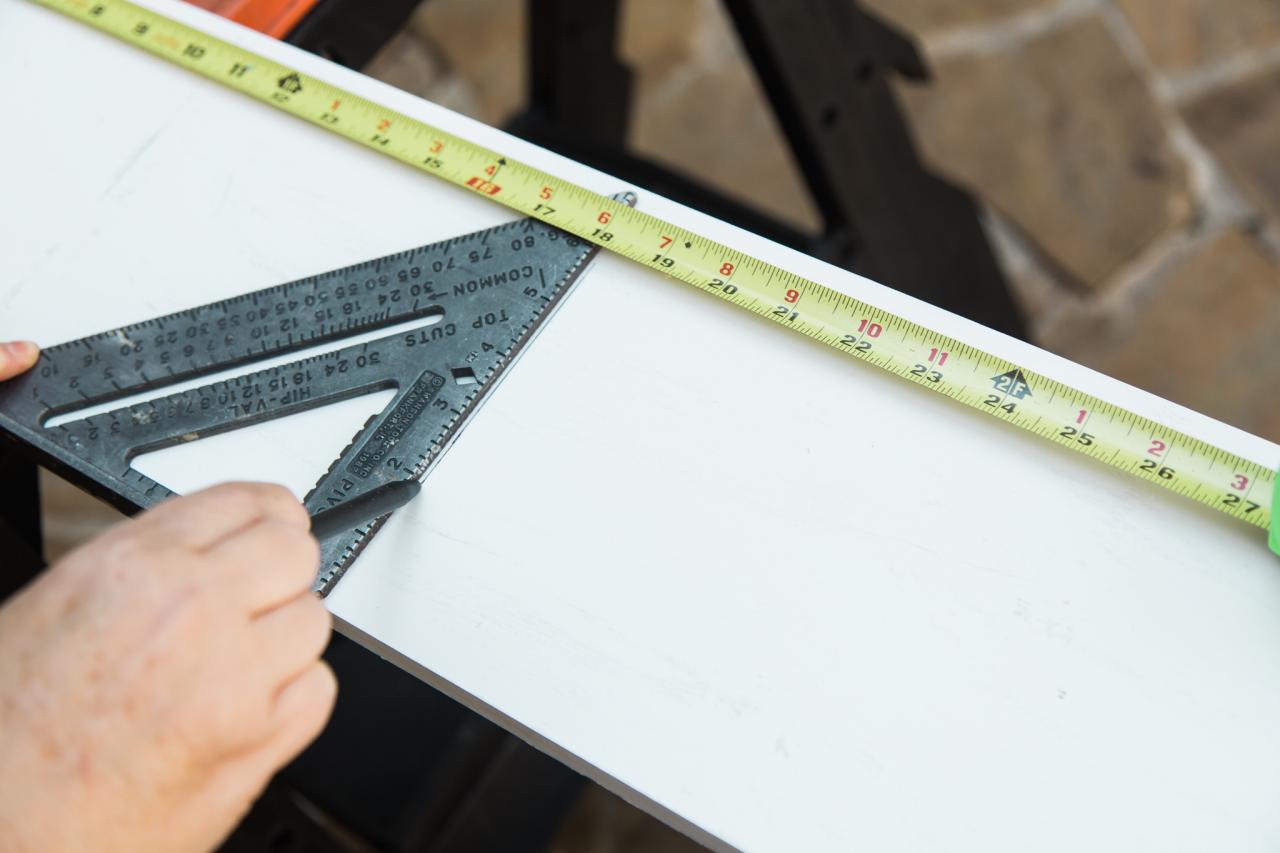
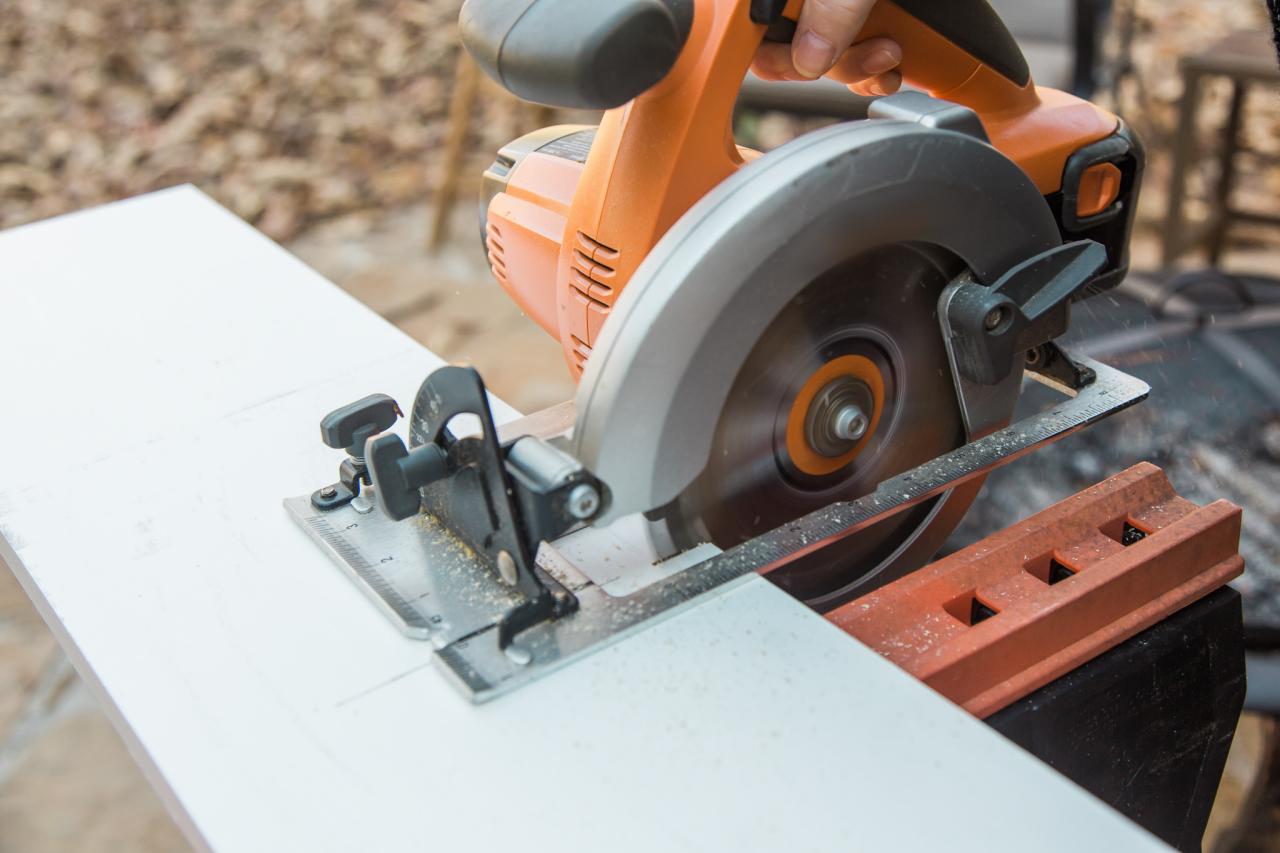
Measure + Cut Wood
Get three pieces of wood cut at a home improvement store, or measure and mark three pieces of the 1" x 8" pine at 18 inches long (Image 1). Cut them using a circular saw at home (Image 2). Sand off any rough edges, as needed.

Brian Patrick Flynn, FlynnsideOut.com
Image 1

Brian Patrick Flynn, FlynnsideOut.com
Image 2
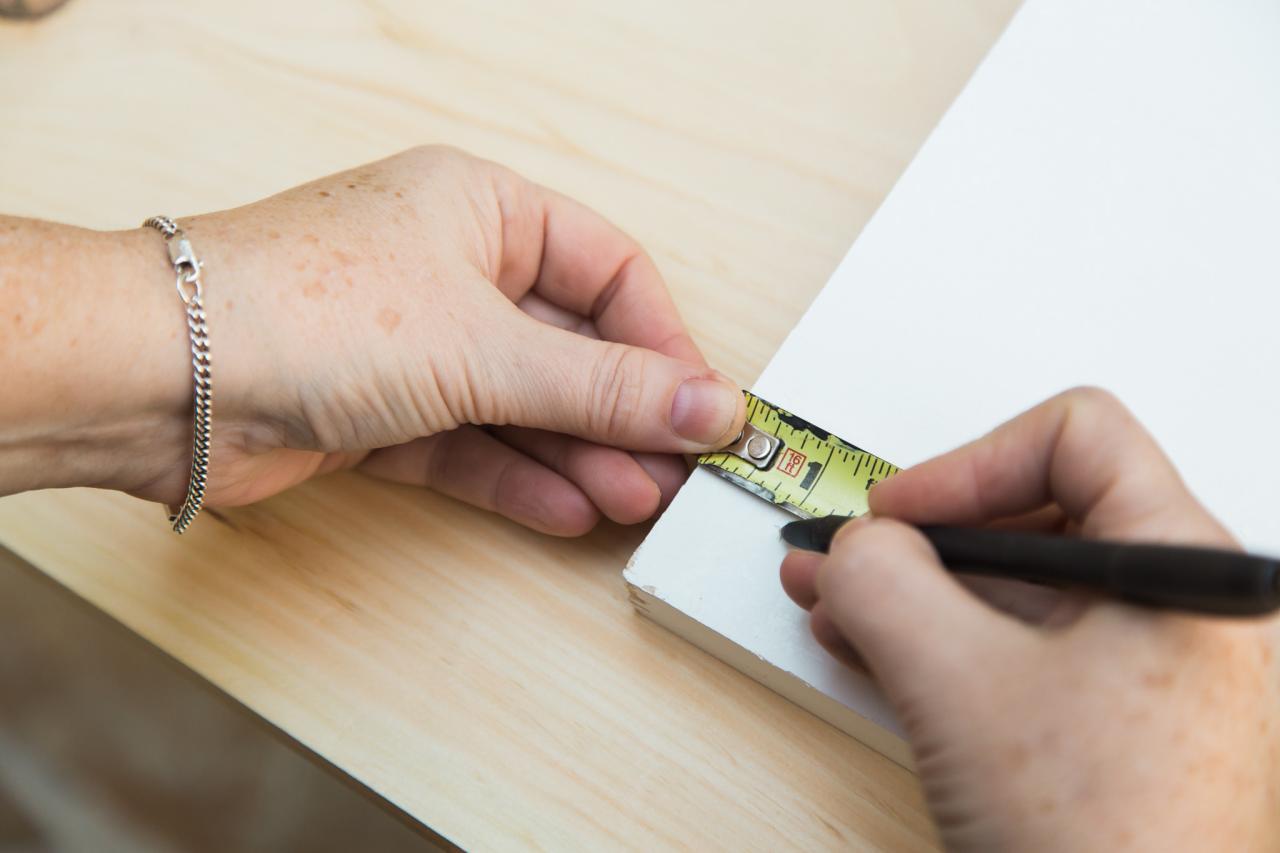
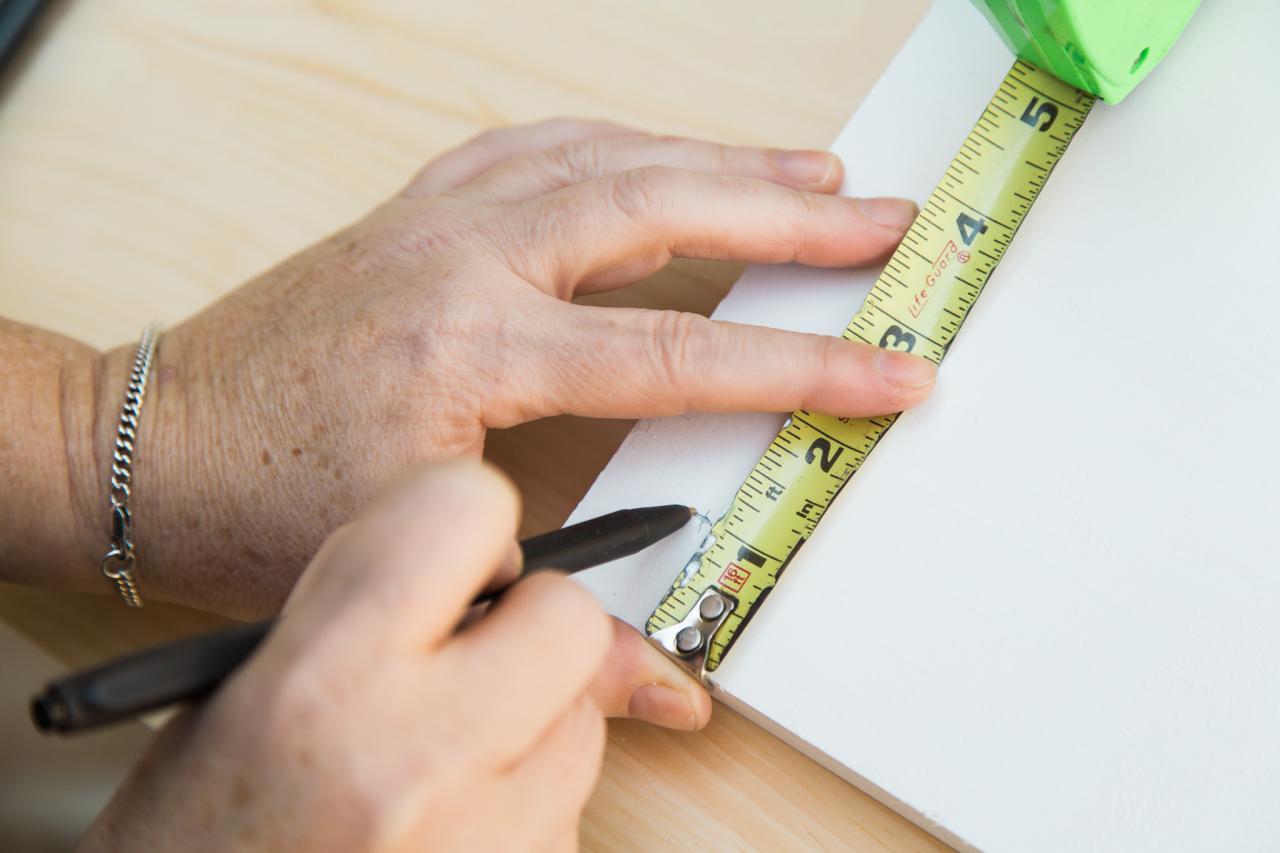
Measure Wood + Mark Holes
Flip all the boards upside down. Using a tape measure, mark 1 inch horizontally and vertically from each corner on all three boards (Image 1, 2). This is where the holes for the rope and the grommets will go (also called nylon spacers). These grommets will be hidden from sight but will help keep the shelves in place so you won’t have to deal with multiple knots.

Brian Patrick Flynn, FlynnsideOut.com
Image 1

Brian Patrick Flynn, FlynnsideOut.com
Image 2
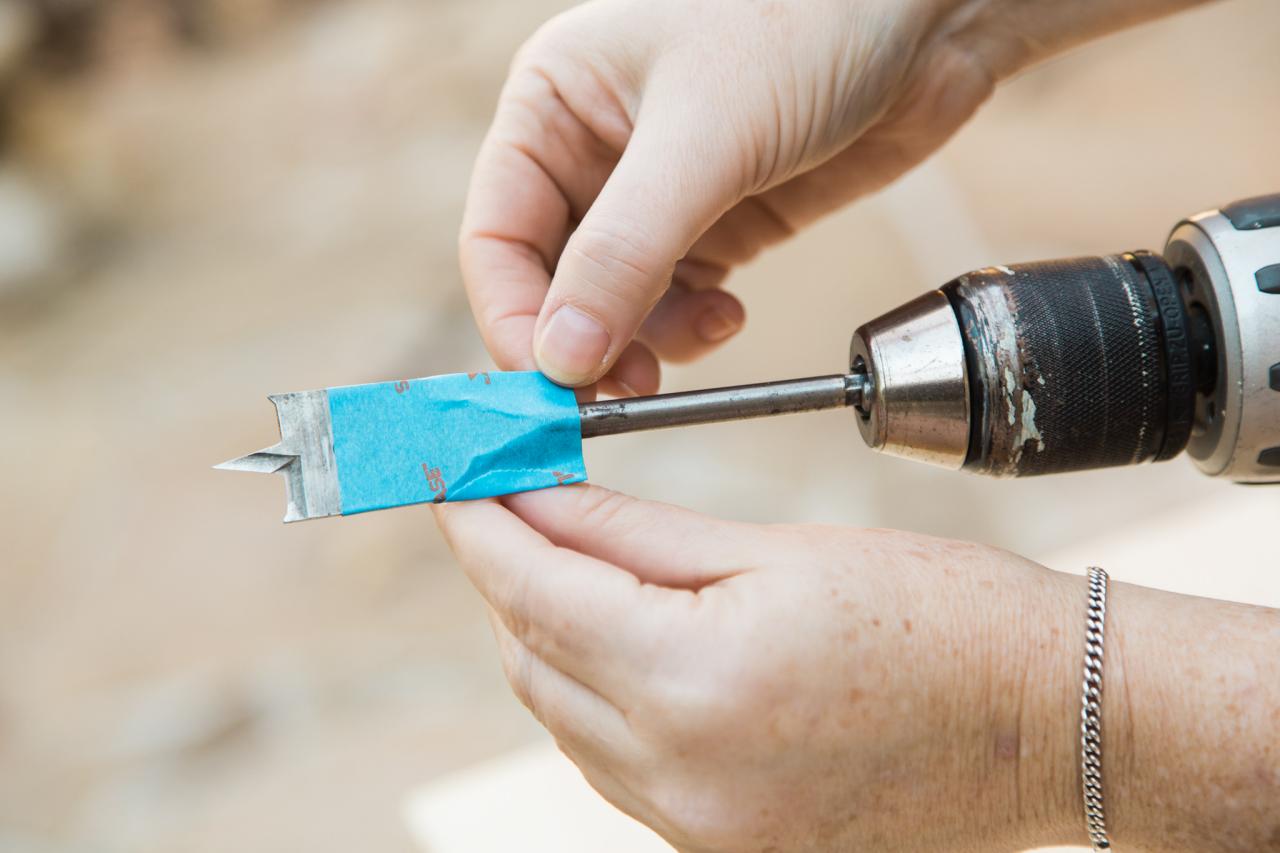
Drill Grommet Side
Next, prepare the 1-inch spade bit with painter's tape to act as a depth guide so you don't drill too deep into the bottom side of each shelf (Image 1). You want to drill just deep enough so that each plastic grommet fits flush and is hidden from view. Tape the bit so that just 3/8" of the tip is exposed (Image 2). Line up the point of the spade bit with your pencil mark and drill down slowly so you don’t go too deep (Image 3). (Your bit's sharp tip will go through a little bit on the other side but that’s OK.) Repeat until all 12 holes are prepped. Note: Once you’re done, resist the urge to stick a grommet in there at this point, as it may get stuck!

Brian Patrick Flynn, FlynnsideOut.com
Image 1

Brian Patrick Flynn, FlynnsideOut.com
Image 2

Brian Patrick Flynn, FlynnsideOut.com
Image 3
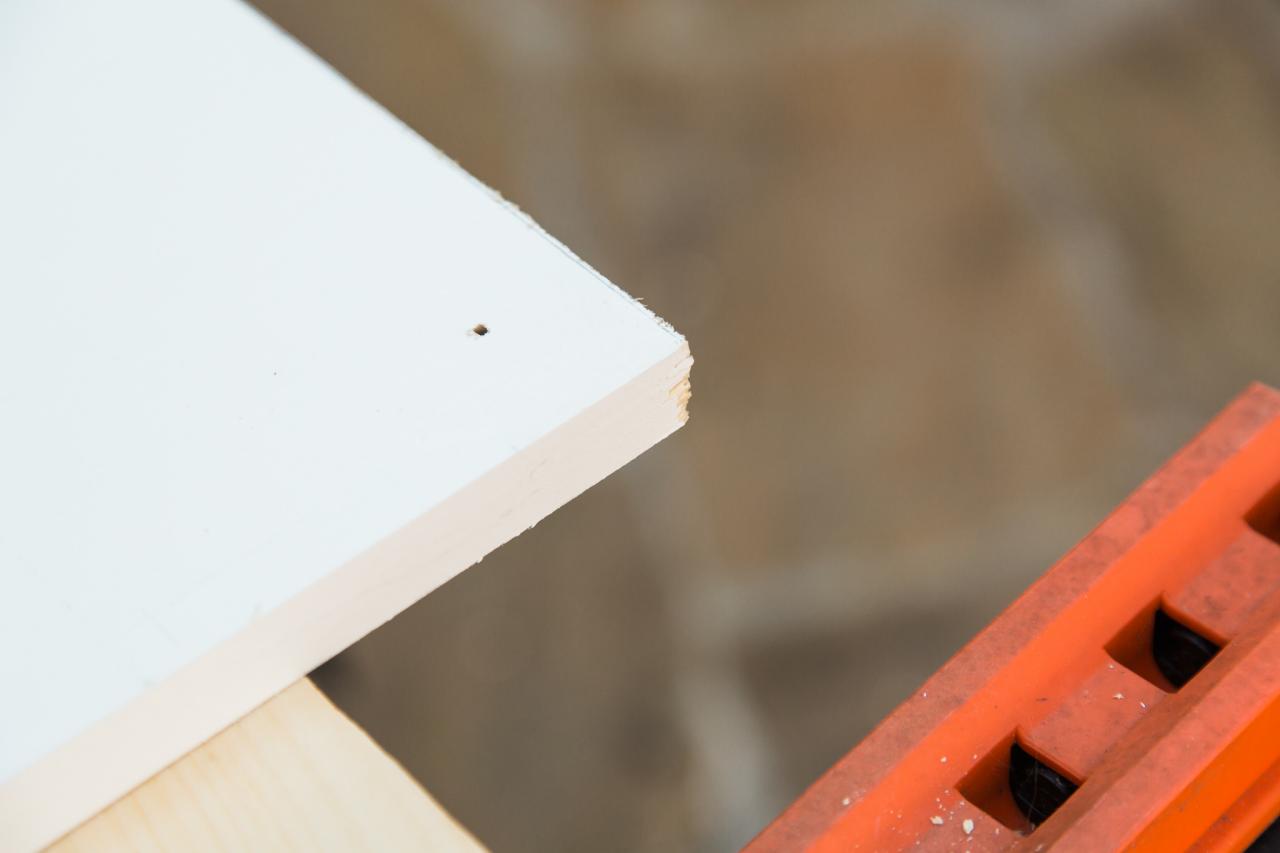
Flip + Drill
Next, flip the three boards over right side up and using the small hole as a guide (Image 1), switch out the spade bit with a regular 3/8" drill bit and drill through (Image 2). Repeat until all 12 holes are complete (Image 3).

Brian Patrick Flynn, FlynnsideOut.com
Image 1

Brian Patrick Flynn, FlynnsideOut.com
Image 2

Brian Patrick Flynn, FlynnsideOut.com
Image 3
Paint Shelves
Once all the holes are prepped, paint the primed boards. While they’re drying, move on to the next step.

Brian Patrick Flynn, FlynnsideOut.com
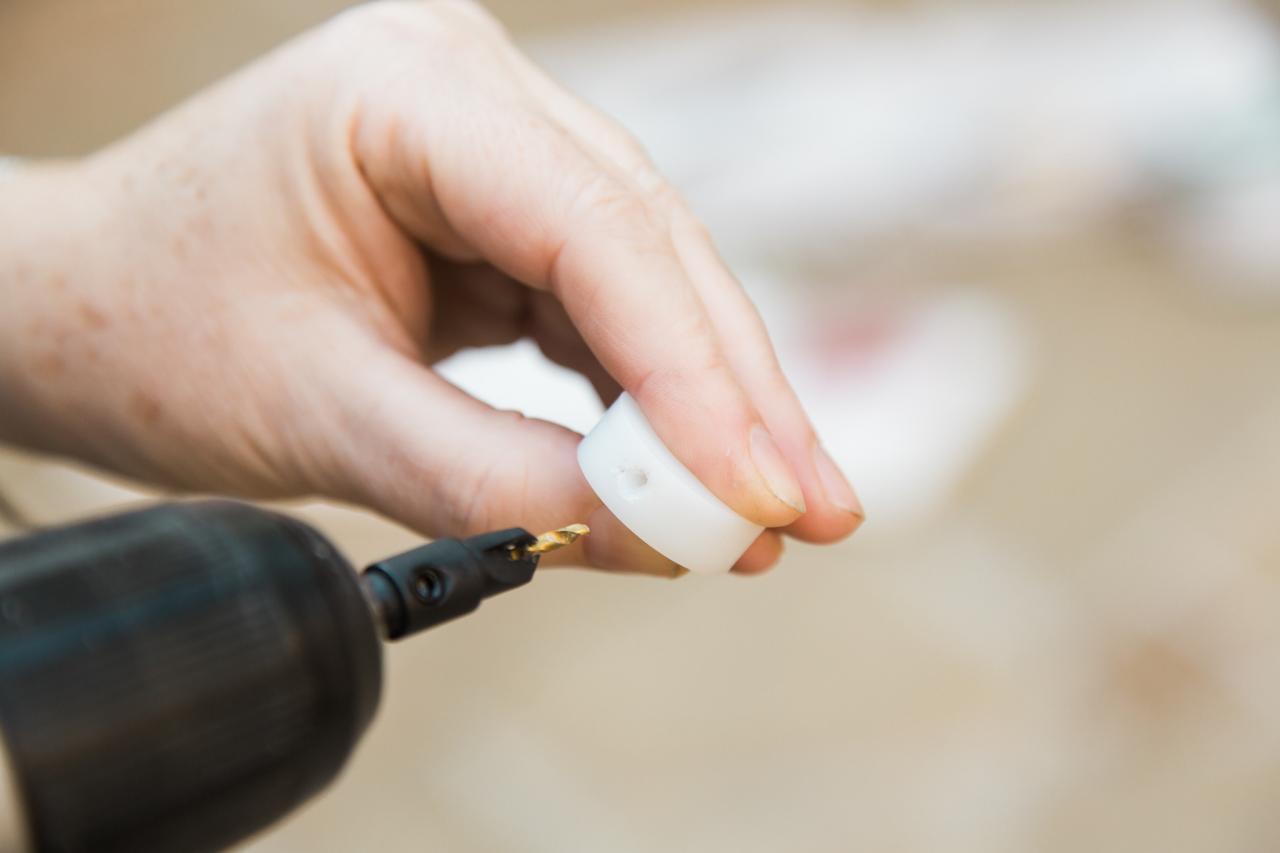
Prepare Grommets
Using the 1/16" drill bit, pre-drill into each of the 12 plastic grommets (Image 1). Then, drill into that same hole using the countersink bit so that when you do add the screws later, the screws will lay flush against the side of the grommet (Image 2).

Brian Patrick Flynn, FlynnsideOut.com
Image 1

Brian Patrick Flynn, FlynnsideOut.com
Image 2
Measure + Cut Rope
Our shelf was around 34 inches tall, so we used two 7-foot-long pieces of rope — one for the front and one for the back. You can customize to your own dimensions. Note: It’s a lot easier to thread the rope through the holes if you wrap the ends with painter's tape.

Brian Patrick Flynn, FlynnsideOut.com
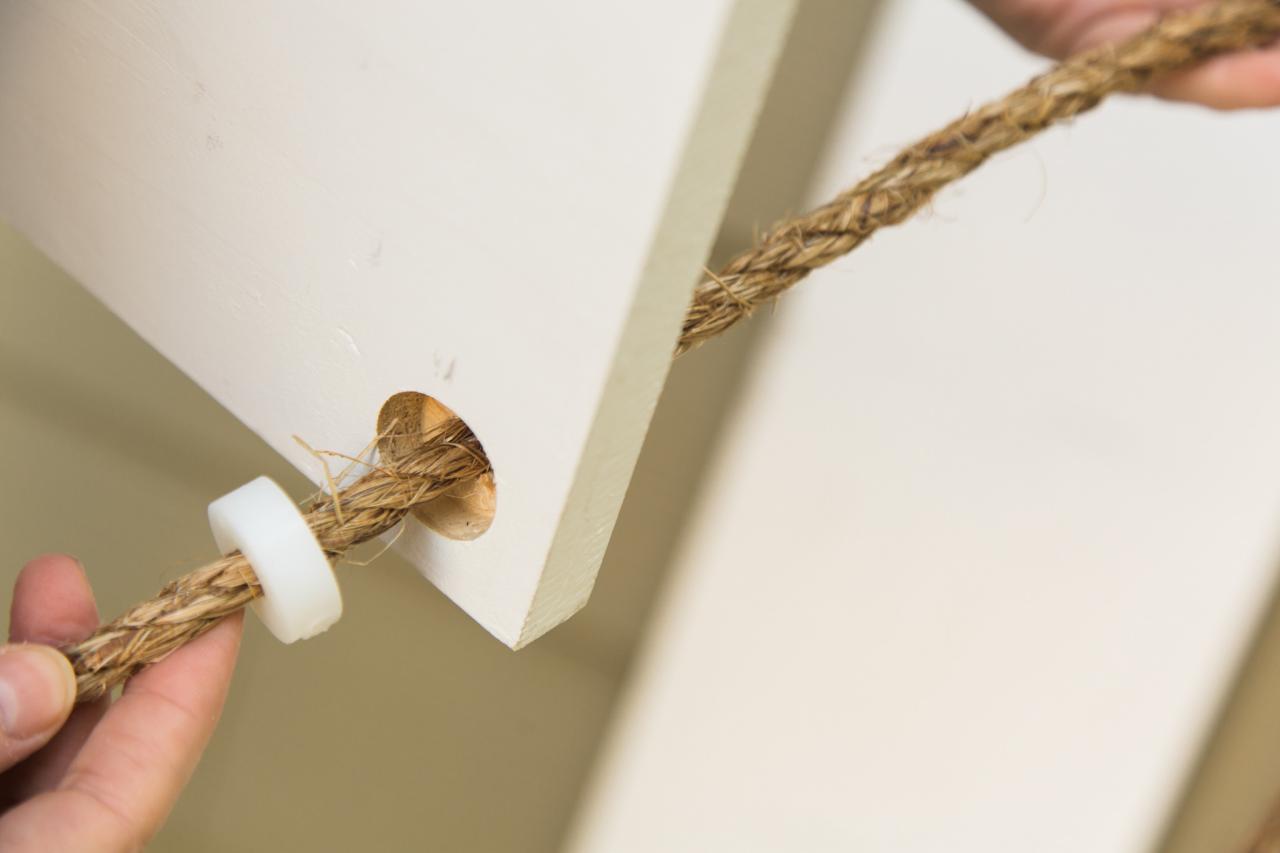
Assemble Shelf
Next, assemble the shelf by threading the back rope through the top shelf first, then its grommets, so that the rope and shelf is centered and hanging securely off something. You can go ahead and hang it in place or temporarily on something so you can make adjustments easily. (We used a scrap piece of board with a screw in it.) Next, thread the front rope through each side of the top shelf (Image 1), then its grommets (Image 2, 3) and let the front rope hang loosely for now.

Brian Patrick Flynn, FlynnsideOut.com
Image 1

Brian Patrick Flynn, FlynnsideOut.com
Image 2

Brian Patrick Flynn, FlynnsideOut.com
Image 3
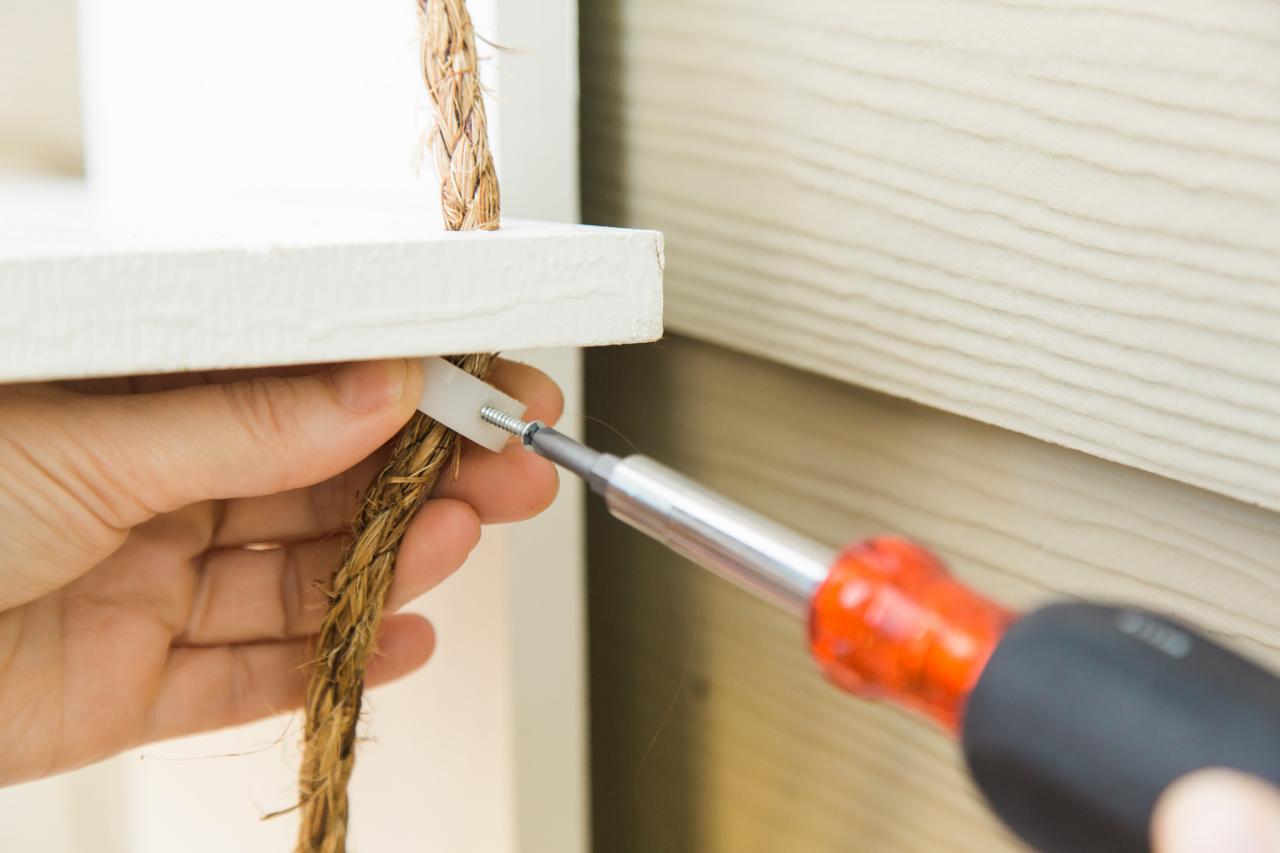
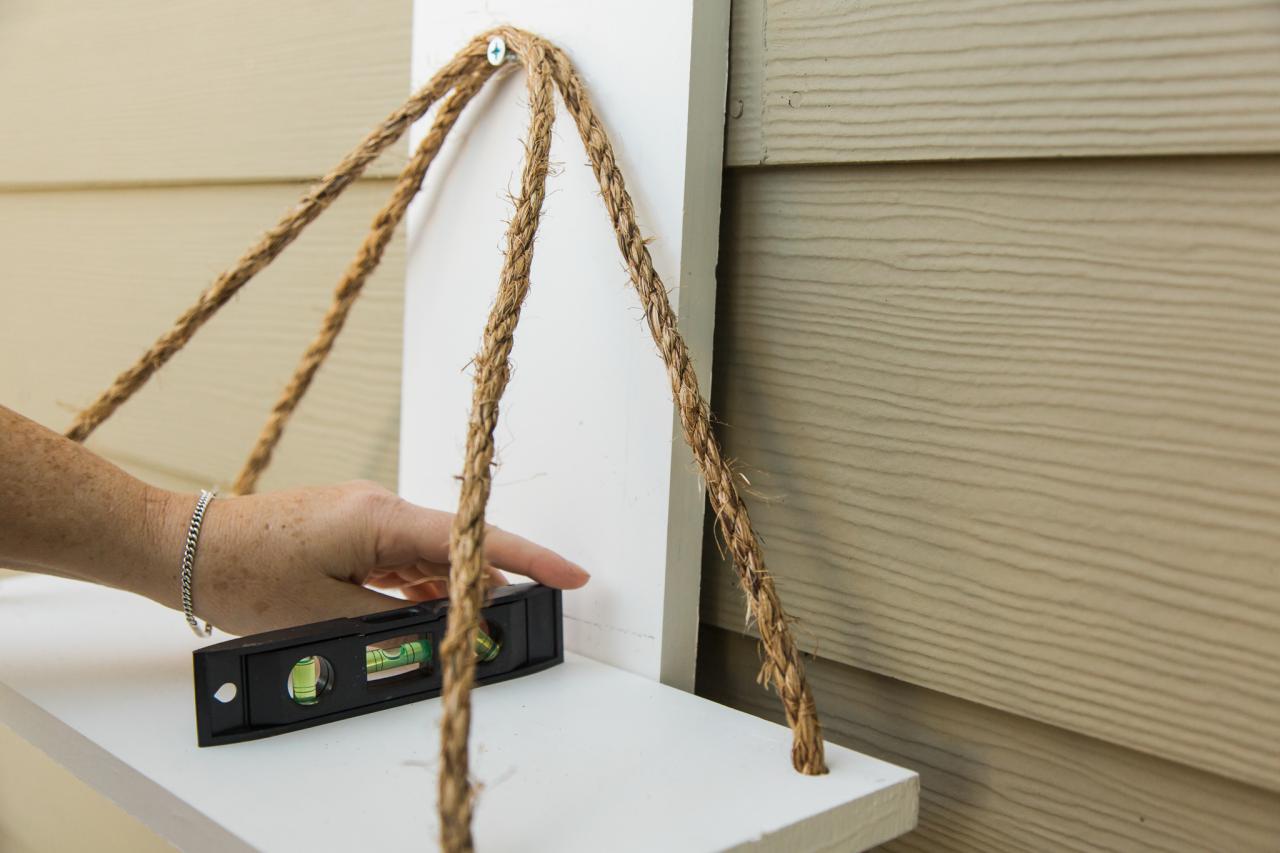
Make Adjustments
It’s important to take the time to get the top shelf adjusted so that it’s the desired height with the back rope first. Once you determine the proper height of the top shelf on the rope, drive the small #4 3/4-inch screws into each grommet slowly with a drill, pushing the screw through the back rope and into the other side of the grommet (Image 1). Since you used the countersink bit, the screw should lay flat and the grommet will slide nicely up into the hole you drilled into the underside of the board. Repeat this step on the other side of the shelf/back rope. Next, focus on the front ropes and getting the top shelf completely level before moving on (Image 2), driving screws into the grommet/rope, then sliding the shelf down onto the grommet so that the shelf is proper height and level. Once you get it "just so" you can measure down from this top shelf to get the lower shelves spaced correctly and level, as well (Image 3).

Brian Patrick Flynn, FlynnsideOut.com
Image 1

Brian Patrick Flynn, FlynnsideOut.com
Image 2

Brian Patrick Flynn, FlynnsideOut.com
Image 3
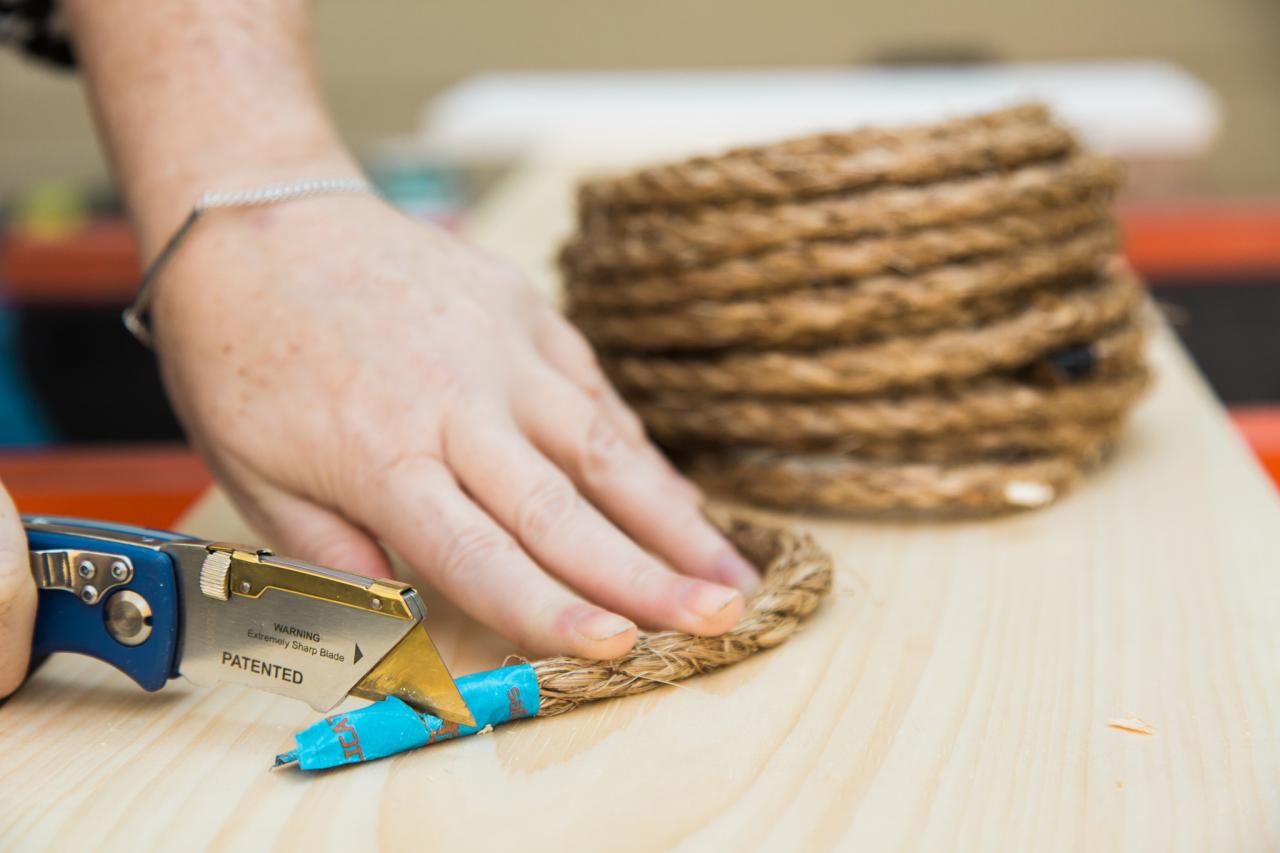
Tie Off + Trim
Once the bottom shelf is hung, tie off the ropes into a knot on either side (Image 1), then trim them with a utility knife (Image 2). For an interesting texture, you can pull apart the ends of the ropes for a fringed look (Image 3). Now you’re ready to hang the shelf; just be sure to use the proper hardware and anchors. Note: If you hang the shelf in a bathroom, over time the steam will help the rope straighten out a bit.

Brian Patrick Flynn, FlynnsideOut.com
Image 1

Brian Patrick Flynn, FlynnsideOut.com
Image 2

Brian Patrick Flynn, FlynnsideOut.com
Image 3


