


How to Make a Headboard With Storage
Maximize your bedroom's storage by building handy cubbies into your headboard.

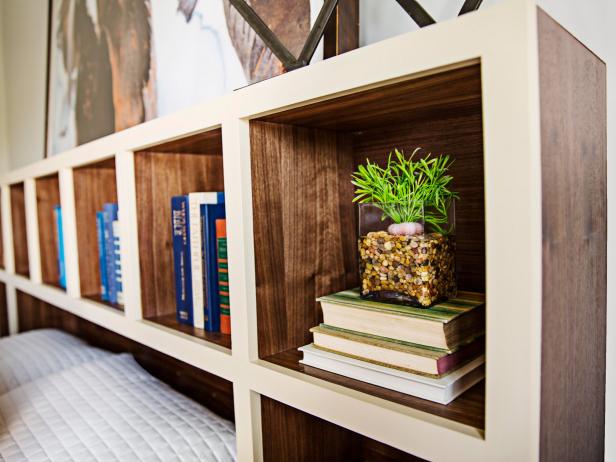
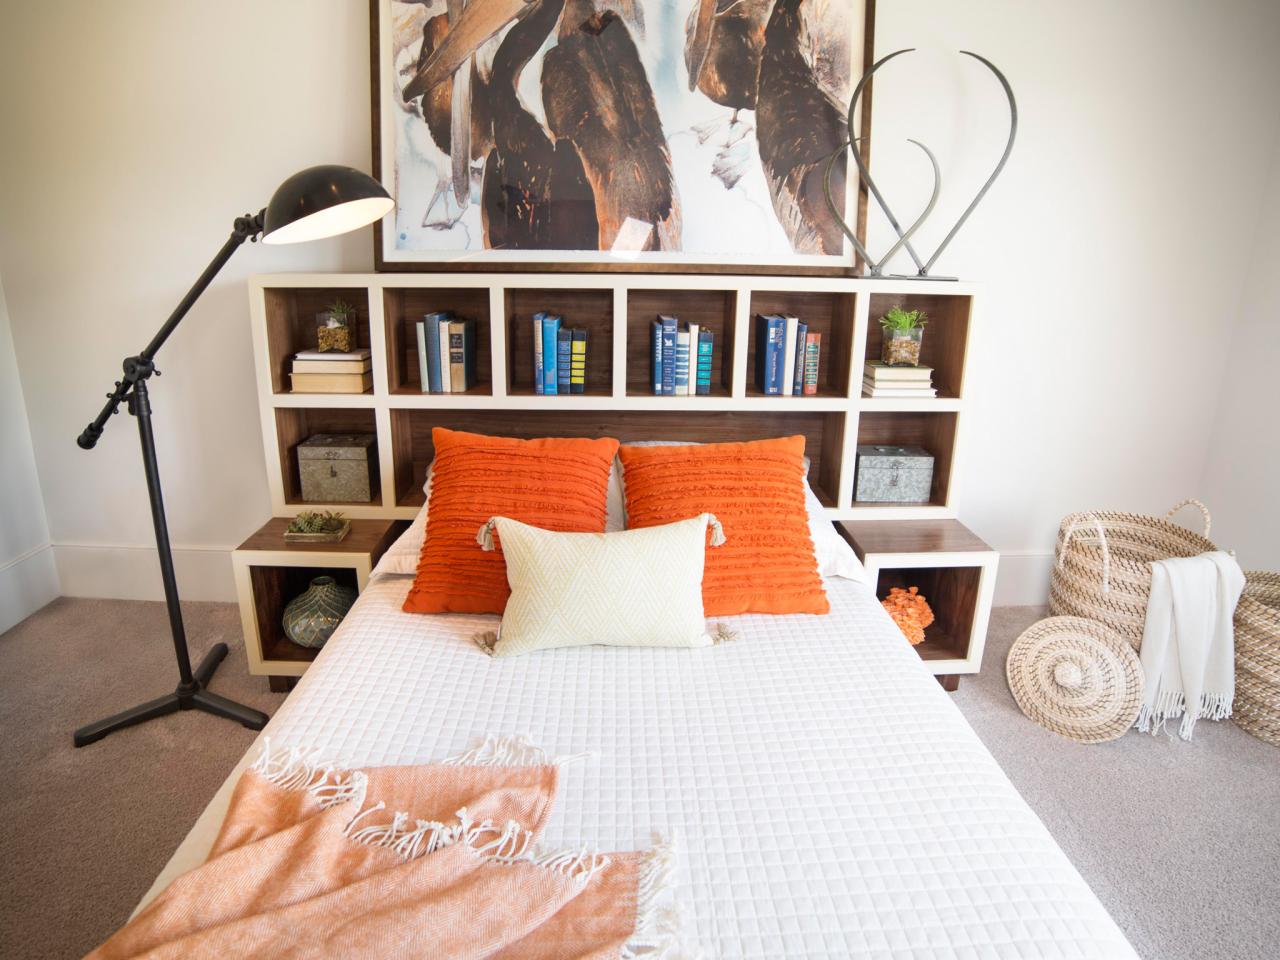
Headboard With Storage Cubbies
Create storage and visual appeal with a DIY storage cubby headboard.

Photo by: Wade Works Creative
Wade Works Creative
Materials and Tools
- (5) sheets 3/4" plywood
- (8) 1x2 x 8' primed pine or poplar boards
- (1) 2" x 2" x 3' walnut board
- 7/8" diameter dowel, 1' long
- chop saw
- circular or table saw
- trim nail gun
- drill
- 7/8" Forstner drill bit
Cut List
-Piece A - (3) bottom double and top inner horizontal stretcher: 2x10 x 7' plywood
-Piece B - (2) middle double horizontal stretcher: 8-3/4" x 7' 1-1/2" plywood
-Piece C - (2) inner sides of top unit: 9-1/2" x 2' 5-3/4" plywood
-Piece D - (1) back inset panel of top unit: 2' 3-1/2" x 7' 1-1/2" plywood
-Piece E - (2) outer sides of top unit: 9-1/2" x 2' 6-1/2" plywood, miter joint on one side
-Piece F - (1) outer skin of top unit: 9-1/2" x 7' 4-1/2" plywood, miter joints on both sides
-Piece G - (14) compartment dividers: 1" x 1' x 8-3/4" plywood
-Piece H - (1) face frame for center horizontal: 7' 1-1/2" poplar board
-Piece I - (2) face frame for top and bottom horizontal: 7' 4-1/2" poplar board
-Piece J - (2) face frame for side verticals: 2' 3-1/2" poplar board
-Piece K - (7) face frame for inside verticals: 1' 1" poplar board
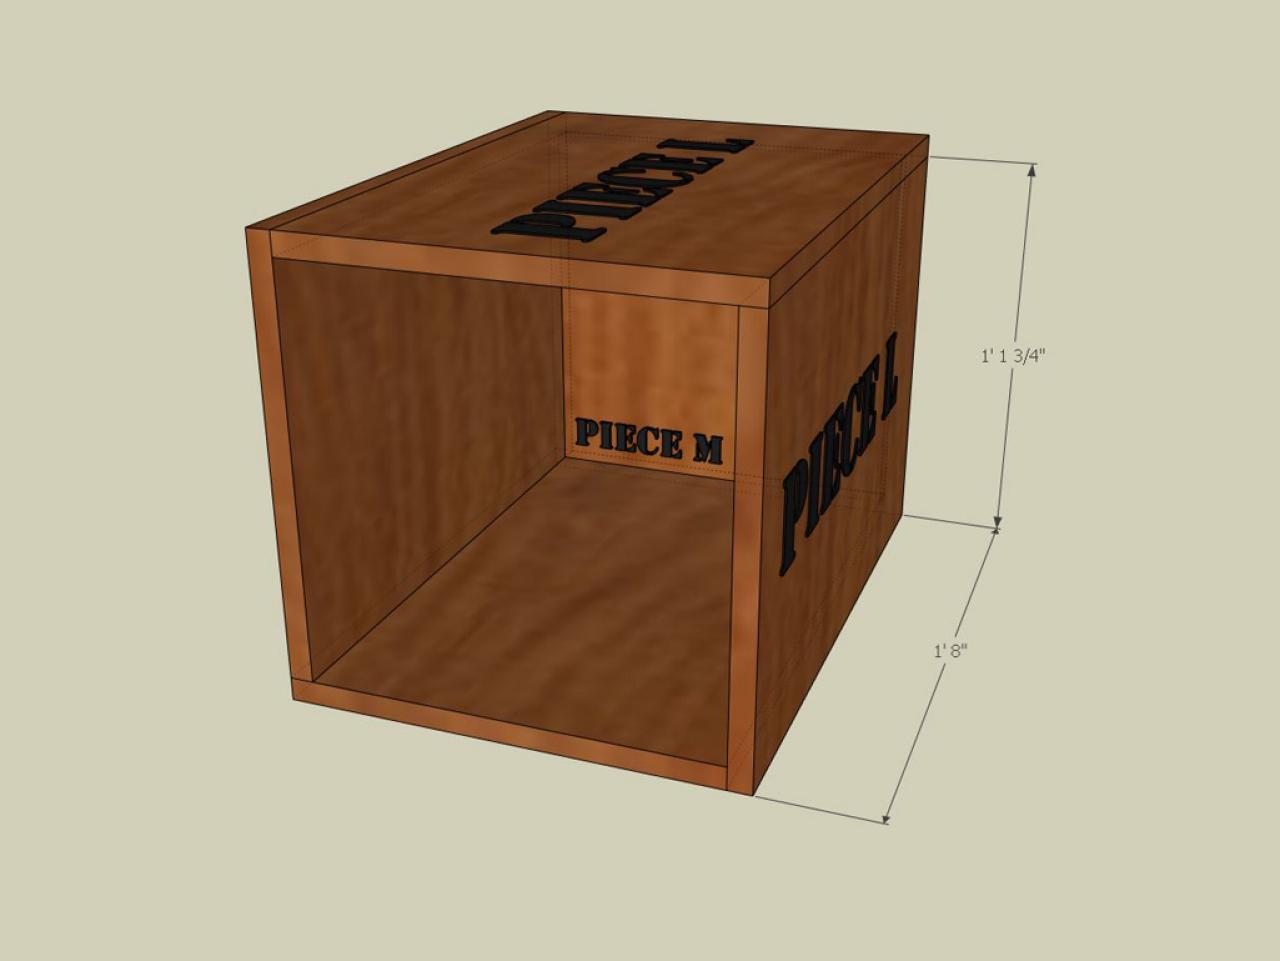
-Piece L - (8) inner sides of base console table: 1' 8" x 1' 1-3/4" plywood
-Piece M - (2) back inset panel of console table base 1' 1" x 1' 1" plywood
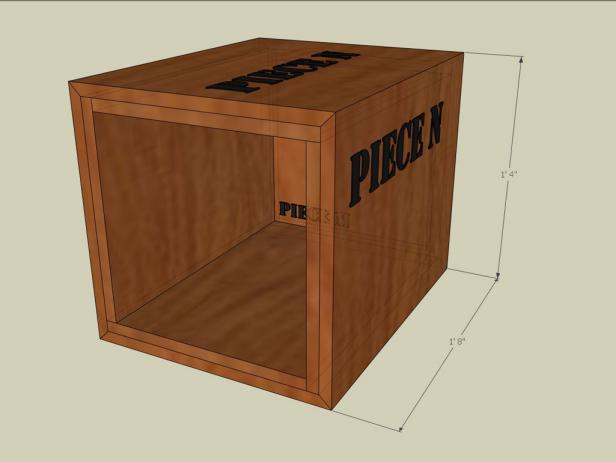
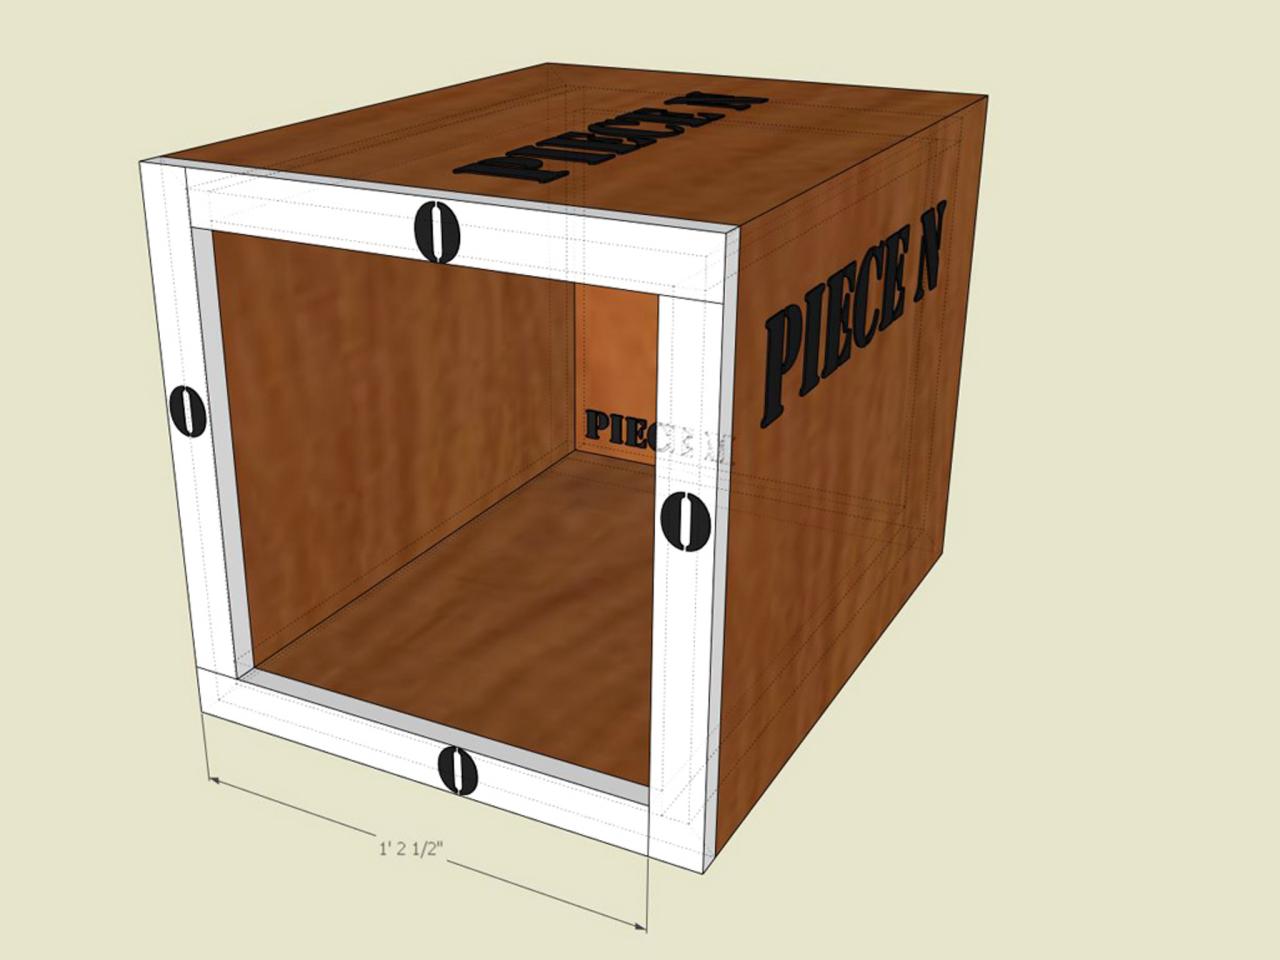
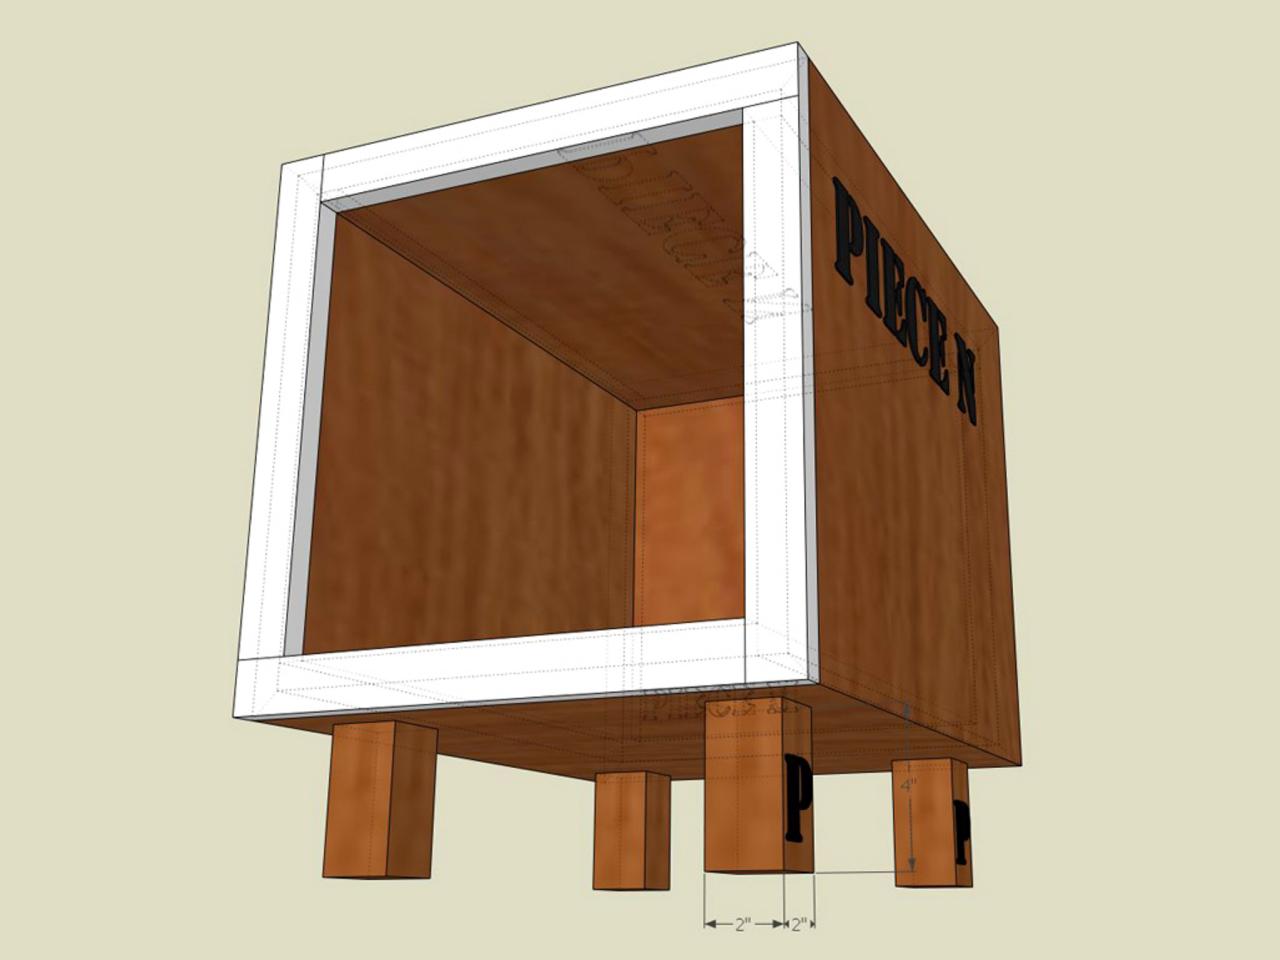
-Piece N - (8) outer sides of console table base: 1' 8" x 1' 4" plywood
-Piece O - (8) face frame for console table base: 1' 2-1/2" poplar board
-Piece P - (8) leg for console table base: 2x2 x 4" walnut board
-Piece Q - (8) wooden dowel for console legs: 7/8" x 1"
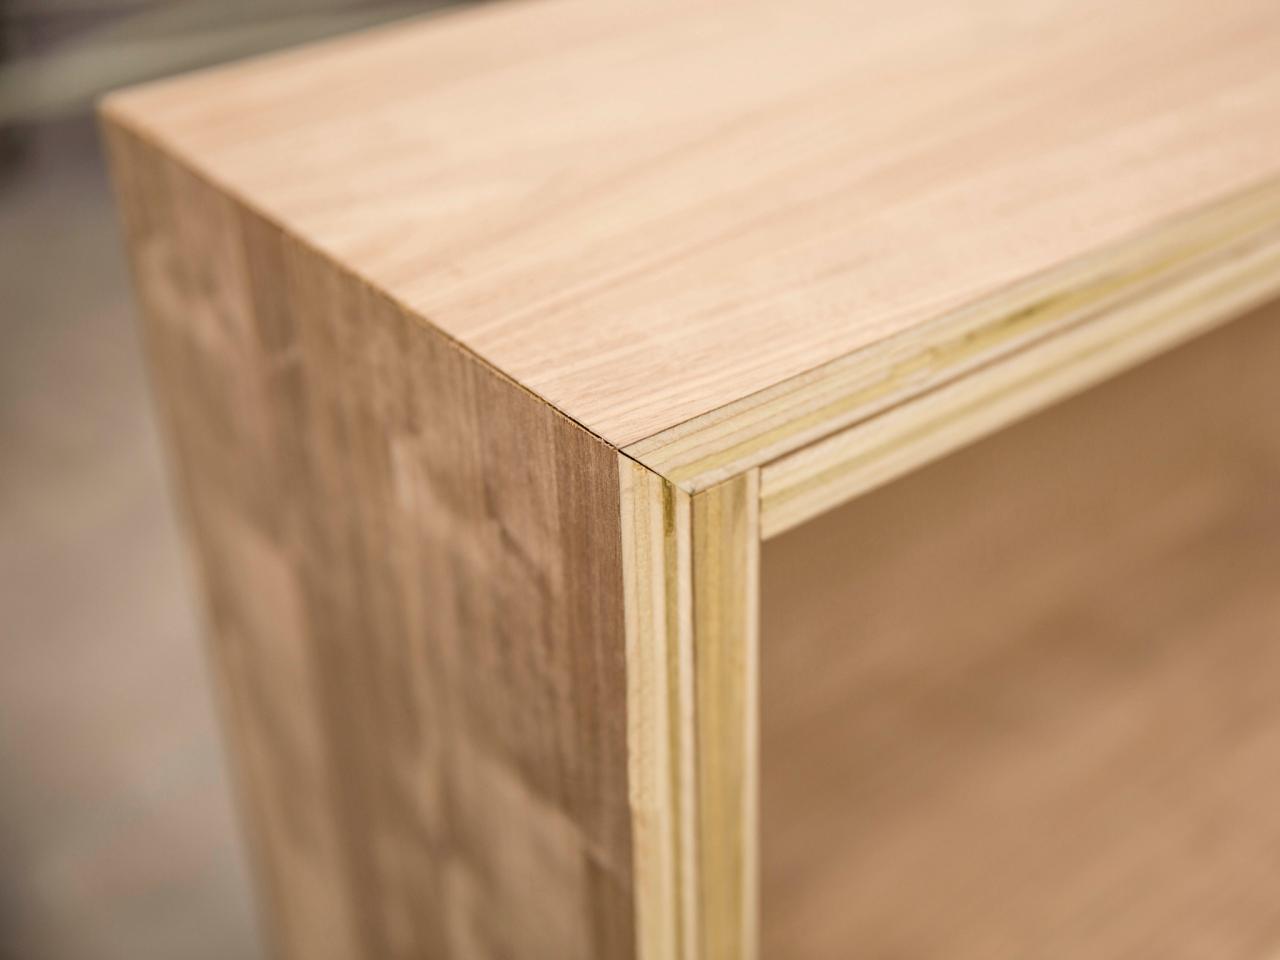
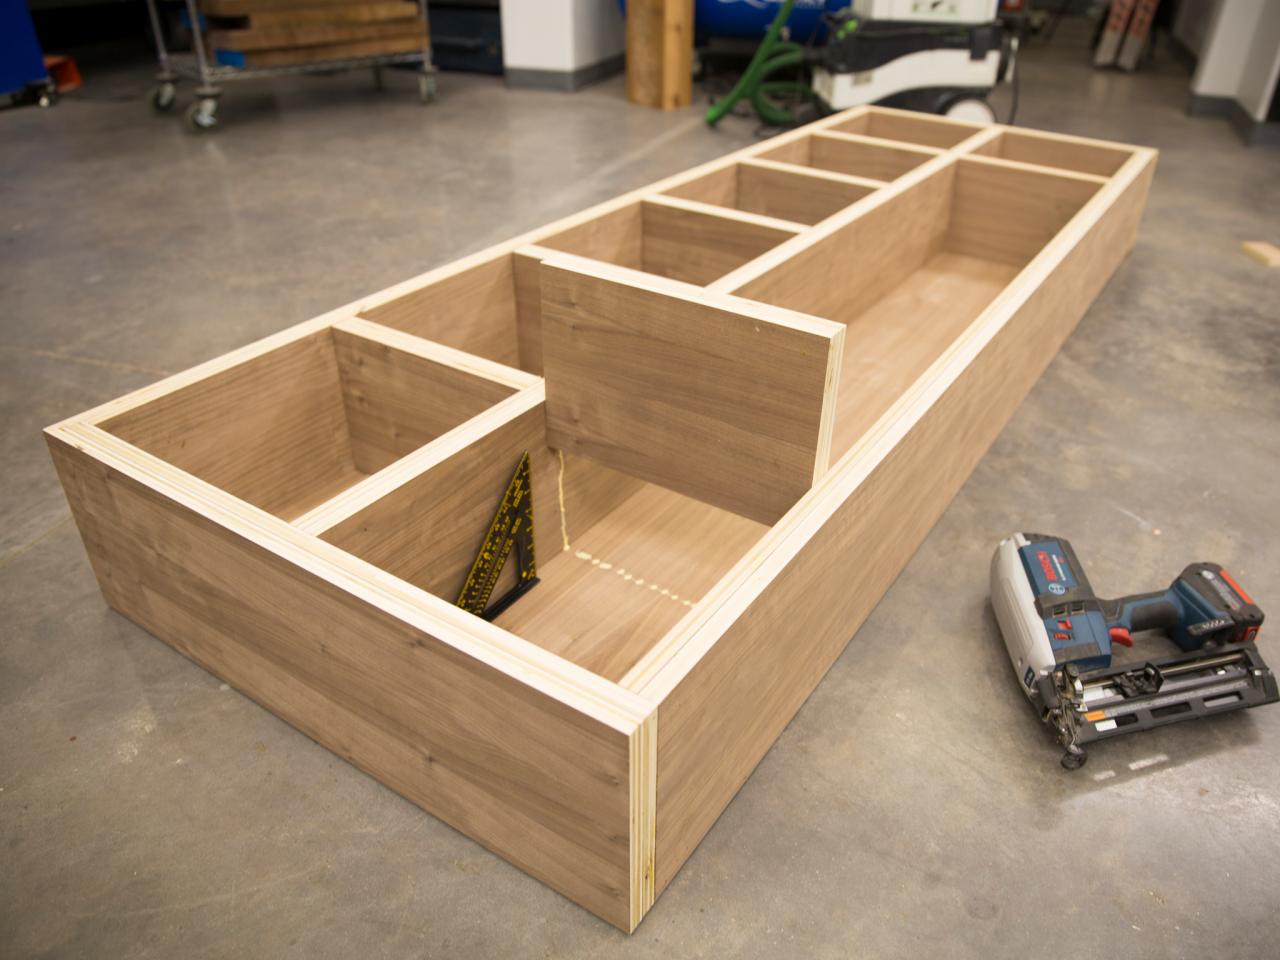
Cut + Assemble Top Unit
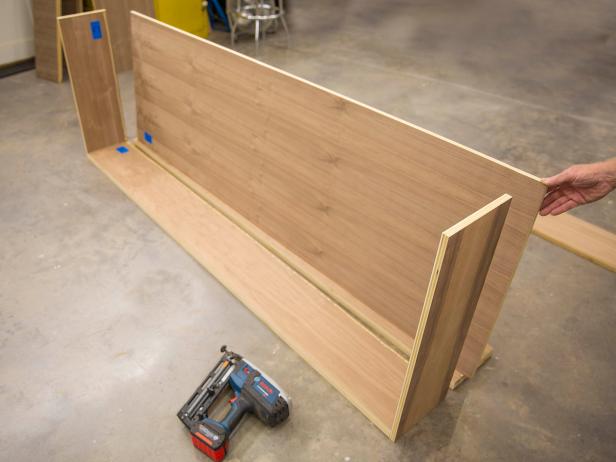
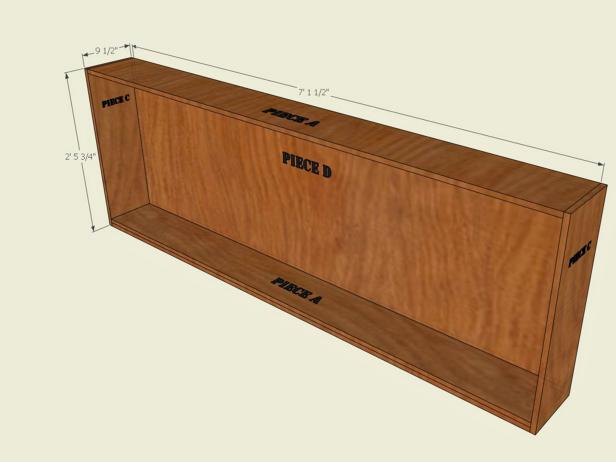
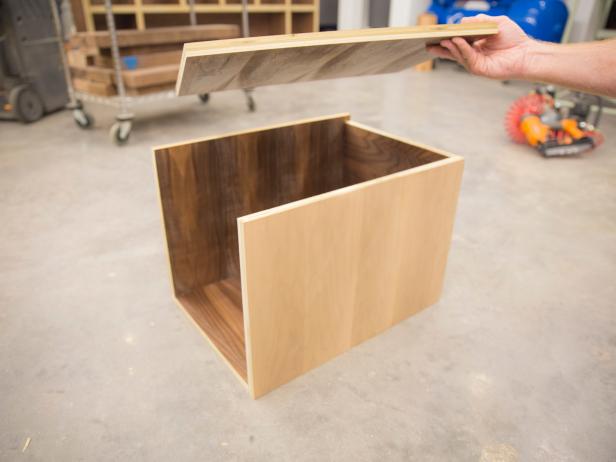
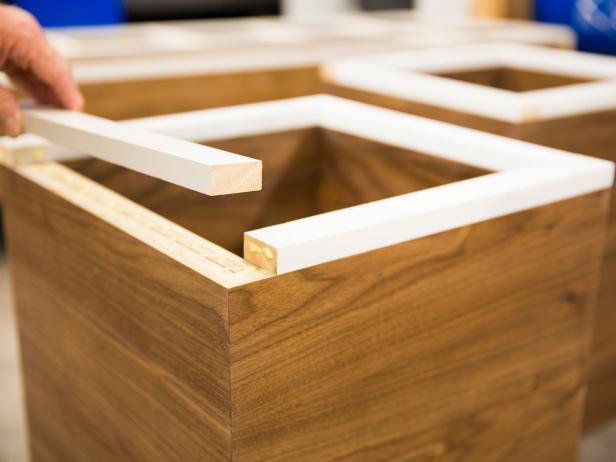
Pre-cut pieces A-P with a table or circular saw. Glue and nail two (Piece A) sections together, and then glue and nail that assembly to (Piece C) on each side. Both (Piece C) sections will cap the end of (Piece A) sections. Glue and nail back panel (Piece D) inside the frame, and cap with one more (Piece A) (Images 1 and 2). Glue and nail two (Piece B) sections together, and mount that assembly in the center of the box.
Wade Works Creative
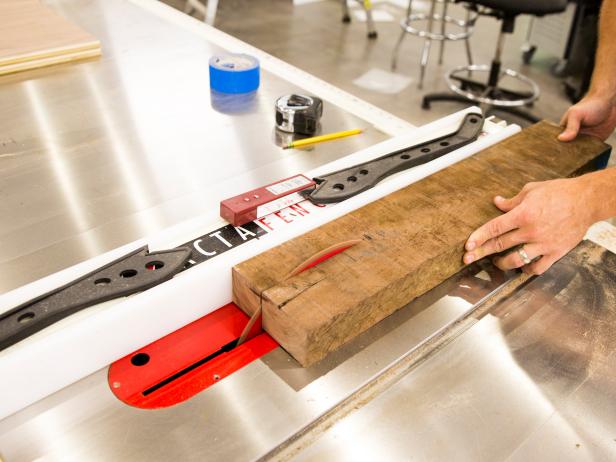
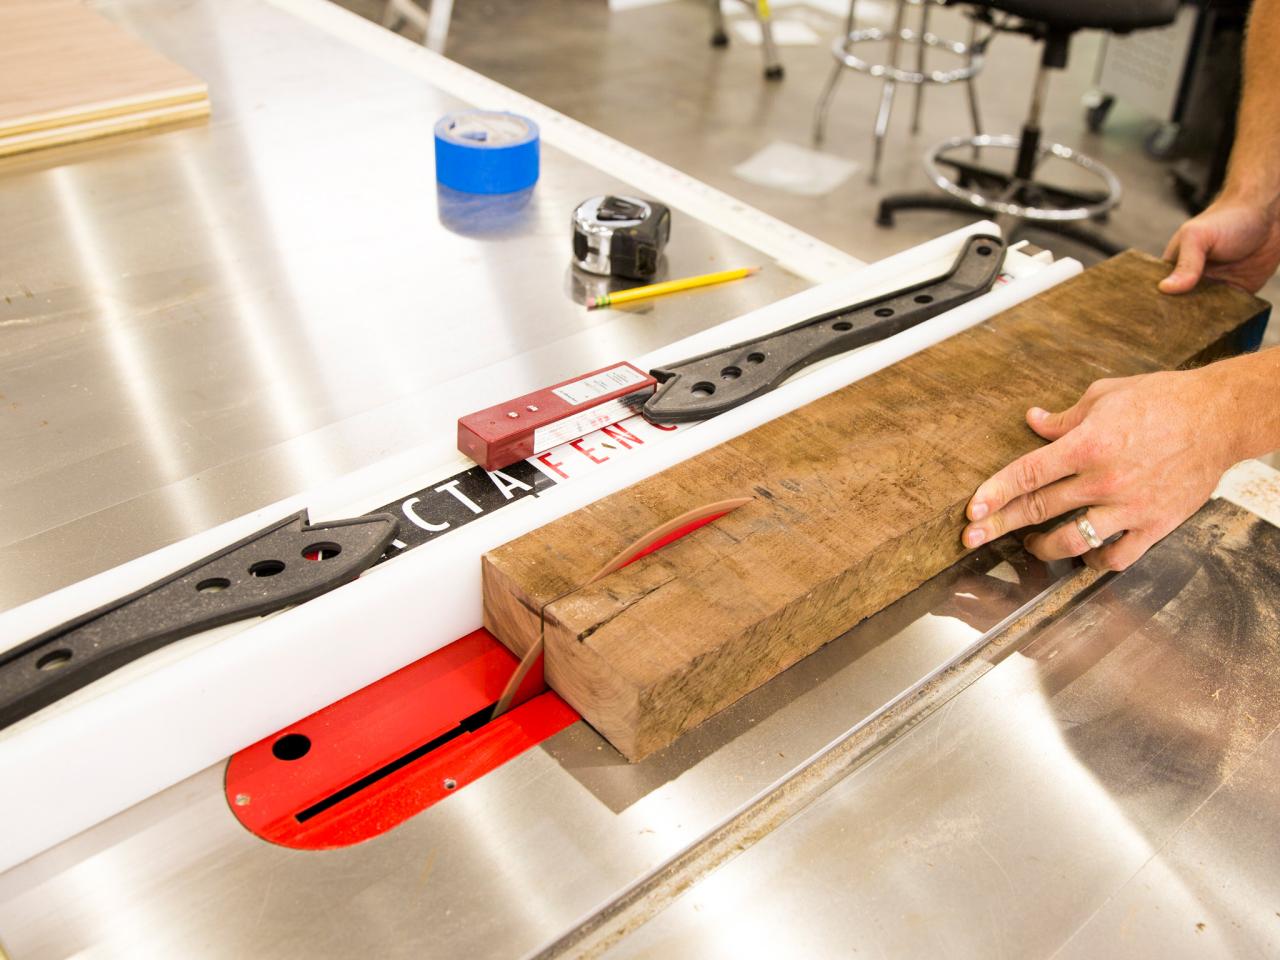
Precut all plywood, poplar and walnut pieces A-P with a table saw or circular saw.
Wade Works Creative
Headboard With Storage Cubbies
Precut all plywood, poplar and walnut pieces A-P with a table saw or circular saw.
Photo By: Wade Works Creative
Headboard With Storage Cubbies
Precut all plywood, poplar and walnut pieces A-P with a table saw or circular saw.
Photo By: Wade Works Creative
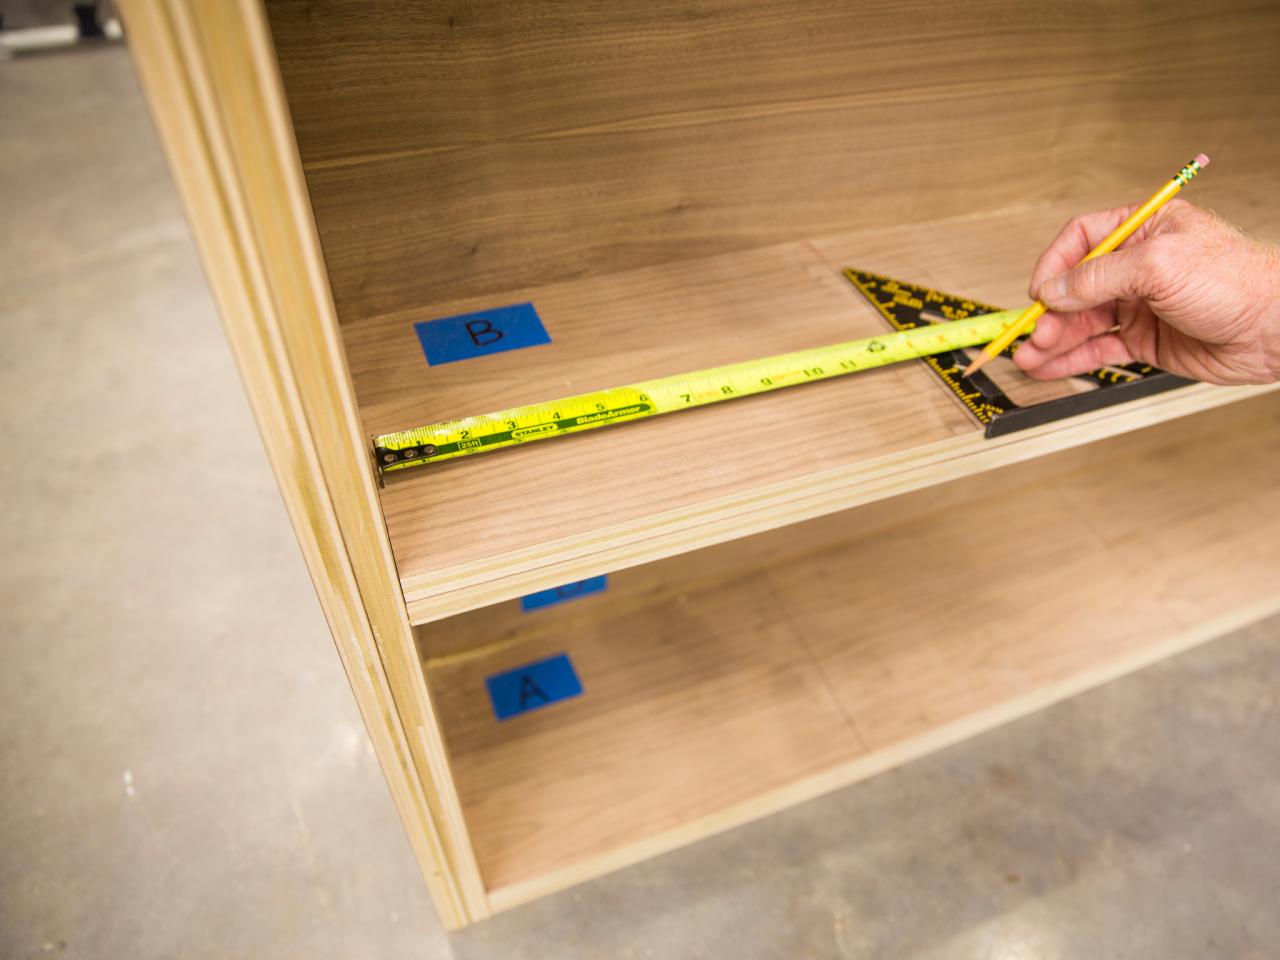
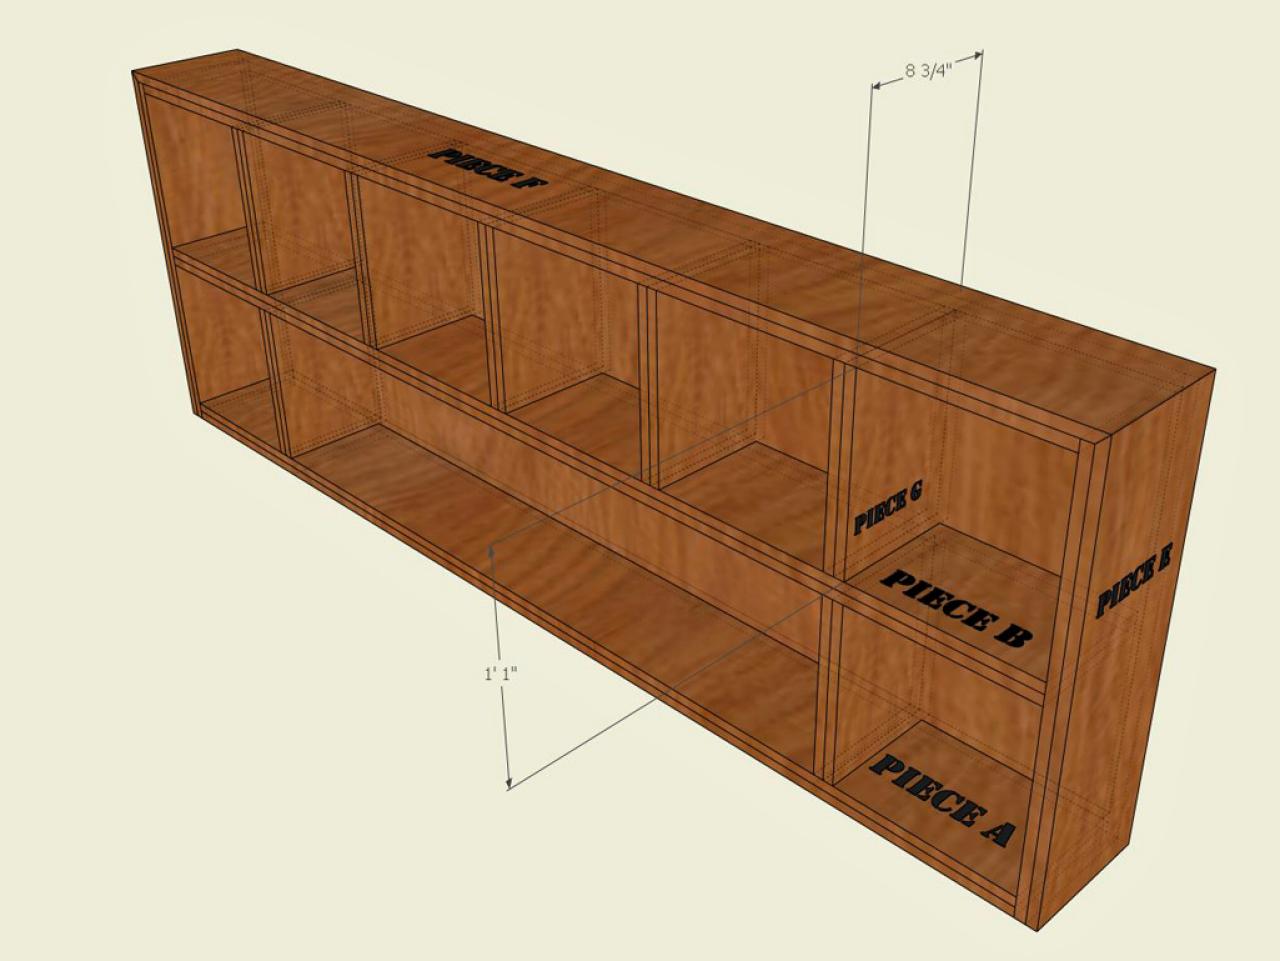
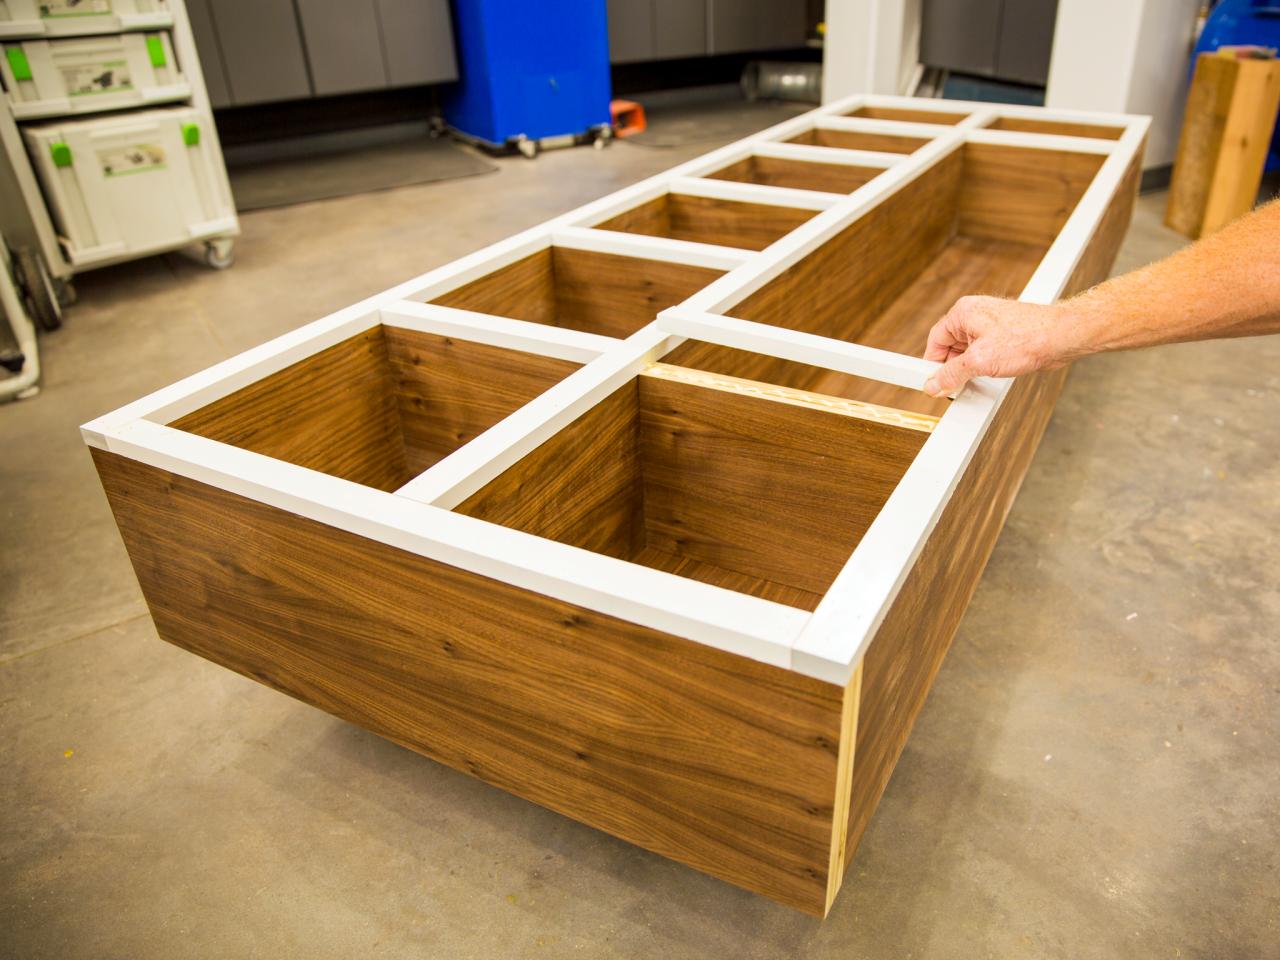
Finish Top Unit Frame
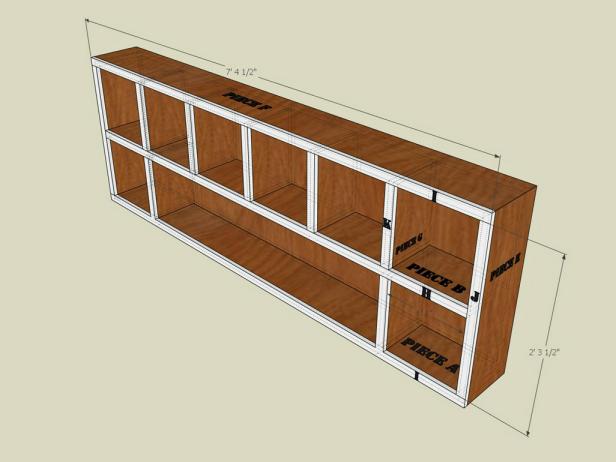
Glue and nail two (Piece E) sections on either side and a (Piece F) on top (Image 1). Take care to align miter joints closely, as this is the finished surface (Image 2). Place alignment marks for vertical dividers you will assemble in the next step (Image 3).


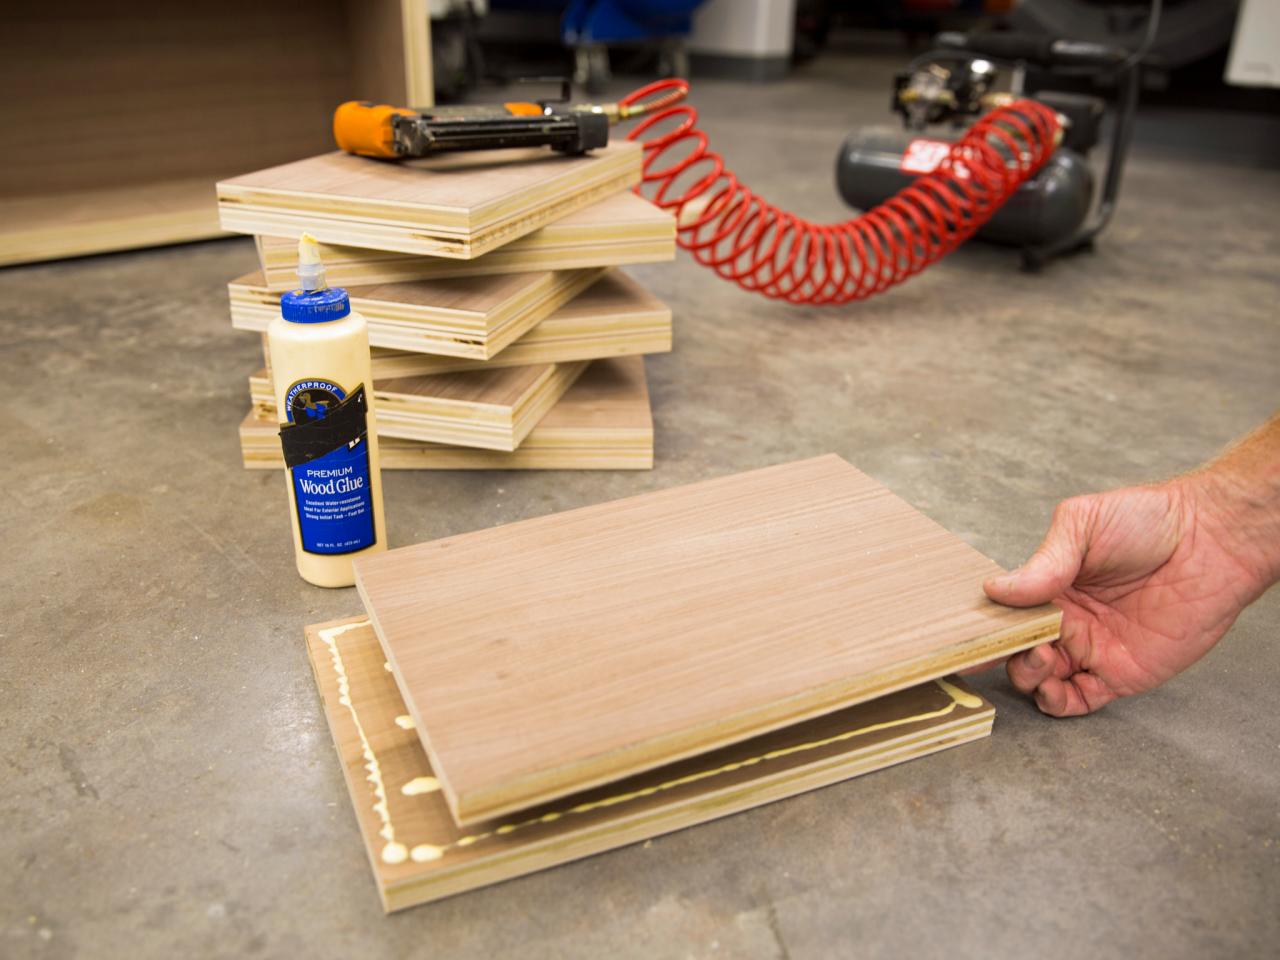
Assemble Storage Compartments
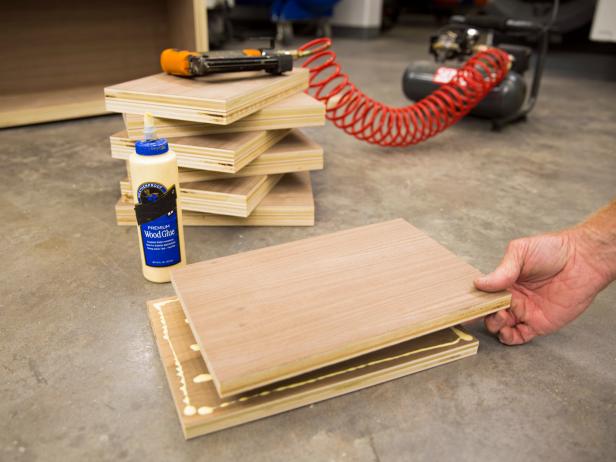
Glue two (Piece G) pieces together, and repeat for all pieces to make a total of seven (Image 1). Glue and nail the seven (Piece G) sections on the previously marked alignments (Images 2 and 3). Note: It is easier to finish this assembly separately, or you can finish at once at the end.


Attach Trim
Apply desired finish on (Pieces H-K), and let dry. Glue and nail (Piece H), two (Piece I) sections, two (Piece J) sections and seven (Piece K) sections to front of unit, ensuring boards are flush on all sides. Set the unit aside.
Chip

Assemble Inner Table Frame
Glue and nail four (Piece L) sections in a pinwheel pattern, and inset (Piece M) flush against the back using glue and nails. Repeat to make a second console table (Images 1 and 2).

Chip
Assemble Around Frame
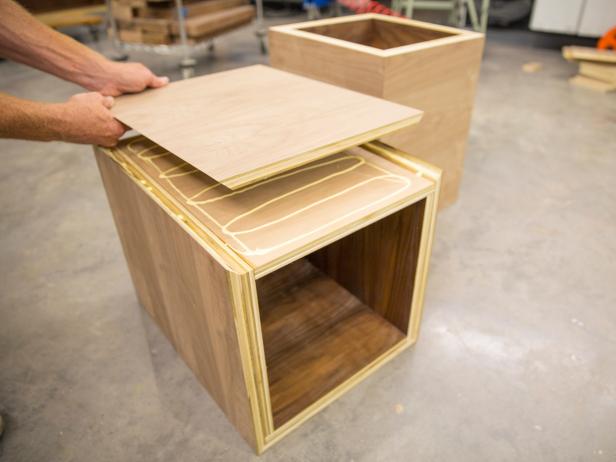
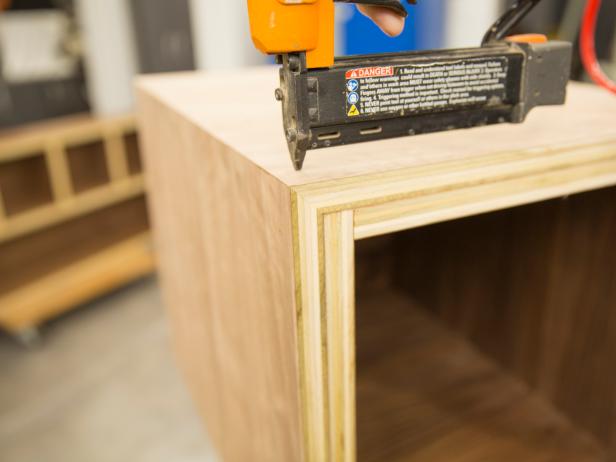
Glue and nail four (Piece N) sections around the table, taking care to align all miter joints as this is the finished surface. Repeat for the second console table (Images 1-3).
Chip
Attach Table Trim
Apply paint or finish to all (Piece O) sections if desired, and let dry. Glue and nail four (Piece O) sections in a pinwheel pattern, assembling flush on all sides. Repeat for the second console table (Images 1 and 2).

Wade Works Creative
Wade Works Creative
Headboard With Storage Cubbies
Glue and nail (4) piece O's as face frames in a pinwheel pattern as face frames aligning flush to all sides. Pre-finish O pieces with desired paint/finish prior to assembly)
Photo By: Wade Works Creative
Headboard With Storage Cubbies
Glue and nail (4) piece O's as face frames in a pinwheel pattern as face frames aligning flush to all sides. Pre-finish O pieces with desired paint/finish prior to assembly)
Photo By: Wade Works Creative
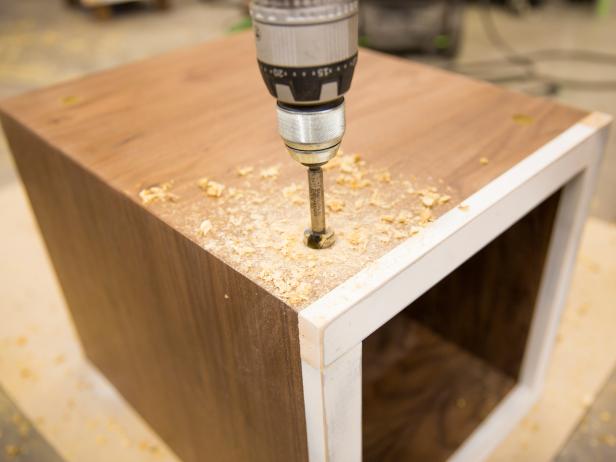
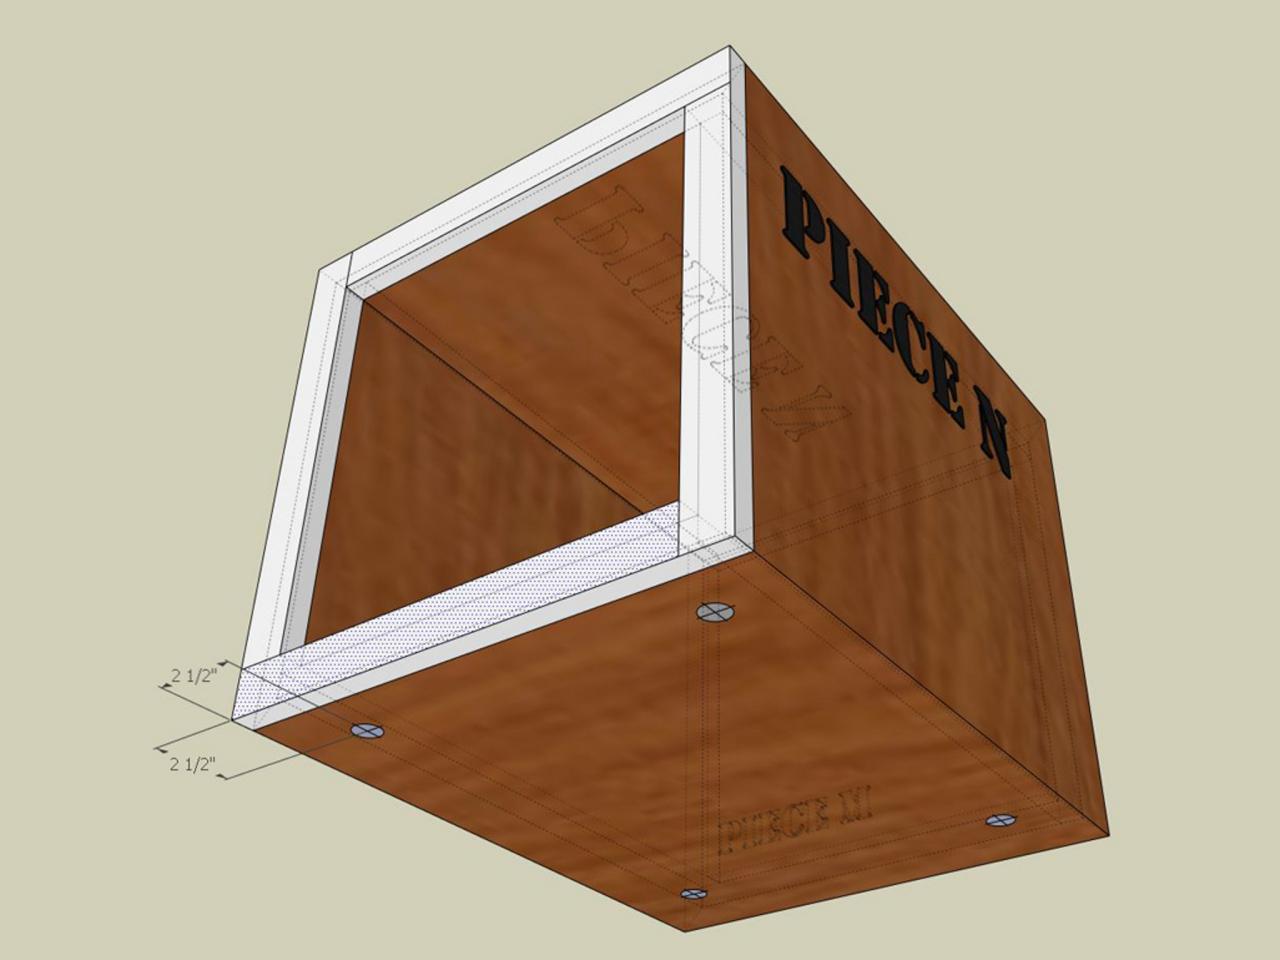
Mark + Drill for Table Legs
Measure and mark the center line for all console legs at 2-1/2" off the edges. Drill a 3/4" deep hole with a 7/8" Forstner bit at each mark. Repeat for second console table (Images 1 and 2).

Wade Works Creative
Wade Works Creative
Headboard With Storage Cubbies
Measure and mark center line for all console legs at 2 1/2" off the edges. Drill a 3/4" deep hole with 7/8" Forstner bit at each location.
Photo By: Wade Works Creative
Headboard With Storage Cubbies
Measure and mark center line for all console legs at 2 1/2" off the edges. Drill a 3/4" deep hole with 7/8" Forstner bit at each location.
Photo By: Wade Works Creative
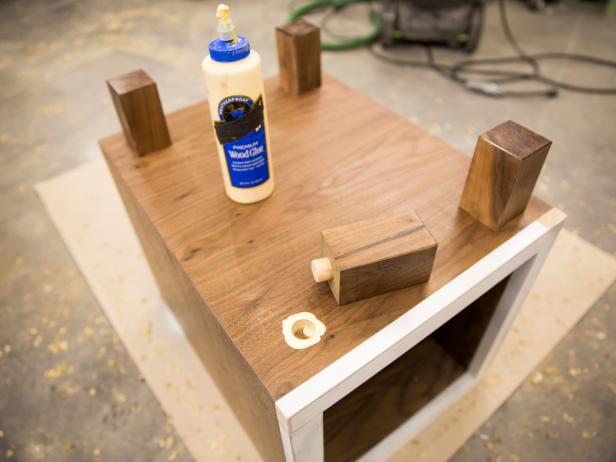
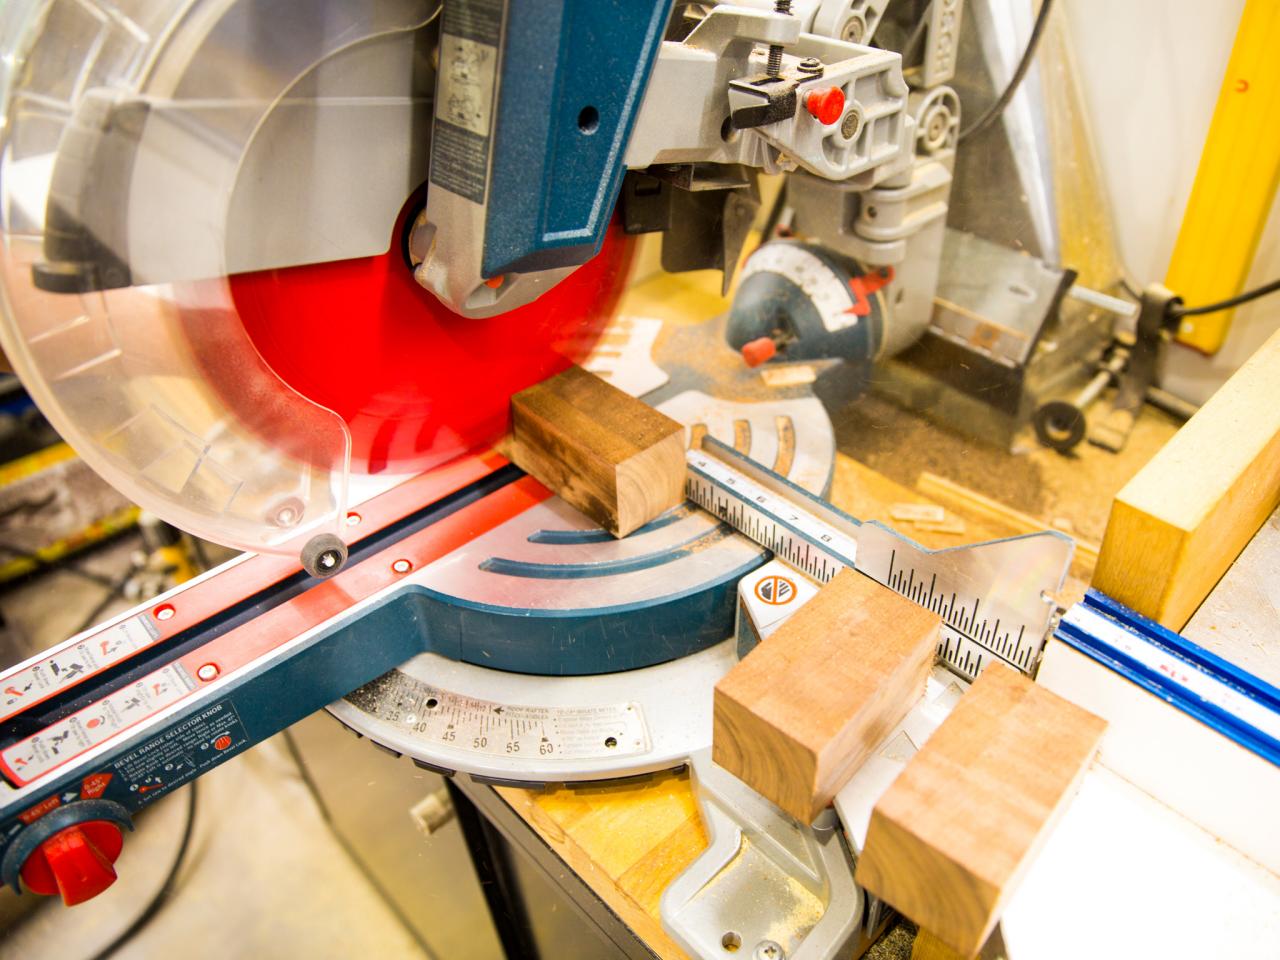
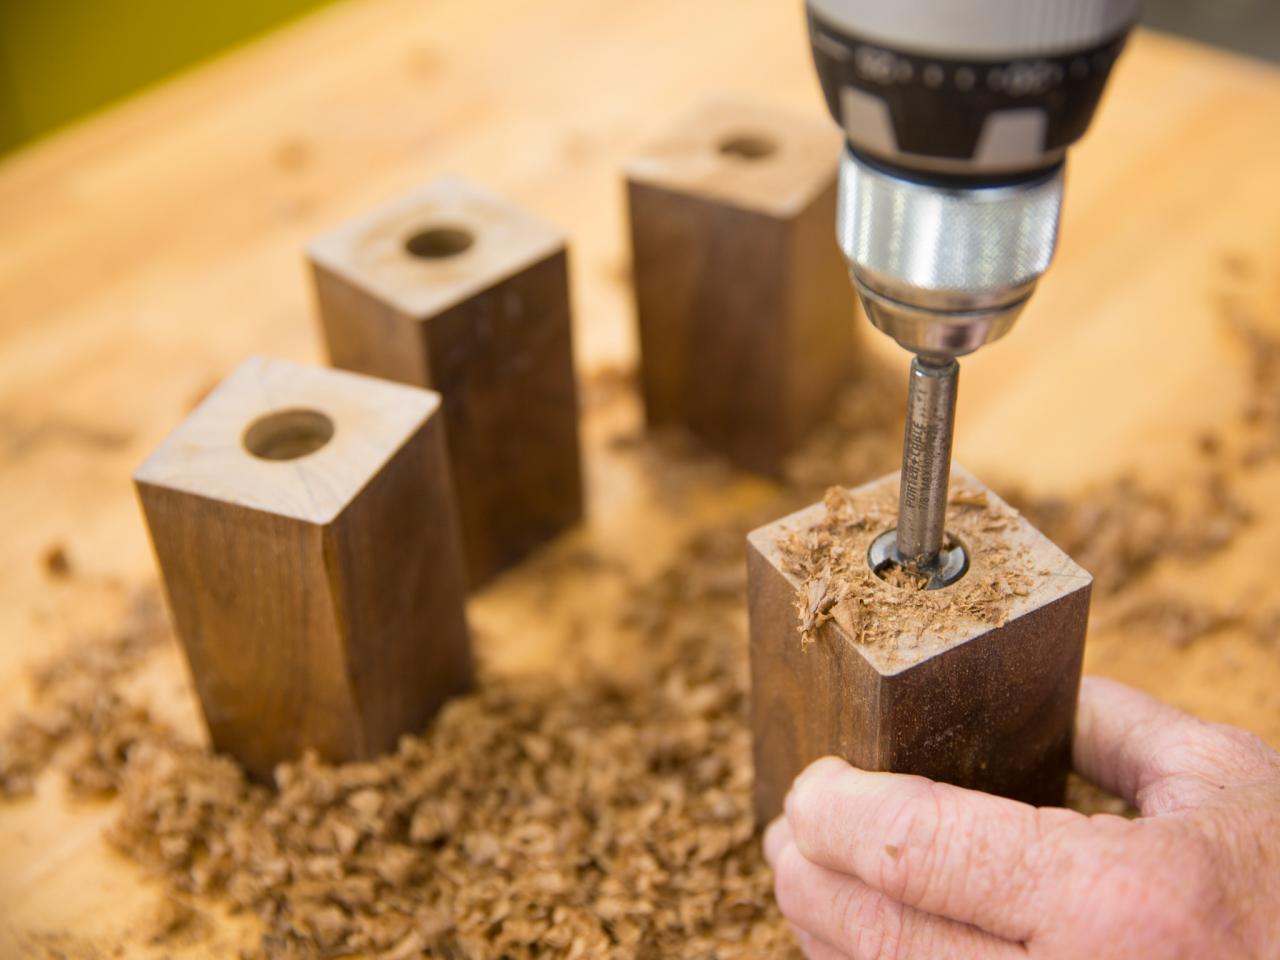
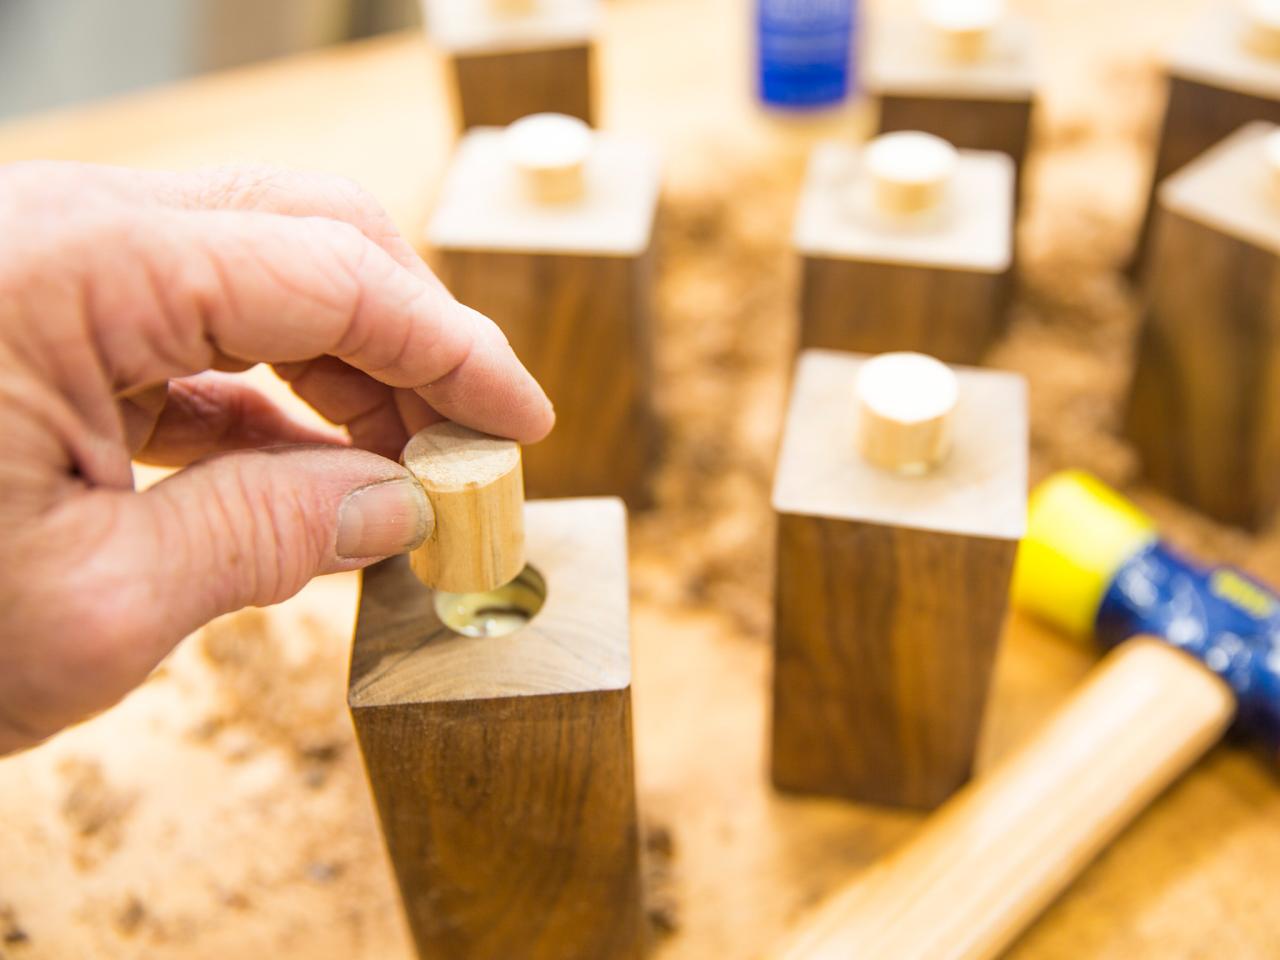
Assemble Legs
Cut all (Piece P and Q) sections (Images 1 and 2). Measure and mark the center line of all legs, and drill a 1/2" deep hole with a 7/8" forstner bit (Image 3). Glue and set wood dowels in the holes in the legs (Image 4). For an easier option, use premade legs and mounting plates.
Wade Works Creative

Wade Works Creative

Wade Works Creative

Wade Works Creative
Headboard With Storage Cubbies
Cut 8 legs and wooden dowels to make a storage headboard.
Photo By: Wade Works Creative
Headboard With Storage Cubbies
Cut 8 legs and wooden dowels to make a storage headboard.
Photo By: Wade Works Creative
Headboard With Storage Cubbies
Measure and mark center line of all legs and drill a 1/2" deep hole with a 7/8" Forstner bit.
Photo By: Wade Works Creative
Attach Legs
Glue and align legs in holes in bottom of the console table ensuring legs are parallel with edges of the box. Apply touch up finish as needed.

Wade Works Creative
Wade Works Creative
Headboard With Storage Cubbies
Glue and align legs in holes in bottom of console ensuring legs are parallel with edges of box.
Photo By: Wade Works Creative
Headboard With Storage Cubbies
Glue and align legs in holes in bottom of console ensuring legs are parallel with edges of box.
Photo By: Wade Works Creative
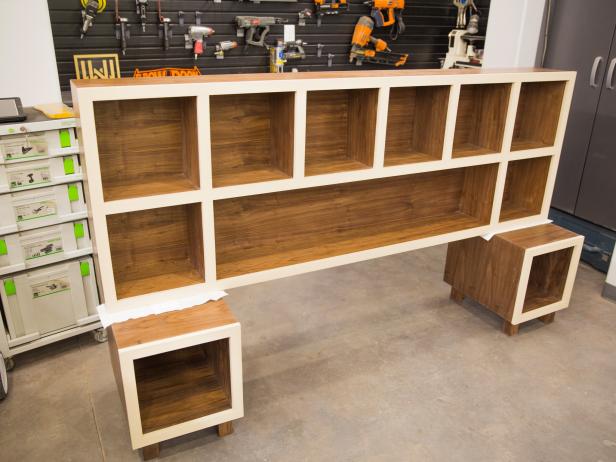
Assemble Headboard
Place top shelving unit over the two bottom console tables (Image 1). Fill compartments with your favorite books and other personal items (Image 2).
Wade Works Creative
Wade Works Creative


