


Step-by-Step Shelving: DIY Ladder Shelf
Open shelving at its finest! This DIY shelf is the perfect way to upcycle that old wooden ladder for useful decor that looks like a million bucks.


We've all seen ladders repurposed as blanket racks, book stands and maybe even plant homes, but this ladder DIY will shock with its simplicity while wowing with its sophistication. We're convinced this upcycled ladder shelf will become a stunning staple in your home that everyone will be asking about.
Materials Needed
- wood ladder
- 25.75"-x-13" wood plank
- 28"-x-14.5" wood plank
- 34.75"-x-16" wood plank
- 41.5"-x-18" wood plank
- 48"-x-20" wood plank
- drop cloth
- chalk paint + paint roller
- sandpaper
- cloth
- drill
- wood screws
- level
- two-hole pipe straps
- clear sealing wax
Prep Wood Planks

Jalynn Baker

Jalynn Baker
Lay out a drop cloth to create a workstation for the project. Cut wood pieces to the desired length and lay out accordingly. The measurements listed above work for a standard-sized ladder, but if your ladder is a a different size, you may need to take your own measurements before purchasing the wood. Paint the wood in your favorite shade of chalk paint, and let dry.
Prep Ladder

Jalynn Baker
Jalynn Baker
Jalynn Baker
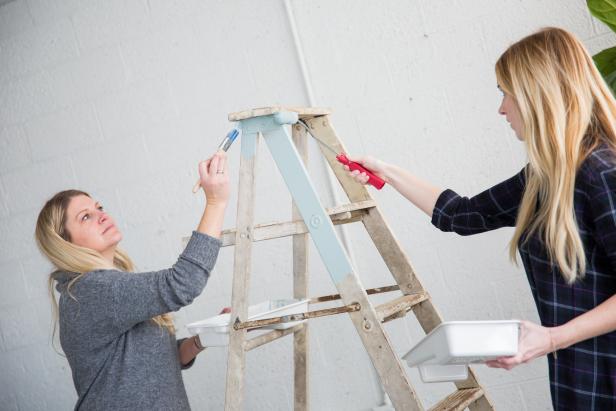
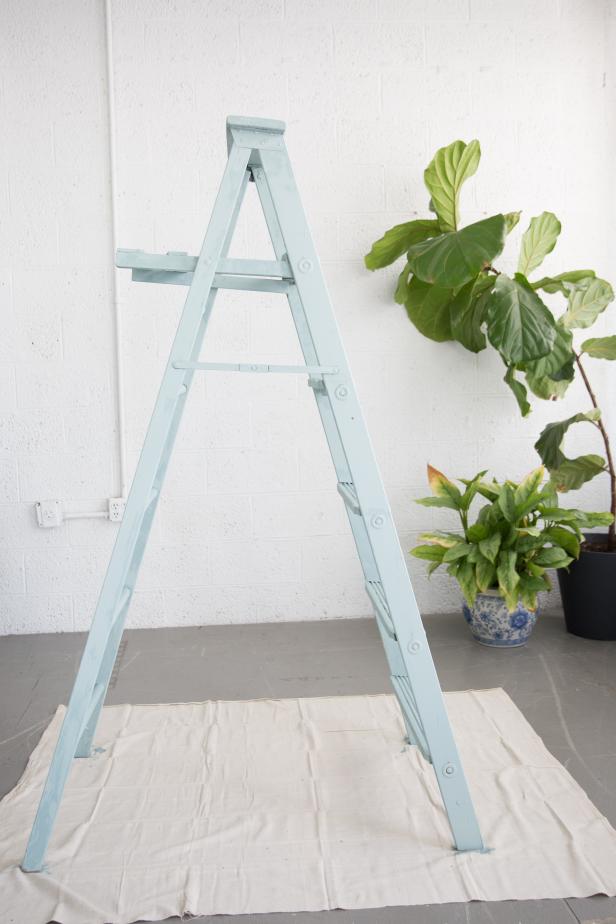
While the wood planks are drying, prep the ladder. Sand down any rough patches, removing any unwanted paint spots as well. Wipe away dirt and dust after sanding. Paint the ladder, and let it dry completely.
Attach Shelves

Jalynn Baker

Jalynn Baker
Beginning at the top of the ladder, place the smallest wood plank across the step and ladder platform. Attach with wood screws on both ends ensuring that the piece is secure. Place the remaining shelves onto the ladder accordingly, attaching them with wood screws where there is a step and two-holed pipe straps wherever there is a ladder rung. Use a level to ensure that the shelves are even and flat.
Seal & Style

Jalynn Baker
Once all the shelves are attached, seal the entire shelving unit using clear sealing wax and a cloth. Once the shelf is complete, style with books, plants, knick-knacks or all of the above. The possibilities are endless with a shelving unit this versatile.

Jalynn Baker


