


How to Make Your Own Picture-Perfect Photo Ledge
Don’t break the bank with a store-bought shelf, DIY a custom photo ledge you’ll be proud to display in your space.


Picture ledges are a sleek, beautiful way to display pictures, books, vinyl records and so much more. Instead of spending way too much on a store-bought shelf that may not even be the right length for your space, DIY your very own to the exact specs you are wanting!
Materials Needed
- (2) 1x4 x 4’ pine boards
- (1) 1x2 x 4’ pine board
- stain + cloth
- gloves
- wood glue
- trigger clamps
- finish nails
- hammer
- drill + bit
- 1” wood screws
Stain the Wood

Jalynn Baker
Using the stain color of your choice, spread a layer on each board and wipe off the excess.
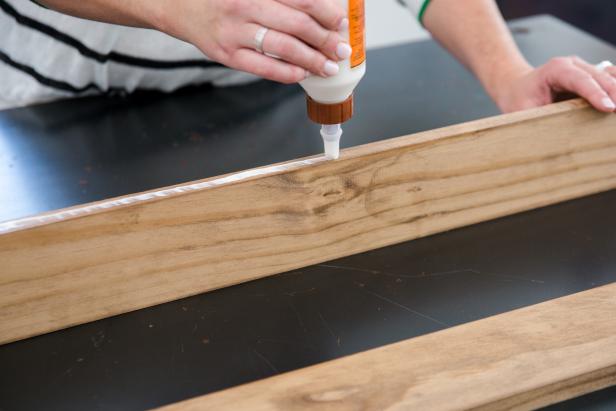
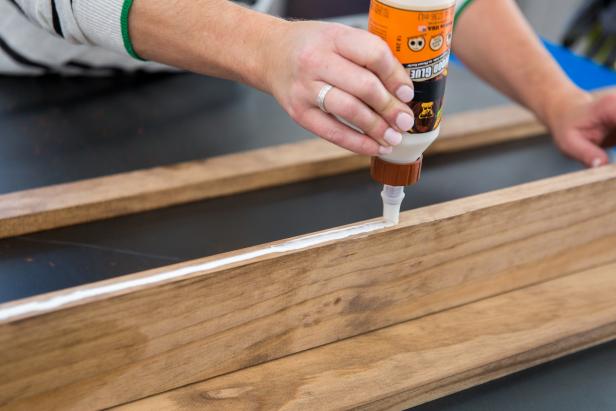
Glue Up
Jalynn Baker
Jalynn Baker

Jalynn Baker
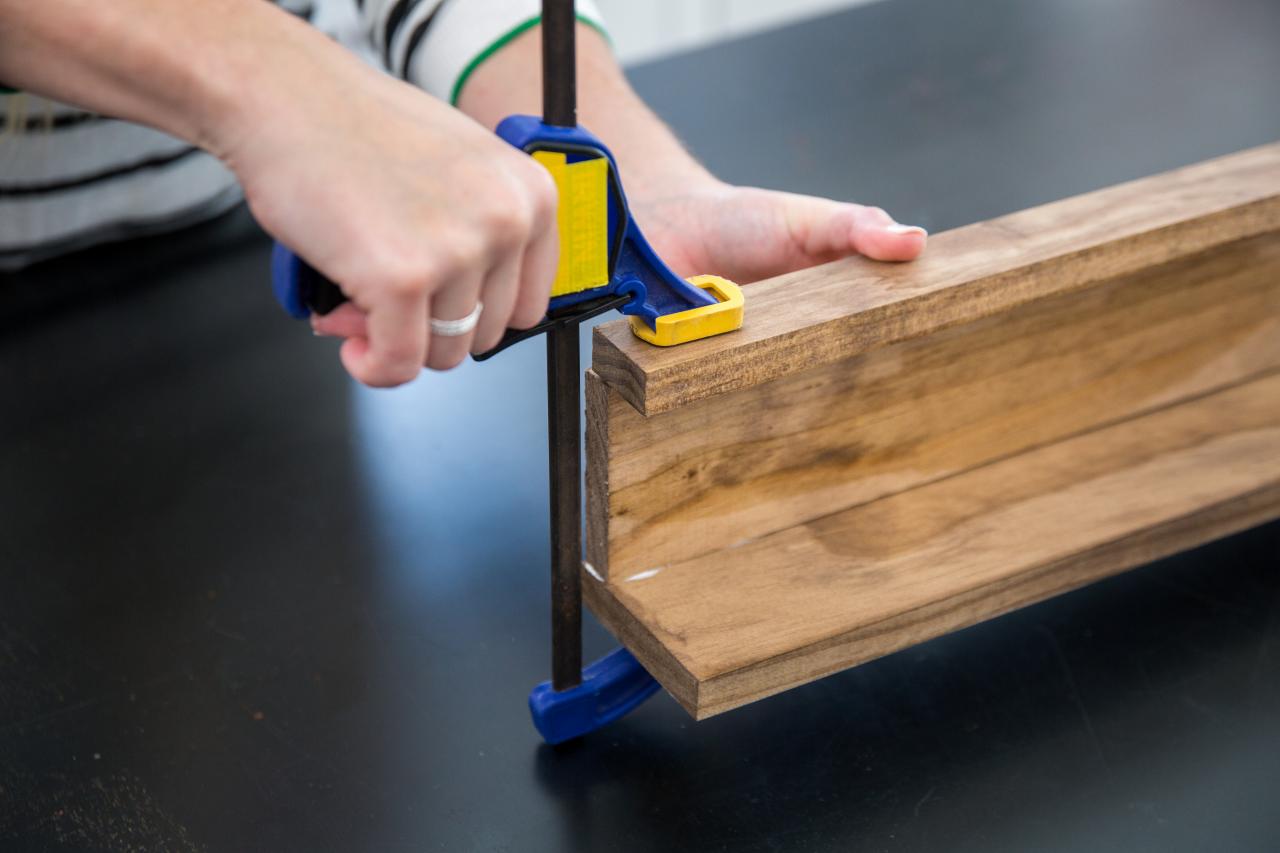
Once the stain has dried, spread glue on one edge of one of the 1x4 boards. With the other 1x4 board lying flat, place the glued piece upright on the front edge. Next, spread glue on the top edge and place the 1x2 on top parallel with the bottom board. The achieved shape should resemble a “J.”
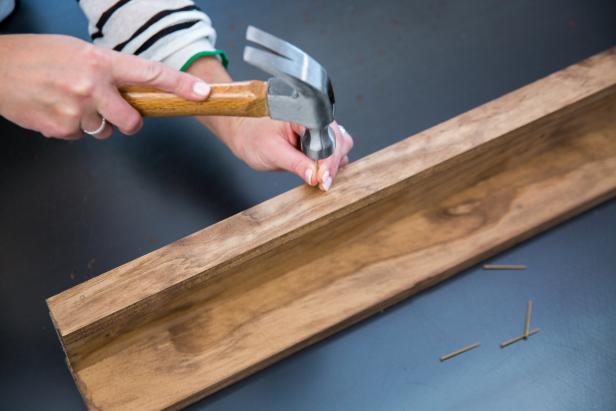
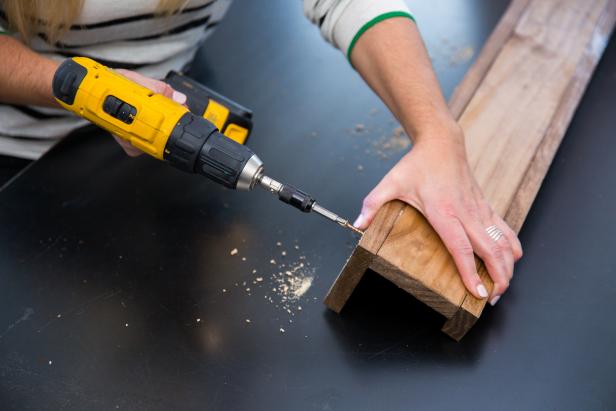
Secure
Jalynn Baker

Jalynn Baker
Jalynn Baker
Once the glue has been allowed to dry overnight, remove the clamps and further secure the 1x2 with finish nails if desired. On the back, screw pilot holes and drive 1-inch wood screws to increase the overall strength of the ledge. To hang, locate the studs in the wall and drill directly through the back boards into the wall. The type of screw will depend on your wall and how much weight you plan to put on the ledge, but most likely a 2-inch wood screw will do the trick.
Decorate and Display

Sarah Busby
Adorn with family photos and memories or place above a record player with your favorite vinyl on display. Whatever you choose, this ledge is sure to bring a touch of minimalist sophistication to any space.


