


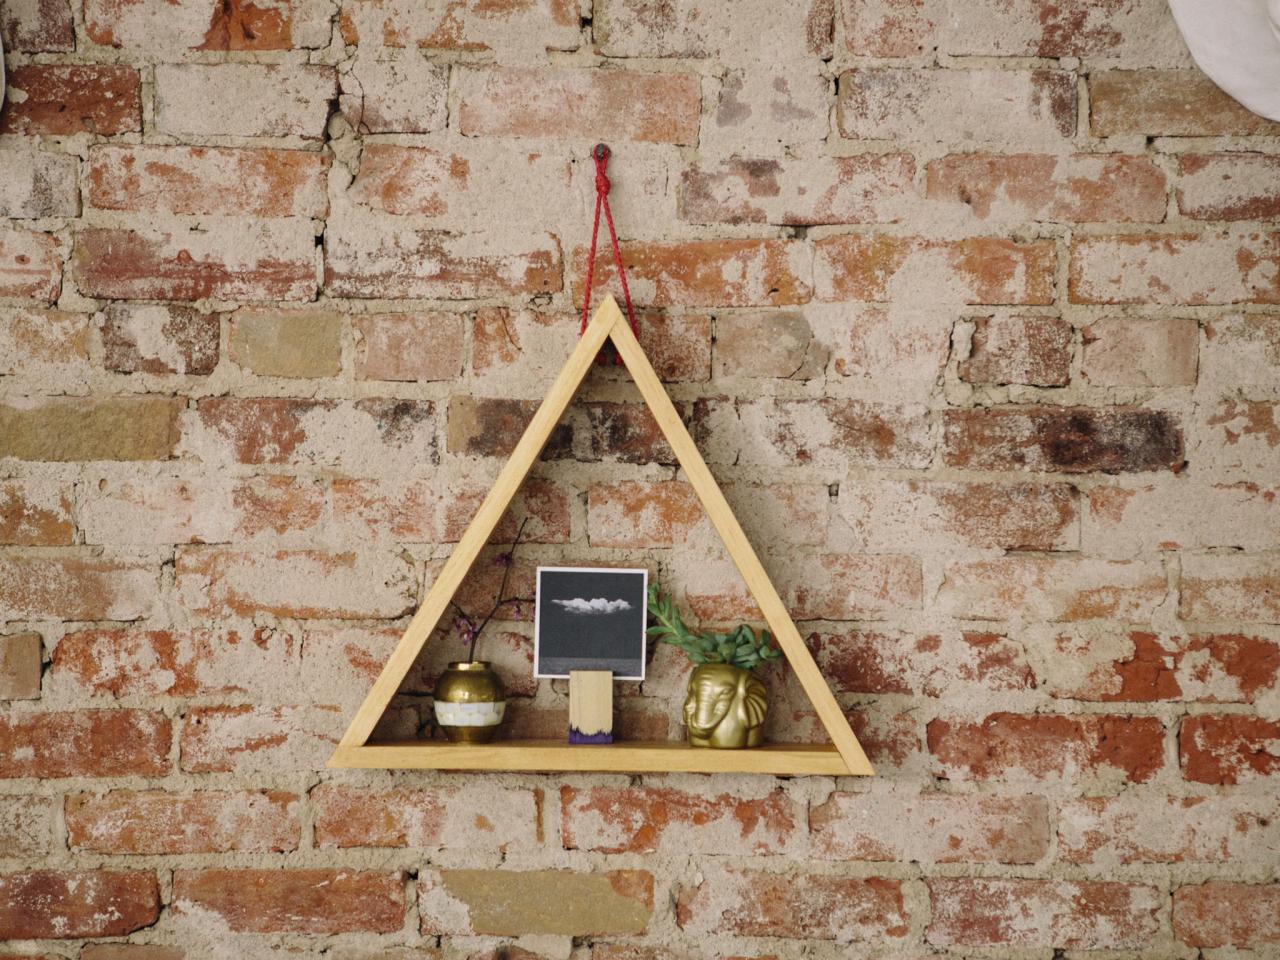
How to Make a Hanging Triangle Shelf
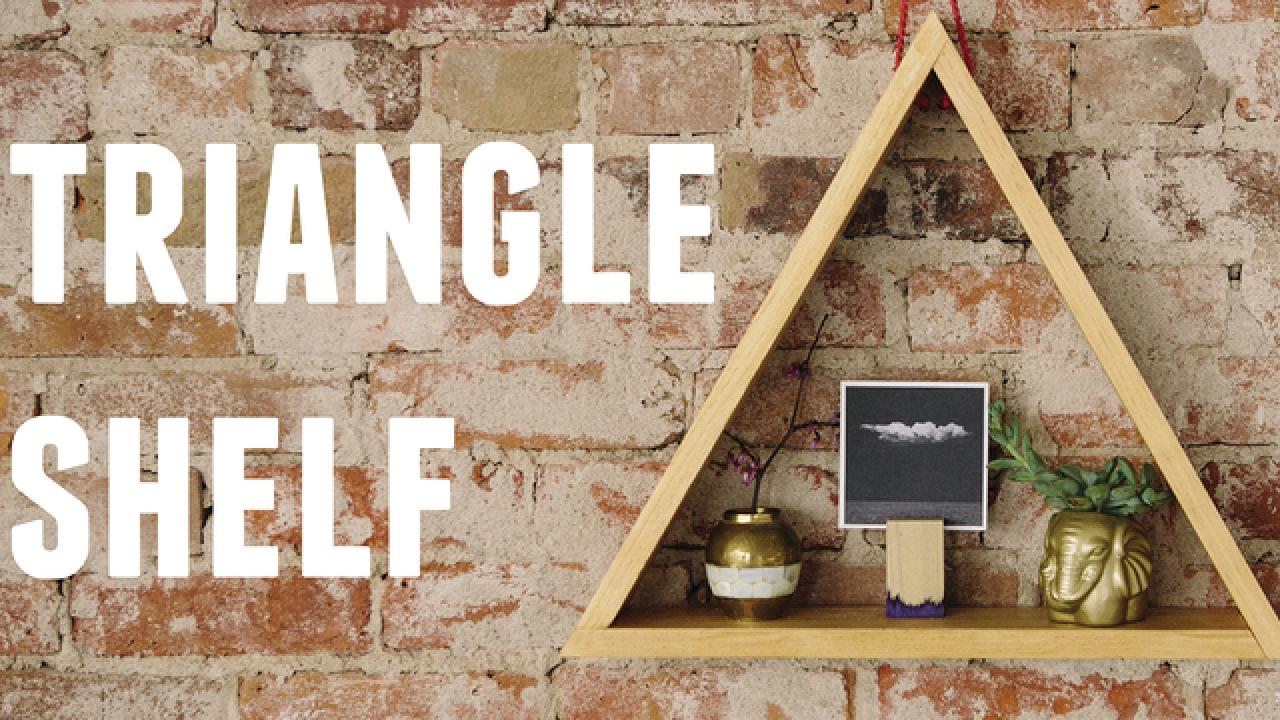

Triangle Shelf
Make a hanging triangle wood shelf using only a few materials and tools.

Materials and Tools:
1x4 select pine, enough to cut into three 18" boards
miter saw
wood glue
wood filler
nail gun and 18-gauge 1.5" nails
drill and 3/8” drill bit
scissors
orbital sander and sandpaper
paint or polyurethane
rope
Cut Shelf Sides
Measure the length you want the sides of the triangle shelf to be and mark with a pencil (in this case 18”). Cut one end of the 1x4 at a 33-degree angle using a miter saw. Flip and cut the other end (on the 18” mark) at a 33-degree angle in the opposite direction of the first cut. You will have open 33-degree angles on each end. Use this piece as a template to mark and cut the remaining pieces.


Cut Wood Piece
Cut wood piece at a 30-degree angle with a miter saw to make a triangular wood shelf.
Mark Wood Piece
Measure the length you want the sides of the triangle shelf, and mark with a pencil.
Fit Pieces Together
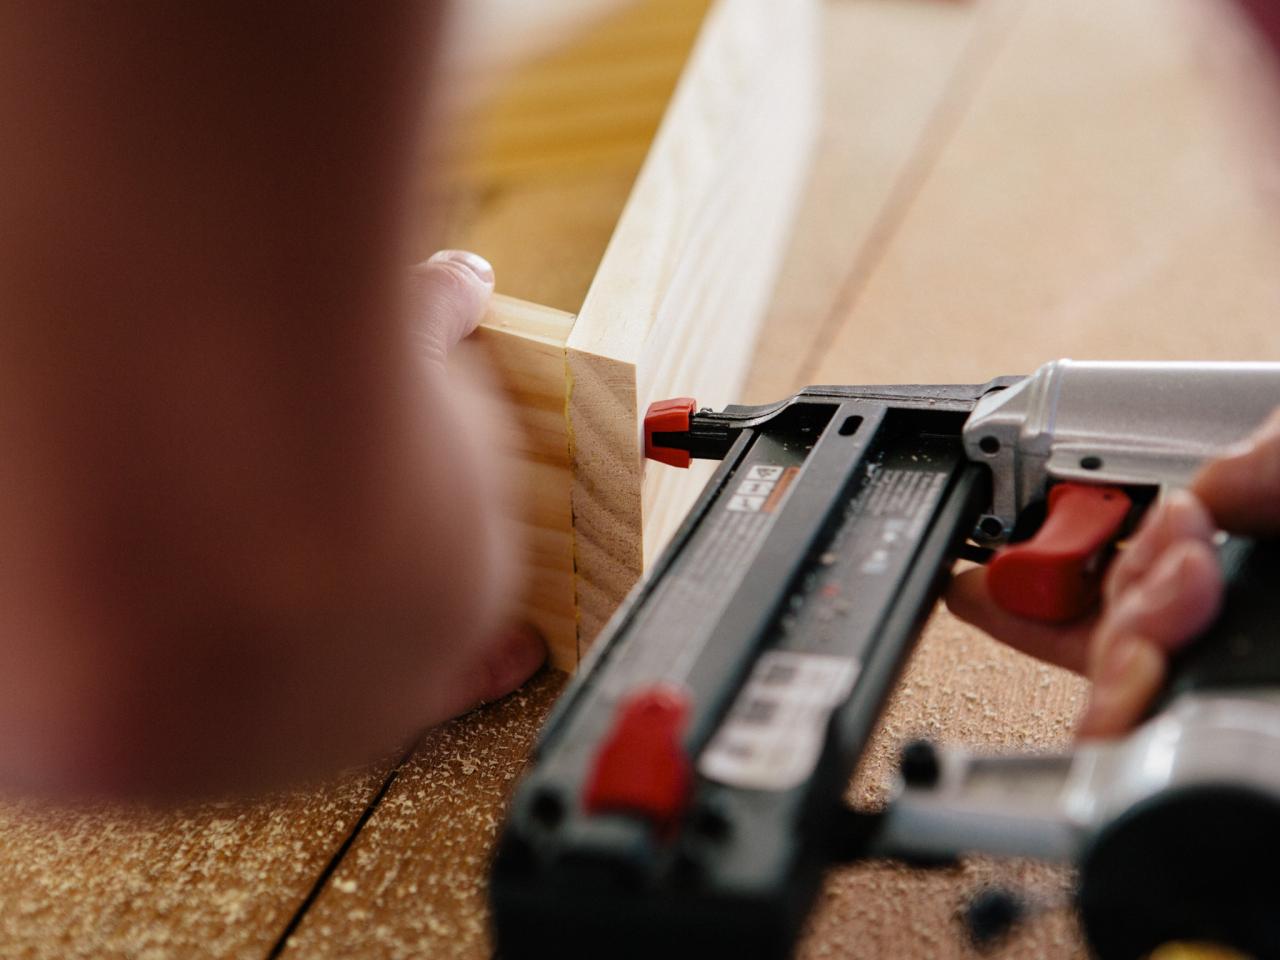
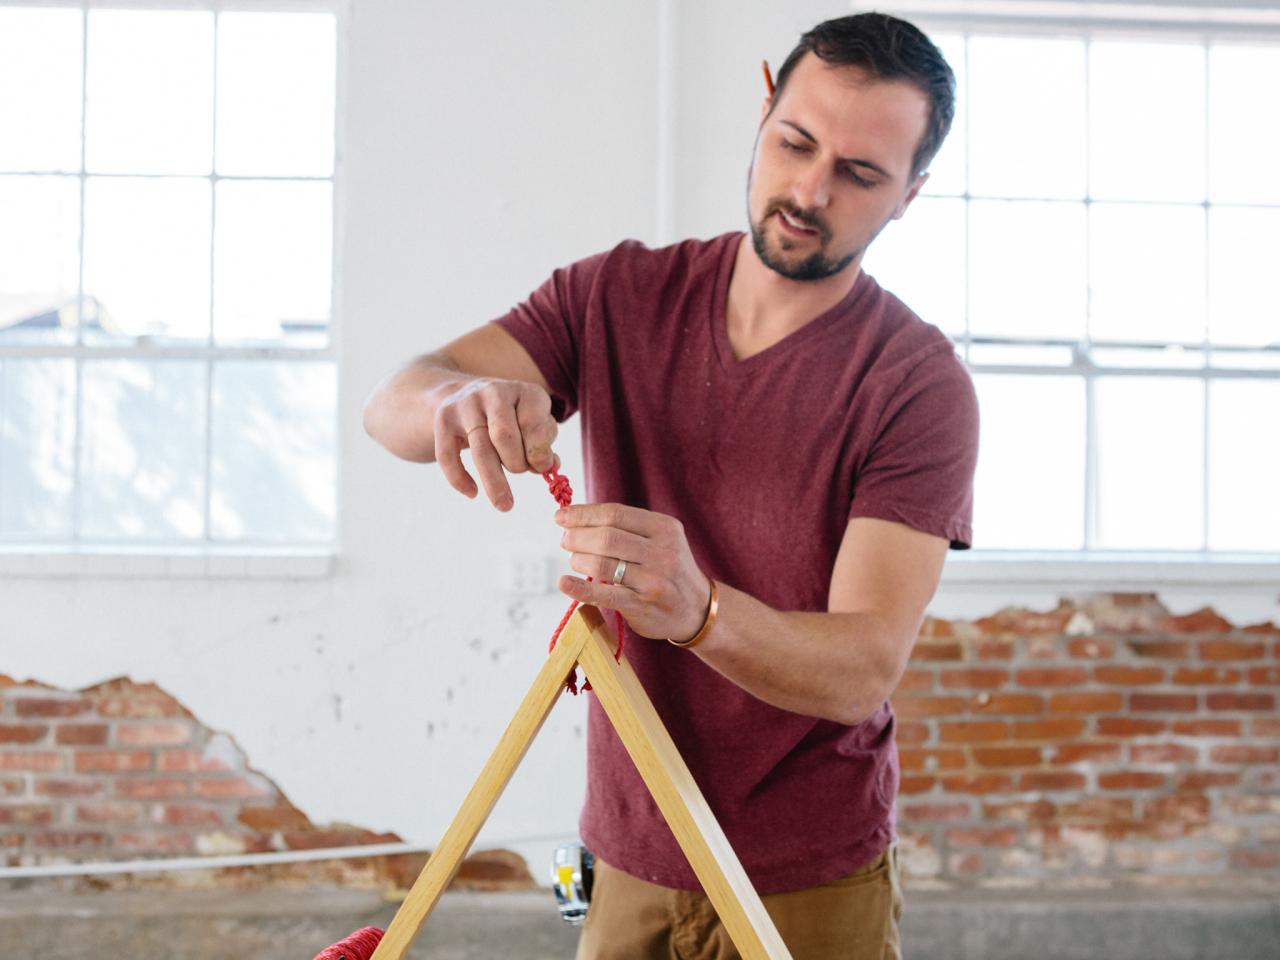
Dry-fit the pieces of wood together into the shape of a triangle to ensure all of the cuts are 100 percent accurate and the pieces fit together well with no big gaps on the corners. Starting with one corner, apply glue where the pieces of wood touch and press pieces together. Nail the corner together using 1.5” 18-gauge nails. Fill nail holes with wood filler. Repeat this step for the other 2 corners.


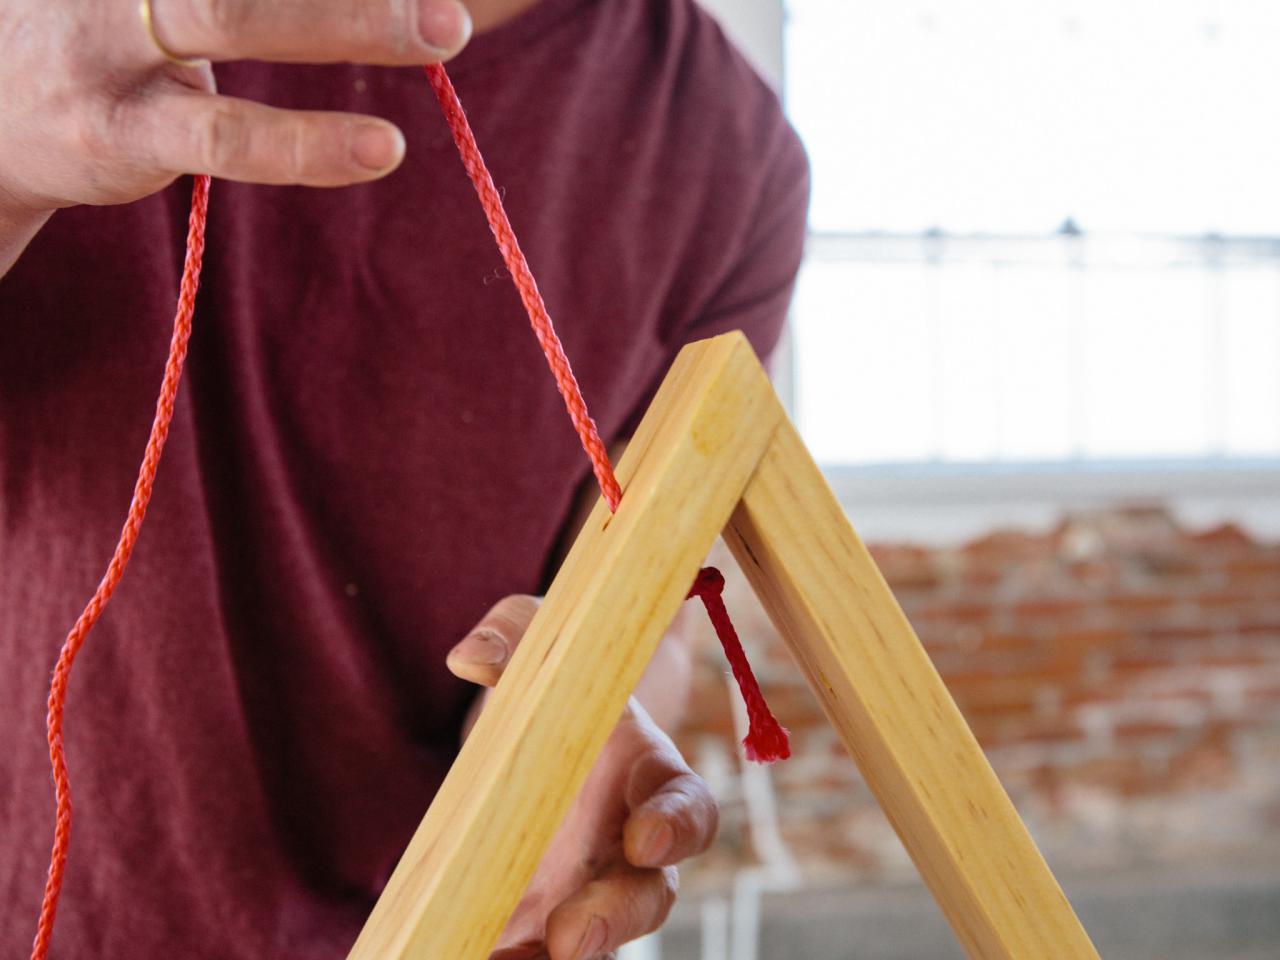
Drill Holes and Sand
Measure 2” down from the top point of the triangle on both sides and make a mark with a pencil. Ensure the mark is centered on the wood by measuring 1.5” from the edge. Drill a hole at the mark using a 3/8” drill bit. Lightly sand the entire piece removing any rough edges on the corners.


Customize Your Shelf
Paint, stain or poly the triangle. Insert a colorful piece of rope through one of the previously drilled holes and tie a knot on the inside. Repeat on the other side. Cut each piece of rope at desired length and tie together to hang. Display small treasures and photos on your chic new shelf.


