


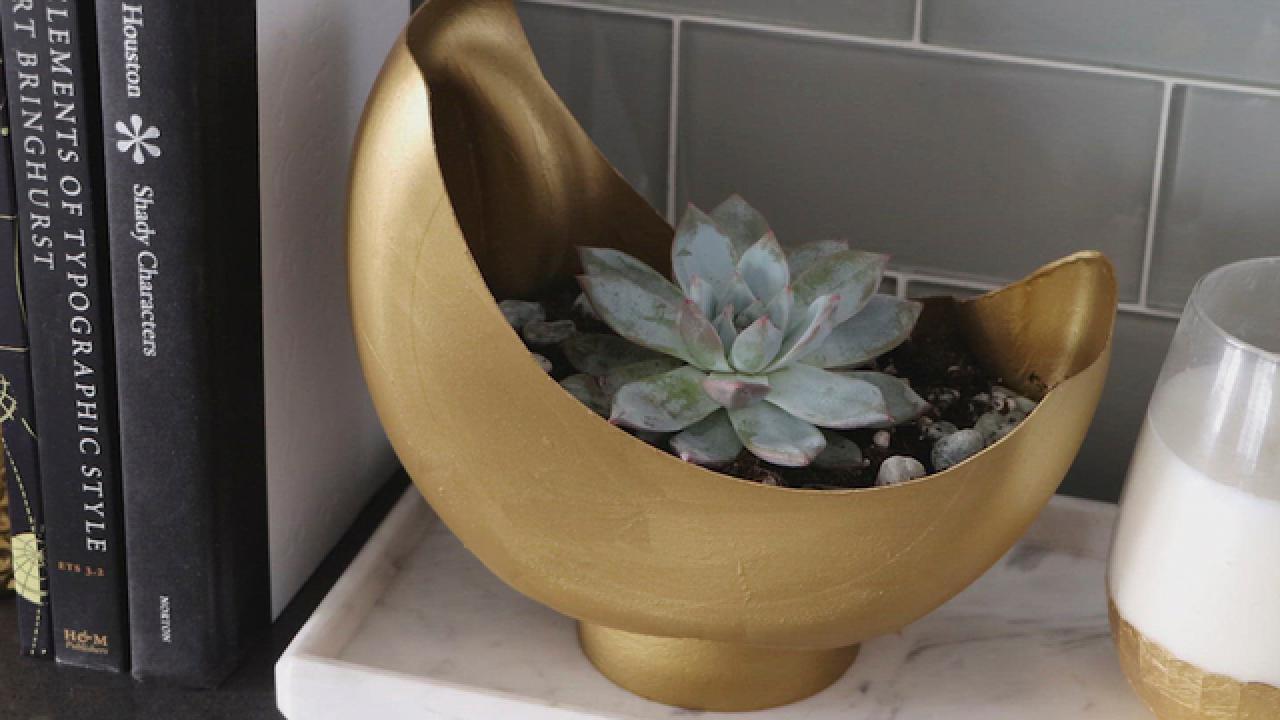
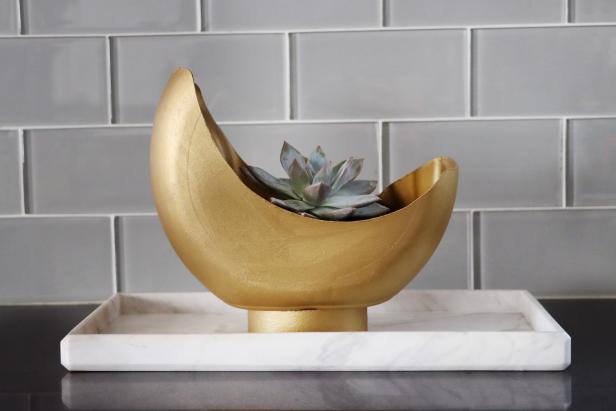
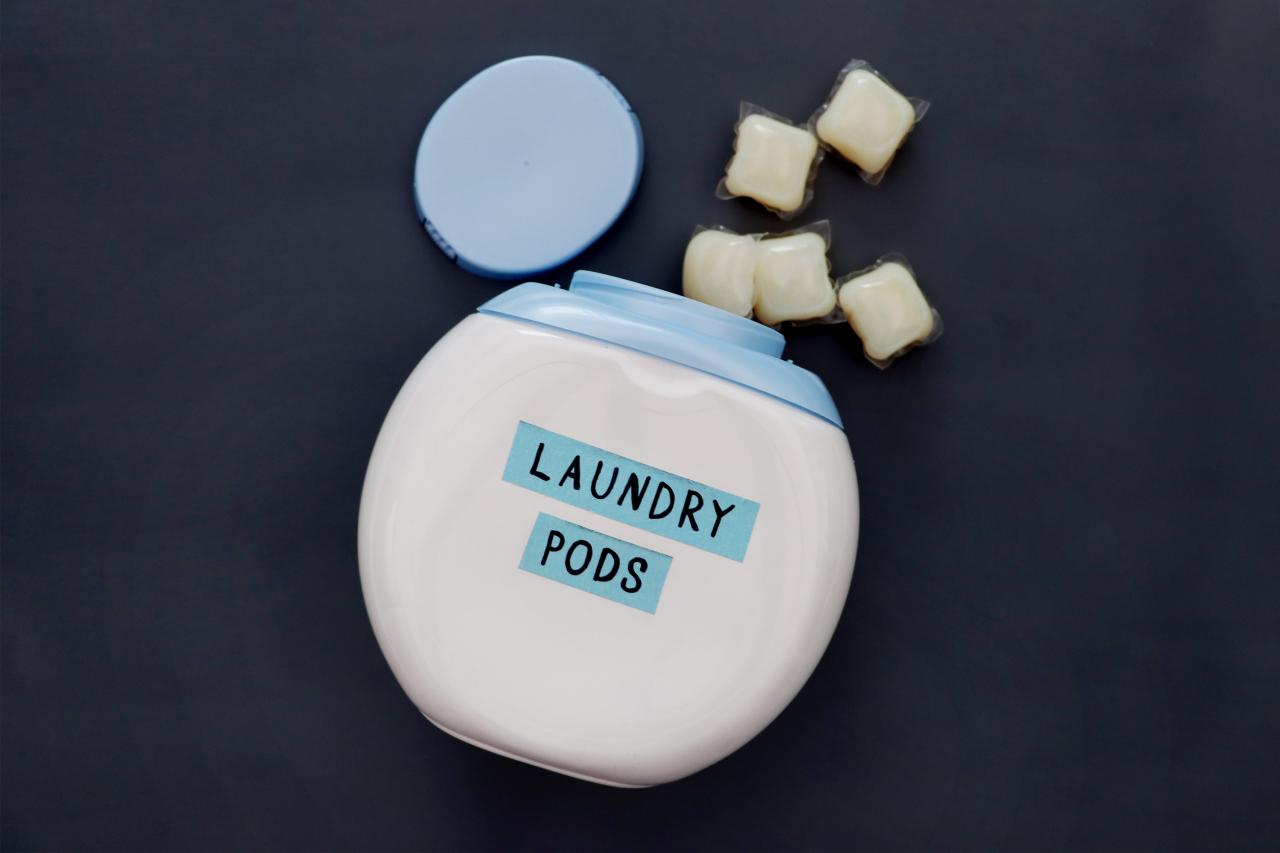
Turn an Old Laundry Detergent Pod Container Into a Moon Planter for Succulents
This trendy, DIY upcycled moon planter is surprisingly easy to make out of an old laundry pod container. No one will believe that this lunar planter came straight out of your recycling!

Karen Kavett

Unlike a lunar eclipse, you can (and will want all your friends) to look directly at this one-of-a-kind, upcycled moon planter made from materials straight out of your recycling bin. Grab an old laundry pod container, a few basic craft materials, and voila! You and your succulents can thank us later.
Materials + Supplies
- laundry pod container
- craft knife
- scissors
- permanent marker
- 7" cooking pot/pan lid
- rubbing alcohol
- paper towels
- sandpaper
- empty masking tape roll
- white paint
- gold paint
- paintbrush
- low-temp hot glue gun
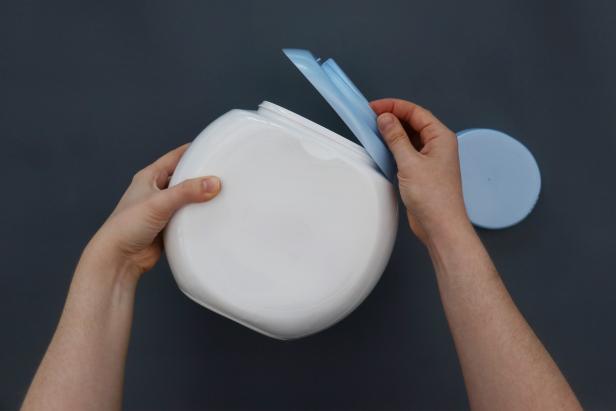
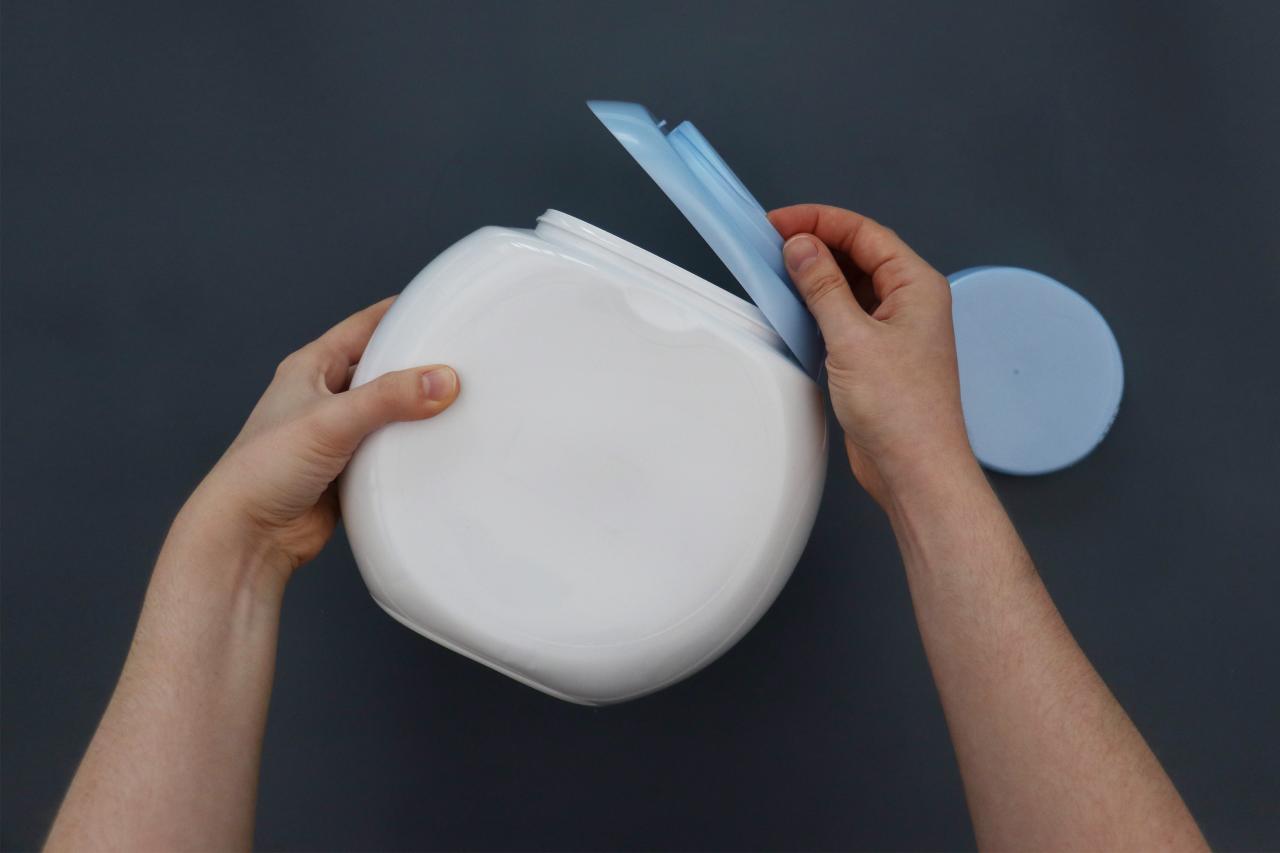
Remove All Labels
Remove all labels from your empty laundry pod container. If they are being stubborn, try loosening them with hot water or adhesive remover (Image 1). Then pop the top plastic piece off so you’re left with just a round container (Image 2).

Karen Kavett
Karen Kavett
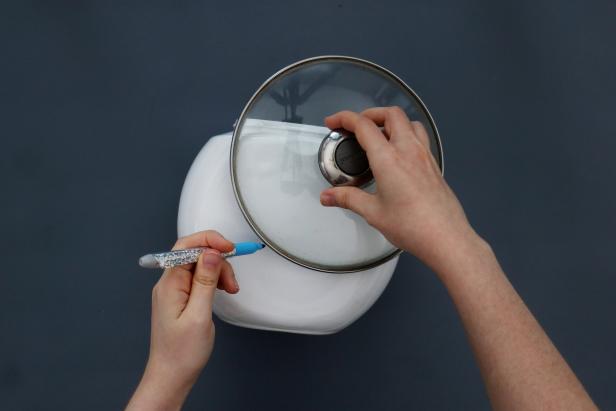
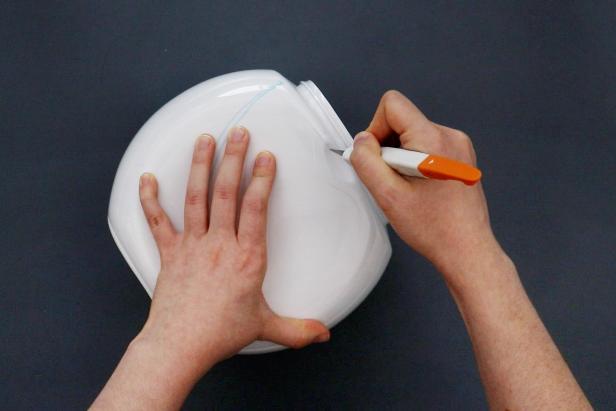
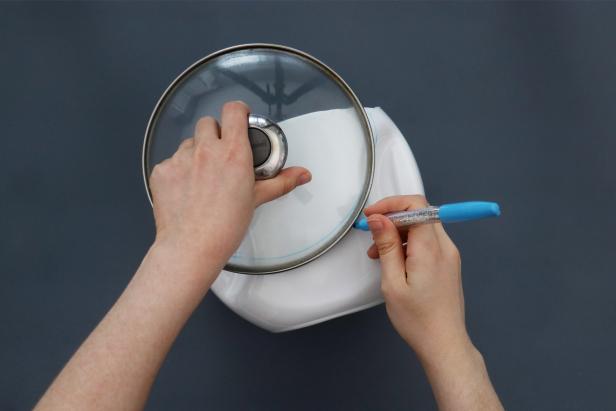
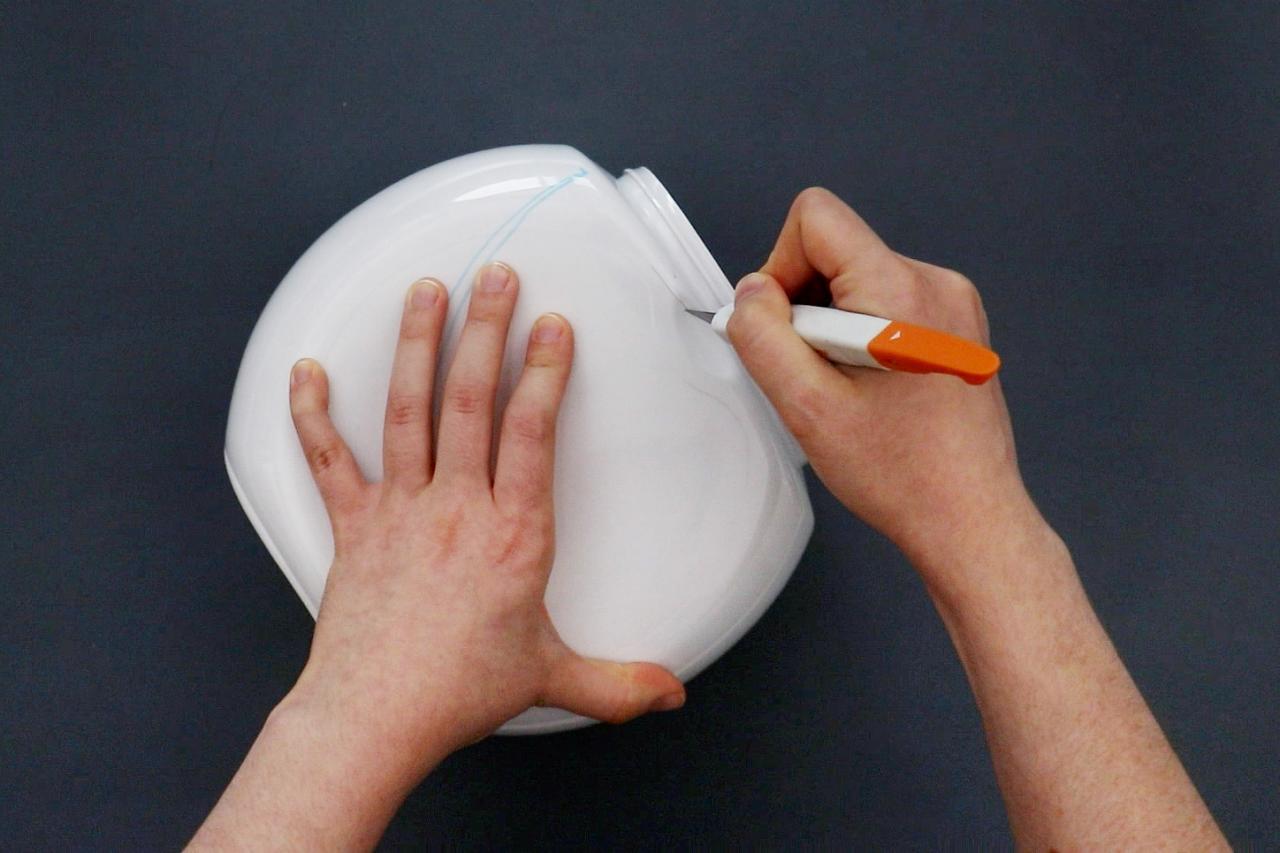
Trace a Circle
Trace a 7” pot lid (or anything else around the same size) to get a moon shape on the front of the container (Image 1). Feel free to draw this multiple times until you’re happy with the placement (Image 2).
Karen Kavett
Karen Kavett
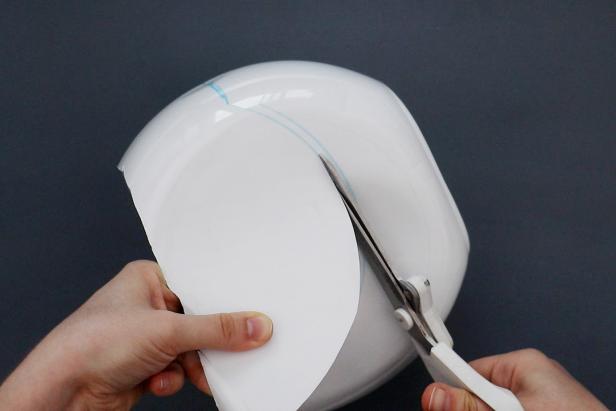
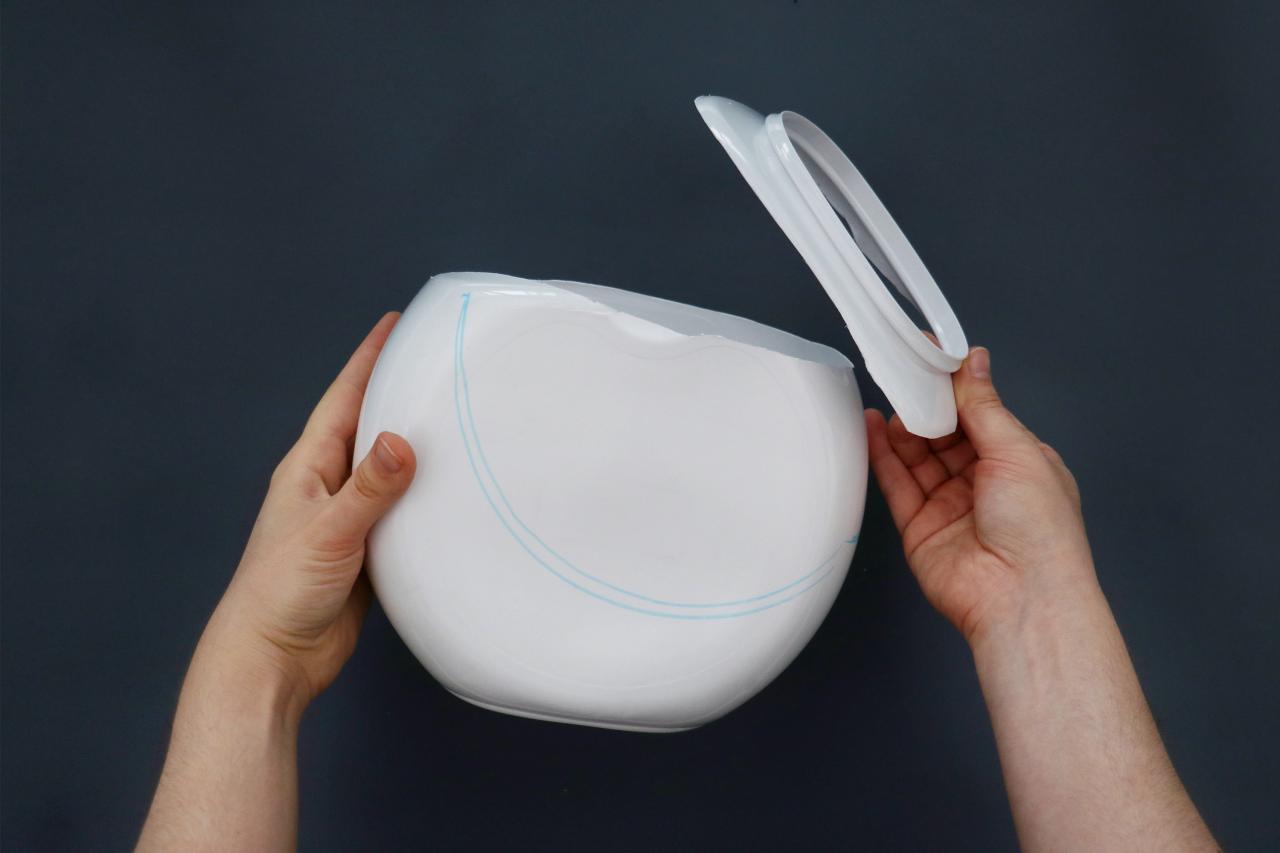
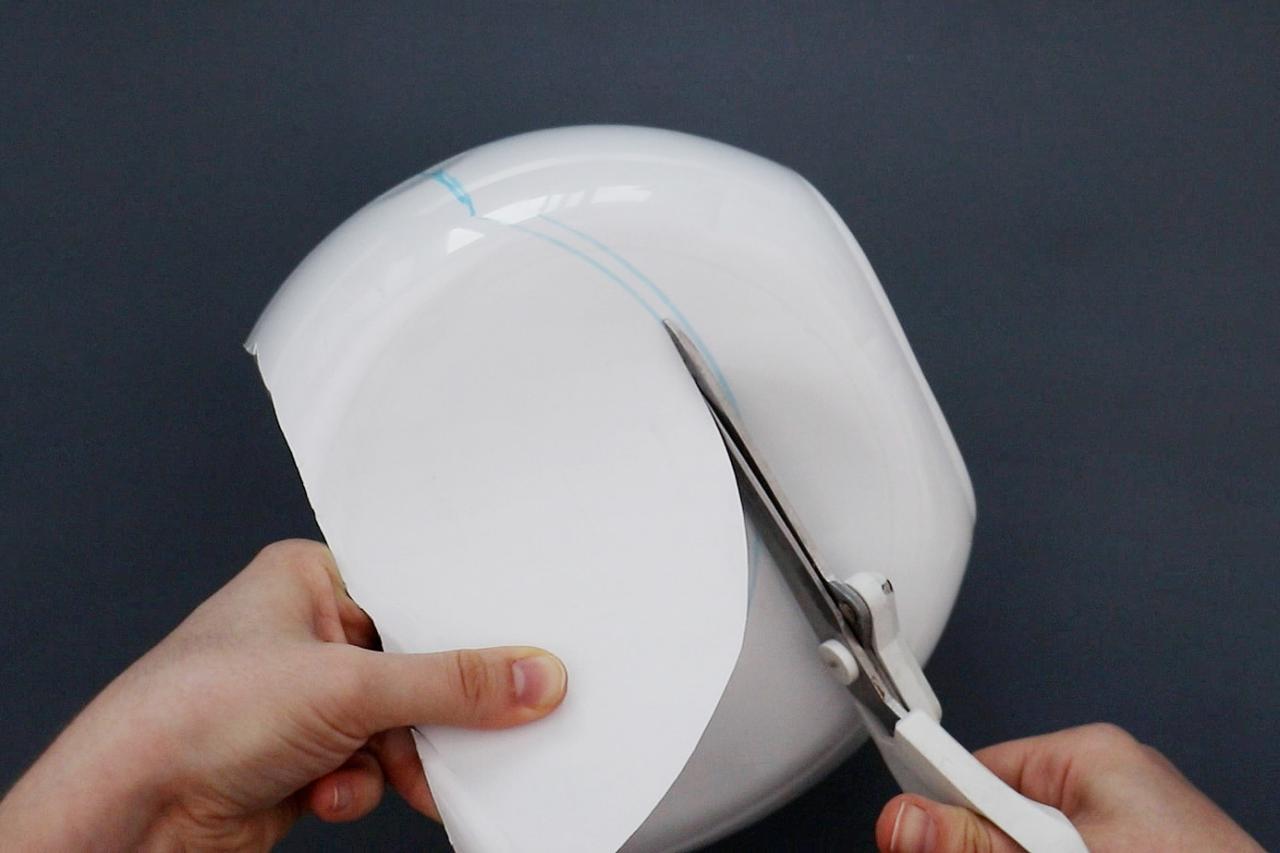
Start Cutting
Use a craft knife and scissors to cut off the rim from the container (Image 1 - 3). Then carefully cut out the front of the container to reveal your moon shape (Image 4 + 5).
Karen Kavett

Karen Kavett

Karen Kavett
Karen Kavett

Karen Kavett
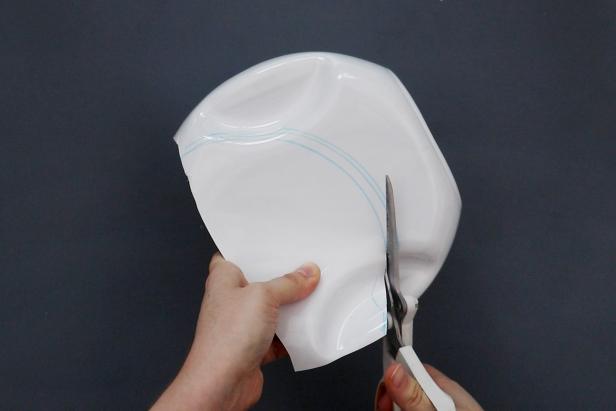
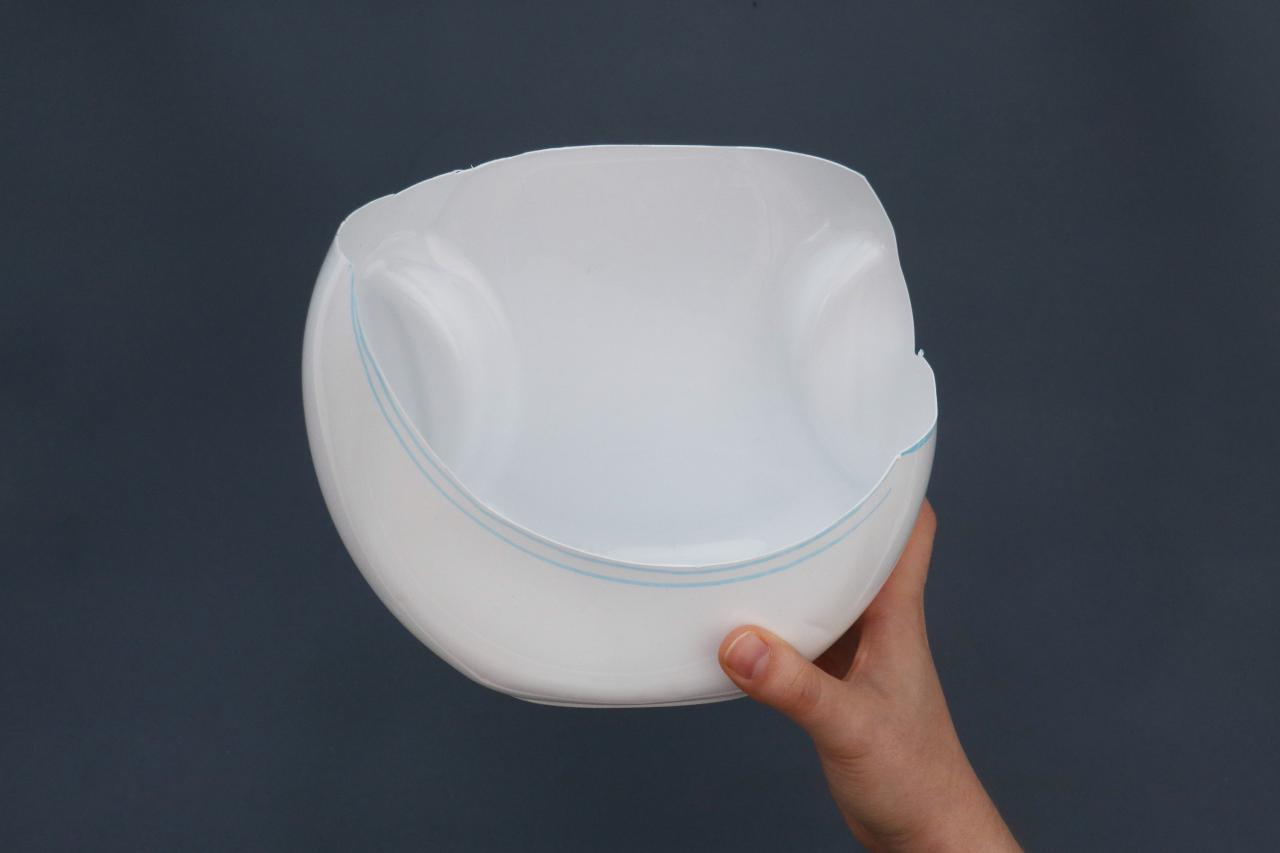
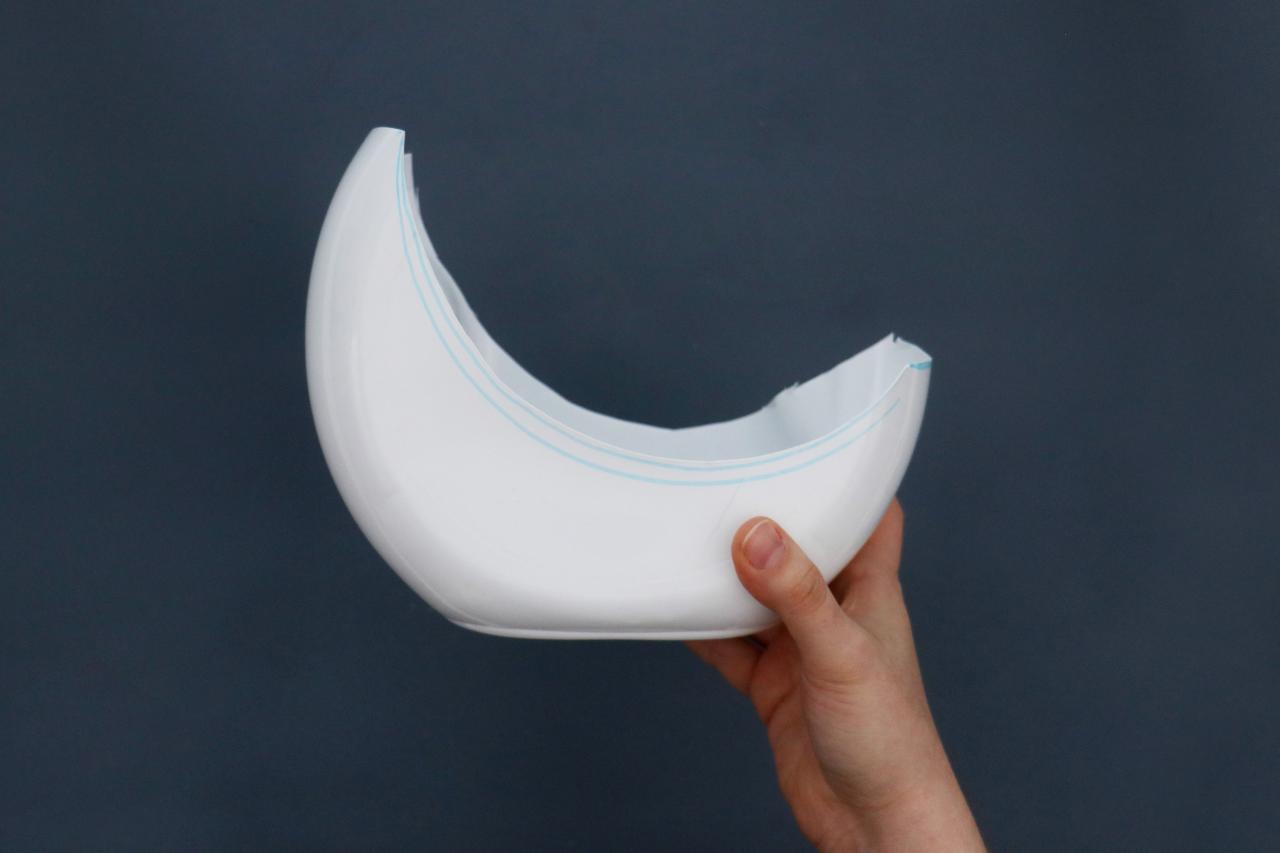
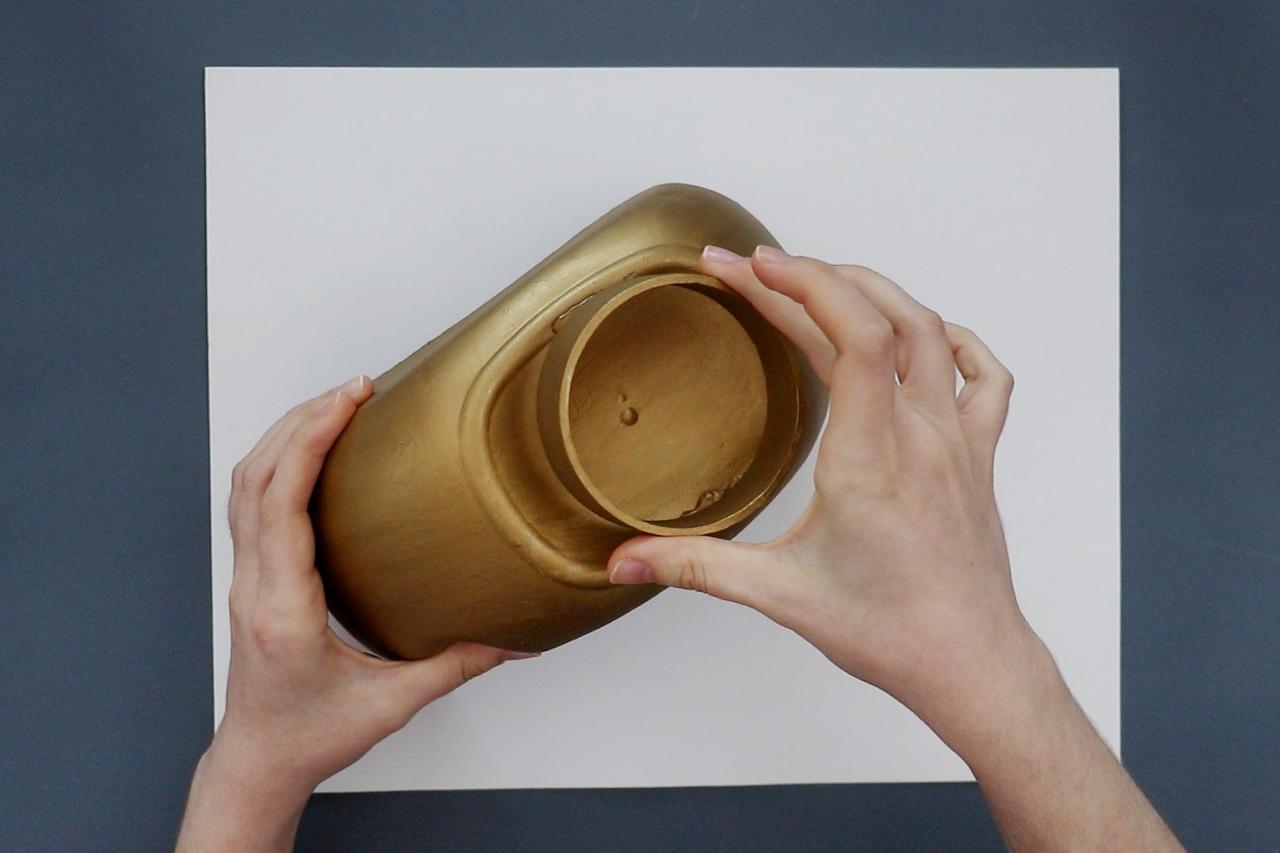
Trace a Circle on the Back
Trace your pot lid again on the back, lining it up so it matches the placement on the front (Image 1). Cut it out, being extra careful when cutting through the handholds (Image 2 + 3).
Karen Kavett
Karen Kavett

Karen Kavett
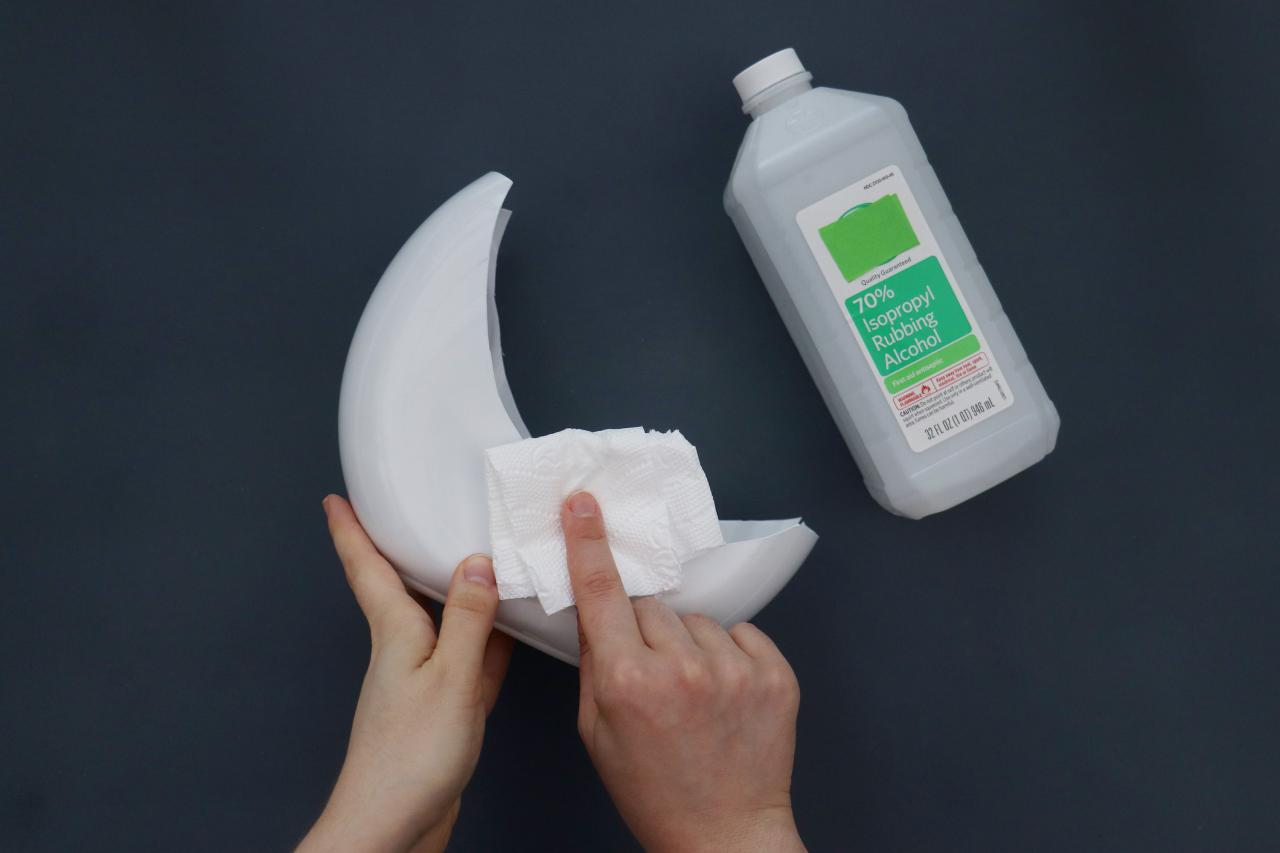
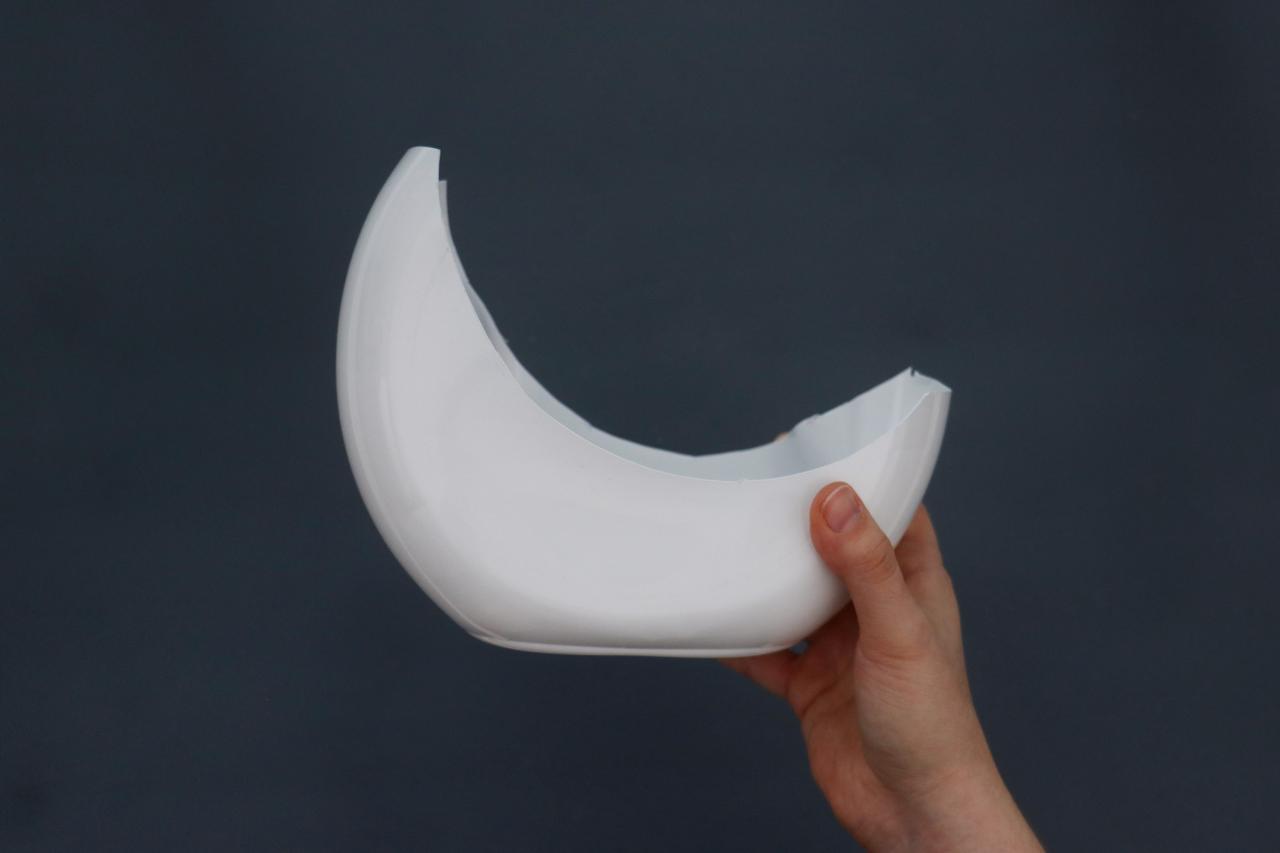
Remove Any Marker
Use a paper towel dampened with rubbing alcohol to “erase” the marker lines (Image 1 + 2).

Karen Kavett

Karen Kavett
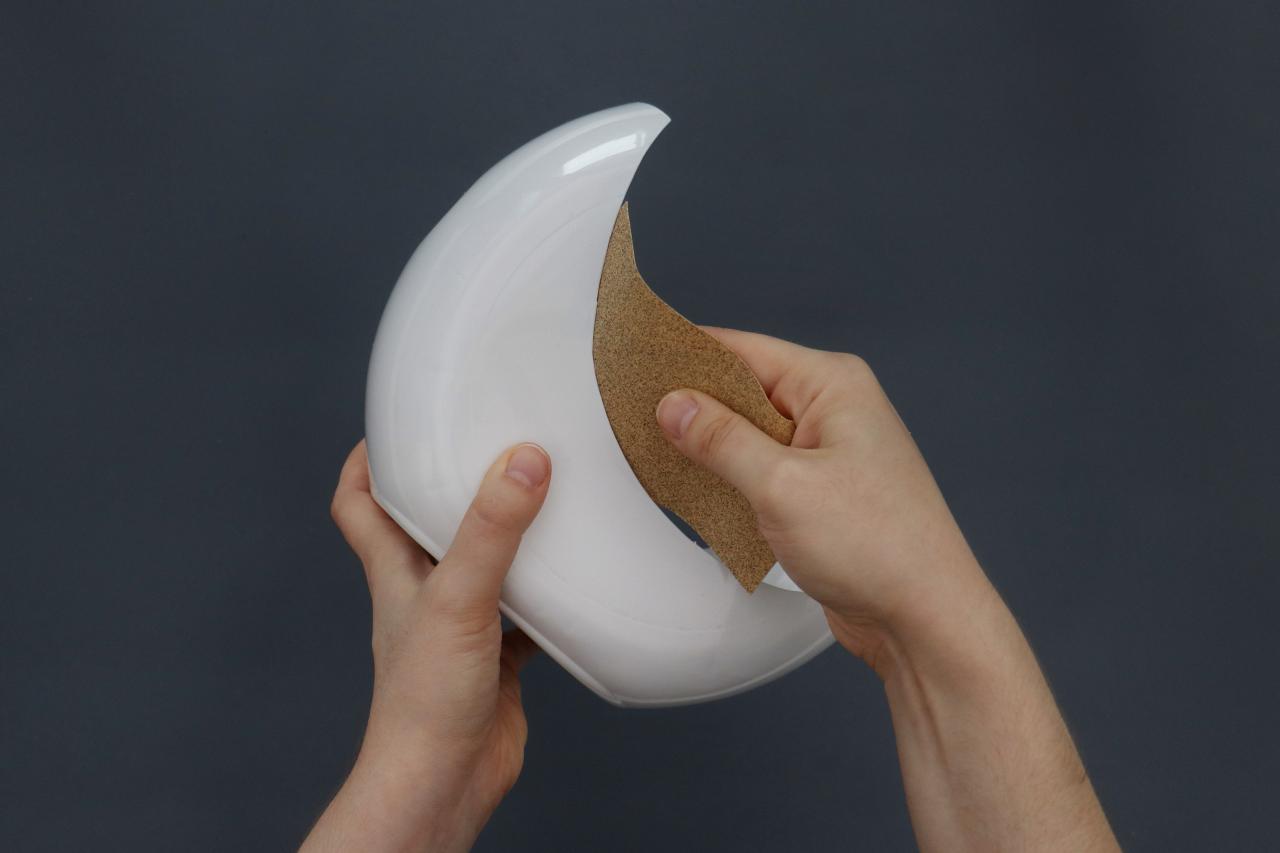
Sand the Edges
Trim down any rough corners and edges. Then go over the entire thing with sandpaper. Sand the edges to smooth them down and sand the inside and outside to give the paint more texture to grip onto.

Karen Kavett
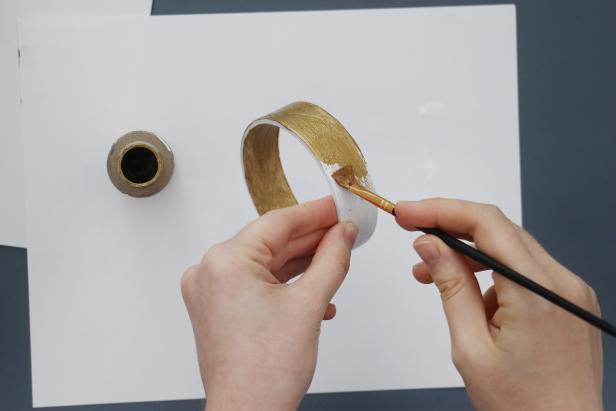
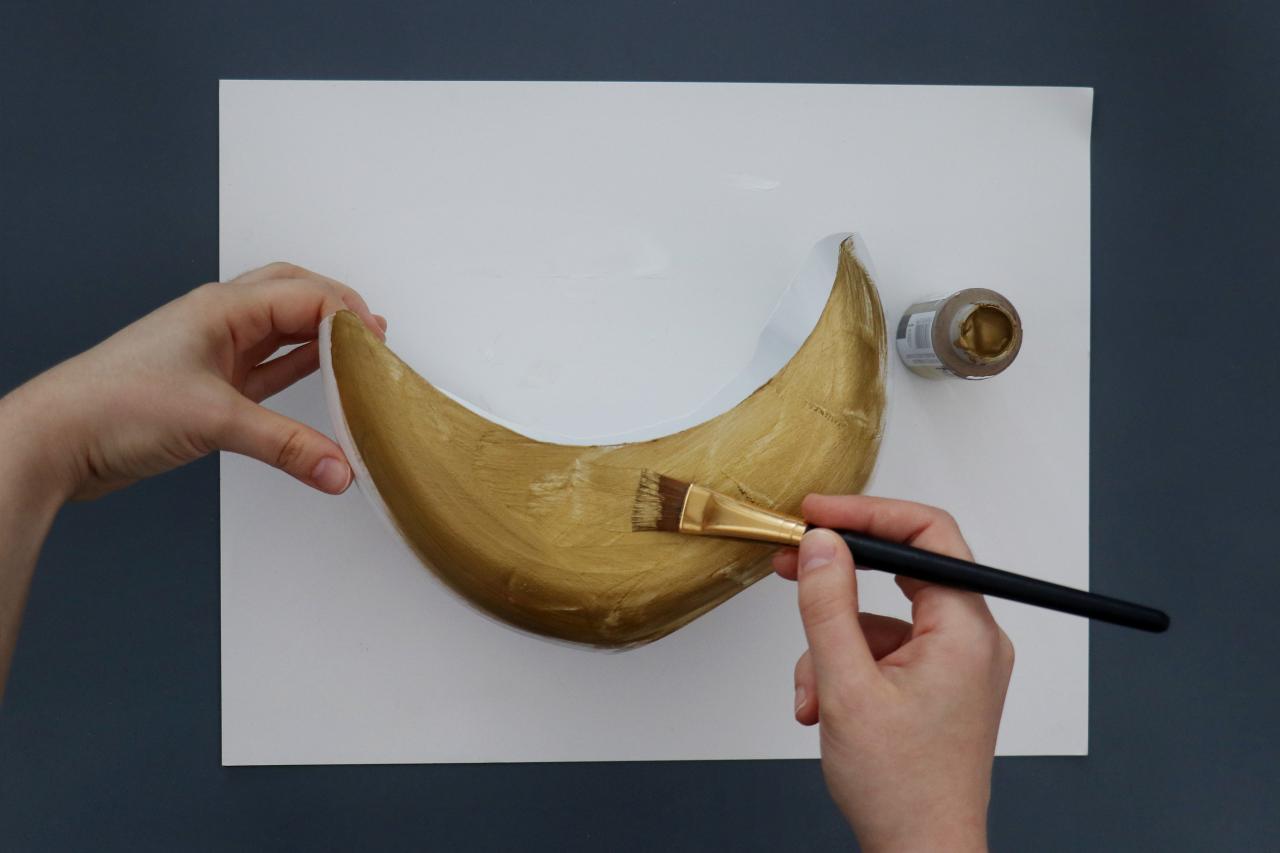
Paint Your DIY Moon Planter
Paint the entire thing gold (or another color of your choosing), using either acrylic paint or spray paint (Image 1). You may need to do several coats to get an even finish (Image 2 + 3).

Karen Kavett

Karen Kavett
Karen Kavett
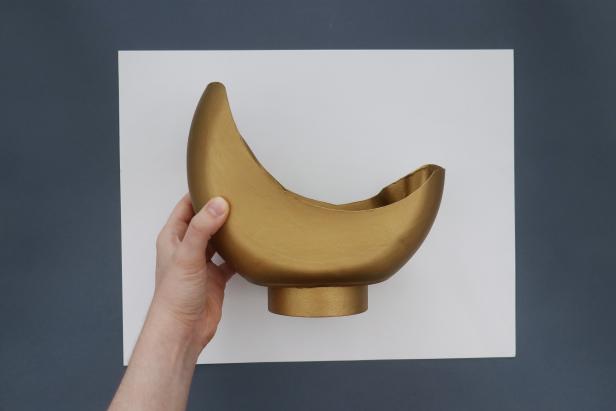
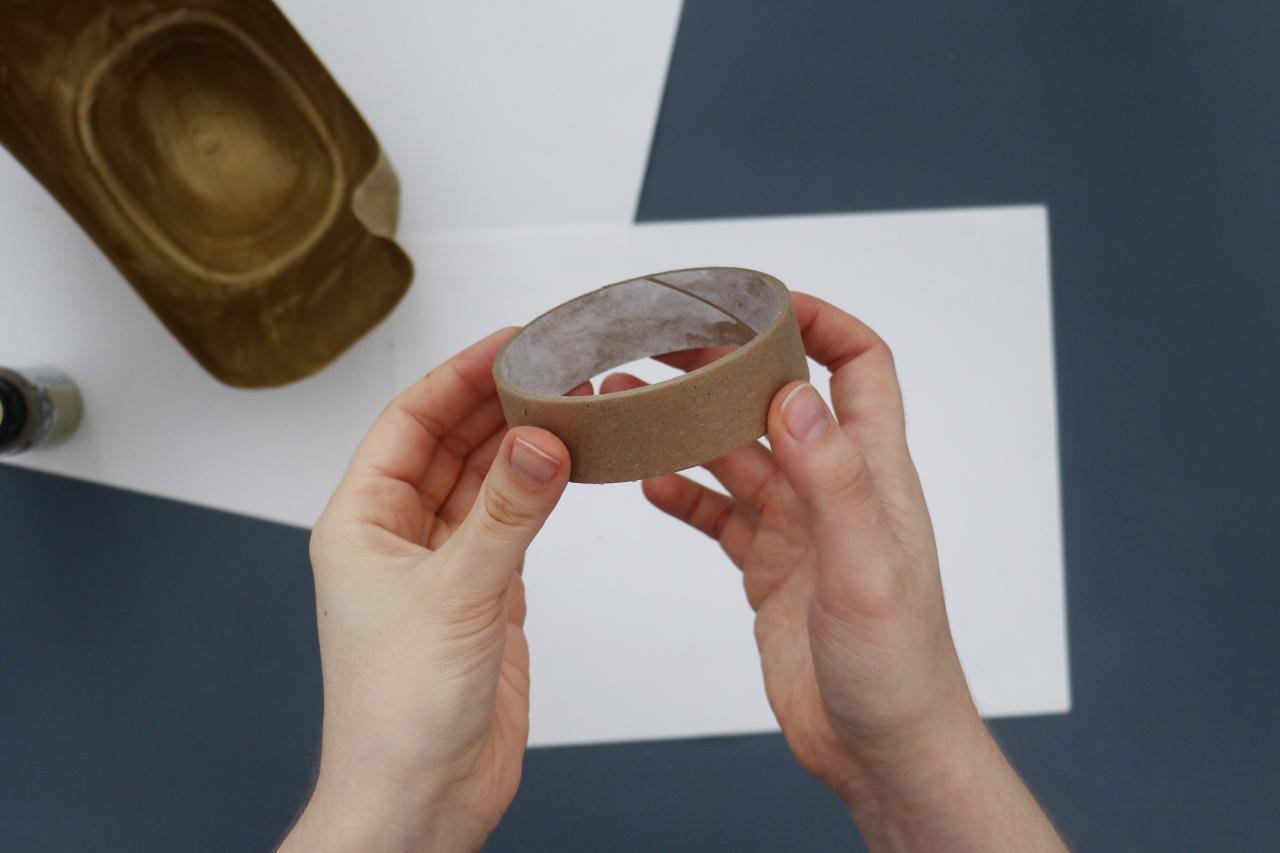
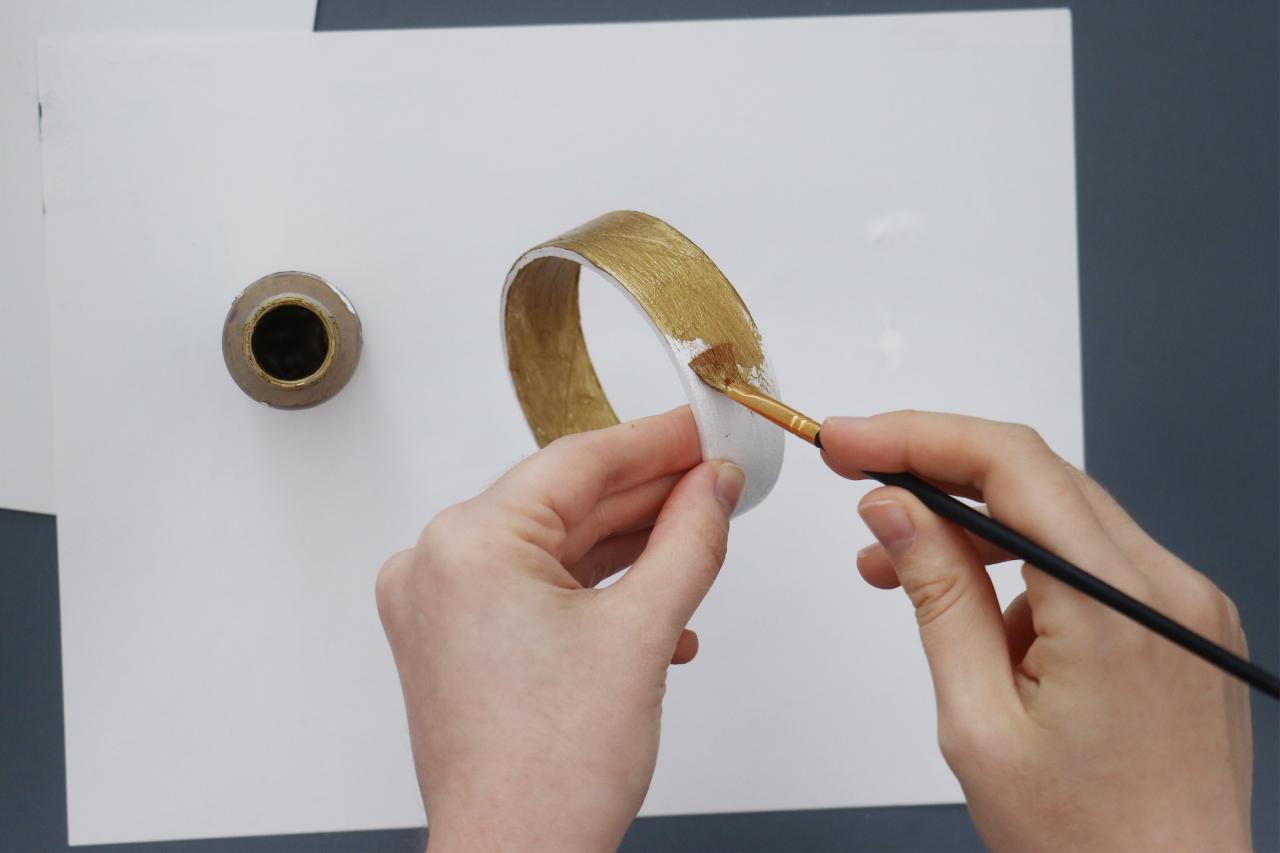
Paint the Base
Use an empty masking tape roll for the base (Image 1). Prime it with a coat of white paint (Image 2). Once dry, add 1-2 coats of paint in the same color you painted the planter (Image 3).

Karen Kavett

Karen Kavett
Karen Kavett
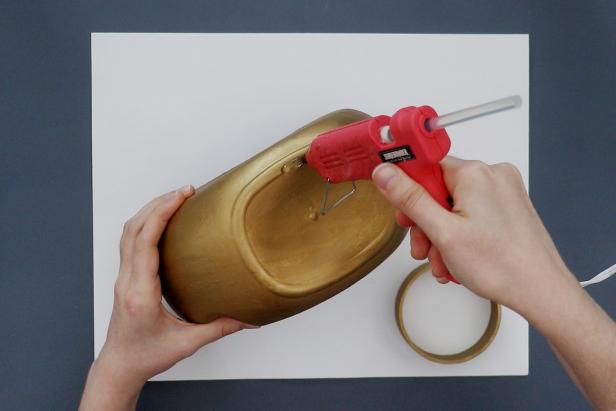
Glue it all Together
Once all of the paint is dry, use hot glue to attach the base to the bottom of the planter (Image 1 - 3).
Karen Kavett

Karen Kavett
Karen Kavett
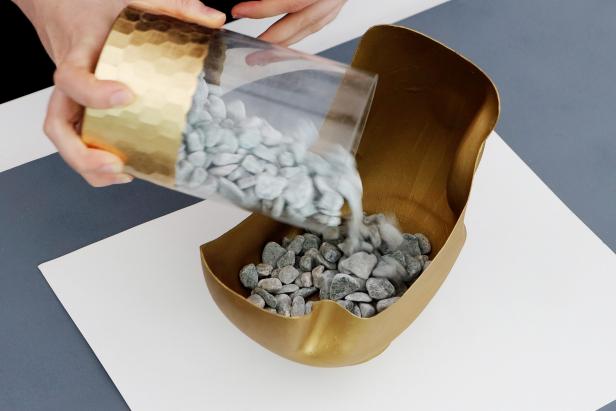
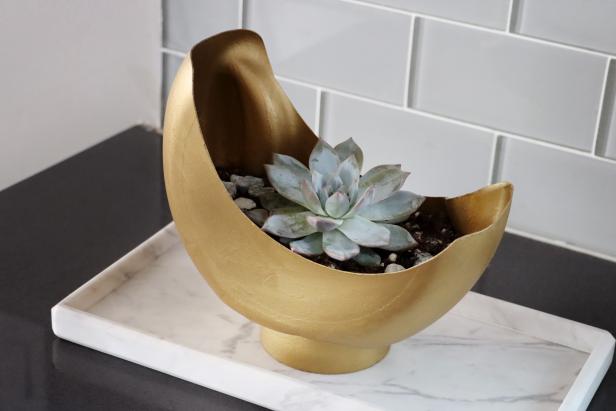
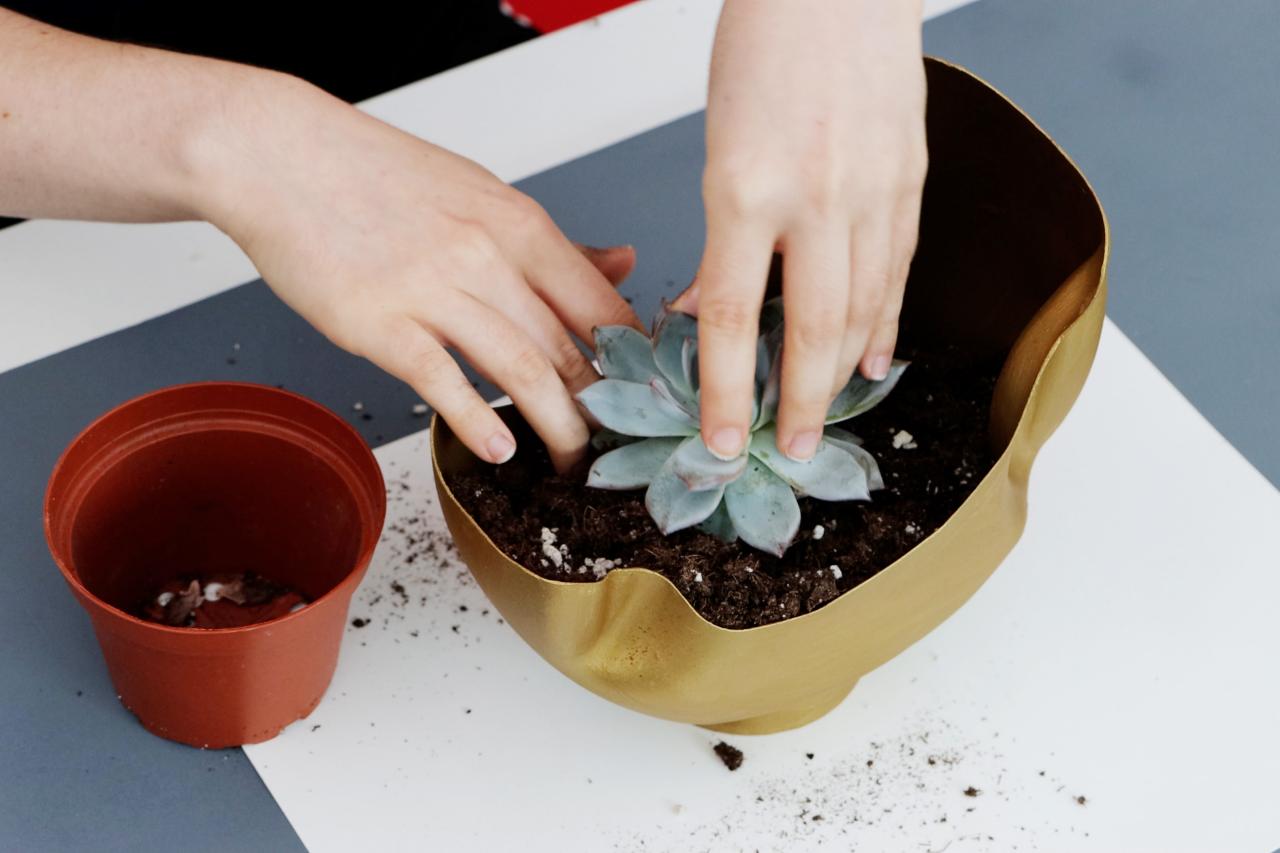
Add Plants
Weigh down the bottom of the planter with rocks so it doesn’t tip over (Image 1). Then add your plant and you’re finished (Image 2).
Karen Kavett

Karen Kavett
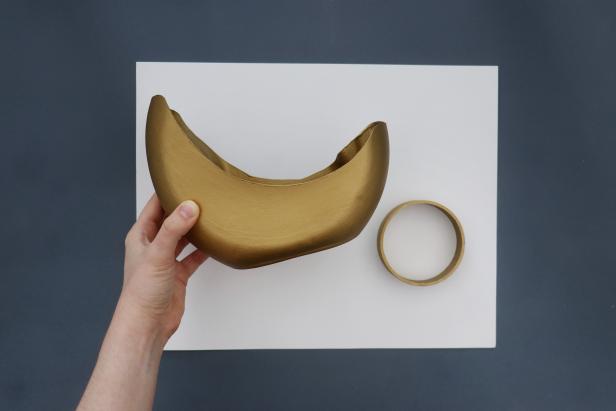
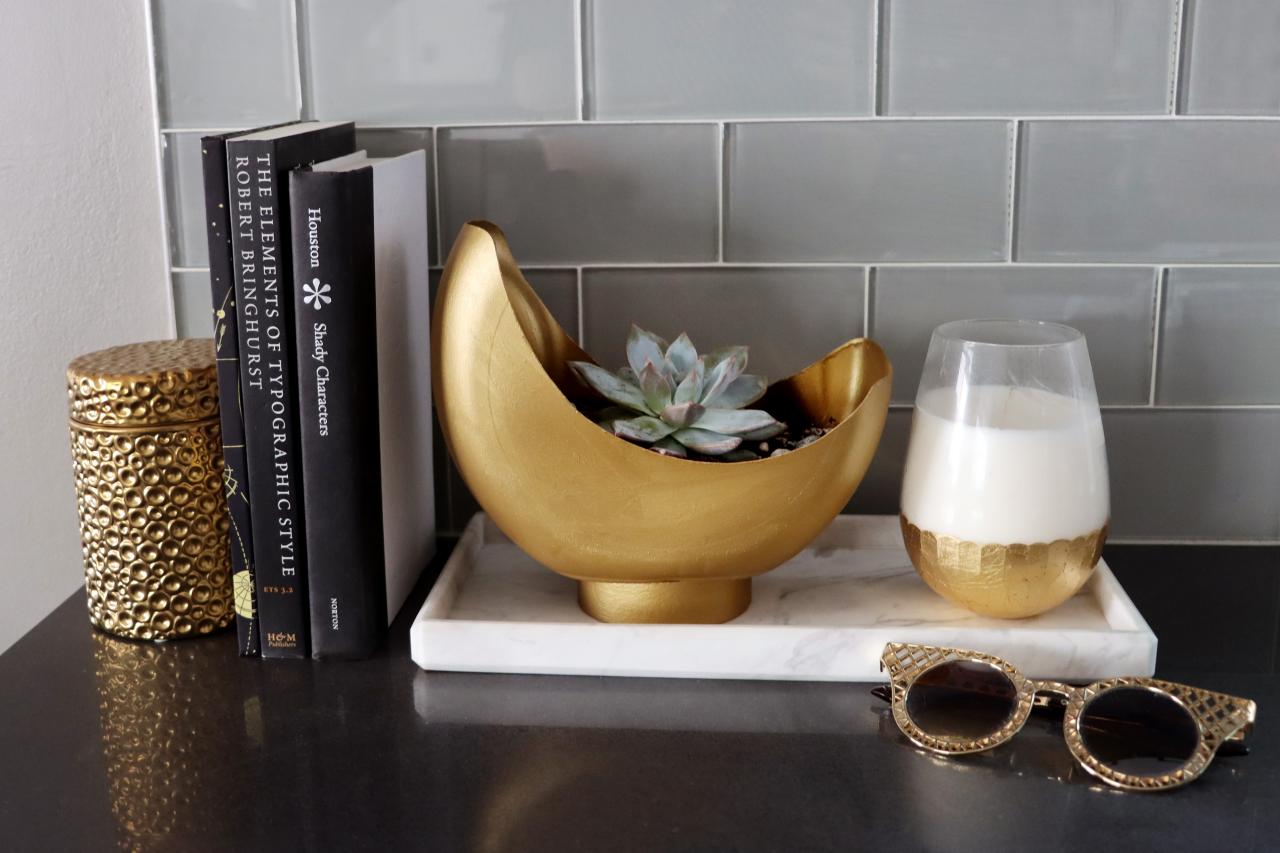
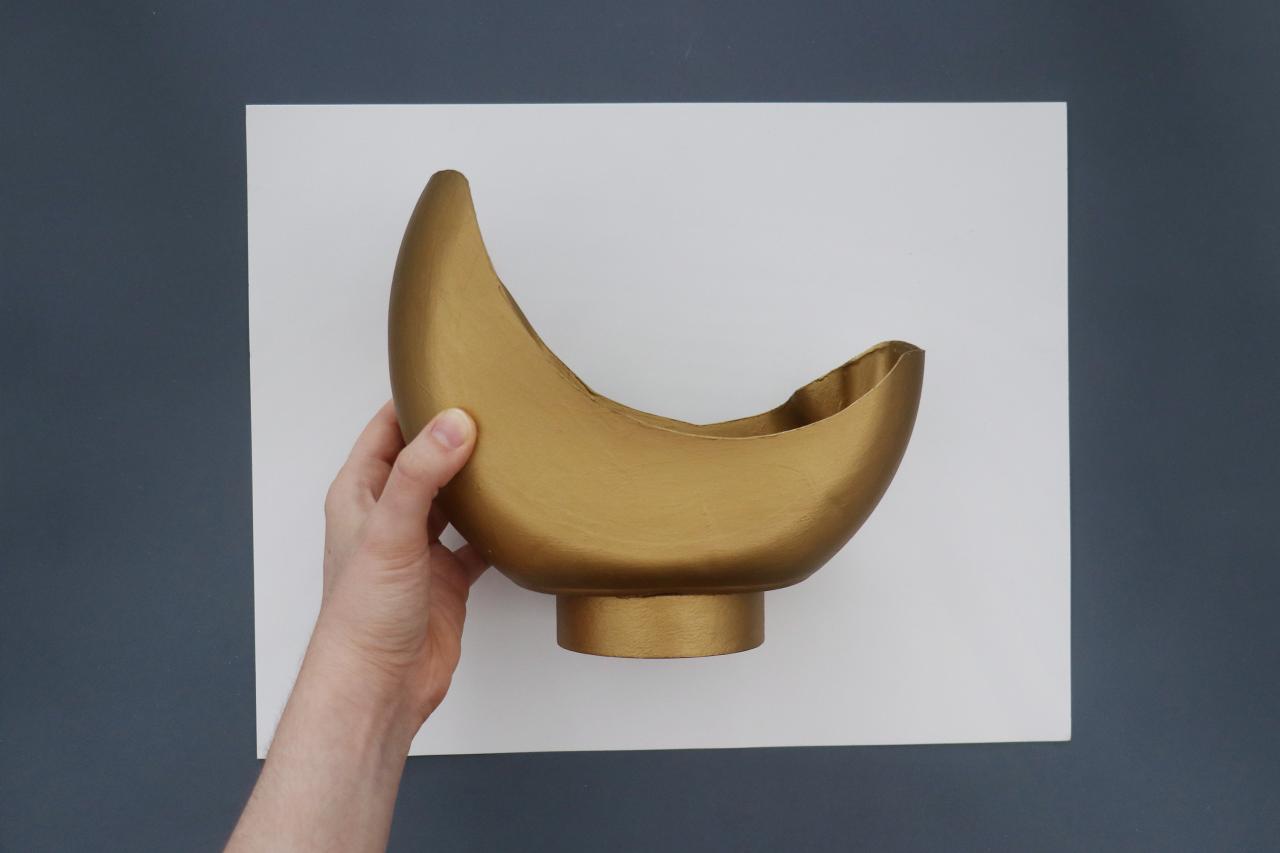
Your DIY Upcycled Moon Planter is Done!
Now you have a trendy DIY upcycled moon planter made from materials right out of your recycling bin.
Karen Kavett
Karen Kavett
Karen Kavett
Upcycling Ideas

How to Make a DIY Upcycled Bookend Vase From an Old Cereal Box
This trendy DIY upcycled bookend vase looks like clay, but it’s actually made of cardboard! Transform an old cereal box to give your bookshelf a boho-chic look for cheap.

Upcycled Wine Cork Board
Start saving up your wine corks to make this simple recycled memo board.

DIY Succulent and Cactus Projects You Just Have To Try 26 Photos
Succulents can be used to make modern but earthy decor. Here's how to get creative with these drought-tolerant plants by using them in everything from wreaths to hanging wall art.


