


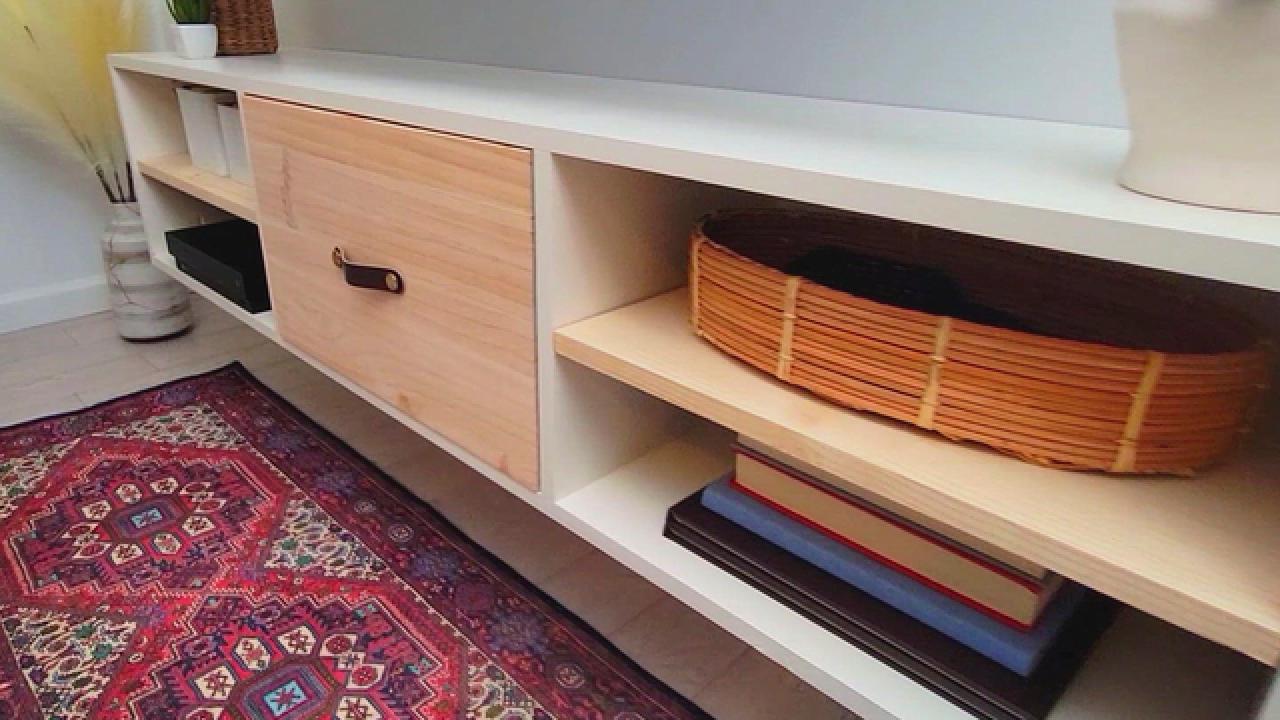
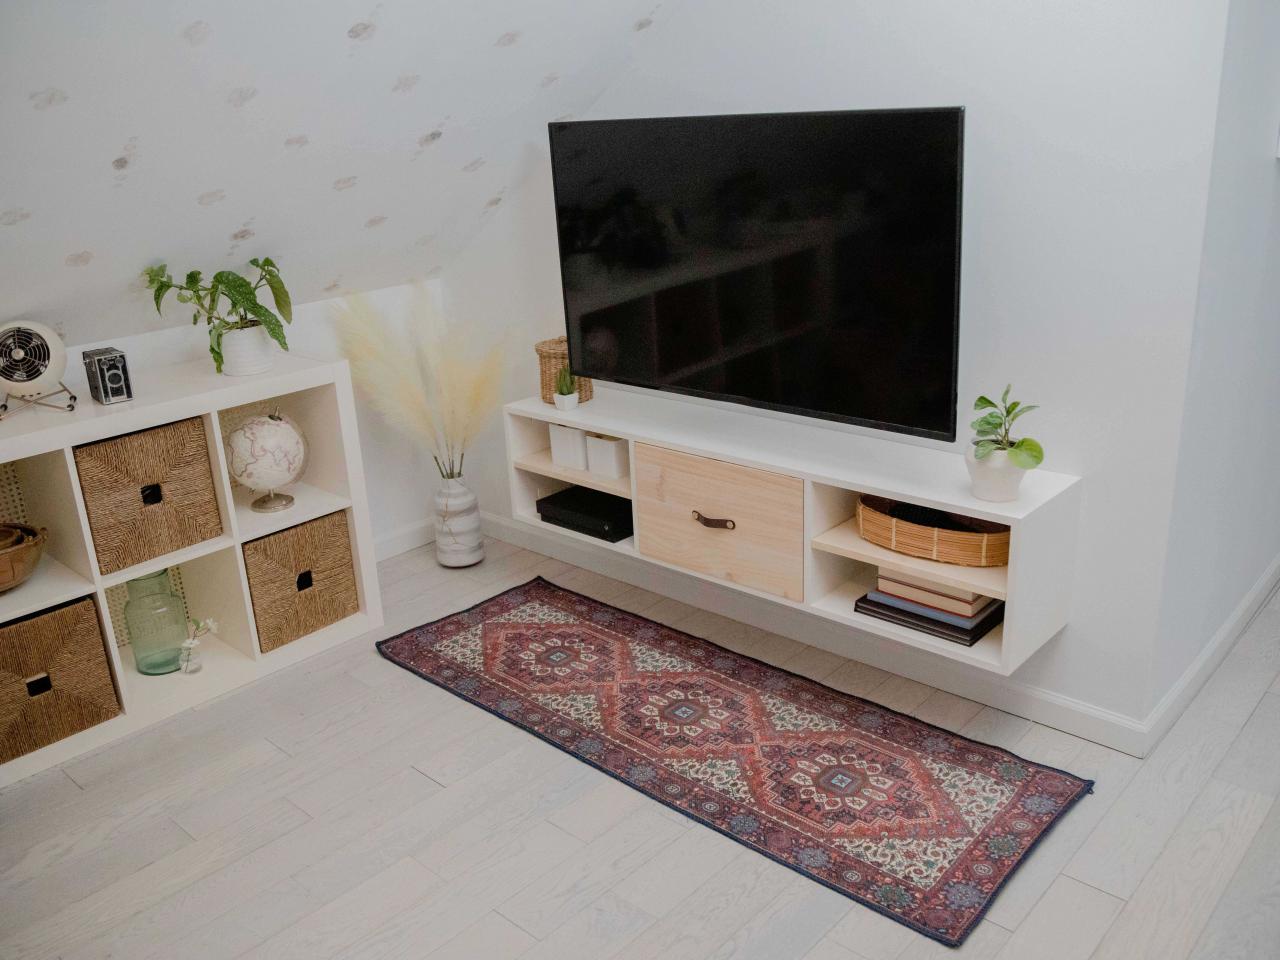
How to Build a Floating Shelf With Hidden Charging Station
Don't let unsightly cables and cords clutter your living space. This DIY floating shelf has a built-in power strip tucked away in a drawer — the perfect spot to charge your phones, tablets and other gadgets out of sight.

Shain Rievley
Materials Needed
- (4) 6' shelf boards
- wood glue
- (4) 90-degree corner clamps
- (2) 36" clamps
- pocket hole jig system
- 1-1/4" pocket hole screws
- brad nail gun
- 1-1/4" brad nails
- 1-1/2" hole saw
- drill
- 1-1/2" #8 screws
- sandpaper
- wood filler
- paint drop cloth
- paint roller and tray
- paint
- recessed power strip
- 3/8" drill bit
- jigsaw
- (2) 10" drawer slides
- screwdriver
- drawer pull
- stud finder
- 4' level
- measuring tape
- 3" screws
Cut List
- sides: (2) 12" x 12" pieces
- top and bottom: (2) 12" x 60" pieces
- middle section sides: (2) 12" x 12" pieces
- middle section back: (1) 11-3/4" x 20" piece
- drawer sides: (2) 6" x 9-3/4" pieces
- drawer base: (1) 9-3/4" x 16” piece
- drawer back: (1) 5-1/2" x 17-1/2" piece
- drawer front: (1) 11-3/4" x 20” piece
- shelf supports: (4) 1” x 1” x 10” pieces
- shelves: (2) 12” x 18-1/4" pieces
Cut the Wood
Use a circular saw or miter saw to cut the furniture shelf boards into the pieces listed above.
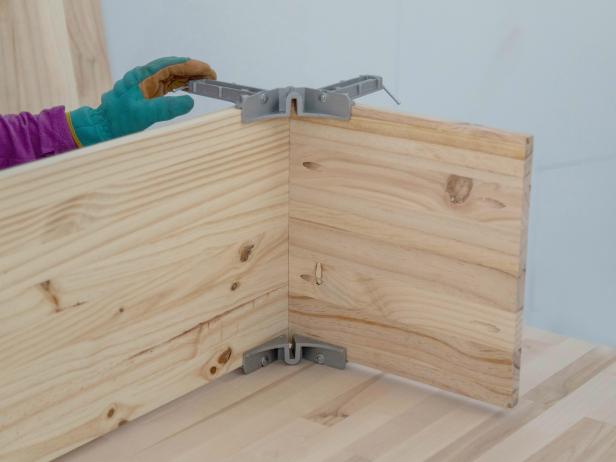
BUILD THE EXTERIOR FRAME
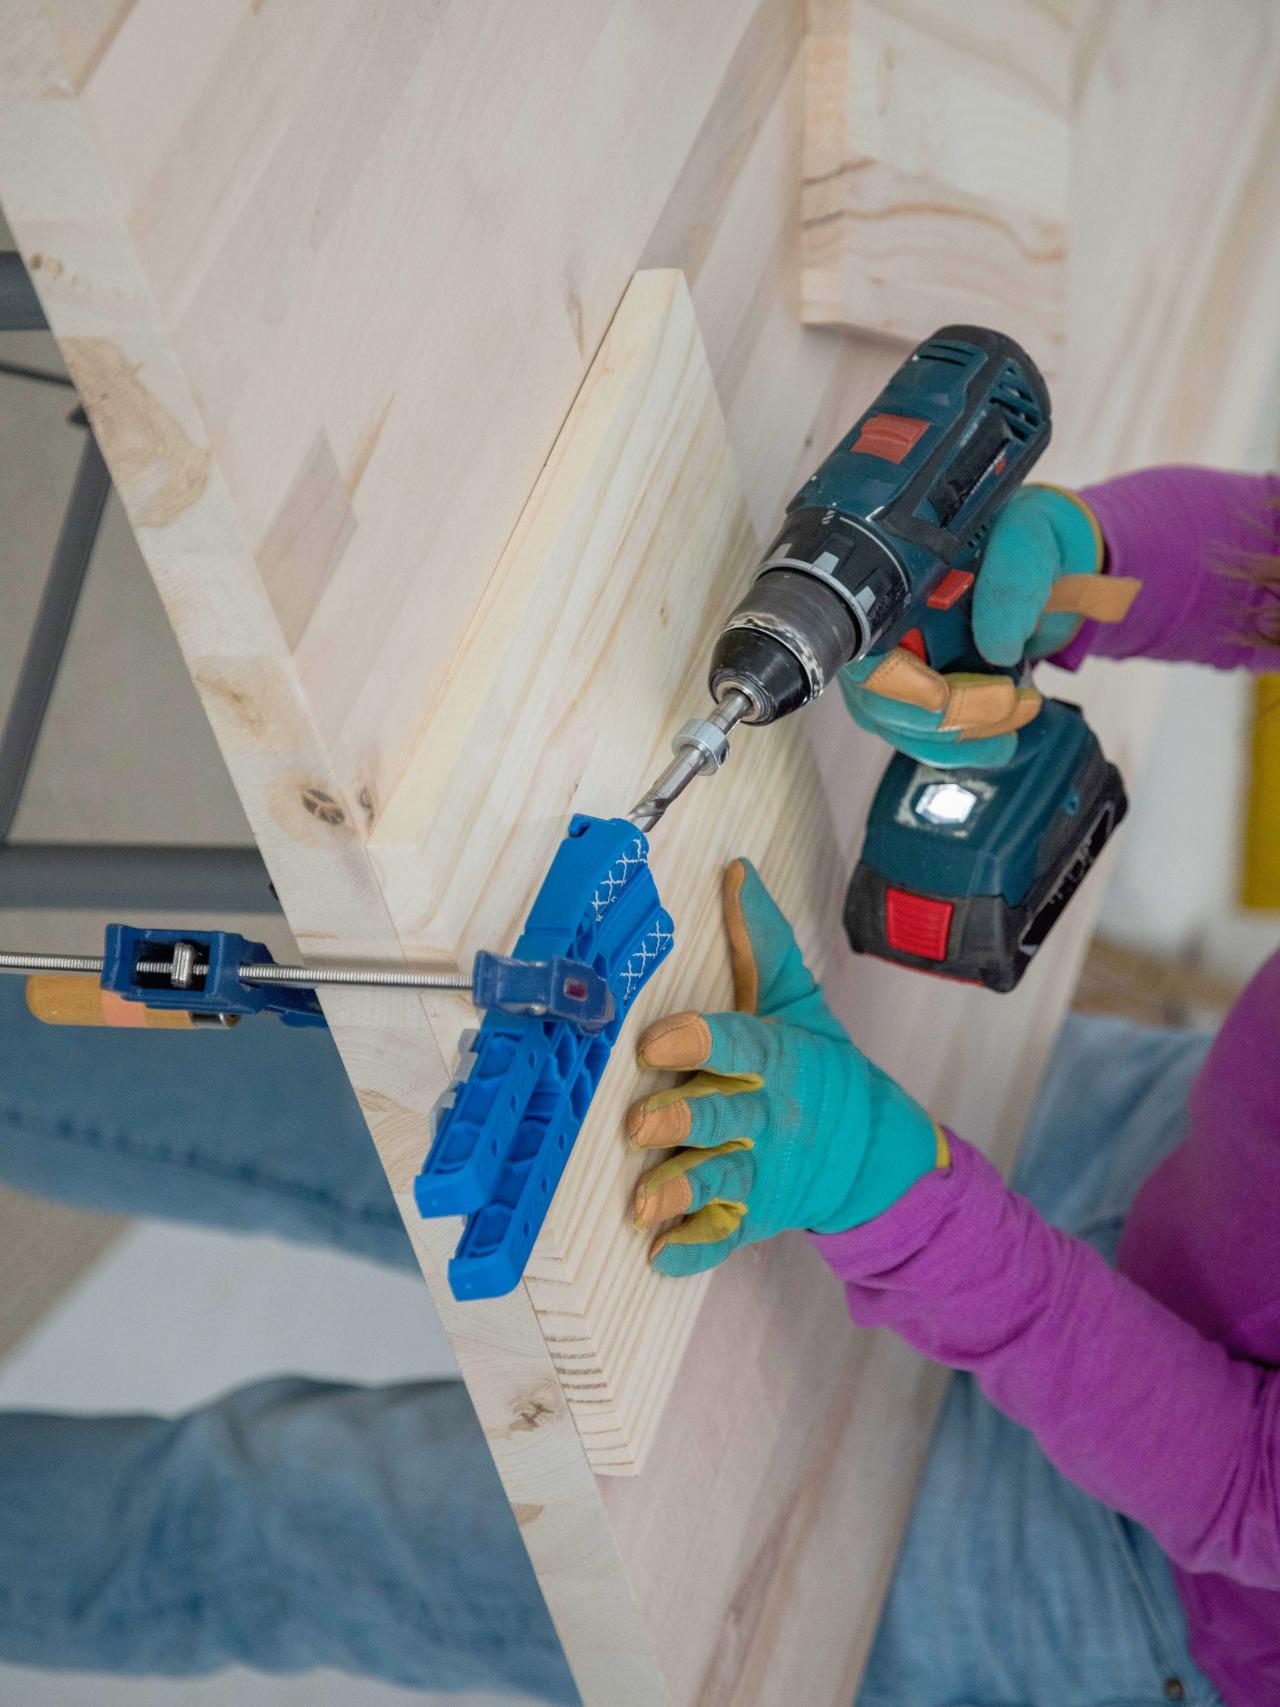
Pocket Hole Side Pieces
Pocket hole the two 12" x 12" side pieces (Image 1). Make a total of four holes on each piece: two on one end and two on the opposite end (Image 2).

Shain Rievley

Shain Rievley
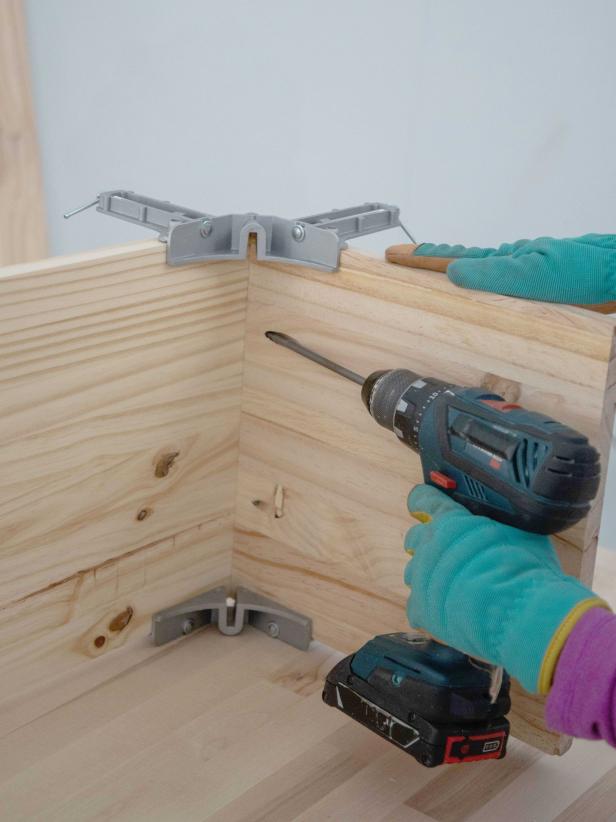
Attach Side Pieces to Bottom Piece
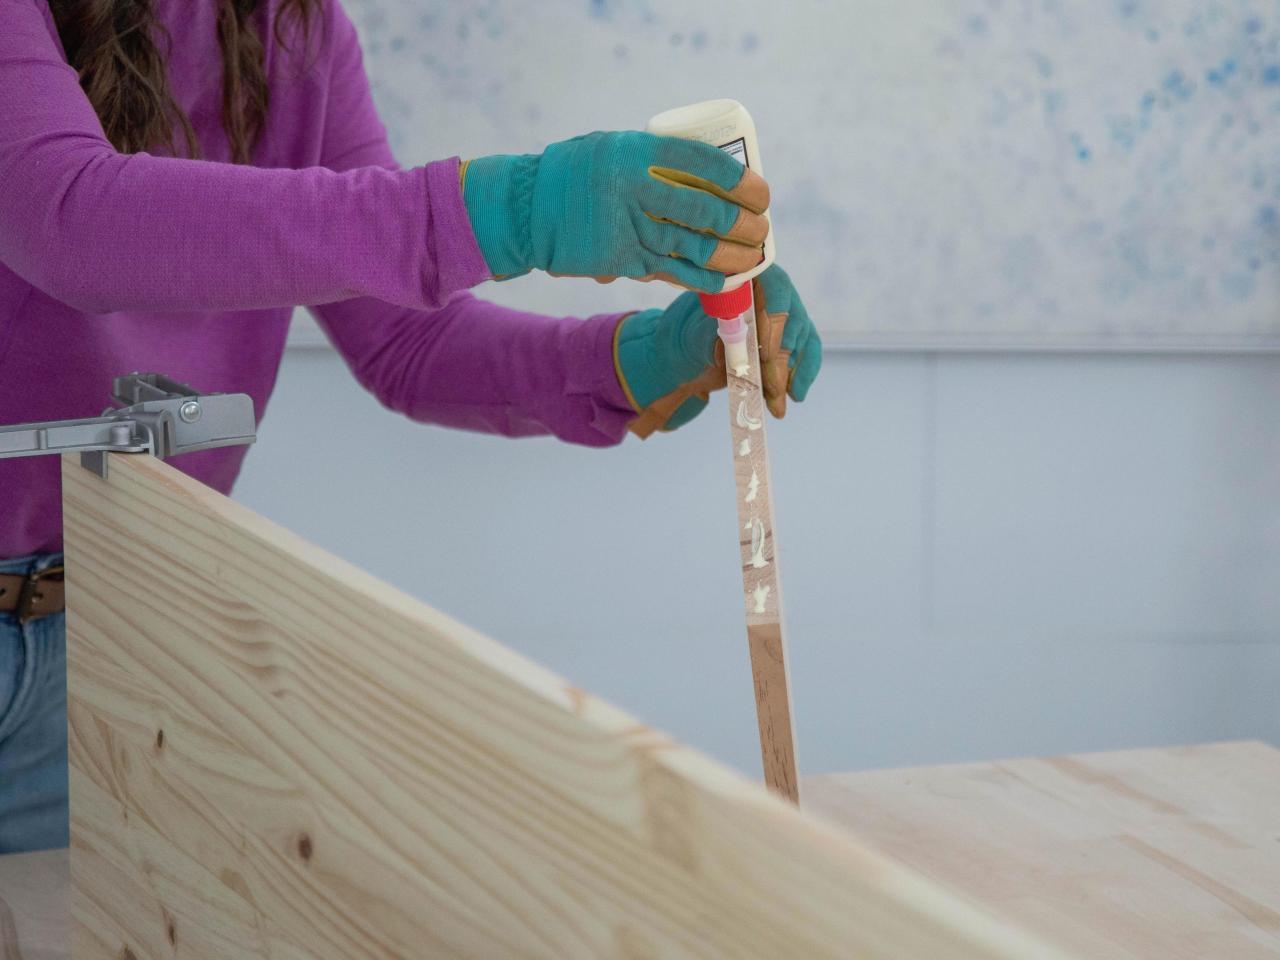
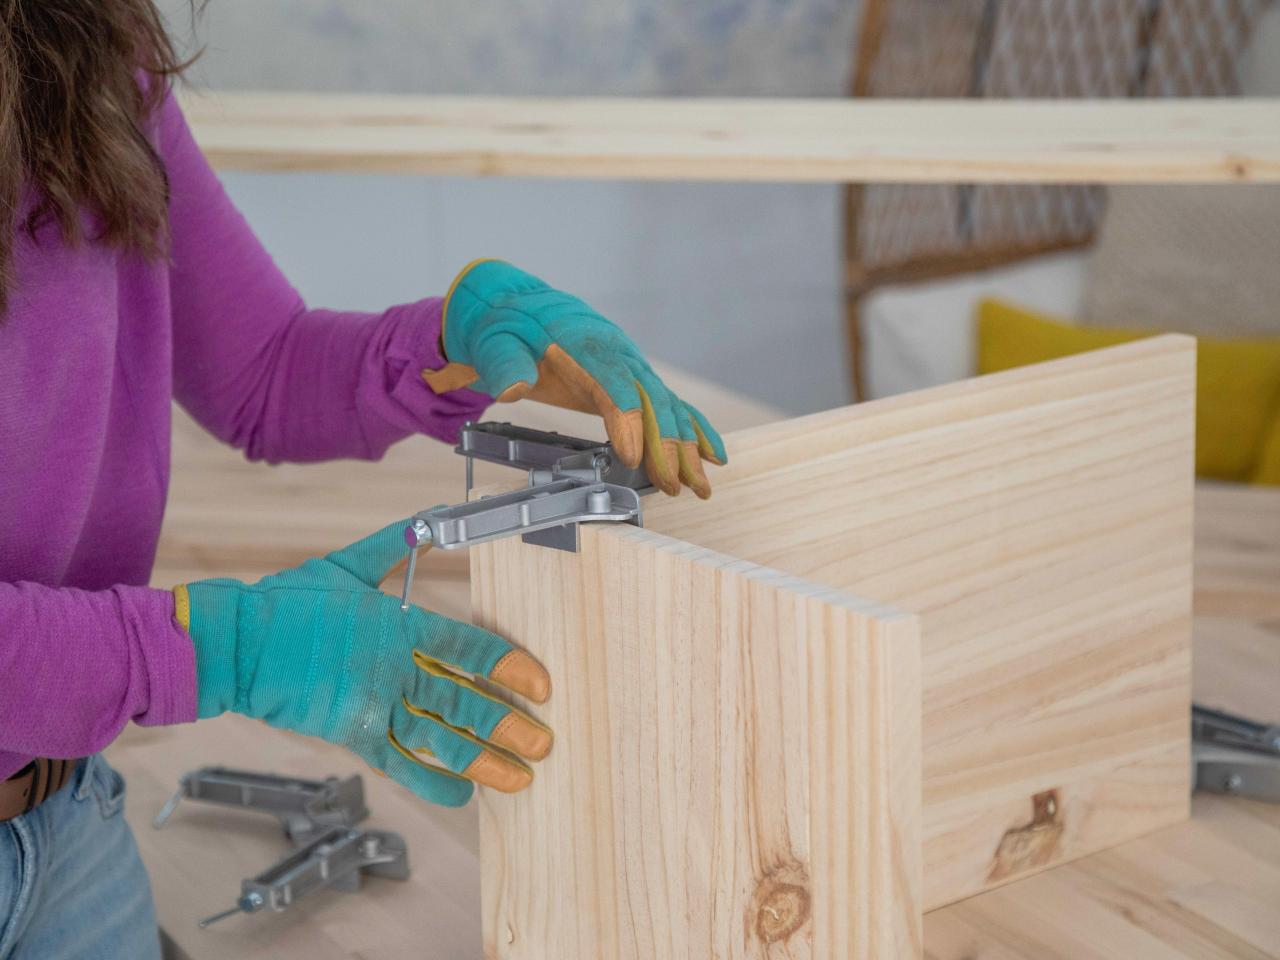
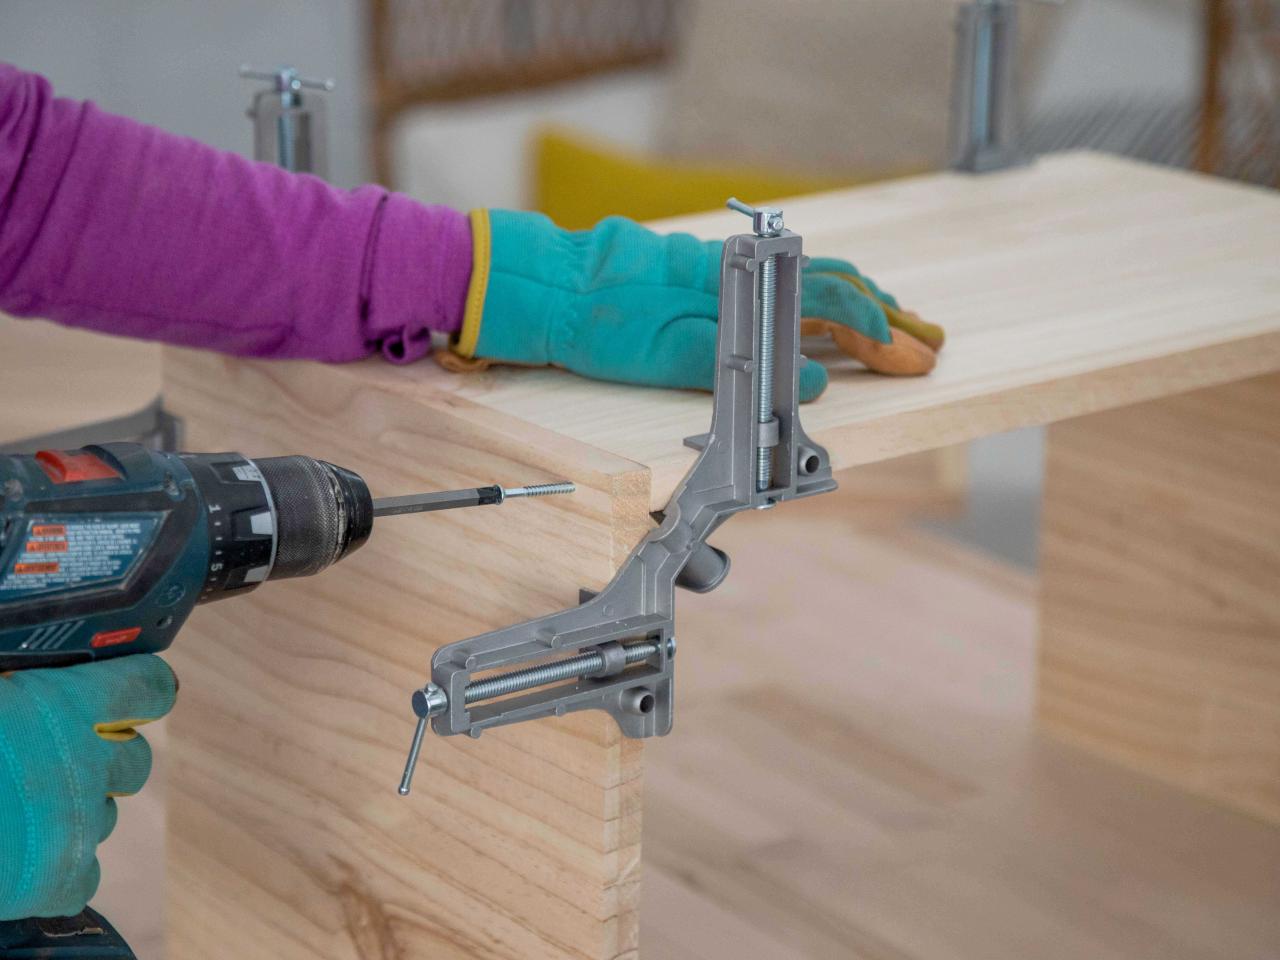
Add wood glue to the edge of one of the side pieces (Image 1) and use a right-angle clamp to connect it to the 12" x 60" bottom piece (Image 2). Attach with 1-1/4" pocket hole screws (Image 3). Repeat this process with the second side piece to make a "U" shape.

Shain Rievley
Shain Rievley
Shain Rievley
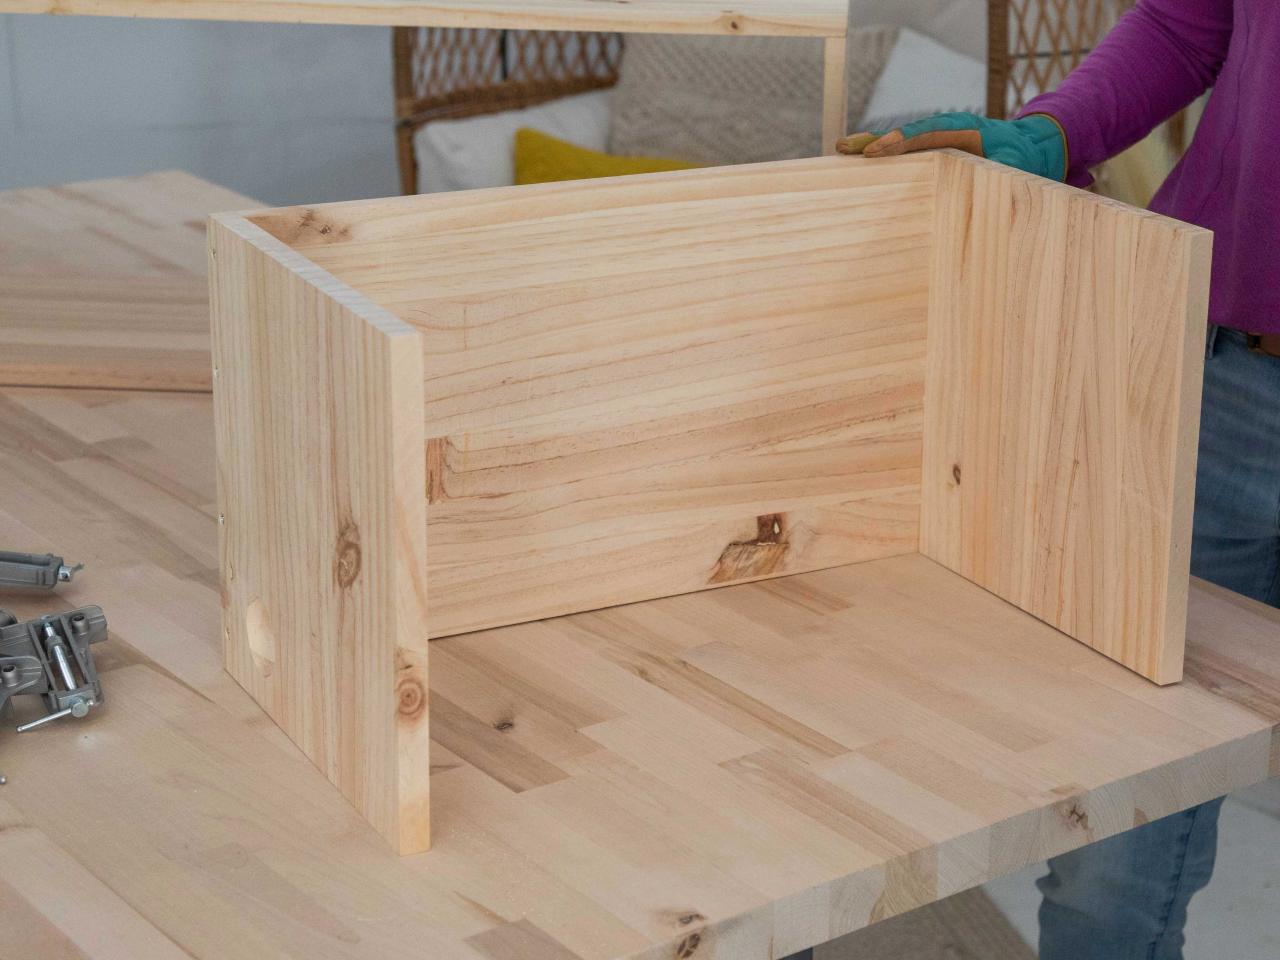
Attach Top Piece
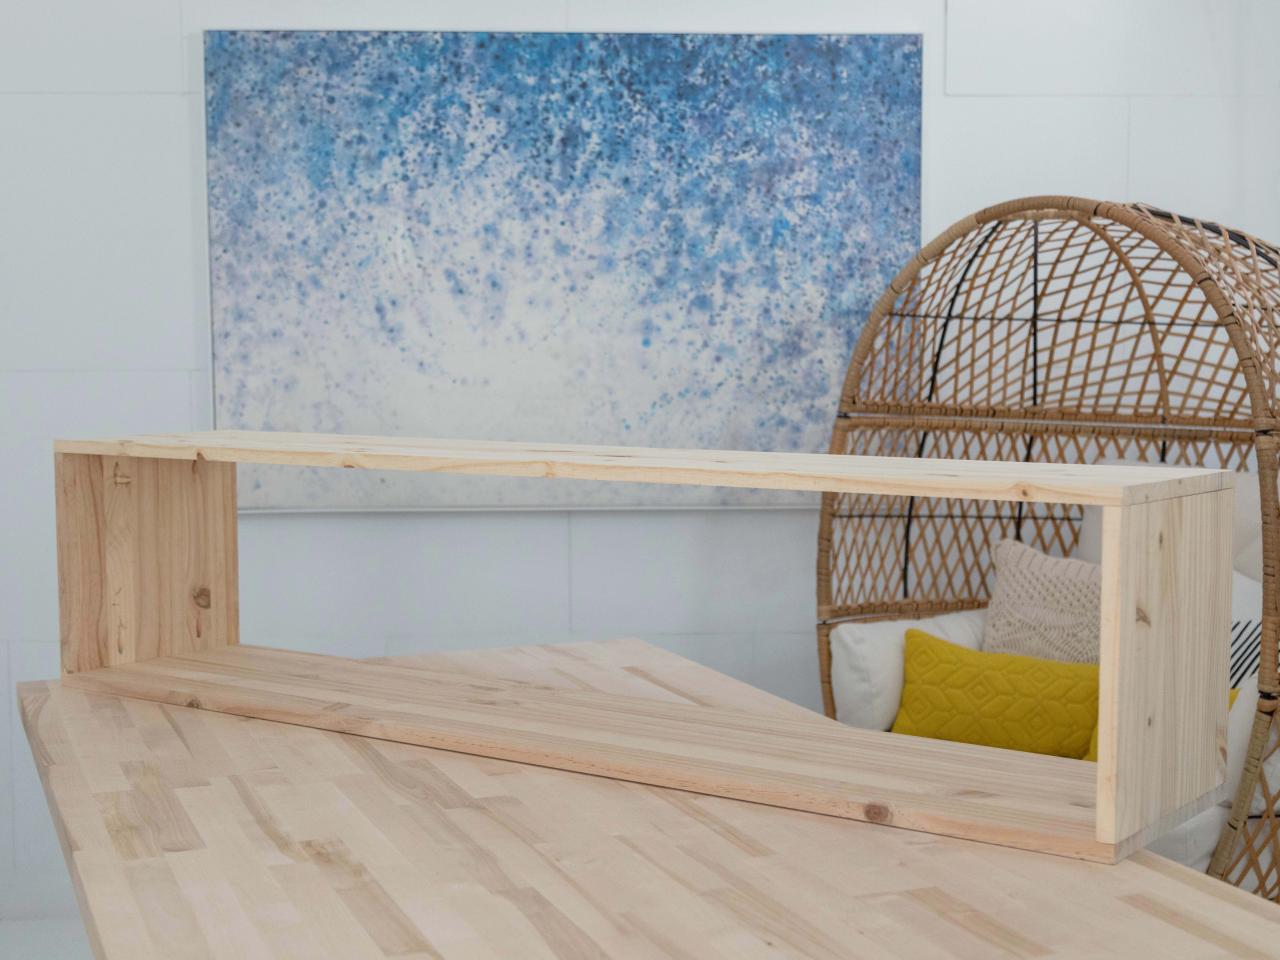
Attach the "U" shape to the 12" x 60" top piece using the same method to make a rectangular box.

Shain Rievley
BUILD THE MIDDLE SECTION
Cut Hole for Power Cord in Side Piece
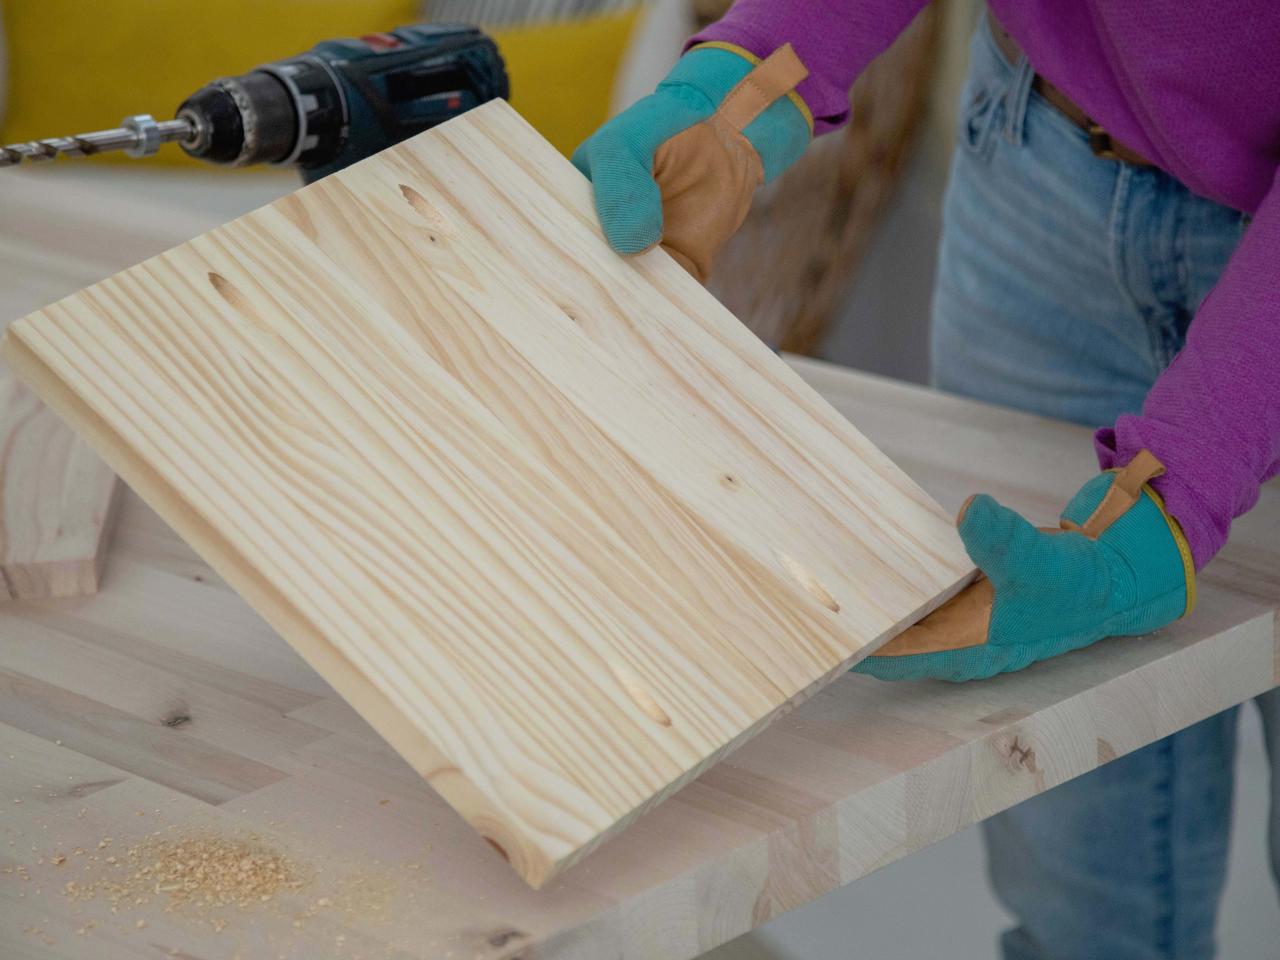
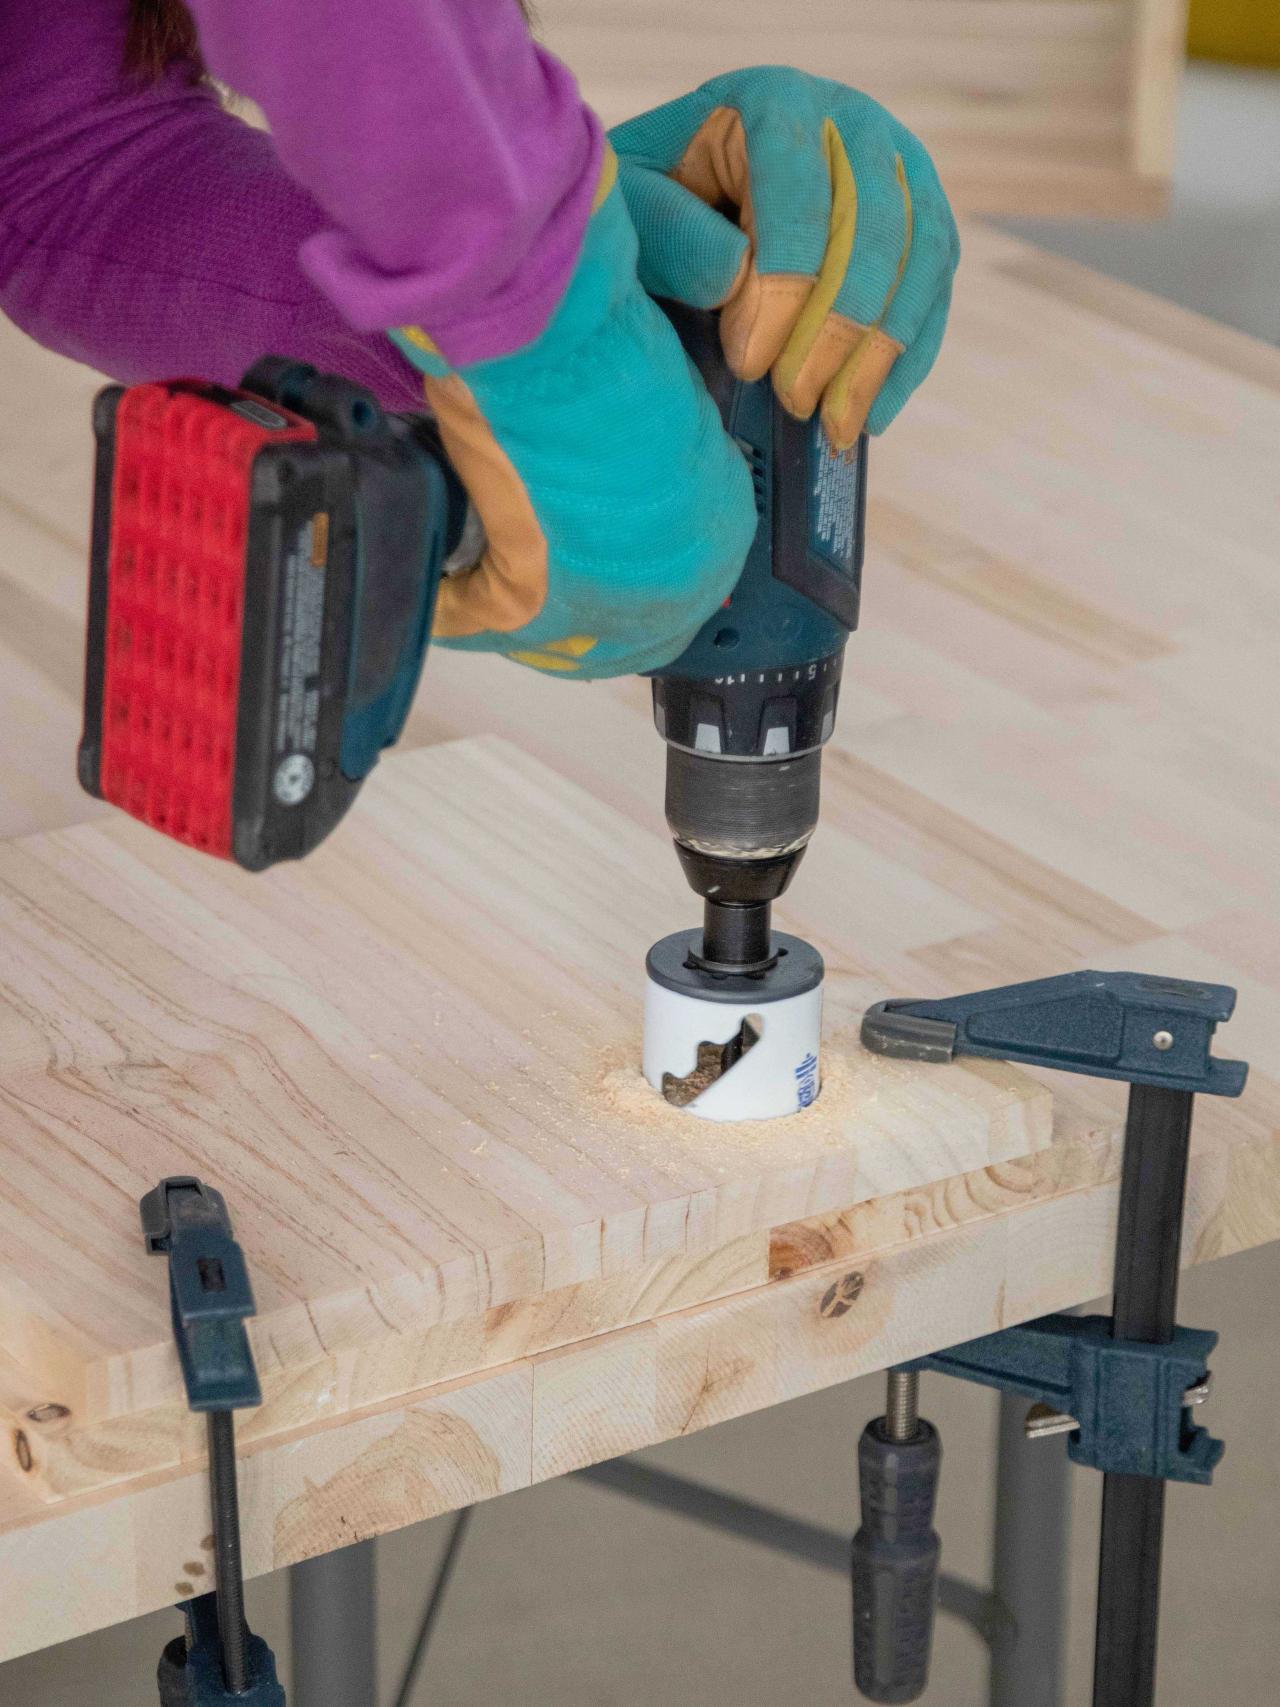
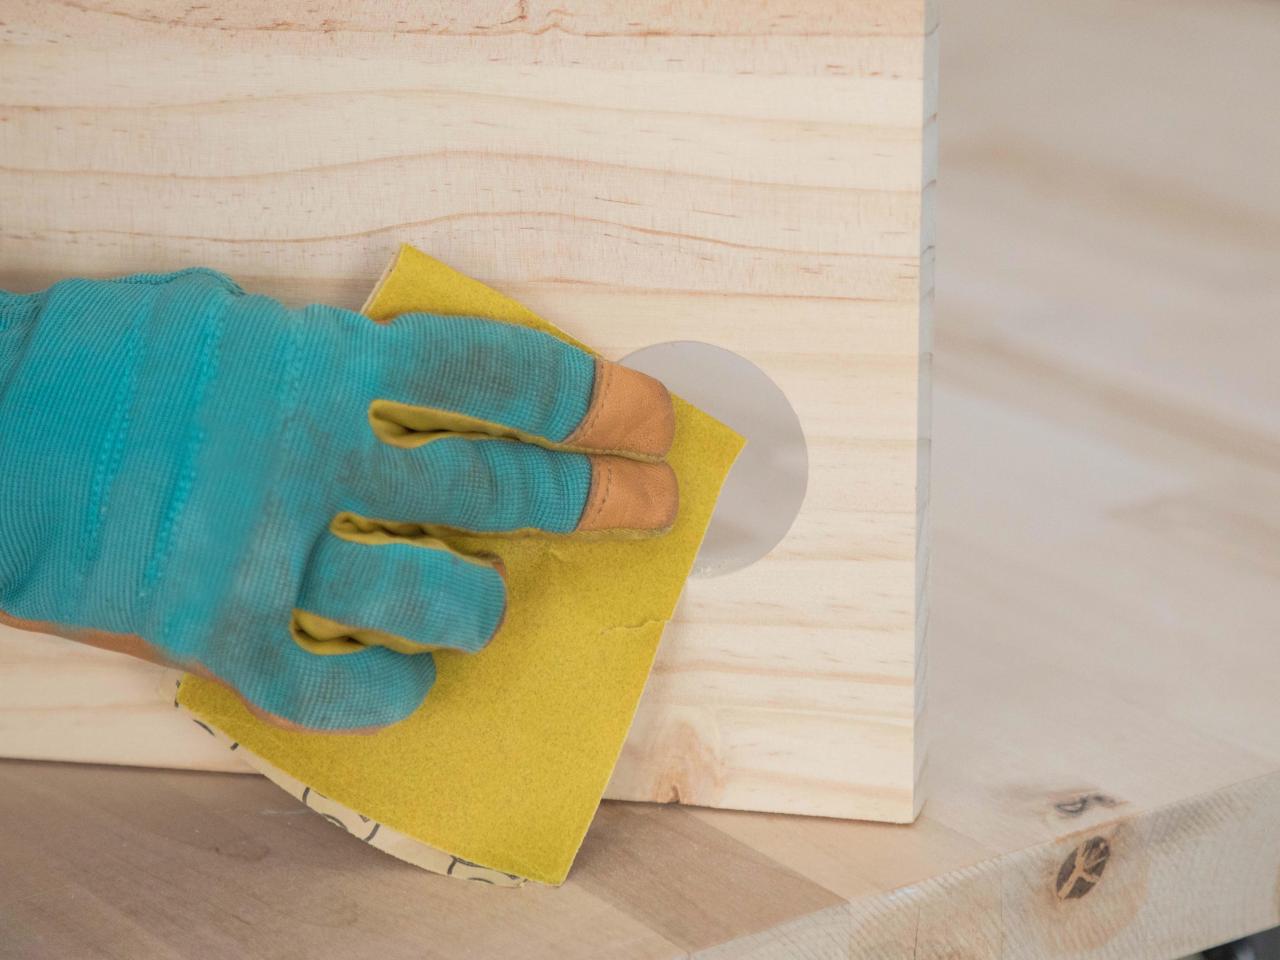
Use a 1-1/2" hole saw to cut a hole big enough for a power cord to fit through on one of the 12" x 12" middle section side pieces (Image 1). Sand until smooth (Image 2). This will be the left side piece of the middle section of the shelf.

Shain Rievley

Shain Rievley
Attach Side Pieces to Back Piece
Attach the side piece you just modified to the 11-3/4" x 20" middle section back piece using a right-angle clamp and wood glue (Image 1). Attach the other 12" x 12" middle section side piece to the opposite end of the back piece using the same method, creating a "U" shape. Screw everything together with 1-1/2" screws (Image 2). Tip: Position the power cord hole you drilled toward the bottom edge of the back piece (Image 3). This will allow your cord to sit neatly on the back of the shelf, close to the wall and power outlet.

Shain Rievley

Shain Rievley

Shain Rievley
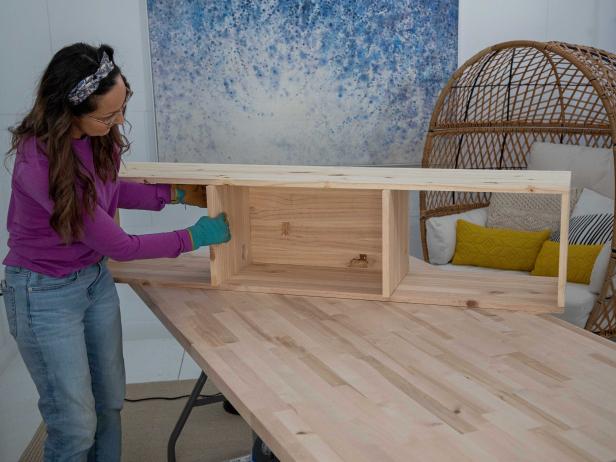
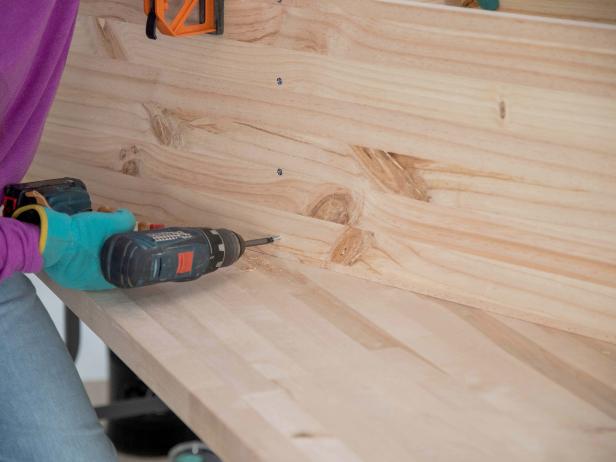
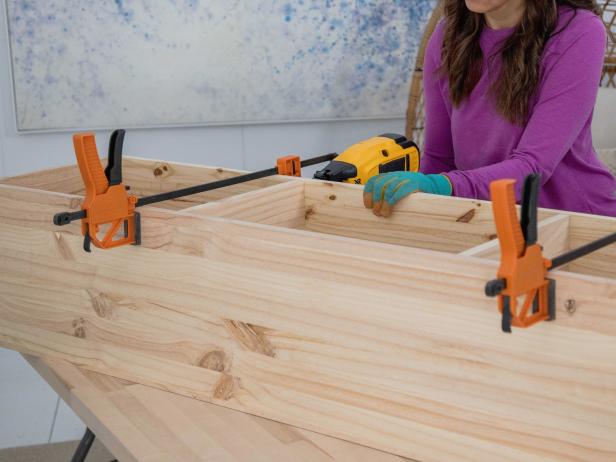
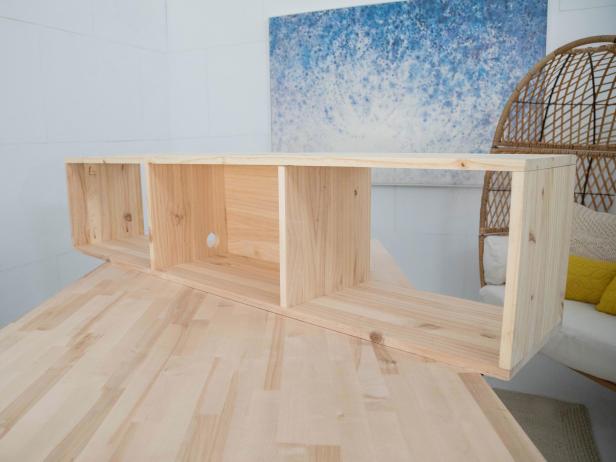
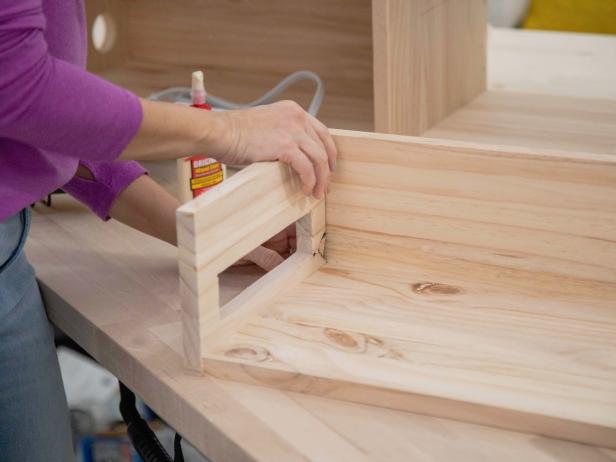
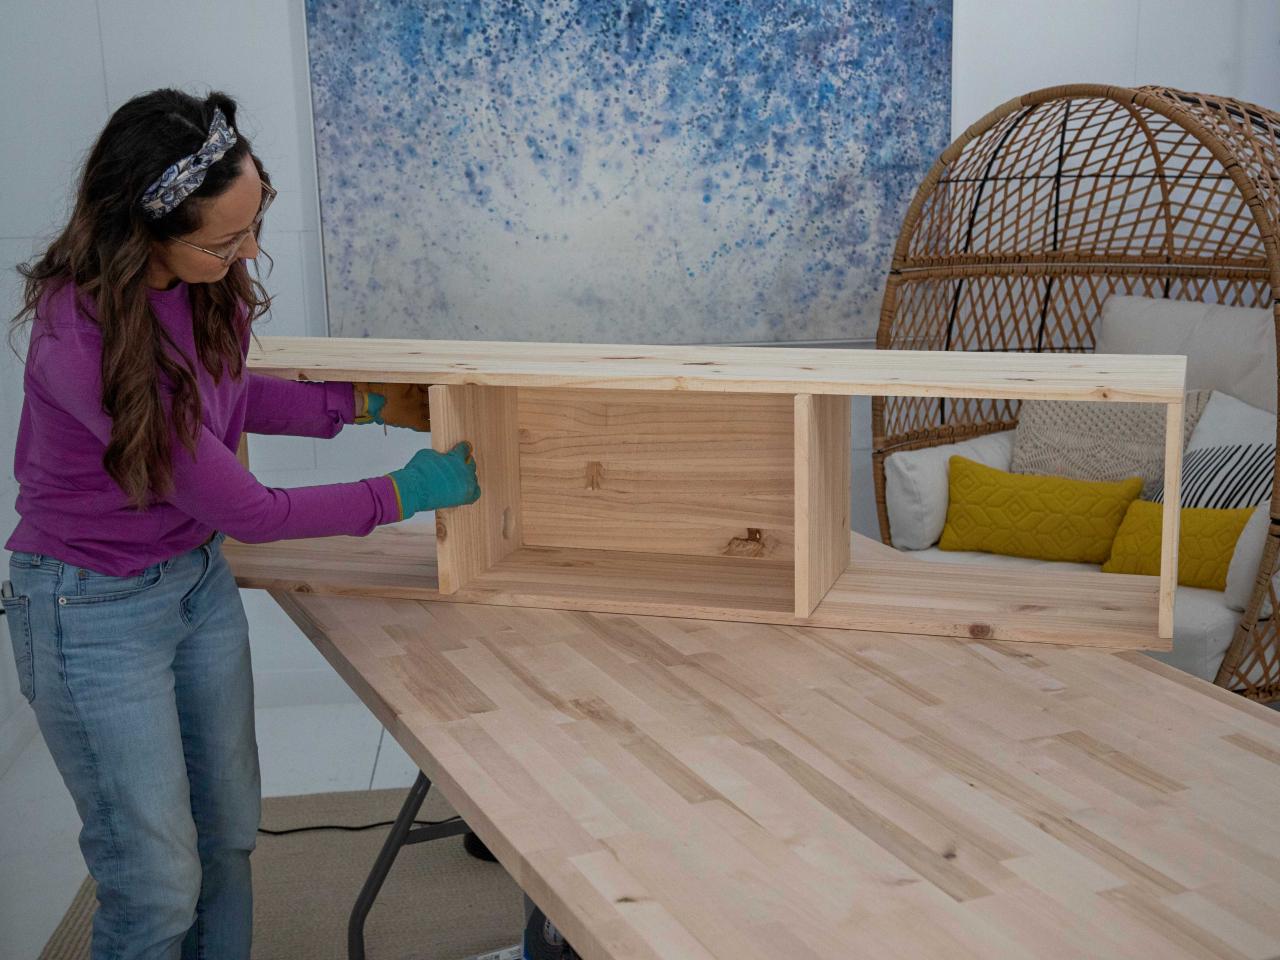
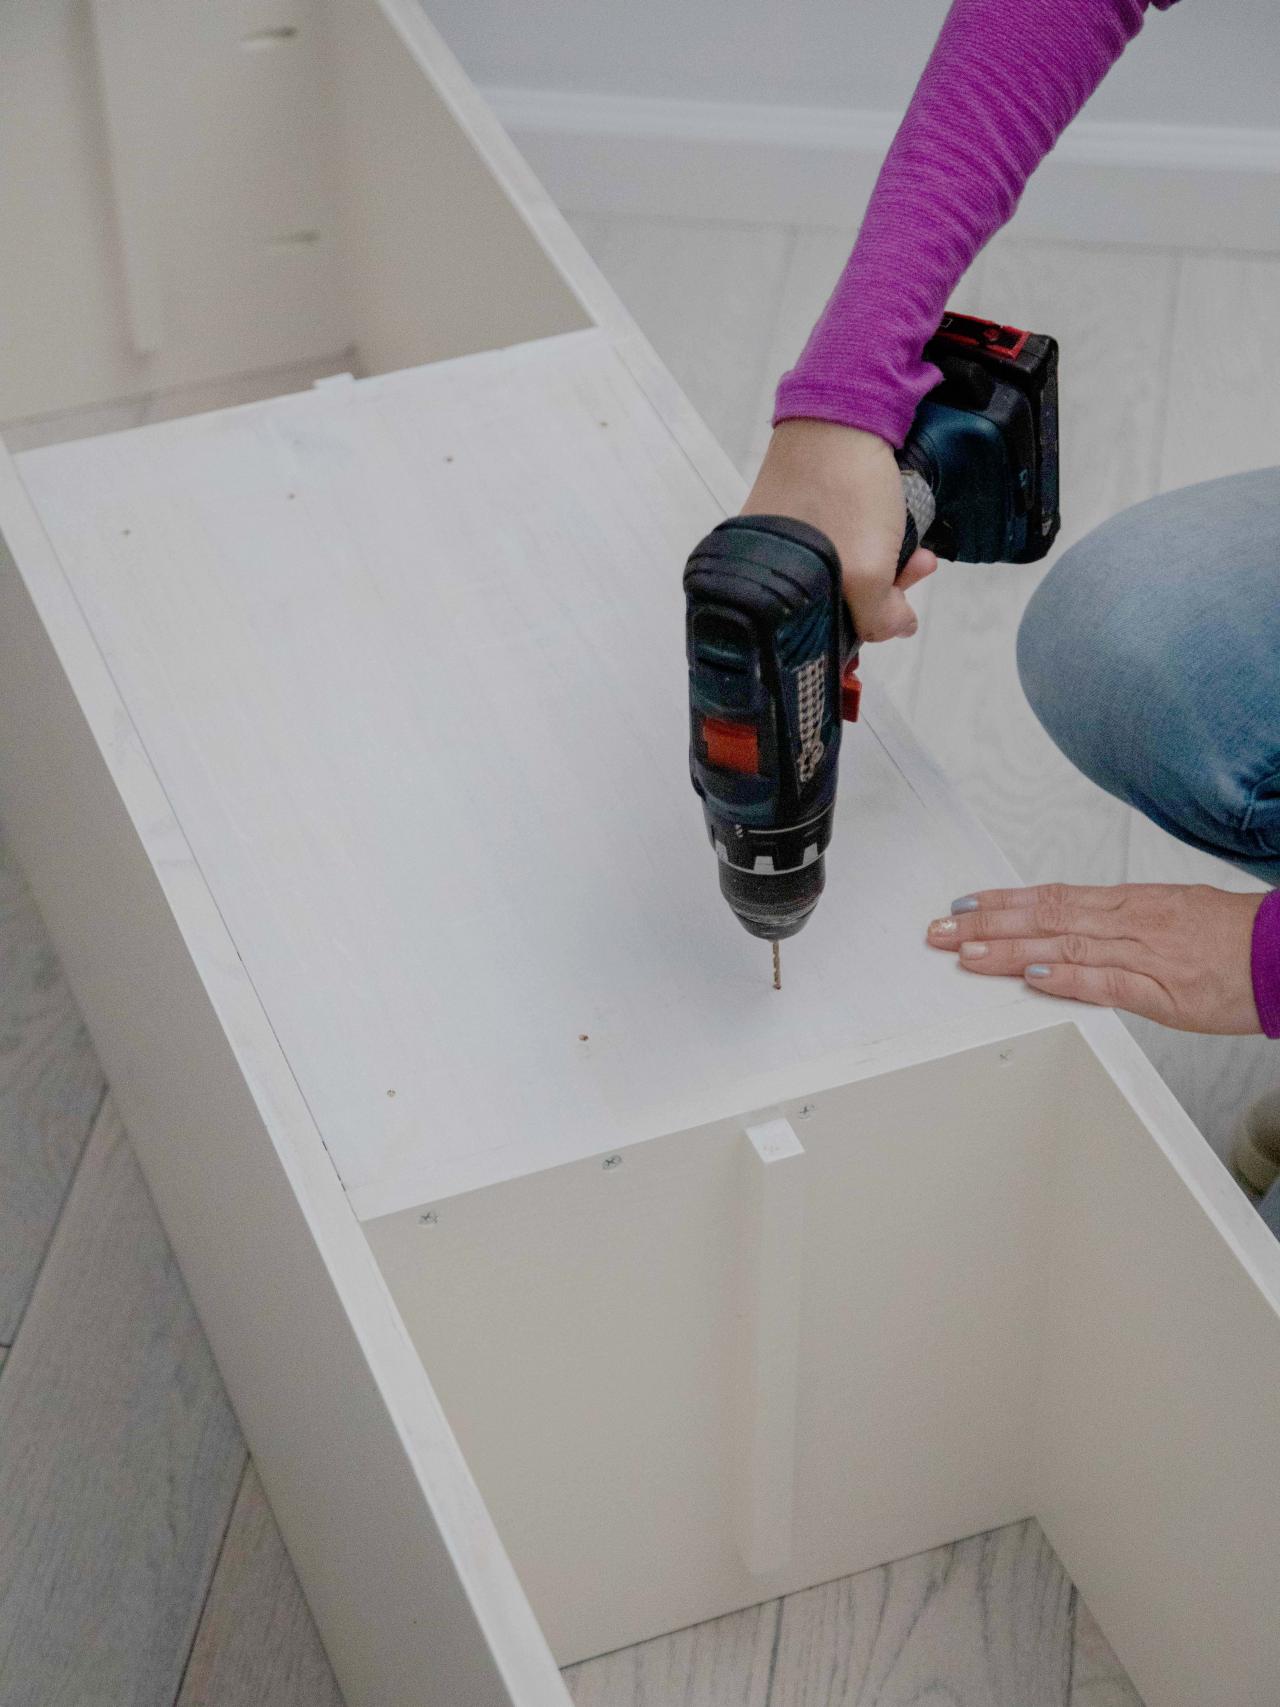
Attach Middle Section to Exterior Frame
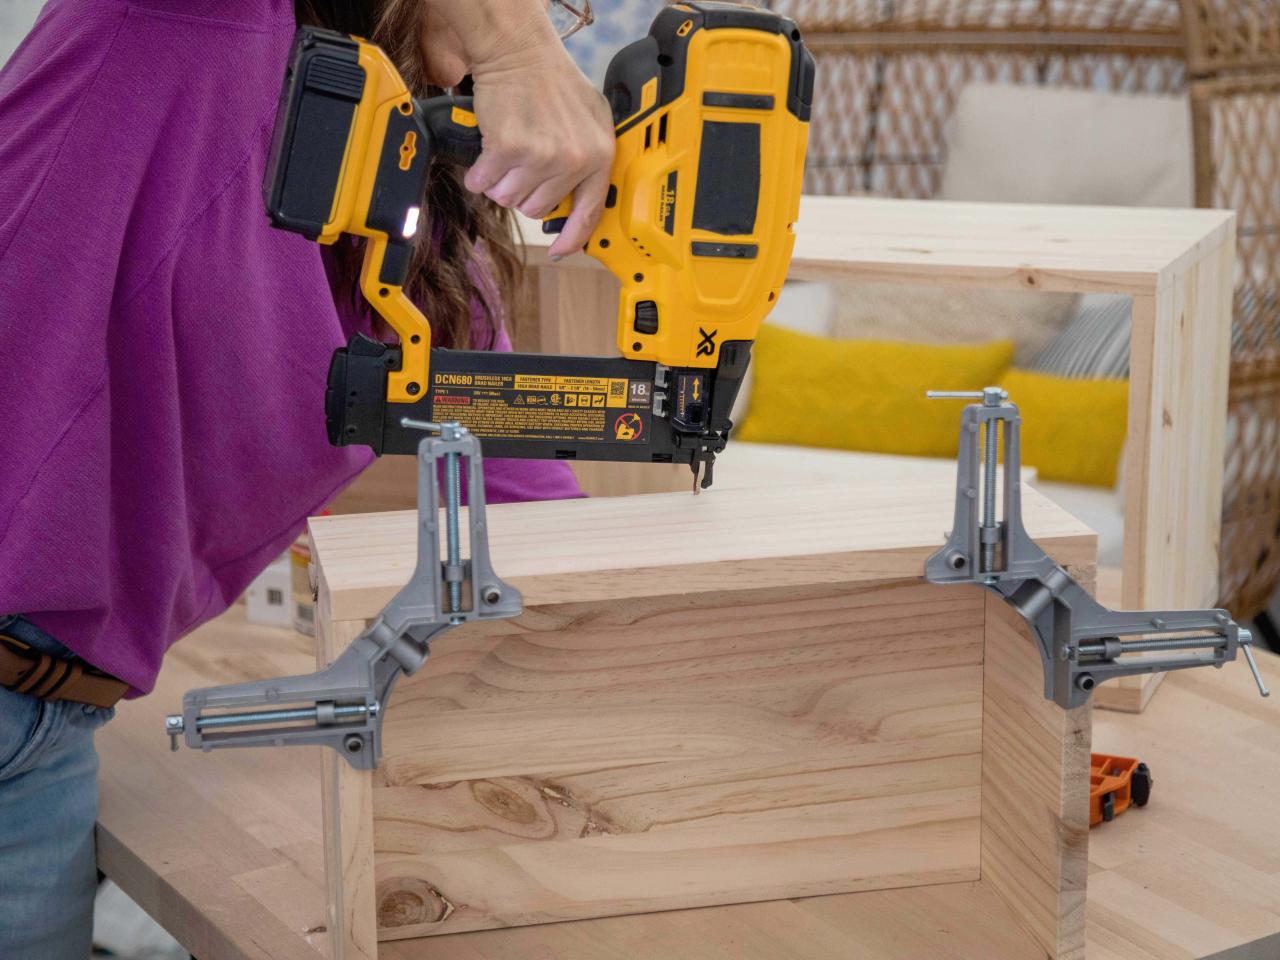
Add wood glue to the edges of the "U"-shaped middle section. Slide the middle section into the center of the exterior frame (Image 1). Flip the whole unit on its back. Use 36" clamps to hold everything in place. Attach the middle section from the bottom with 1-1/2" screws (Image 2). Attach it from the top with 1-1/4" brad nails (Image 3). Having a solid wood back will keep the piece sturdy and allow you to attach the unit to the studs (Image 4).
Shain Rievley
Shain Rievley
Shain Rievley
Shain Rievley
BUILD THE DRAWER
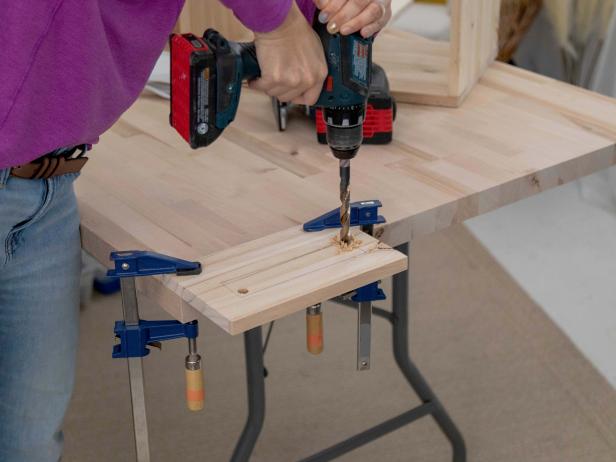
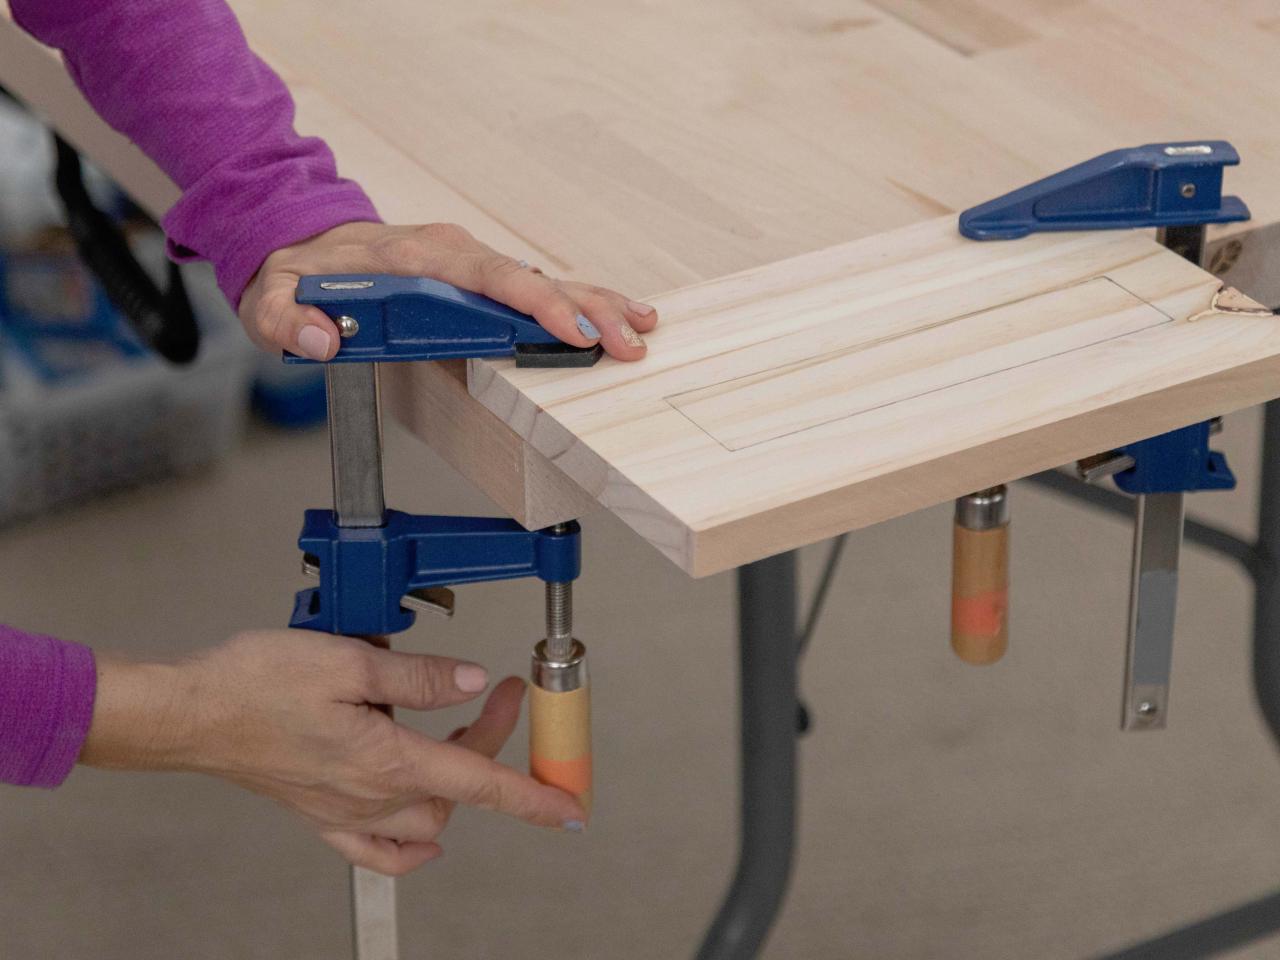
Cut Power Strip Slot in Side Piece
Trace the dimensions of a power strip onto one of the 6" x 9-3/4" drawer side pieces. Clamp the wood to the table (Image 1). Use a 3/8" drill bit to make a pilot hole at the corner of the traced shape (Image 2). Use a jigsaw to cut out the rest (Image 3). Your power strip will fit snugly in the hole. This will be the left side piece of the drawer.

Shain Rievley
Shain Rievley
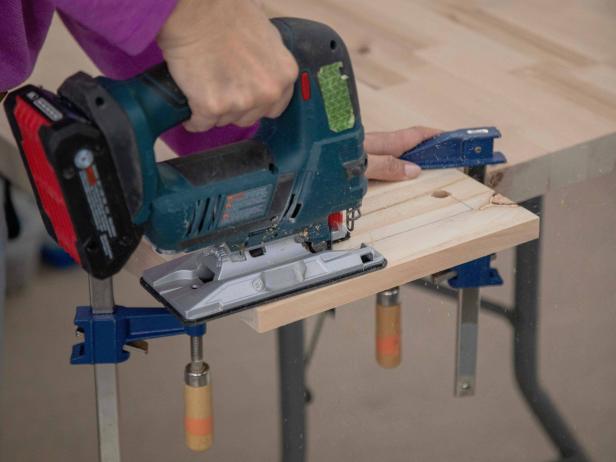
Shain Rievley
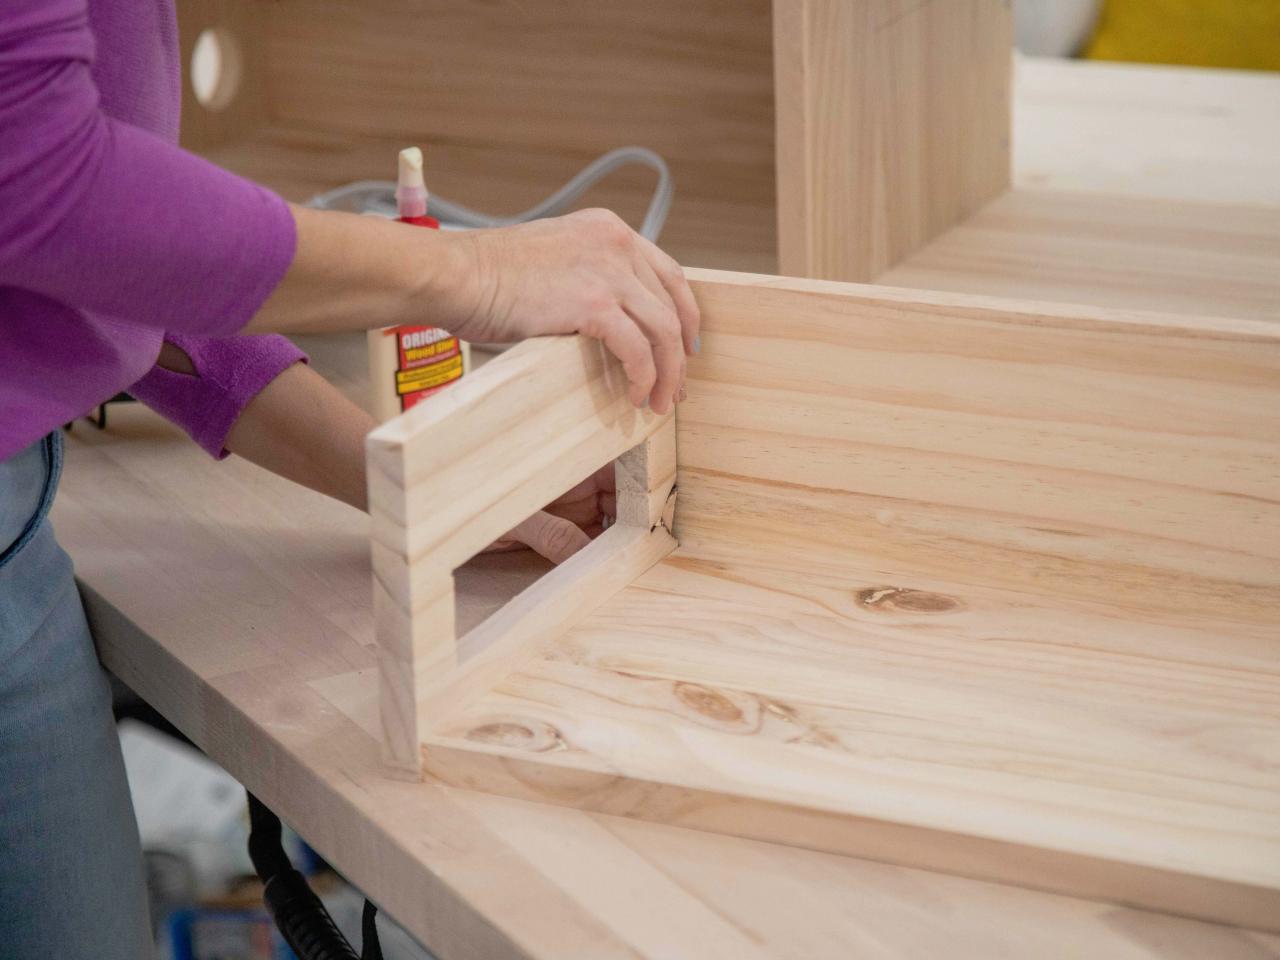
Attach All Drawer Pieces
Add wood glue and attach the drawer side piece you just modified to the 9-3/4" x 16" base (Image 1). Attach the 5-1/2" x 17-1/2" piece as the back and the other 6" x 9-3/4" piece without the power strip hole as the right side (Image 2). Clamp it all together using 36" clamps and right-angle clamps. Nail together with a brad nail gun (Image 3).
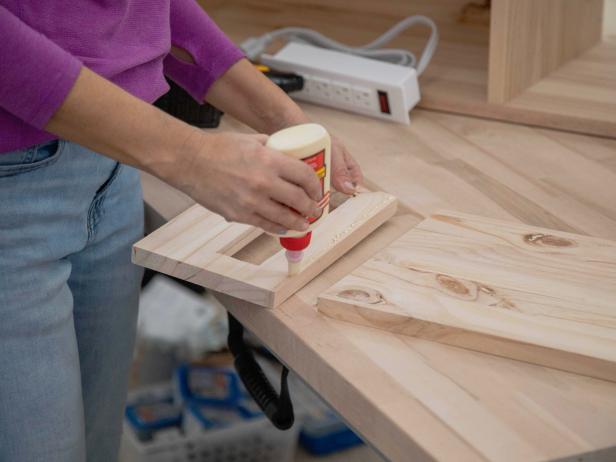
Shain Rievley
Shain Rievley

Shain Rievley
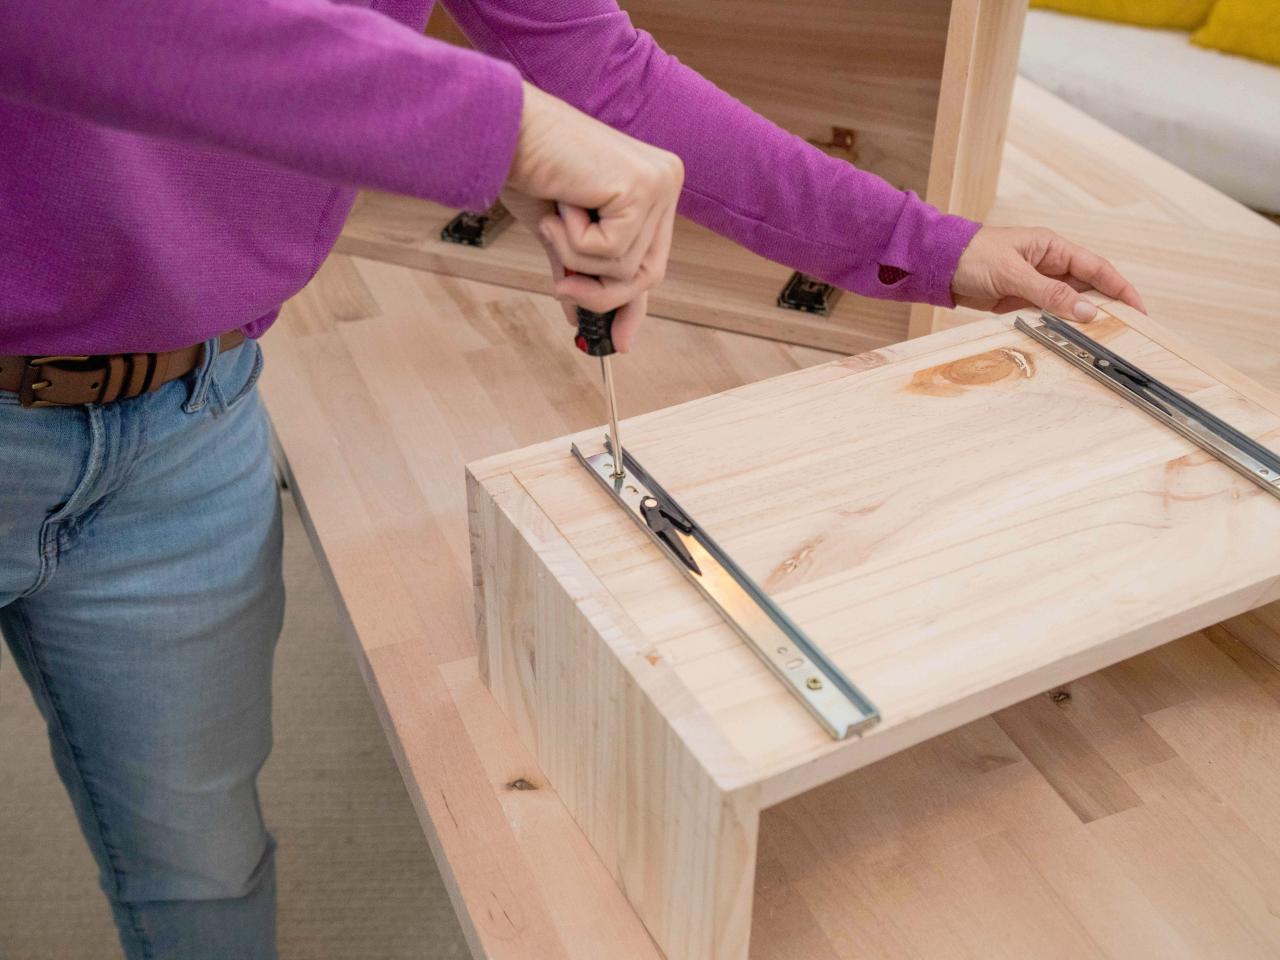
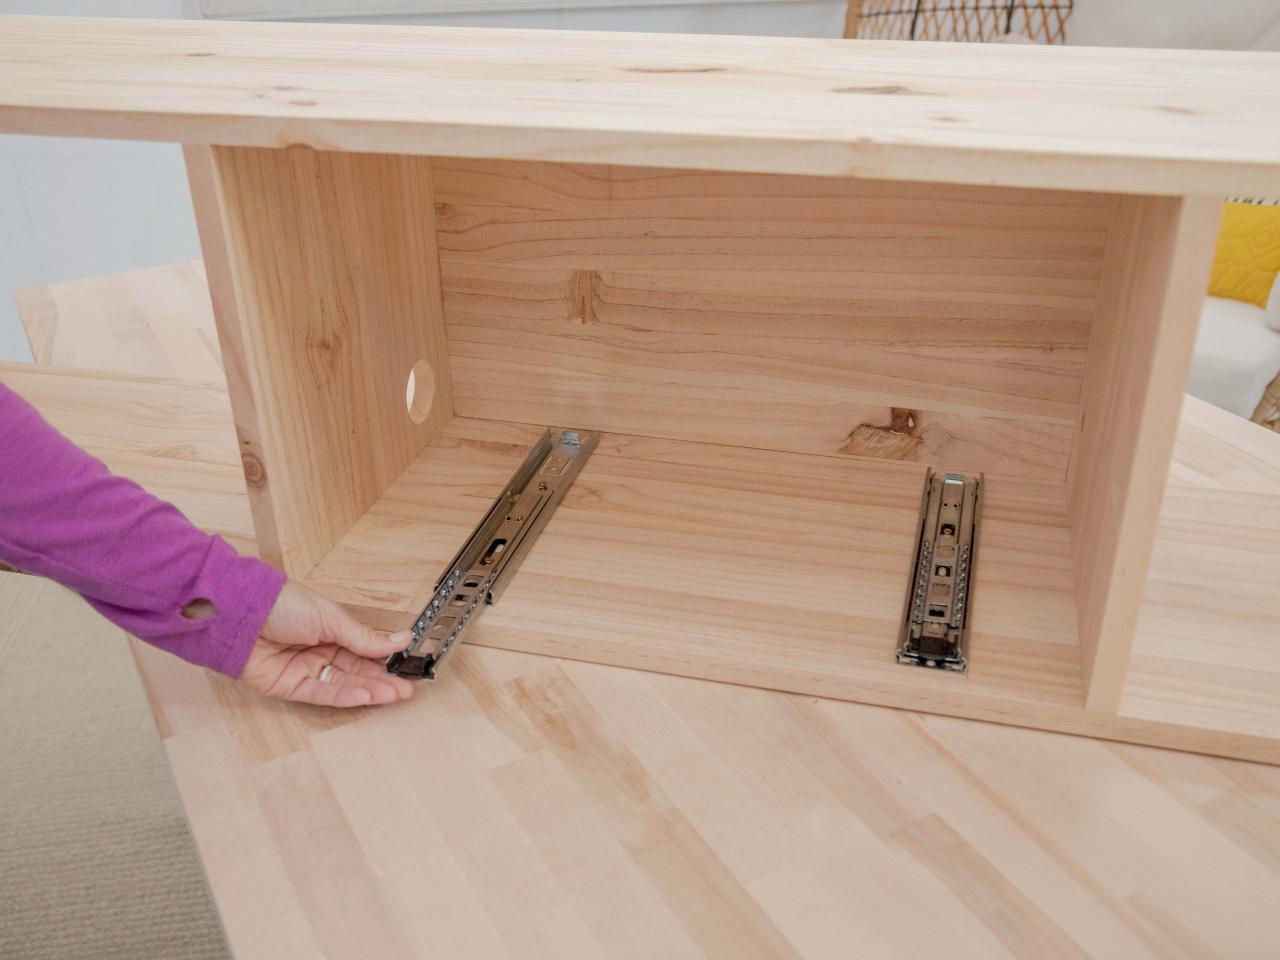
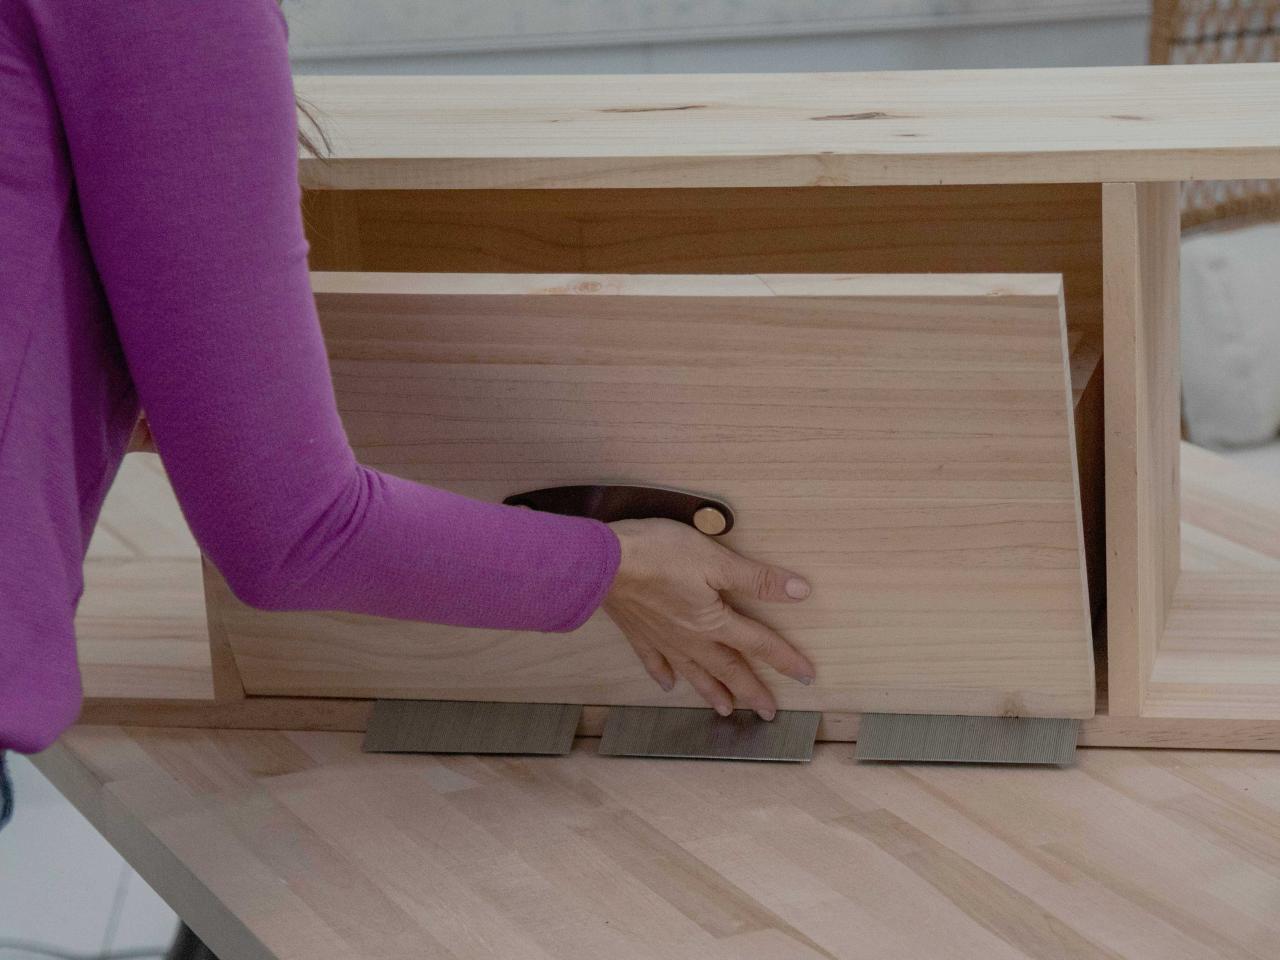
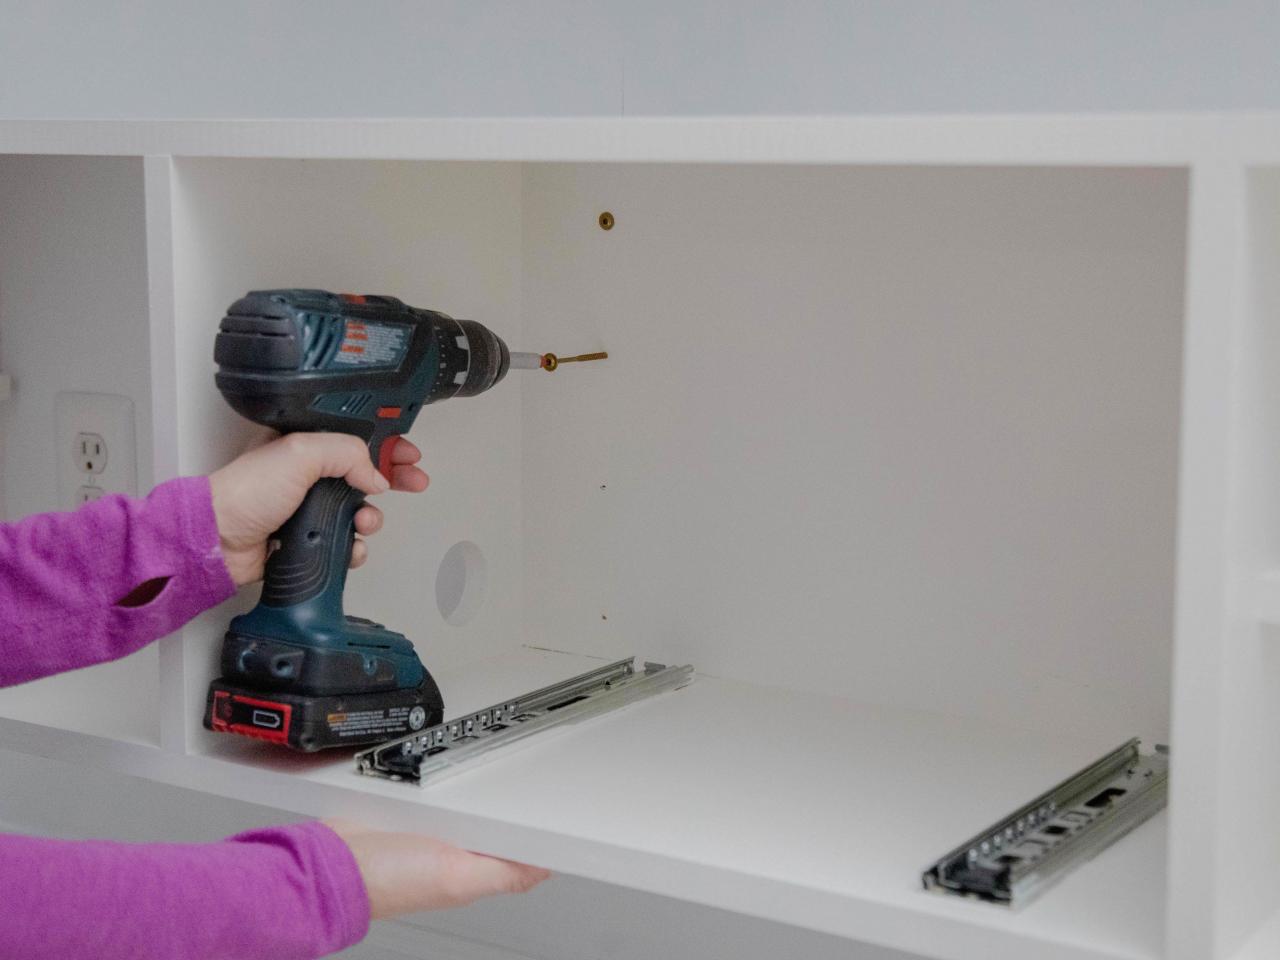
Attach Drawer Slides
Separate the pieces of the drawer slides. Attach one piece to the bottom of the drawer (Image 1) and the other piece to the base of the middle section of the unit (Image 2). Place the drawer into the unit and snap the slides back together (Image 3).

Shain Rievley

Shain Rievley

Shain Rievley
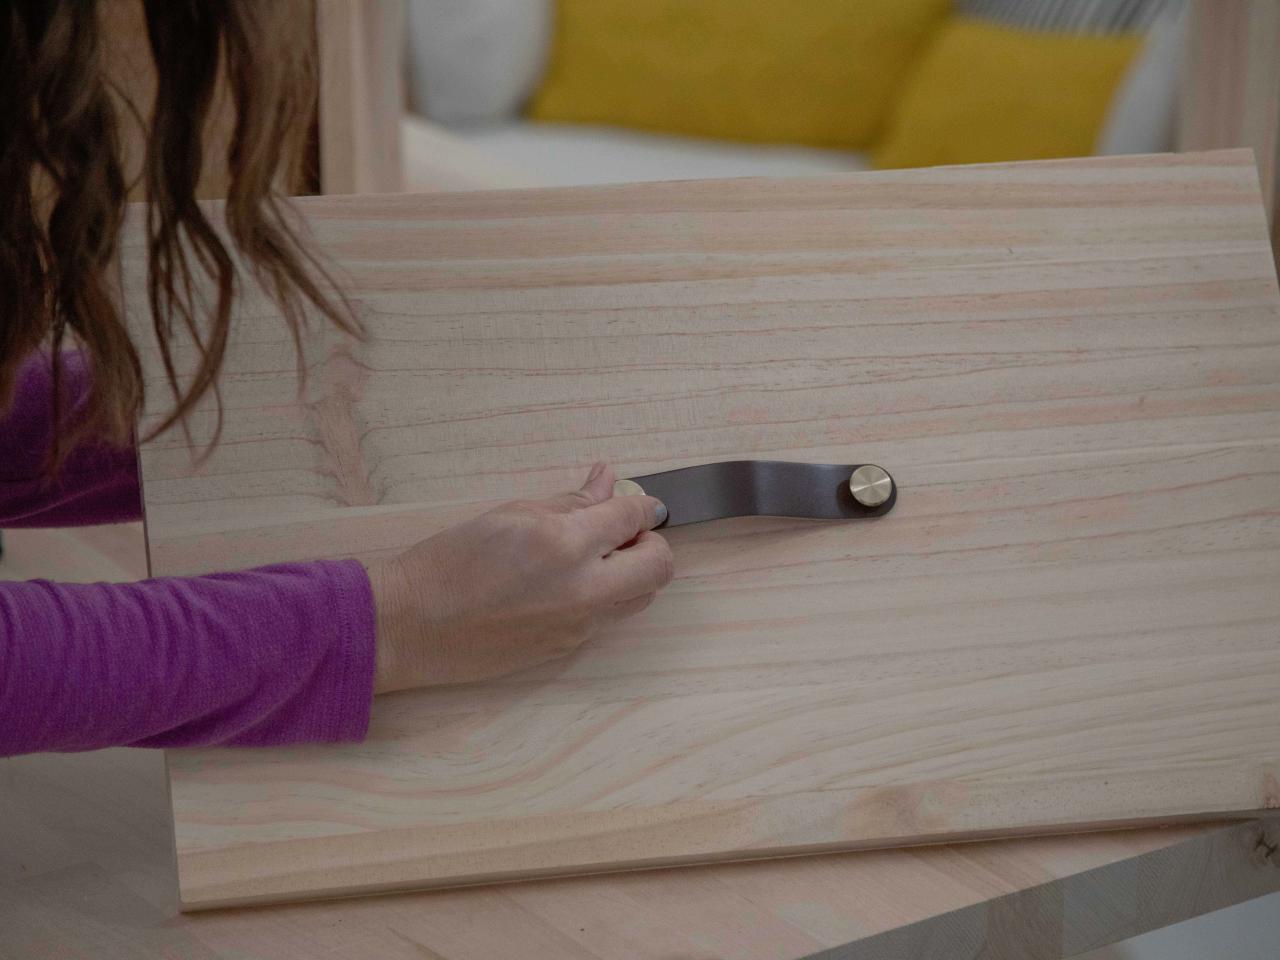
Attach Drawer Pull
The 11-3/4" x 20" piece will be the front of the drawer. Center and mark the position of a cabinet handle on the wood. Drill holes (Image 1) and screw into place (Image 2).
Shain Rievley
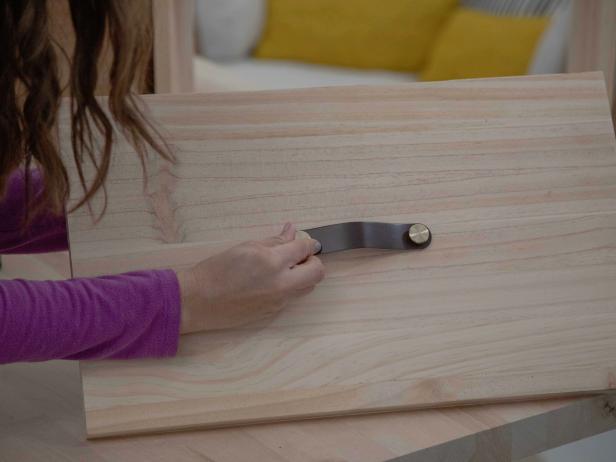
Shain Rievley
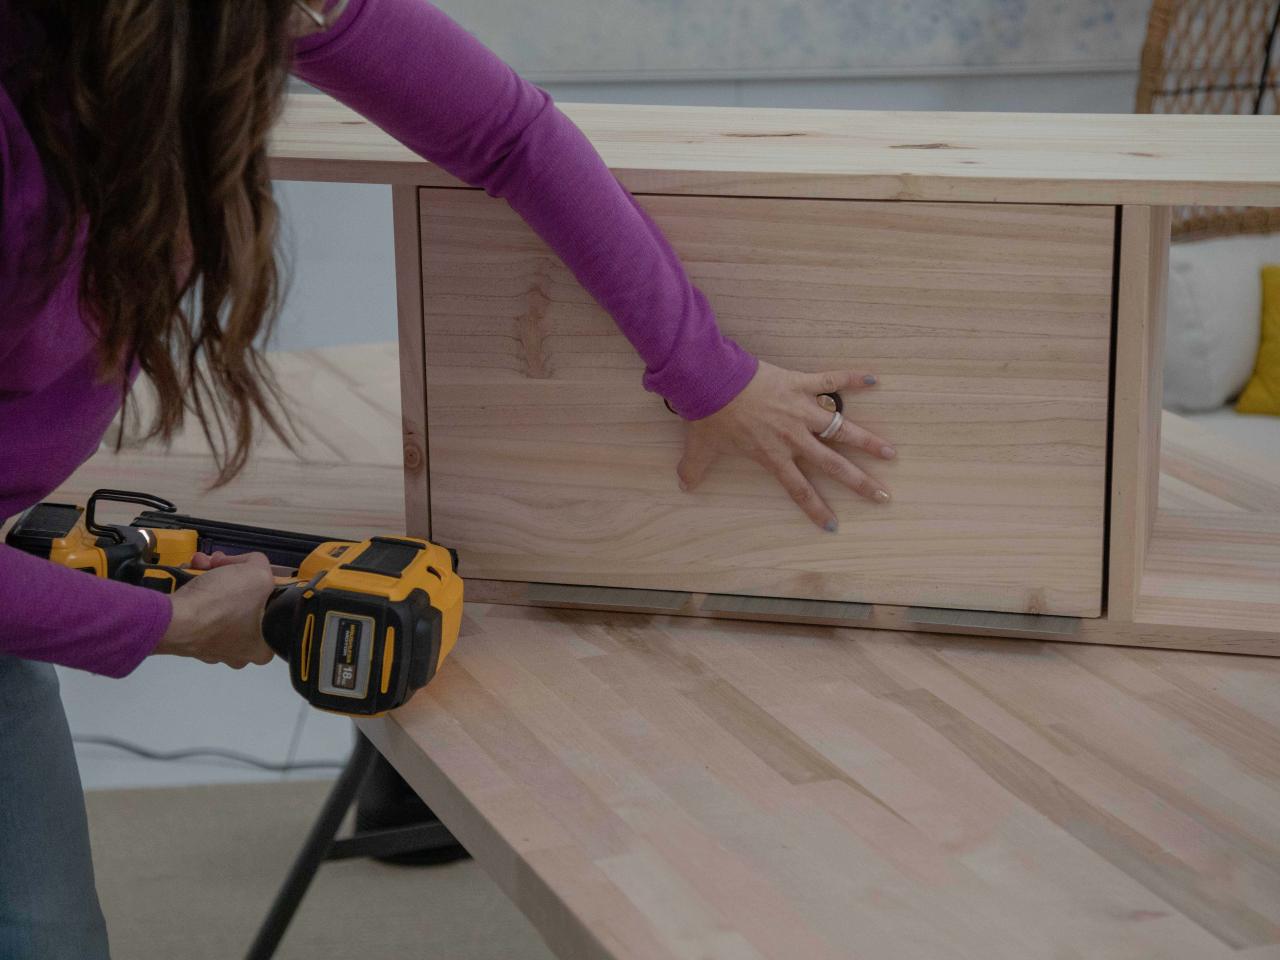
Attach Drawer Front
This step is a little tricky since you have to raise the drawer front up to give the drawer enough clearance to pull in and out. Use very thin shims or a row of finish nails to elevate the front piece to the correct height (Image 1), then secure with brad nails (Image 2).

Shain Rievley

Shain Rievley
ADD FINISHING TOUCHES
Attach Shelf Supports
Rip four pieces of wood down to 1" x 1" x 10". Add wood glue and attach each piece of wood 5" up the sides of the outer open sections of the unit with a nail gun.

Shain Rievley
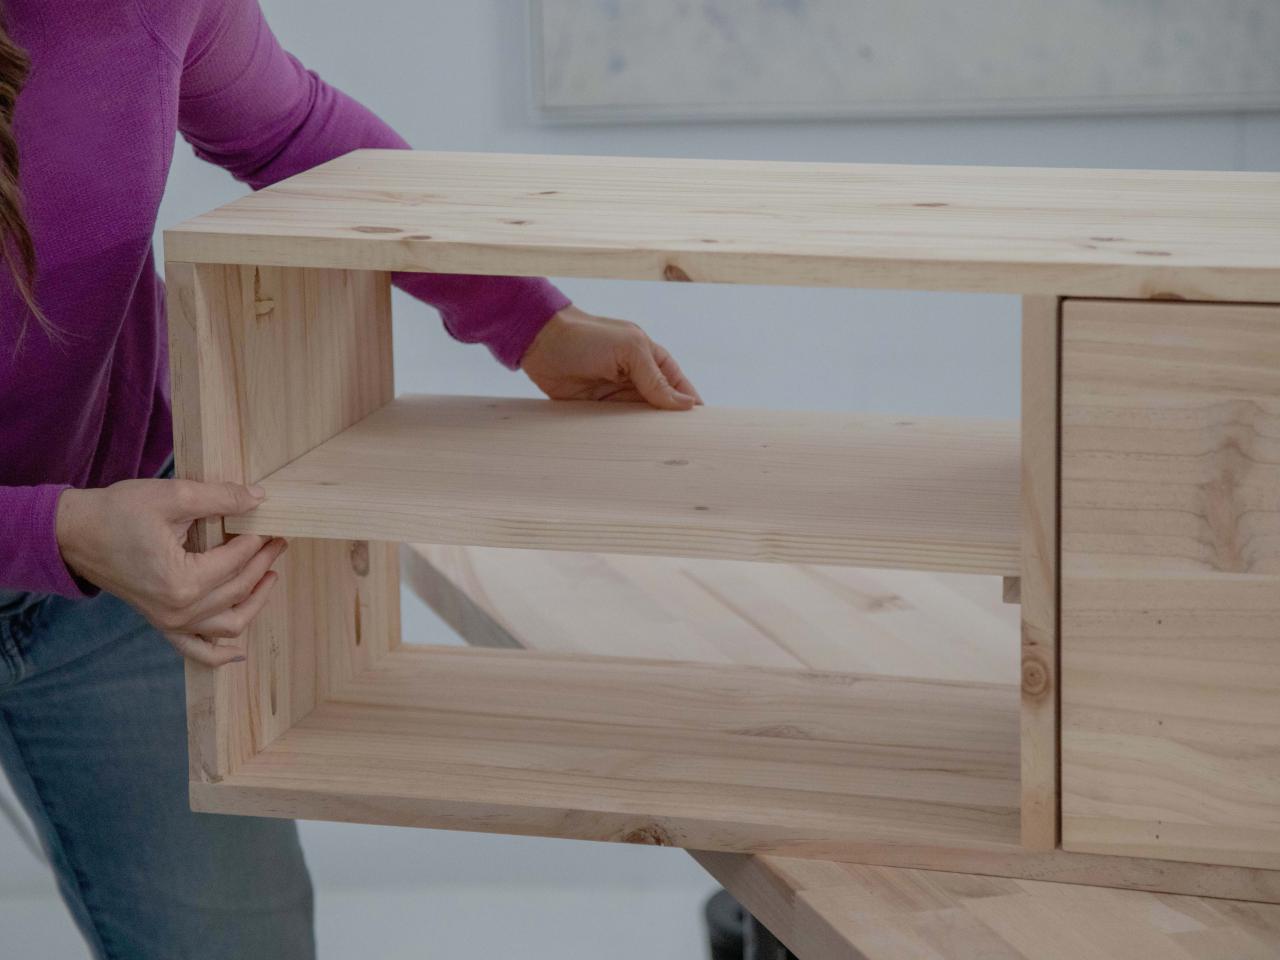
Add Shelves
Rest the 12" x 18-1/4" shelves onto the supports to make sure everything is even.

Shain Rievley
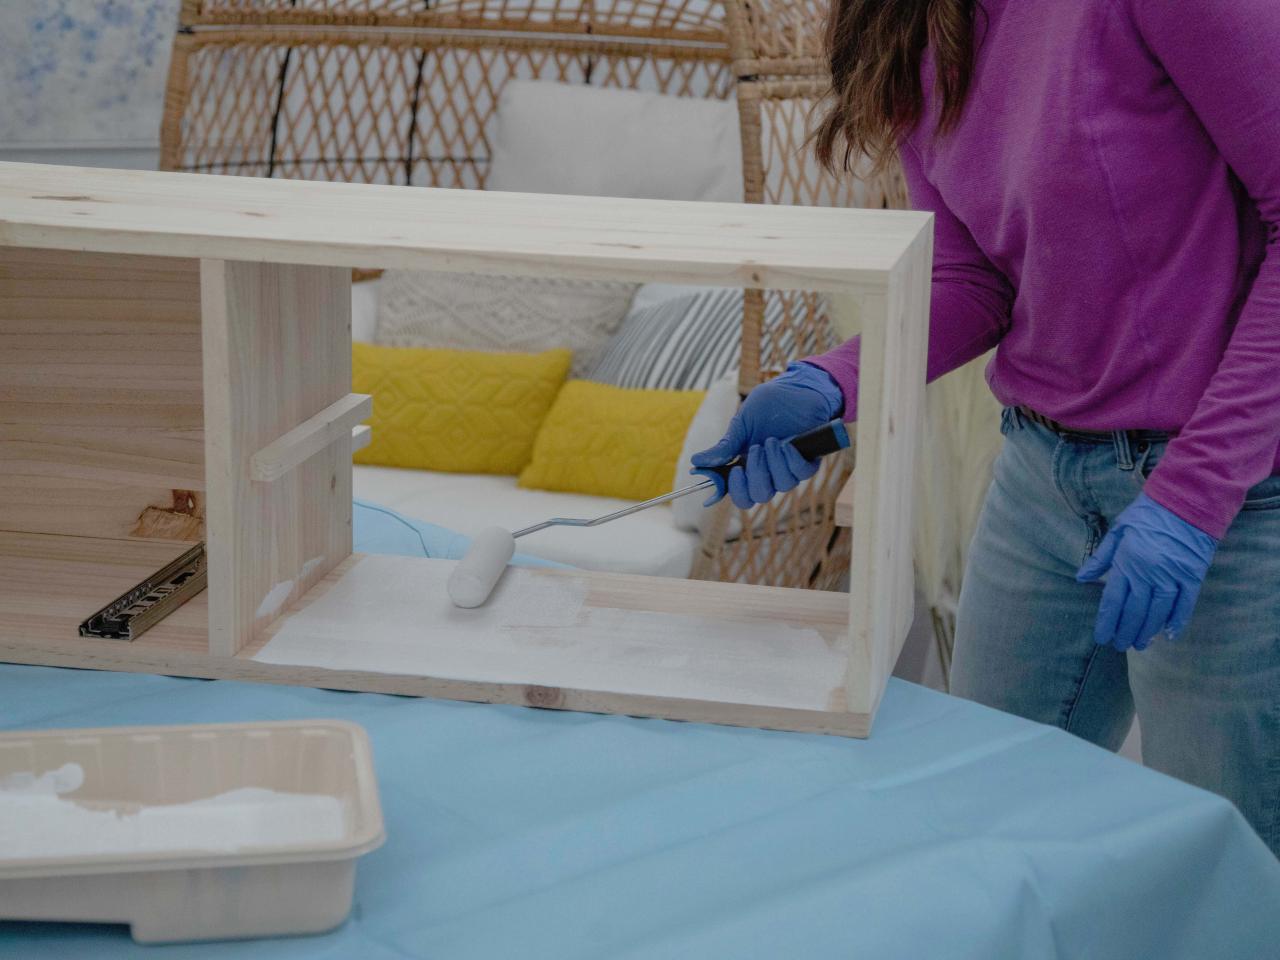
Paint
Remove the shelves and drawer so they can remain natural wood color. Prime and paint the rest of the unit white or your color of choice. (We used SW-7012.)

Shain Rievley
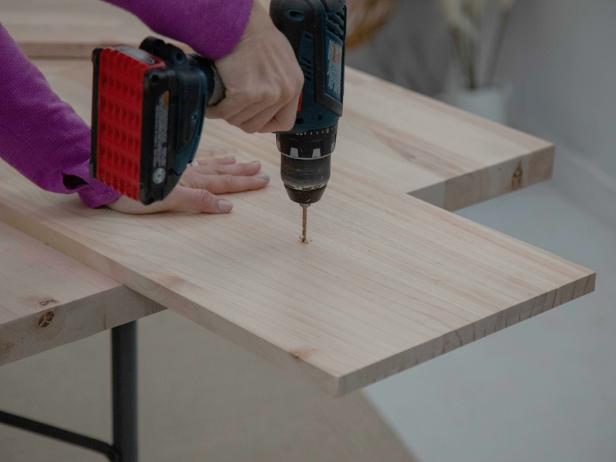
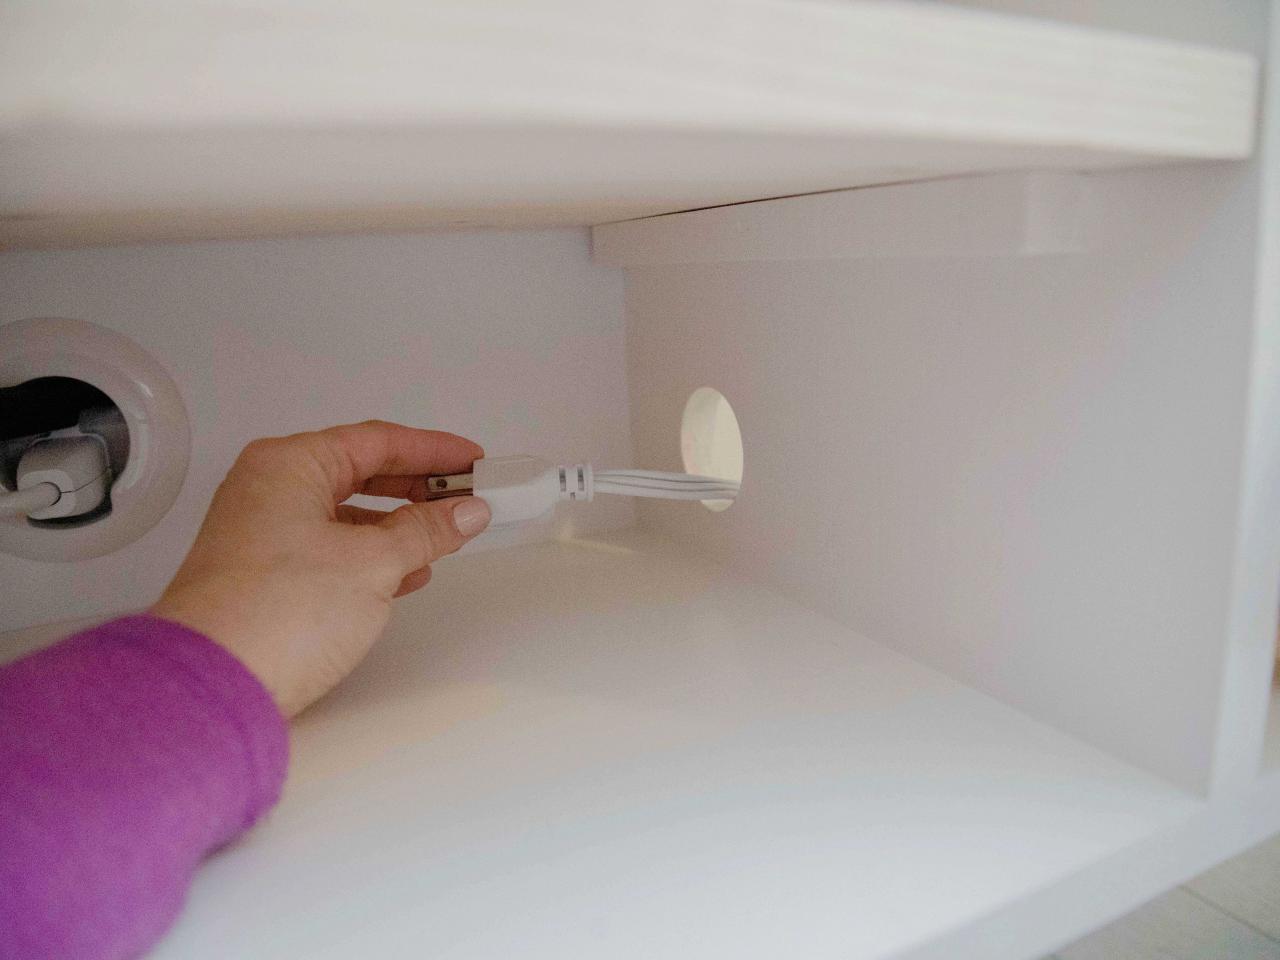
Attach Unit to Wall
Mark the studs in the wall. Predrill holes in the center back piece of the unit (Image 1). Secure the floating shelf to the wall with 3" screws (Image 2). Add the unpainted shelves and drawer back to the unit. Snake the power strip cord through the hole for easy access to outlet (Image 3).

Shain Rievley

Shain Rievley

Shain Rievley
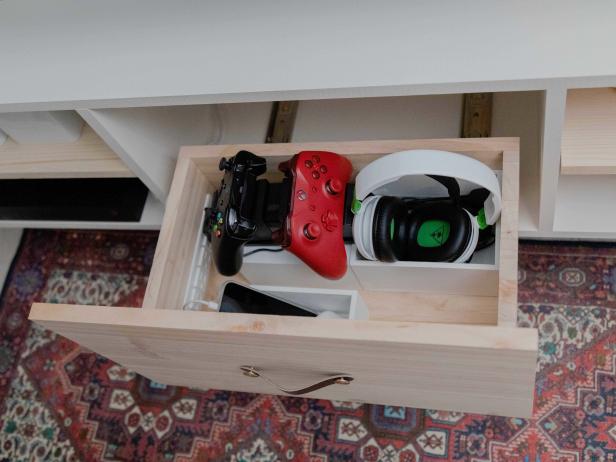
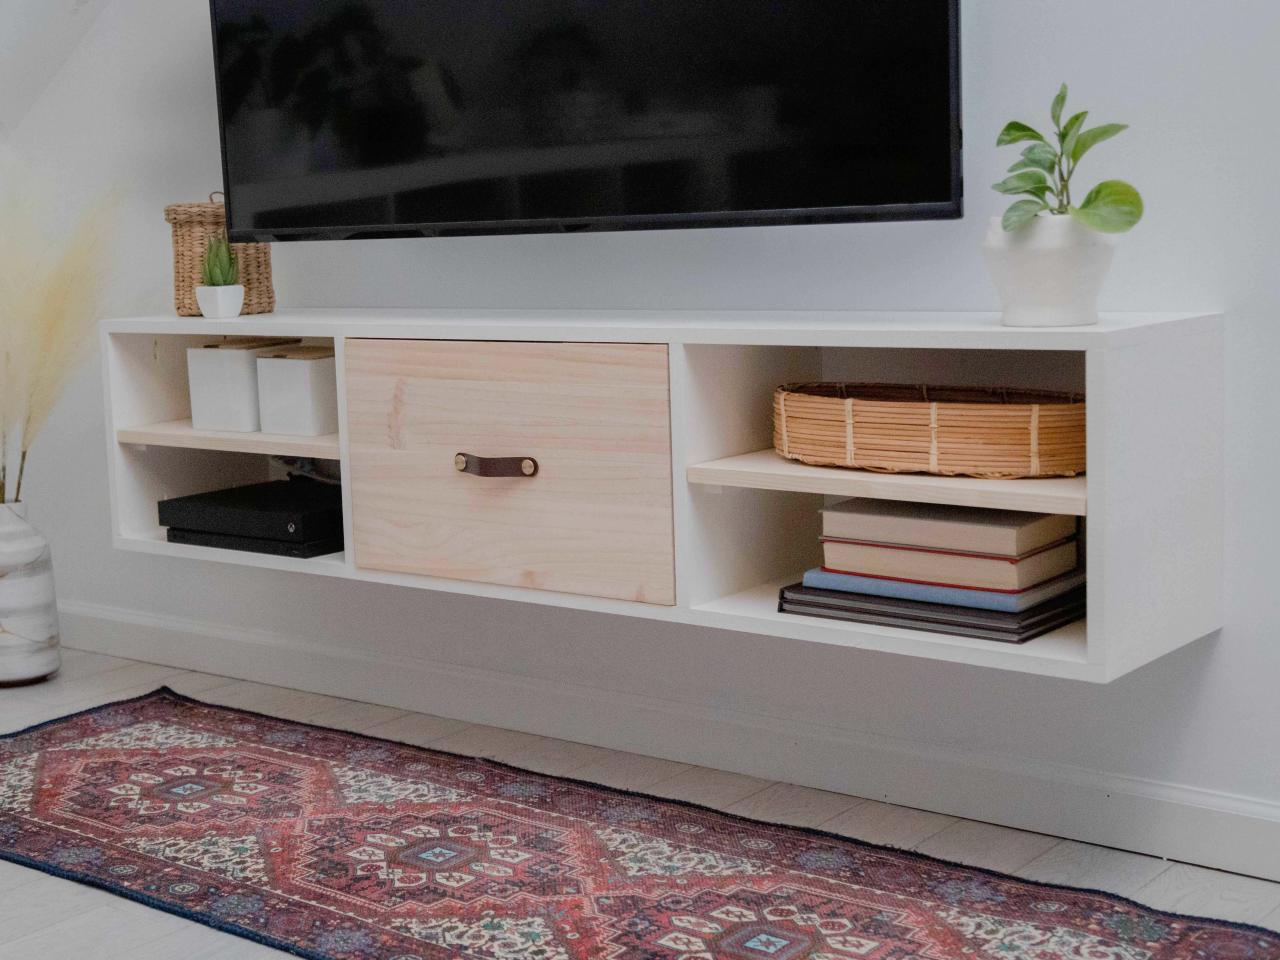
Fill It Up
Use the drawer to stash remotes, gaming controllers, headphones and other electronic accessories (Image 1). The built-in power strip is perfect for charging phones and tablets out of sight. Store DVD players, gaming consoles and decorative accents on the open shelves (Image 2).
Shain Rievley

Shain Rievley


