Easy DIY Bike Rack
Build this simple, wooden DIY bike rack to keep all your family's wheels neatly organized.
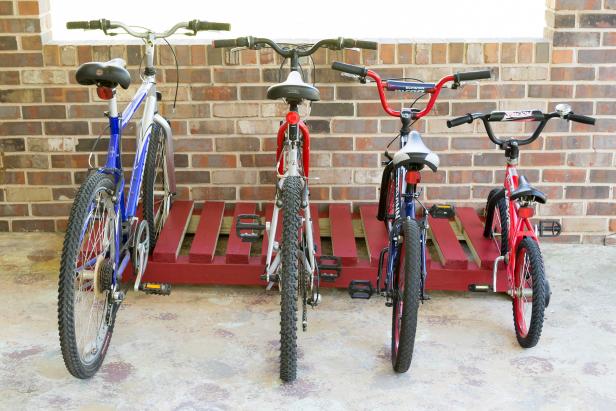
On a typical day, there are at least four bikes in our driveway. That number increases during the summer and weekends. To keep the bikes from overtaking our driveway, we decided to make a simple bike rack that will accommodate our current fleet of bikes and have room for more.
Debbie Wolfe
This simple bike rack has enough space to hold family and guests' bikes.
Materials + Tools
- (2) 4x4 x 6' pressure treated lumber
- (15) 2x4 x 29" pressure treated lumber
- (60) 10d 3" galvanized nails or 3" exterior screws
- drill and bits
- hammer
- tape measure
- speed square
- paint (optional)
Mark 4x4s
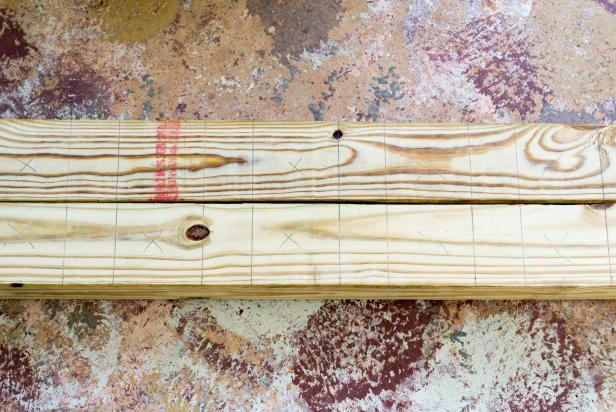
Lay the 4x4s parallel to and right up against one another with the ends even. In this position, the locations for the 2x4s can be marked on both at the same time. Beginning at one end, mark the locations for (13) 2x4s on the 4x4s. 2x4s are 3-5/8" wide, and there are 2" between them. Used a scrap of 2x4 to mark the board spaces. A speed square helps quickly mark the 2" space and helps to keep the marker block properly aligned.
Debbie Wolfe
Beginning at one end, mark the locations for (13) 2x4s on the 4x4s. The 2x4s are 3-5/8" wide, and there are 2" between them. I used a scrap of 2x4 to mark the board spaces.
Attach End Boards
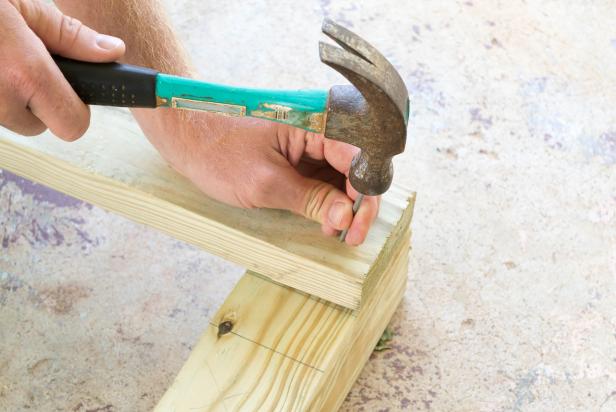
Position the 4x4s parallel to one another, spaced so that the outer edges are 29" apart. Nail (or screw) the (2) end 2x4s in place with a single nail (or screw) in each end. The ends of the 2x4s should be flush with the sides of the 4x4s.
Debbie Wolfe
Nail (or screw) the (2) end 2x4s in place with a single nail (or screw) in each end.
Square Up Assembly & Attach 2x4s
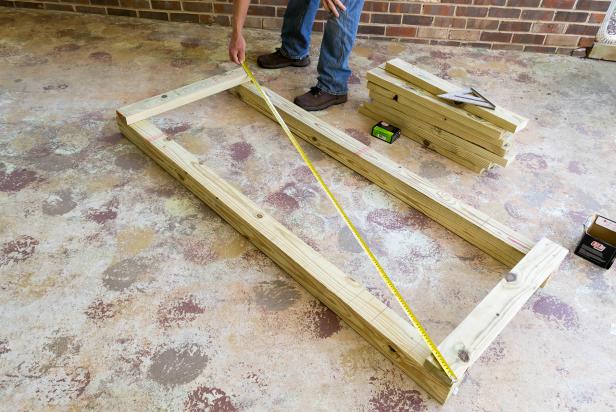
Measure diagonally from the top left corner of one of the 2x4s to the bottom right of the other, then from the bottom left corner of the first one to the top right of the other. The two measurements should be the same. If not, gently tap the longer end with a hammer to rack it into the proper position. When the assembly is square, drive a second nail (or screw) into each end of the 2x4s. Working from one end to the other, and using the pre-marked locations to guide you, attach the remaining (11) 2x4s on the top side by driving two nails (or screws) into each end.
Debbie Wolfe
Square up the assembly. Measure diagonally from the top left corner of one of the 2x4s to the bottom right of the other, then from the bottom left corner of the first one to the top right of the other.
Attach 2x4s to Bottom
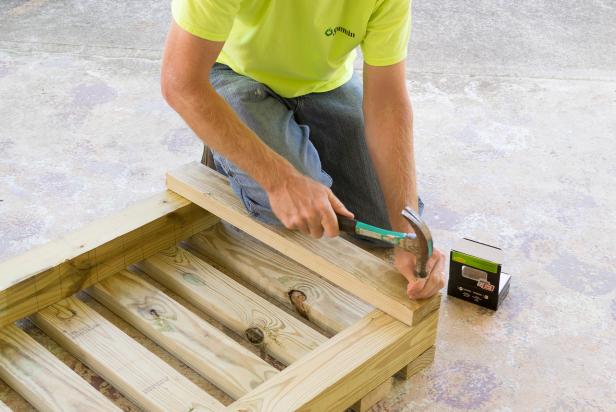
Flip the assembly over. Attach one 2x4 across each end of the bottom, parallel to those on the top. Apply a coat of exterior paint (optional).
Debbie Wolfe
Flip the assembly over. Attach one 2x4 across each end of the bottom, parallel to those on the top.
Park Your Bikes!
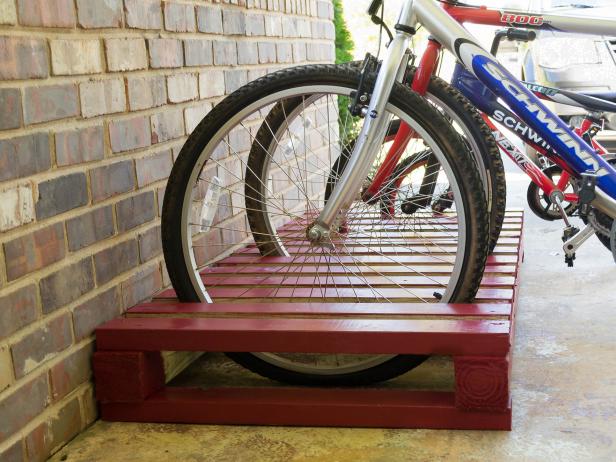
Place the rack up against the wall and park your bikes. The best part about this bike rack is that if you need more space for visitors' bikes, move the rack away from the wall and park the bikes on alternating sides. At least a dozen bikes or scooters can fit in this simple DIY bike rack.
Debbie Wolfe
Each slot in this bike rack will accommodate a wheel.


