


DIY Wall Bike Rack
Make an industrial-style DIY wall-mounted bike rack that will show off your bike and keep your riding gear organized.

I'm pretty slapdash about prepping for a morning bike ride. I've lost countless blinking tail lights and it's not uncommon for me to take off on a ride without a water bottle.
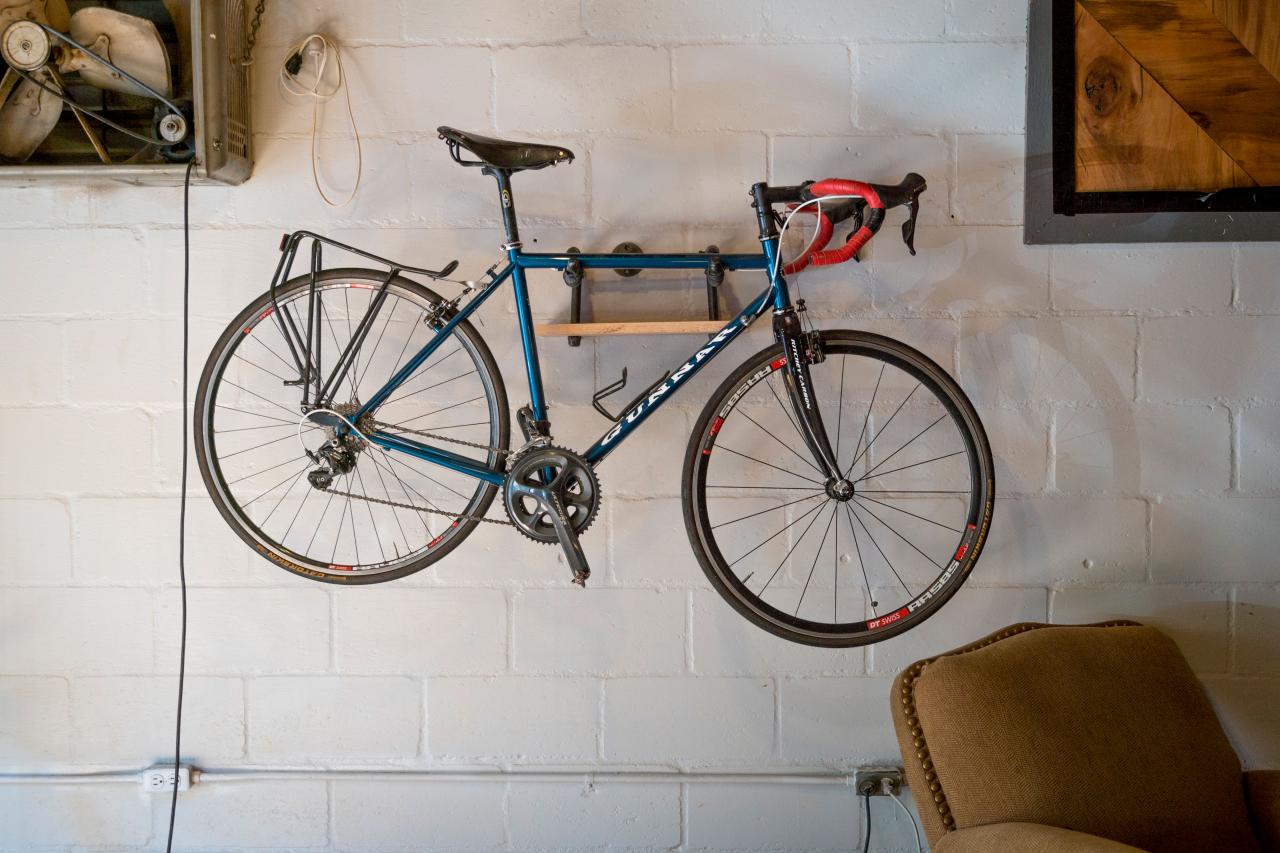
Atlanta wood and metal artist Jon Briggs Foster has a design solution to solve my morning mess: a clever, wall-mounted bike rack that's a snap to build with some iron gas pipe fittings and only a small amount of woodworking skill. The industrial-style bike rack design works perfectly in small spaces and has a shelf for must-have bike commuter items.

Chris Tsambis/Abstract Pictures
Keep your bike and commuter gear together with a stylish and sturdy bike rack made from pipe fittings.
The materials can vary a bit depending on your design, but the list is pretty short no matter how you decide to style your rack. Here's what you'll need to build your own bike rack like the example below.
Materials
- assortment of iron gas pipe fittings, 1/2" in diameter: (7) 3” pipe fittings, (6) 1-1/2” pipe fittings, (5) tee-fittings, (2) 5” pipe fittings, (4) 90-degree elbows, (2) 45-degree elbows, (2) cap fittings
- 1” x 10” x 18” wood board for the shelf, with 2 holes drilled to fit over 1/2” pipe fittings.
- recycled bike tubes to wrap around the cradles holding the bike frame
- thread lock
- floor flange for mounting rack to the wall
- screws for mounting rack into wall studs
I opted to fit a wooden shelf above the hanging bike so I can keep my bike lights, water bottle and keys together. You can pattern your wall bike rack after our examples or experiment with your own design.
Keep these basic measurements in mind: The bike rack will need to extend about 11 inches from the wall to make room for the handlebars, and the cradles that hold the bike frame should be roughly 12 inches apart.
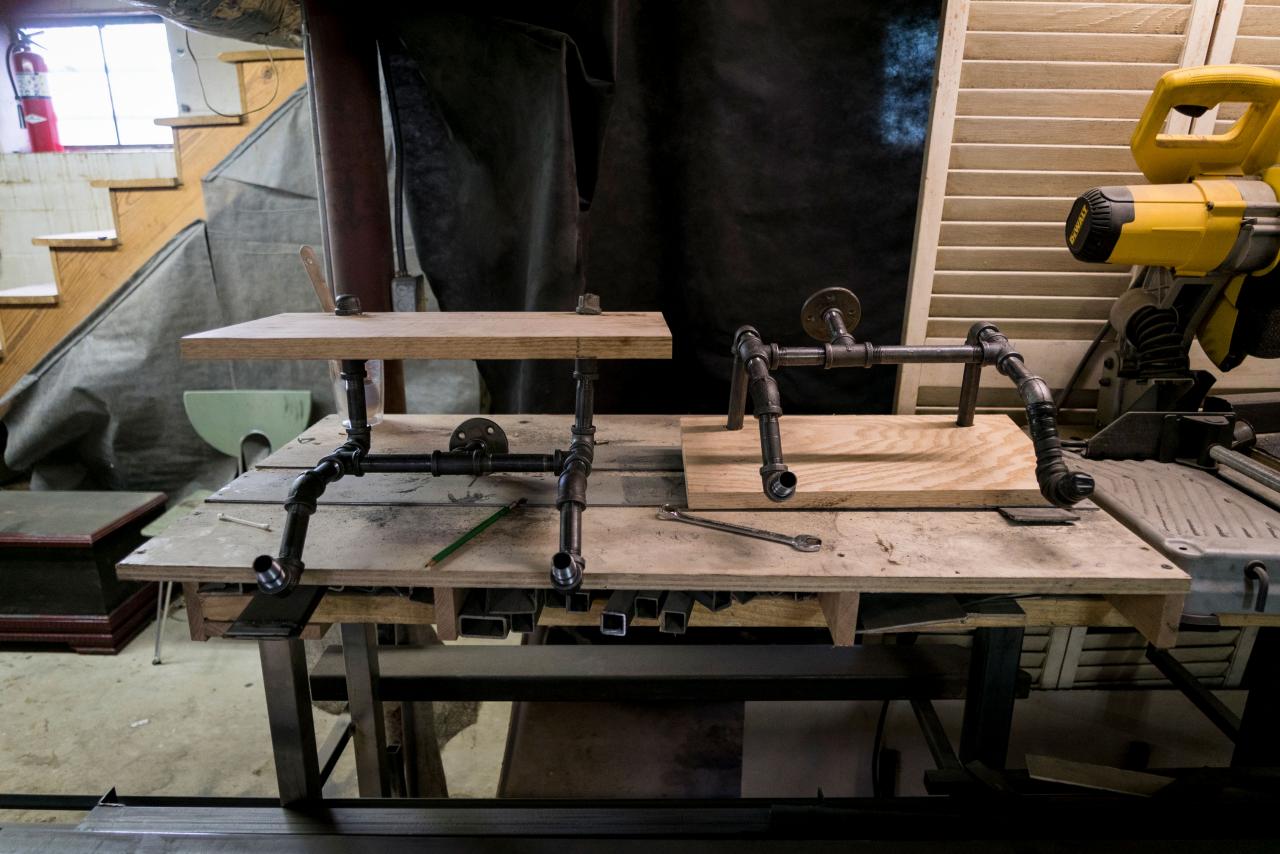
The pipe fittings just screw together, so it's simple to craft a rack that looks and works the way you want.

Chris Tsambis/Abstract Pictures
It's easy to create a custom-looking bike wall hanger with pipe fittings — just screw them together in a design that works for you.
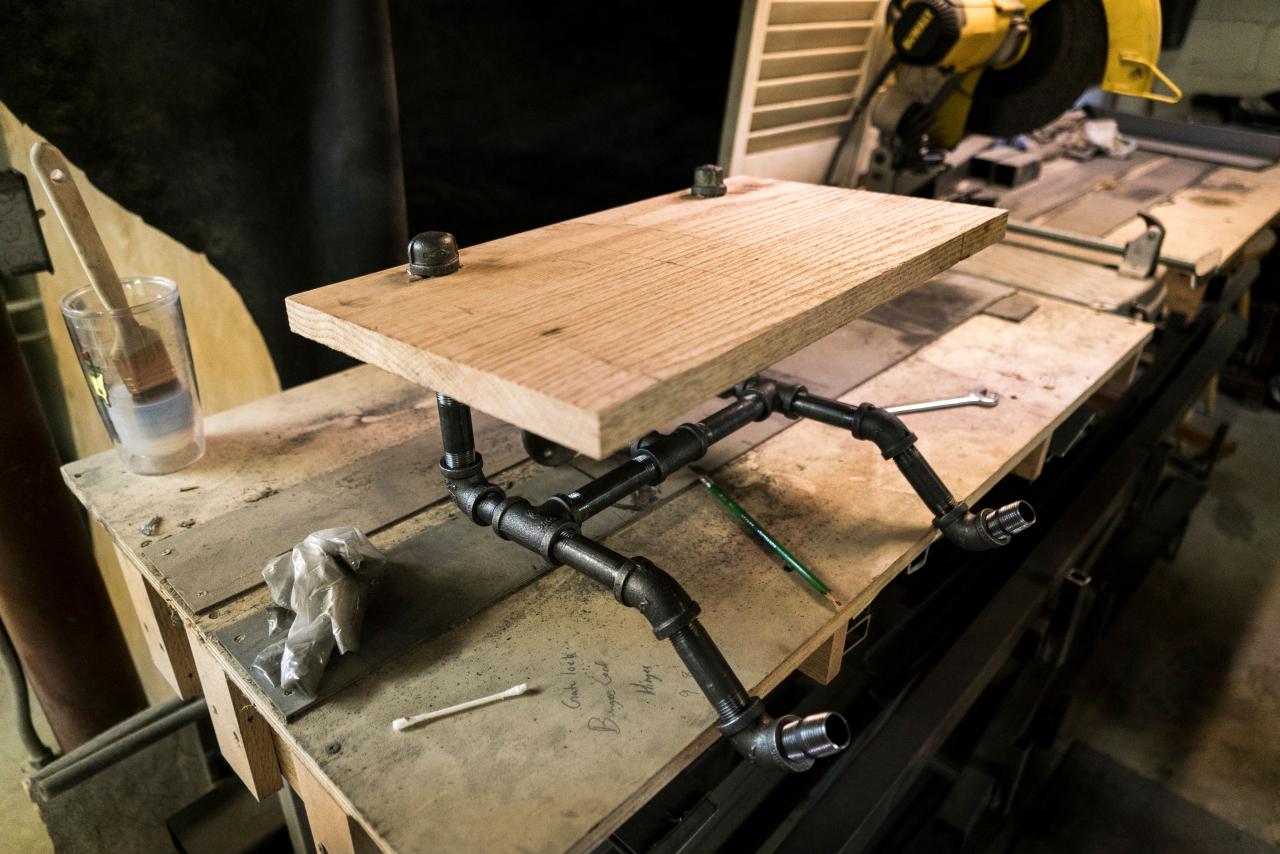
It's simple to attach a shelf for your water bottle and other commuter gear above or below the bike cradle of your DIY bike rack. The screw-on end caps hold the shelf in place.
While most woods will work just fine, Jon suggests using a hardwood such as red oak. Hardwoods absorb stain more slowly than softwoods such as pine, so it's easier to produce an even finish. And hardwoods won't dent as easily as softwoods. Red oak is one of the more available and less expensive hardwoods.

Chris Tsambis/Abstract Pictures
Pipe fittings come in many lengths and screw together easily, making them great for DIY crafts.
We chose to complete the industrial look of our design by wrapping the pipes that cradle the bike frame — made using 90-degree elbow pipe — with recycled rubber bike tubes. Other soft material would work as a cushion to protect your bike's frame. Be creative — leather or even handlebar tape in a color that matches your bike are other ideas.

Chris Tsambis/Abstract Pictures
It's simple to attach a shelf for your water bottle and other commuter gear above or below the bike cradle of your DIY bike rack. The screw-on end caps hold the shelf in place.
Wall Bike Rack Building Tips From Jon
- To protect the bike frame, we wrapped the cradles that hold the bike in rubber bike tubes. Any soft material will work. An idea: Wrap the cradles in handlebar tape that matches the color of your bike.
- Wear gloves during this project. The pipe fittings come out of the box covered in fine grease.
- Piece your rack together beginning with the arm and bike cradle, working your way back toward the pipe fitting that screws into the mounting flange.
- Squeeze a drip of thread lock on the pipe fitting threads, but use a grade of thread lock that still allows the pipe fittings to be loosened by hand tools.
- Mount the flange to the wall separate from the bike rack.
- Before mounting the flange: Tighten the flange onto the bike rack, hold the entire assembly against the wall so the rack is oriented correctly, then mark the top hole in the flange with tape so you'll know how to position the flange against the wall when you're ready to mount the rack permanently.
- Softwoods such as pine absorb stains more quickly than hardwoods such as oak, which could result in a blotchy finish. Use a pre-stain conditioner if using softwood.
- Invest in a quality stud finder that locates the edges of wall studs.
- Use a water-based polyurethane rather than oil-based polyurethane to make clean-up easier.
- If you opt to use reclaimed wood, be sure to treat it for potential wood-boring insects.
- Quality tools are worth the extra cost as they tend to last longer.

Chris Tsambis/Abstract Pictures
To protect the bike frame, we wrapped the cradles that hold the bike in rubber bike tubes. Any soft material will work. An idea: Wrap the cradles in handlebar tape that matches the color of your bike.
More Bike Storage Ideas

12 Garage Bike Storage Ideas
Store your bikes safely and create more available space in your garage with these bike storage solutions.

Stylish Ways to Store Bikes When Short on Space 7 Photos
Finding an adequate amount of storage space always seems to be a struggle. We can help.

DIY Bike Rack
Build this simple, wooden DIY bike rack to keep all your family's wheels neatly organized.


