


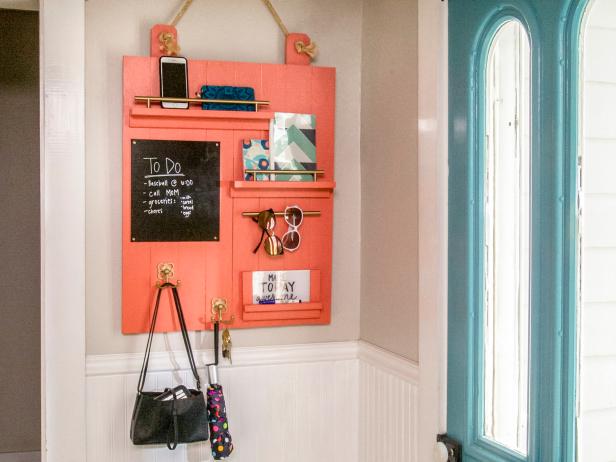
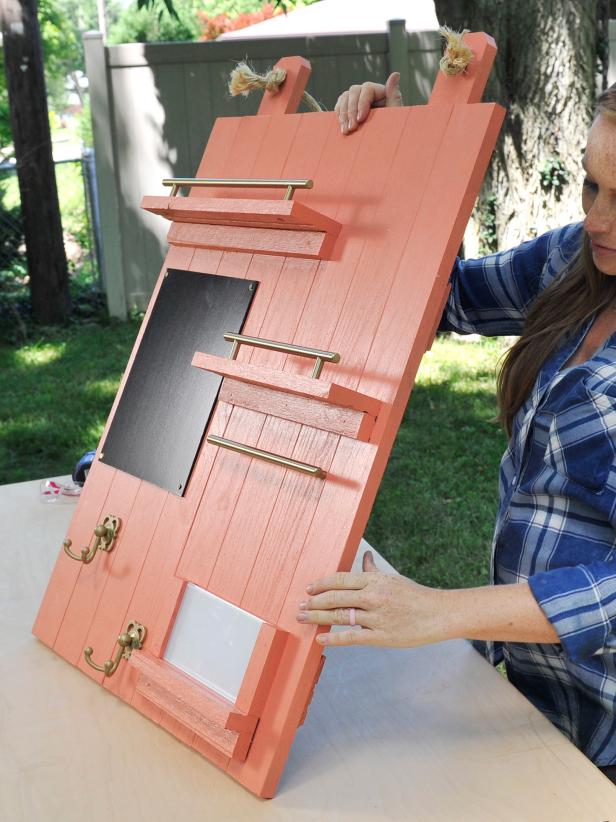
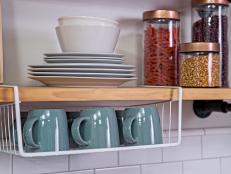
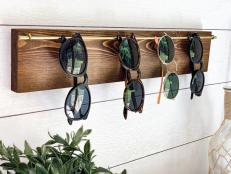
Make a Wall Organizer From Upcycled Hardwood Flooring
Concur clutter with this easy-to-build hanging helper made from hardwood flooring.

MaryAnnCarter
Tools and Materials
- (1) box of 3.25” hardwood flooring
- paint-and-primer-all-in-one
- paintbrush
- (3) cabinet pulls
- (1) piece of glass subway tile
- (3) decorative hooks
- 3/4” screws
- dry erase/chalkboard plywood
- gold spray paint
- construction adhesive
- caulk gun
- miter saw
- miter saw stand
- table saw
- compressor
- 16-gauge finish nail gun
- 1-1/4” finish nails
- tape measure
- pencil
- orbital sander
- sandpaper
- dust mask
- 5/8" Forstner drill bit
- 4' of 1/2" sisal rope
- scissors
- drill
- chalk marker
- dry erase marker
- utility knife
- 1-1/4" wood screws
Skill Level: Beginner
Estimated Time: 1/2 day
Estimated Cost: $250
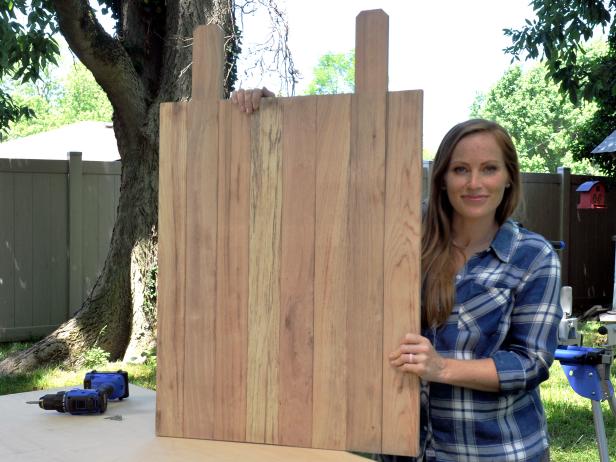
Step 1: Determine Size of Backboard

MaryAnnCarter
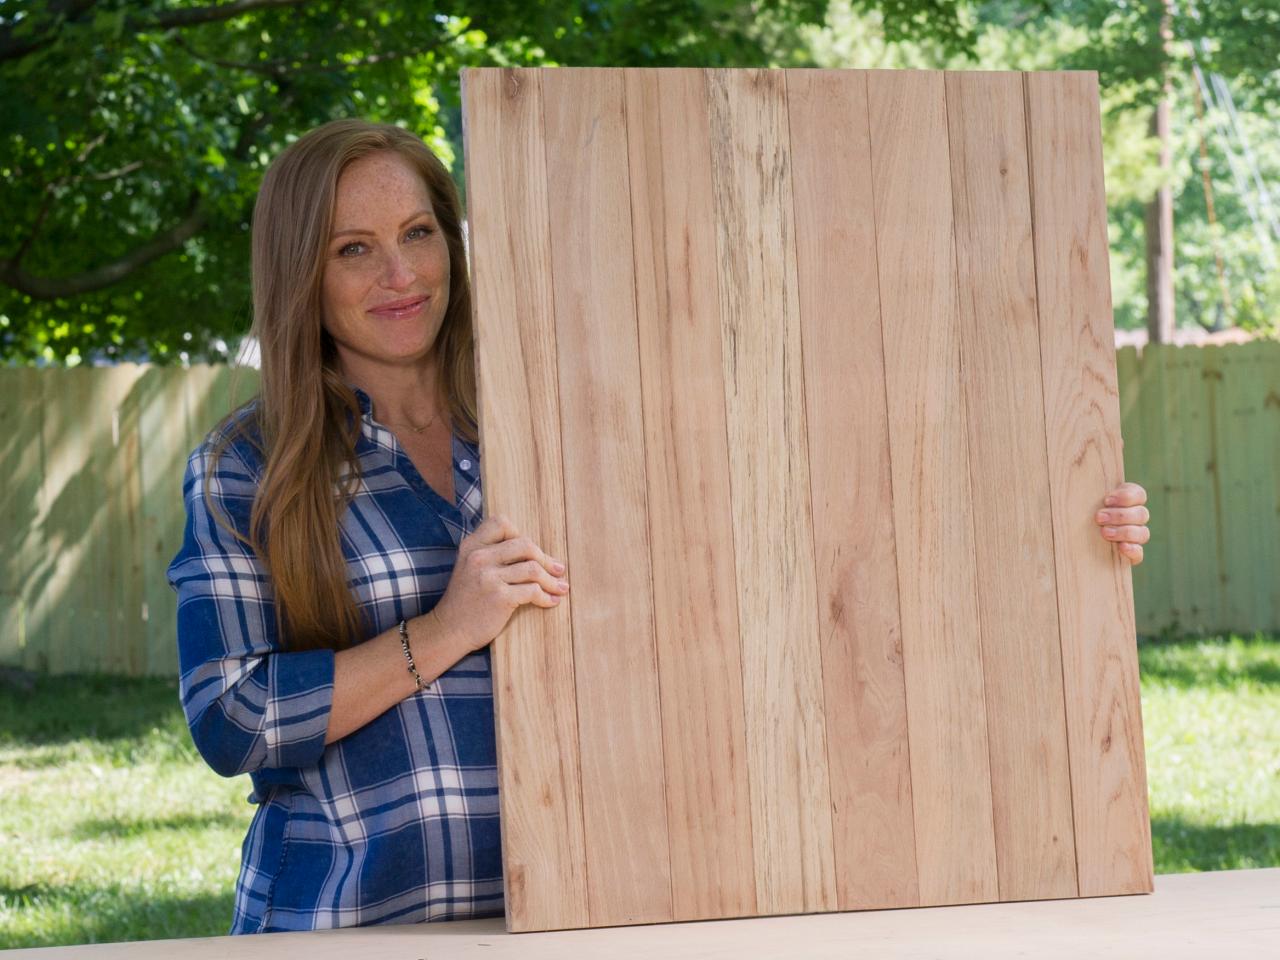
Start by building the organizer’s back as a base. We used leftover hardwood flooring, but you could use new wood as well. Cut eight pieces of flooring boards to 32” (or whatever size fits your space).
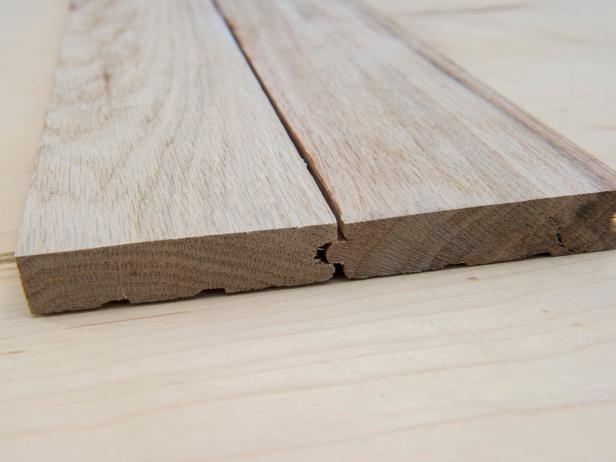
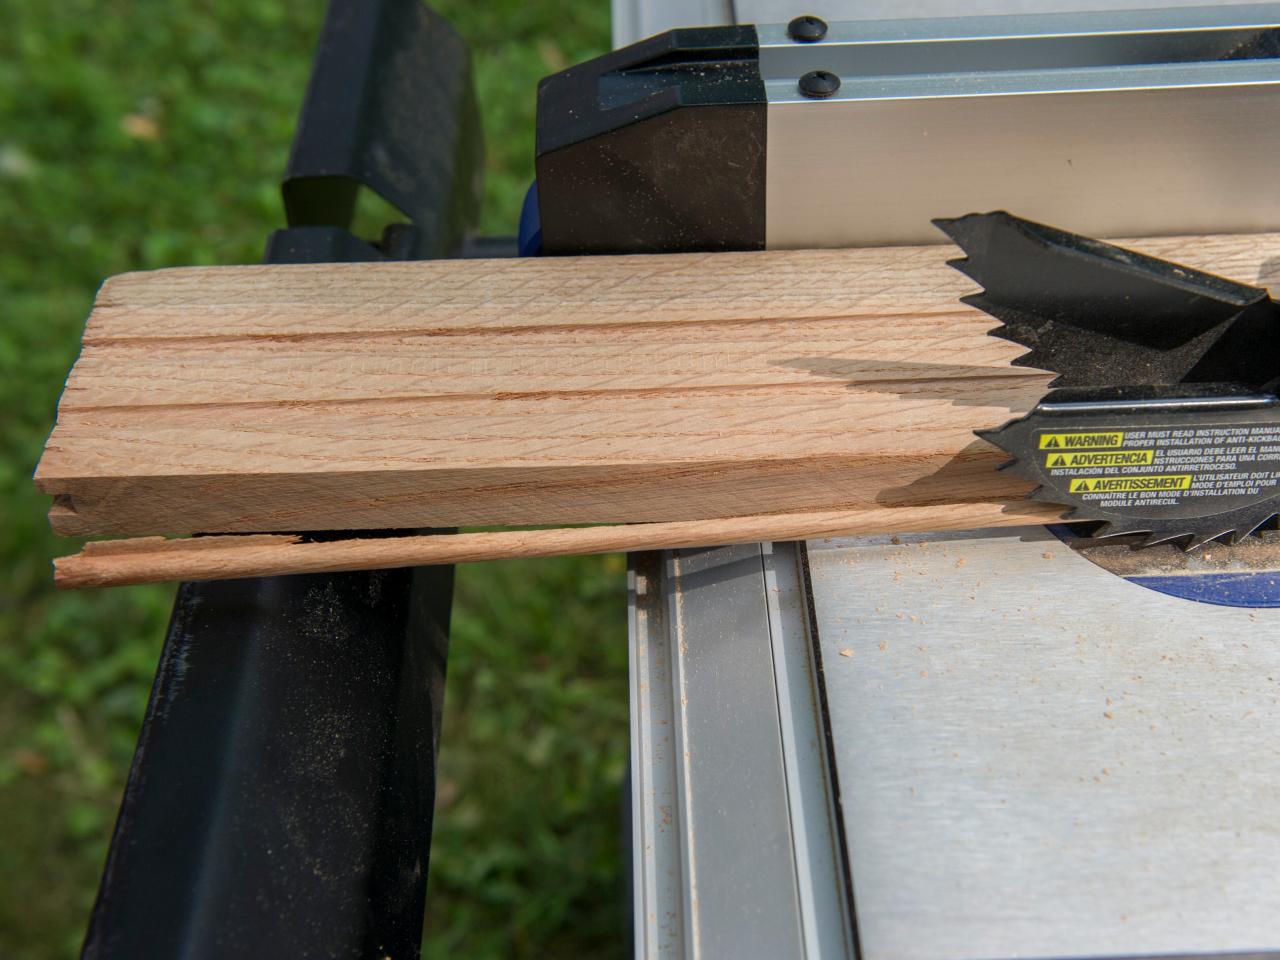
Step 2: Remove Tongue and Groove

MaryAnnCarter
If you are using leftover flooring, use a table saw to rip the tongue off one of the 32” boards and the groove off another board. These will serve as the outer pieces to the organizer while the rest of the pieces will connect using the tongue and groove.
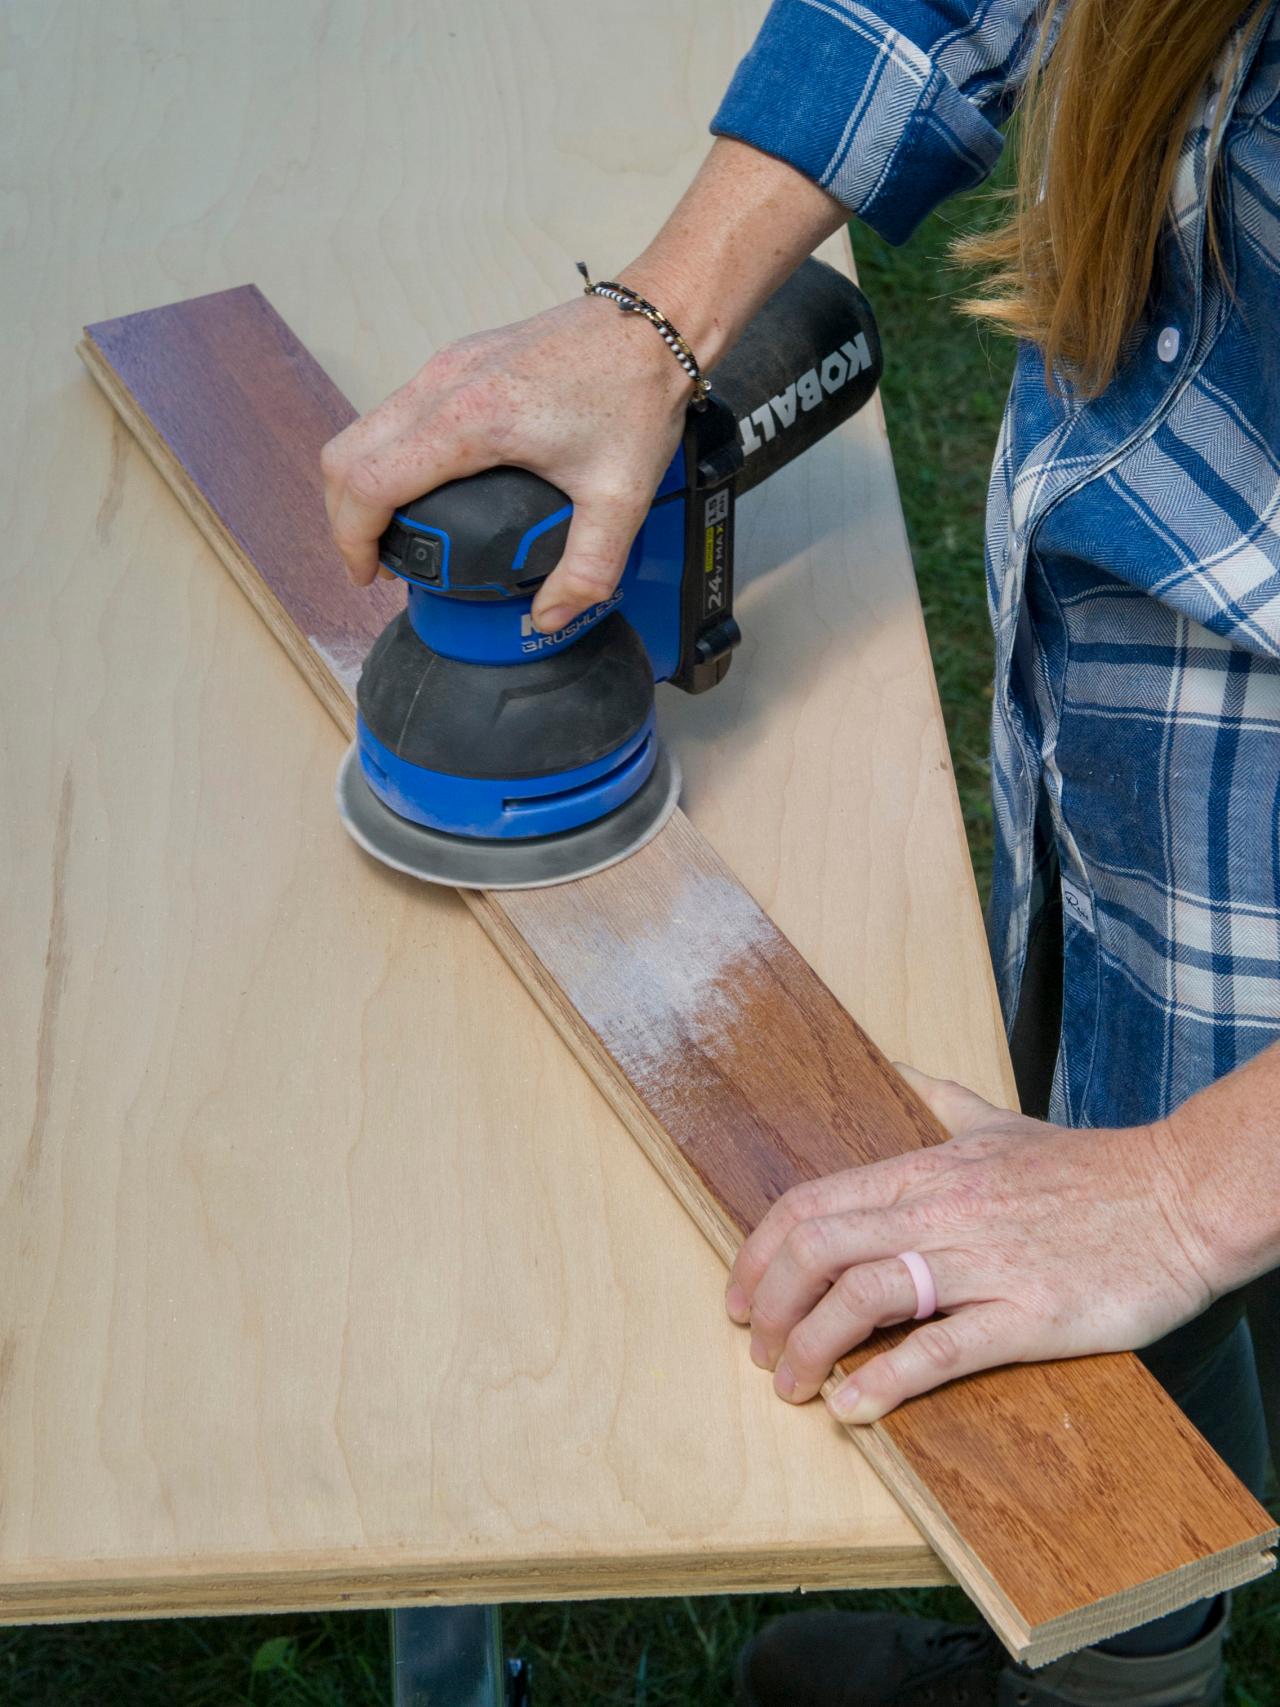
Step 3: Prep for Finish or Paint

MaryAnnCarter
If you’re not painting or staining boards, skip this step. If you are painting or staining the boards, sand off the existing finish using an orbital sander. If the flooring has a glossy finish, use a 40- or 60-grit sandpaper.
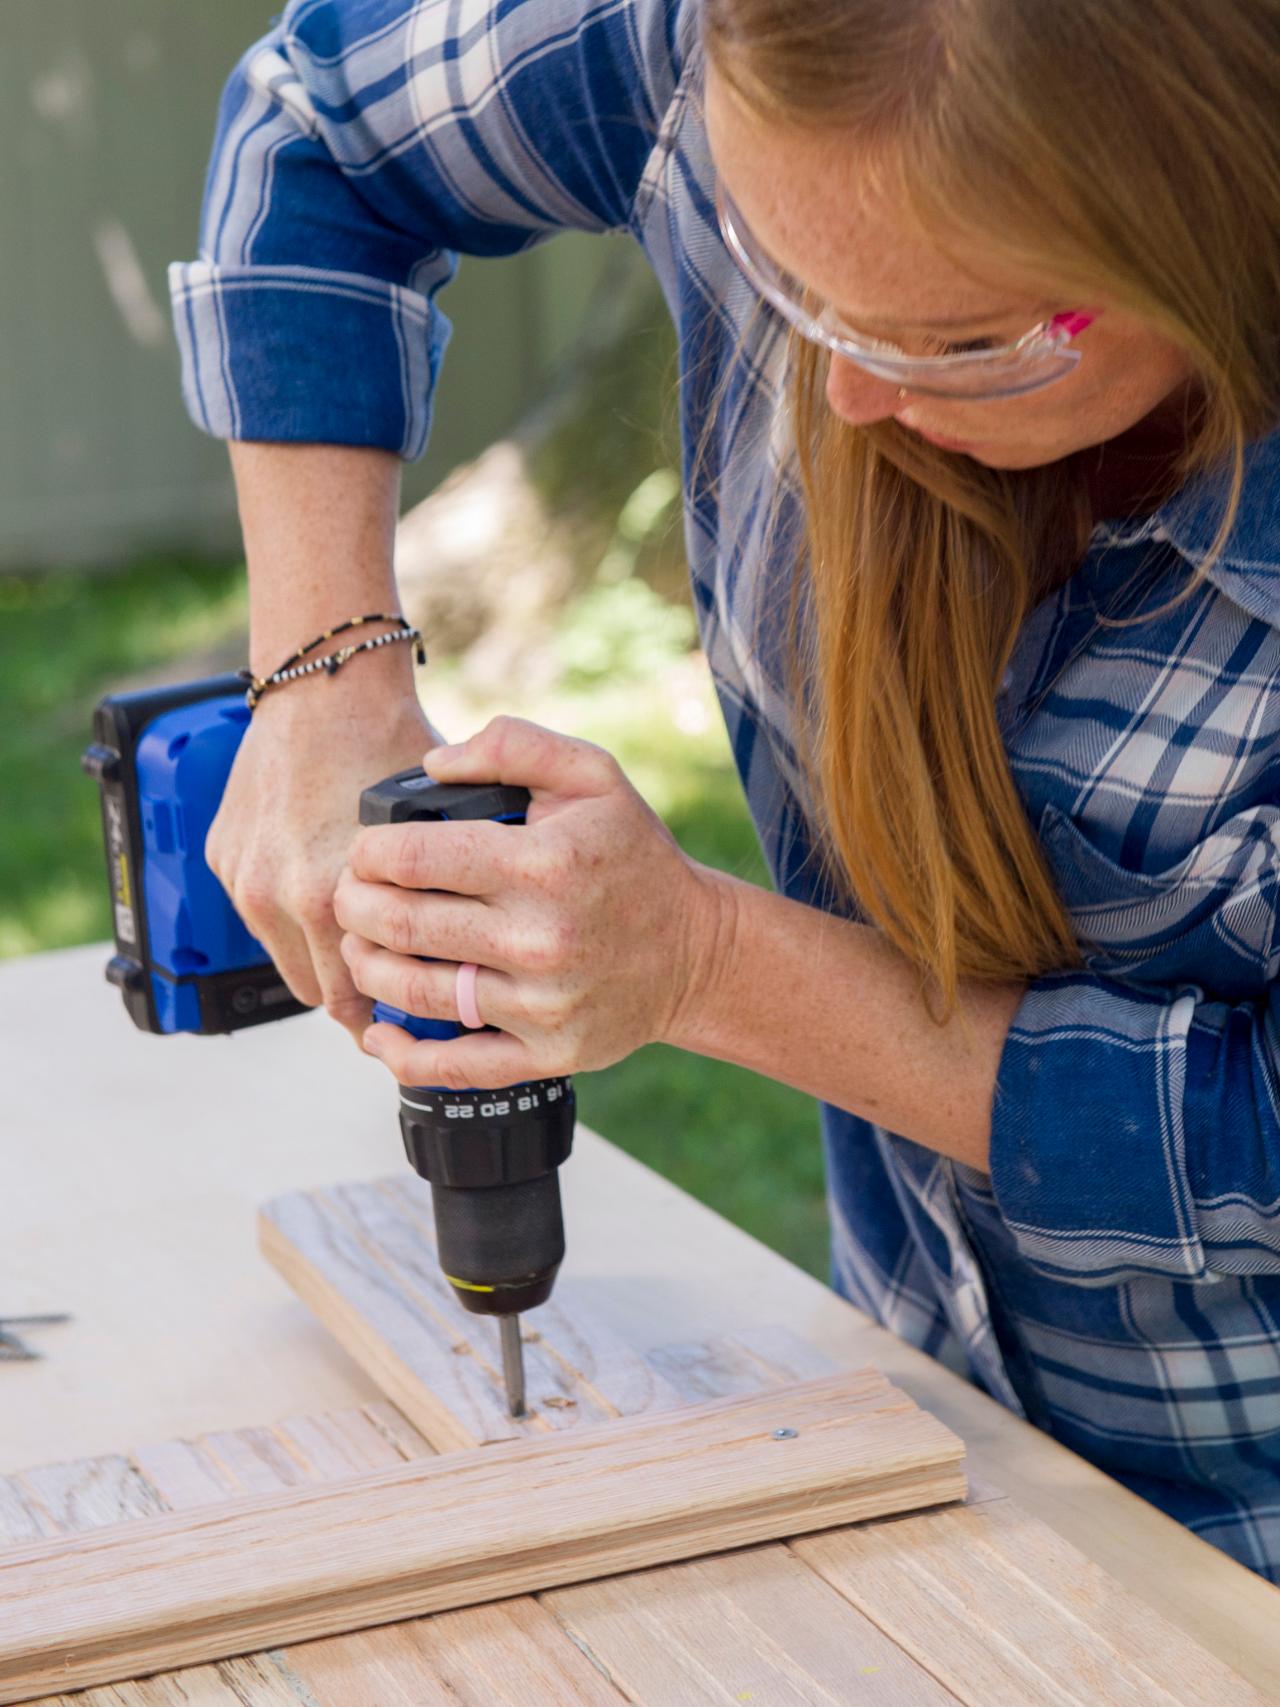
Step 4: Attach Backboard Pieces
MaryAnnCarter

MaryAnnCarter

MaryAnnCarter

MaryAnnCarter
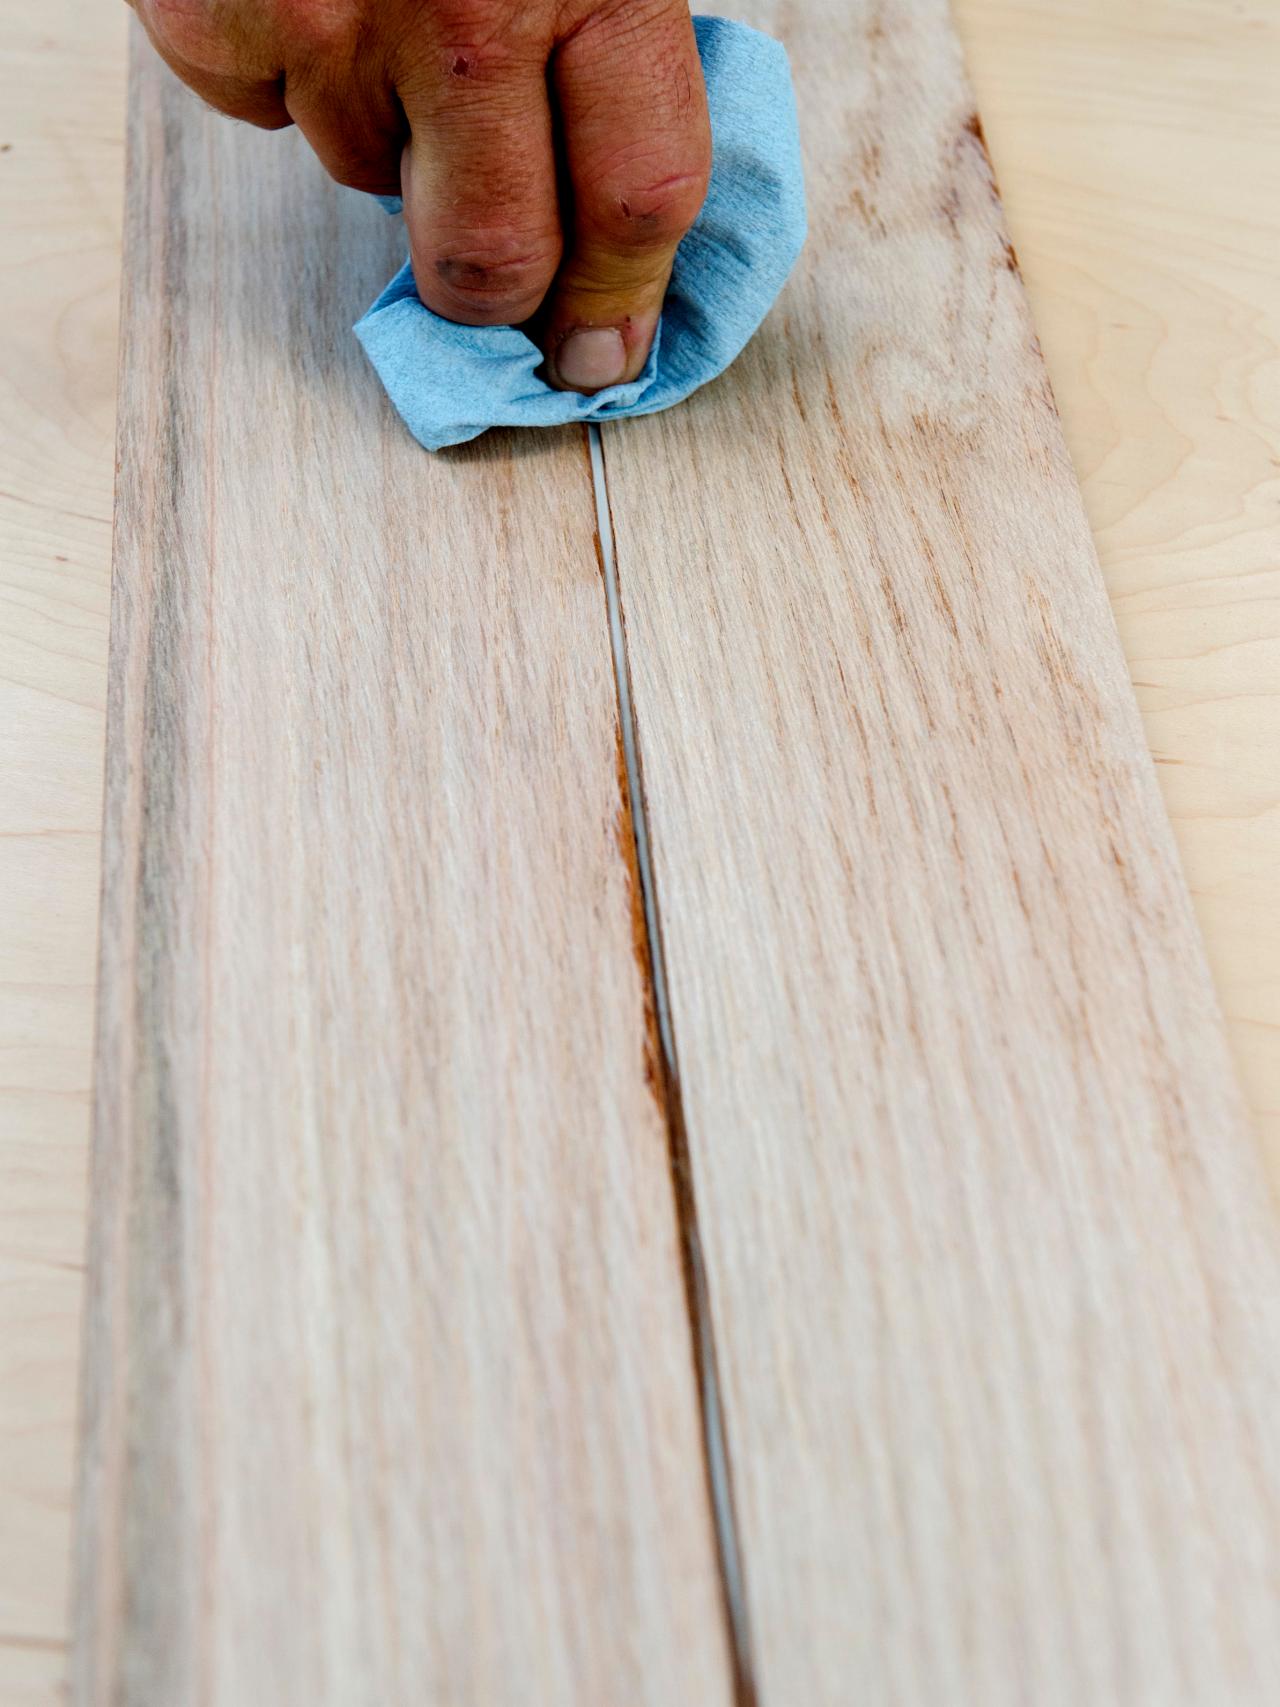
Attach all eight boards using construction adhesive. Apply the adhesive to the groove of each board and connect them together. If the adhesive seeps out between the boards, be sure to immediately wipe it away; paint or stain may not cover the adhesive.
Step 5: Add Bracing

MaryAnnCarter

MaryAnnCarter
When the glue has dried, flip the board over and create braces for hanging the organizer. Cut two pieces of flooring to 24”. Make a mark 4” from the bottom of the board and one 4" from the top of the board. Line boards on the inside of those marks (they should be about 14” apart) then attach each one using 1-1/4” wood screws.
Step 6: Attach Hanging Brackets

MaryAnnCarter
MaryAnnCarter
To make the hanging brackets, cut two more pieces of flooring to 12". To add a little style, cut the corners at a 1” angle on each side. Attach each bracket square to the top horizontal brace.
Step 7: Drill Rope Holes

MaryAnnCarter
Use a 5/8” Forstner bit to drill holes into the top of the 12” hanging brackets. The drill bit should be slightly bigger than the size of the rope, but you may want to first use a scrap piece of wood to test that the rope fits through the holes.
Step 8: Paint or Stain
We chose to paint our wall organizer with an interior paint-and-primer-all-in-one. A 2” flat paintbrush works best. Let dry.
Step 9: Build Shelves
Build two custom shelves to hold accessories. For the first shelf, cut two flooring boards to 12-1/2”. Use a table saw to rip one of those 12-1/2” pieces to 1” wide. Use 1-1/4” finish nails to attach the one full-size piece to one ripped piece, placing them perpendicular with the small piece as the vertical one. For the second shelf, cut two flooring boards to 16-1/2”. Use a table saw to rip one of those 16-1/2” pieces to 1” wide. Attach one full-size piece to one ripped piece, placing them perpendicular with the small piece as the vertical one; again use 1-1/4” finish nails. Paint each shelf the same color as the backboard.
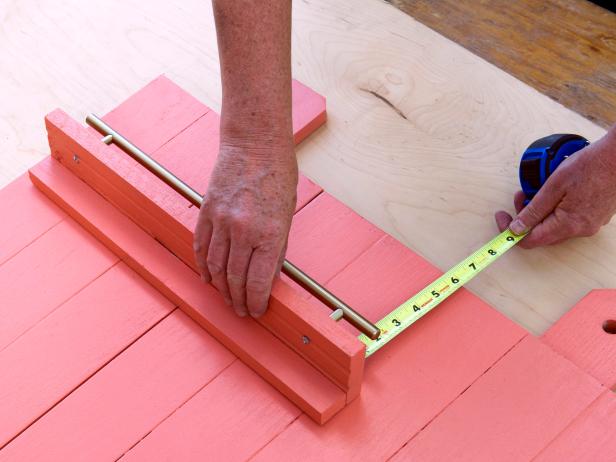
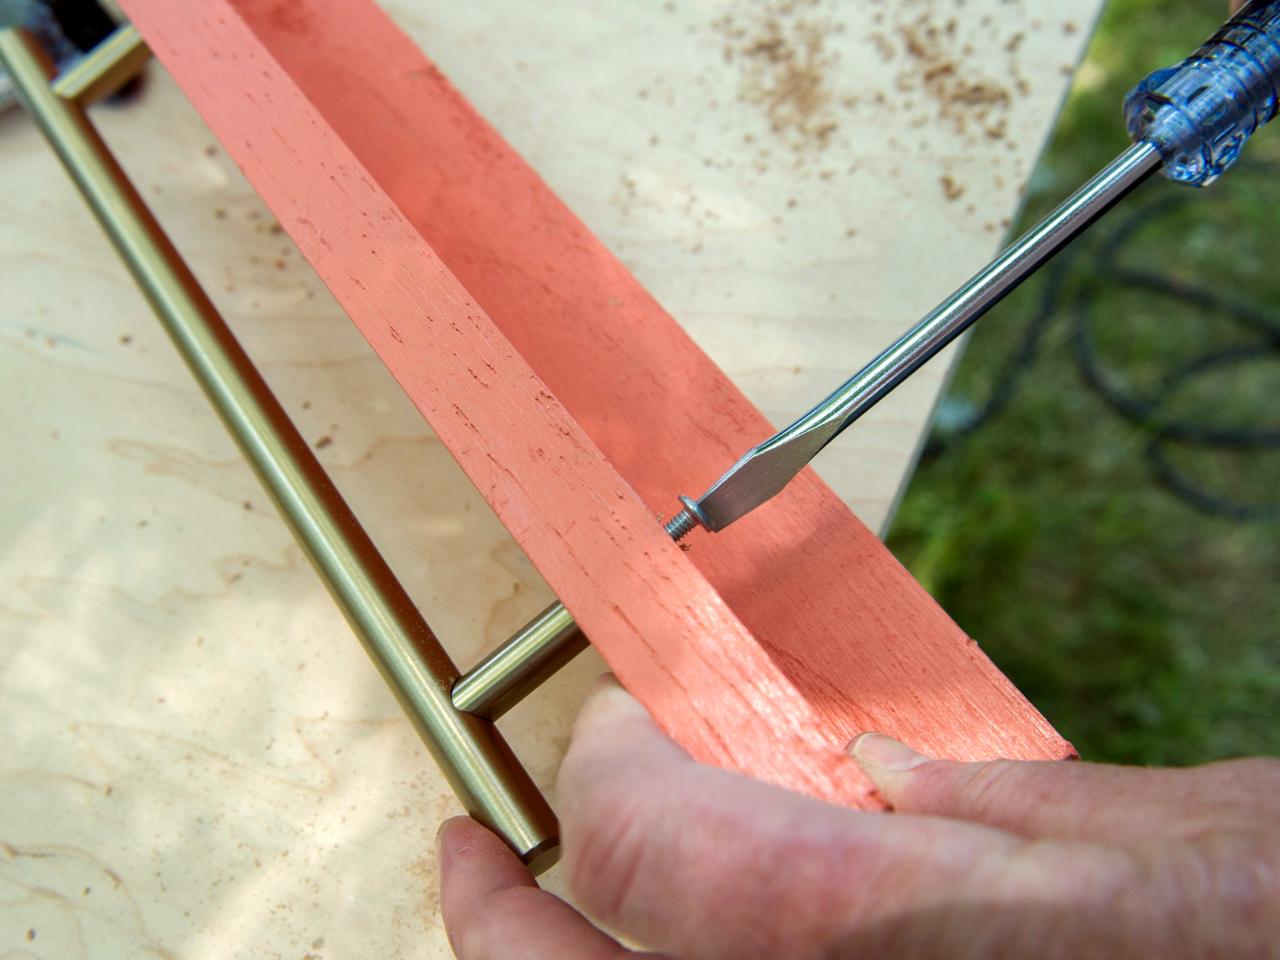
Step 10: Add Pulls to Shelves

MaryAnnCarter

MaryAnnCarter
Add cabinet handles to the shelves to hold accessories in place. Attach the 9-3/4” handle to the shelf that is 12-1/2” long. Attach a 12” handle to the 16-1/2” shelf. Predrill the holes for the screws and then use the hardware that came with the handles to secure it in place.
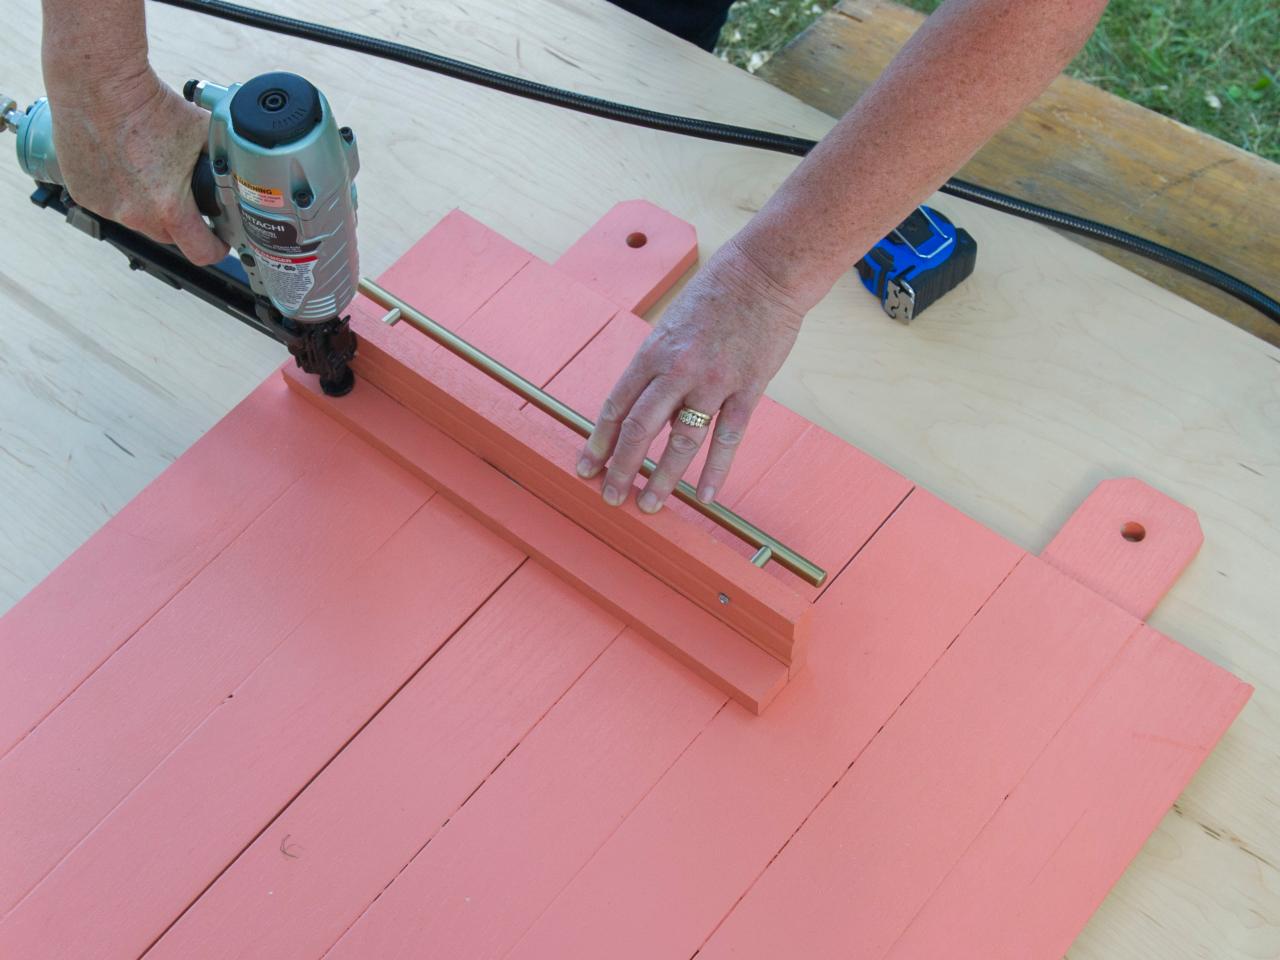
Step 11: Attach Shelves
MaryAnnCarter

MaryAnnCarter
Attach the shelves to the backboard. We placed the bigger shelf toward the top, 1” in from the left and the smaller shelf lower down, 1” in from the right. Use 1-1/4” finish nails to fasten your shelves.
Step 12: Add Another Handle
Attach a third cabinet handle to hold accessories such as sunglasses. Predrill and attach below the smaller shelf.
Step 13: Make a Chalkboard Section
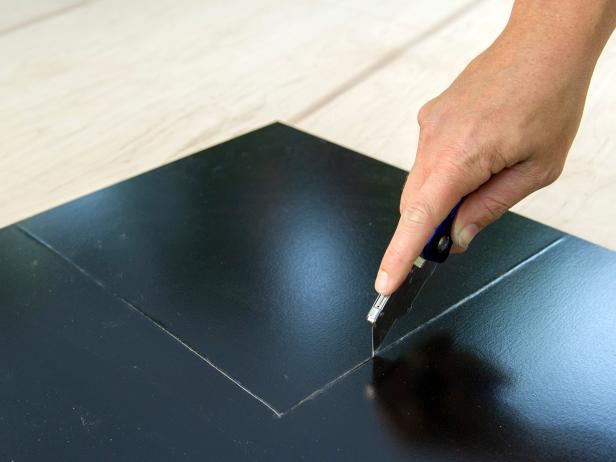
MaryAnnCarter
Use a utility knife to cut the chalkboard to 10-1/2”x 12”. Attach it below the top shelf using 3/4” screws.
Step 14: Add Hooks
We chose to spray-paint our hooks to match the handles, but you can design yours however you wish. Attach the hooks with the hardware provided by the manufacturer.
Step 15: Create a Tile Message Board

MaryAnnCarter
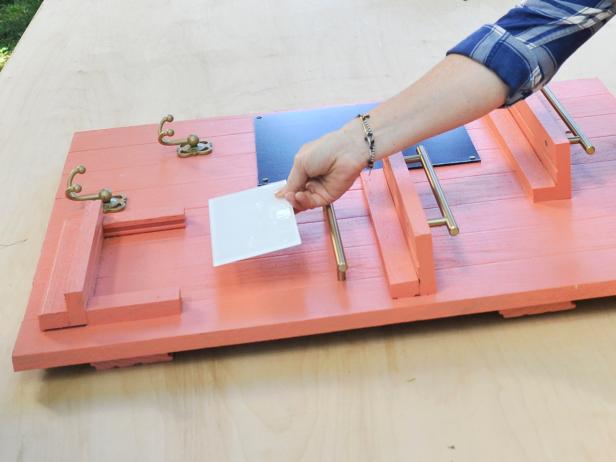
MaryAnnCarter
We used a subway tile to create a second message board for dry-erase markers. To make one, cut a flooring board to 14” and use a table saw to rip two boards down to 1-1/2” wide. Use a miter saw to cut both pieces into two 4” pieces and two 10” pieces. Paint these pieces to match the rest of the organizer. Attach the two 10” boards perpendicular to one another like you did with the shelves, using 1-1/4" finish nails. For the horizontal piece, face the bottom of the board up so the groove can serve as a spot to store a marker. Use 1-1/4” finish nails to attach the 10” pieces to the backboard. Then attach the two 4” pieces to the top of the horizontal piece, placing them so the groove is on the inside of the shelf so the tile can slide in behind it.
Step 16: Add Rope
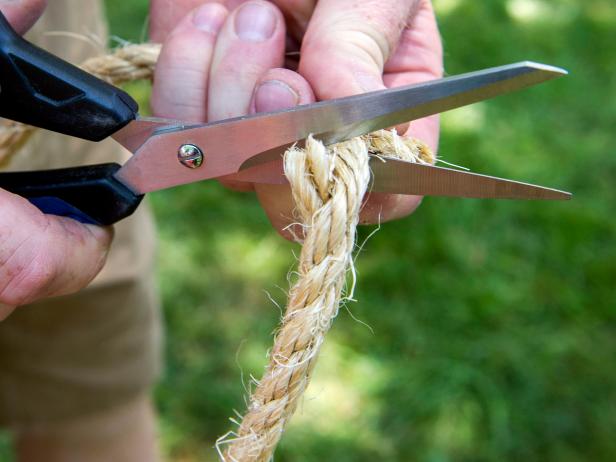
MaryAnnCarter

MaryAnnCarter
MaryAnnCarter
Cut 1/2” sisal rope to your desired length and thread it through the holes on the vertical braces. To make it easier, wrap the ends of the rope with tape so they’ll slide through the holes.
Step 17: Hang It Up

MaryAnnCarter
Hang your wall organizer from a hook. Be sure to insert it into a stud or use an anchor to make sure it’s secure.


