


How to Build a Bike Shed
Learn how to build an outdoor gazebo to store bikes, outdoor equipment or just make it a place to relax in the shade.

SHAIN RIEVLEY
This 10’ x 12’ outdoor room can be built to cover a patio, carport or just use as storage for bicycles and recreational equipment. We built our structure with painted, pressure-treated wood and heavy-duty corrugated PVC roof panels to make sure it will last for years to come.

Tools and Materials
- work gloves and safety glasses
- shovel
- post-hole digger
- (2) 50lb. bag of gravel
- (8) 50lb. bag quick setting concrete
- (6) 4x4 x 10’ pressure-treated posts
- (1) 2x4 scrap piece of wood or stakes for bracing posts and stirring concrete
- measuring tape
- (5) 2x6 x 10’ pressure-treated wood
- (6) 2x6 x 12’ pressure-treated wood
- (8) 1x2 x 8’ presure-treated wood
- 48" level, a line level and a post level
- nylon mason line string
- (1) gallon exterior paint (we used Behr color “Iron Gate”- MQ2-60 )
- (1) mini paint roller and tray
- circular saw
- (1) box 4” exterior wood screws
- (1) box 2" decking screws
- drill
- (6) joist hangers
- (1) box of #10 – 1-1/2" connector screw
- (1) box 1-3/4" decking screws
- (6) 12’ PVC roofing panel (Castle Grey is the color we used)
- (1) box 1” fasteners
- (1) plastic closure strips
- (1) hex socket set
- landscape fabric and pins
- small 3/16” rock or gravel
Plan Layout
Determine how big your gazebo is going to be and lay out where to dig the post holes. We used six posts in two evenly spaced rows. The two rows are 10 feet apart and the posts in each row are spaced five feet apart. Our total overall footprint is 10’ x 12’.
Dig Holes
Use a post-hole digger to make the six holes two-feet deep. Check with your municipality’s code authority if you think your frost line may be deeper than two feet. If you don’t have a post-hole digger, a shovel works too. To make the task even easier, rent a large power drill with an auger bit from an equipment rental company.

SHAIN RIEVLEY
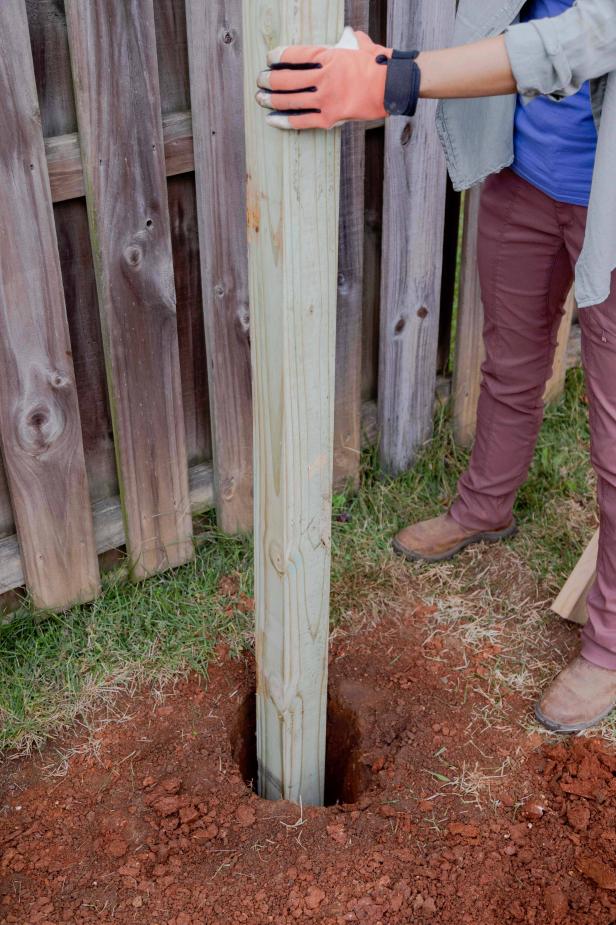
Set Posts
Fill the holes with 2” of gravel before putting the pressure-treated posts in place. Pro Tip: Insert screws pointing up at an angle at bottom of each post. This will help the post really grab the concrete as it sets. Attach a post-level to the wood to ensure that it’s standing straight. When it is level, brace it with scrap 2x4s to hold it in place while the concrete dries. Pour a bag of concrete into the hole and add water; use the manufacturer’s recommended ratio. After the concrete is completely cured (about 24 hours), back-fill the last few inches with dirt.

SHAIN RIEVLEY
SHAIN RIEVLEY

SHAIN RIEVLEY

SHAIN RIEVLEY

SHAIN RIEVLEY
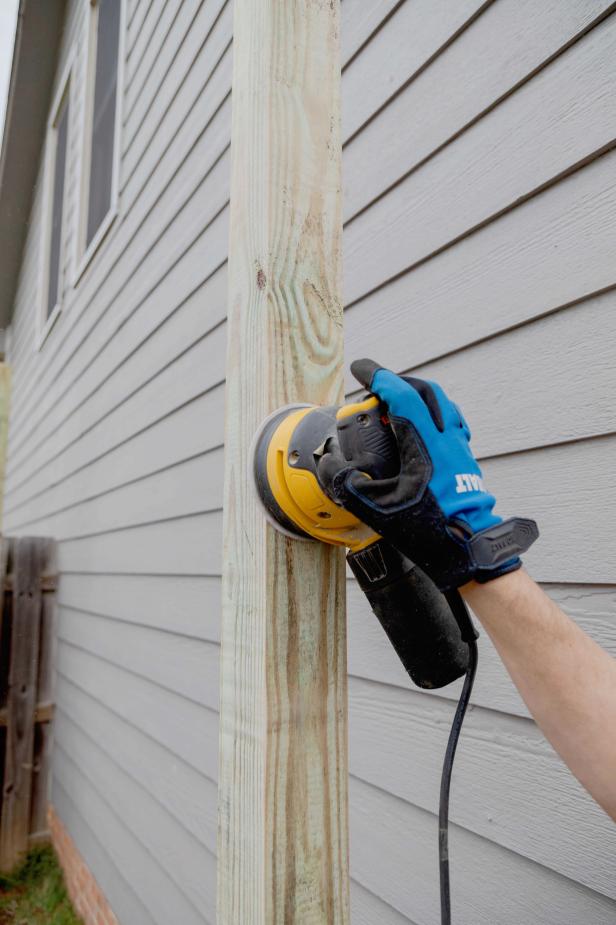
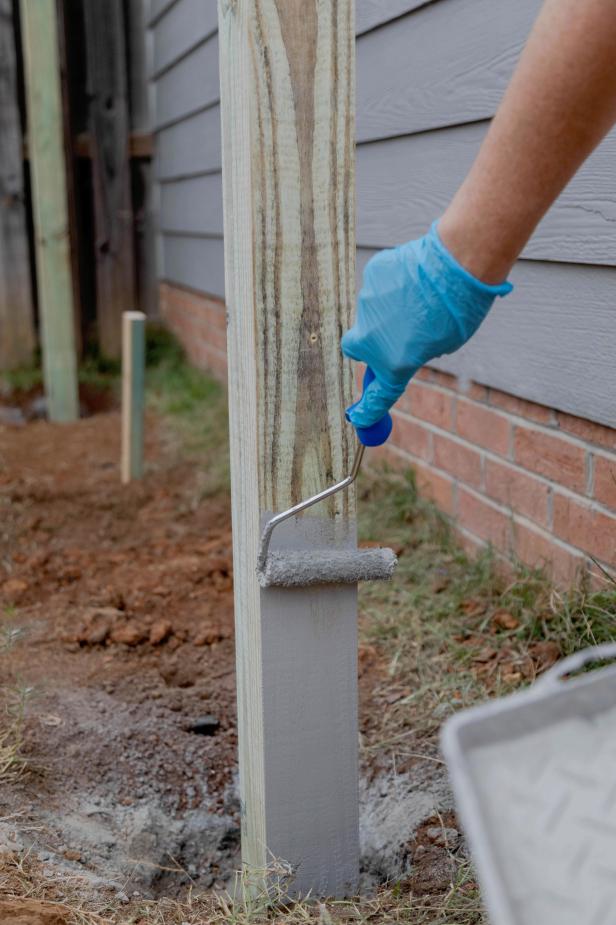
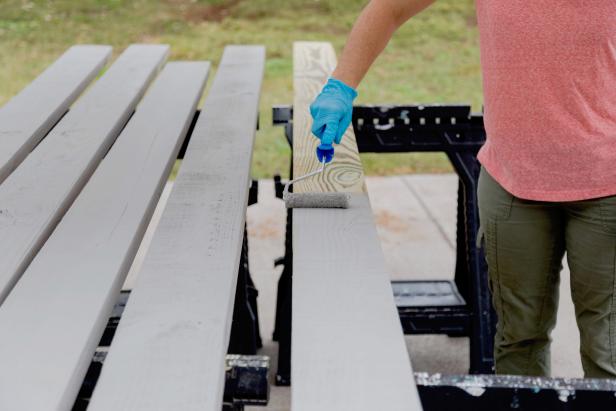
Paint
Use an orbital sander to smooth any rough spots off the posts. Paint all posts and the rest of the wood with exterior paint. We chose to paint our posts when they were standing, but you can also paint them before they’re installed.
SHAIN RIEVLEY
SHAIN RIEVLEY
SHAIN RIEVLEY
Angle Tops of the Posts
We made the roof of our gazebo sloped so rain and snow will easily run off. The slope of the roof is shallow, it has a 2/12 pitch, meaning for every 12 inches the roof drops 2 inches. Check your local codes to see if there are specific requirements for angles. If you live in an area with heavy snowfall, you may have to pitch your roof at more of an angle. Use a circular saw to cut the posts down to create a slope away from the house. Use nylon string and a line level to ensure the three sets of two posts are even.

SHAIN RIEVLEY

SHAIN RIEVLEY
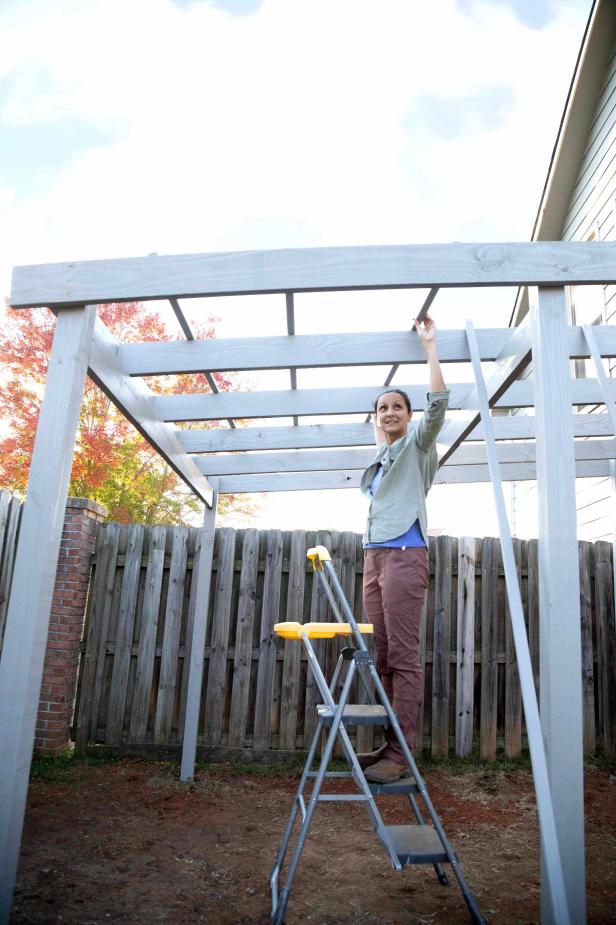
Add Horizontal Frame
Frame the exterior of the posts with 2x6 x 12’ boards along the front and back, and use 2x6 x 10’ boards along the sides. Fasten the wood with decking screws. Use a level as you go to make sure all the pieces are even.

SHAIN RIEVLEY

SHAIN RIEVLEY

SHAIN RIEVLEY

SHAIN RIEVLEY
Install Joist Supports
Install joist hanger brackets just below the outer horizontal frame pieces on all the posts. When you insert the 2x6s into these brackets, they need to be level with the bottom of the outer frame pieces you installed in the last step. Insert the 2x6 boards into the brackets and secure them with connector screws.

SHAIN RIEVLEY

SHAIN RIEVLEY

SHAIN RIEVLEY
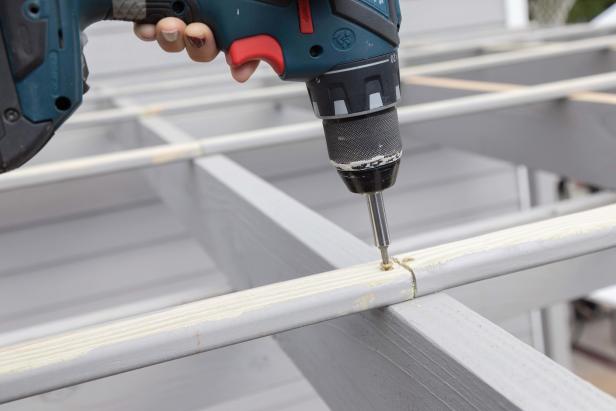
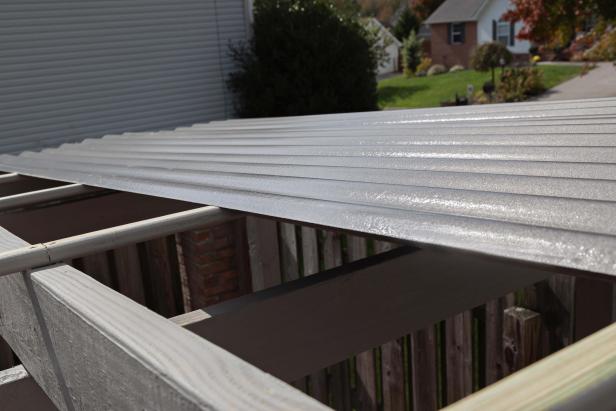
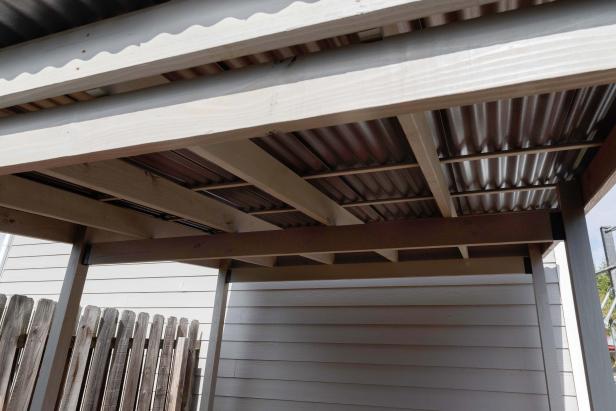
Install Joists
On top of the supports, secure a 2x6 board every two feet for the length of the structure. Use 2-1/2” decking screws to secure them through the outer frame pieces.

SHAIN RIEVLEY

SHAIN RIEVLEY
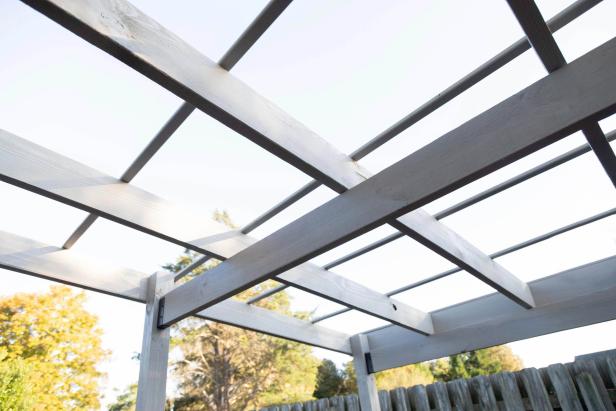
Add Rafters
On top of the joists, use 1-1/2” decking screws to secure 1x2 rafters spaced two feet apart.
SHAIN RIEVLEY
SHAIN RIEVLEY
SHAIN RIEVLEY
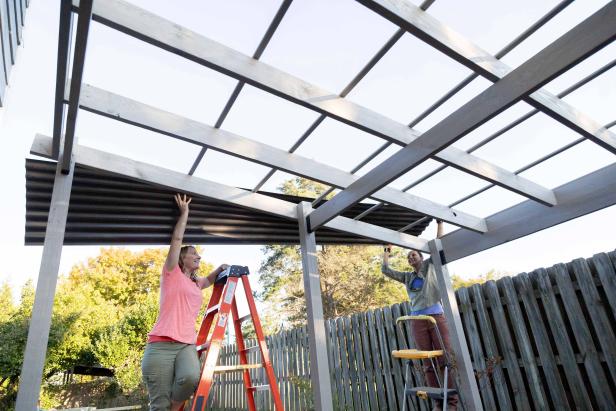
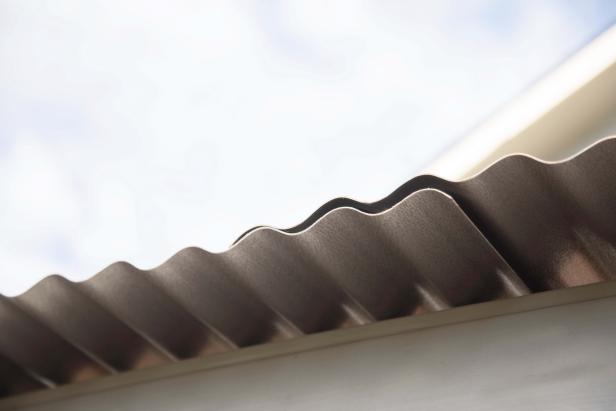
Attach Roof Panels
Lay the PVC roof panels on top of the rafters. Overlap the panels as you go and screw them in place with the manufacturer’s recommended sealing washer fasteners. You can add plastic closures for a more a finished look.
SHAIN RIEVLEY
SHAIN RIEVLEY
SHAIN RIEVLEY
SHAIN RIEVLEY

SHAIN RIEVLEY
Create a Natural Floor
Lay landscape fabric out over the entire ground. Landscape pins will hold it all in place. Cover with a 2” layer of fine gravel. Add a border of large rocks where needed.

SHAIN RIEVLEY


