


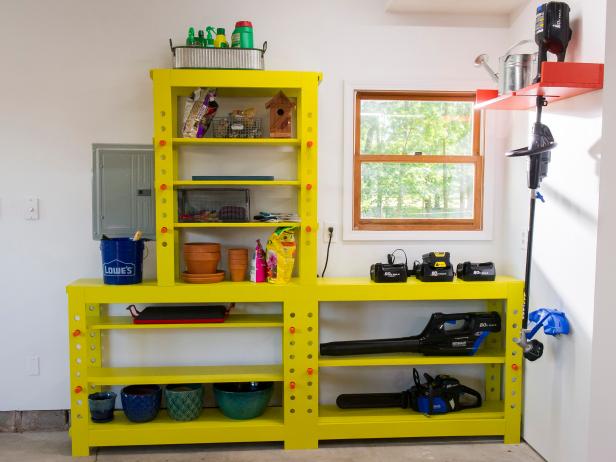
Easy Woodworking Project: Build Storage Shelves for the Garage
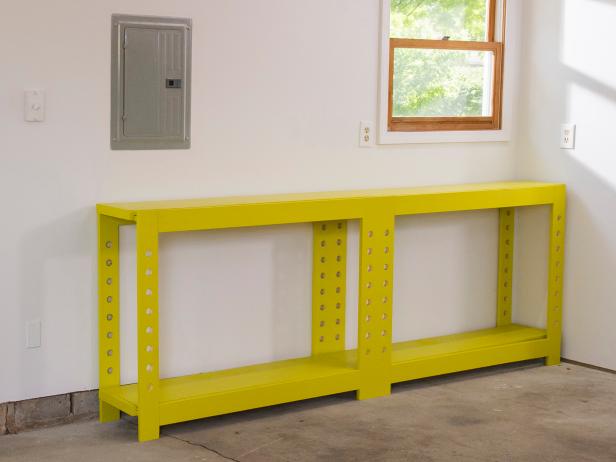
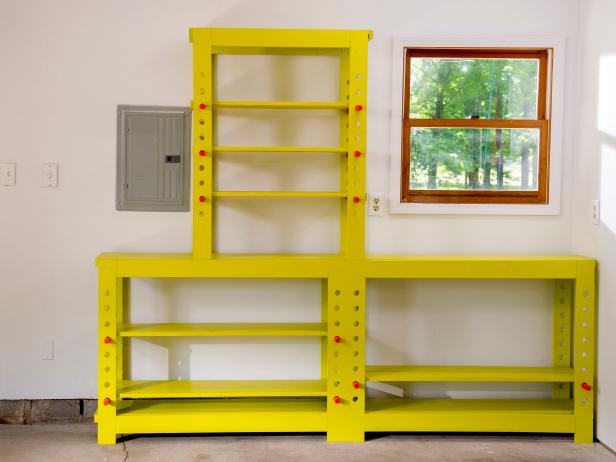
Keep tools and equipment organized with these easy-to-build shelves. The design is simple yet sturdy and the pegboard supports mean the shelves can easily be adjusted.
MaryAnnCarter
Tools and Materials
- (3) 1x2 x 8’ pine
- (1) 1x8 x 8’ pine
- (6) 1x12 x 10’ pine
- (8) 1x4 x 10' pine
- (1) 1x4 x 10' pine (for the hanging shelf)
- (1) 1x12 x 8' pine (for the hanging shelf)
- (6) 1”x 36” dowels
- pocket-hole jig
- 1-1/4" pocket-hole screws
- drill
- 1-1/8” Forstner bit
- 3/8” Forstner bit (for the hanging shelf)
- 1-1/4” screws
- 3” screws (for the hanging shelf)
- 1-3/4” screws (for the hanging shelf)
- sanding block
- measuring tape
- pencil
- square
- interior paint-and-primer-all-in-one
- paintbrush
- paint roller
- miter saw
- jigsaw (for the hanging shelf)
- safety glasses
- hammer
Skill Level: Intermediate
Estimated Time: 1 day
Estimated Cost: $250
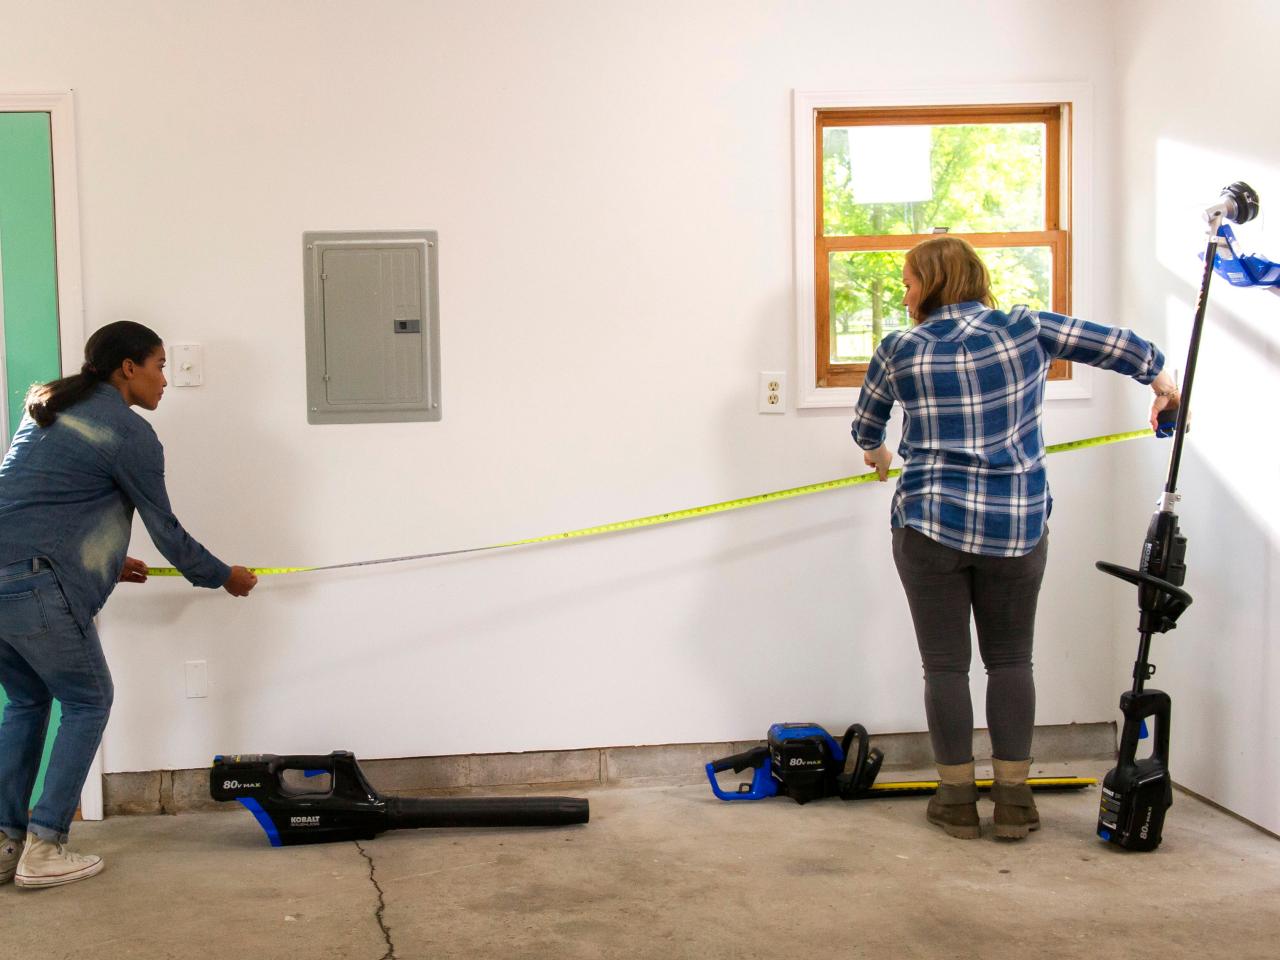
Step 1: Determine Size and Space

MaryAnnCarter
Measure the area where you’ll be placing the shelves. Take into account electrical outlets, breaker boxes and other permanent fixtures that may need to be accessed around the shelves.
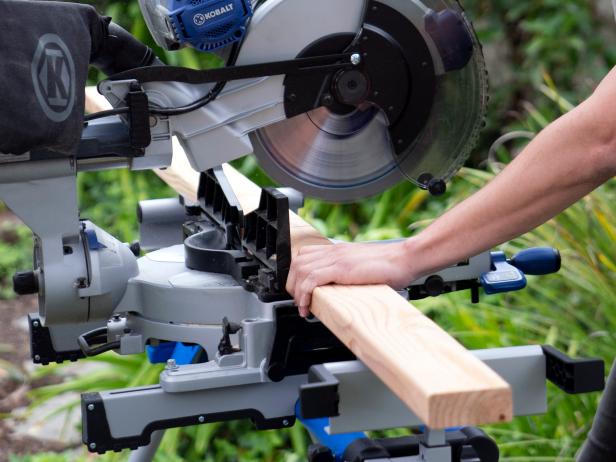
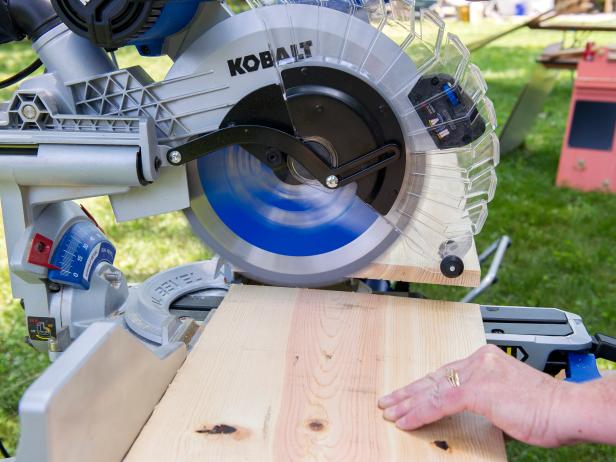
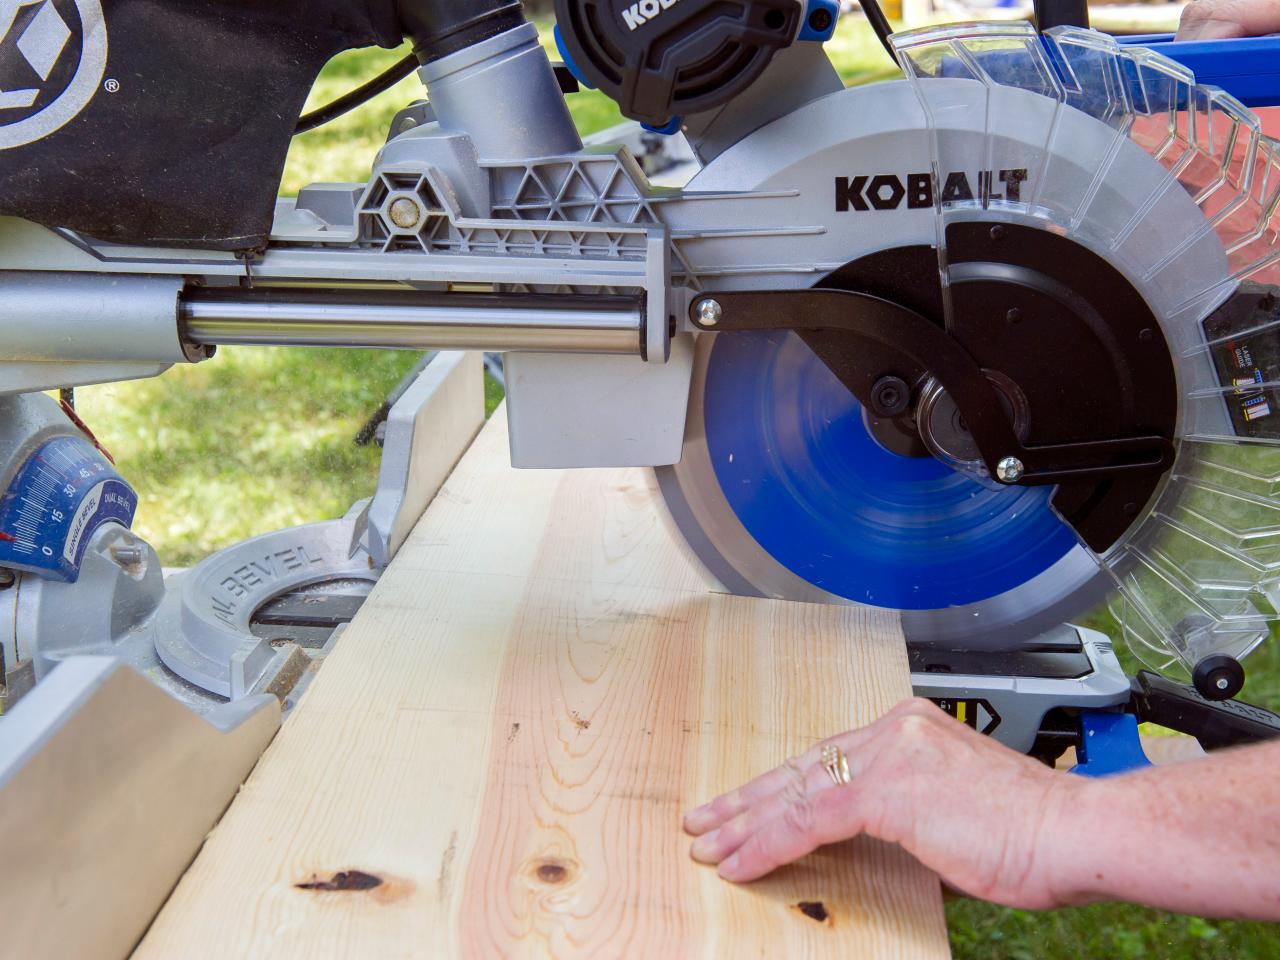
Step 2: Cut Vertical Pieces
This shelving unit will contain a base section and an upper section. For the base legs, cut four 1x4s and two 1x8s to 36”. For the upper section, cut four 1x4s to 45”.
Step 3: Cut Horizontal Pieces
Gary Payne
When all the legs have been cut, create the horizontal braces for both the upper and lower sections. These horizontal braces are made with 1x4s. Cut two 1x4s to 27” for the top section. Cut eight 1x4s to 41-1/2” for the base section. Cut the center support brackets for the top and bottom shelves to sit on; cut six 1x4s to 12” and two 1x8s to 12”.
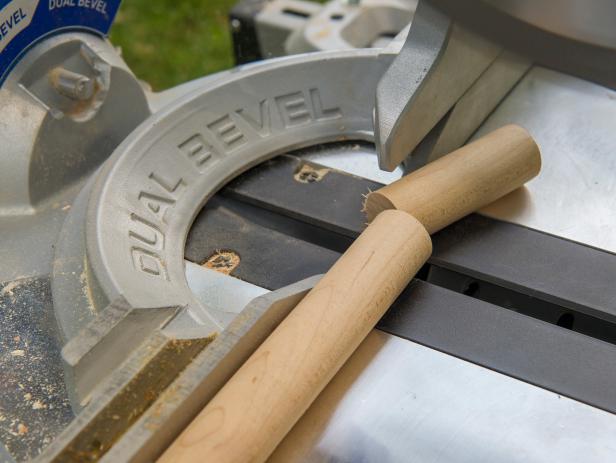
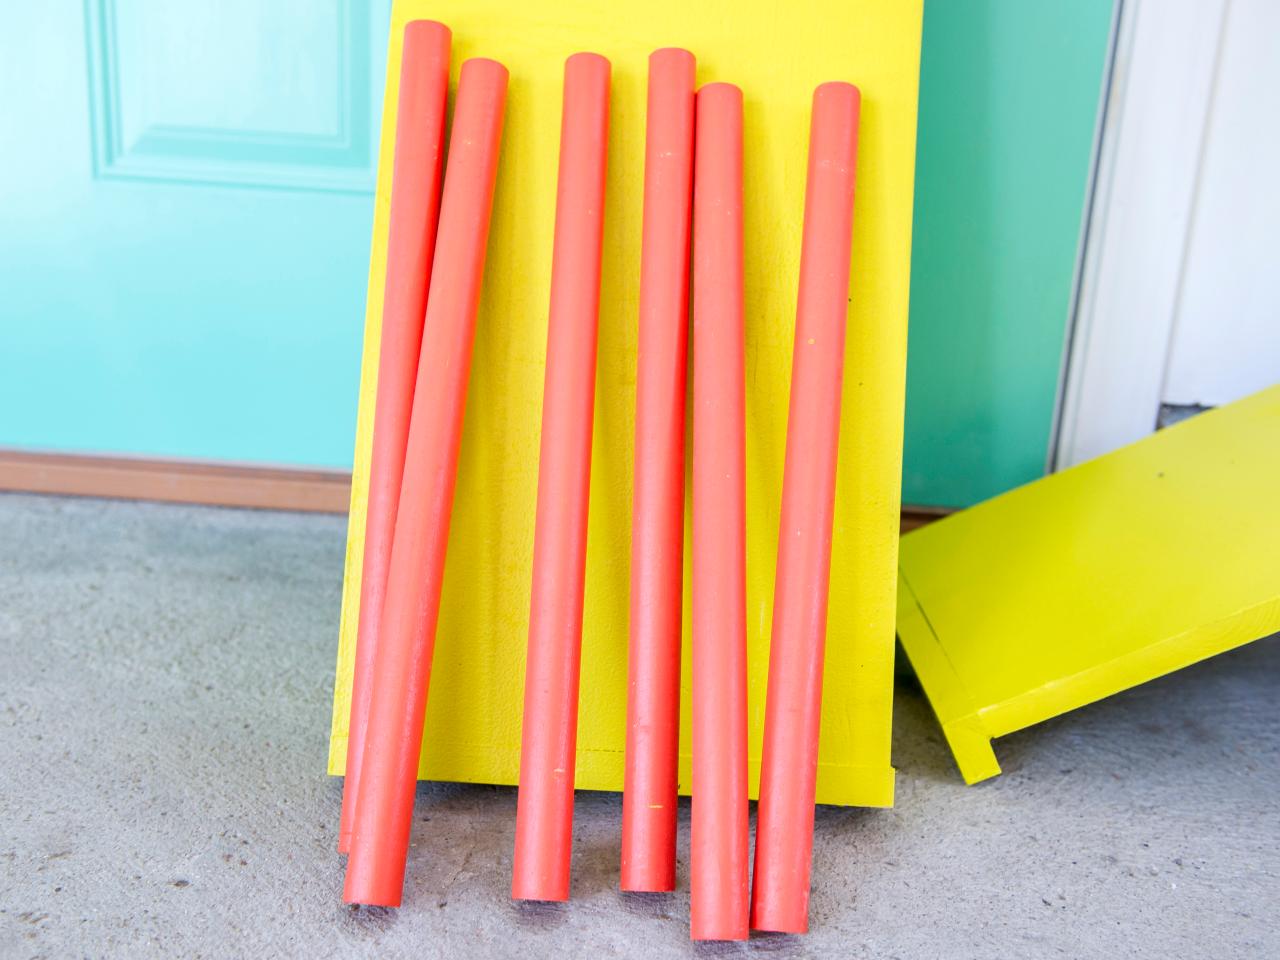
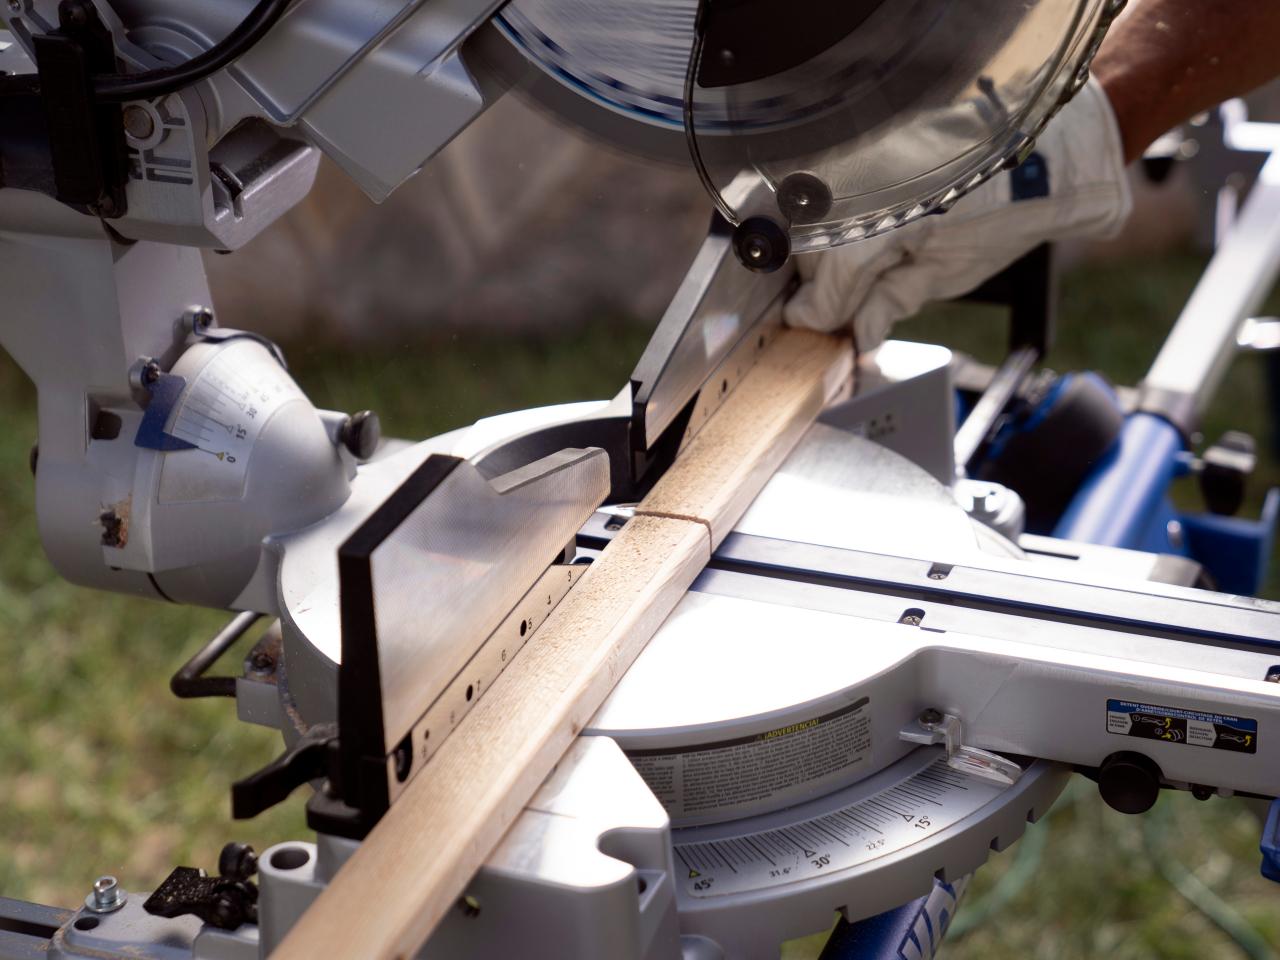
Step 4: Cut Dowels
MaryAnnCarter
Cut the pegs that will hold up the shelves; cut 12 pieces at 16-1/2”.
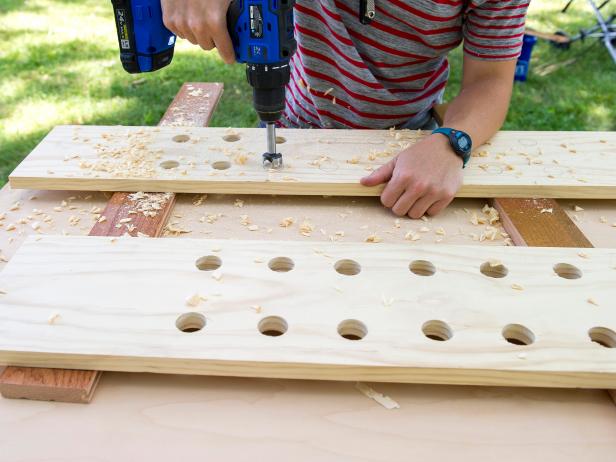
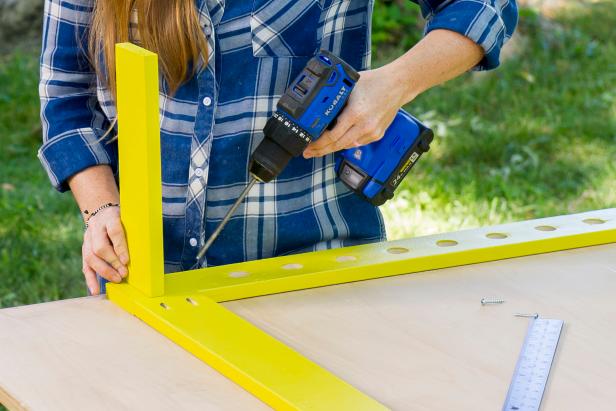
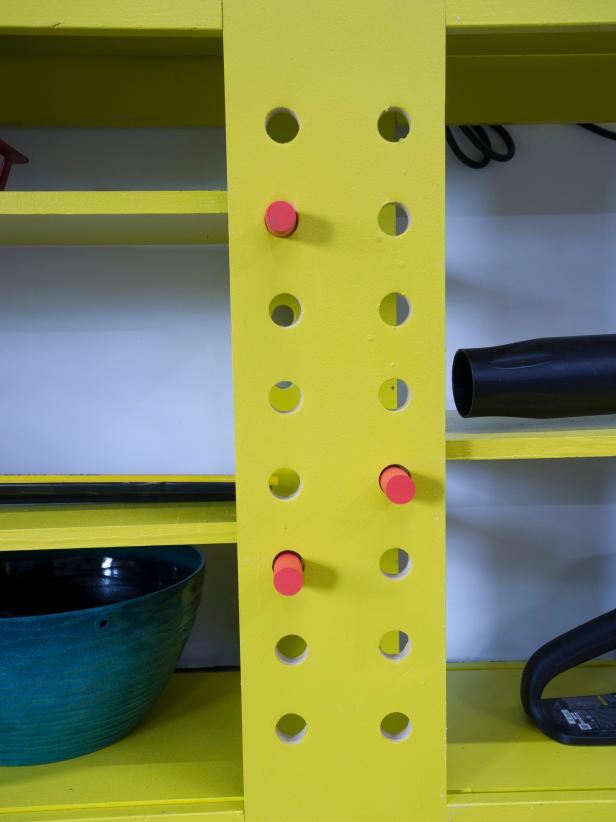
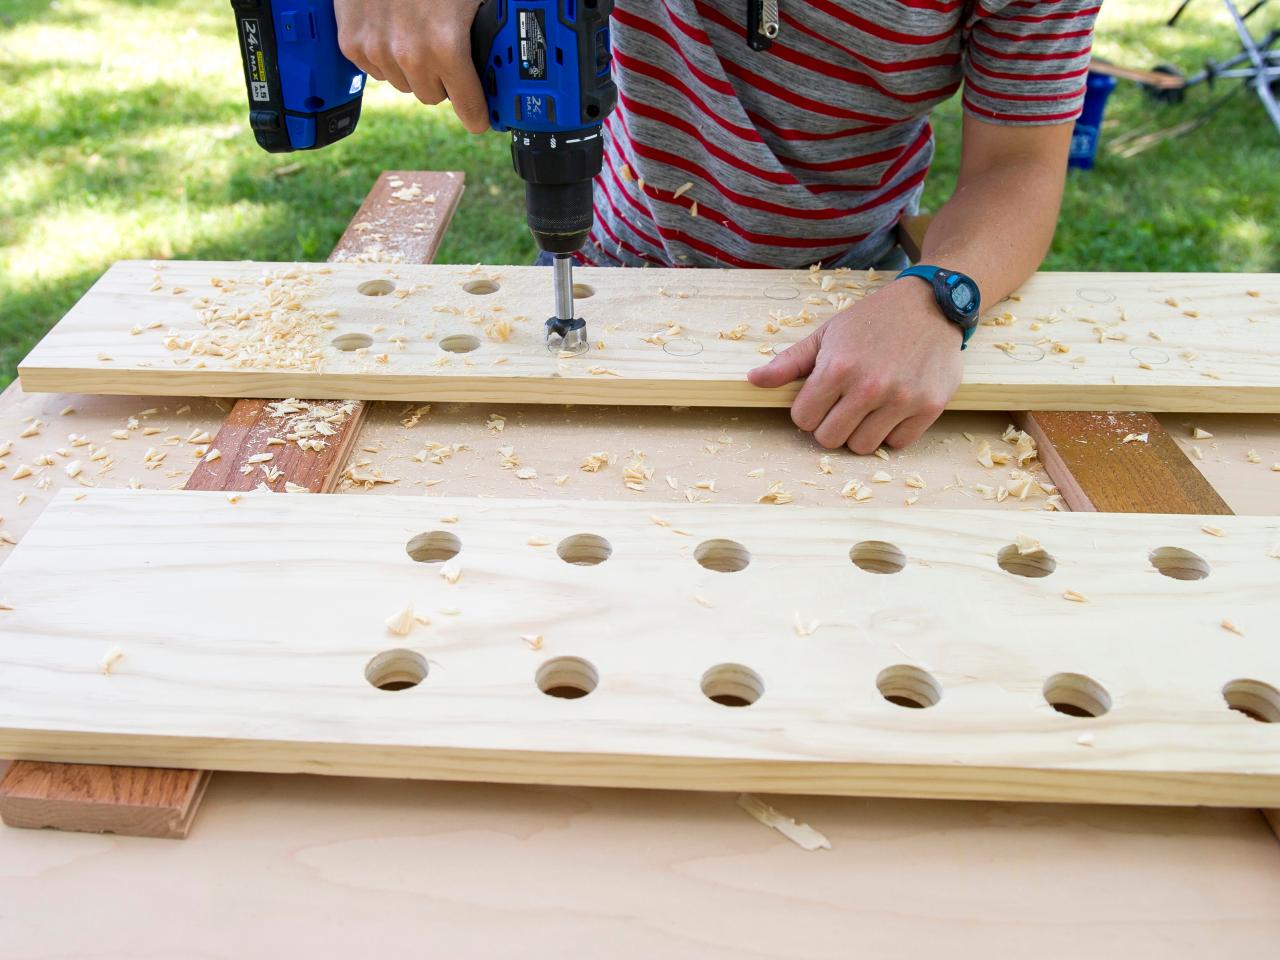
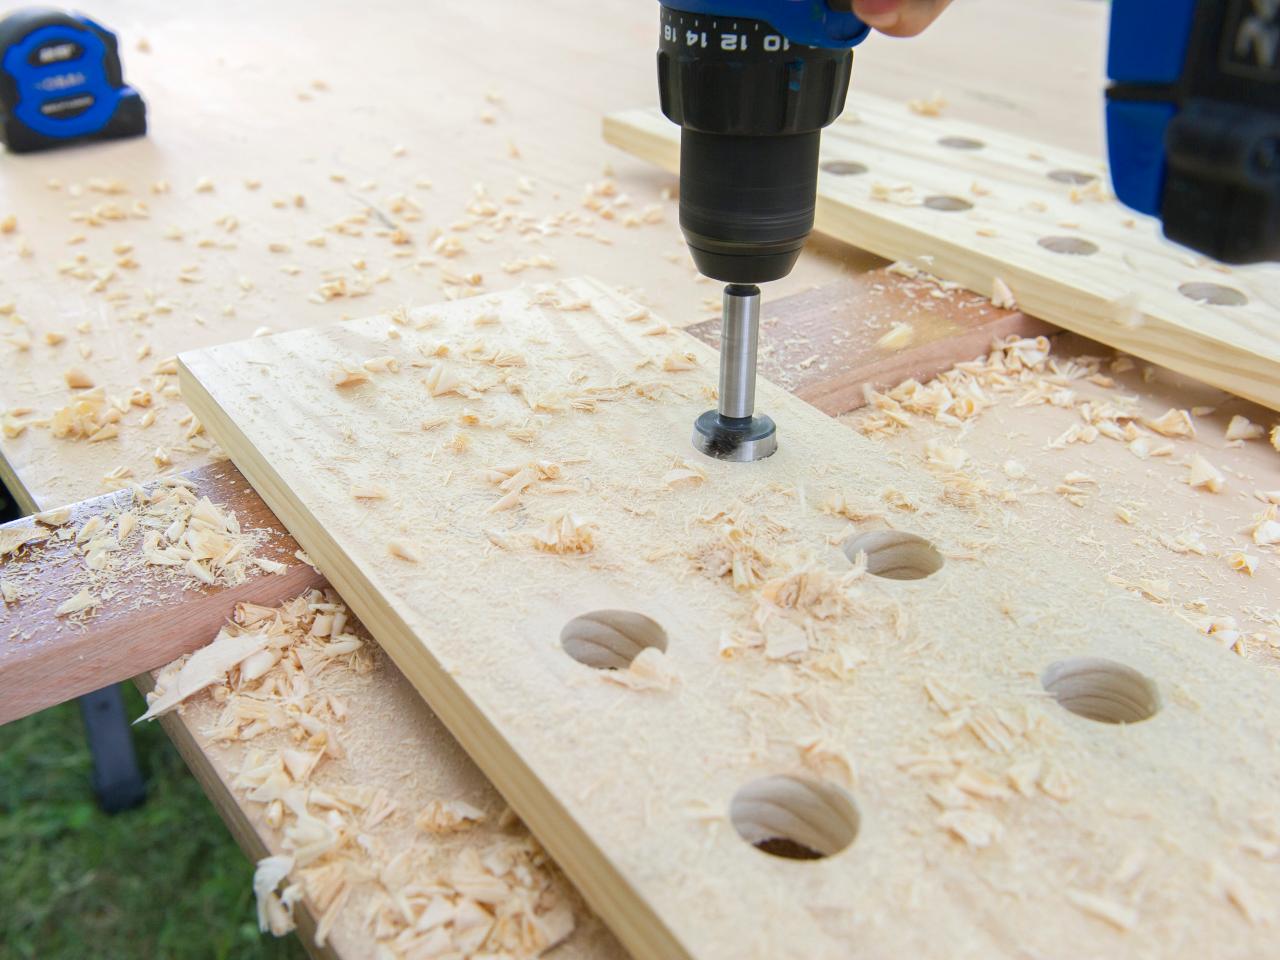
Step 5: Drill Holes in 1x4 Base Legs

MaryAnnCarter
In each of the leg boards, use a drill and 1-1/8” Forstner bit to drill holes for the dowels. The dowels will hold up the shelves and will allow you to vary the heights of the shelves. Determine the top and bottom of the legs and make sure the boards remain oriented correctly through the remainder of the process so the holes line up. Start with the four 1x4 legs for the base unit; measure and mark the lowest hole 8- 1/2” on-center, from the bottom of the leg. The holes should be 3” on center apart from one another. Continue to measure and mark seven more holes in each board (for a total of eight holes). There should be 6-1/2” remaining at the top of the board. After the first board is drilled, use it as a template to measure and mark the other three boards. Sand any holes that may have splintered while drilling.
Step 6: Drill Holes in 1x8 Legs
MaryAnnCarter

MaryAnnCarter
The 1x8 legs will have two sets of holes so the shelf height can vary on the left and right sides of the unit. Mark the board 1-3/4” in from each edge. This will be the center line of the holes that will be drilled. Like the 1x4, mark the first hole 8-1/2” from the bottom of the board and continue to measure and mark the holes 3” on-center, apart from one another. There will be eight holes in each column, 16 total. Like the 1x4 there will be 6-1/2” remaining at the top of the leg without holes. Use the first board as a template for the second board.
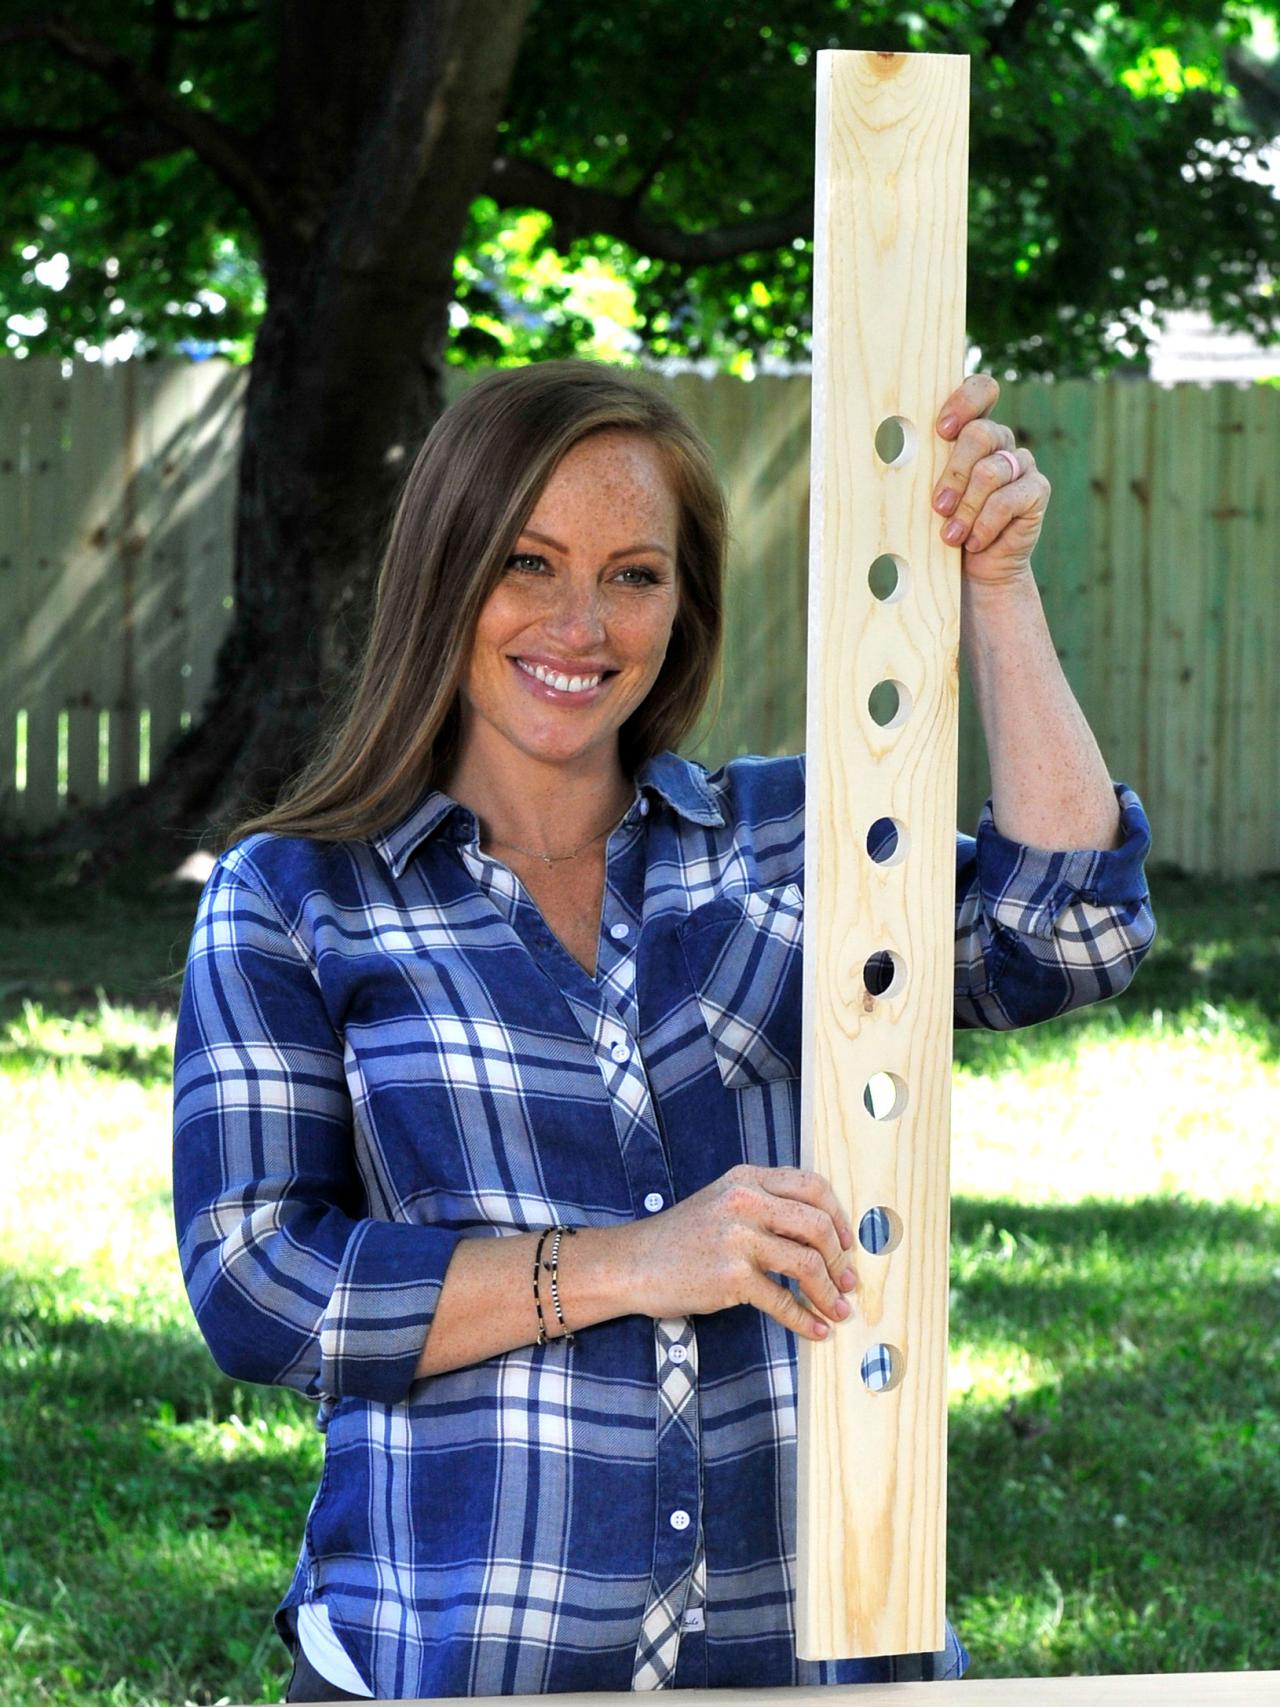
Step 7: Drill Holes in 1x4 Upper Legs
The remaining four 1x4 legs are for the upper part of the shelves. Mark the first hole of the upper leg 8” from the bottom on-center. The holes should also be 3” apart on-center. Drill 10 holes. This should leave you with 8” on top of the holes. Use the first board as a template for the other three boards.
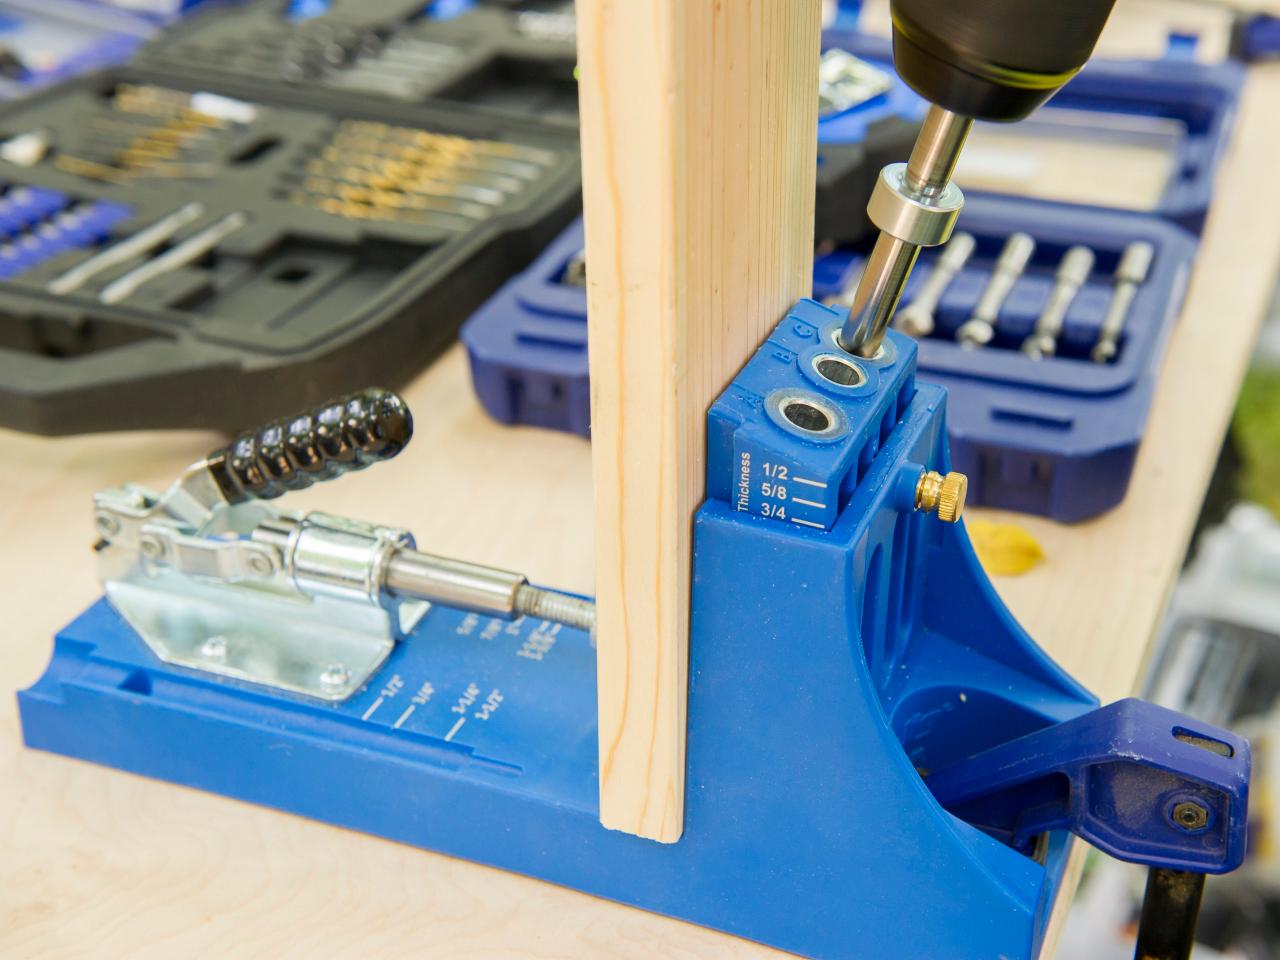
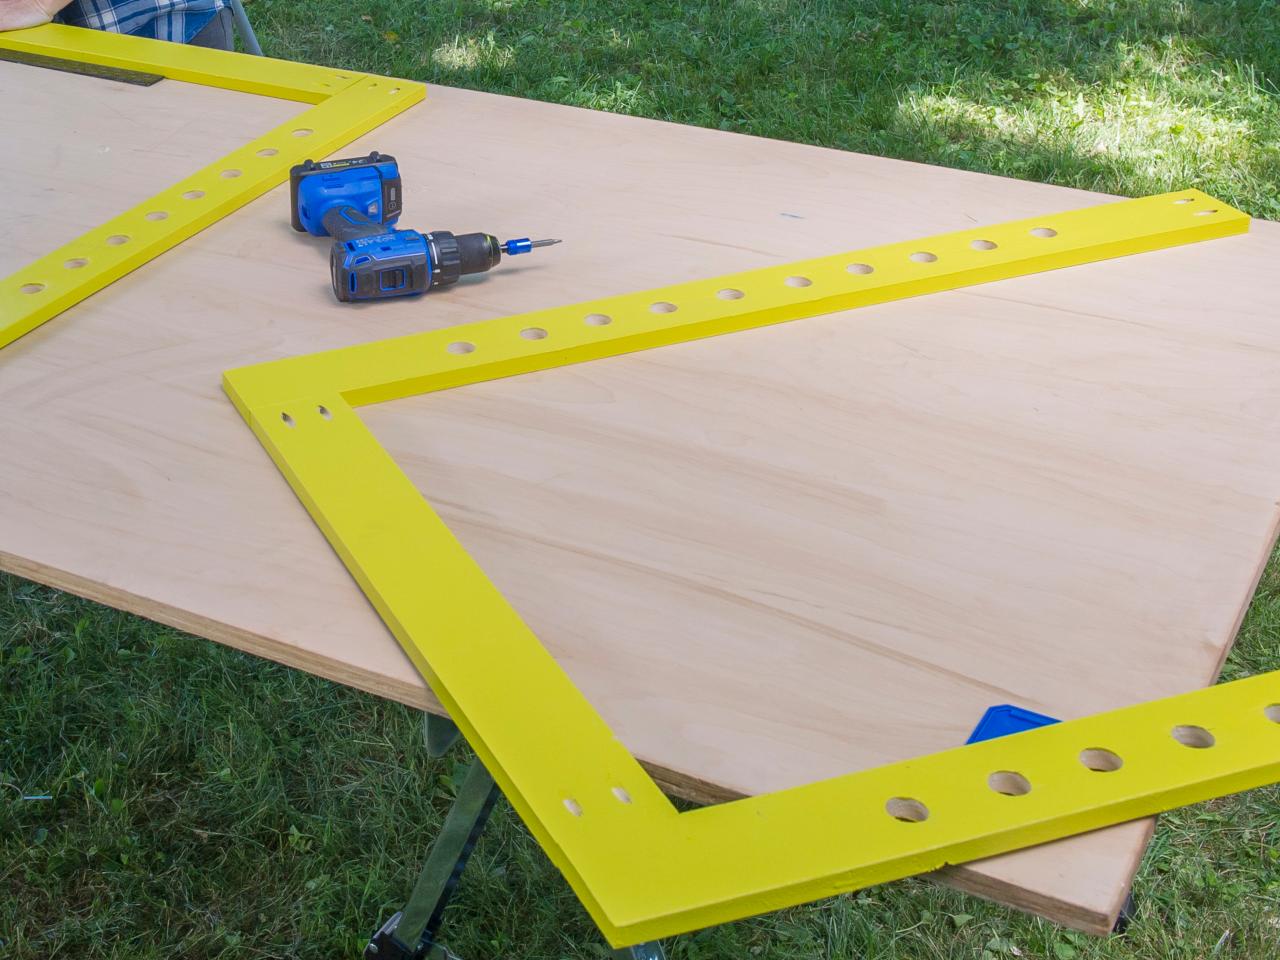
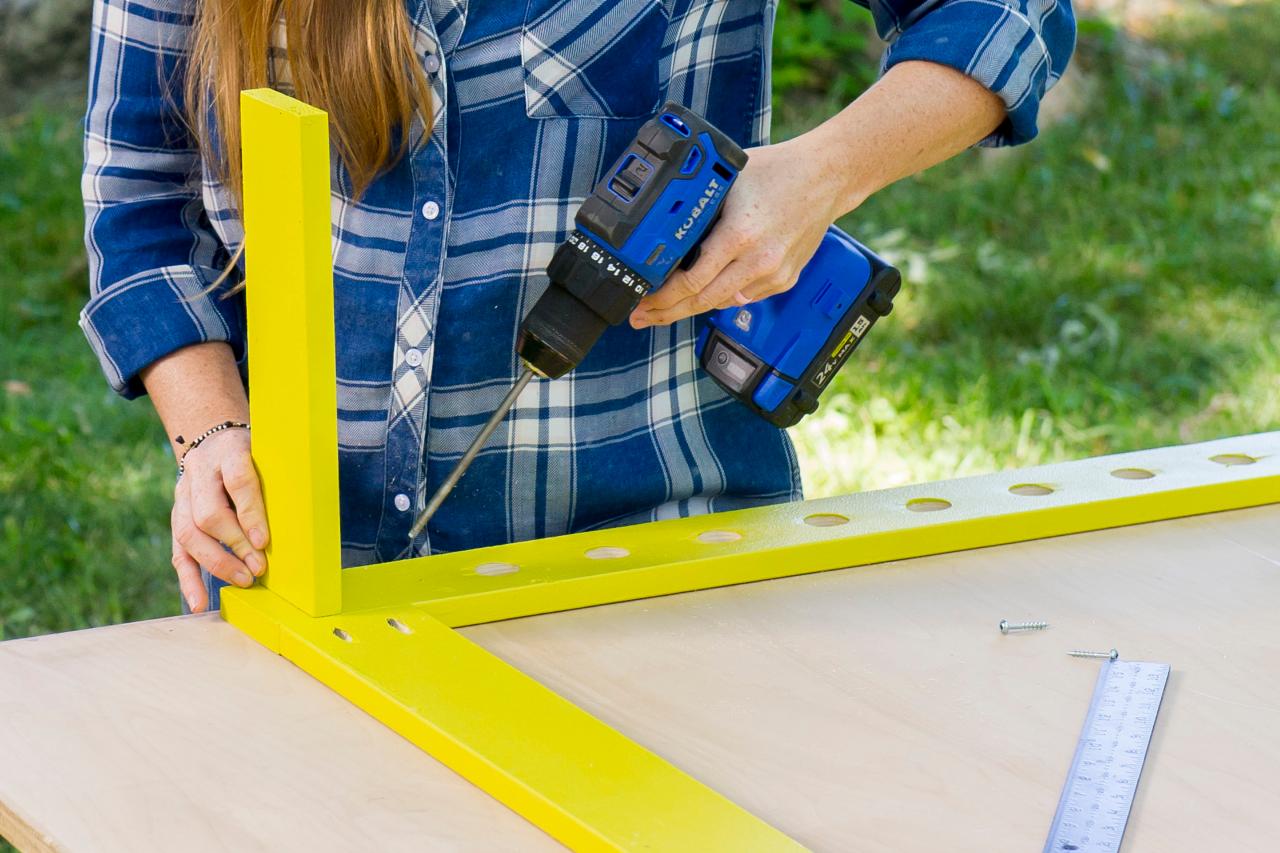
Step 8: Prep Horizontal Braces

MaryAnnCarter
The base legs will be made up of two matching frames (front and back). Each frame consists of two 36”-long 1x4 legs — one on the left and one on the right, and a 36”-long 1x8 leg in the center. The horizontal braces are made from the 41” 1x4s. Drill pocket holes in both ends of all eight 41” horizontal braces (for the top and bottom sections), and make it so the holes will be facing in.
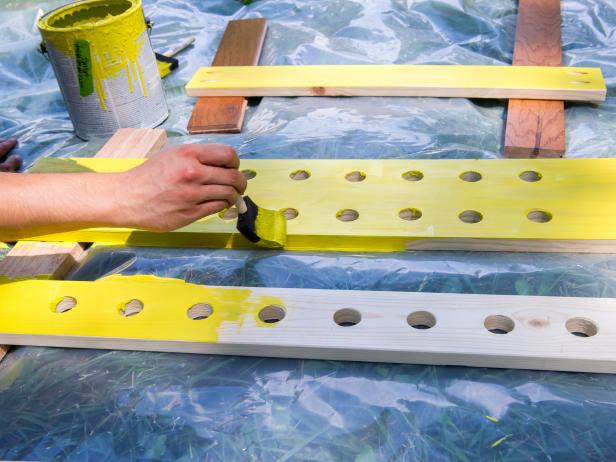
Step 9: Paint
MaryAnnCarter

MaryAnnCarter
Paint the dowels, legs and braces. Get creative and paint the dowels a different color. The paint will help protect the wood from scuffs, moisture, etc.
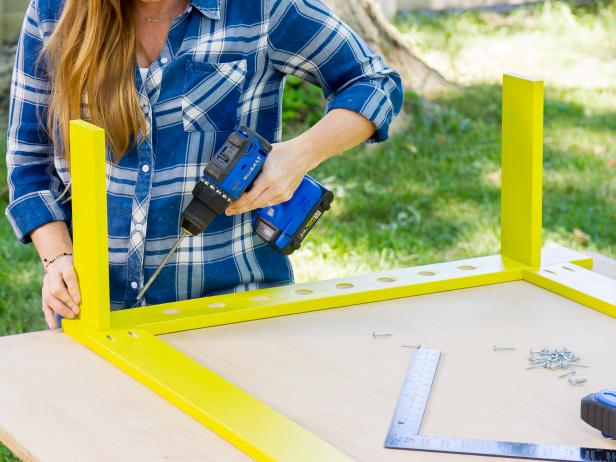
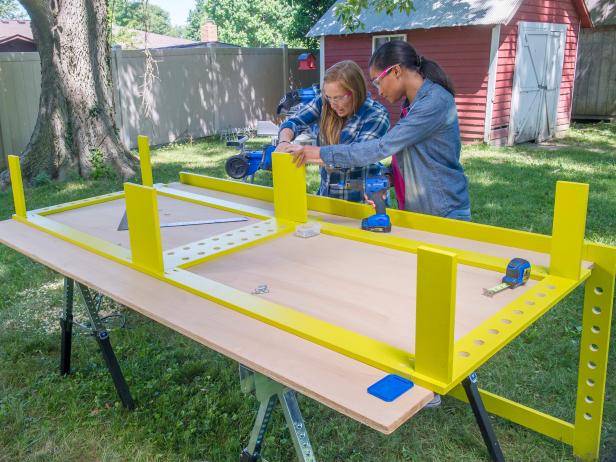
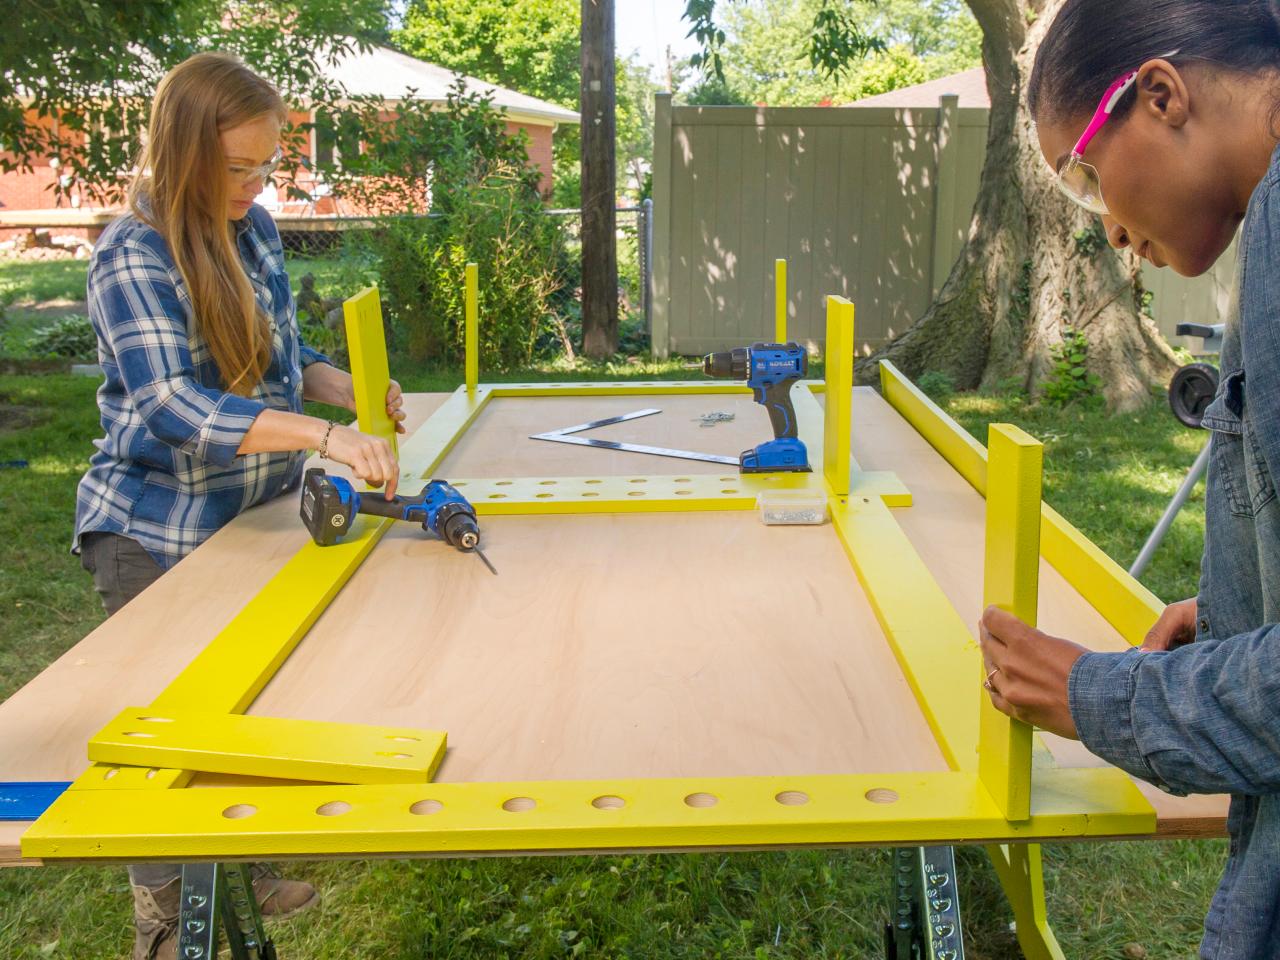
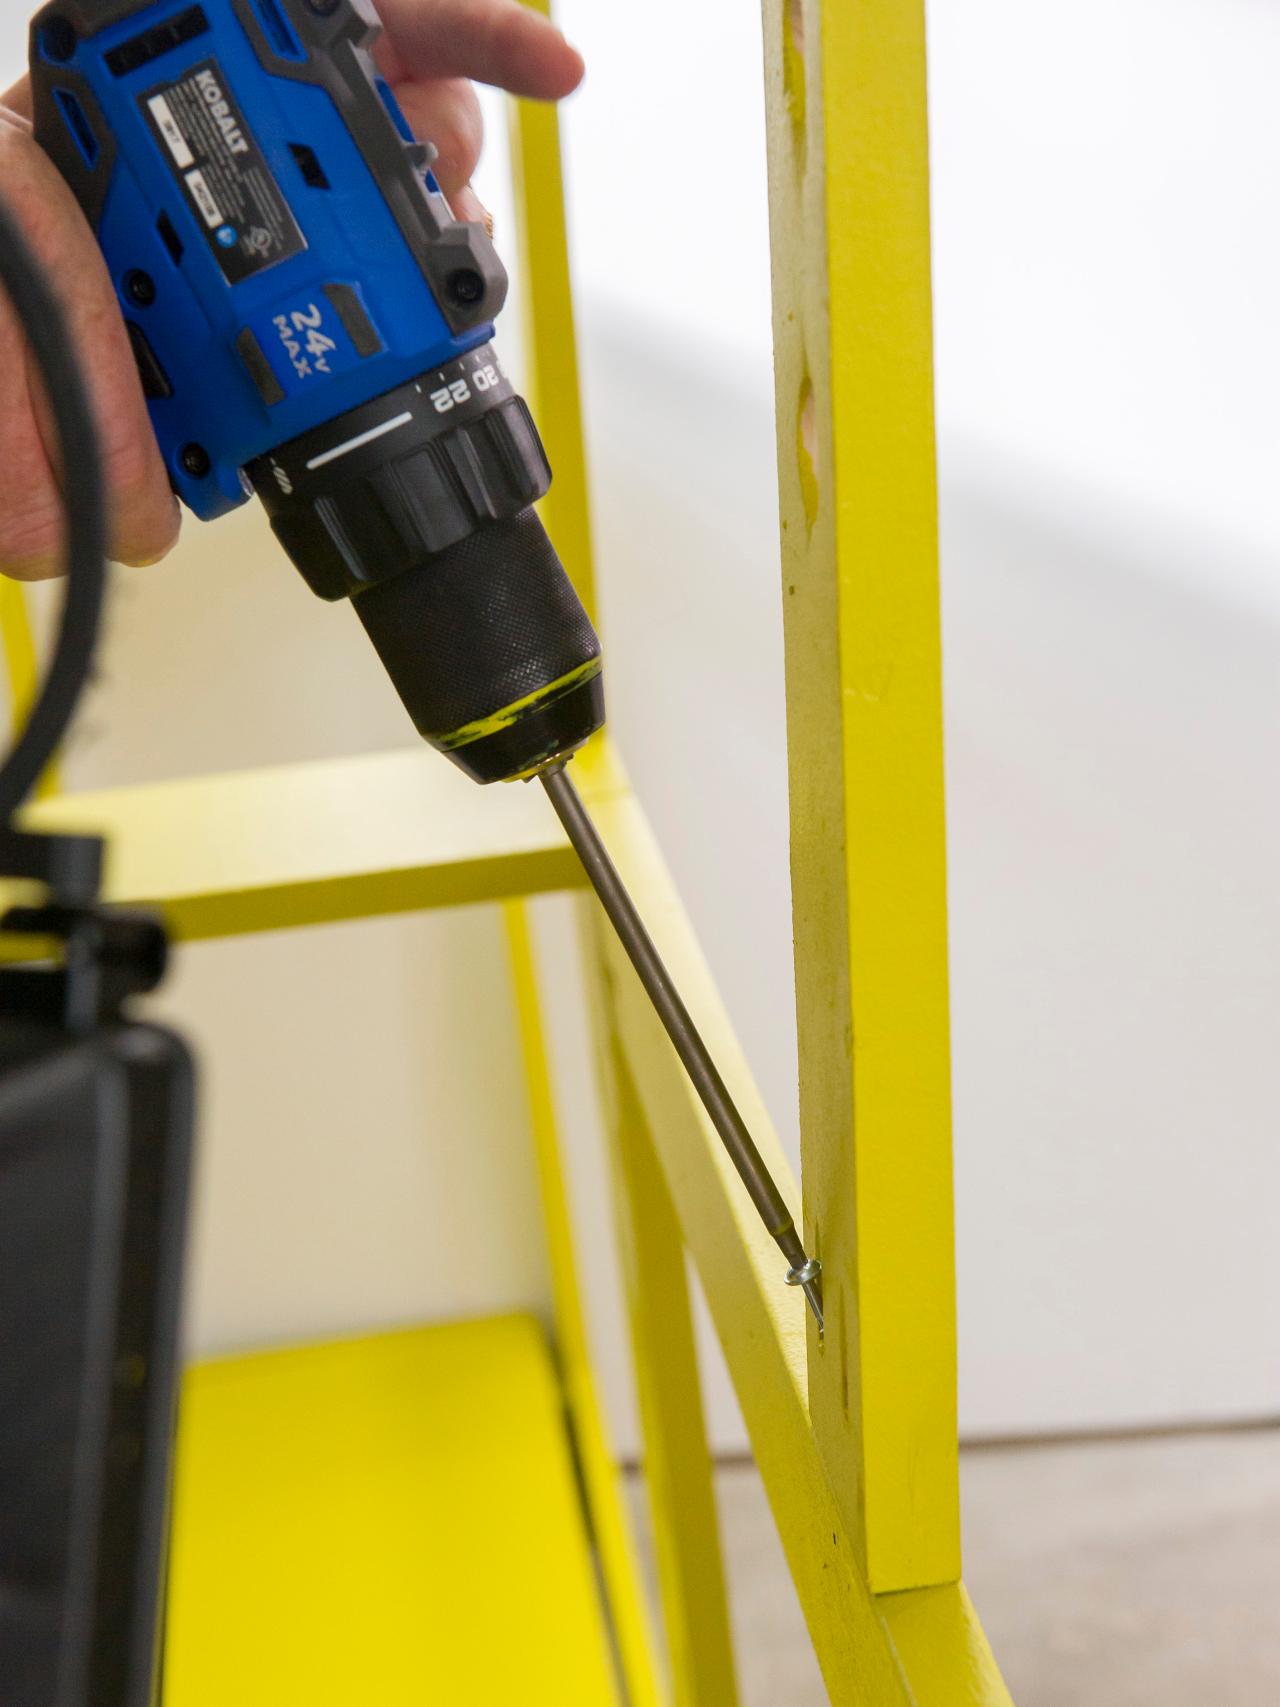
Step 10: Assemble Frames
MaryAnnCarter
Attach the legs to the braces with 1-1/4” pocket-hole screws. The top horizontal braces should sit flush to the top of the legs while the bottom horizontal braces will sit 2” up from the bottom of the legs. Repeat the process for the second side of the base frame.
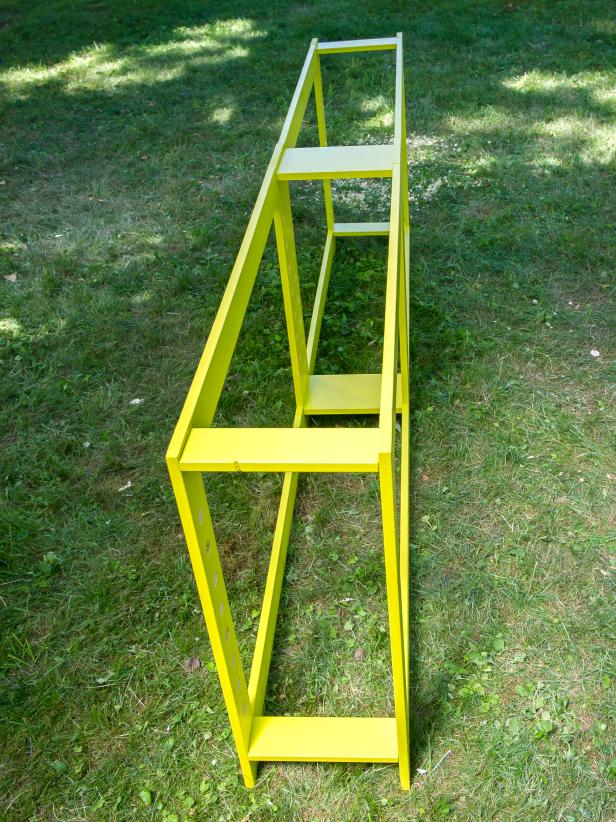
Step 11: Attach Middle Support Brackets
MaryAnnCarter

MaryAnnCarter
MaryAnnCarter
Drill pocket holes in all six 12” center support brackets on both ends. These brackets will connect the front and back of the frames. Attach the top braces first. Attach two 1x4 x 12” (left and right) and one 1x8 x 12” in the middle. Place them 3/4” below the top of the leg. This will allow the top and bottom shelf to sit flush to the top of the legs. Then attach the bottom brackets, 4-3/4” from the bottom of the legs. Use 1-1/4” pocket-hole screws.
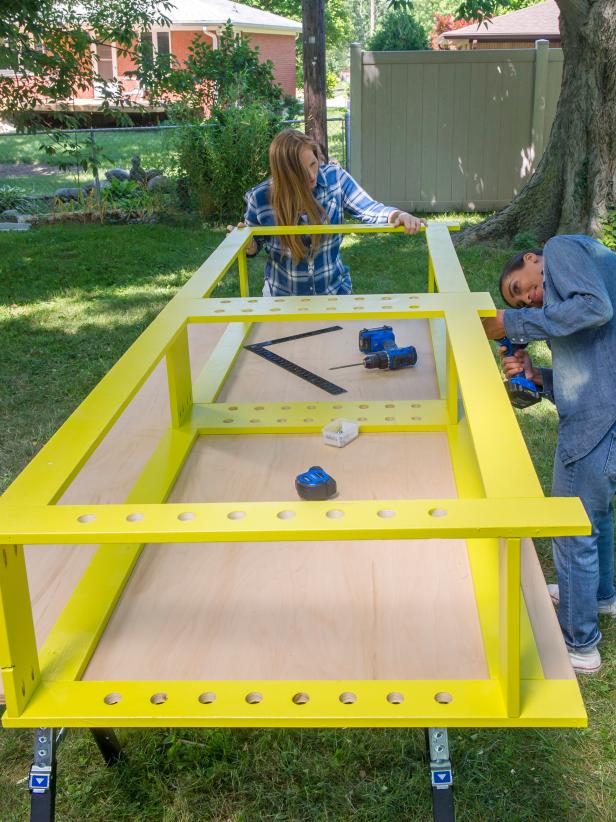
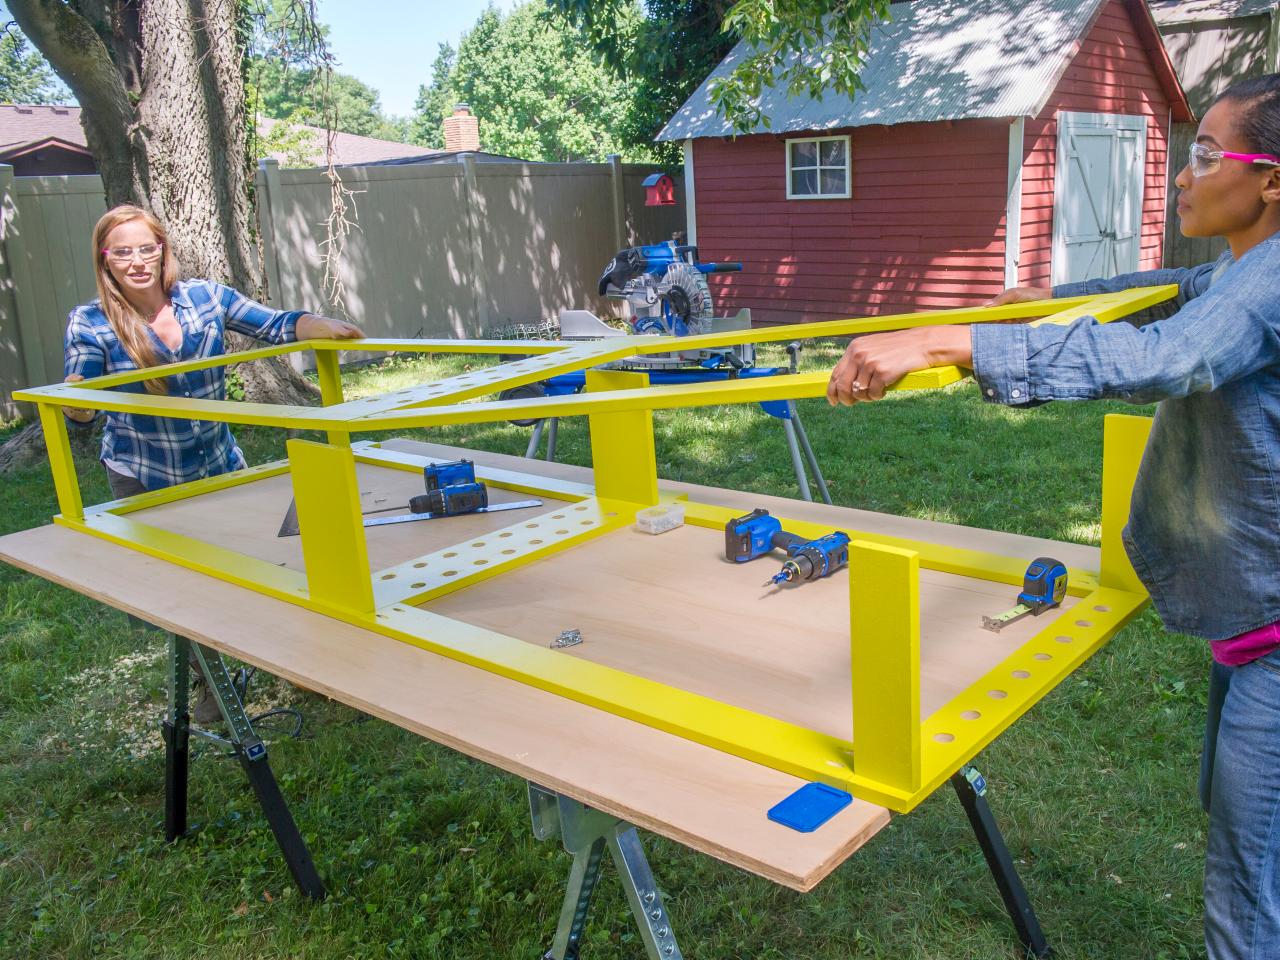
Step 12: Attach Back and Front of Base

MaryAnnCarter
MaryAnnCarter
MaryAnnCarter
Lay the other section of the base on top of the assembly with the brackets. Attach the other section to the brackets using 1-1/4” pocket-hole screws.
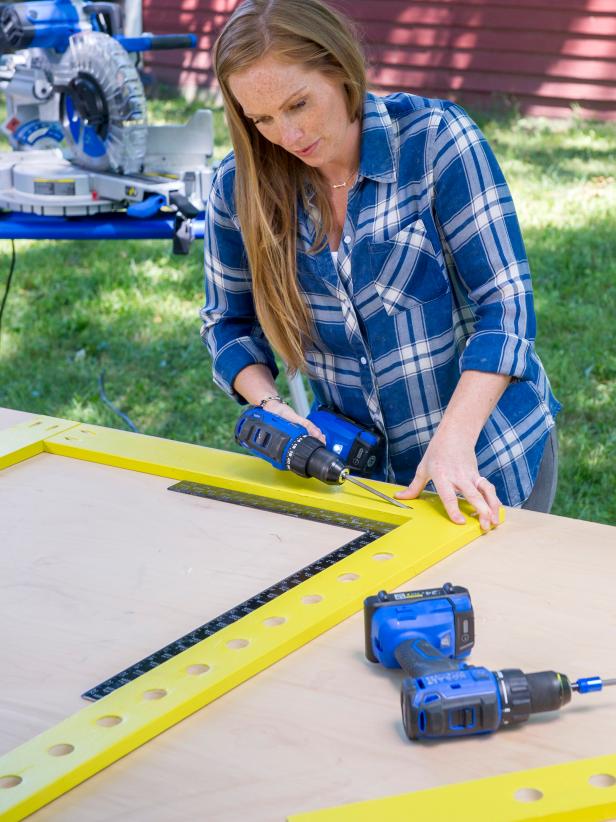
Step 13: Assemble Upper Frame

MaryAnnCarter
Assemble the top frame of the shelving unit. Use two 1x4 x 45” vertical leg pieces, one for the left and one for the right. Orient the legs to the top and bottom and keep them positioned correctly for the duration of the build. Drill pocket holes in the bottoms of all four 45” vertical legs (these will attach to the base section of the unit). Pocket-hole both ends of the two 39-1/2” horizontal braces and attach them flush to the top of the 45” vertical legs using 1-1/4” pocket-hole screws. Repeat for the back of the frame.
Step 14: Attach Front and Back of Upper Section
MaryAnnCarter
Drill pocket holes in both ends of the remaining two 1x4 x 12” support brackets. Attach them 3/4” below the top of the leg (like you did with the lower section) so the shelf will sit flush with the top of the leg.
Step 15: Cut Bottom-Section Shelves

MaryAnnCarter
For the shelves on the bottom section, we made two that span the full length of the unit and four that are half the length. The full-length ones will sit on the top and the bottom of this section.
For the half-length shelves, cut the 1x12s into four 46-1/2” pieces. (If needed, you can make more than four.) For the full-length shelves, cut two of the 1x12s to 98”. Double-check that these measurements will work for your unit; remember to account for the lip pieces that will hang over the dowels and brackets.
Step 16: Cut Upper-Section Shelves
For the fixed top shelf on the upper section, cut one 1x12 to 35”. For the adjustable shelves, cut a 1x12 into three 32-1/2” pieces. Again, double-check your measurements before you cut.
Step 17: Cut Shelf Lips

Gary Payne
Cut the 1x2s into (20) 11-1/4” pieces for shelf lips (two for each shelf). The lips will attach to the end of each shelf so they can hook over the dowels.
Step 18: Paint Shelves and Lips
Paint all the shelves and lip pieces and then allow them to fully dry.
Step 19: Attach Lips to Shelves
MaryAnnCarter
Align the 1x2 vertically on each end of the 1x12 shelves and attach them using 1-1/4” screws. Repeat for all 10 shelves.
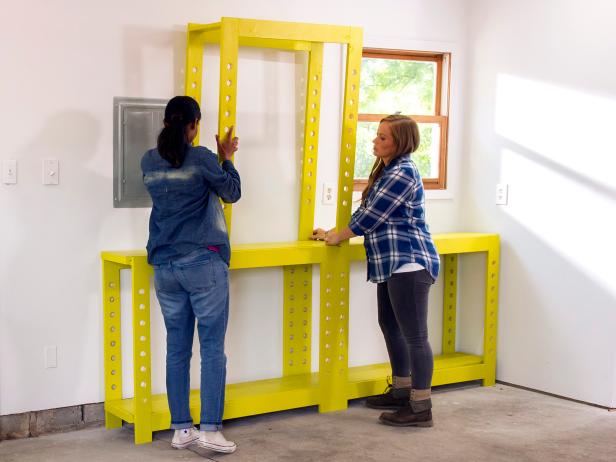
Step 20: Attach Top and Bottom Sections
MaryAnnCarter
MaryAnnCarter

MaryAnnCarter
Attach the top section to the base top of the leg or horizontal brace boards using 1-1/4” pocket-hole screws. If you’ve already put the shelves in place, you’ll need to remove them before attaching the upper and lower sections.
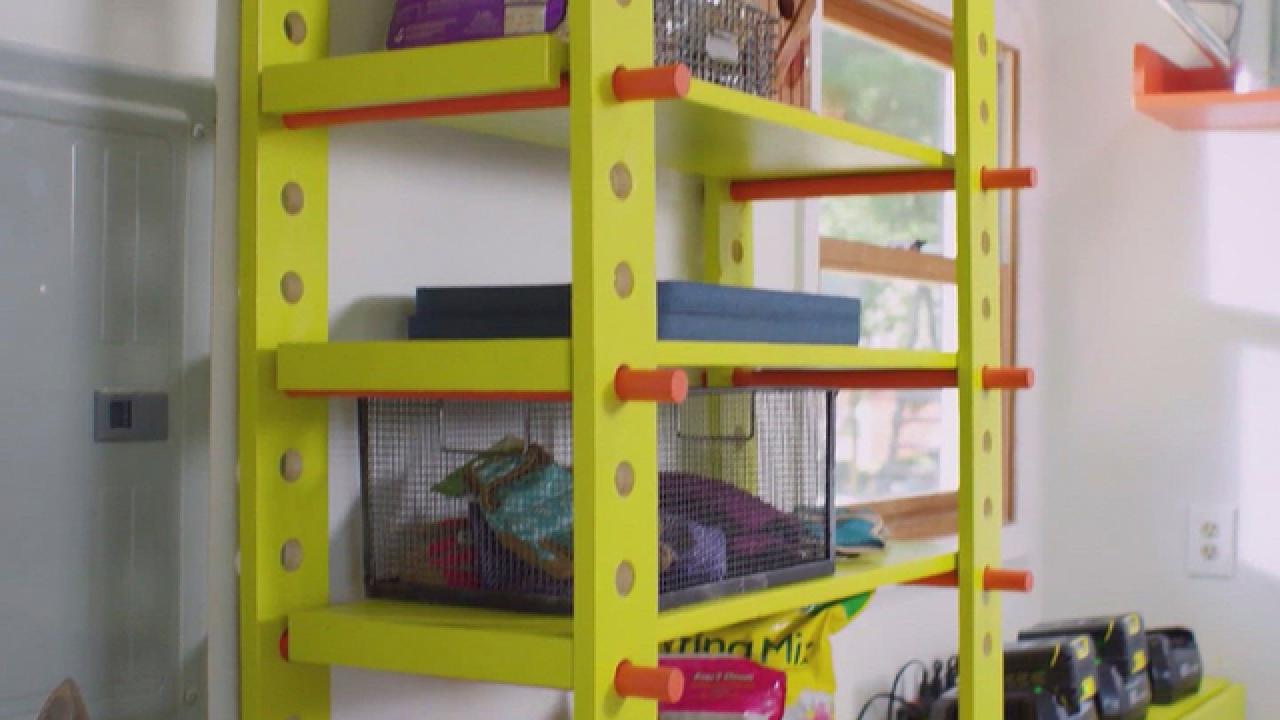
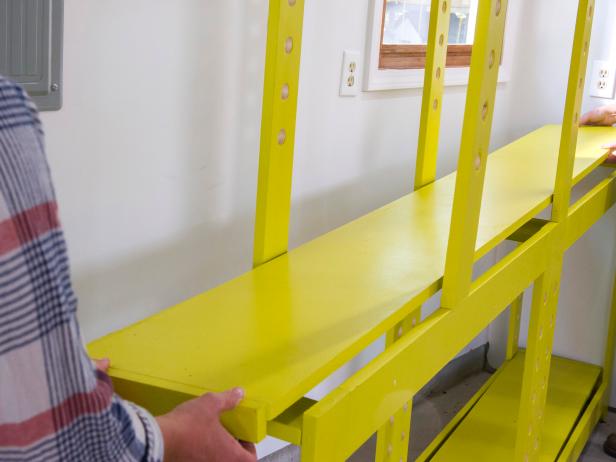
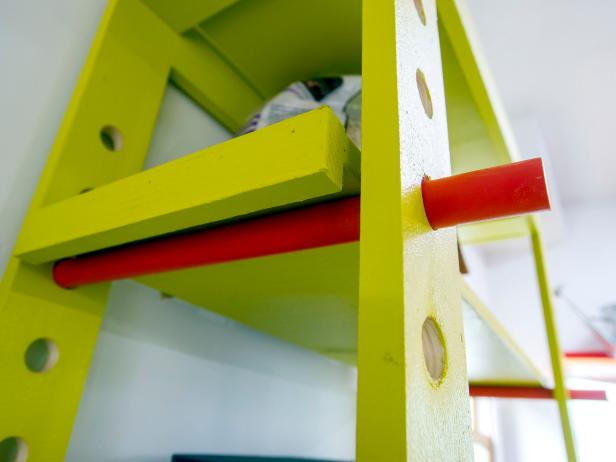
Step 21: Add Dowels Then Shelves
MaryAnnCarter
MaryAnnCarter
MaryAnnCarter
MaryAnnCarter
When the paint has dried, place dowels into the holes in the configuration that best fits the items to be stored. First, add the three fixed shelves and then slide the shelves onto the dowels, making sure the lip on each end of the shelf overlaps the dowel.
MaryAnnCarter
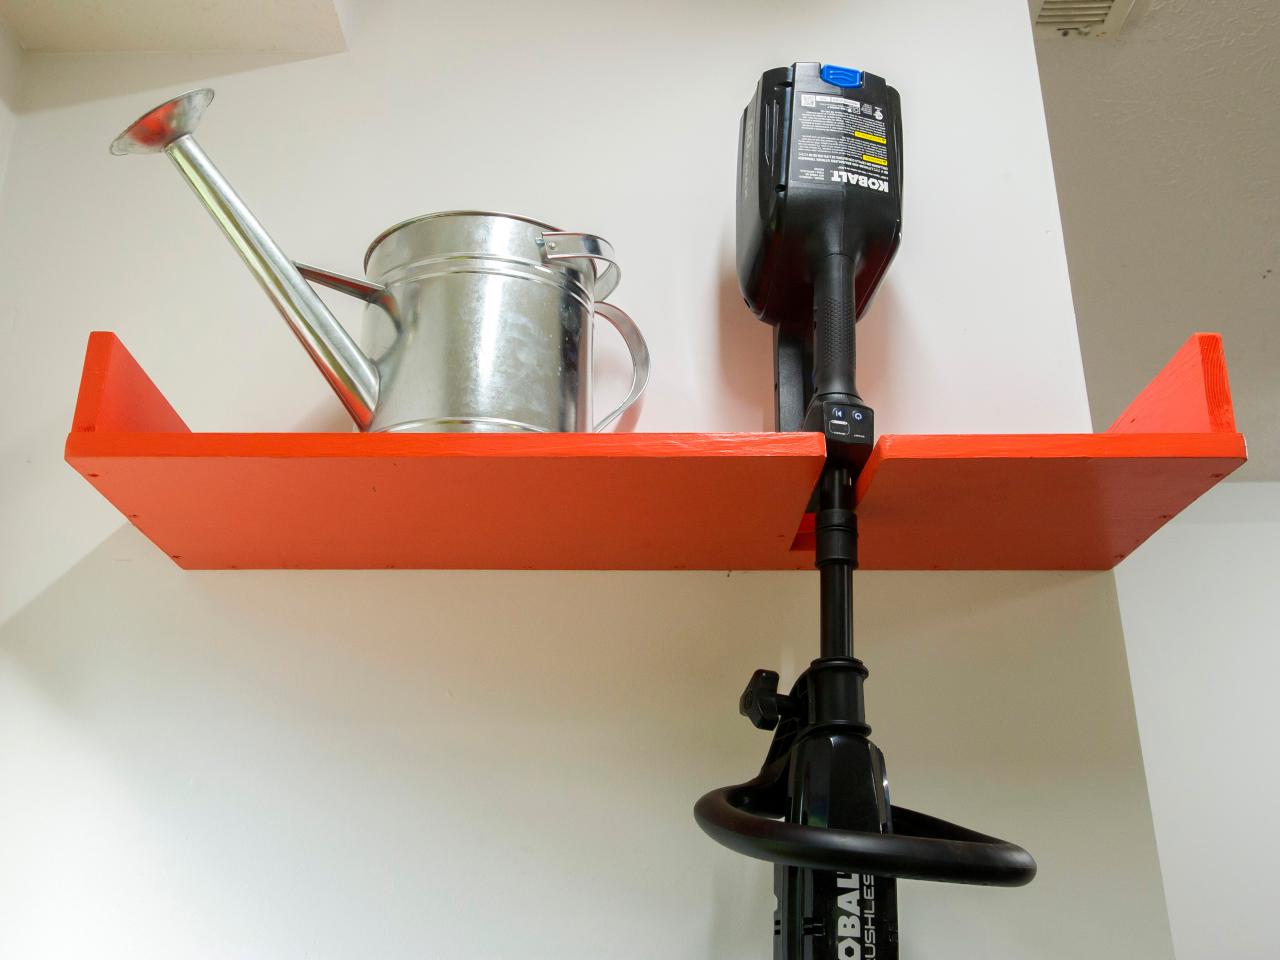
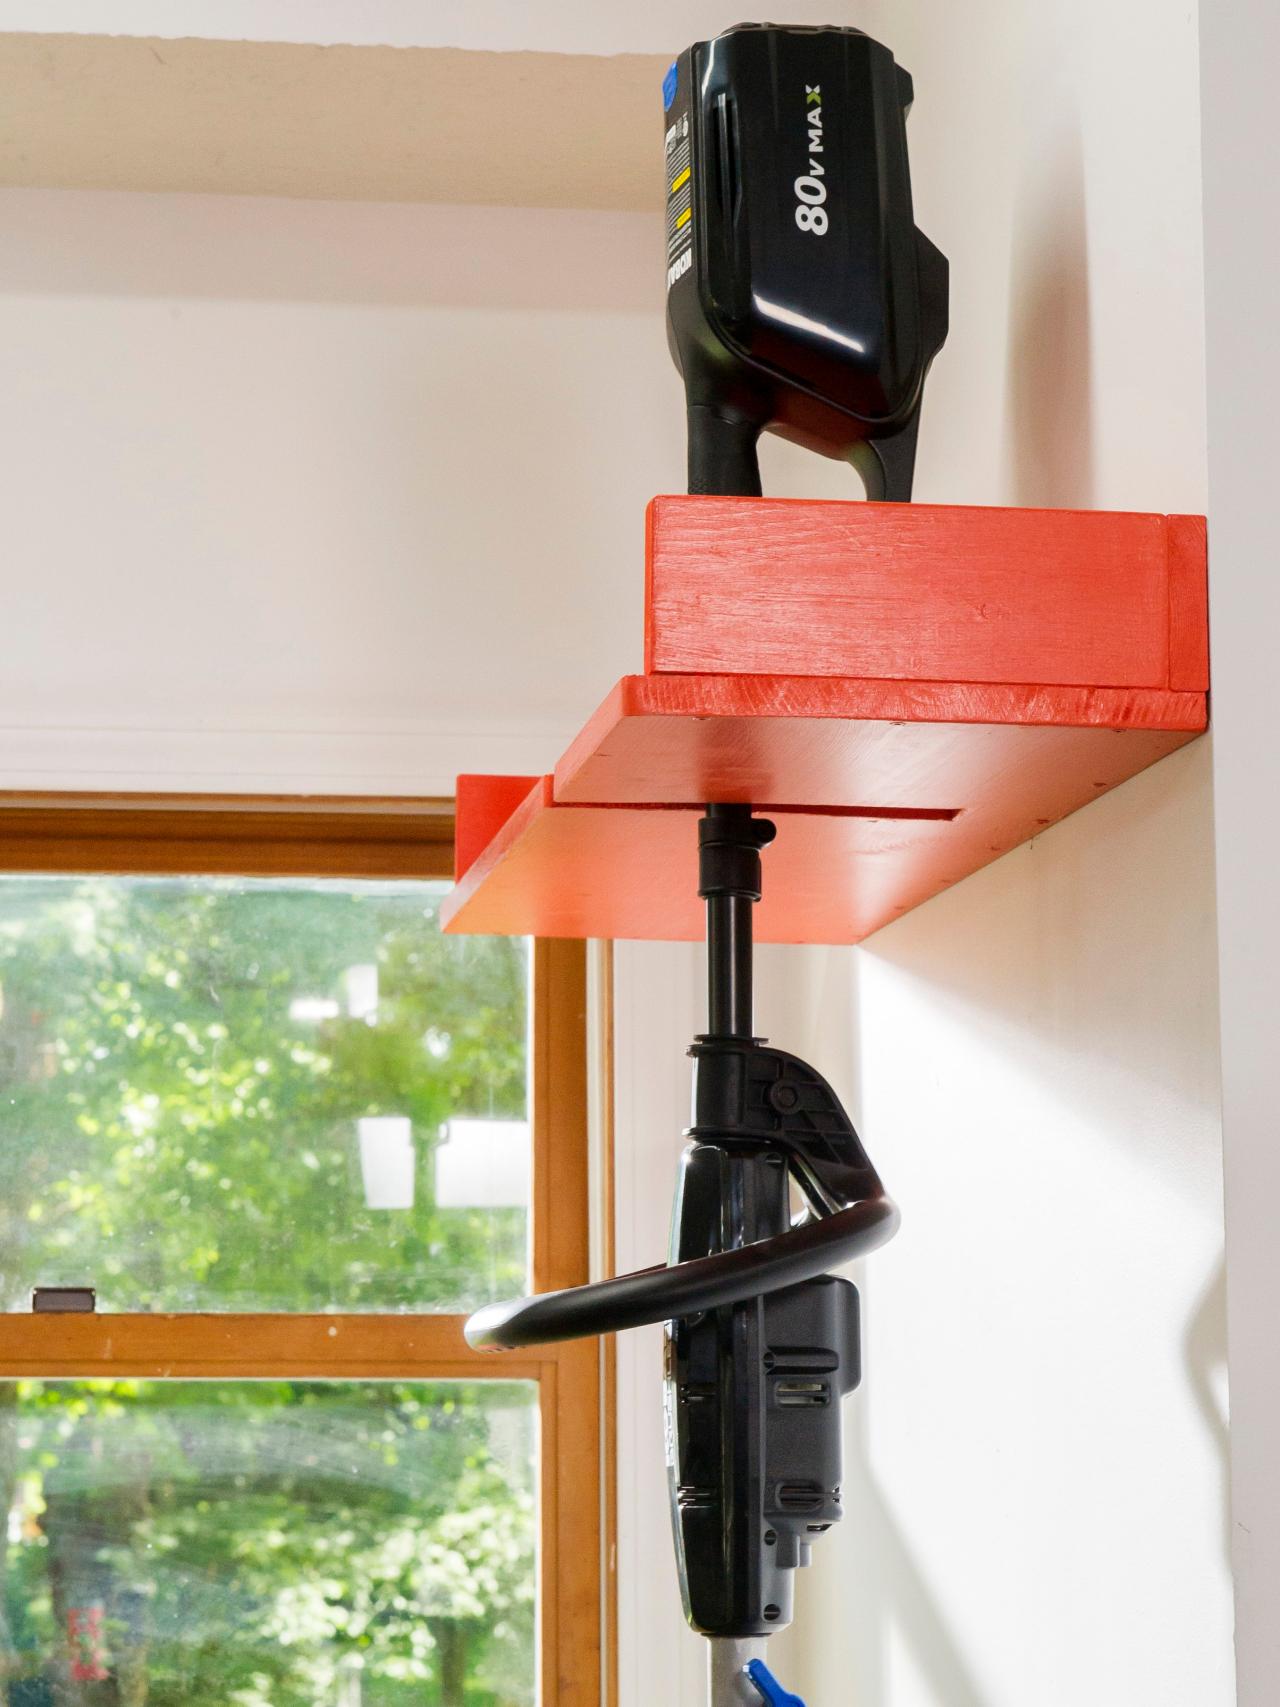
We also built a wall shelf to hold hanging tools like a string trimmer. Here’s how we did it.

MaryAnnCarter
Step 1: Determine Size
Measure the length between the studs for the area where the shelf will hang. The shelf will need to be long enough to attach to at least two studs for even hanging.
Step 2: Measure Tools
Measure the tool(s) to be hung. The tools will slide into a customized slot cut in the shelf. The slot should be customized to the specific tool so it’s large enough to slide the tool in place, but not so wide that the tool can fall through or be unstable. If adding multiple slots, ensure there’s enough space for the motor or element that holds each tool in place above the slot.
Step 3: Cut Materials
MaryAnnCarter
Cut the 1x12 to 32” for the shelf. Cut the 1x4 into two 10-1/2” pieces and one 32” piece. These will sit on top of the 32” base and create a border for the shelf.
Step 4: Mark Slot Placement
For the string trimmer to be hung, measure and mark a slot 9” x 1-1/2” onto the 1x12.
Step 5: Cut Slot
Clamp the 1x12 to a worktable so that where the slot will be cut overhangs, making it easier to make the cuts. On the inside of the inner two corners of the marked slot, drill a small hole using a 3/8” Forstner bit; this will help guide the jigsaw blade to cut the back edge. Use a jigsaw to cut out the slot. Repeat if adding more slots.
Step 6: Attach Border Pieces
Attach the three 1x4 pieces on the top edges of the 1x12 using 1-3/4” screws.
Step 7: Paint
Paint the shelf with interior paint-and-primer-all-in-one.
Step 8: Install
Hang the shelf in at least two studs using 3” screws. Be sure to hang it high enough for the tool to hang off the ground.

MaryAnnCarter


