


DIY This Trendy Fluted Table
All you need is half-round wood trim, a few cans of spray paint and some basic building supplies to DIY this designer-inspired fluted table for less.

Liz Gray

Scroll through Pinterest and you'll quickly note an emerging trend: fluted furniture. Everyone is trying it, from scalloped headboards to grooved walls and coffee tables. Put down the phone and make your own fluted table with this easy DIY from HGTV Handmade’s Liz Gray. Plus, learn how to create a sleek, marbled look with spray paint that will guarantee a second glance from friends.

Liz Gray
Materials + Tools
- 15'' unfinished round circle
- 12'' concrete tube
- (60) 11/16'' half-round pine trim pieces
- marble effect spray paint
- white spray paint + primer
- matte black spray paint
- clear acrylic sealer
- (20) 1'' spring clamps
- wood glue
- hand saw
- tape measure
- pencil
- sandpaper
- scrap wood
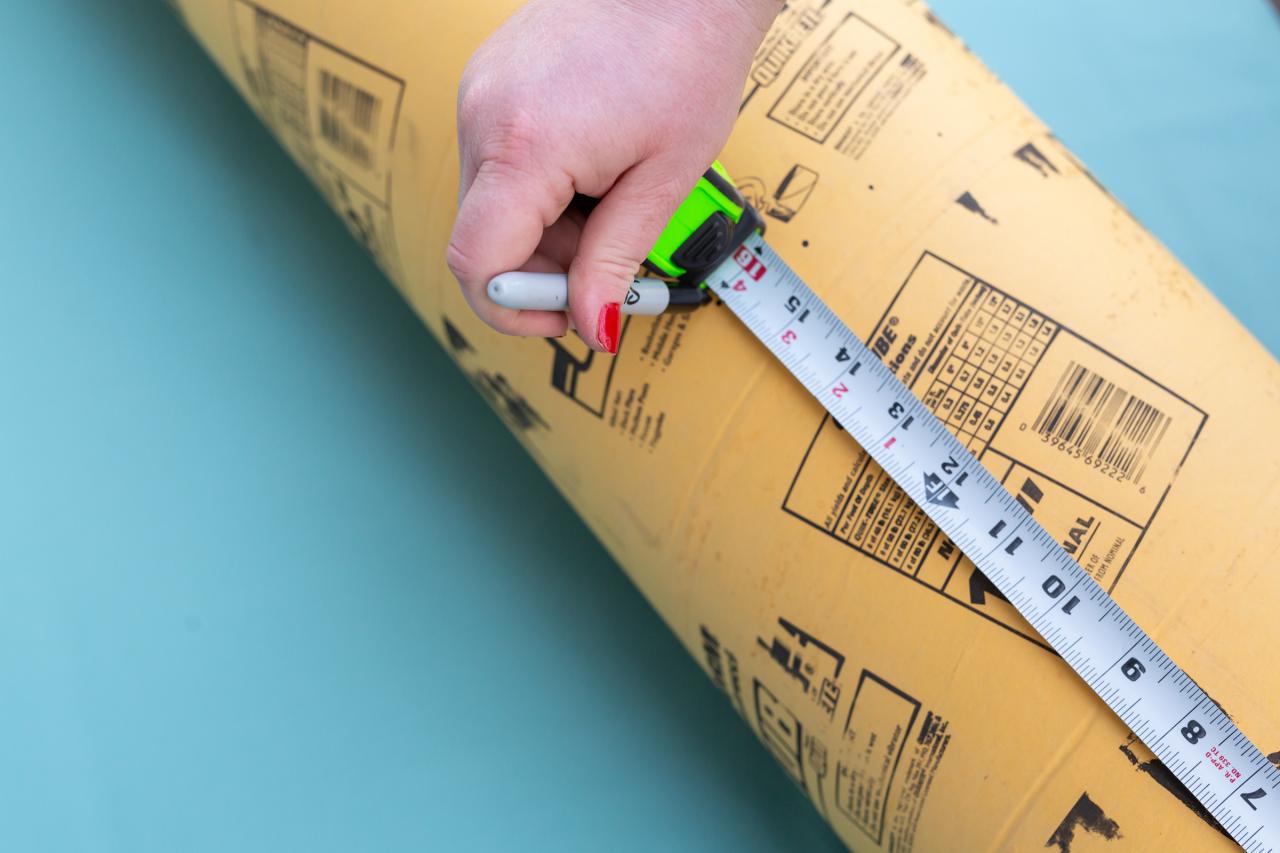
Measure + Cut Tube
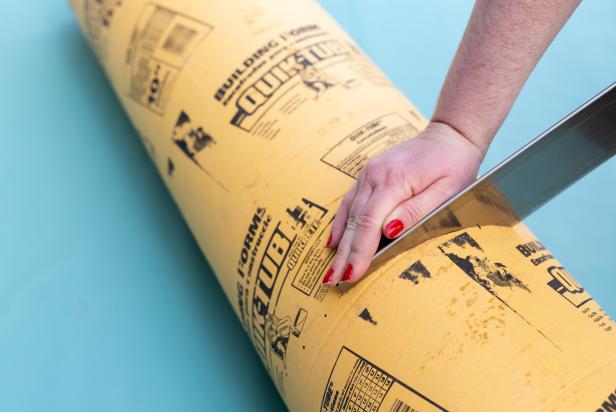
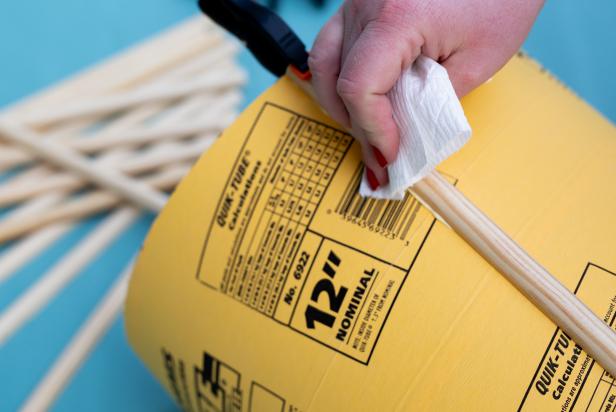
First, determine the height of your concrete tube for either an end table or coffee table. Note: End table standard height is 20 to 24 inches and up to 2 inches lower than the arm of your sofa. For coffee tables, the standard height is up to 2 inches lower than the top of the cushions. Next, use a tape measure to determine where to cut the tube; use a pencil to mark a dotted guideline all the way around in 1-inch increments (Image 1). Then use a hand saw to cut the tube in half (Image 2). Tip: Use a steady, sawing motion to start the cut, then press on the end of the saw to slice down into the tube to ensure a straight cut (Image 3). Even up the edges using sandpaper if needed.

Cassidy Garcia

Cassidy Garcia
Cassidy Garcia
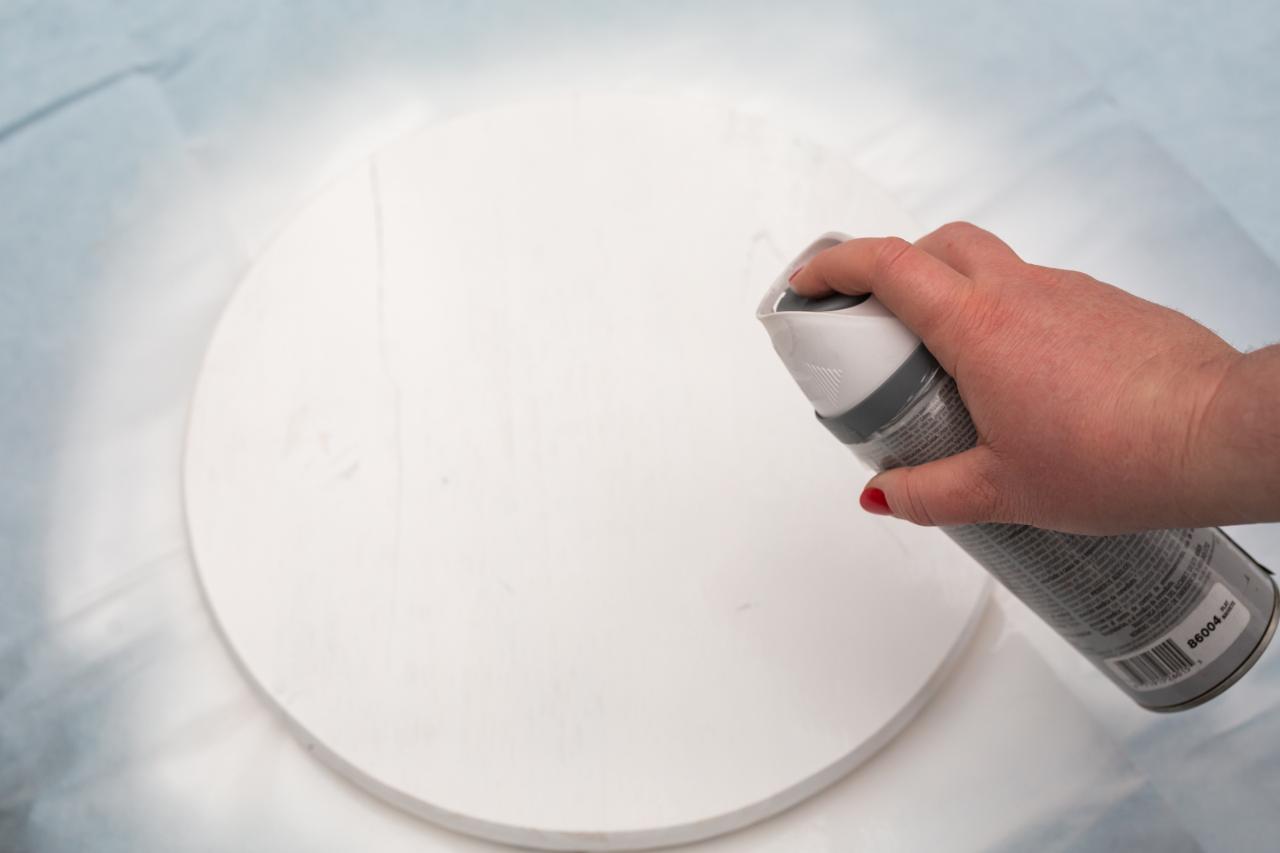
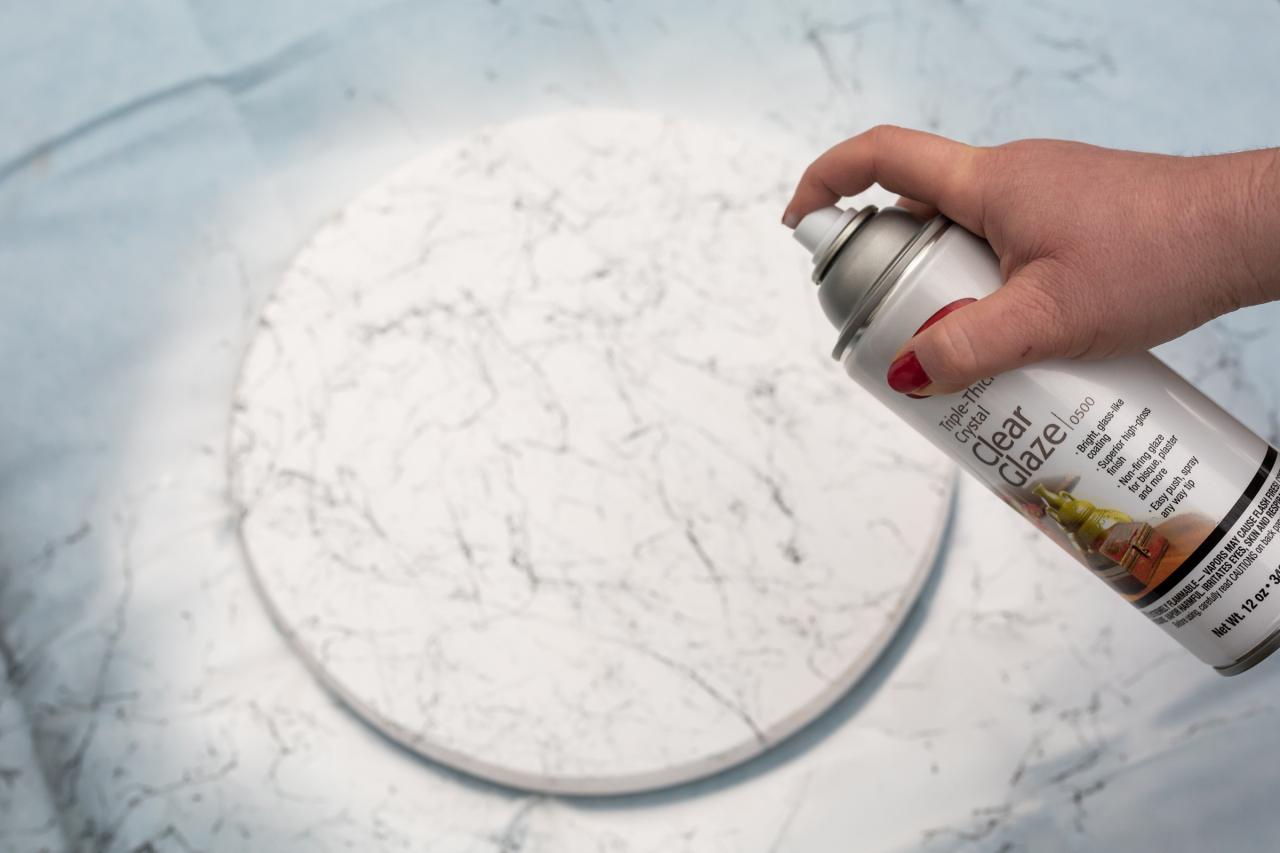
Paint Top + Marble Effect
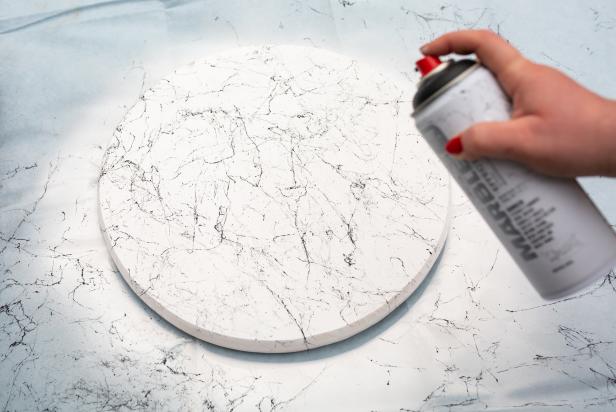
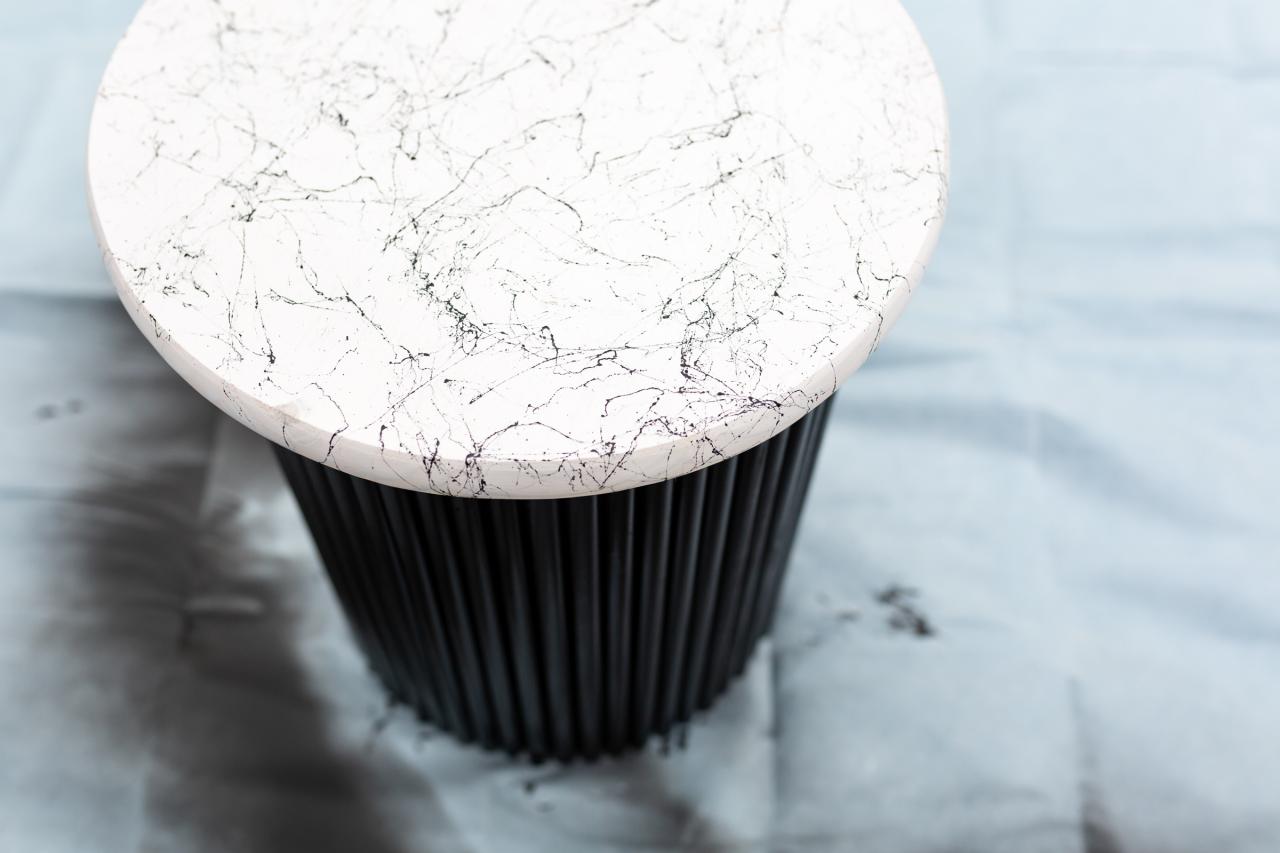
Spray paint the 15-inch unfinished wooden circle with three coats of white spray paint plus primer (Image 1); use sandpaper between each coat to remove visible wood grain and create a smooth finish. Next, use the marble effect spray paint, using slow sweeping motions, to add thin strips of black paint to the white circle top (Image 2). Last, seal the tabletop with three coats of clear acrylic spray (Image 3). Let the wood dry completely. Tip: Check out this marbled table hack for more inspiration.

Cassidy Garcia
Cassidy Garcia

Cassidy Garcia

Montana's Marble Effect spray is medium pressure, high-grade and high covering for a deceivingly realistic marble effect. It can be used on many different surfaces such as paper, cardboard, primed canvas, wood, glass, metal, ceramics, porcelain, stone, acrylic and other paintable materials.
Cut Trim + Attach
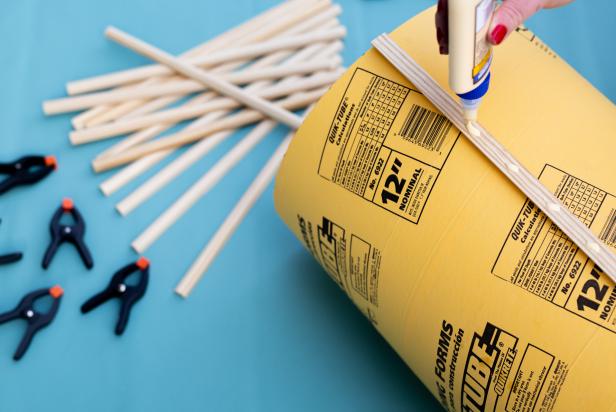
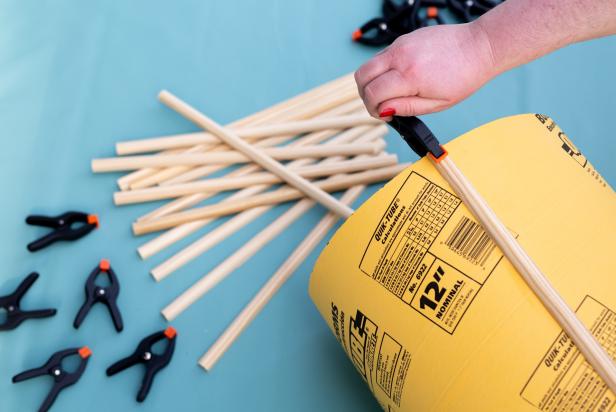
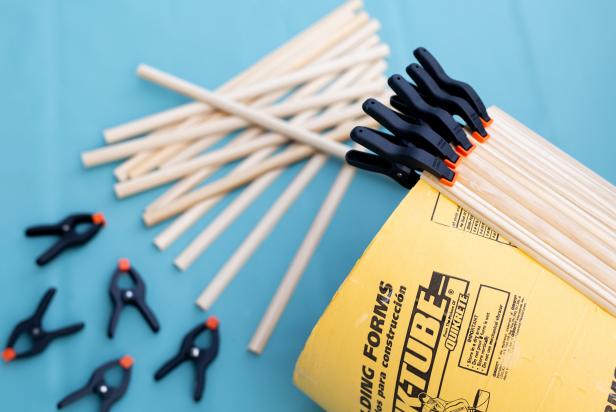
To create a fluted look, use a hand saw to cut 60 pieces of 11/16-inch half-round pine trim pieces to match the height of your tube (Image 1). Then, apply several small dots of wood glue to the first wood trim piece (Image 2) and attach it to the outside of the concrete tube. Secure the trim with a 1-inch spring clamp (Image 3). Wipe any excess glue with a towel (Image 4). Continue to glue and clamp the wooden trim pieces around the tube until it is covered (Image 5). Use sandpaper to level any uneven edges.

Cassidy Garcia
Cassidy Garcia
Cassidy Garcia
Cassidy Garcia
Cassidy Garcia
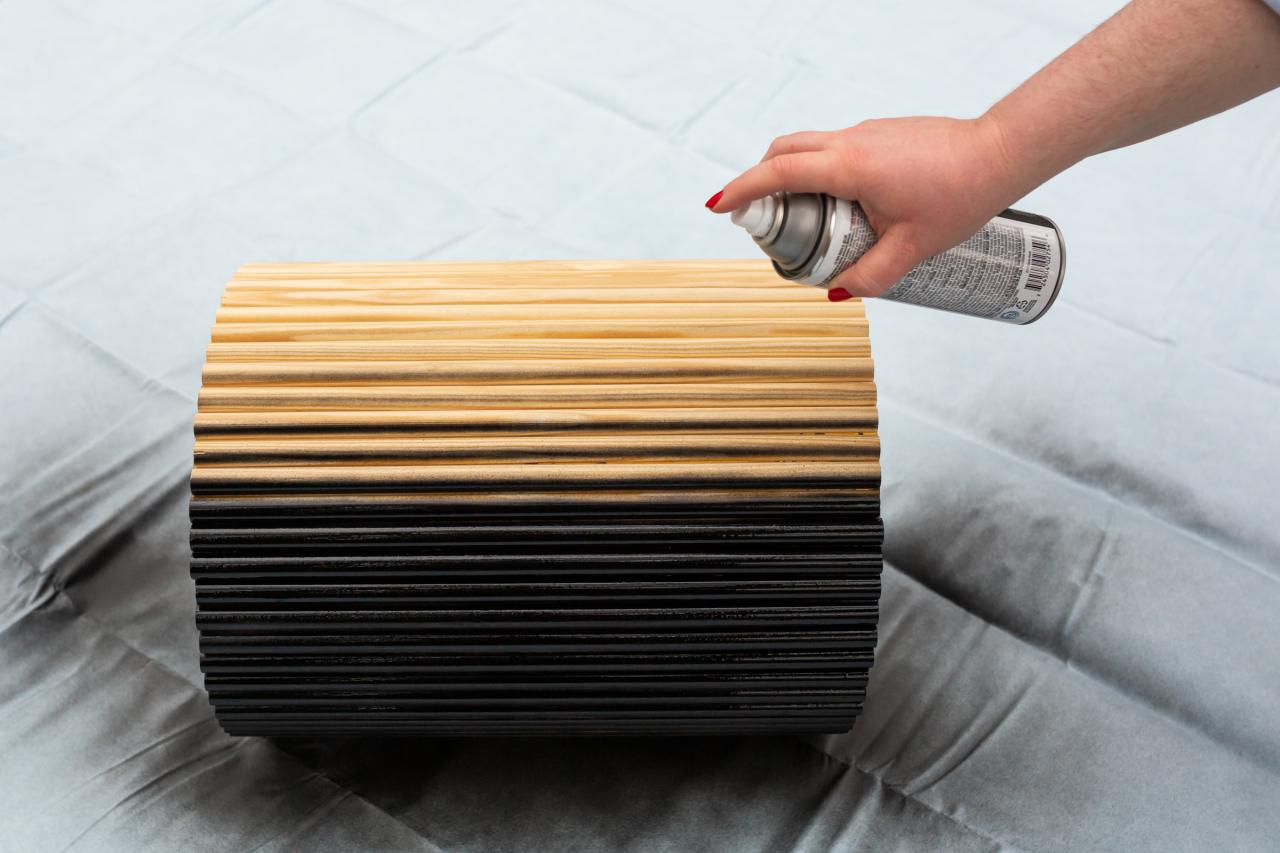
Paint Base + Assemble
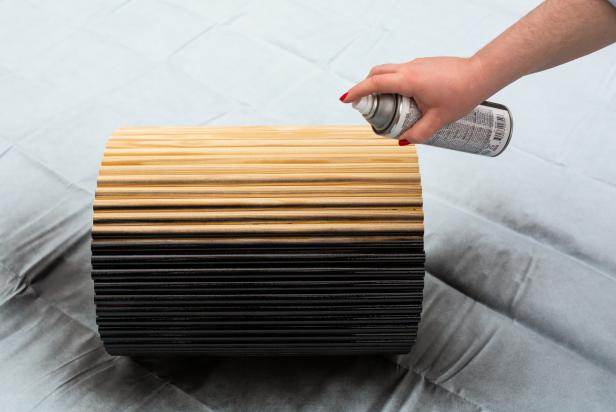
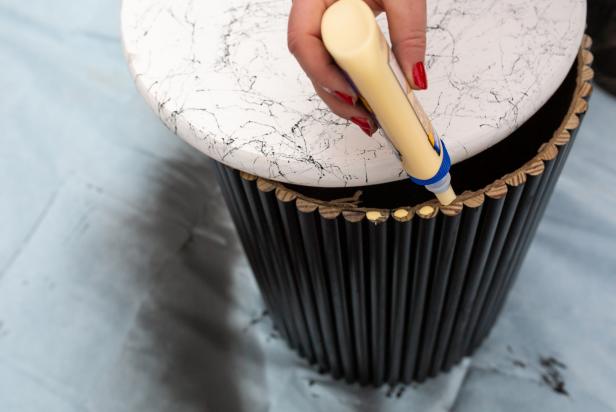
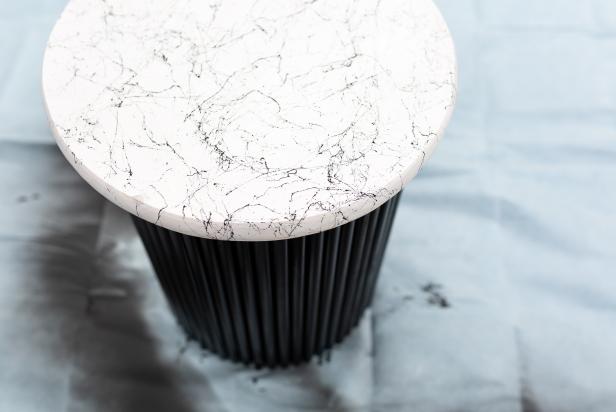
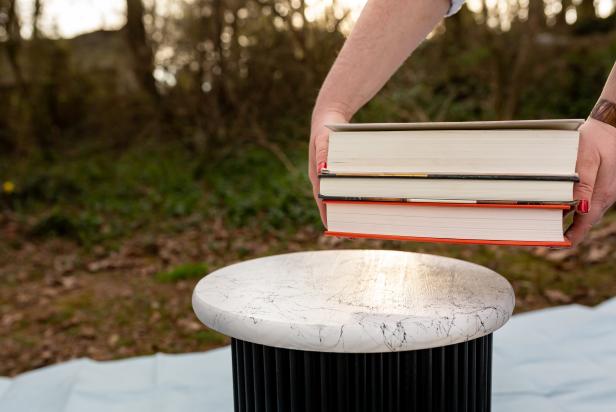
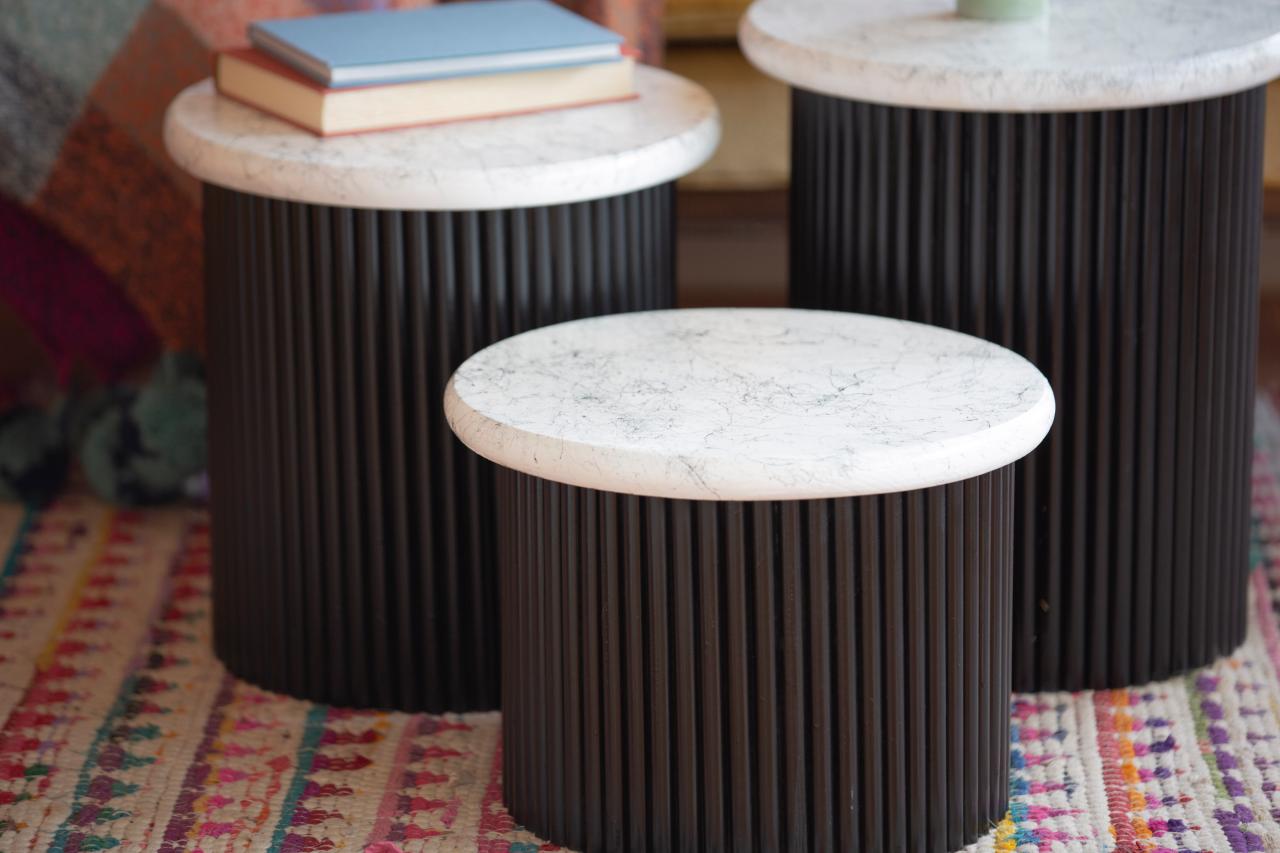
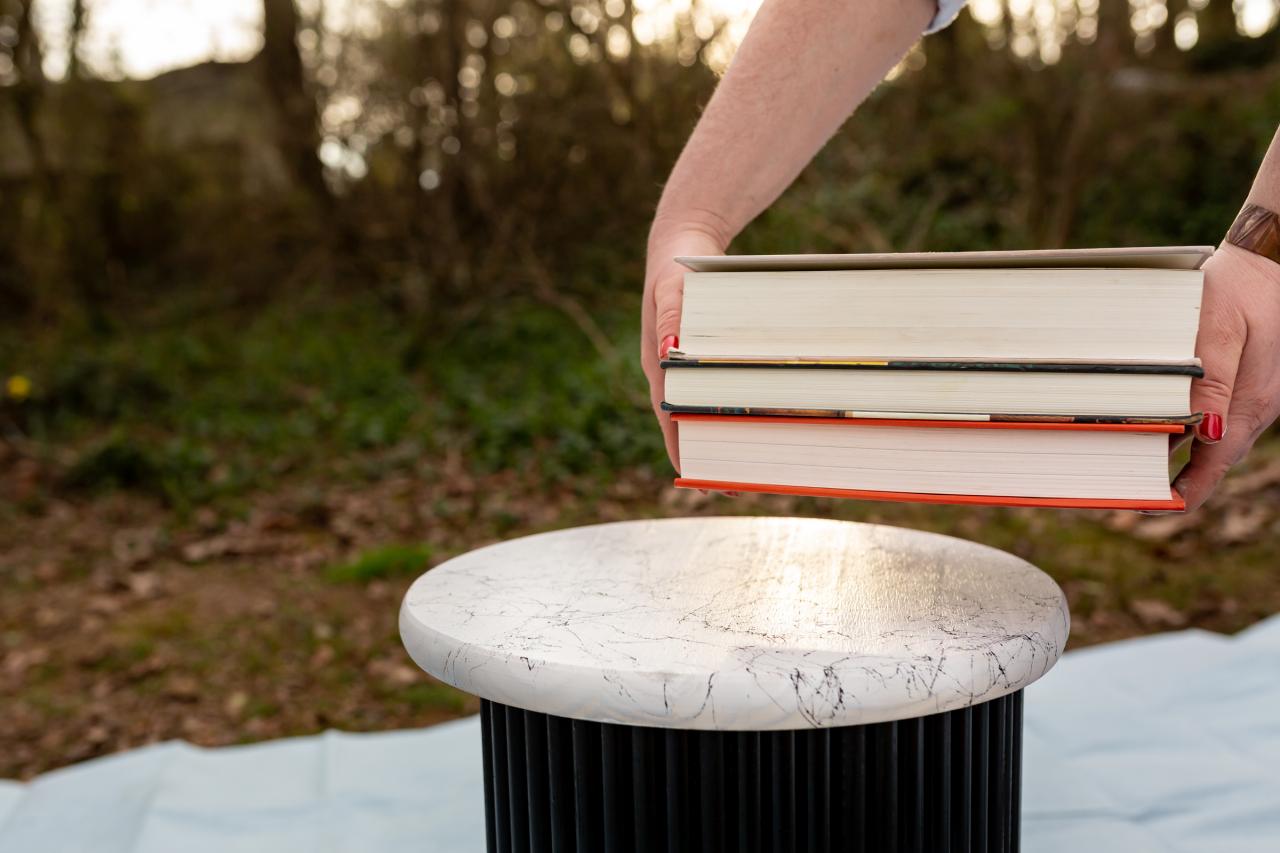
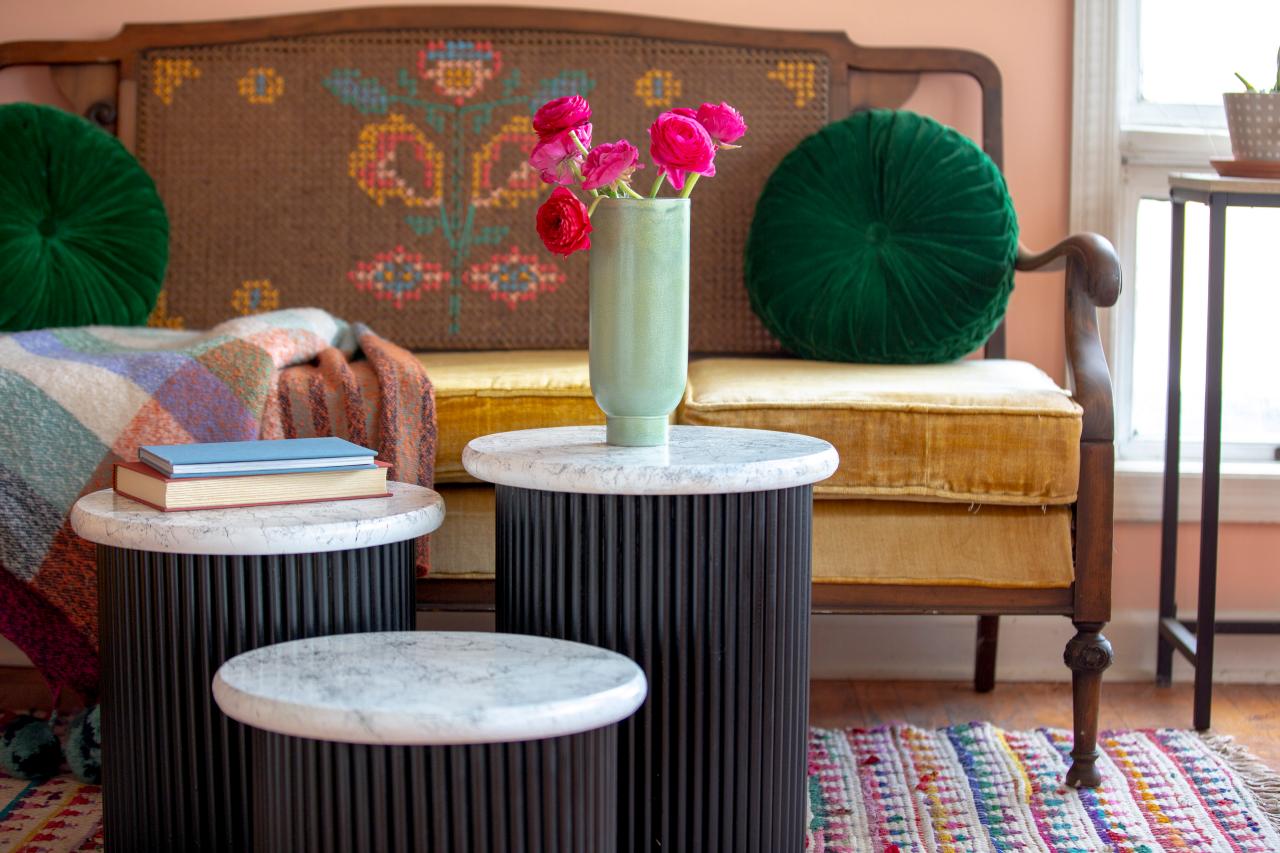
Spray paint the base of the table using matte black spray paint (Image 1); add two coats of paint to ensure complete coverage. Once the base is dry, add wood glue around the top of the base (Image 2) and place the wooden circle on top (Image 3). Tip: Place heavy books on top of the table to help create a stronger bond as the wood glue dries (Image 4). Use your trendy, new table as a single piece or group it with more tables for a dramatic layered look (Image 5).
Cassidy Garcia
Cassidy Garcia
Cassidy Garcia
Cassidy Garcia

Liz Gray
Furniture DIYs

How to Paint a Faux Marble Tabletop
Get the look of Carrara marble for less with our easy DIY.
Turn a Wood Pallet Into an Ottoman
Take DIY decor to a new level with this pallet ottoman.

How to Make a Chic, C-Shaped Side Table
Function meets fabulous in this easy, low-cost DIY.


