


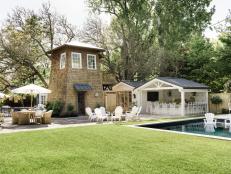
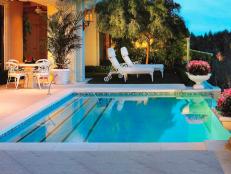
Make a DIY Stock Tank Pool
This stock tank pool how-to will have you lounging in the summer sun in just one weekend — and for a lot less cash than you'd expect.

Yasmin Murphy

Summer is finally here and what better way to cool off than a backyard pool. Stock tank pools are trendy, affordable and surprisingly easy to DIY. HGTV stylist Jill Tennant shares a step-by-step guide to convert a livestock watering tank into a backyard pool that’s budget-friendly and super stylish. Flamingo float optional.
Materials + Tools
- 8' galvanized stock tank
- above ground pool filter pump
- above ground pool inlet kit
- above ground plunger valves
- pool filter cartridges
- chlorine dispenser
- pool skimmer
- 11 cans of matte white exterior primer
- green exterior paint
- paint thinner
- fine-to-medium grit sand blocks
- electric drill
- 2-3/4'' bi-metal hole saw
- painter's tape
- water hose
- tamper
- rake
- 2 bags of sand
- 2 sheets of 8-1/2 x 11" paper
- scrap craft paper
- 1 metal stake
- bundle of string
- white vinegar
- rags
- level
- tape measure
- pencil
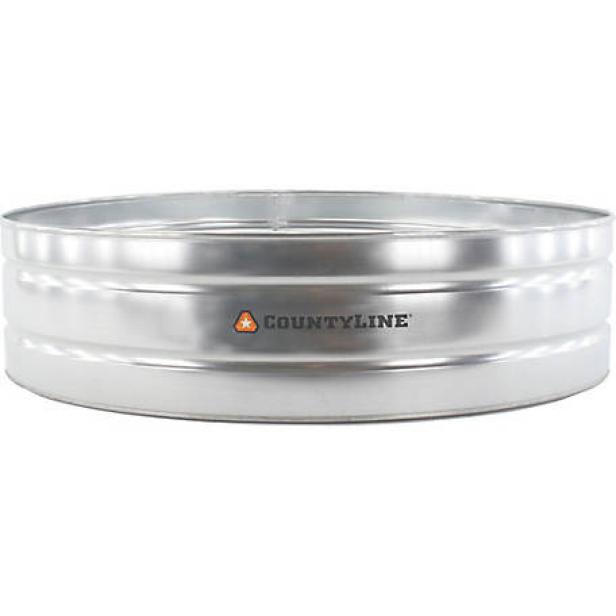
Stock tanks are large water tanks primarily used to provide drinking water for cattle, horses and other livestock, but they're often repurposed in home gardens and yards to create ponds and swimming pools.
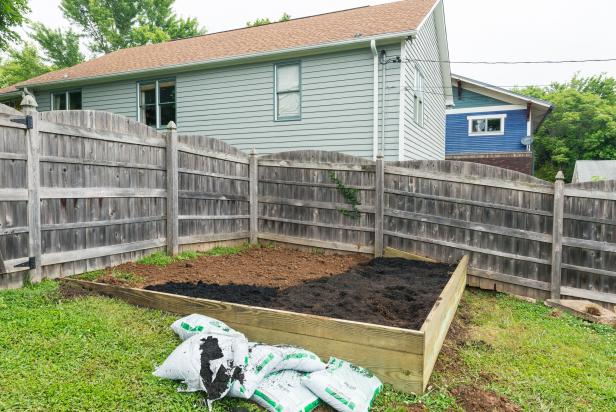
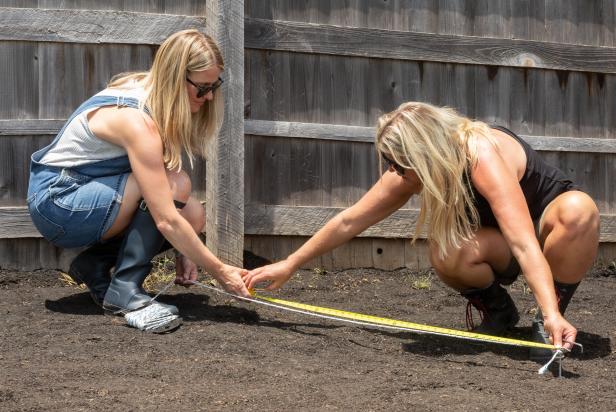
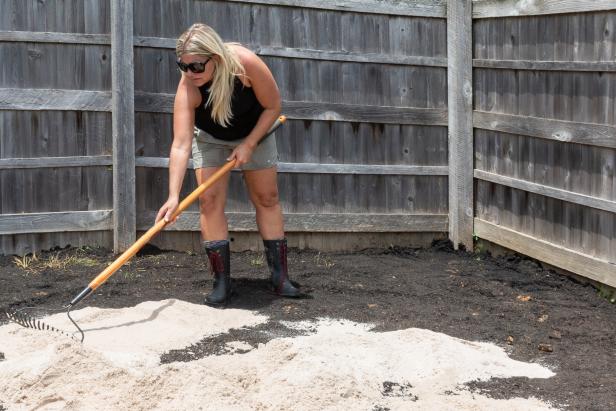
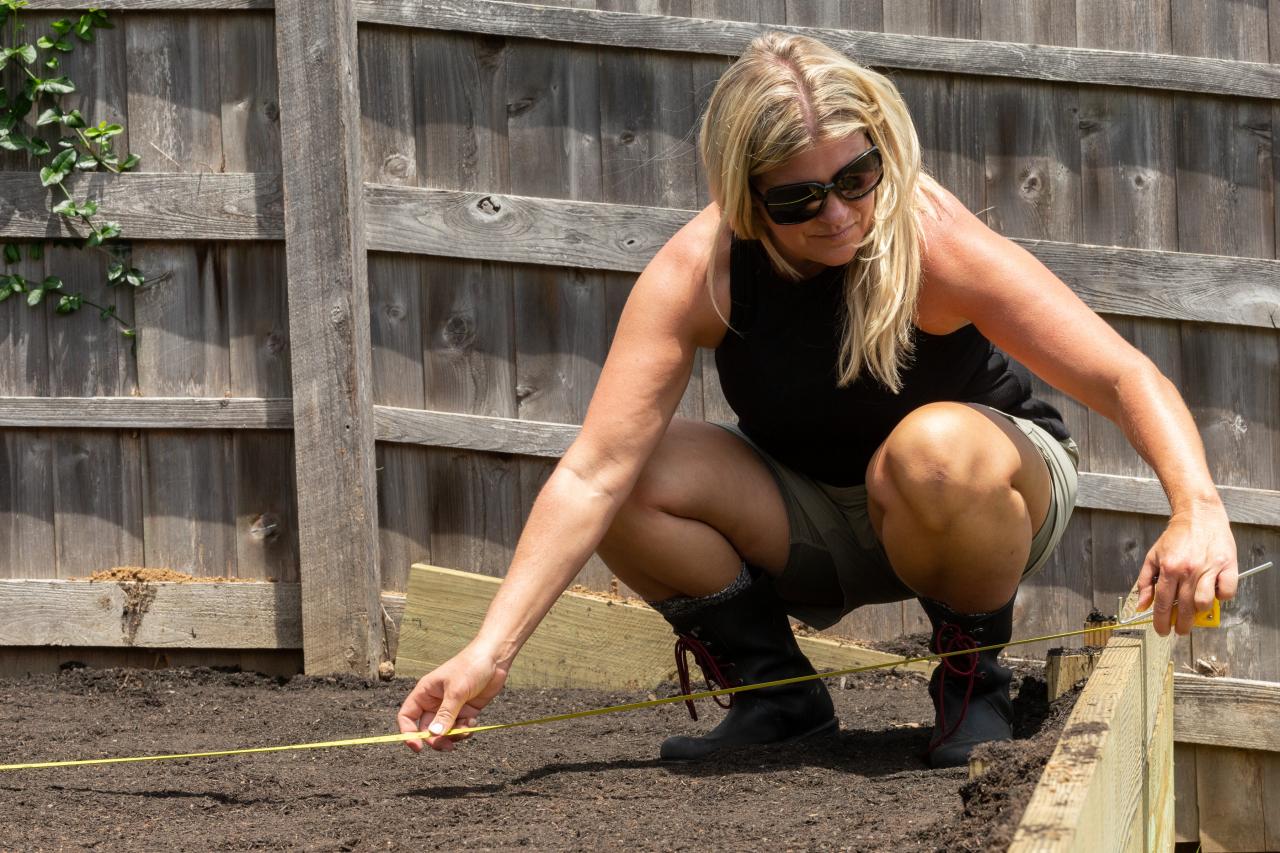
Level Your Landscape
Before you begin, ensure the area where the 8-foot stock tank pool will live is perfectly level. If the yard is not level, build a partially raised bed to ensure the pool will sit flat on the ground (Image 1). First, stake out the dimensions of the bed length with a measuring tape (Image 2). Then use a shovel to dig narrow trenches around the uneven sides of the slope to fit lumber planks. Place lumber planks inside the trenches and screw the boards together. Secure with mixed concrete. Next, add rebar along the slope where needed and cover thoroughly with a thick layer of dirt. Last, go over the entire area several times with a tamper (Image 3) and check frequently with a level (Image 4).
Yasmin Murphy

Yasmin Murphy

Yasmin Murphy

Yasmin Murphy
Set Circumference + Sand
Measure to find the center of the raised bed and mark it with a small stake. Then measure a 4-foot piece of string and tie it to the stake (Image 1). Take the end of the string and walk around the perimeter, marking the circumference as you go. Note: The marked circle will act as the place marker for the pool. Now dump 1-2 bags of sand inside the marked circle (Image 2). Use a rake to evenly spread out the layer of sand (Image 3) and use a tamper to flatten the surface (Image 4). Check with a level.
Yasmin Murphy

Yasmin Murphy
Yasmin Murphy

Yasmin Murphy
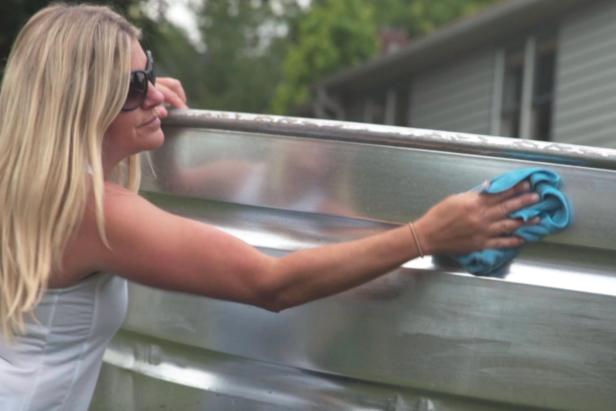
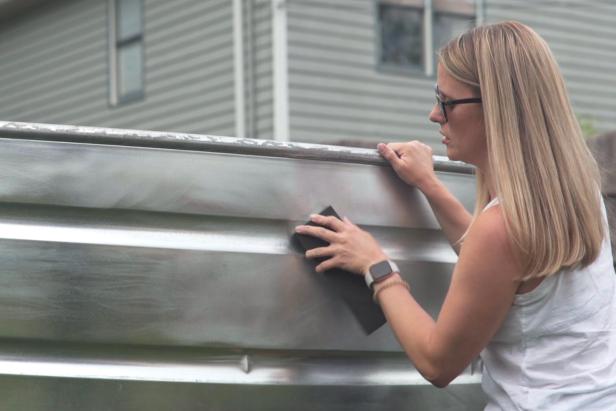
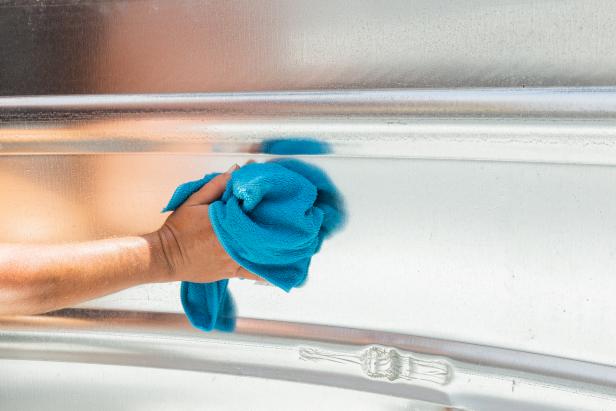
Prep Tank
Team lift the stock tank onto a raised working area, like a portable work table or several folding sawhorses in the backyard. Use paint thinner and a clean rag to clean the outside of the stock tank to remove any dirt and debris (Image 1). Next, use a fine-to-medium sanding block to lightly scrub the outside of the stock tank to remove excess shine and create grain for the primer to adhere (Image 2). Last, remove any sanding dust by using another rag and white vinegar to clean the surface (Image 3).
Yasmin Murphy
Protect + Primer
Cover and tape the inside of the pool with craft paper to protect it from overflow spray paint (Image 1). Next, add one coat of matte white primer to the outside of the tank (Image 2). Let dry completely. Then add one more coat of primer to the outside of the tank and let dry overnight. Tip: You will need 10-11 spray cans of white primer for an 8-foot stock tank.


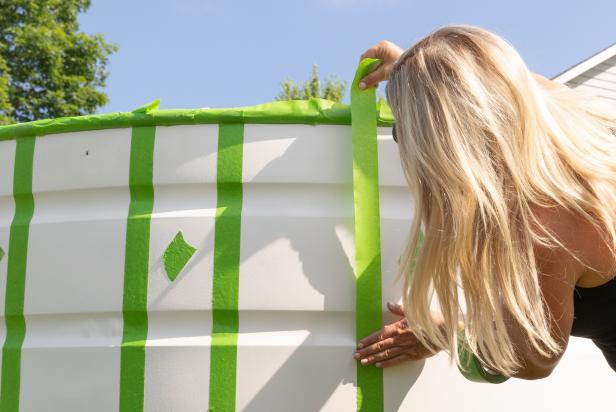
Mark + Paint Stripes
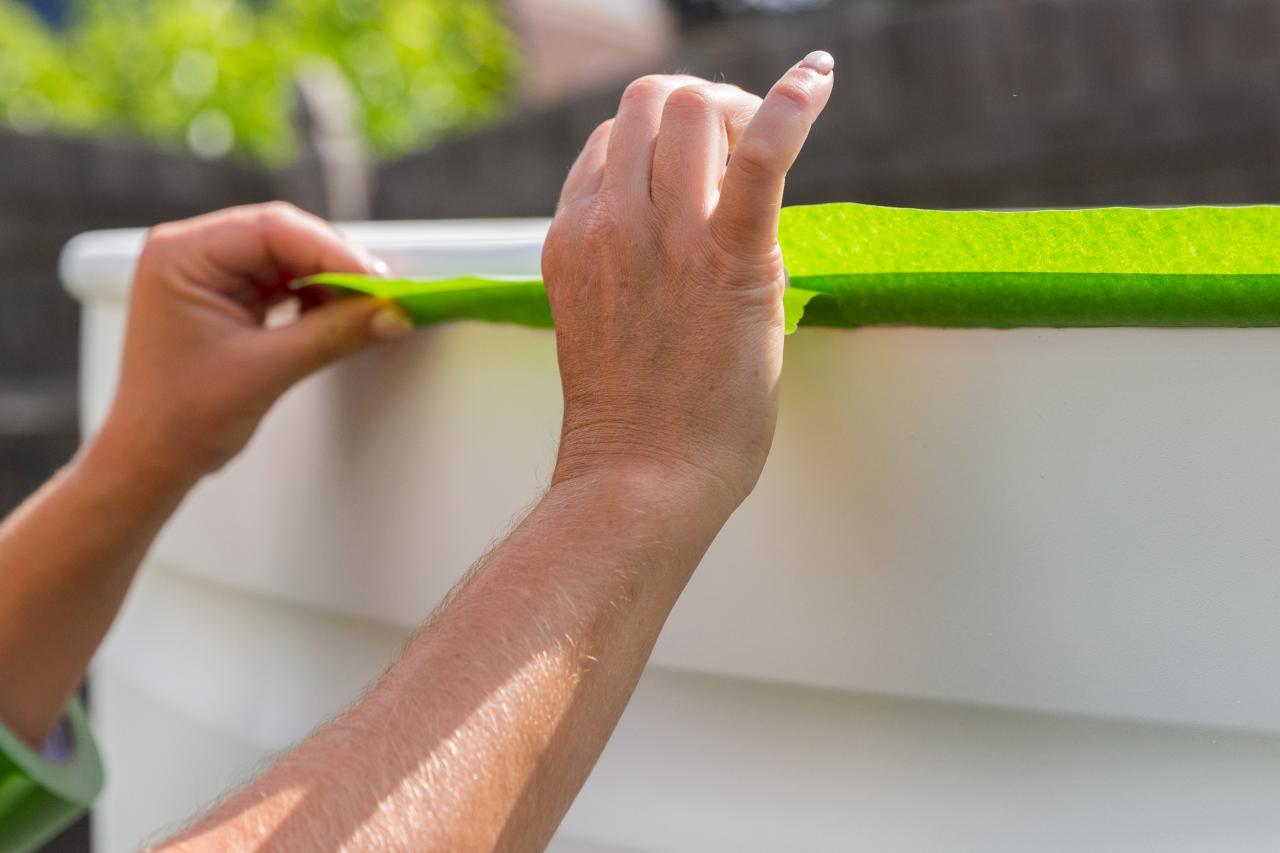
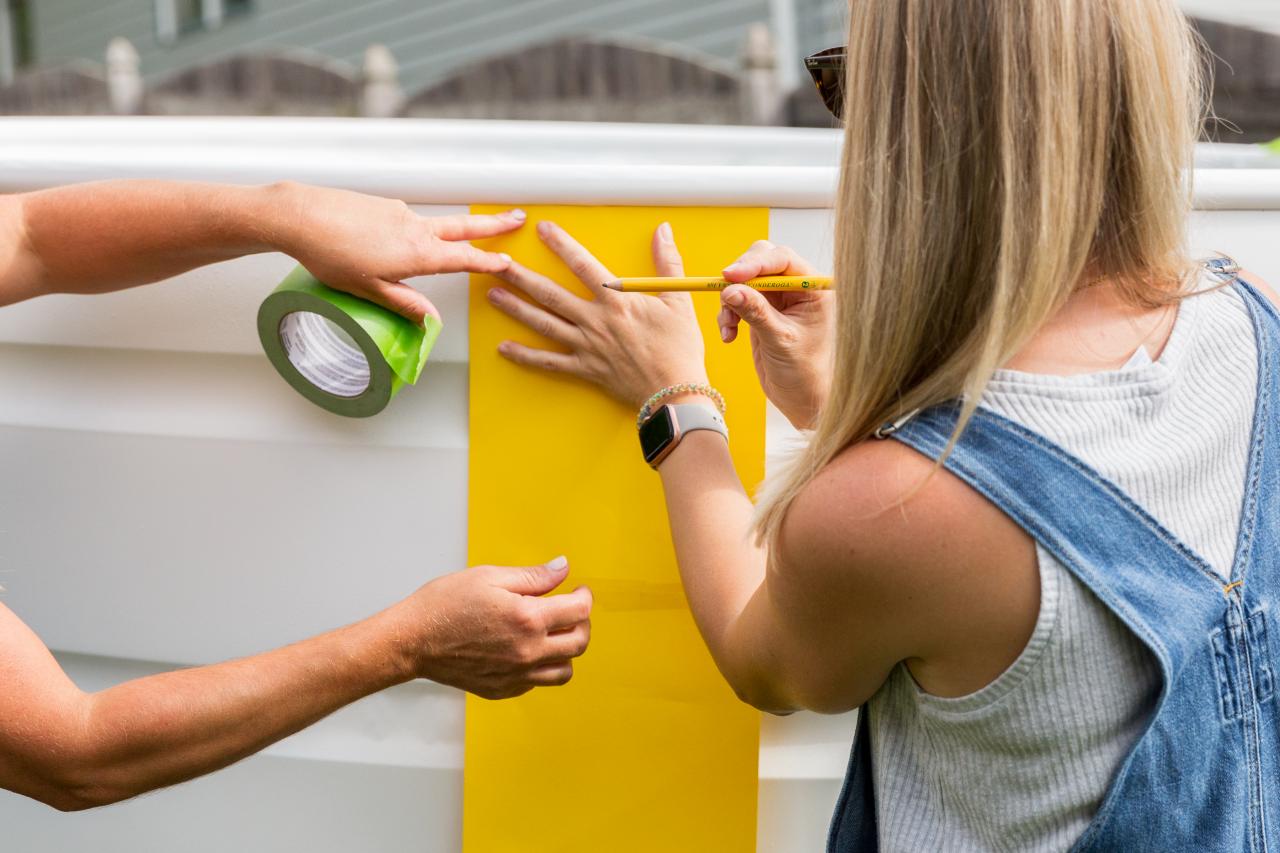
First, thoroughly wrap the lip of the stock tank all the way around with painter’s tape (Image 1). Next, tape two 8-1/2-inch by 11-inch pieces of paper together vertically and place them onto the side of the stock tank pool beneath the lip (Image 2). Then, use a pencil to create tick marks on the top and bottom. Once marked all the way around, add painter’s tape vertically along each tick mark (Image 3). Tip: Place a small piece of tape in the center of the sections that do not need color. Next, spray the painter's tape with a coat of primer to seal the edges for perfect stripes (Image 4). Let the primer dry for one hour. Next, pour green exterior paint into a paint tray and dip a roller into the paint. Apply the first coat of green paint to the designated stripe sections (Image 5) and wait until dry. Then, add a second coat for a bolder look. Once dry, carefully peel off the painter’s tape to reveal perfect green stripes.

Yasmin Murphy

Yasmin Murphy
Yasmin Murphy

Yasmin Murphy

Yasmin Murphy
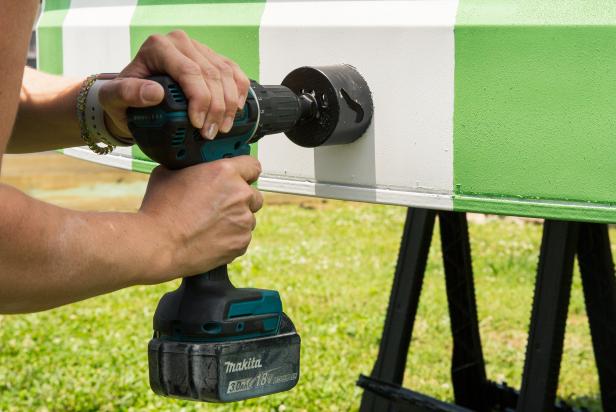
Drill Holes + Add Drain Kits
Use an electric drill and 2-3/4-inch hole saw drill bit to make the holes for the above ground pool inlet set (Image 1). Note: Drill holes per instructions on the inlet set. Once the holes are drilled, use a course file to remove any rough metal edges. Secure the outside of the drain with caulking (Image 2) and attach the remaining parts following the kit instructions.
Yasmin Murphy

Yasmin Murphy
Installing the Pool
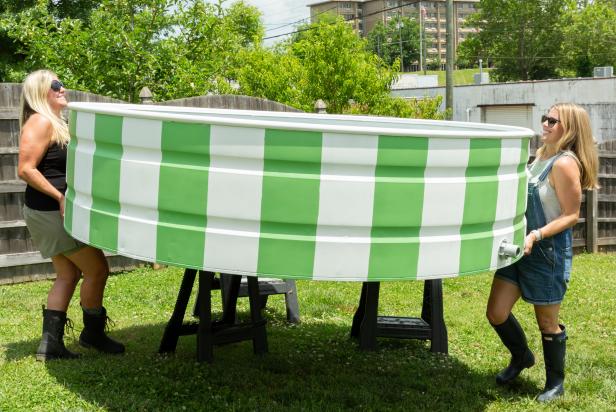
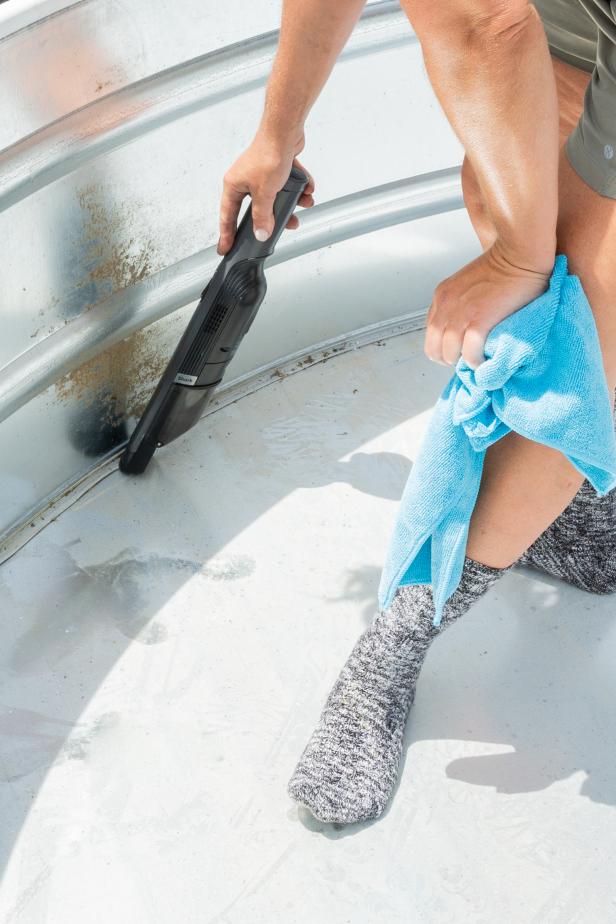
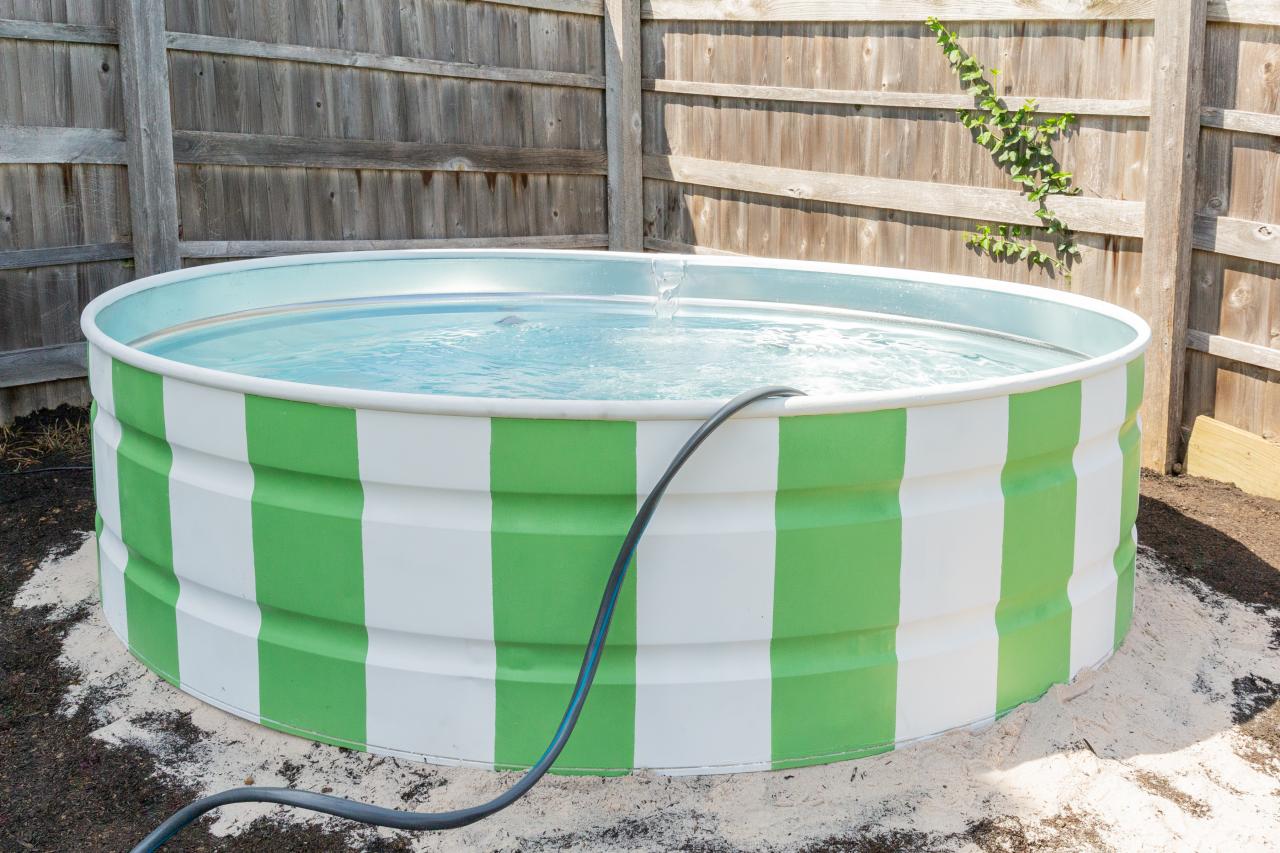
Team lift the painted stock tank pool (Image 1) and place it onto the marked, sandy circle (Image 2). Then hook up the above ground plunger valves, above ground pool pump and filter per their instructions (Image 3). Tip: Check for water leaks by spraying water from a water hose directly onto the drain ports to see if any leaks occur on either side. Next, climb into the tank and use a small vacuum to remove any debris or shaved metal from the inside (Image 4). Wipe down the inside with a rag and white vinegar to prepare for filling. Place a water hose inside the tank and fill (Image 5).
Yasmin Murphy

Yasmin Murphy

Yasmin Murphy
Yasmin Murphy

Yasmin Murphy
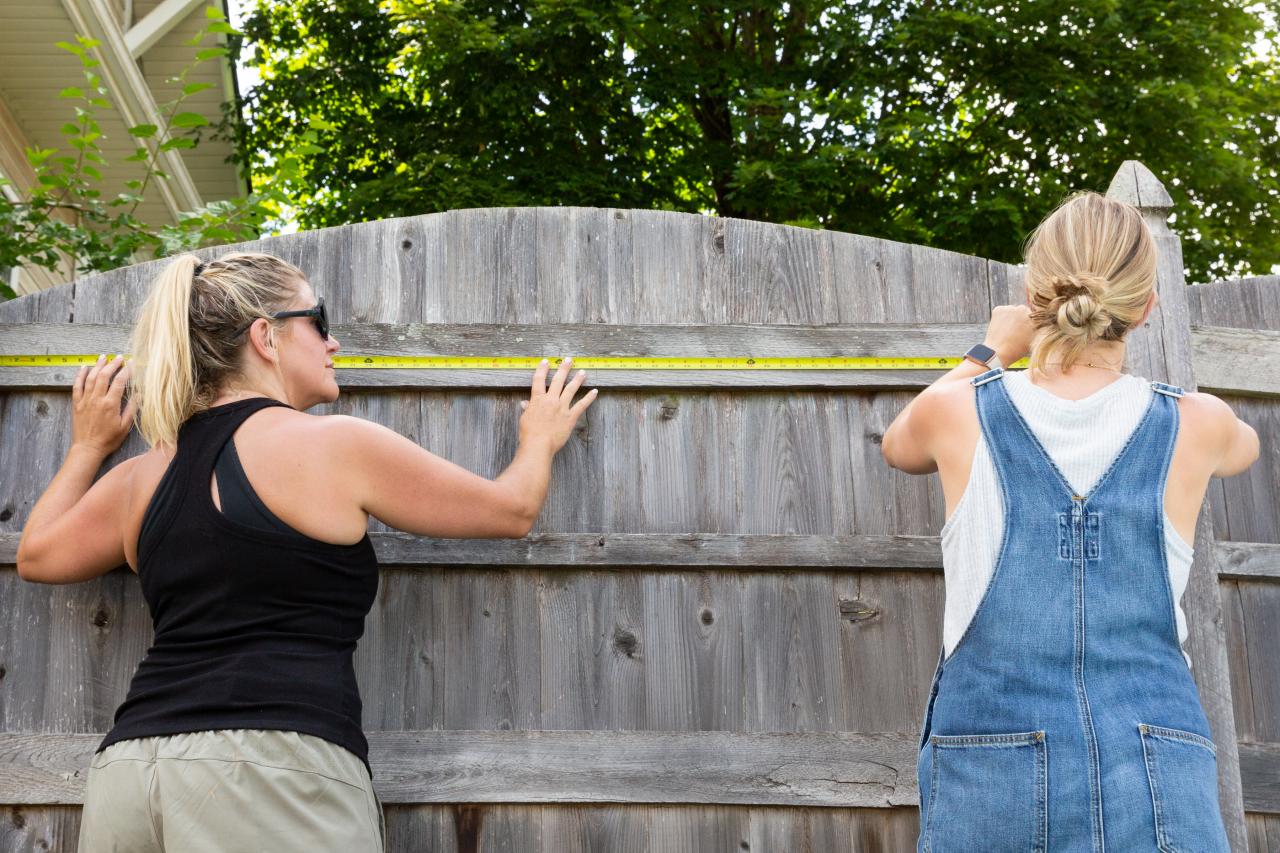
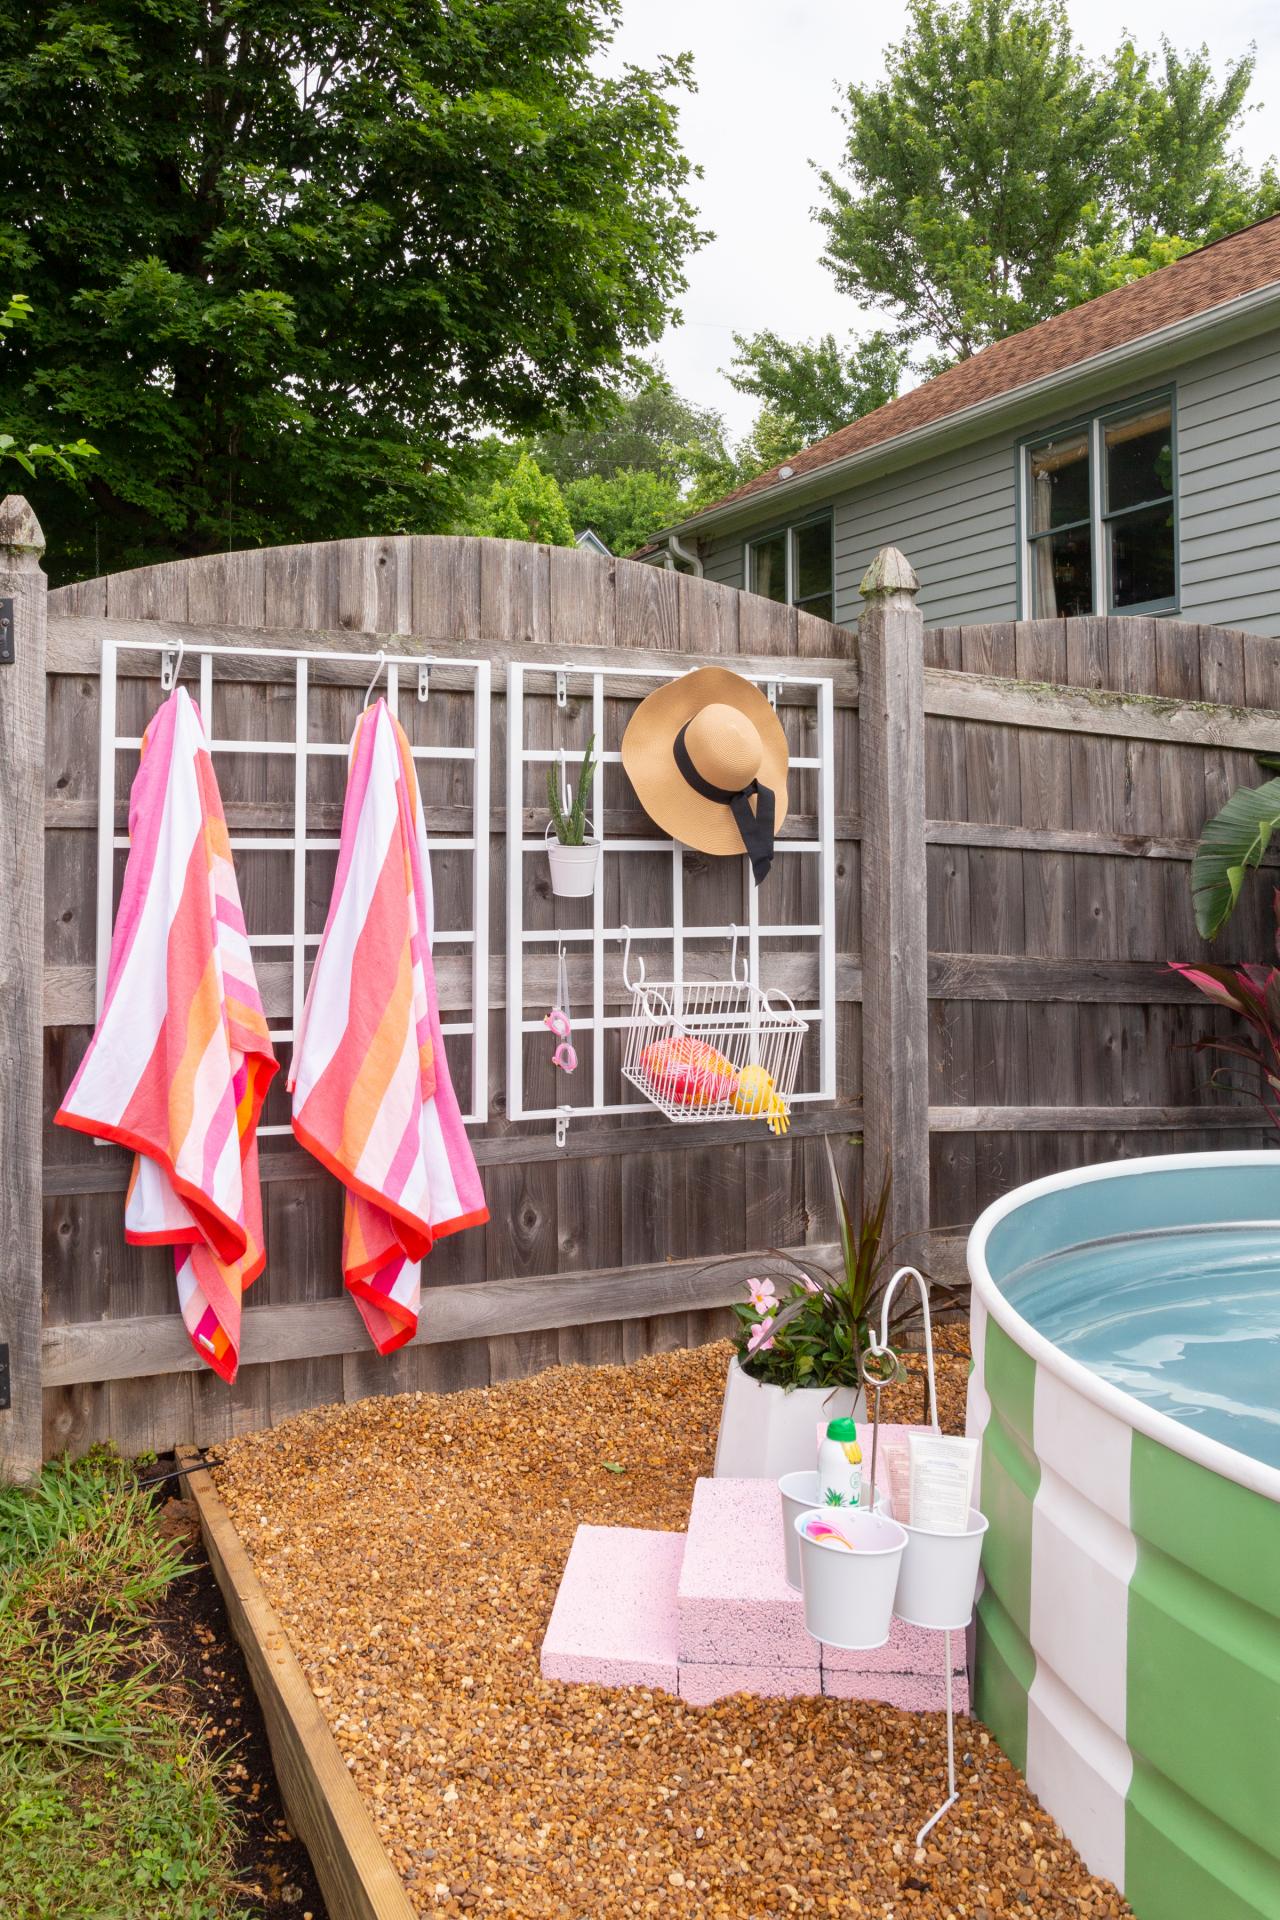
Trellis Pool Storage

Yasmin Murphy
Materials + Tools
- oversized "s" hooks
- 4 heavy duty wall hooks
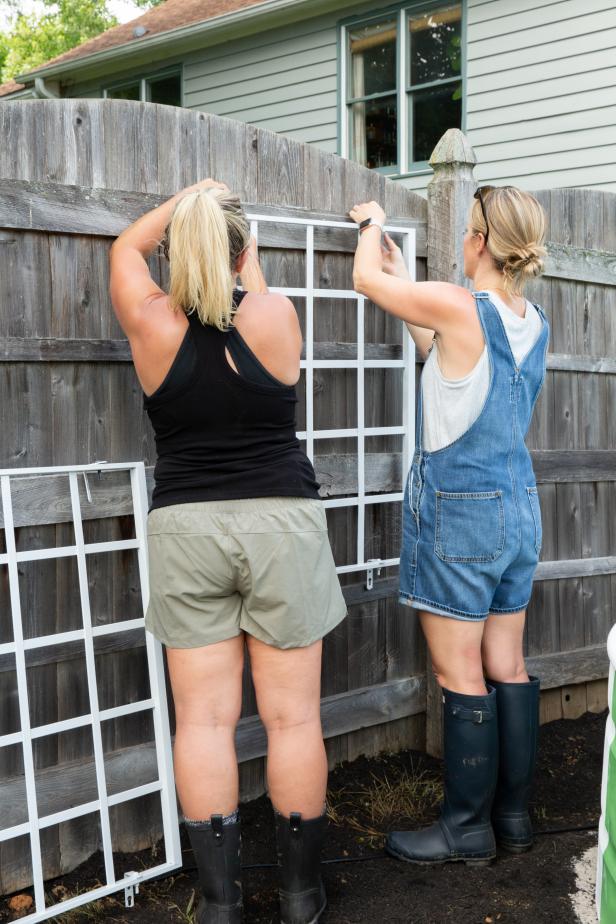
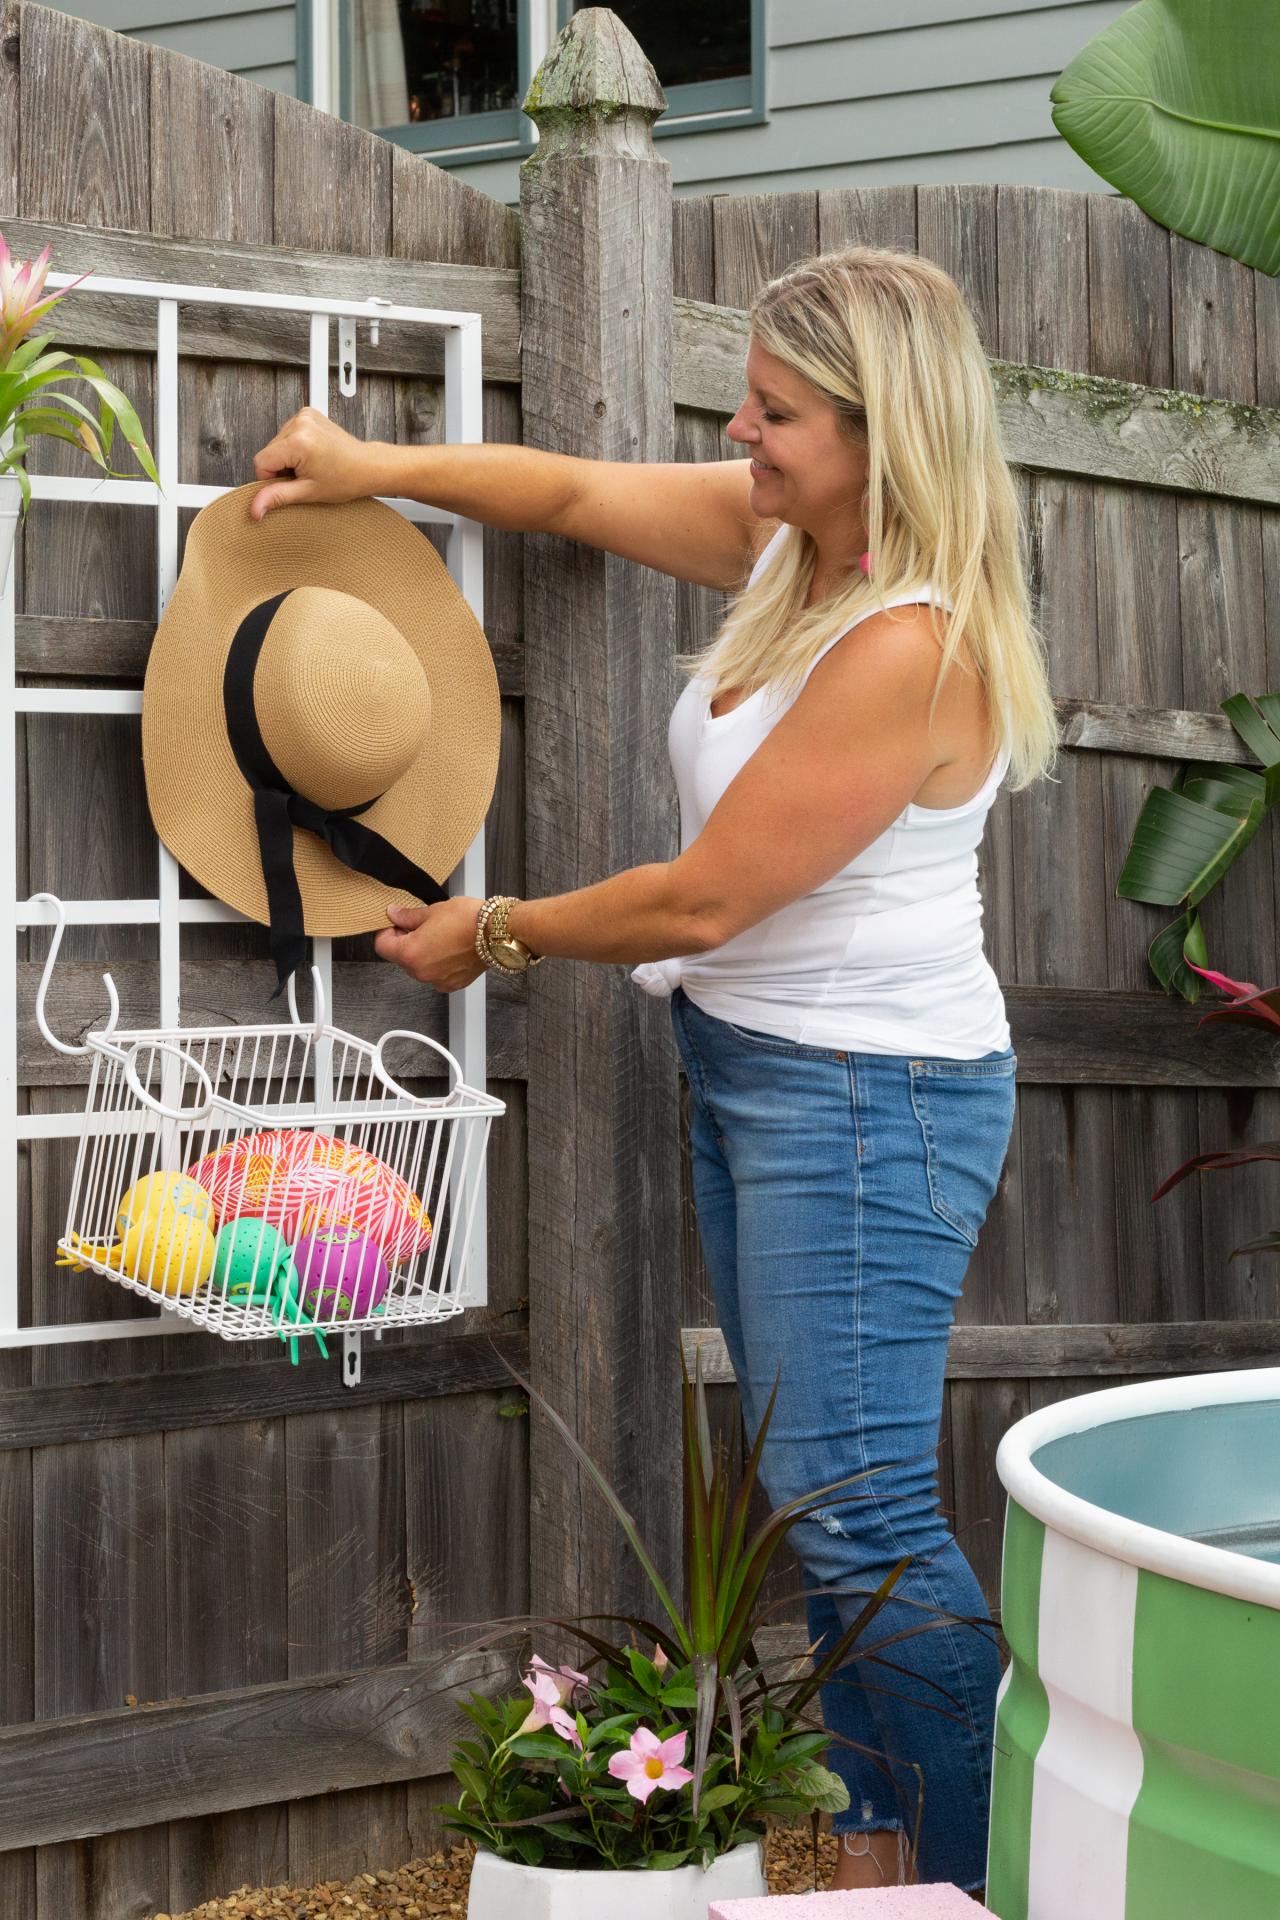
Create extra pool storage with a trellis. Start by measuring the wooden trellis to determine total width for fence hook placement (Image 1). Next, measure, mark and drill the fence holes for the hooks; use an electric drill to create the holes (Image 2). Then spray paint both sides of the trellis with matte white exterior paint (Image 3). Once dry, hang the painted trellis beside the pool (Image 4) and use S hooks to complete the look with towels and hats (Image 5).

Yasmin Murphy

Yasmin Murphy

Yasmin Murphy
Yasmin Murphy

Yasmin Murphy
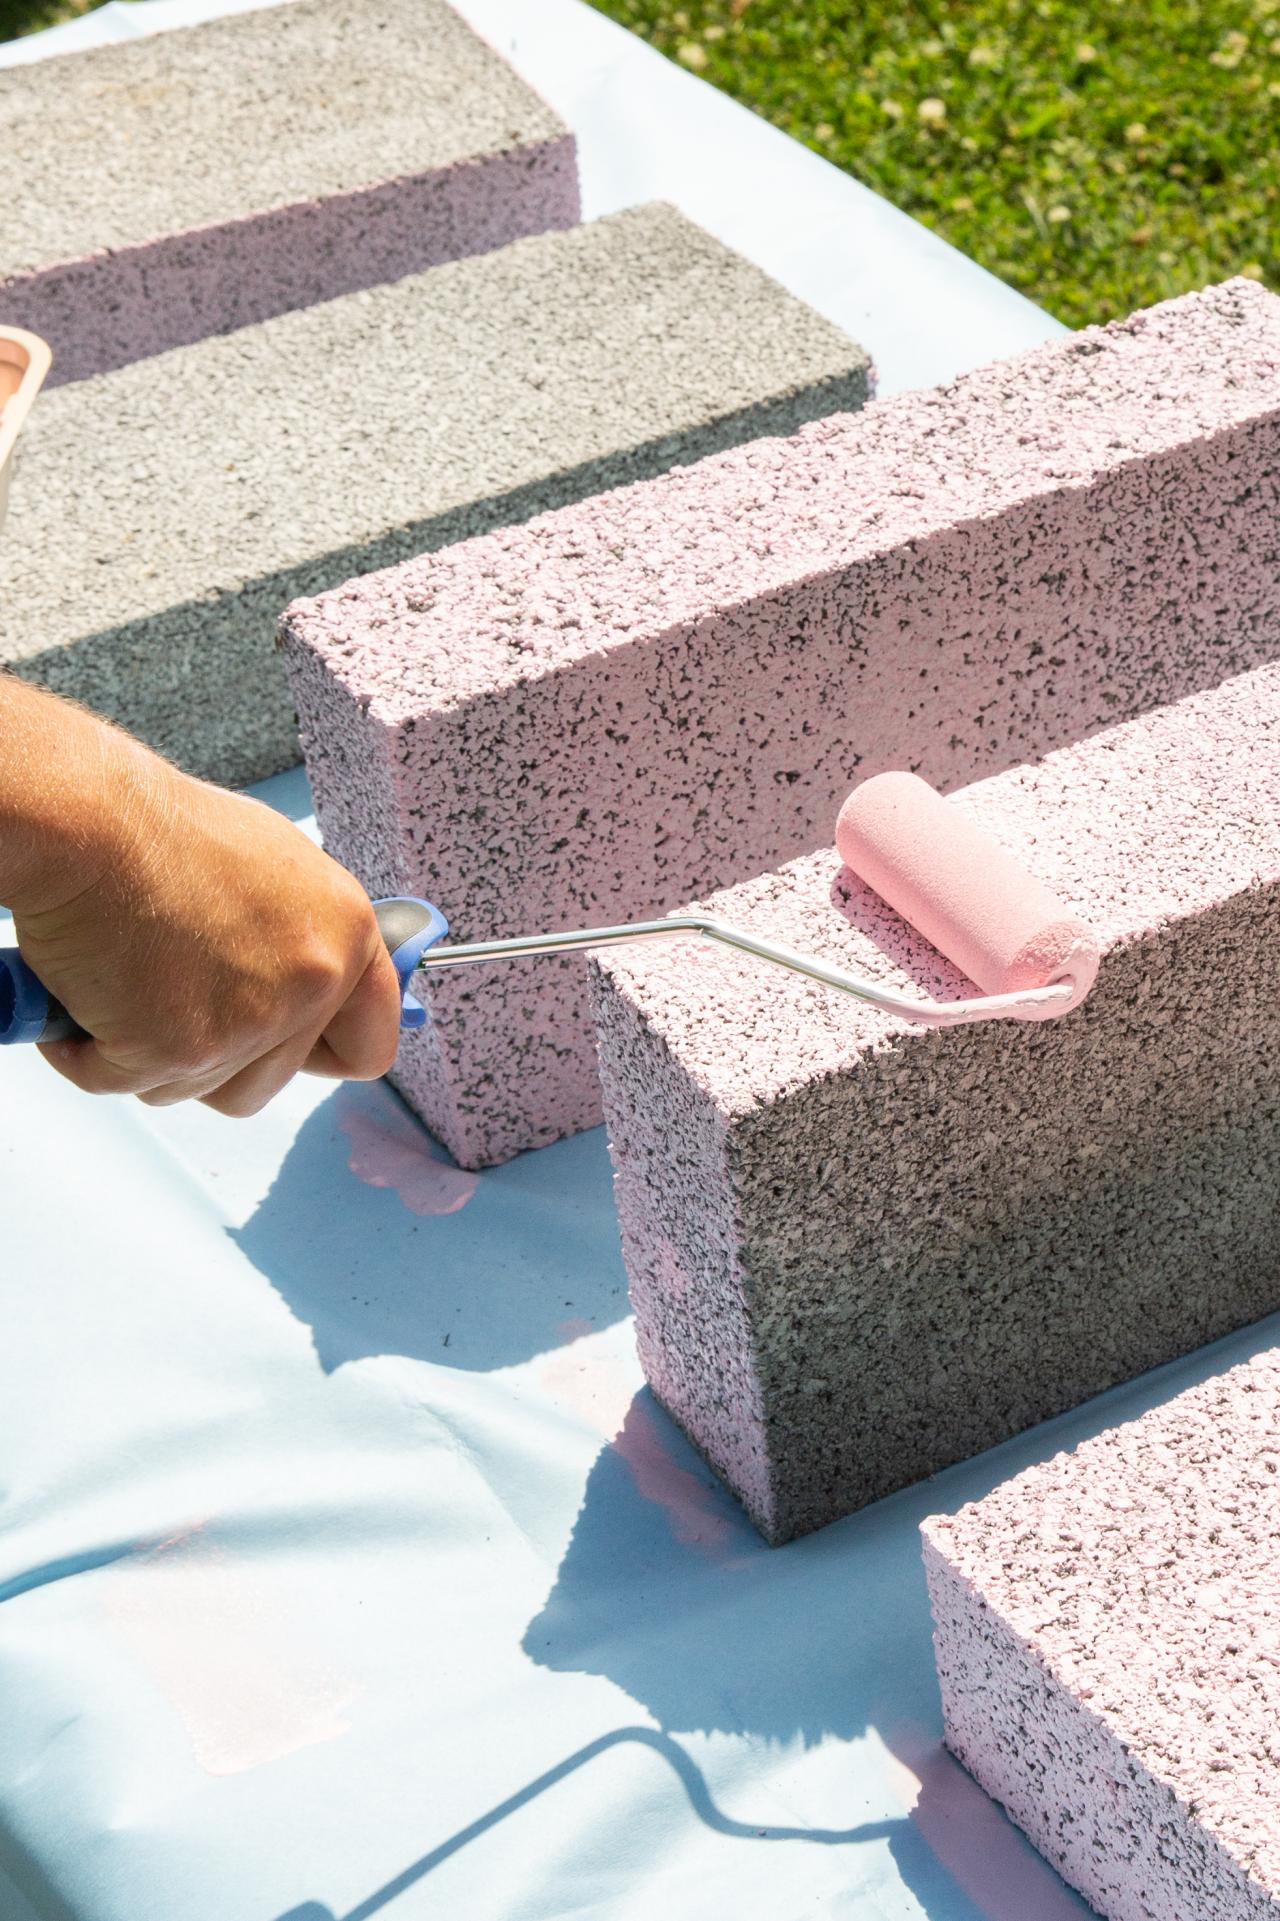
Little Pink Steps

Yasmin Murphy
Materials + Tools
- 6 cinderblocks
- 1-quart pink exterior paint
- roller
- paint tray
- caulk gun
- adhesive caulking
- 2-3 bags of pea gravel
- rake
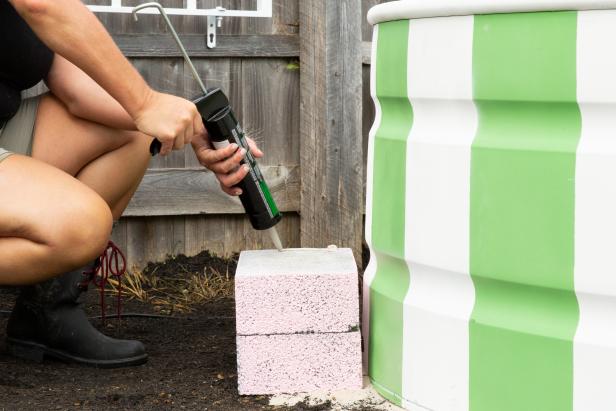
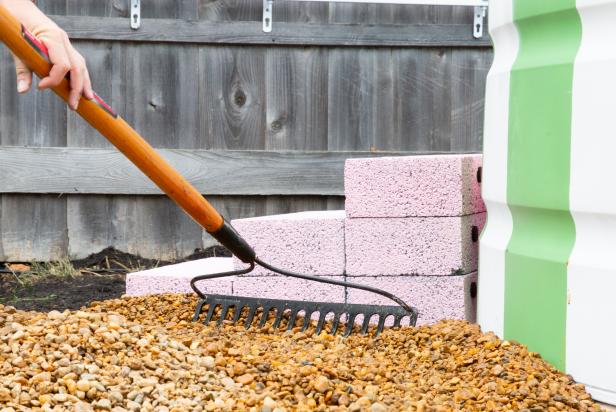
Make stylish steps for easy pool access. First, use a roller to paint six cinderblocks a colorful pink hue (Image 1) using pink exterior paint. When dry, stack them together and secure with a layer of adhesive caulking from a caulk gun (Image 2). Next, pour 2-3 bags of pea gravel around the pool perimeter and spread out with a rake (Image 3).

Yasmin Murphy
Yasmin Murphy
Yasmin Murphy
Add Decor + Enjoy!
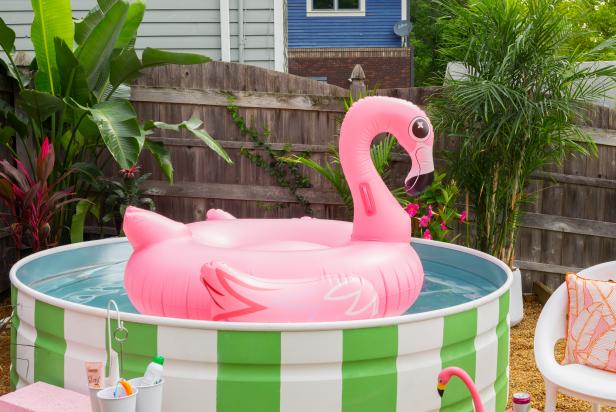
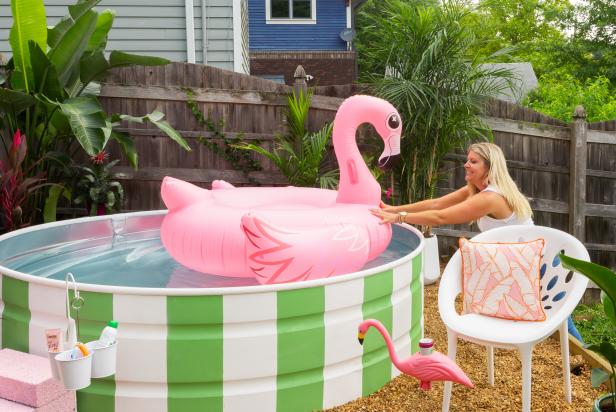
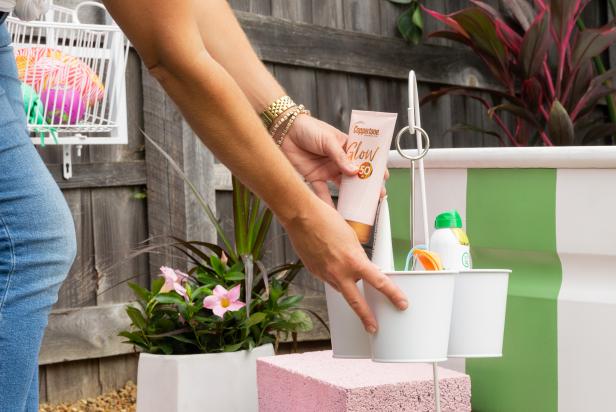
Your pool is officially open! Blow up some pool floats (Image 1-2) and invite the neighbors over for an afternoon swim. Don't forget the sunscreen — we put ours in a poolside planter for easy reapplying (Image 3).
Yasmin Murphy
Yasmin Murphy
Yasmin Murphy


