


DIY Concrete Vintage Camper Planter
Vacation starts now. Your plants can hit the road and see the sights in style in this vintage-inspired concrete camper.

Concrete Vintage Camper Planter
Summer vacation starts now. HGTV Handmade's Crafty Lumberjacks created this charming vintage camper planter with quick-setting concrete and a few embellishments.

Photo by: Caitlin Dabbs
Caitlin Dabbs

Materials + Tools
- insulation board
- foam board adhesive
- heavy duty blade knife
- cardboard
- packaging tape
- super glue
- cutting mat and ruler
- rapid set concrete
- bucket
- stir stick
- distilled water
- tupperware
- mineral oil
- 60- and 220-grit sandpaper
- rag
- painter's tape
- acrylic paint
- plants
- rocks
- wheels
- fabric
- balsa wood
1: Cut Out Mold
Measure and draw out the walls of your mold on the insulation board — one base, one back and two sides (Image 1). Use a round tin lid or bowl to create the curved edge of the back of the camper. For a smooth cut of the insulation board, use a new blade knife and cut three times along the same line, going deeper each cut. Next, cut a piece of cardboard to size and score horizontally to create flexibility to wrap along the curved backside (Image 2). Cut out a small door and window out of cardboard and wrap with packaging tape.


2: Build Mold
Use foam board adhesive to glue all sides of the mold together. Use packaging tape to hold together the mold while the glue dries. Then, tape the scored piece of cardboard (scored side out) along the curved backside with the packaging tape. Use super glue to glue the door and window on the inside of the mold, making sure the door is flush to the base.

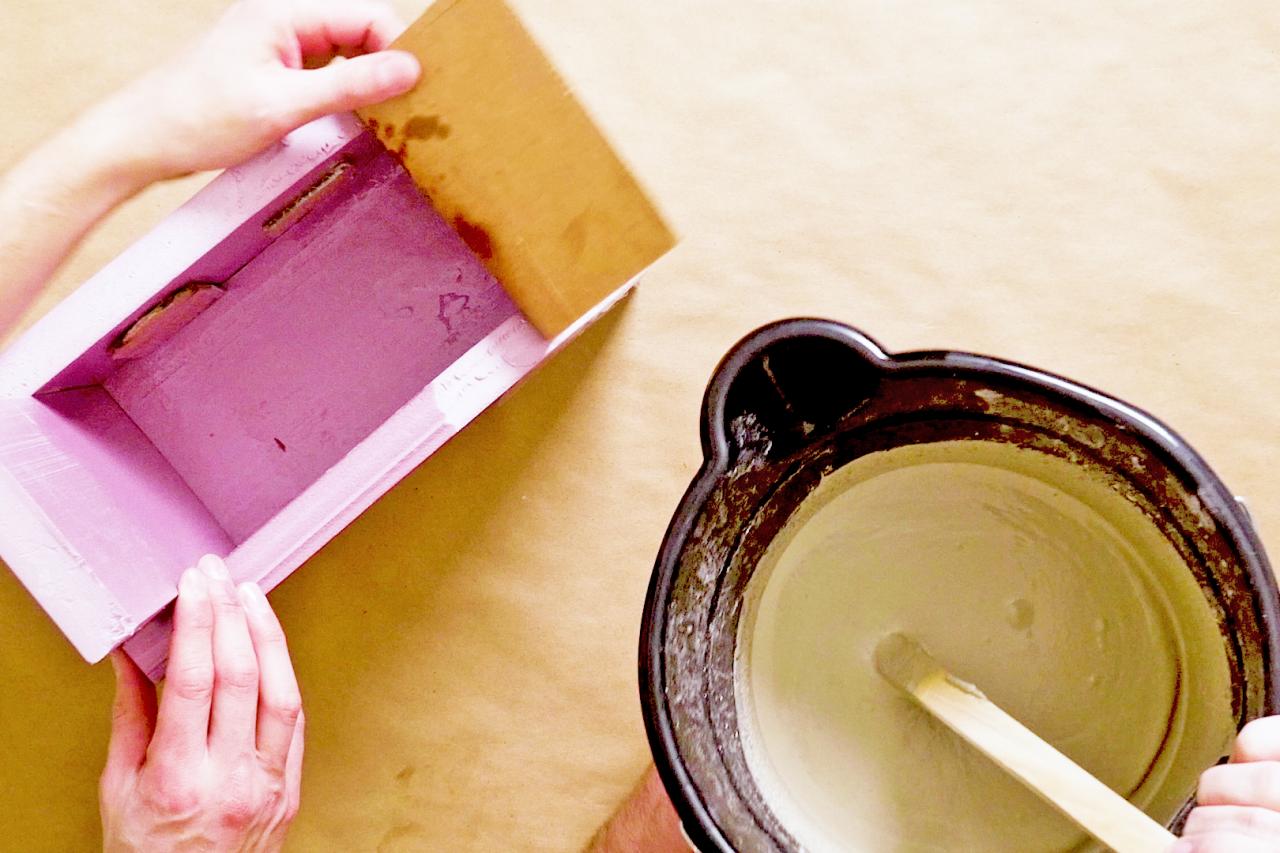
3: Prep & Add Concrete
Mix the concrete according to package instructions. For best results, use distilled water. Concrete can be messy so make sure to work in a well-ventilated area with drop cloths. Next, spray the inside of the mold with mineral oil and carefully pour concrete into the mold. Fill up halfway then place a plastic container in the center of the mold to create an area for the plants. To hold the container in place, place a heavy item inside it and place tape across the top while drying. Continue pouring the concrete until the mold is filled past the window and door. Next, lightly hit and tap the mold on the floor a few times for an even-leveled top and to prevent air bubbles. Let dry according to the concrete instructions.

Concrete Vintage Camper Planter: Mix the Concrete
After you prepare your mold, follow the instructions on the packaging to mix the concrete. Work quickly.
Photo by: Caitlin Dabbs
Caitlin Dabbs
4: Remove Camper & Sand
Once dry, remove the plastic container, peel off the cardboard backside and slightly stretch out the insulation board sides until the camper wiggles out. Use your craft knife to help pull off the door and window. If the camper comes out easily, you can reuse the mold over and over. Then, use 60-grit sandpaper to sand down any large imperfections. Switch to 220-grit to smooth out the surface and wipe clean with a rag.

5: Decorate
Give the camper a base coat with white acrylic paint and let dry (Image 1). Add a line of painters tape around the bottom half of the planter and paint a pop of color. Create embellishments such as a door, curtains and a license plate with balsa wood, fabric and paint (Image 2). Pro Tip: Peel off painters tape before the paint is fully dry to get the cleanest line. To add wheels, raise the back end of the camper by gluing a dowel underneath. Take off the wheels of a toy car and super glue them to each side of the camper.


6: Add Plants
Fill the center of the planter with soil and add small potted plants. If using faux plants, cut a cube of floral foam to size and push the stems inside. Shake rocks inside a zip-top bag with acrylic paint (for faux plants only) to match your planter and let dry. Then, add the rocks on top and finish it off with a decorative flamingo for a festive flourish.

More Concrete Crafts

Time's Ticking! Make This Chic, Gold-Leaf Concrete Clock
Ditch that outdated wall clock and make a stylish statement with an easy-to-create, concrete timepiece.

How to Make a Concrete Fire Bowl
No room for a fire pit? Make an easy concrete fire bowl that fits in a backyard of any size.

Make a Chic Concrete Side Table That Doubles as a Stool
This ultra-stylish concrete side table is mobile, colorful and tough, which is perfect for your outdoor living space.


