


How to Make a DIY Upcycled Bookend Vase From an Old Cereal Box
This trendy DIY upcycled bookend vase looks like clay, but it’s actually made of cardboard! Transform an old cereal box to give your bookshelf a boho-chic look for cheap.

Karen Kavett

Show off your beautiful faux flower bouquet in a unique, functional new way. With this step-by-step guide, HGTV Handmade's Karen Kavett shows you how to turn an old cereal box into a one-of-a-kind DIY upcycled bookend vase.
Materials + Supplies
- cereal box
- hot glue gun
- pattern
- scissors
- pen
- sandpaper
- craft knife
- wooden rings
- saw
- cutting board
- paint
- paintbrush
- baking powder
- rocks
- faux flowers
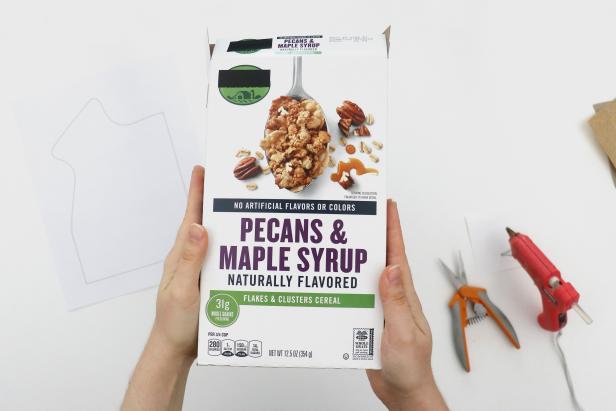
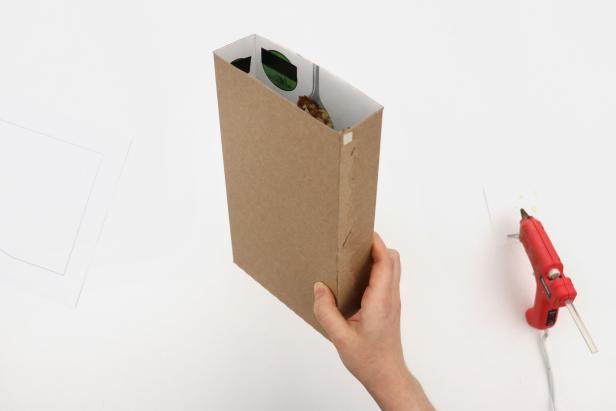
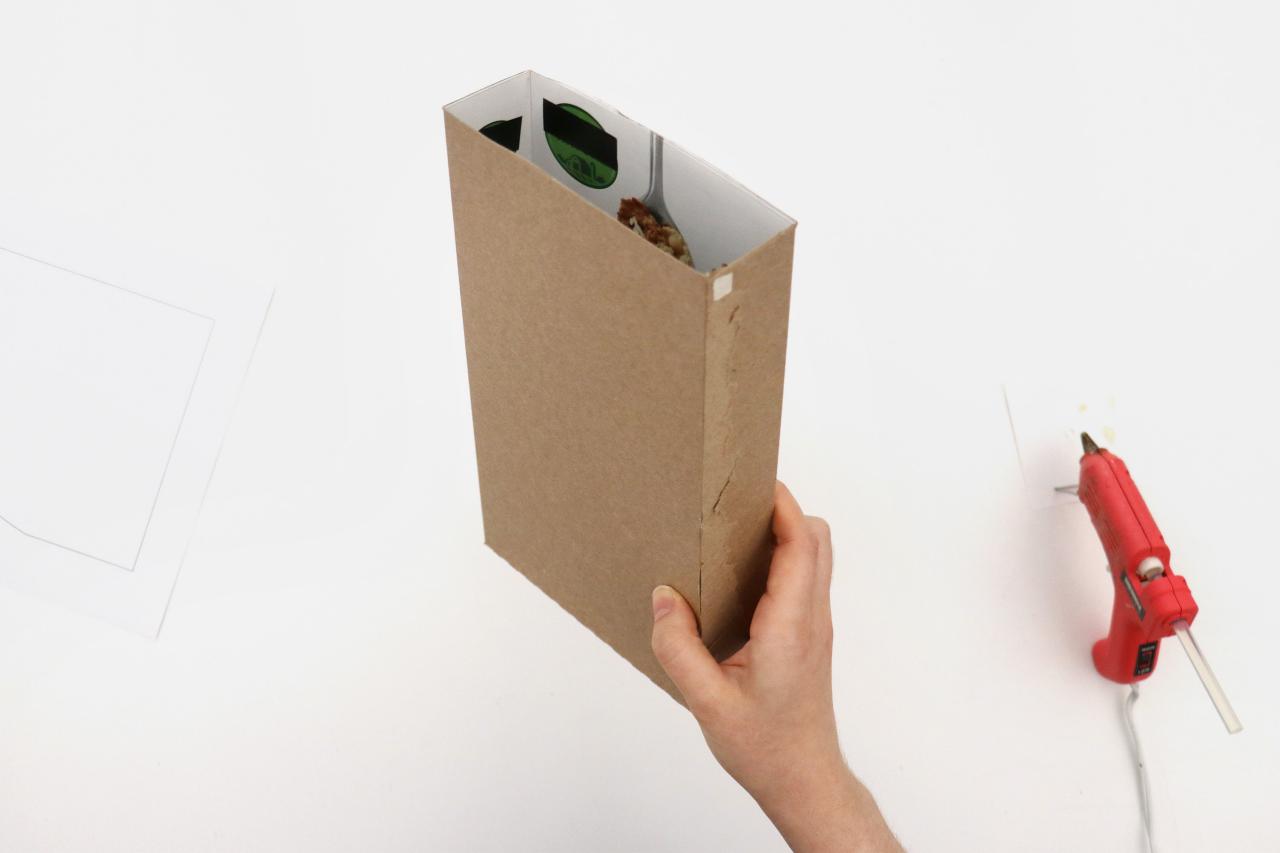
Turn Your Cereal Box Inside Out
Grab an old cereal box (Image 1). Cut off the top tabs from your box and carefully open it up (Image 2). Glue it back together so it is inside out (Image 3).
Karen Kavett

Karen Kavett
Karen Kavett
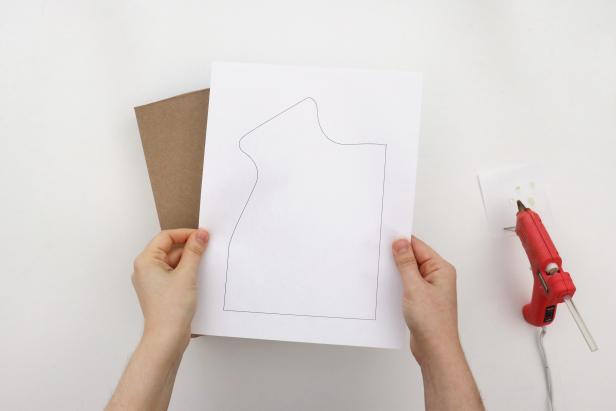
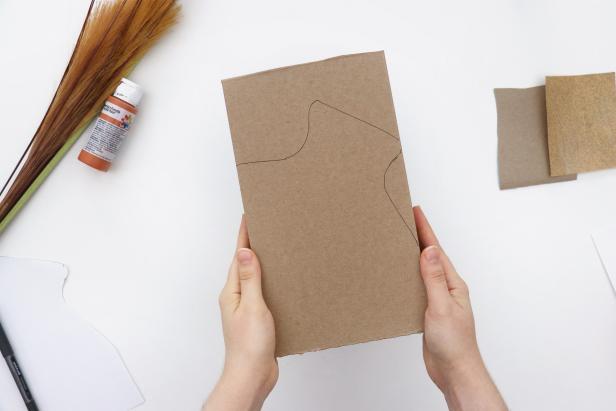
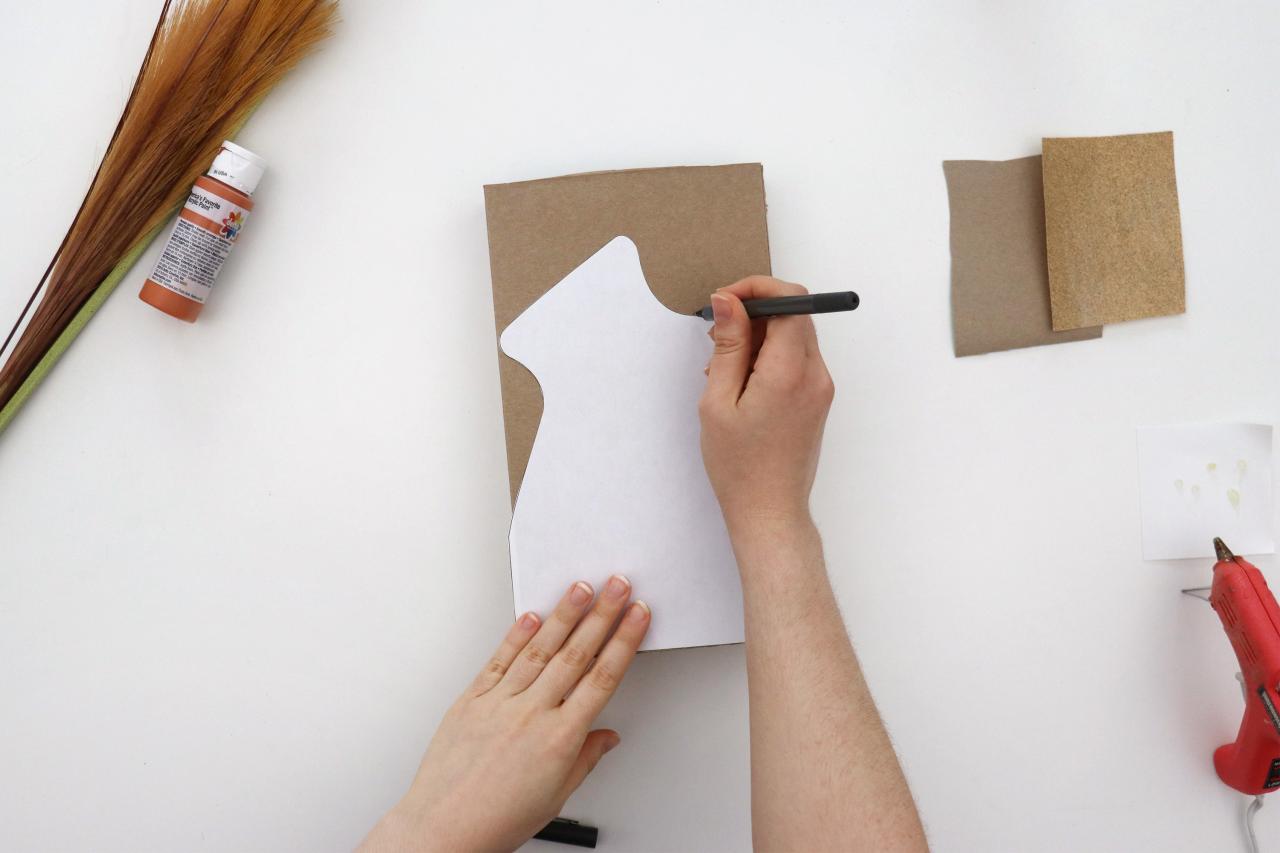
Trace Your Pattern
Print out the pattern and cut it out (Image 1). Trace it onto the front of the box (Image 2), and then flip it over and trace it onto the back of the box (Image 3).
Karen Kavett

Karen Kavett
Karen Kavett
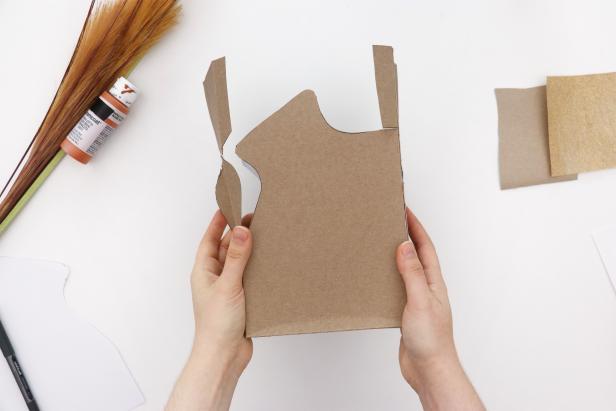
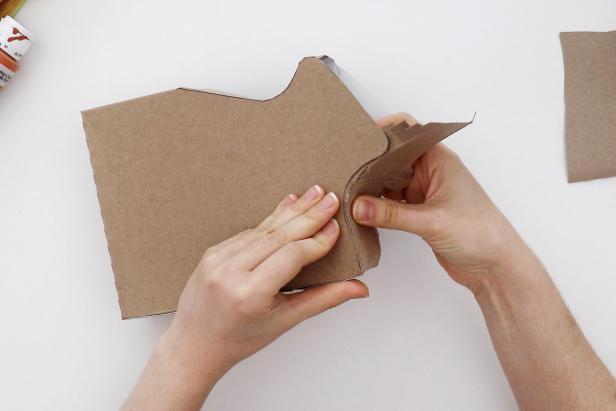
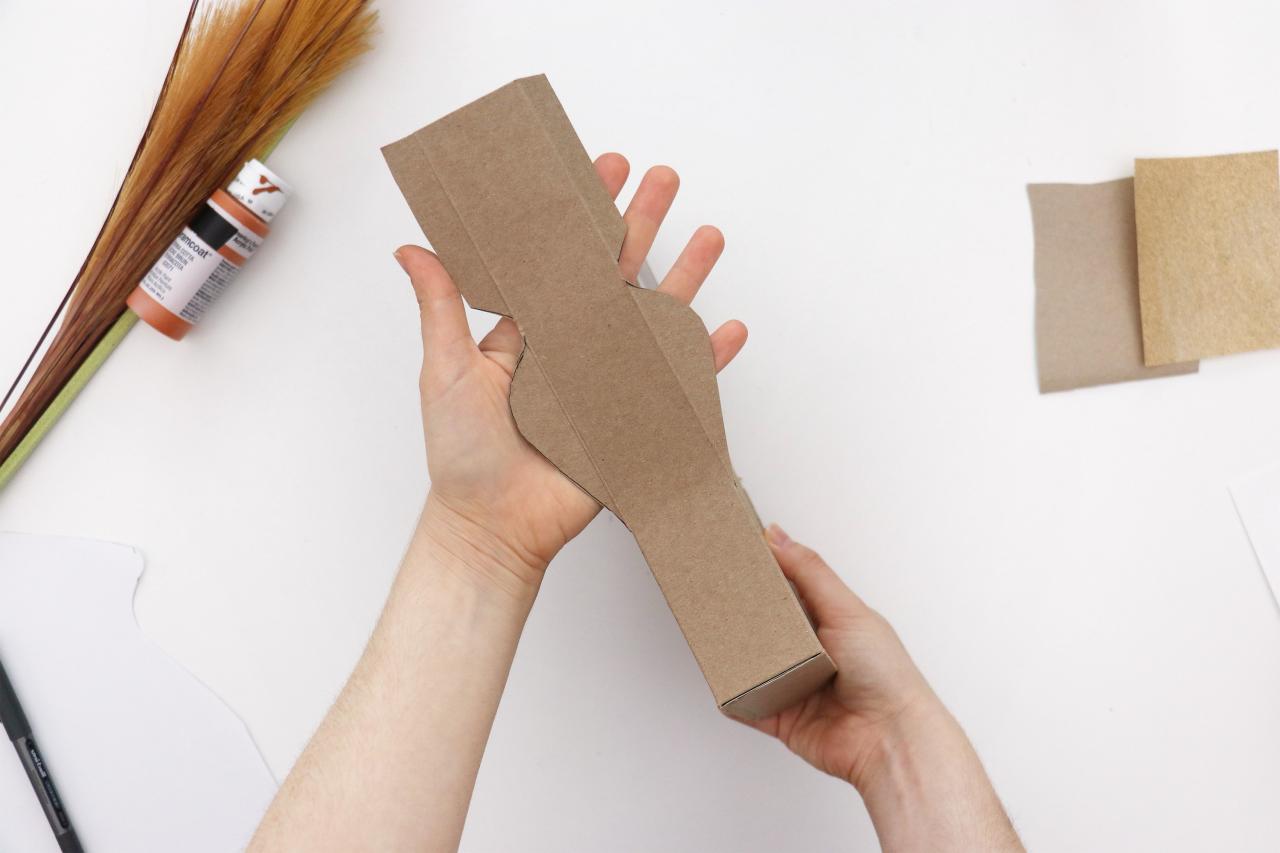
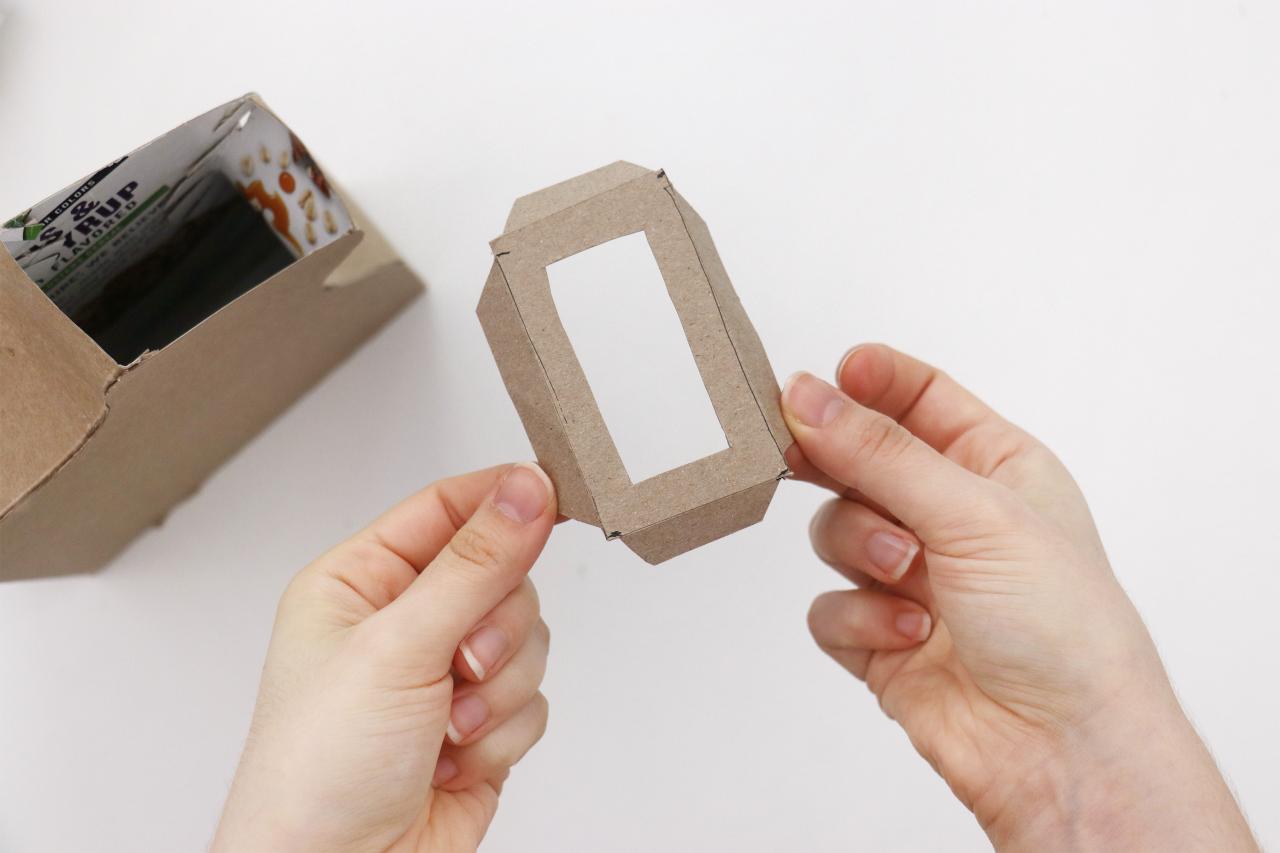
Cut Out Your Design
Cut the shape out from the front and back of the box (Image 1), leaving the sides of the box intact and with tabs on either side (Image 2 + 3).
Karen Kavett
Karen Kavett

Karen Kavett
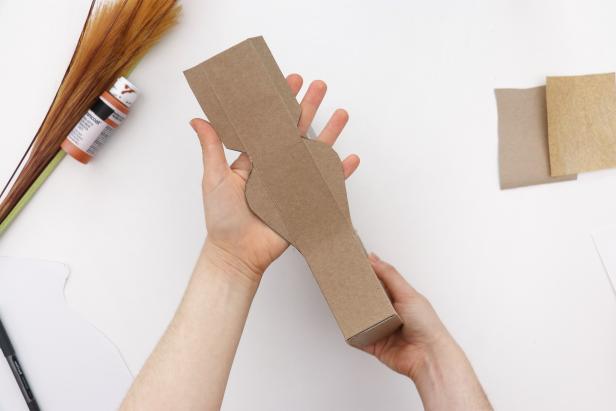
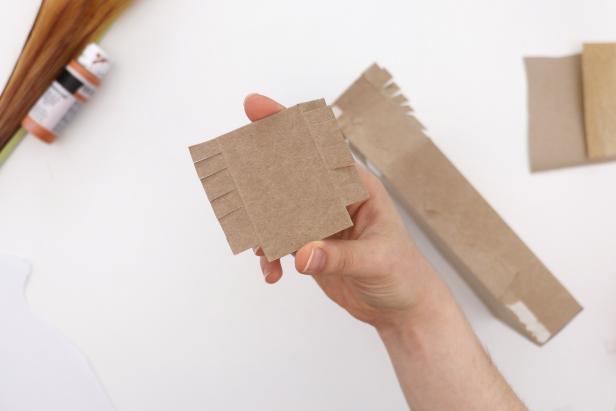
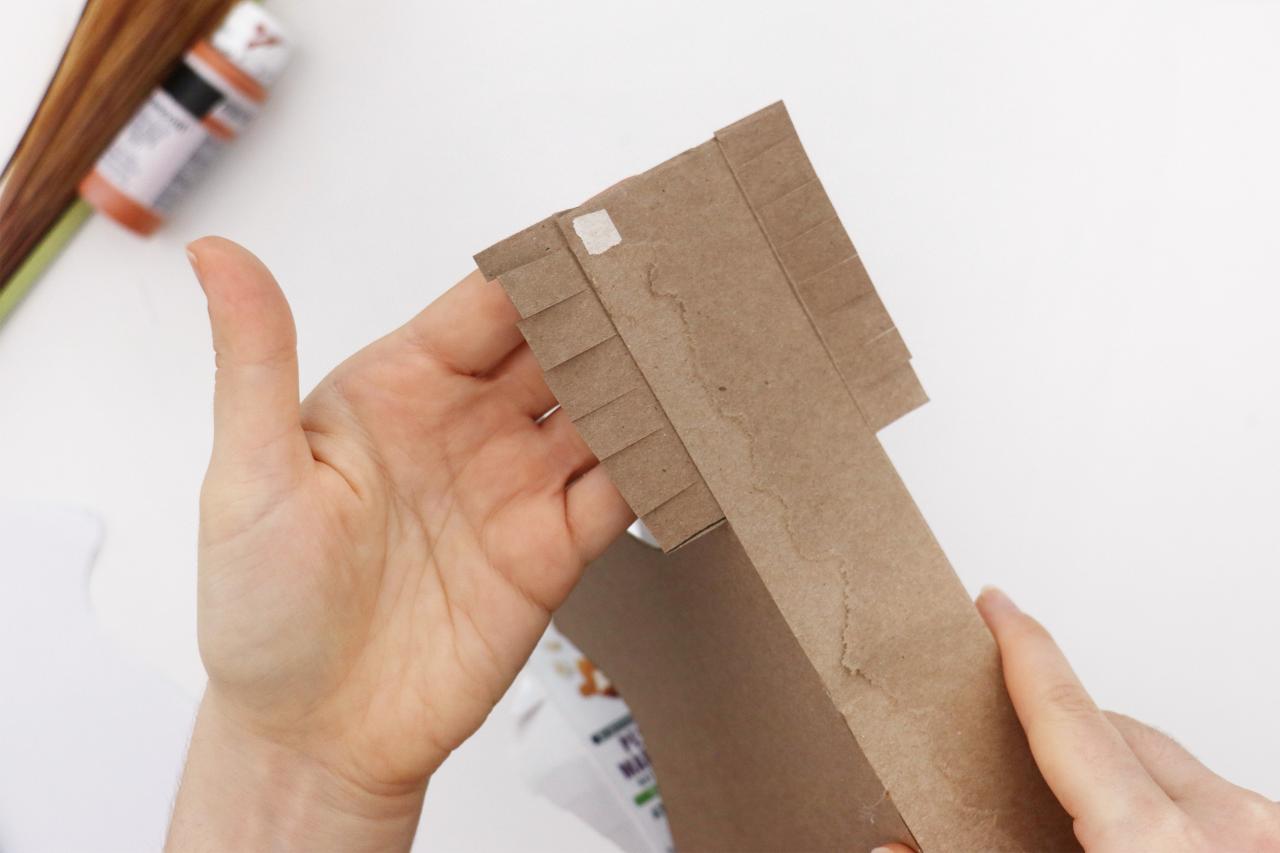
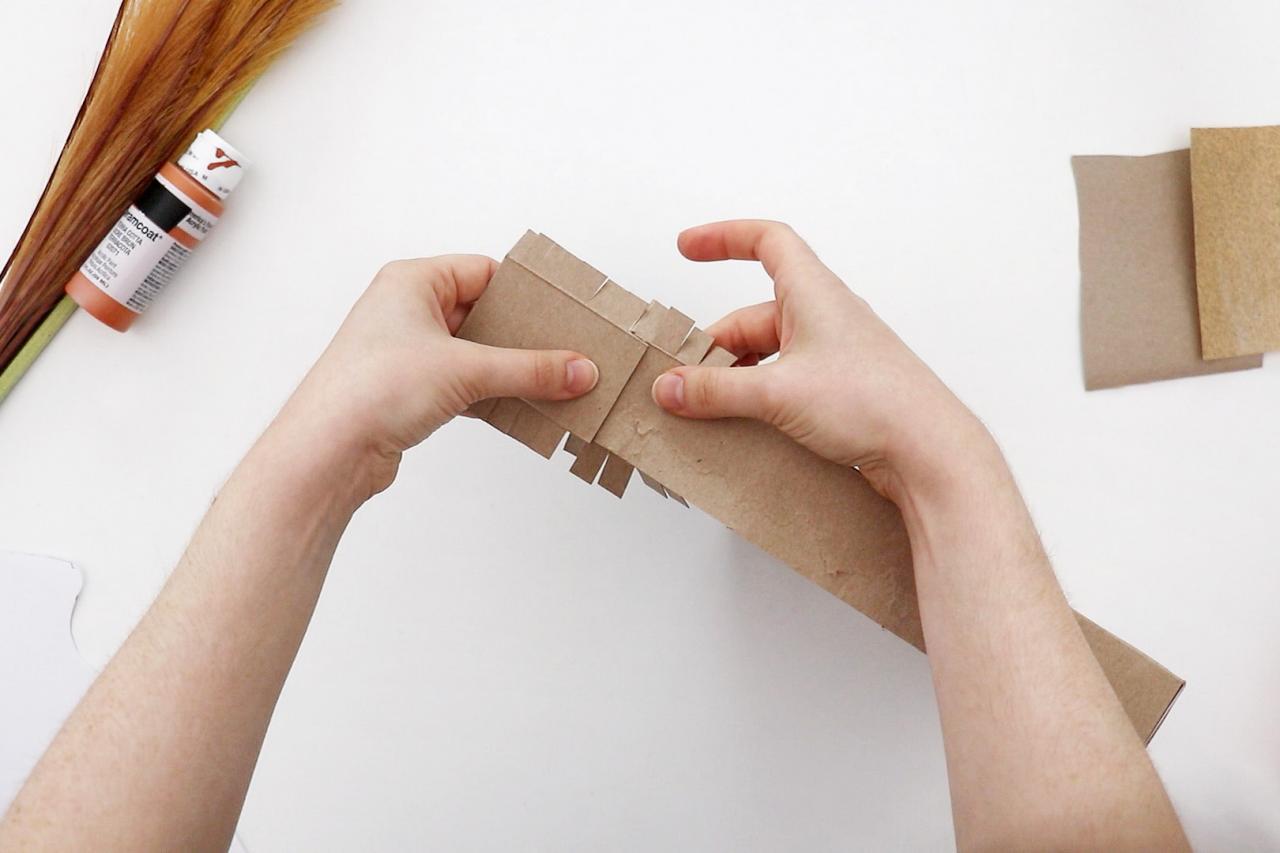
Make Smaller Tabs
Cut lines horizontally into the tabs that are about 1/2 centimeter to 1 centimeter apart, depending on the size of your cereal box (Image 1). This will allow the sides to be flexible so they can bend along the curves of the vase shape (Image 2 + 3).

Karen Kavett

Karen Kavett
Karen Kavett
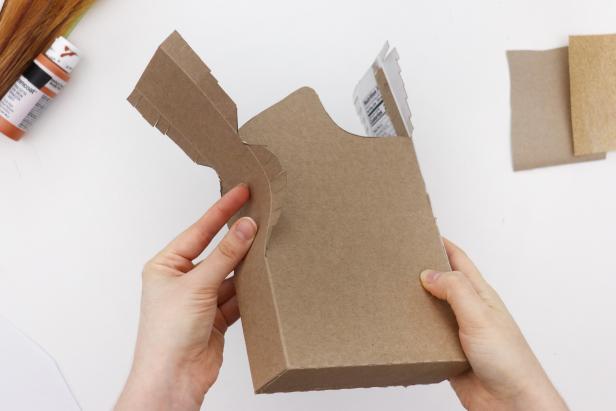
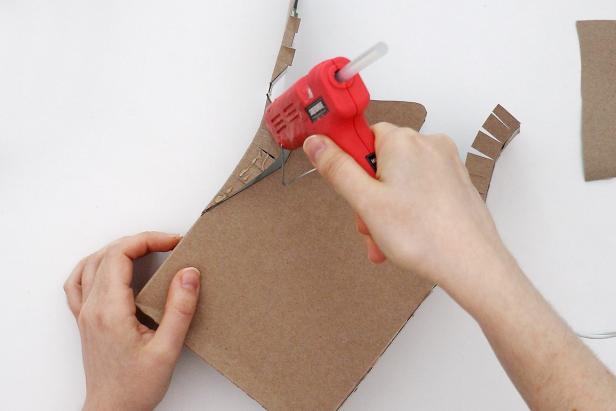
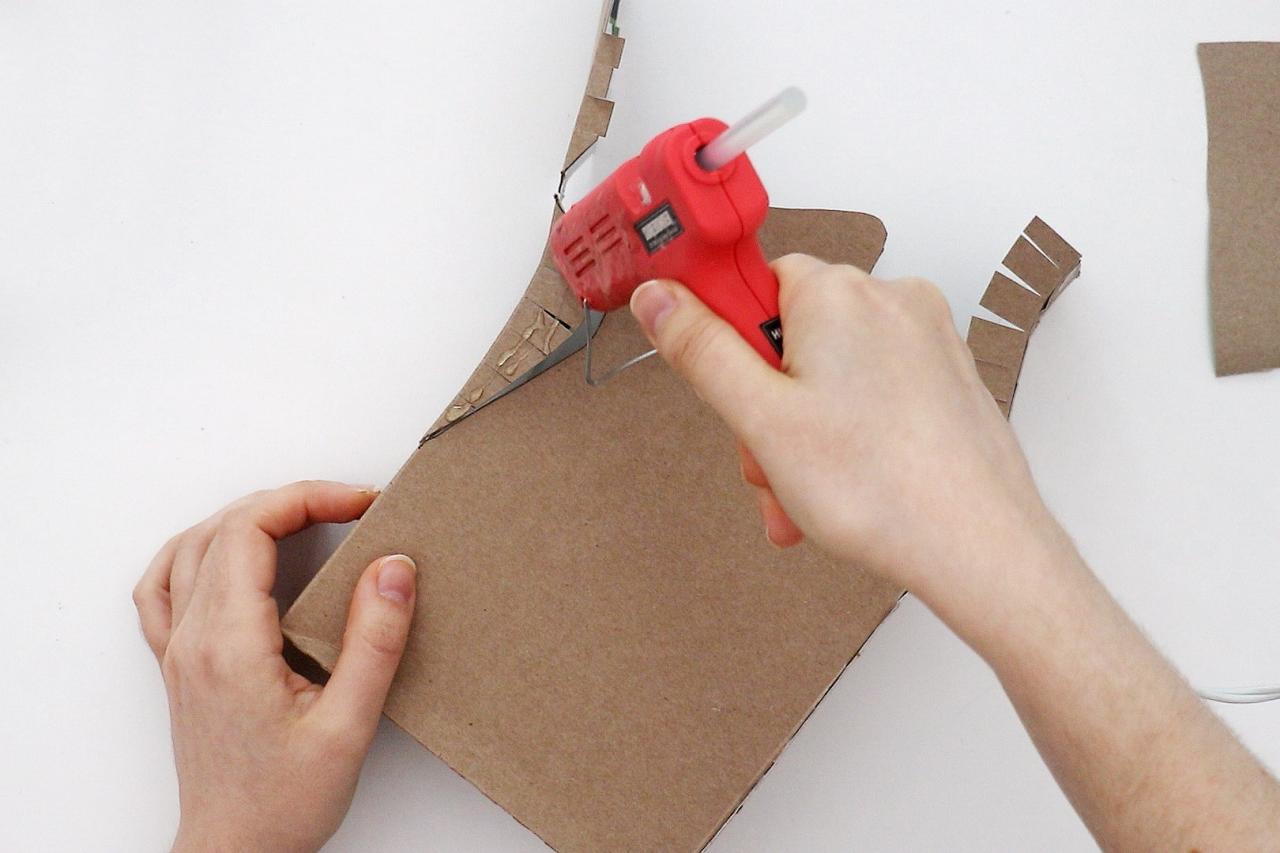
Glue the Lower Side
Glue the sides in place with the tabs inside, following the curve of the vase (Image 1 + 2). Start with the lower side and cut off any excess (Image 3).
Karen Kavett

Karen Kavett

Karen Kavett
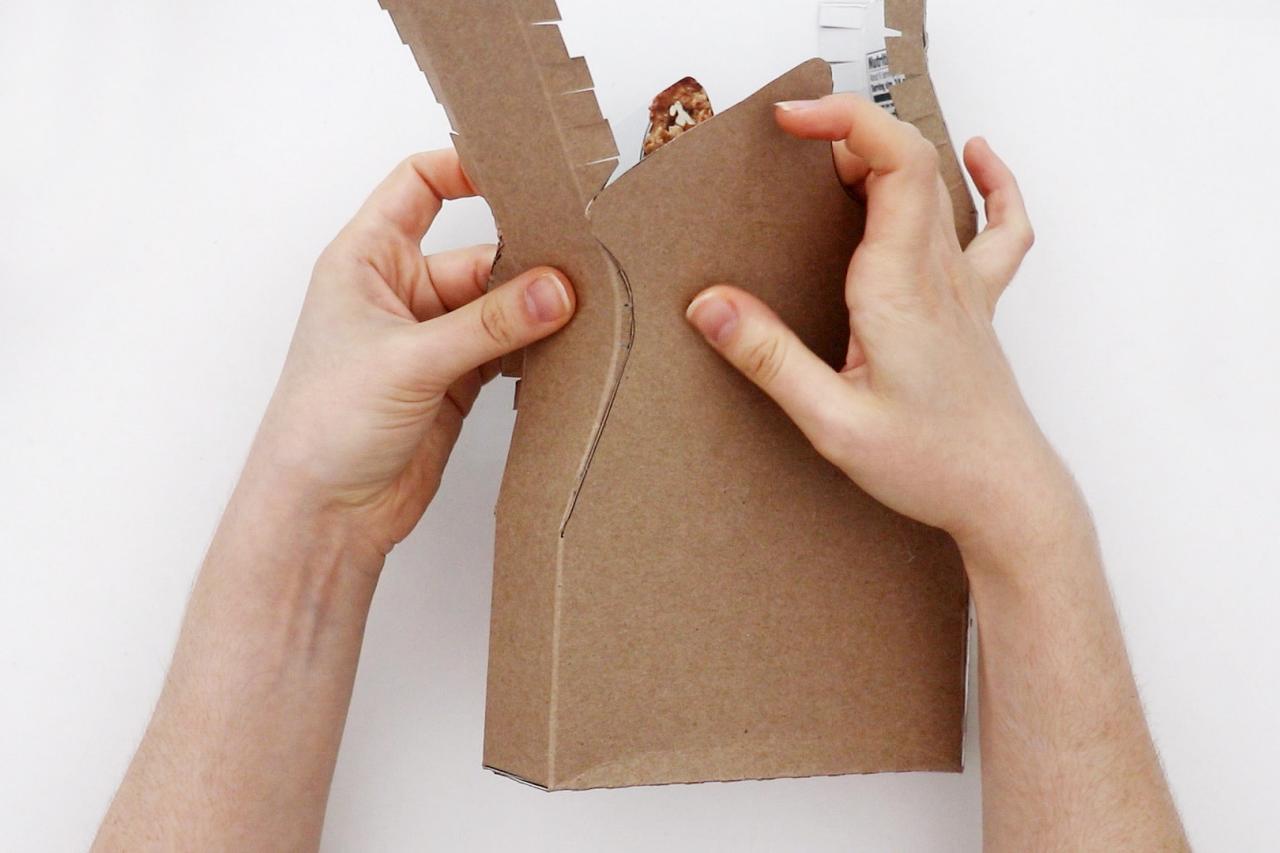
Glue the Upper Side
If needed, glue the excess cardboard from the previous step to the other side to extend it (Image 1 + 2). Glue that side in place the same way as the previous one (Image 3 + 4).
Karen Kavett

Karen Kavett
Karen Kavett

Karen Kavett
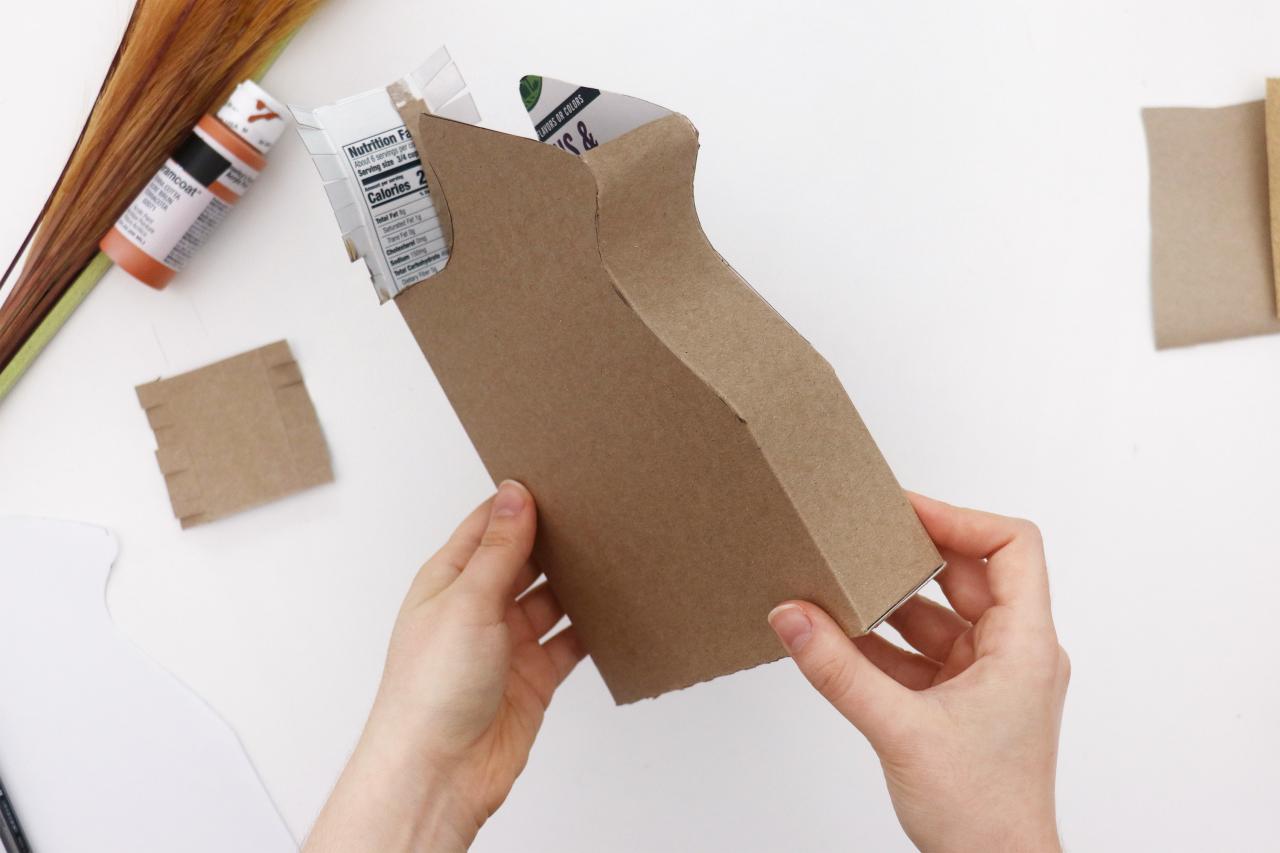
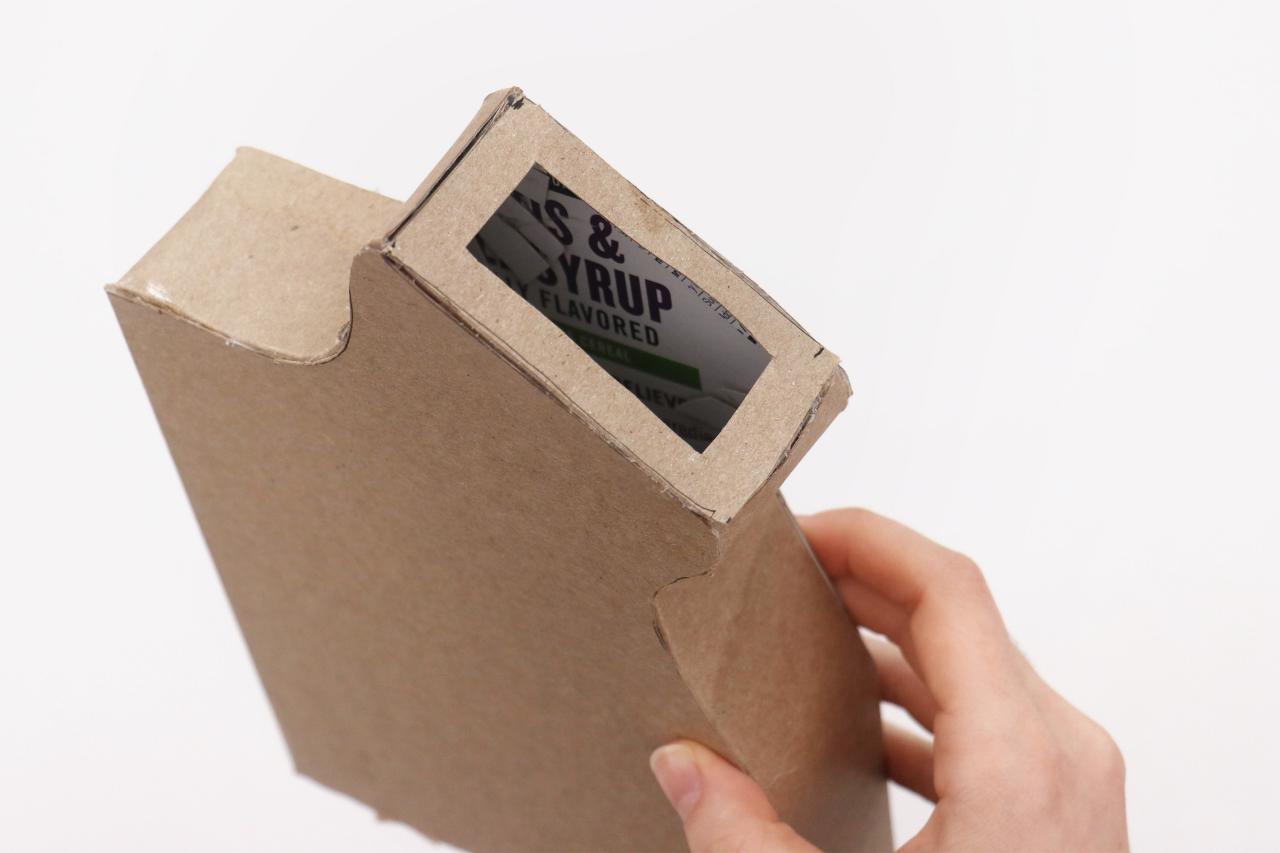
Make the Top Piece of Your DIY Vase
Grab a piece of cardboard from another food container. Trace the opening of the vase. Cut out a rectangle outline with tabs on all four sides, using a craft knife to score the tabs so they fold down easily (Image 1). Hot glue this inside the vase opening (Image 2).

Karen Kavett

Karen Kavett
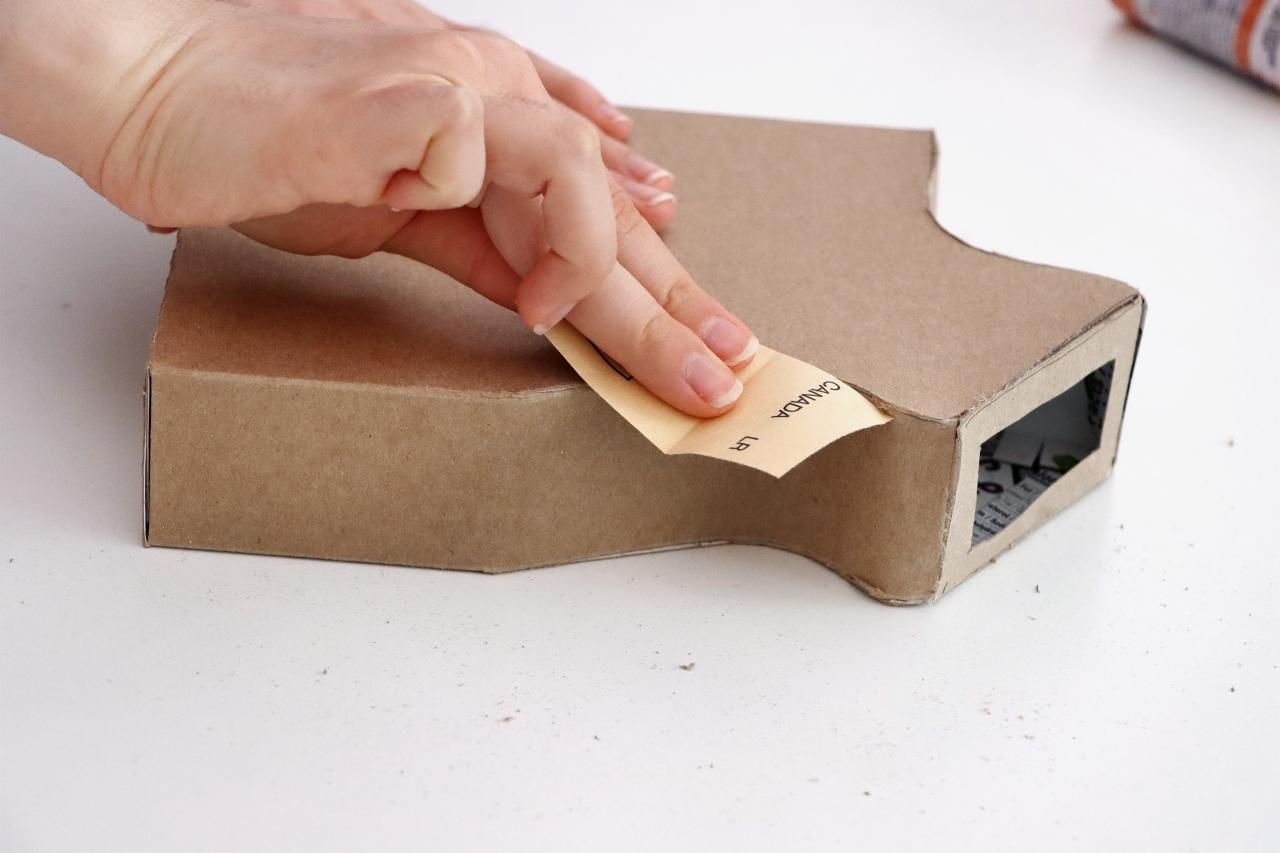
Sand the Edges
Go over all of the edges with sandpaper to smooth them down.

Karen Kavett
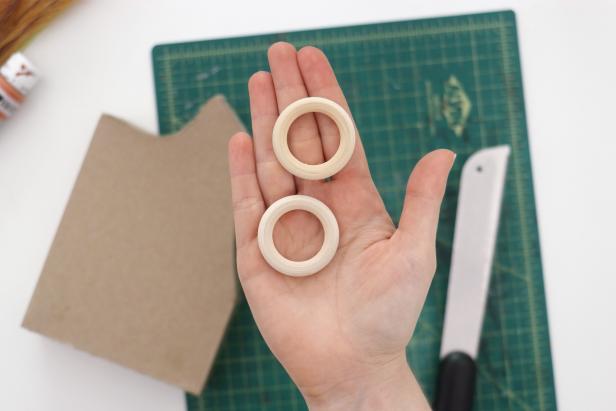
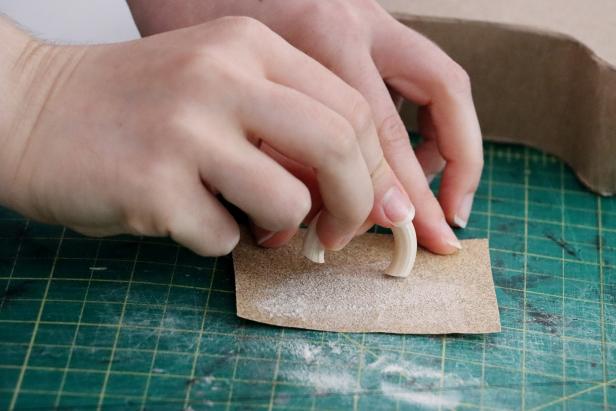
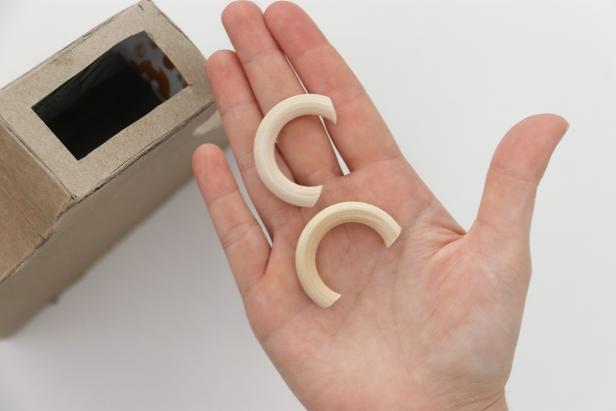
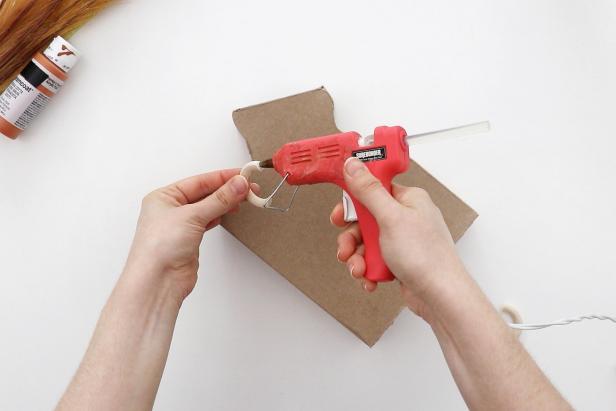
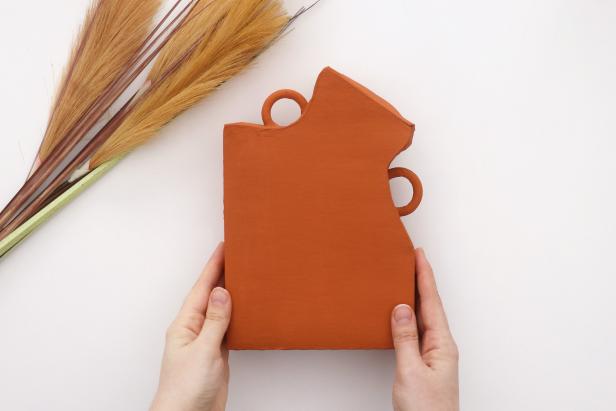
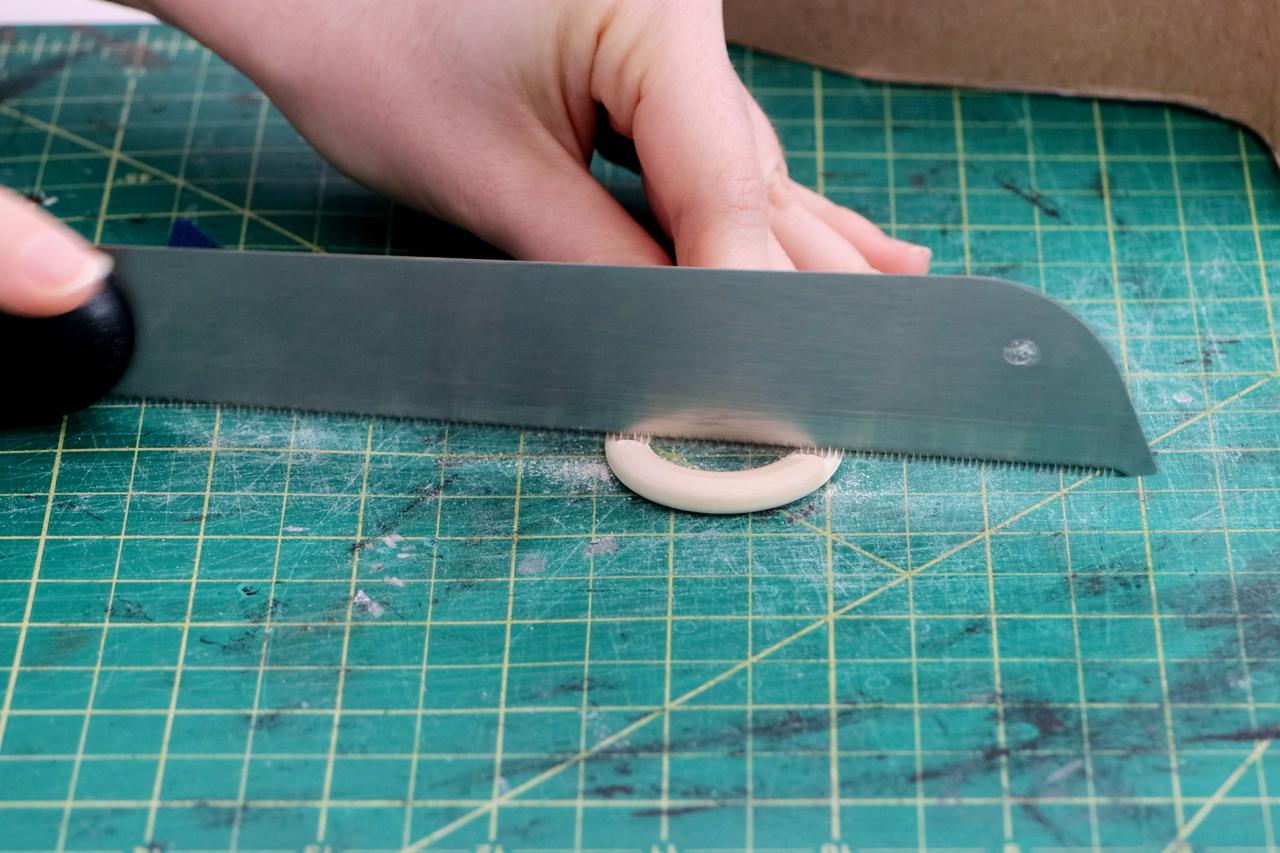
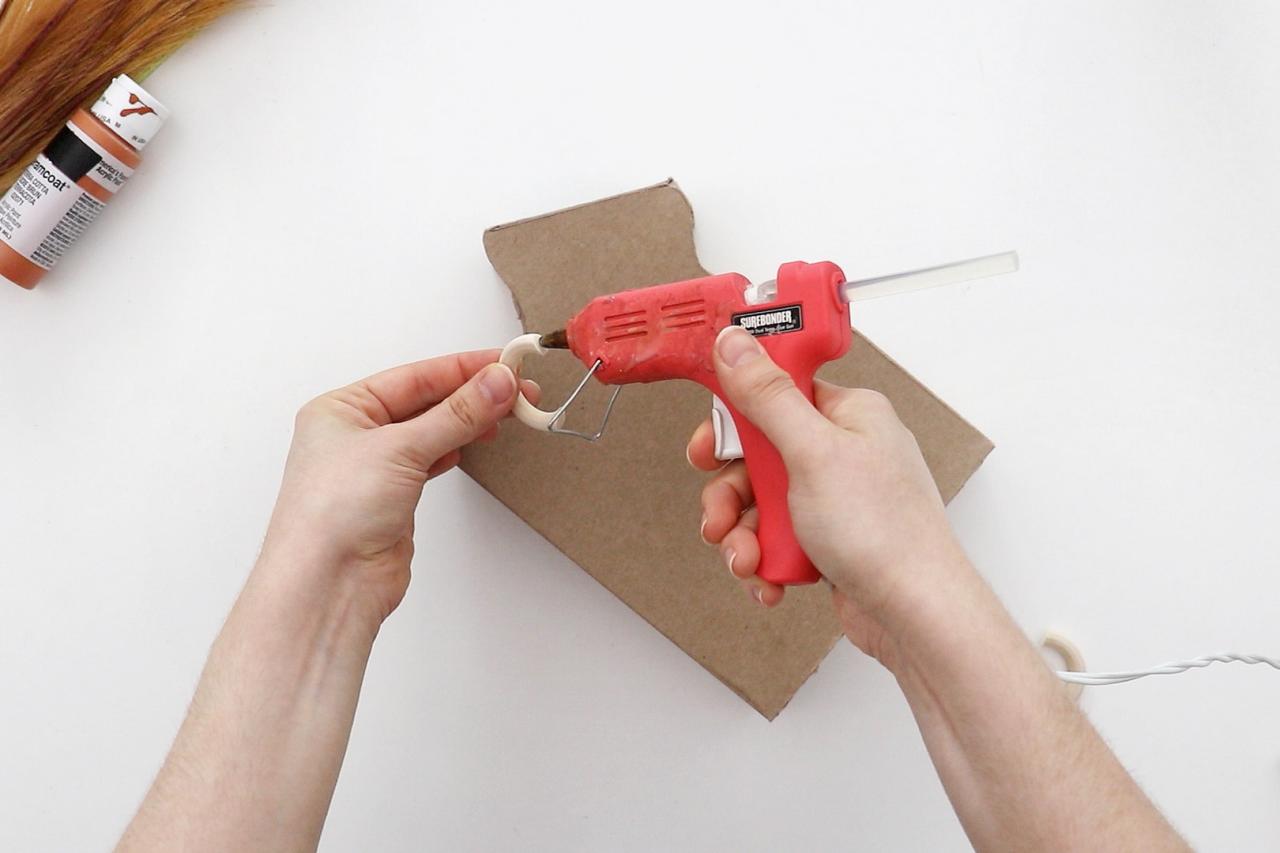
Add Handles
Use small wooden rings as handles (Image 1). Use a saw to cut them down into an arc (Image 2), and then sand the ends until the angles lay flush against the curves of the vase (Image 3 + 4). Hot glue them in place (Image 5 + 6).
Karen Kavett

Karen Kavett
Karen Kavett
Karen Kavett
Karen Kavett
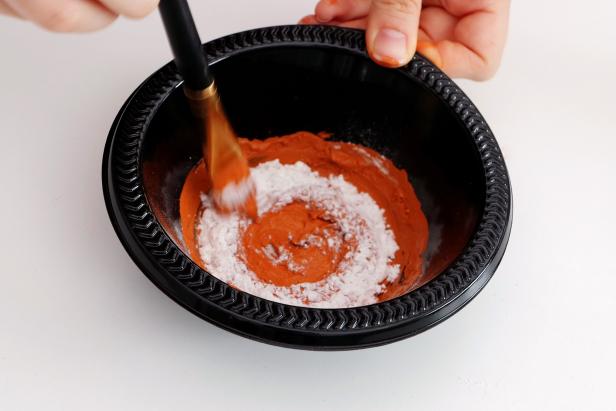
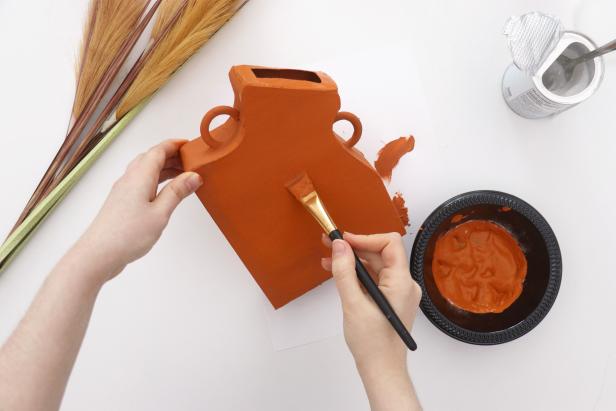
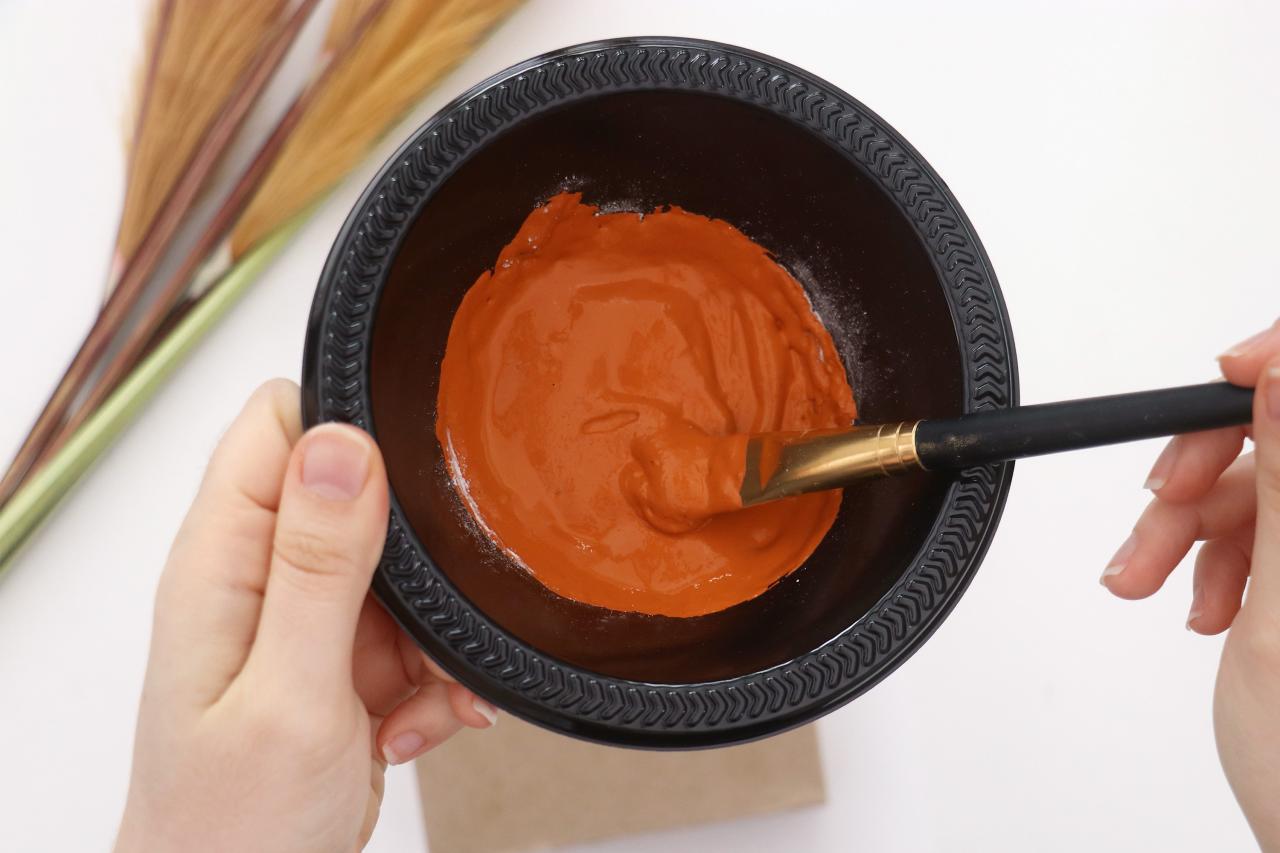
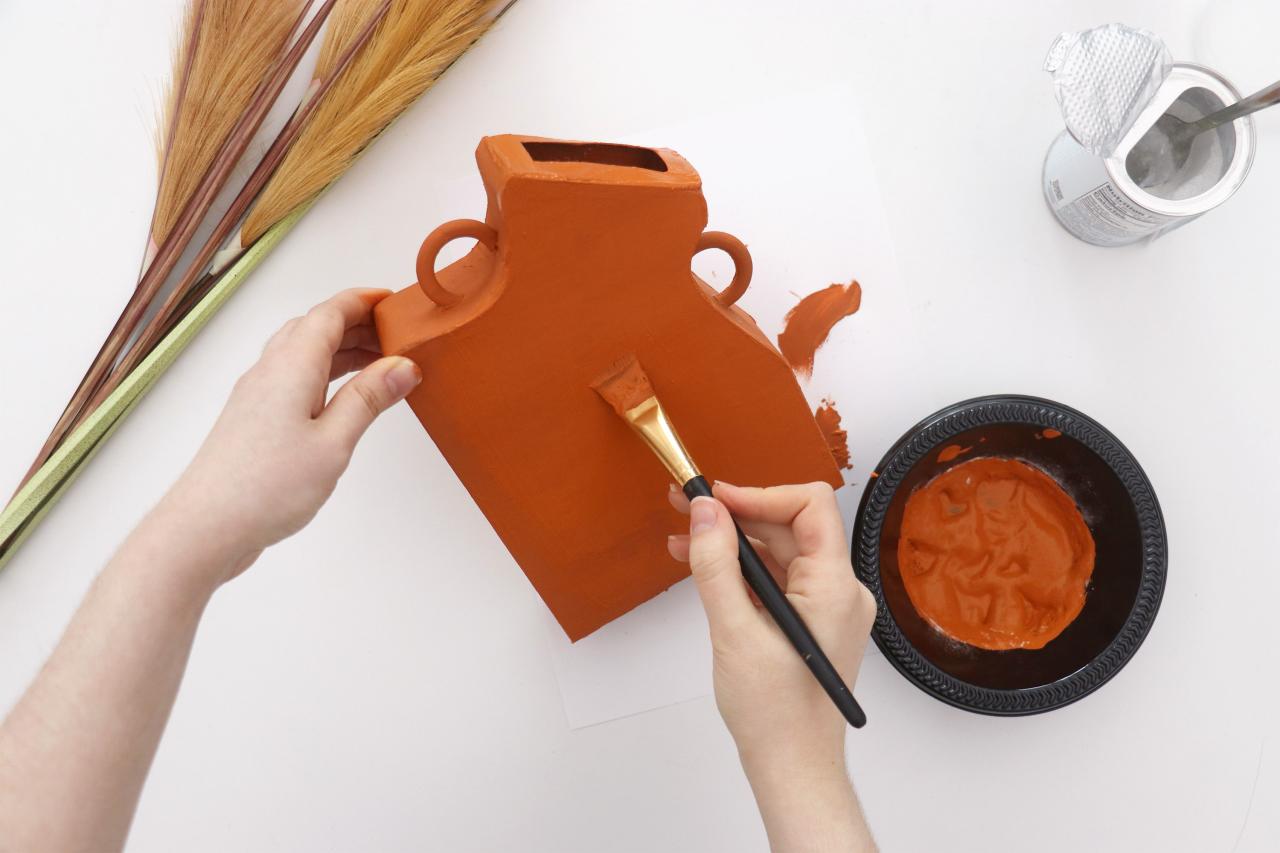
Paint Your Upcycled Vase
To really make it look like ceramic, add a small spoonful of baking powder to your paint (Image 1) and mix them together, which will make the paint fully matte and a little bit textured (Image 2). Be sure to paint inside the top of the vase with a small paintbrush as well (Image 3). Add two coats of paint over the entire vase (Image 4). Let dry completely (Image 5 + 6).
Karen Kavett

Karen Kavett
Karen Kavett

Karen Kavett
Karen Kavett
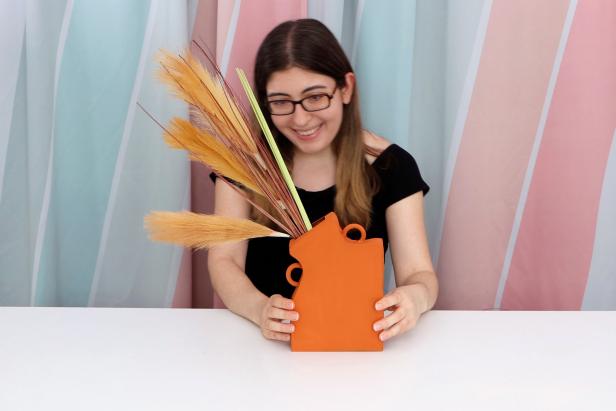
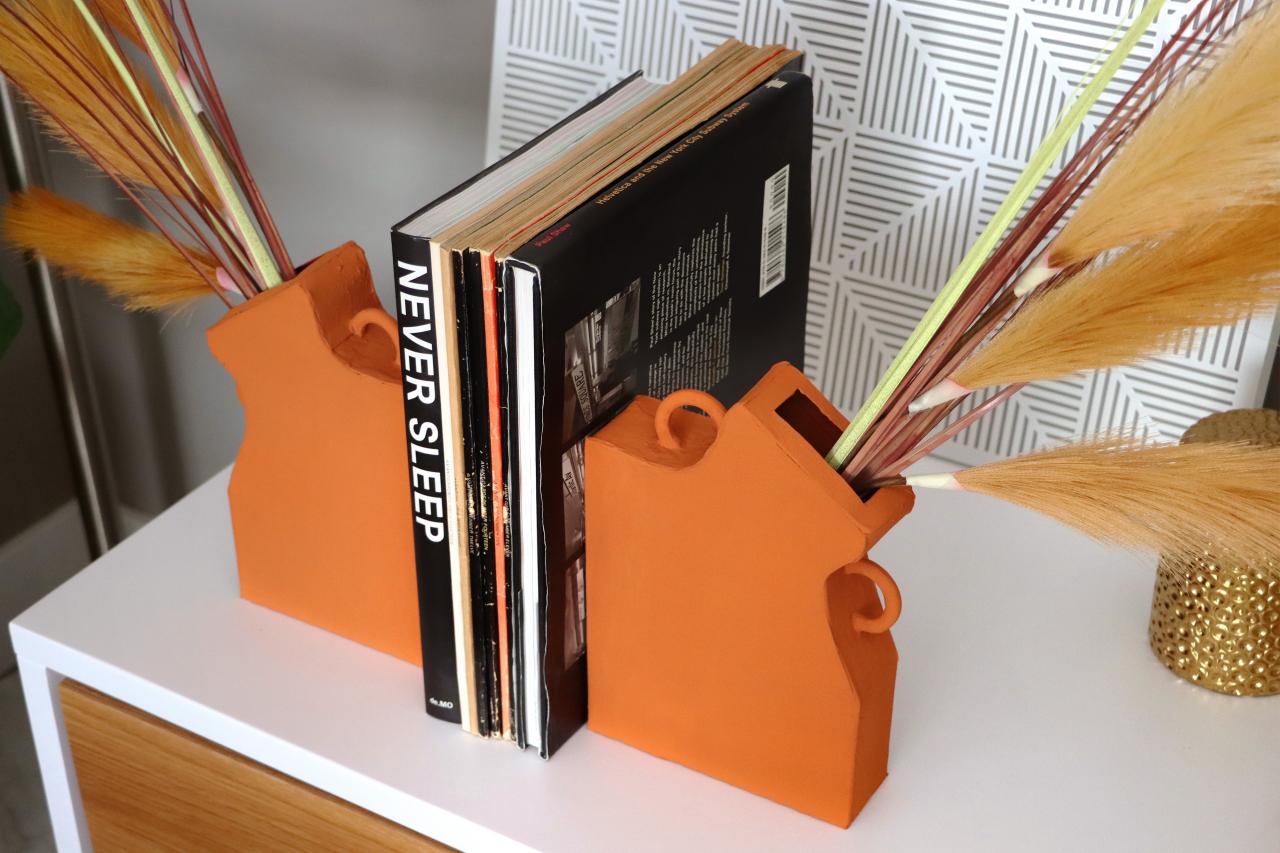
Fill the Bottom With Rocks
Fill the bottom of the vase with small rocks or any other heavy, small items so it doesn’t tip over (Image 1). Add faux flowers to finish it up (Image 2).

Karen Kavett
Karen Kavett
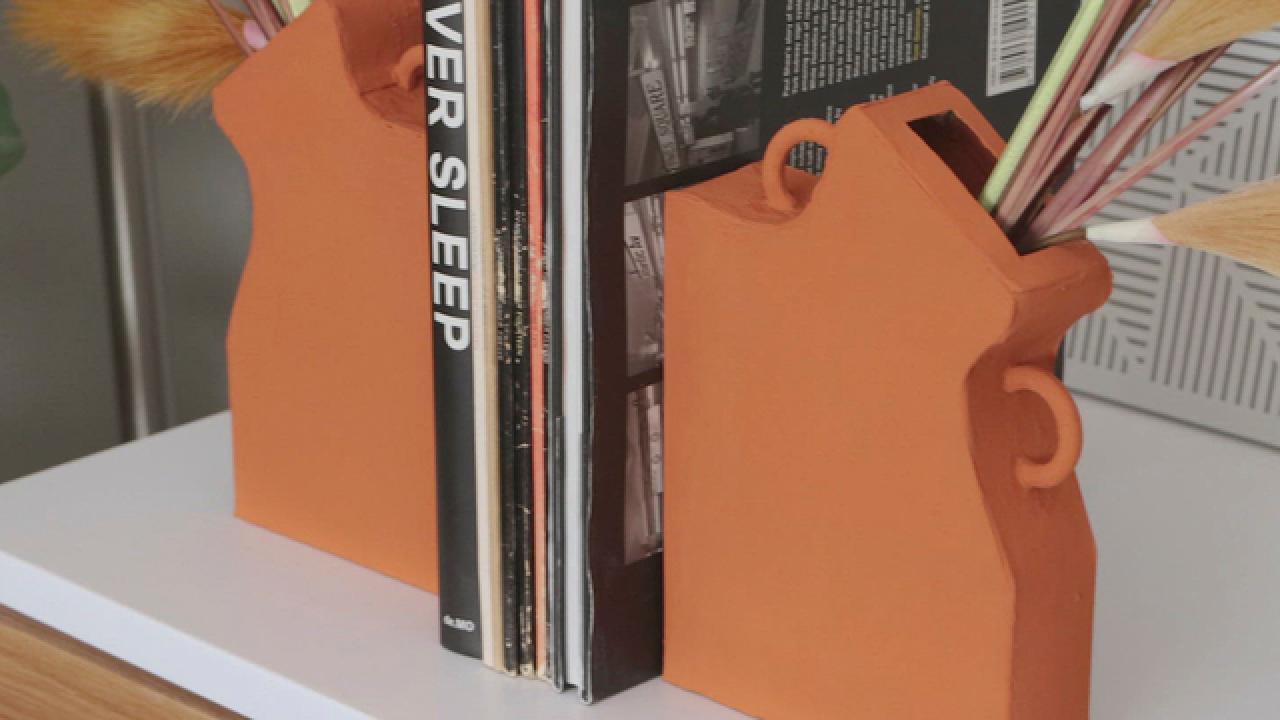
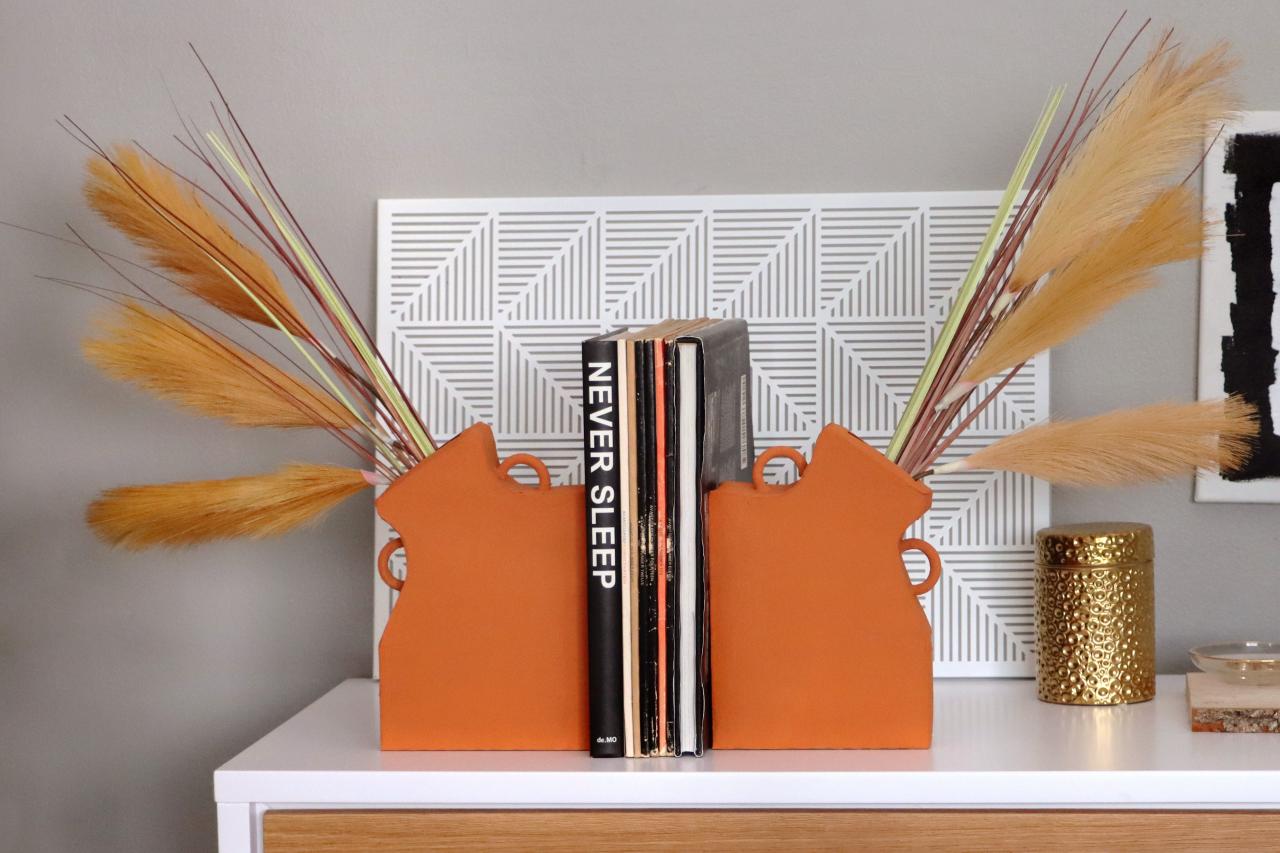
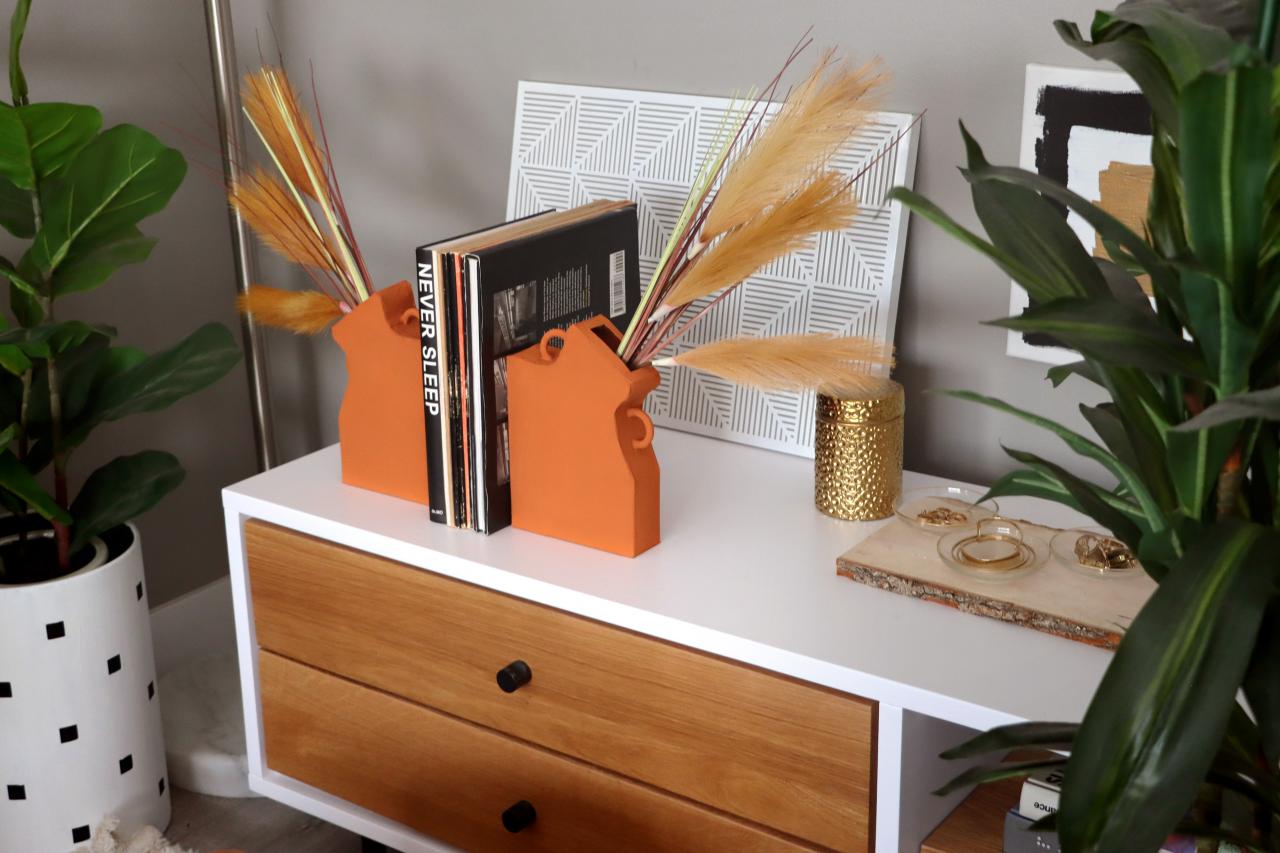
Put Your Finished DIY Upcycled Bookend Vase on the Shelf
You’re all done! Style it with neutral-colored books for a boho look for cheap.
Karen Kavett

Karen Kavett

Karen Kavett
Easy Decorating Crafts

Build Your Own Paper Unicorn Wall Sculpture With This Pattern Kit From Etsy
Make a large-scale, whimsical art piece entirely out of paper and glue.

Upcycled Wine Cork Board
Start saving up your wine corks to make this simple recycled memo board.

Make a Trendy Llama Pillow Without Sewing a Stitch
This adorable no-sew llama pillow will be the cutest thing you put on your couch.


