


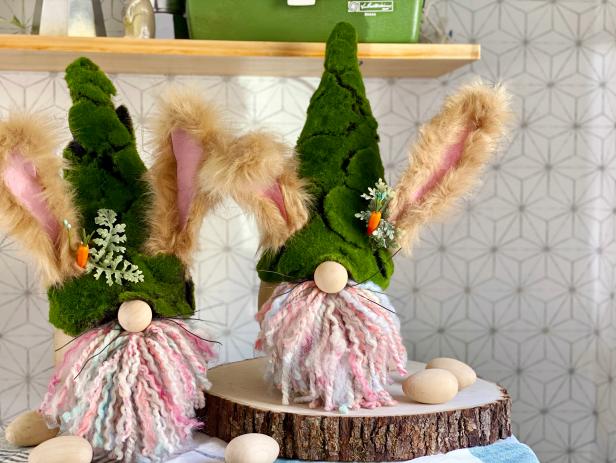
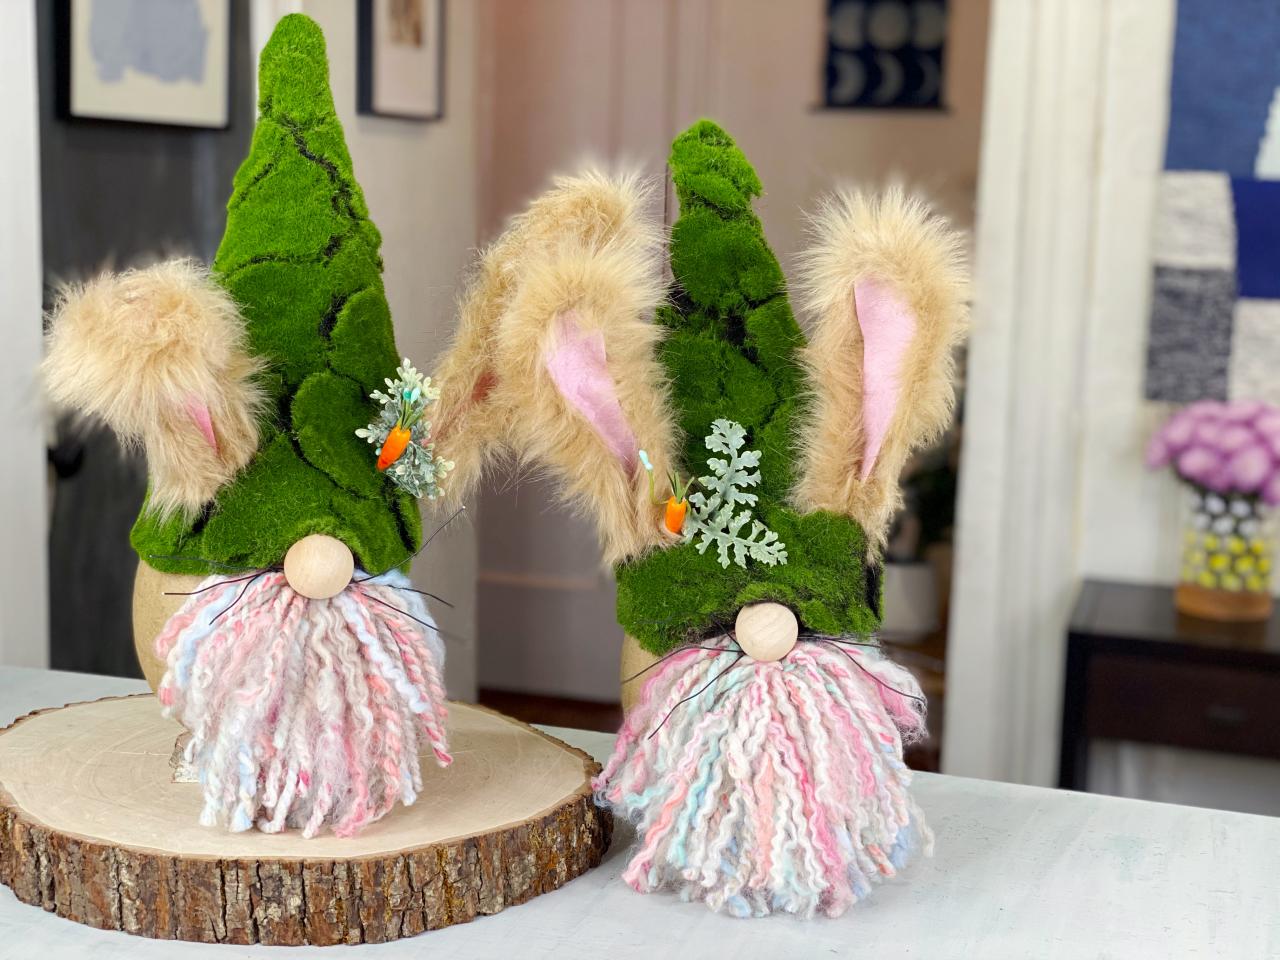
DIY Easter Egg Bunny Gnomes
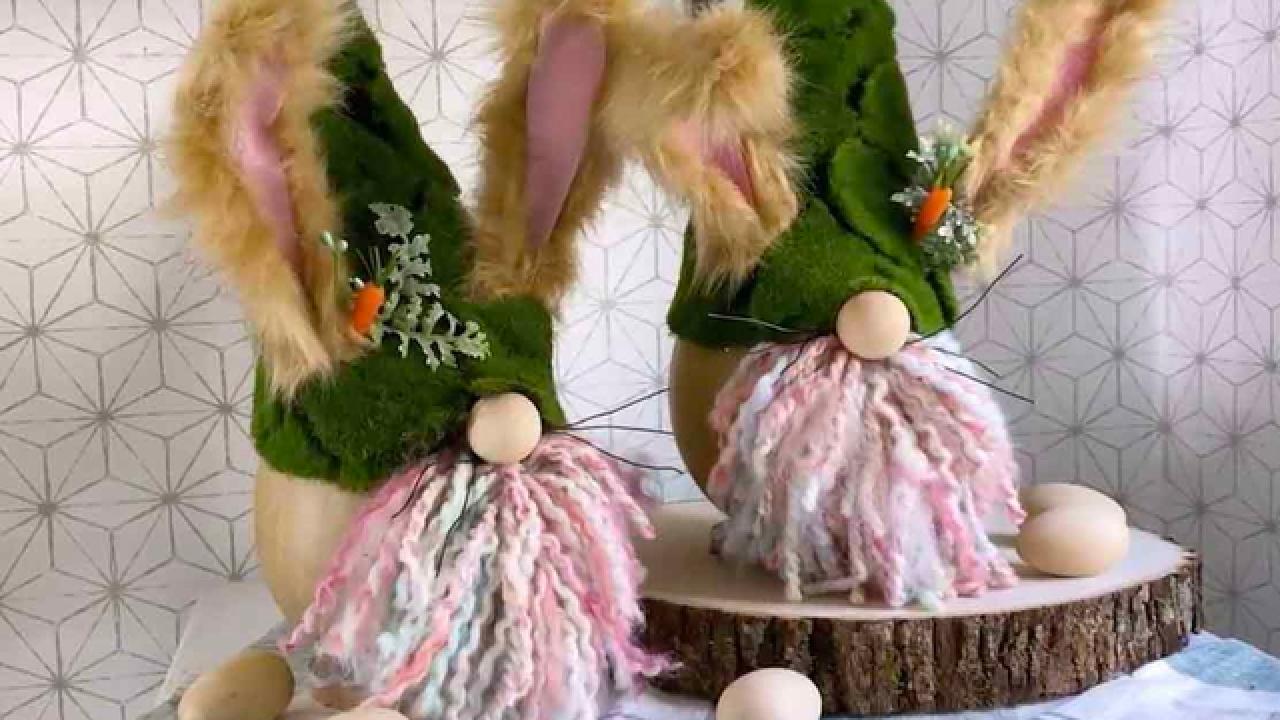
It’s time to hop into some spring crafting. Use everyday craft materials and a sheet of moss to turn a plain paper mache egg into an adorable Easter Bunny gnome.


Gnomes are popping up everywhere lately. Get crafty for Easter by turning a plain paper mache egg and a handful of basic craft supplies into colorful and whimsical Easter Bunny gnomes. Add them to your annual Easter decor or even turn them into Easter baskets by hiding treats in their hat. Gnome worry, be hoppy!
Materials + Tools
- large paper mache styrofoam egg
- square faux moss mat
- colorful fuzzy yarn
- large fuzzy pipe cleaners
- felt
- low-temp hot glue gun
- wire cutters
- clean pet brush or macrame comb
- scissors
- black thick wire
- wooden bead
- miniature spring florals (optional)
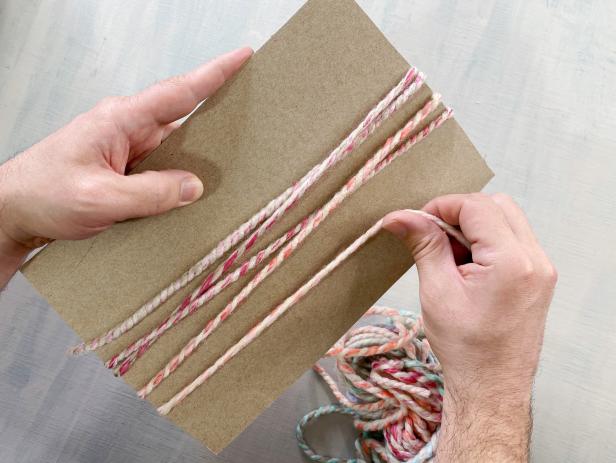
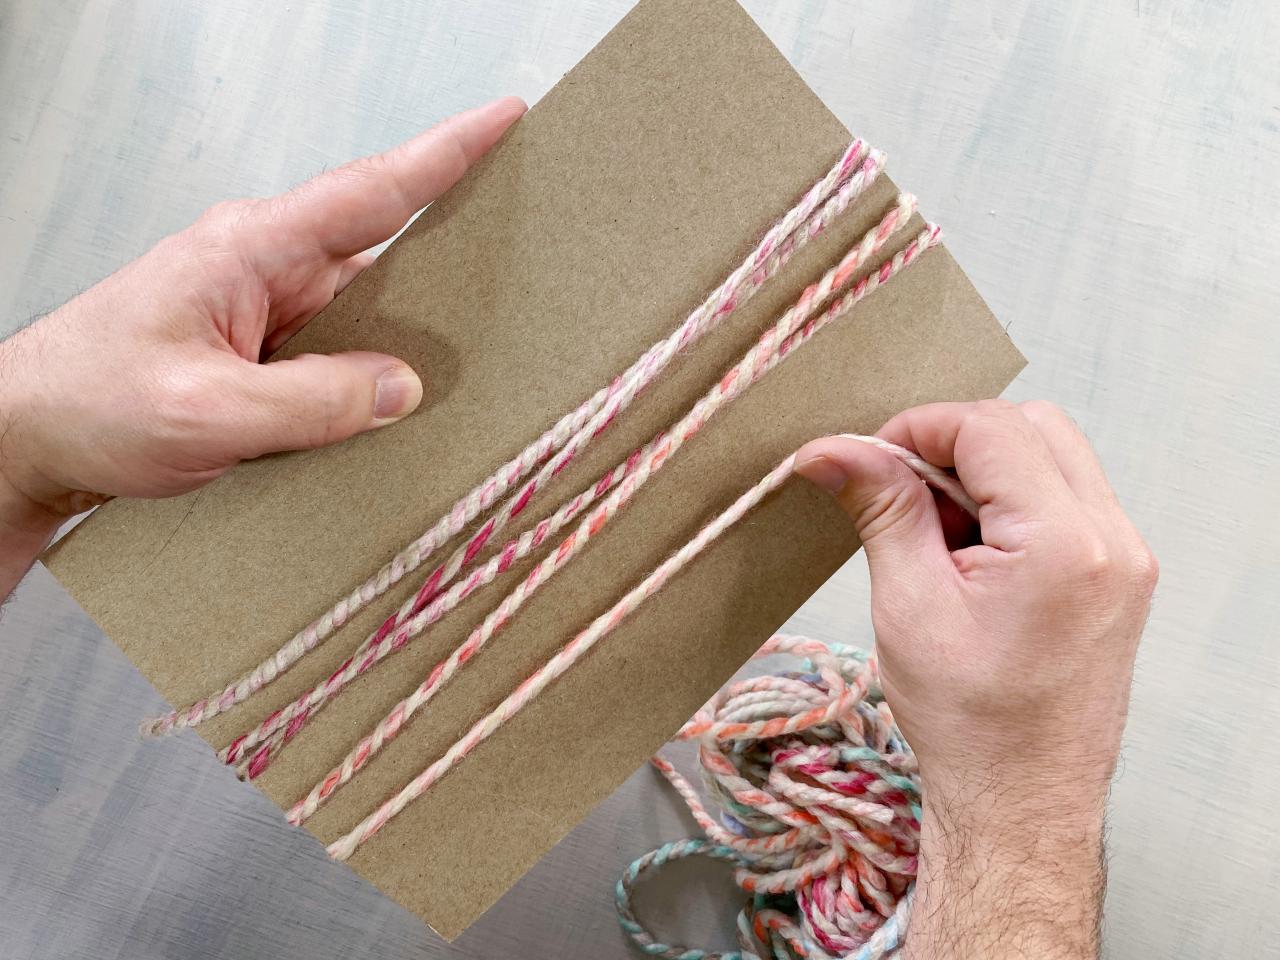
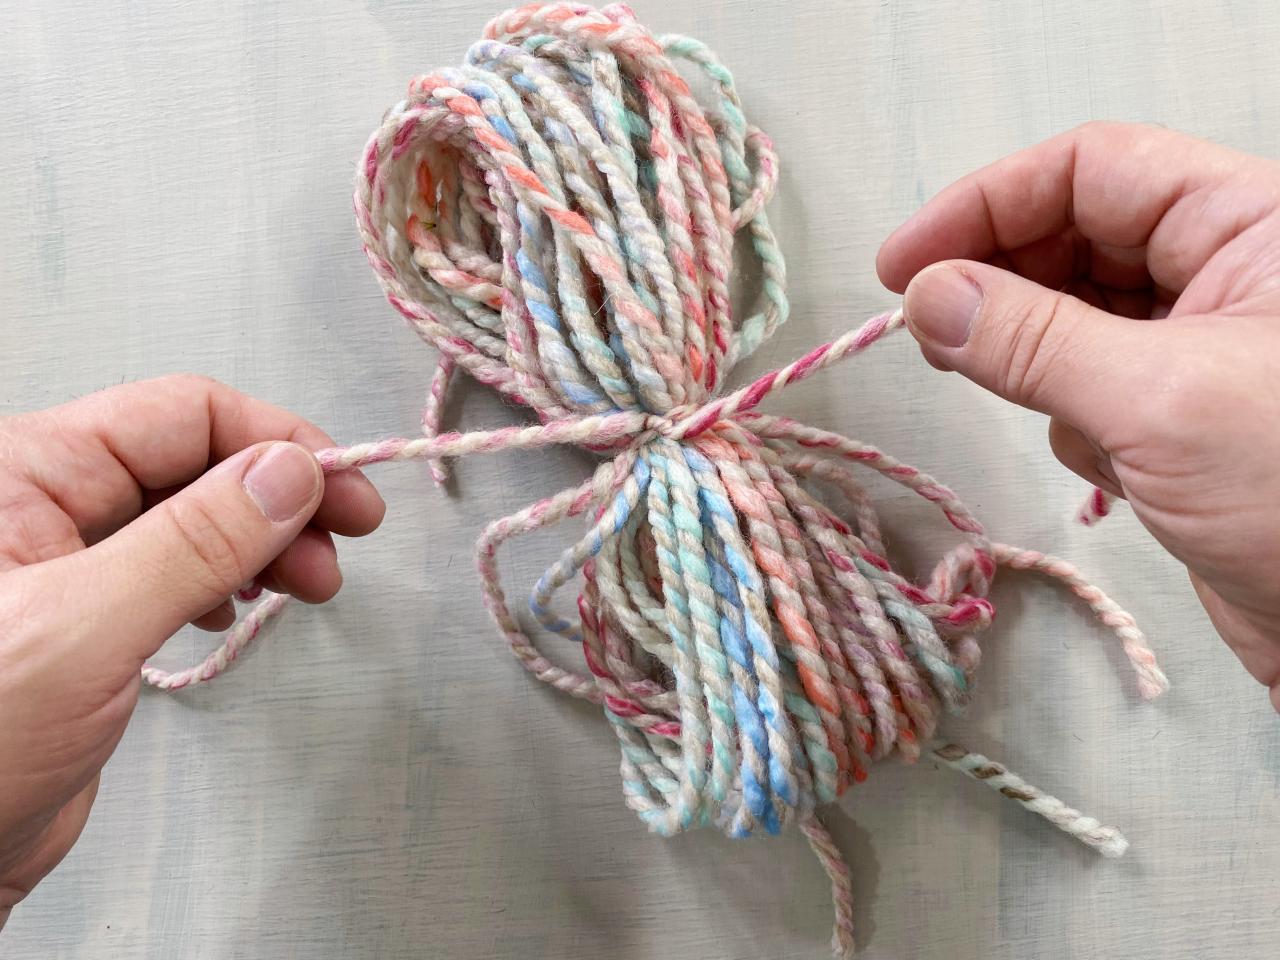
Make a Yarn Beard
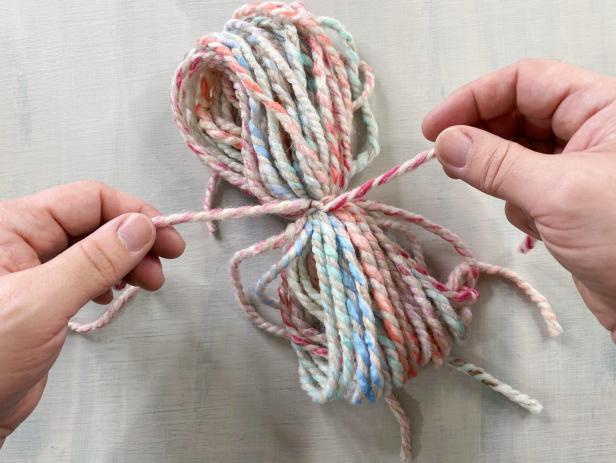
Cut a piece of cardboard into a rectangle twice as long as the desired length of the beard; the beard should cover about half of the paper mache egg. Place one end of the yarn along the length of the cardboard and wrap it around the cardboard about 20-30 times (Image 1). Cut the yarn. Cut another piece of yarn about 12 inches long. Carefully, pull the large yarn loop off the cardboard while holding it together so it does not unravel. Grab the yarn in the center and tie it tightly together with the 12-inch piece of yarn (Image 2).
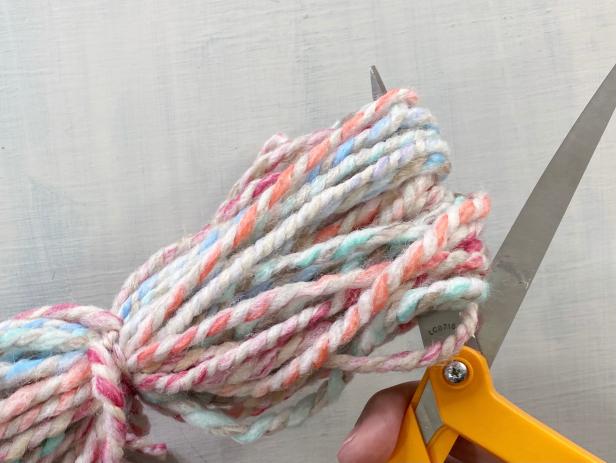
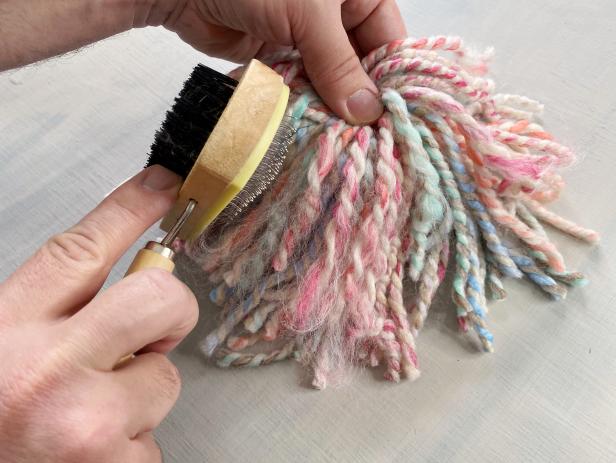
Cut and Comb Beard
Cut the looped ends of the yarn bunch with a pair of scissors (Image 1). Hold the beard in the center and shake it to cut any looped pieces of yarn that you might have missed on the first pass. Use your fingers, a brush or a comb to carefully unravel the ends of the yarn for a fringed, fluffy texture (Image 2). Tip: Use an inexpensive clean pet grooming brush instead of buying a macrame brush or comb.
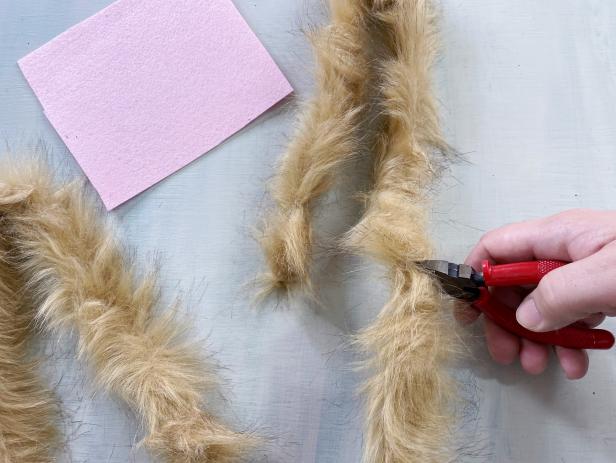
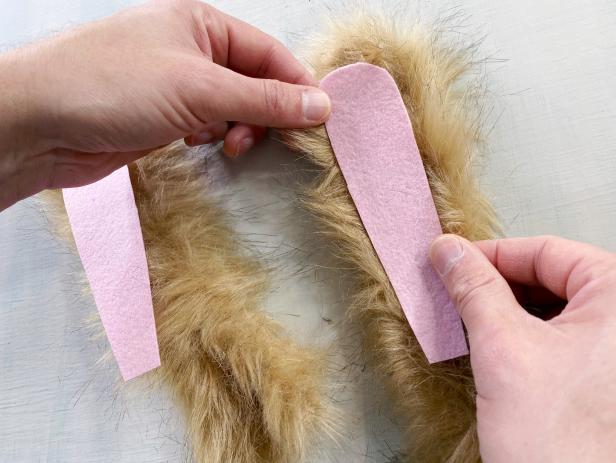
Make Bunny Ears
Measure and cut the fuzzy pipe cleaner into two 20-inch pieces. Bend each pipe cleaner in half and manipulate them to mimic the shape of bunny ears (Image 1). Cut two long, almond-like shapes out of pink felt (or another color of your choosing) for the inside of the ears. Add a light amount of glue around the edge of the felt using a low-temp hot glue gun, then press the felt onto the center of the pipe cleaner (Image 2).
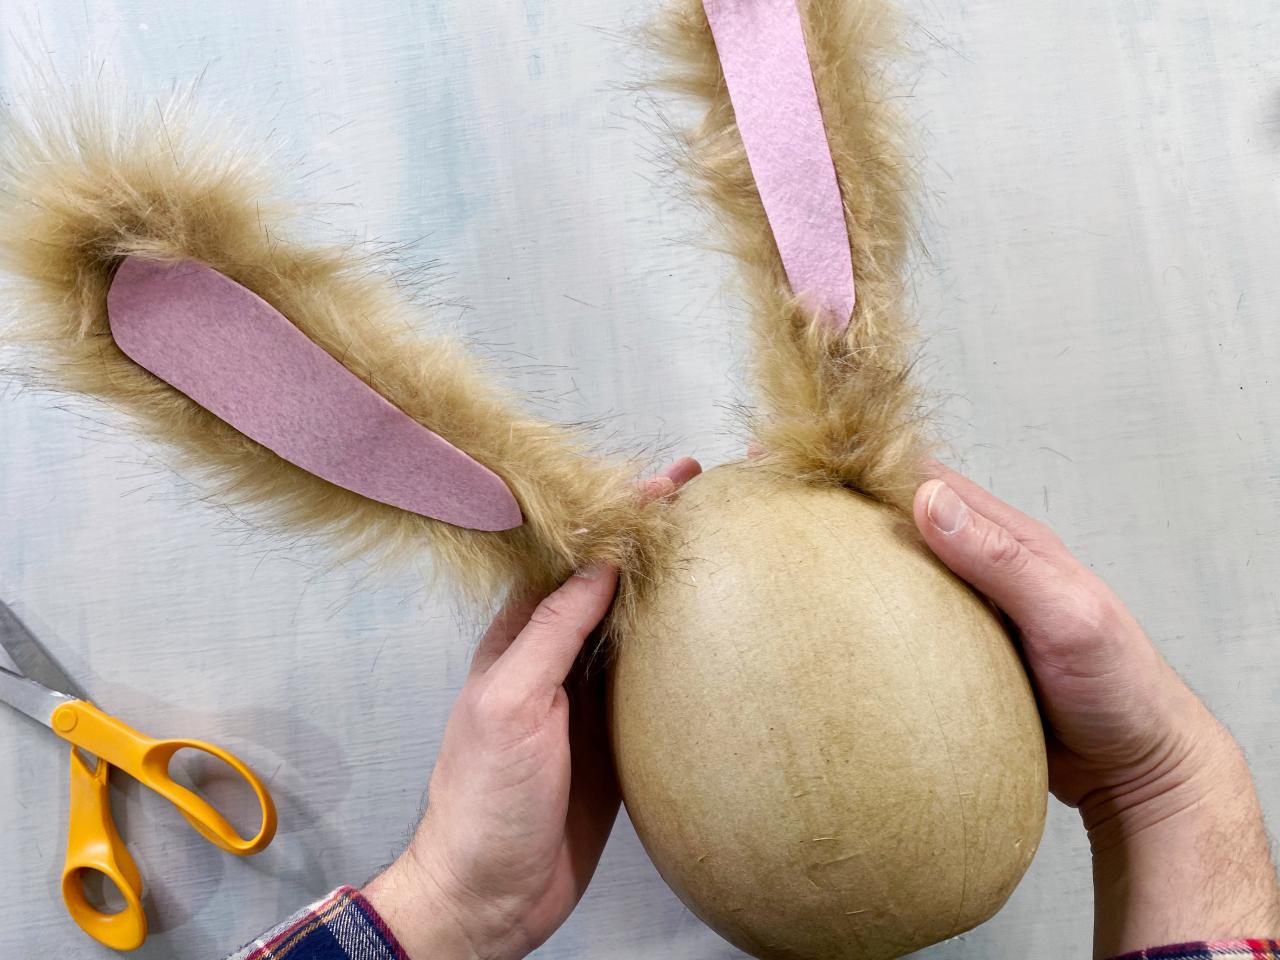
Glue Ears to Egg
Find the vertical center point of the egg and then mark two points on the left and right of the center point, a few inches from the top. Use scissors to gently puncture two holes on the marked point; this is where the ears will sit. Push the ends of each pipe cleaner into the holes. Add a dab of hot glue to secure in place.

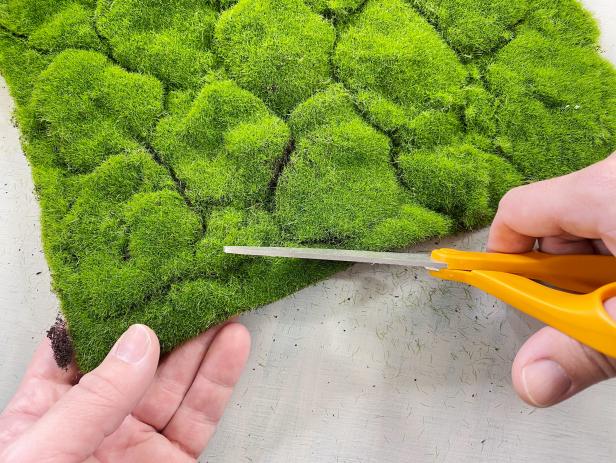
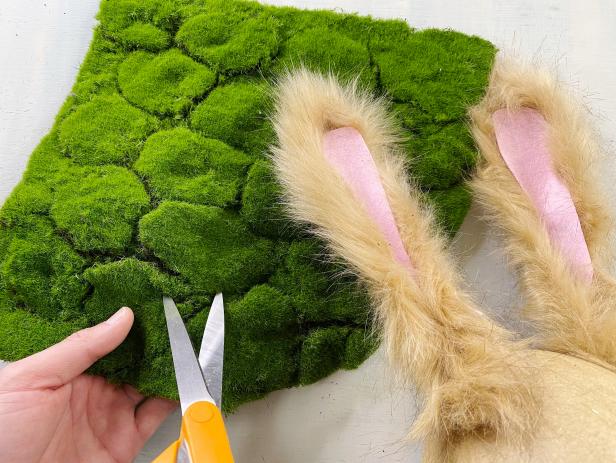
Create a Cone for the Hat
Rotate the moss sheet so a point is facing you. Cut a deep circular edge, starting from the point on the right and swooping down to the point on the left (Image 1). Tip: Use a large as a guide to trace the shape. Hold the moss up to the egg with the cut circular edge in the middle of the egg. Place your finger in the spots where the ears are attached to the egg and cut a horizontal slit big enough for each ear to fit through (Image 2).
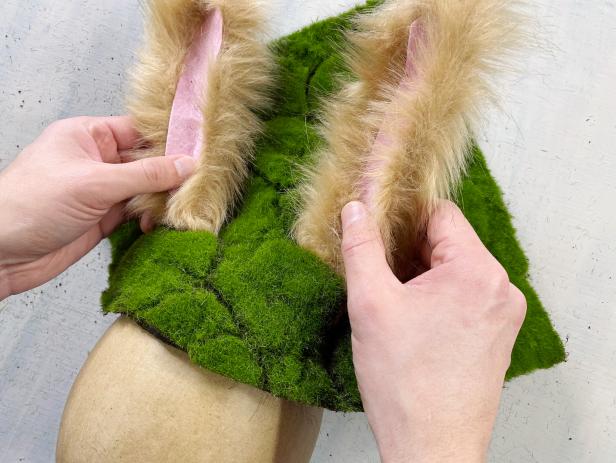
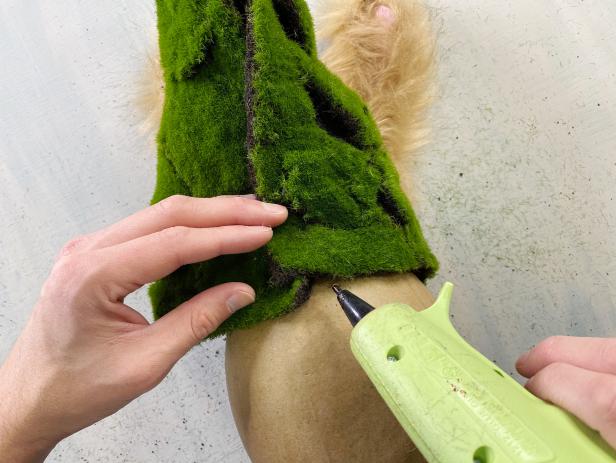
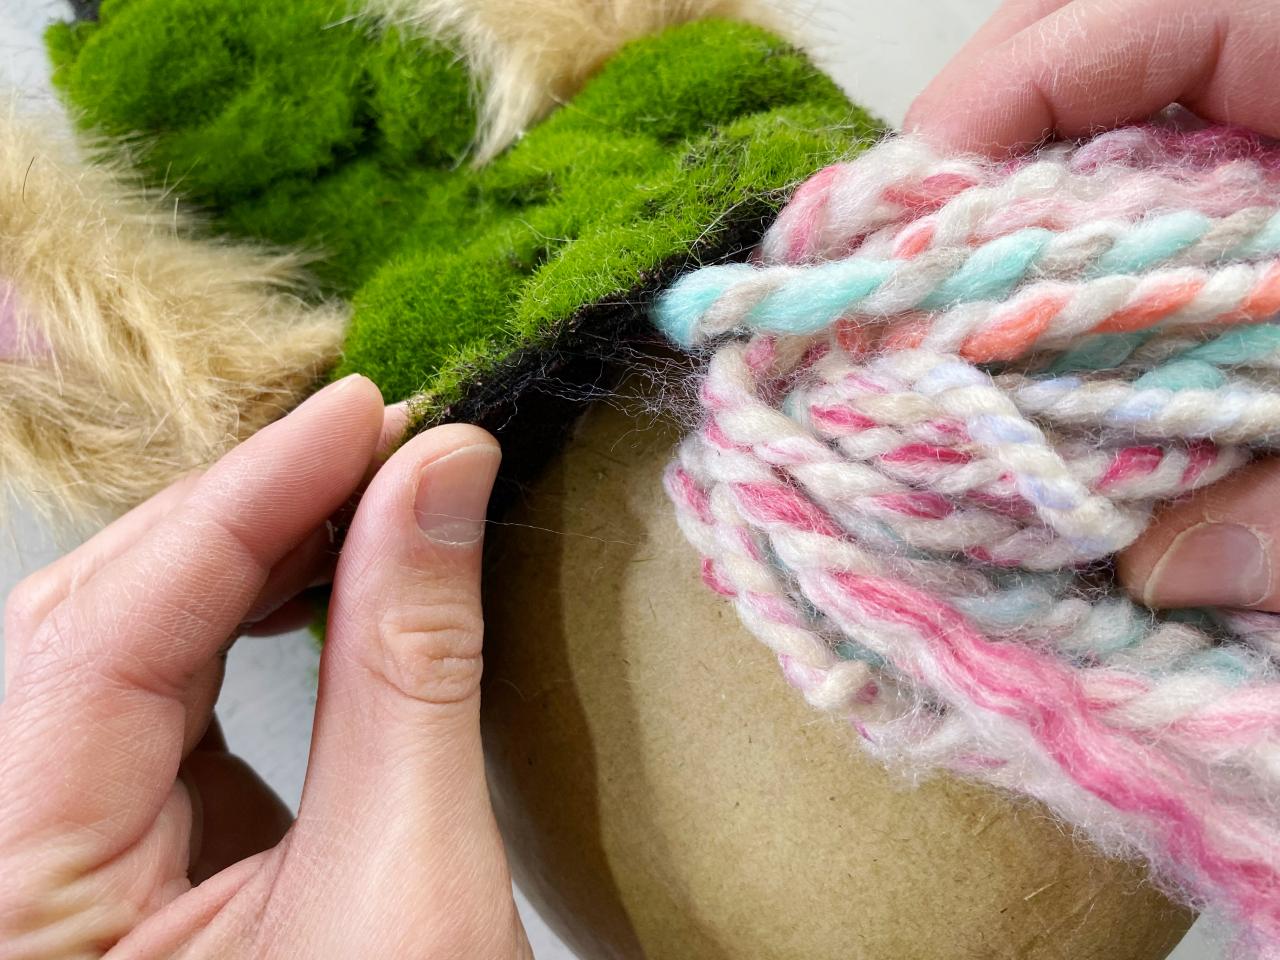
Glue Hat Together
Slide each ear through the cut slits of the moss hat and wrap the two corners around to the back of the egg (Image 1). Turn the egg over and glue the edges of the hat to the egg (Image 2). Hot glue the corners and seams together creating a cone. Tip: Keep checking the front of the egg and manipulate the hat as you glue to get the perfect shape.
Glue on Beard
Line up the center knot of the beard just above where the brim of the hat meets the egg. Add a small amount of hot glue to the tied knot and press it onto the egg until secure.

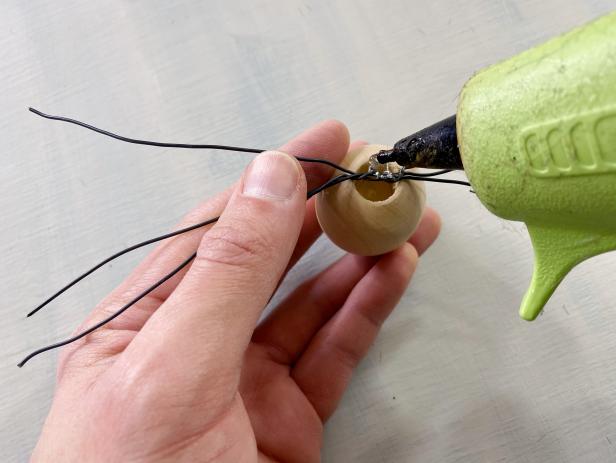
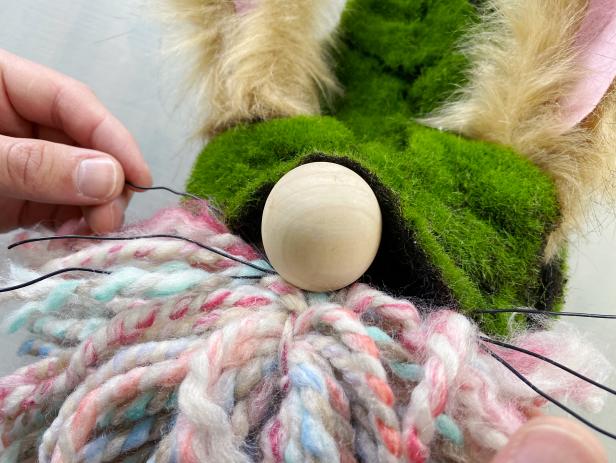
Add Whiskers and Nose
Cut three 6-inch pieces of wire. Hold them together and twist the centers together. Glue the center of the wire to the back of the wooden bead with hot glue (Image 1). Lift the brim of the hat and carefully glue the bead directly above the beard, slightly under the brim of the hat (Image 2). Tip: If the brim of the hat does not stay over the nose, add a tiny amount of hot glue to the back of the brim to help it stay in place.
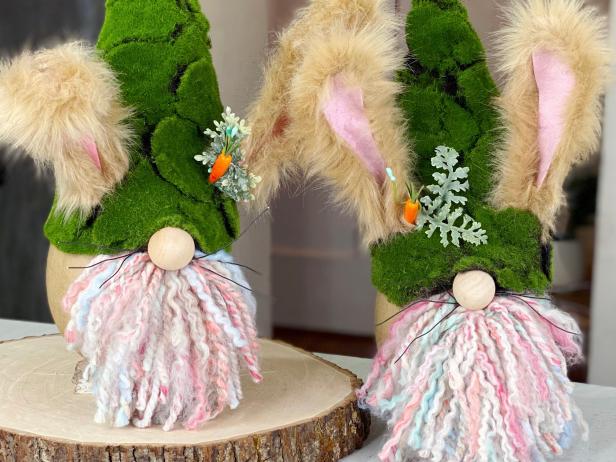
Finish the Look
Optionally, cut miniature faux floral accessories into smaller pieces and hot glue them onto the hat. Shape the ears, and fluff and trim the beard until you're happy with the look. Tip: If the egg does not stand, either because it doesn't have a flat bottom or because of the weight of the features, glue it onto a wood slice for a sturdy base.

Easter Crafts and Decorating DIYs

Make These Easy Easter Egg Bath Bombs
Mix up this spring DIY in a jiffy using plastic Easter eggs and some basic kitchen and bath supplies. Then sneak a few bath bombs into everyone's Easter baskets.

Easy All-Natural Easter Egg Dyes and Designs 17 Photos
You can create chemical-free dyes that will give your eggs a unique look this spring using ingredients you probably have around the house.

5 Crafts to Make With Peeps 13 Photos
If you just can't stop yourself from buying these adorable traditional Easter treats, try our five creative—and delicious—ways to use them this holiday.


