


DIY Doggie Bed Ramp With Smart Storage
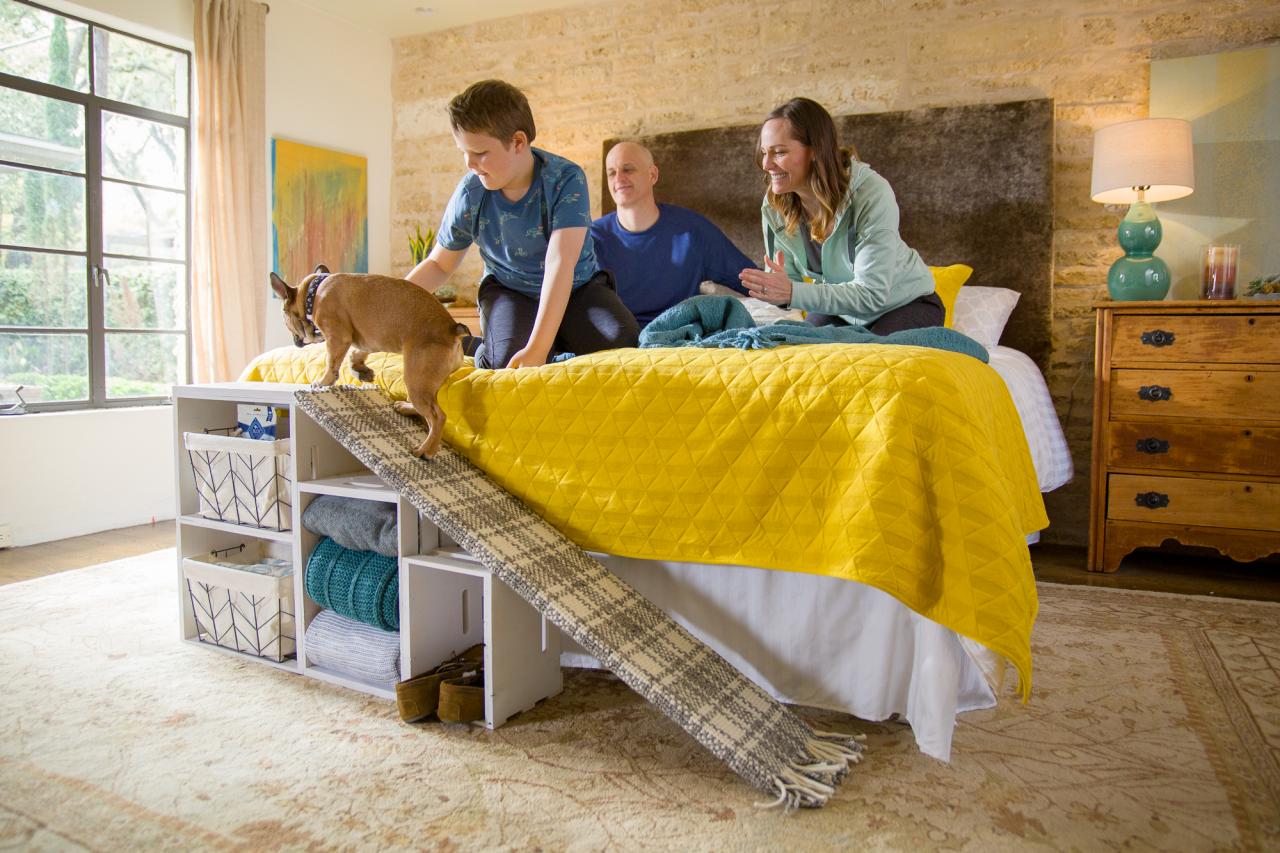
After a long day, even man's best friend could use a leg up when getting on the bed. Make their ruff life a little easier with this DIY bed ramp.
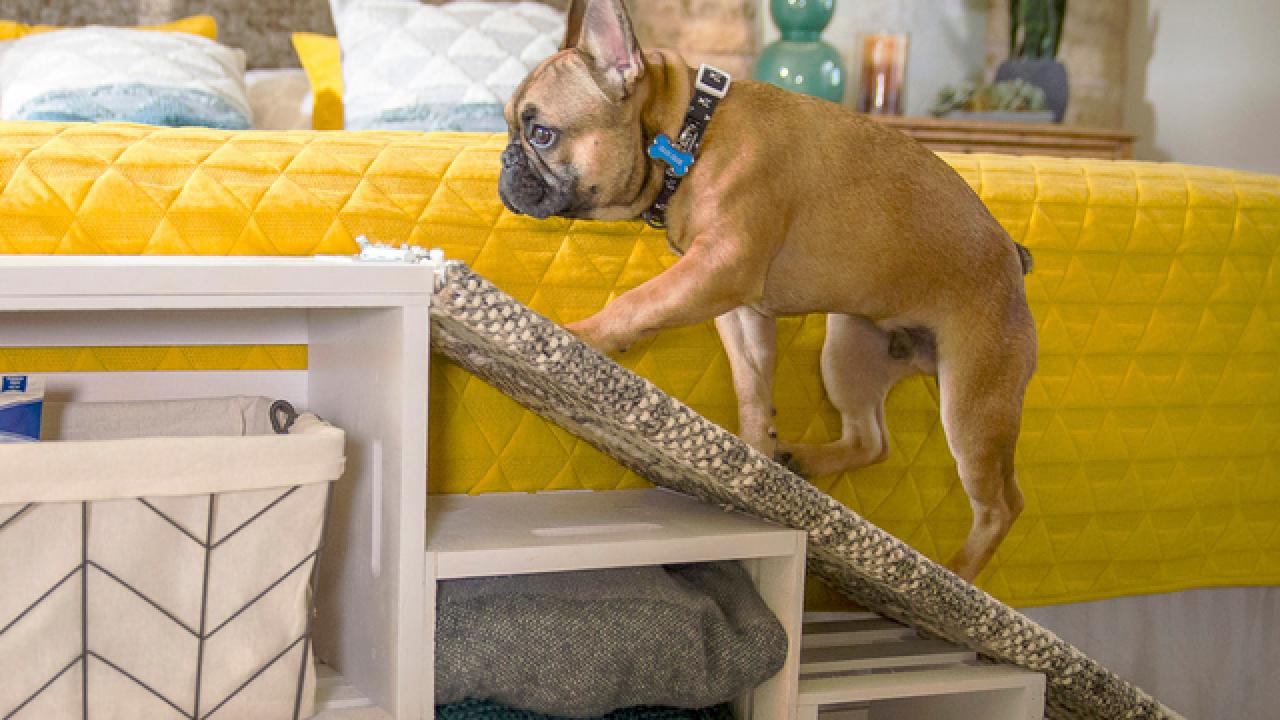
Whether your dog is getting older or just a little on the smaller side, getting on and off the bed can be a bit of a challenge. As with most pet products, retail solutions tend to be a bit of an eyesore and never quite work as well as a custom solution would. Luckily, we’ve got the perfect custom plans to make this doggie ramp a functional piece of furniture you and your pooch will love.

Chris Corona
Materials Needed
- measuring tape
- crates in various sizes
- wood glue
- drill + bits
- hammer
- nails
- 1x10 board
- door hinge + hardware
- small rug
- carpet tape
- miter or circle saw
- pencil
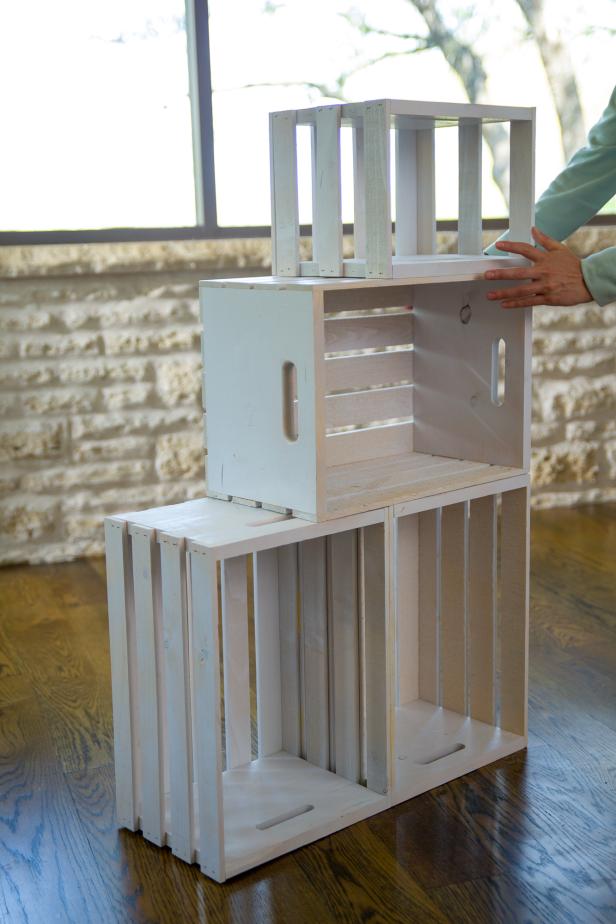
Configure Crates

Chris Corona

Chris Corona
Chris Corona
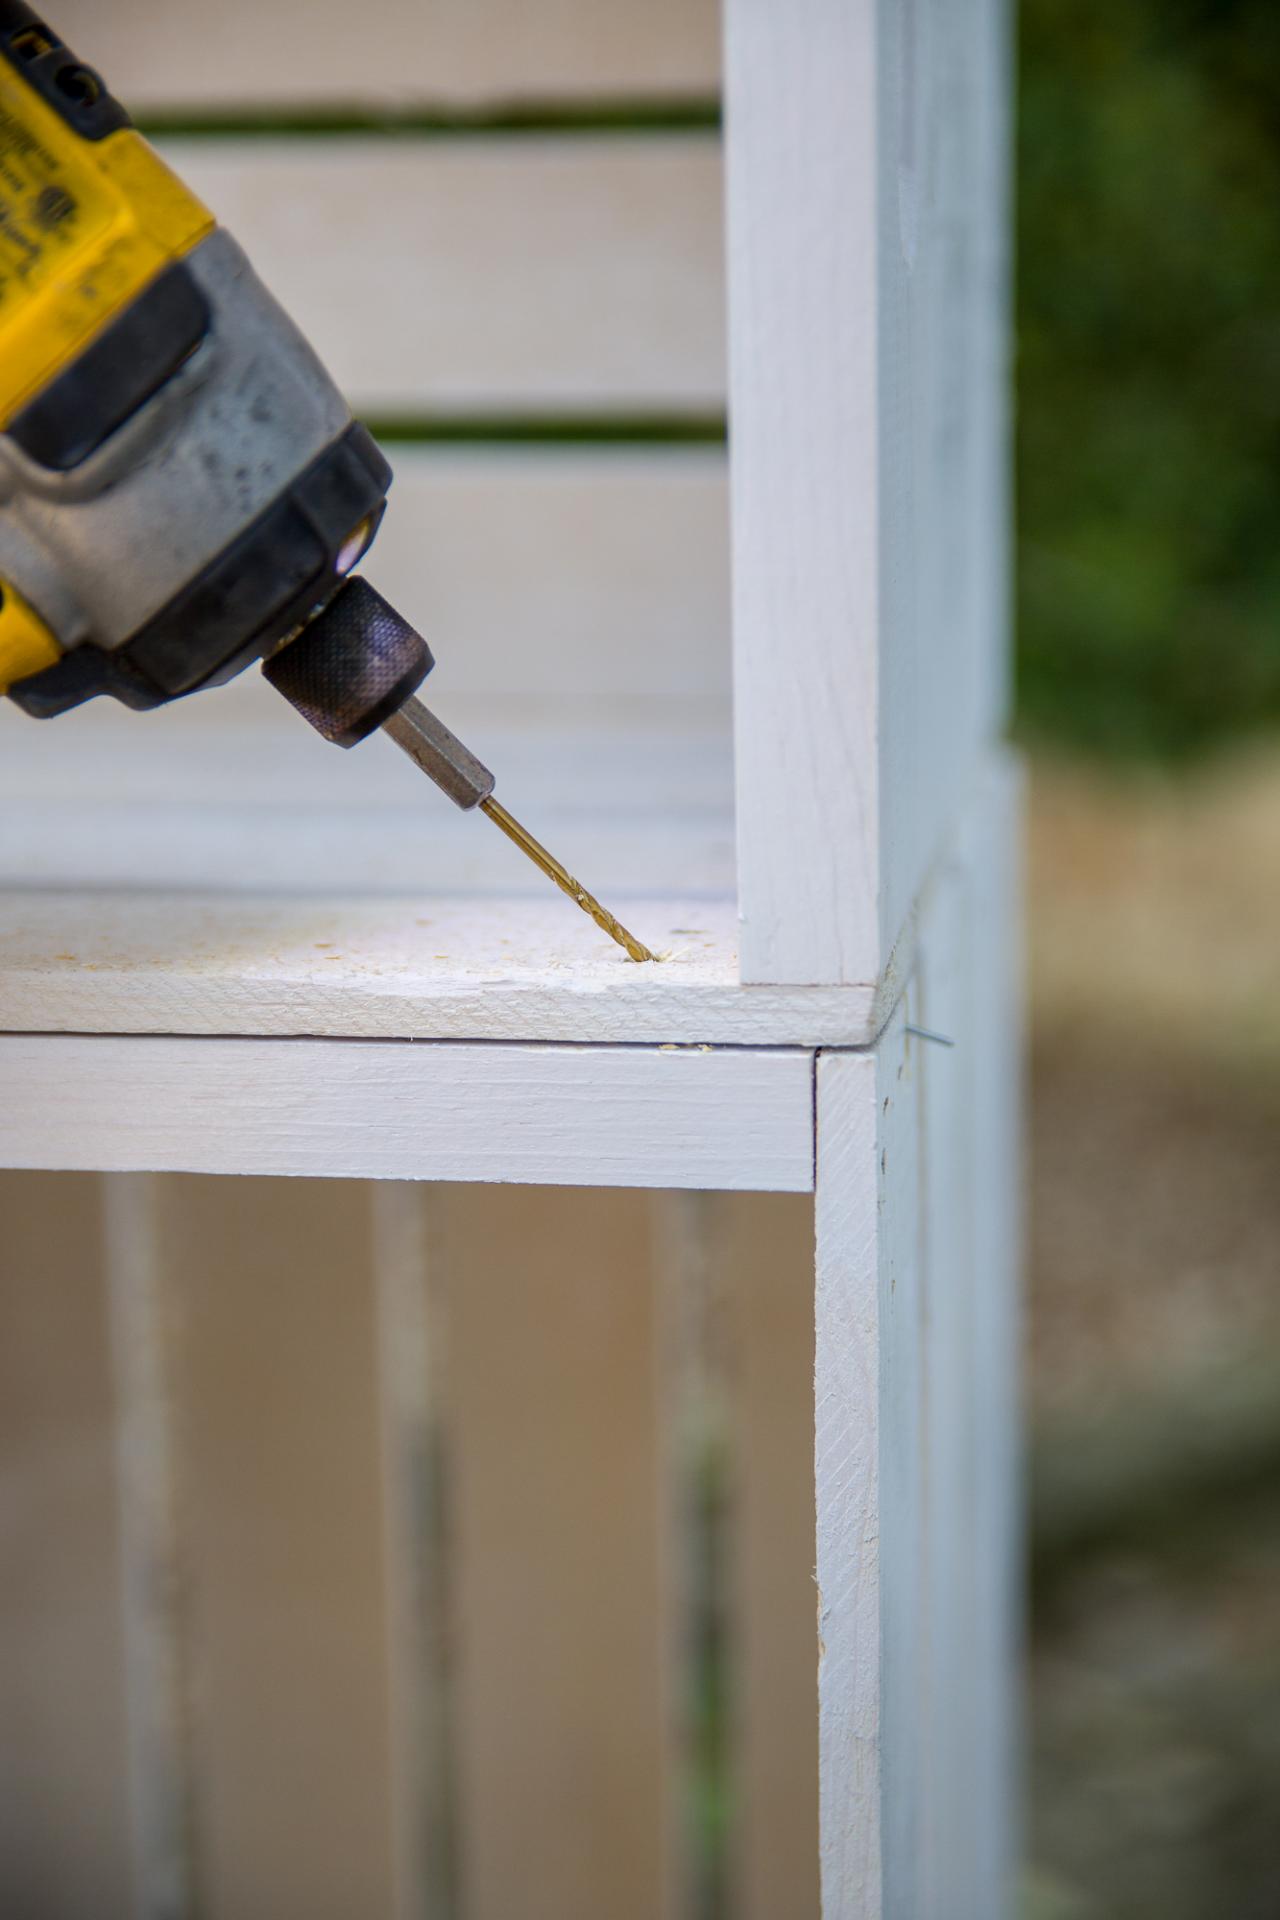
Before you start gluing, it’s important to find a configuration that works for you. Begin by measuring your bed’s width and height and picking strong wooden crates in various sizes that will work. Next, stack the crates in a stair-stepping shape, ensuring that the top crate sits just below the surface of the mattress.
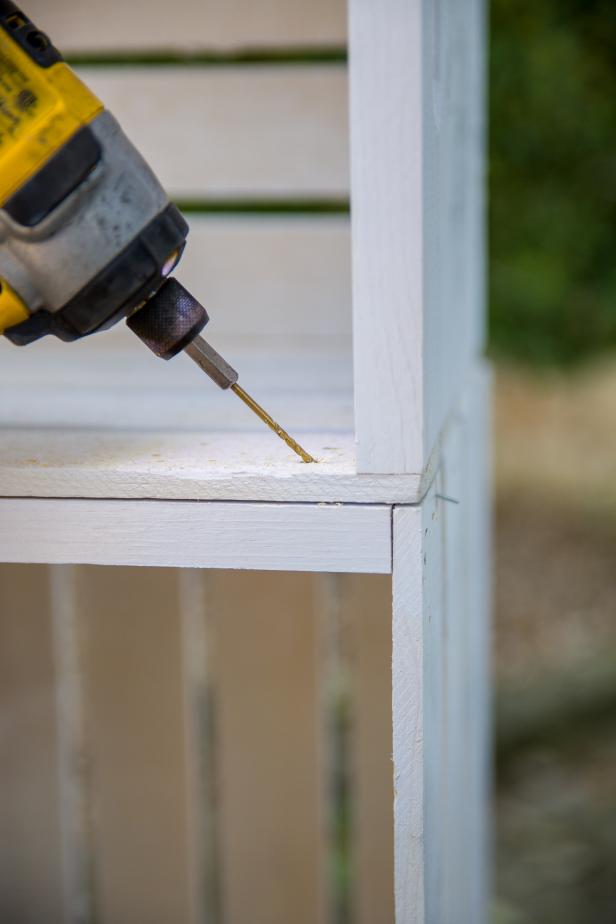
Attach Crates

Chris Corona
Chris Corona

Chris Corona

Chris Corona
Once you’ve found the proper shape, use wood glue and nails to hold the crates together. On the top of the highest crate, attach piece of wood cut to the same size as the top of the crate to keep your pup’s paws from slipping through any cracks.
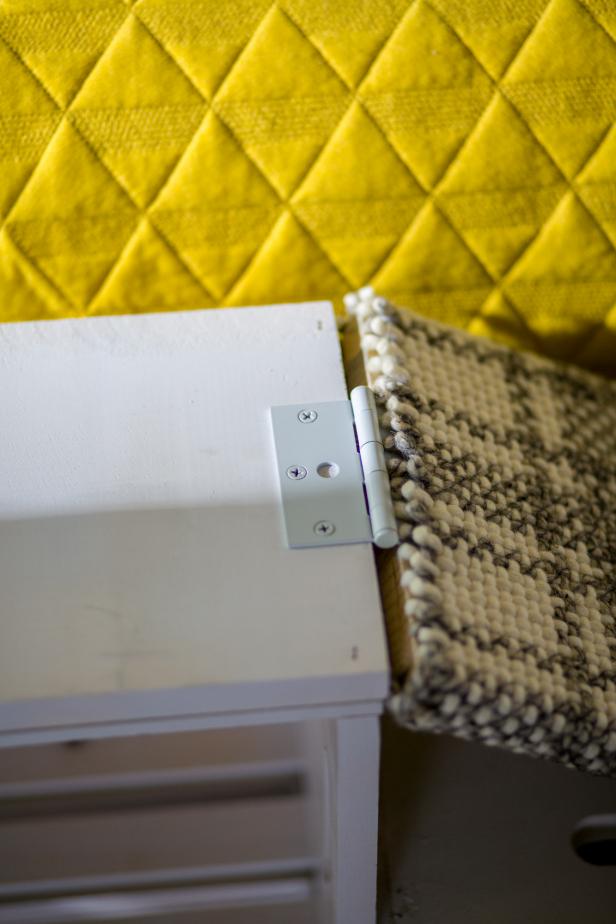
Create Ramp

Chris Corona

Chris Corona

Chris Corona
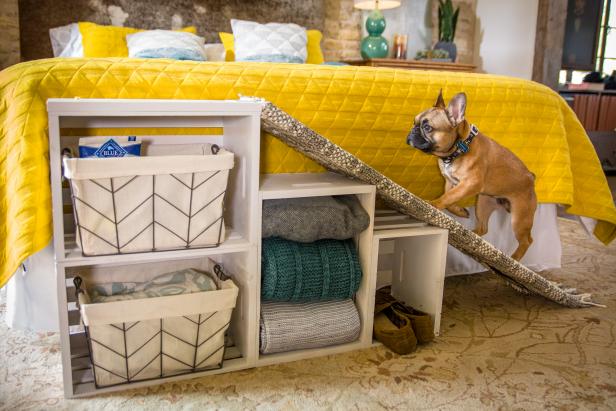
Now for our puppy’s ramp! Cut a 1x10 board to the length of the distance between the edge of the top crate and the floor. Attach a door hinge using the provided hardware on the center of one end of the board. Set the remaining hardware off to the side. Next, wrap the board in a small rug for added traction and style. To do this, trim the rug to the length of the board, wrap around the board, and secure with carpet tape.
Secure Ramp and Style
Chris Corona

Chris Corona
Chris Corona

Chris Corona
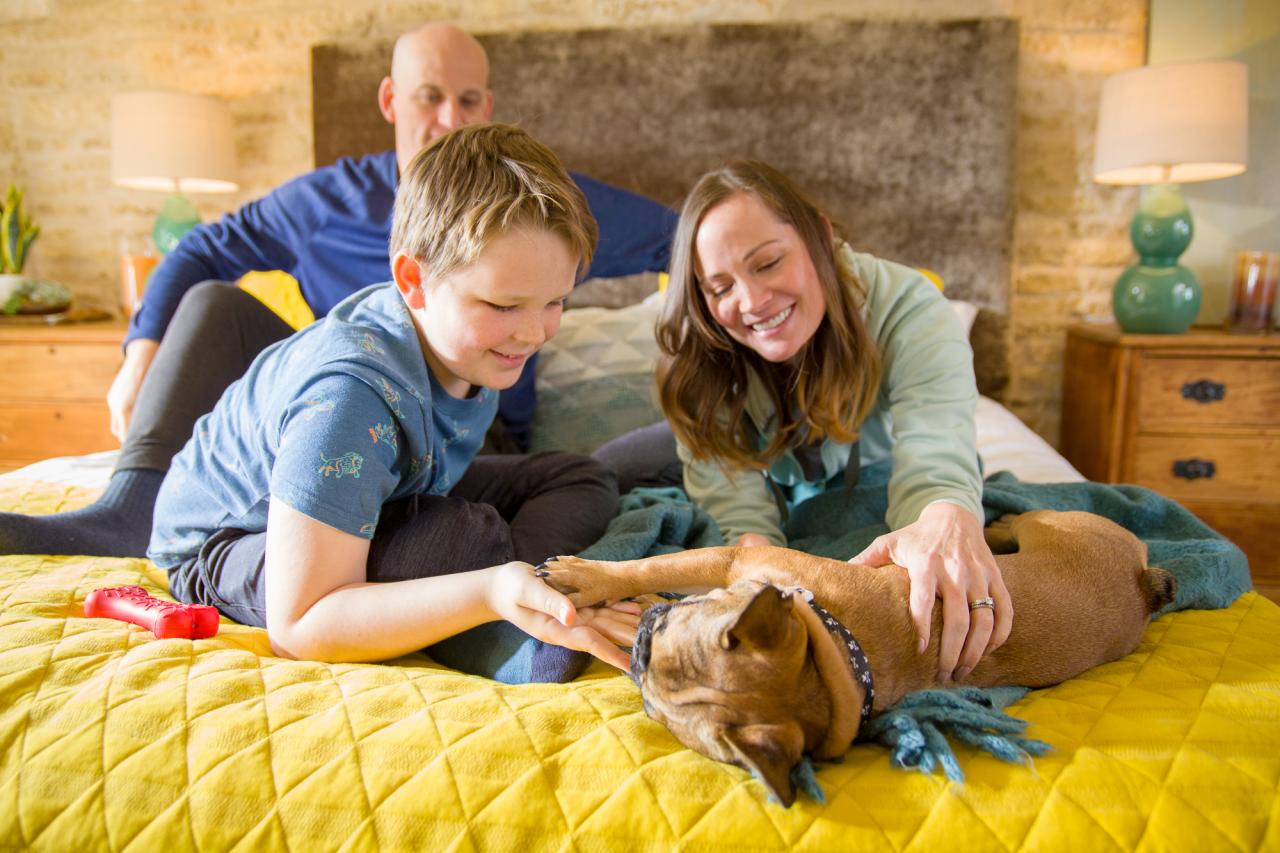
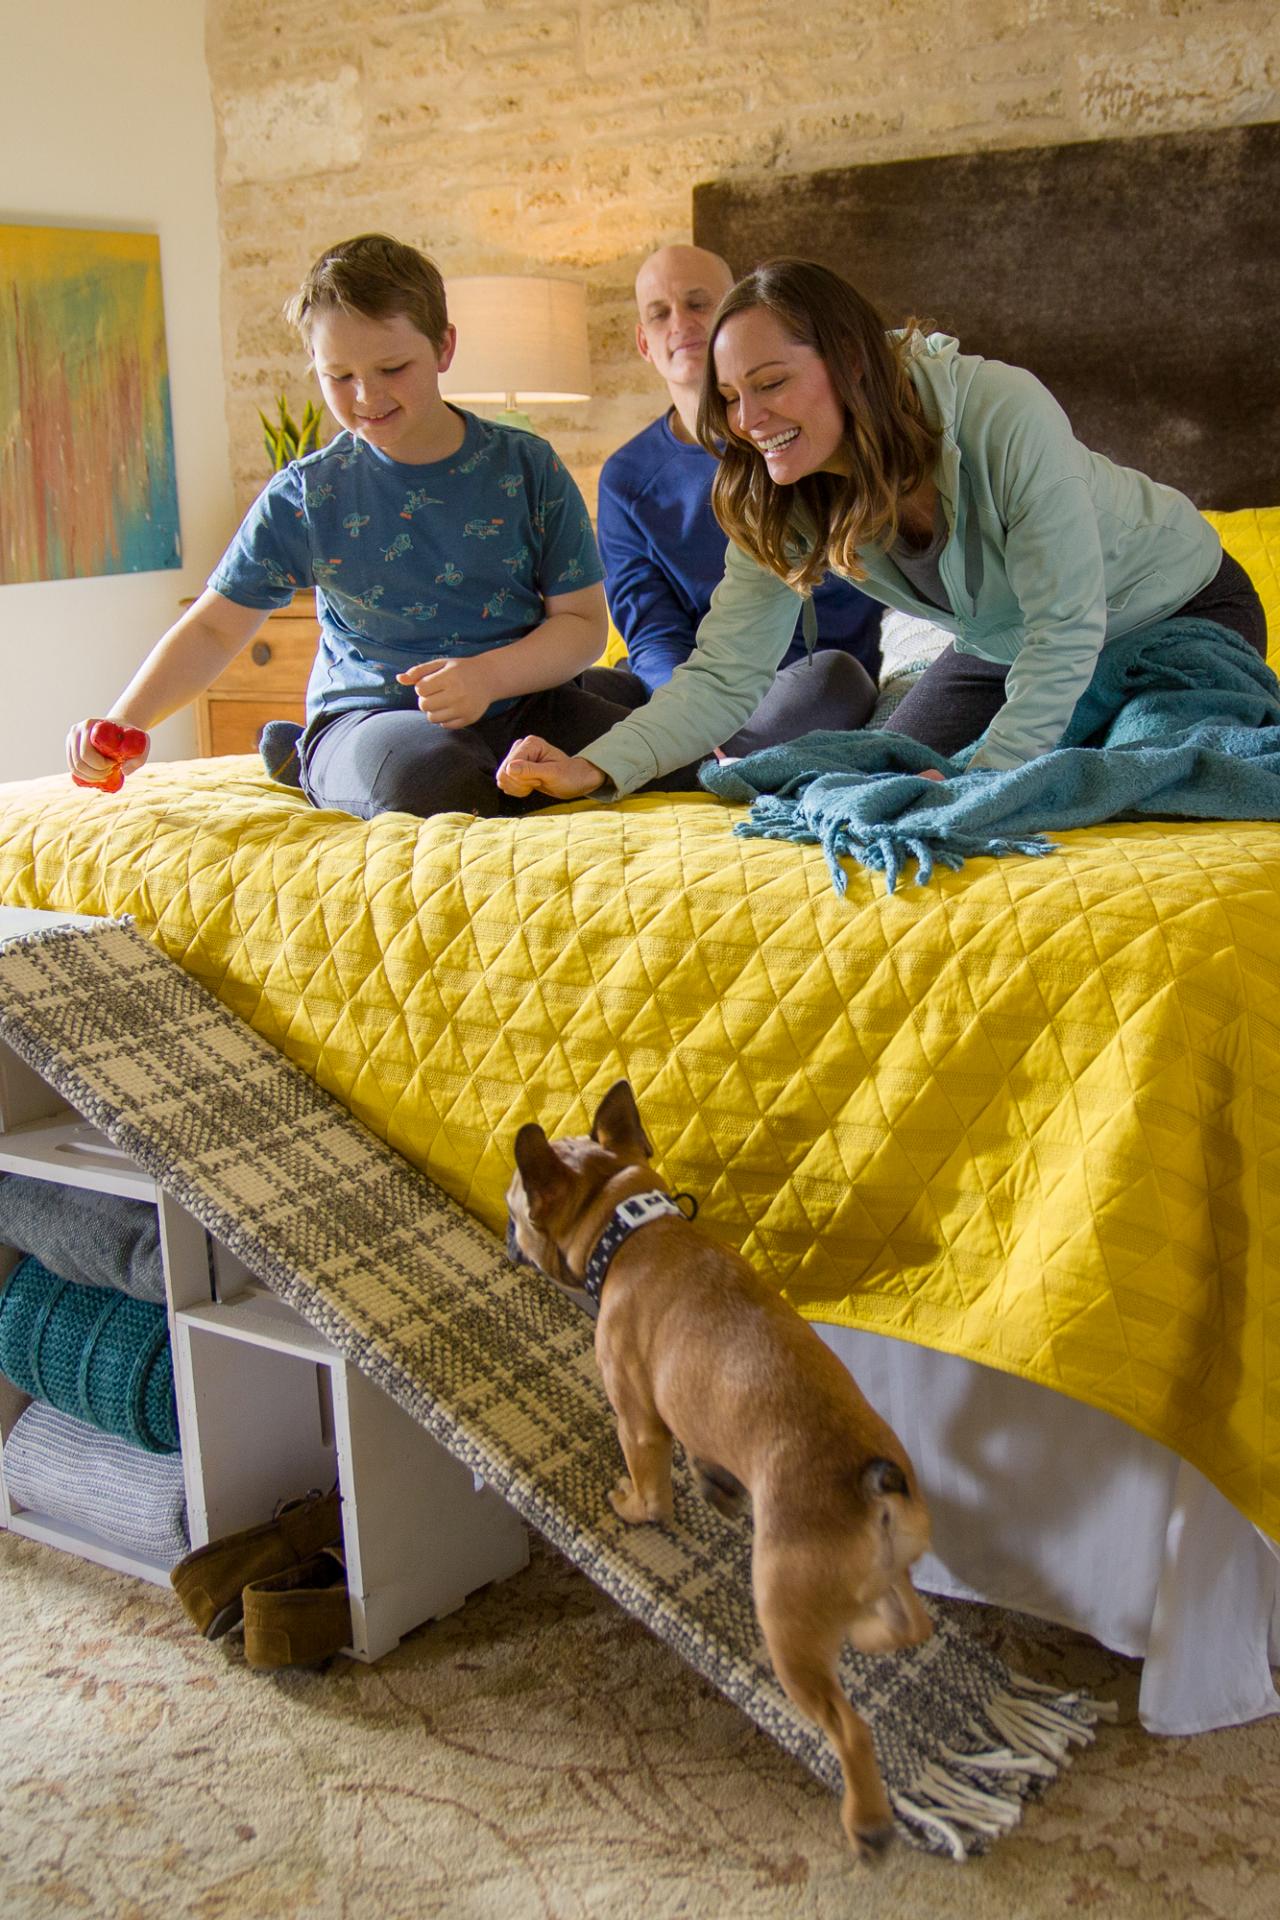
Once the ramp is finished, secure it to the top crate using the hinge and remaining hinge hardware. Style your crates with cute baskets for storage, folded blankets and whatever else you want! If your little guy is slow to catch on, try introducing the ramp with a treat, and it will soon be a hit. Snuggles for all!

Chris Corona


