


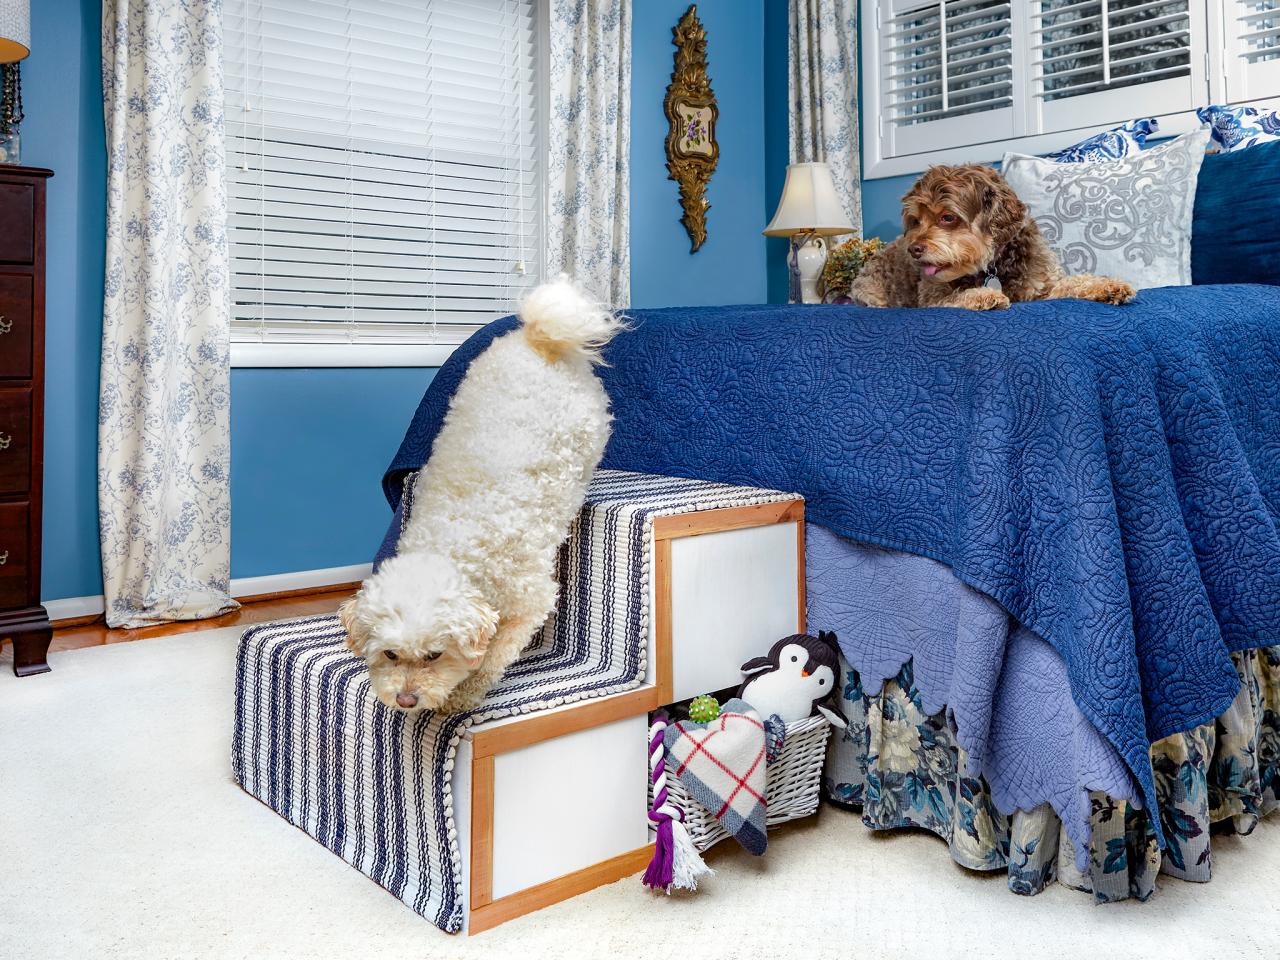
DIY Pet Stairs With Handy Built-In Storage
Your dog will be able to reach snuggle heaven using this DIY staircase that has extra storage for toys.

If you’ve got small pets or if your friend is too old to make the leap onto the bed, this set of DIY steps is helpful, sturdy and easy to build. It fits a 24x36 inch rug perfectly so you can customize its look for any room in the house.

Derek Trimble
Materials and Tools
- jigsaw
- circular saw (optional but helpful)
- hammer or finish nailer
- straight edge and tape measure
- (1) 4x8x1/2 sheet of sanded plywood
- (1) 1x3x6 pine board
- (1) 1” x 8’ piece of flat trim moulding
- wood glue
- masking tape
- (1) box 3/4” finish nails
- 24x36 flat weave rug
- 24x36 non-slip rug mat
- paint and paint supplies
- a small basket
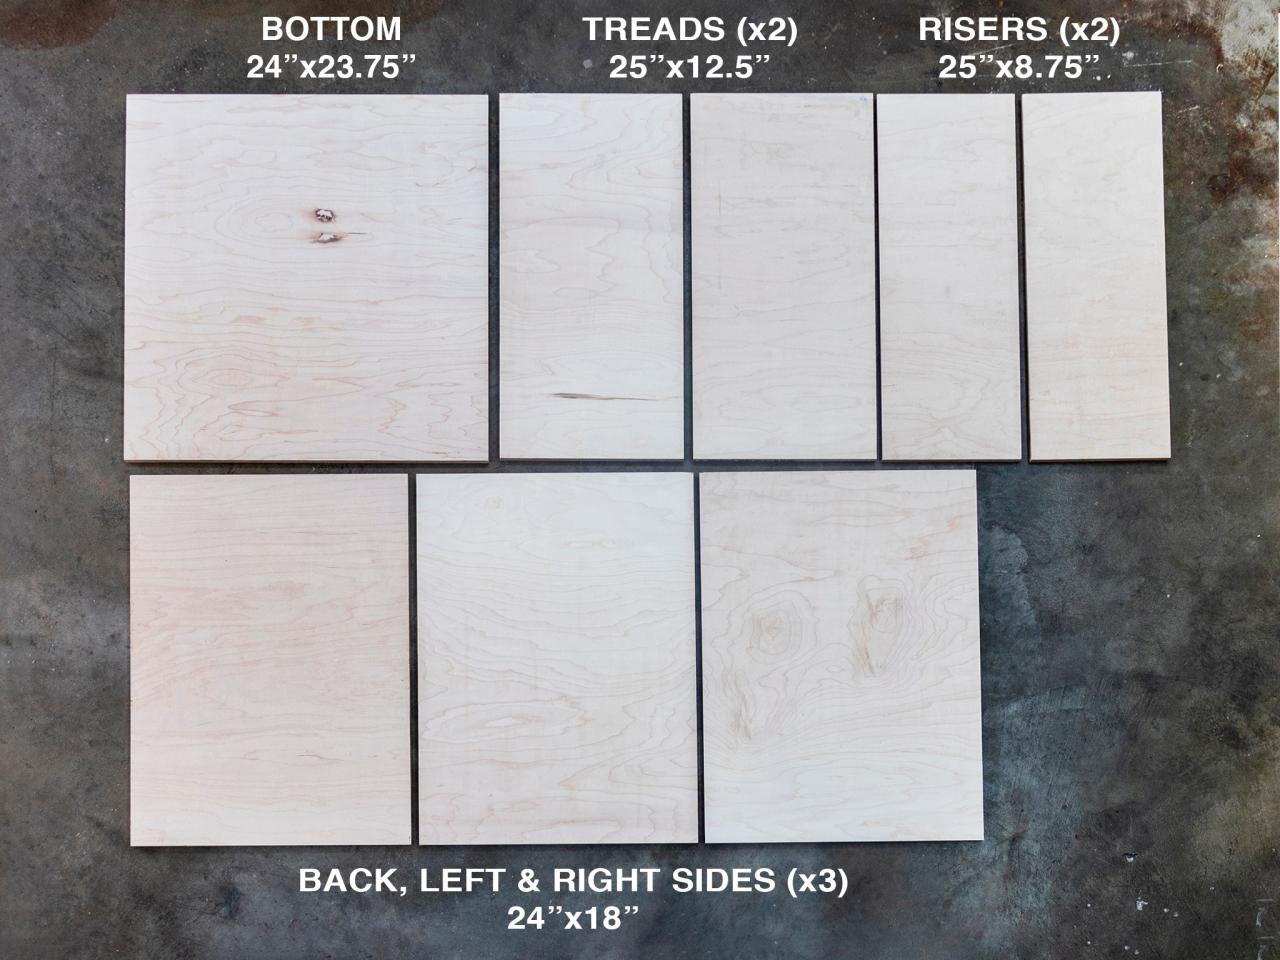
Start With a 4x8 Sheet of Plywood
If you don’t have much workspace, most hardware stores will cut a sheet of plywood down for you. If you’re going to do it on your own, a circular saw makes life easier and it’s important to support your work properly. Here’s the cut list for all the pieces you’ll need:

Derek Trimble
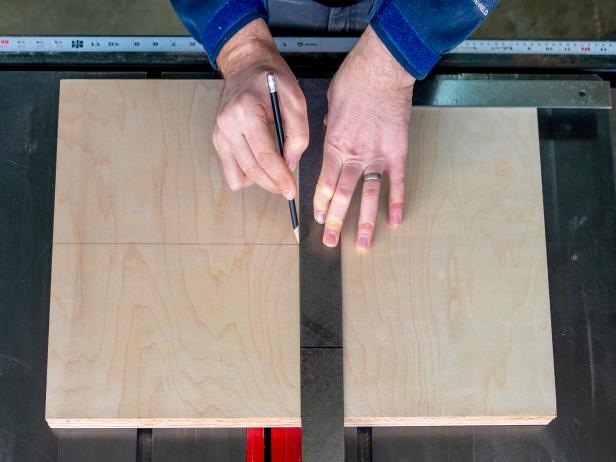
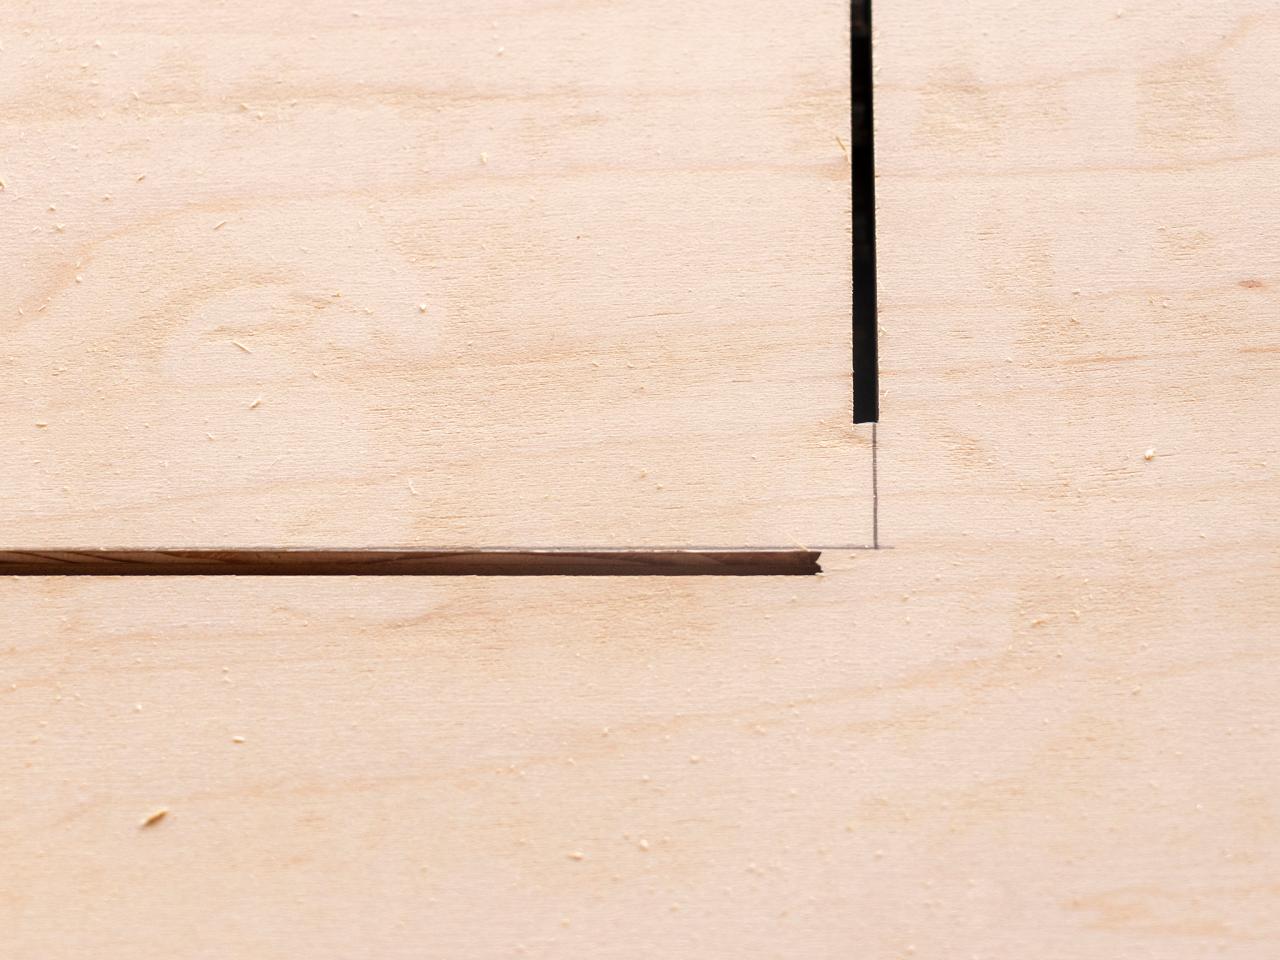
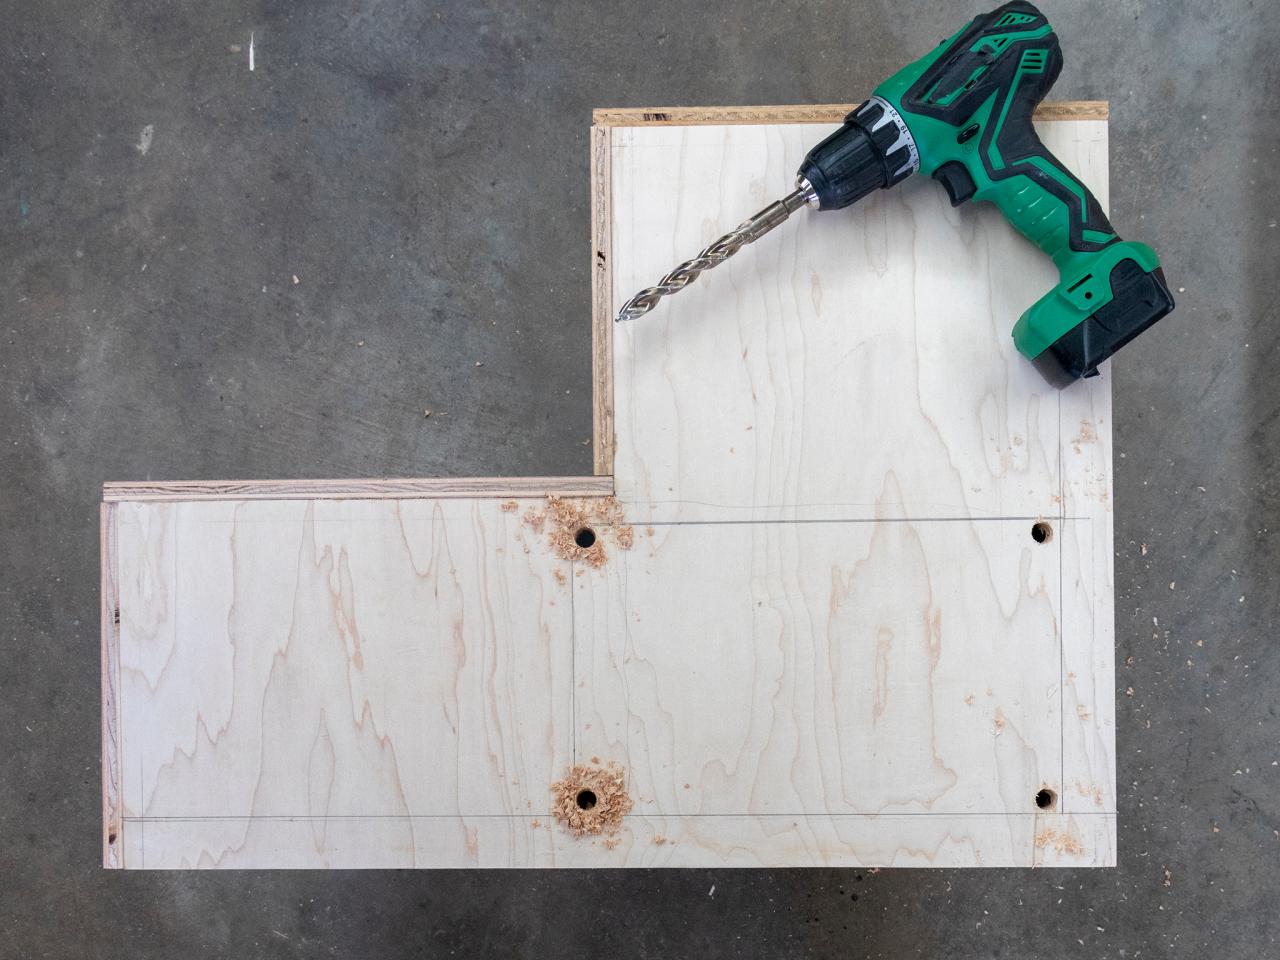
Mark Out a Corner on Both Sides
In order to make a simple pair of steps, you need to cut off the upper right corner of both sides. These plans call for the steps to have a 9” riser and a 12” tread so we'll make our cut accordingly. Measure 9" down from the top-right corner, then draw a line 12" to the left from that point (Image 1). Use a straight edge and make sure your line is 90° to the edge of the board. Once you’ve drawn that 12” line, you just need to draw a line 9” upward to the top of the board (Image 2). Again, do your best to make this line square so you’re making sharp right angles.
Derek Trimble

Derek Trimble
Making Your Cuts
If you’re using a circular saw to make your cuts, it’s a good idea to stop just short of the corner you've drawn (Image 1). Round blades tend to go farther than you’d expect, so stop early and finish your cuts with a small handsaw (Image 2). Tip: If you’re planning to use your jigsaw to make cuts, clamp a straightedge or a yardstick to your piece. A jigsaw has a habit of wandering and a small straight edge can save your project from bad cuts.

Derek Trimble
Derek Trimble
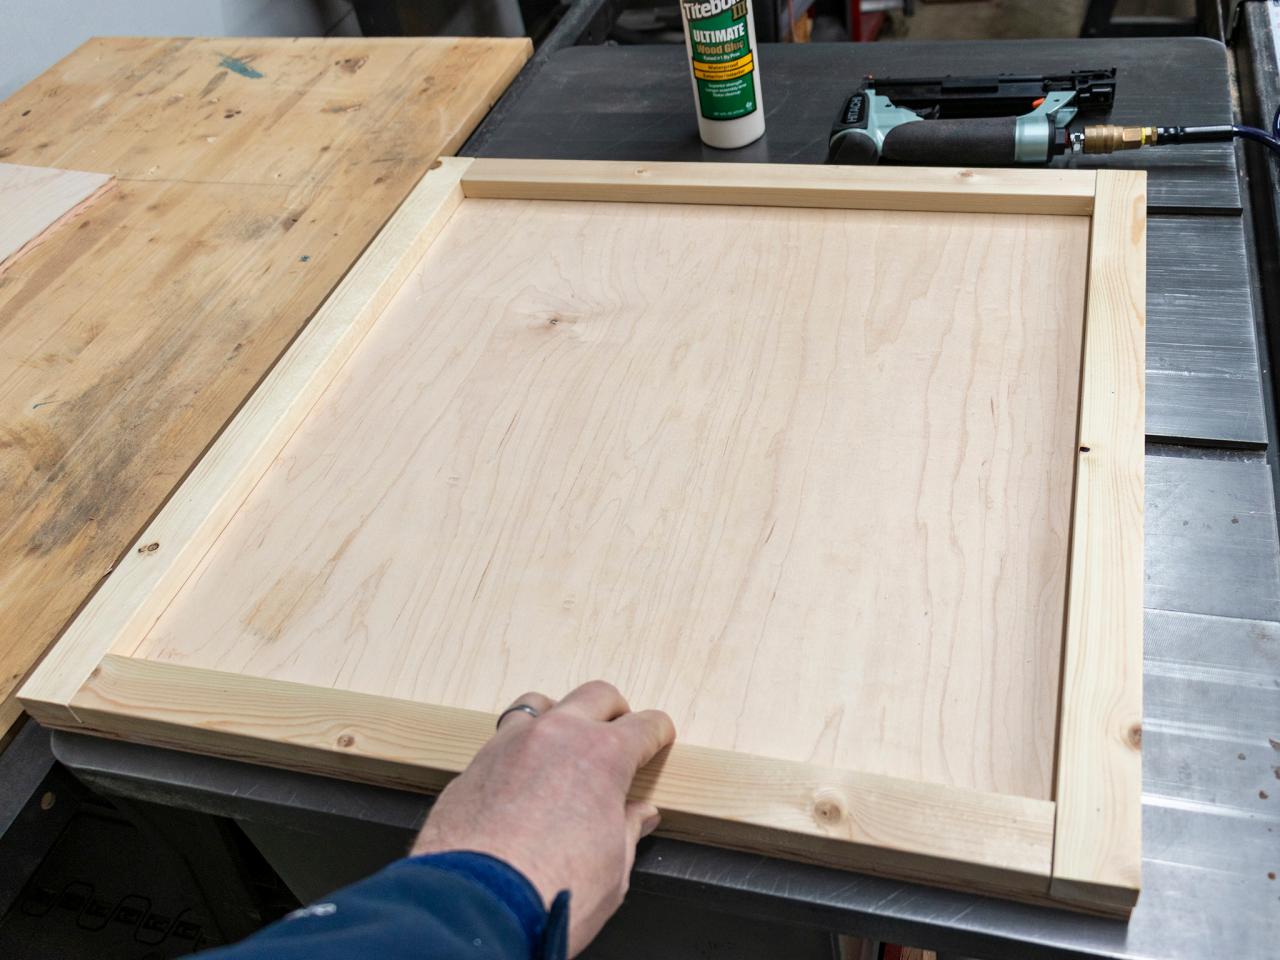
Reinforce the Base
Using your 1x3’s, frame the outer edges of your base plate. This gives you a generous edge to glue and nail your sides in place. You won’t see these unless you flip the stairs over, so it’s okay if it’s not perfect. Just make sure to use a generous amount of glue and nail everything together tightly.

Derek Trimble
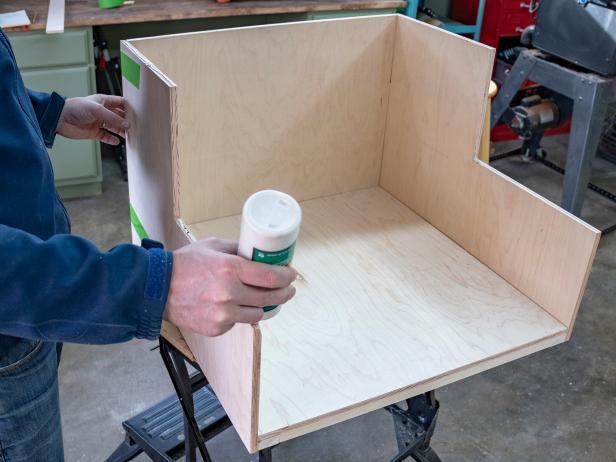
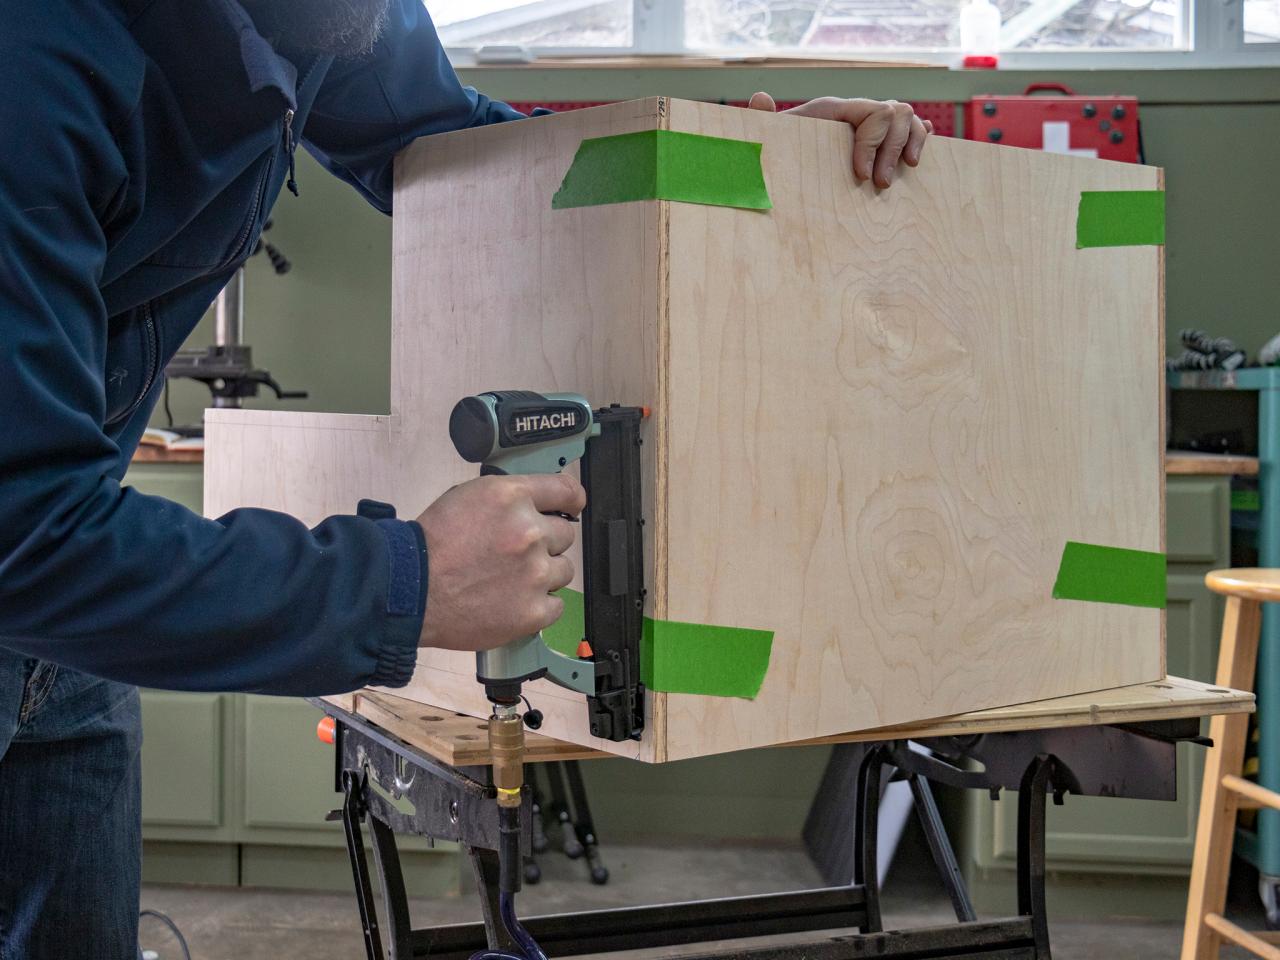
Assemble the Sides
Set your baseplate on a flat surface like your garage floor or a workbench with the 1x3’s facing down. Run a bead of glue around one side and the back and stand up one side piece and the back side. Use painter's tape to hold the corners together to prevent the sides from falling down while you secure them with nails (Image 1). Drive nails around the bottom edges and the vertical corner (Image 2). Do this for the other side next, then allow 30 minutes for the glue to set.

Derek Trimble

Derek Trimble
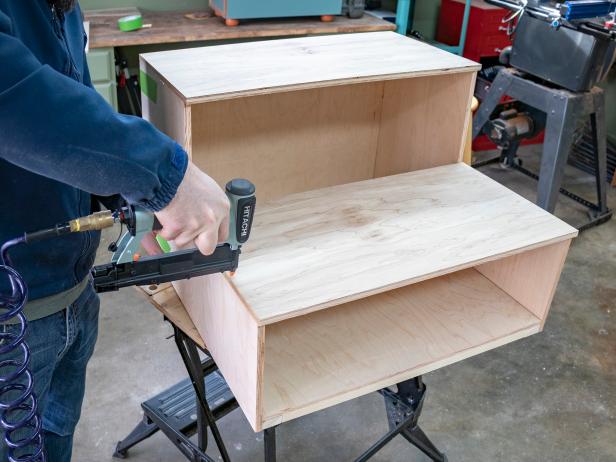
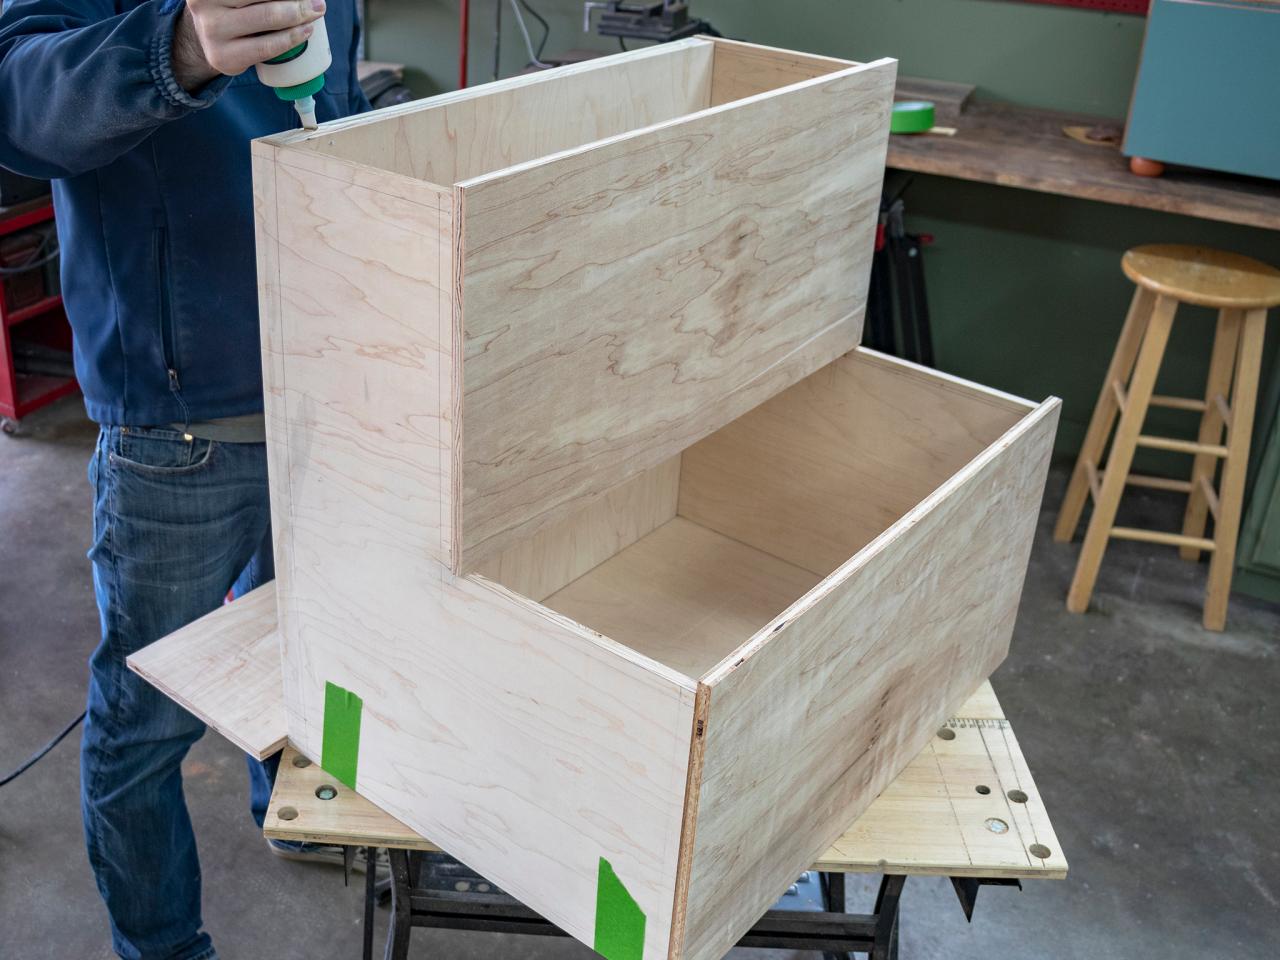
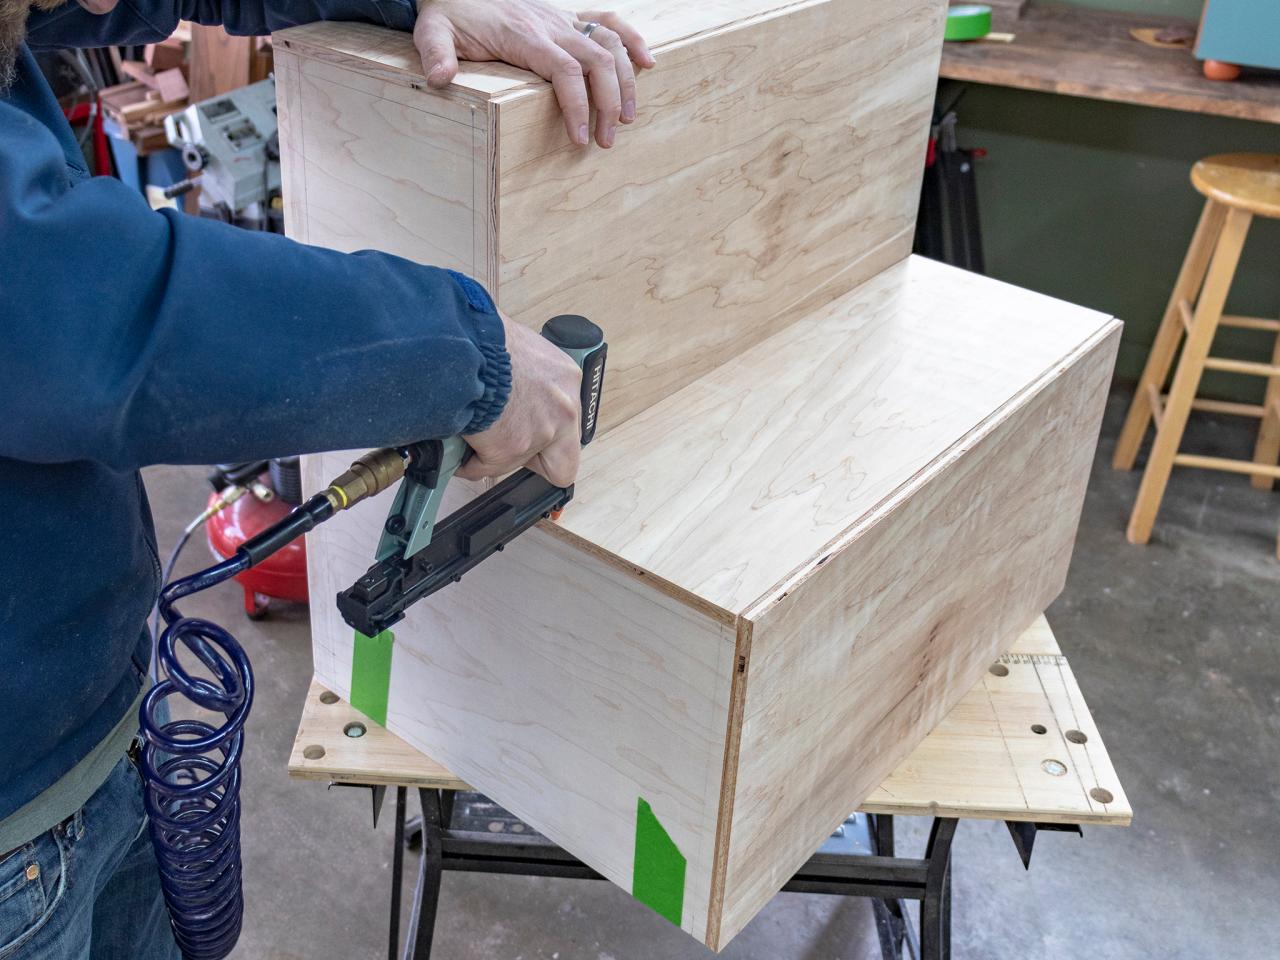
Risers and Stairs
Run a bead of glue along the top edges where the stairs will go, then attach the two 12” stairs using finish nails (Image 1 and 2). Then roll your project onto its back, spread glue where the 9” risers will sit and nail them into place (Image 2 and 3). Give everything a few hours to fully dry, then move on to the next step.
Derek Trimble
Derek Trimble

Derek Trimble

Derek Trimble
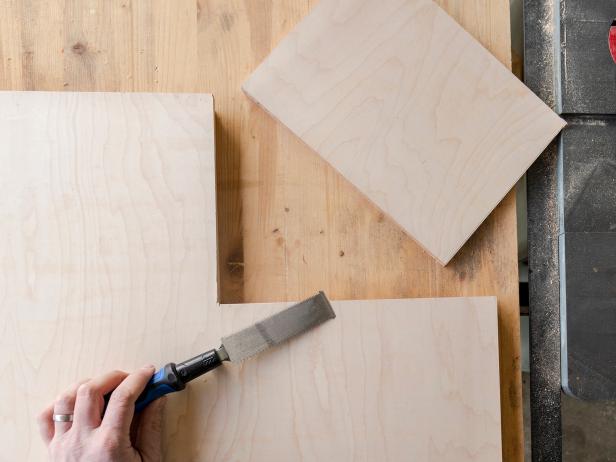
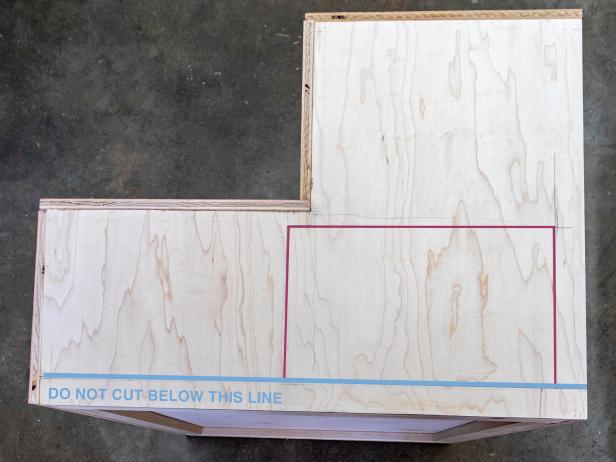
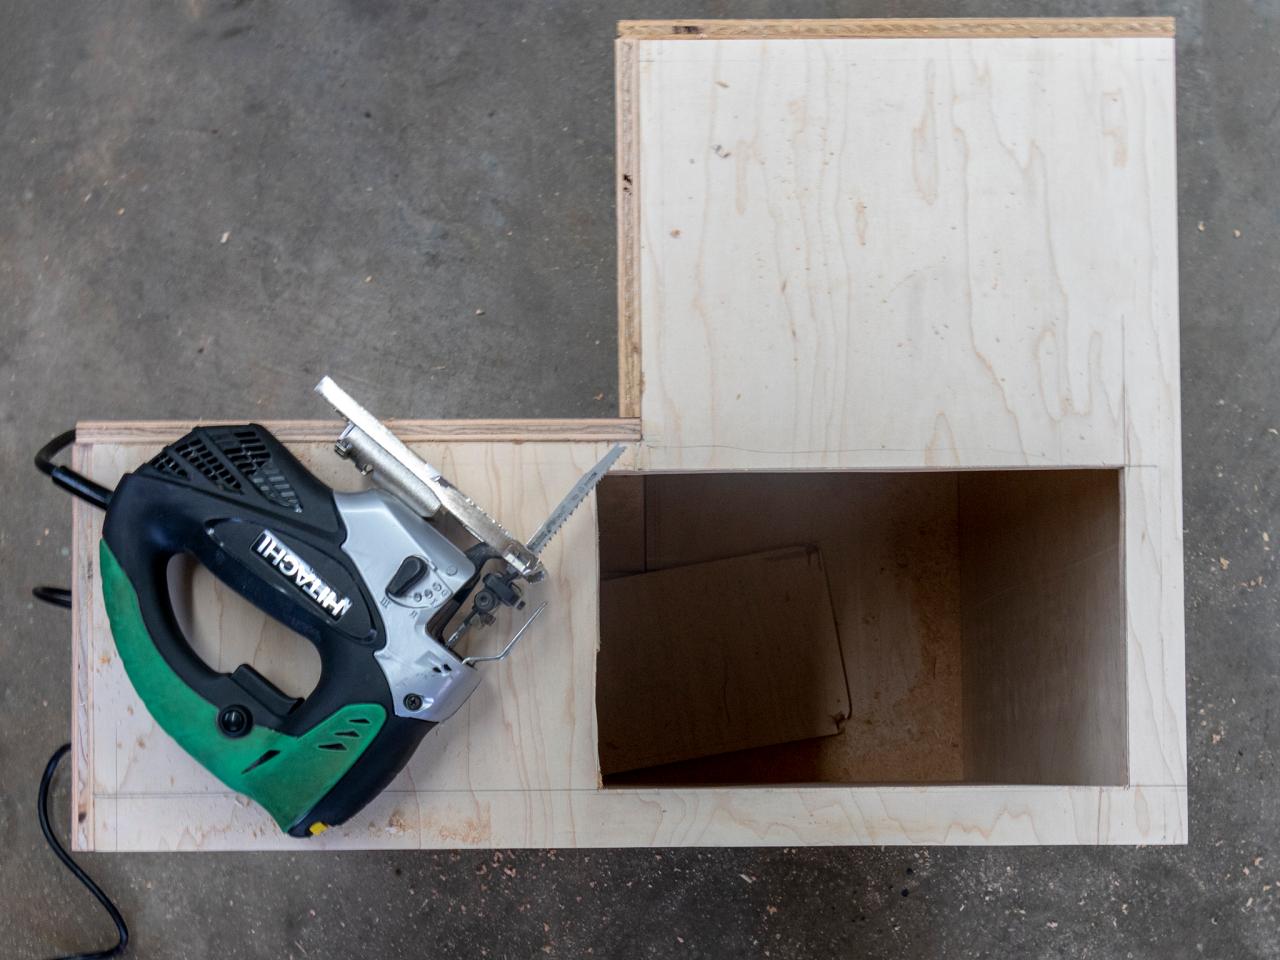
Cut the Storage Hole
Draw a line 1-1/2” up from the bottom of one side, this is where the base is resting behind the side. You don’t want to cut the opening below that line (Image 1). Measure the storage container and layout your cut lines as shown below. Drill a hole inside each corner of your cut lines that’s big enough to accept your jigsaw blade (Image 2). Insert the jigsaw and cut toward the next hole, make a turn and repeat until you’ve cut out the entire hole (Image 3 and 4).
Derek Trimble

Derek Trimble

Derek Trimble

Derek Trimble
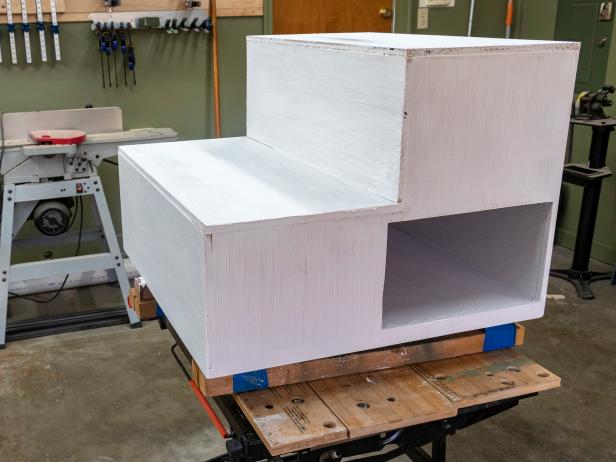
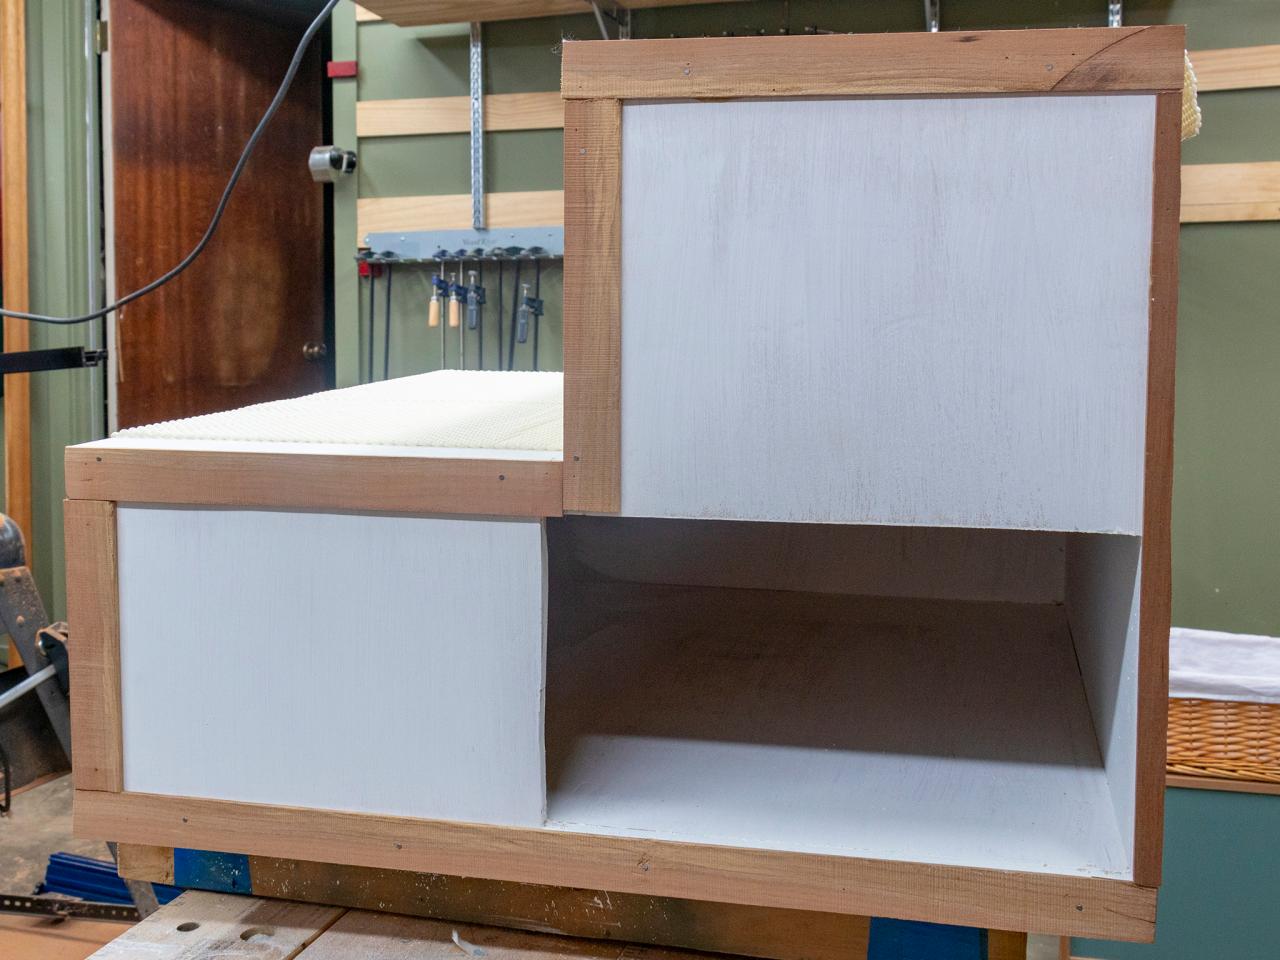
Time for Some Paint
If necessary, give all surfaces a light sanding before the paint, just make sure to wipe it down before painting or staining to remove any loose sawdust (Image 1). Once the paint is dry, flip the stairs over and add some felt or rubber pads to the bottom (Image 2) to protect your flooring.
Derek Trimble

Derek Trimble
Optional: Add Trim
If you painted a light color like we did, or you just don’t like the plywood edges you can tack some 1” trim around the edges to clean things up a bit and add a decorative finishing touch.

Derek Trimble
Add the Non-Slip Pad and Rug
Cut the non-slip pad so it's slightly narrower than your stairs and to its correct length. Using aerosol spray adhesive or a few upholstery staples, attach the non-slip pad to the stairs and risers. Finally, add the flat-weave rug and fill the handy basket with a few of their favorite toys.

Derek Trimble


