


Raised Dog Cot DIY
Build a durable cot for your dog with PVC pipes.


Debbie Wolfe
Finished dimensions of cot will be 27.5” x 31.5”
Supplies
- 1 inch schedule 40 PVC pipe (10 foot piece-dimensions listed below)
- 3-way PVC corner pieces (1 inch) (This is a furniture grade specialty item that cannot be found at big box home improvement stores, you’ll need to order online.)
- 34.5” x 38.5” outdoor or upholstery grade fabric
- lath screws #8 X 1/2"
- drill and bits
- rubber mallet
- scissors
- ruler
To save time, have the pipe cut to these dimensions in the store. The large home improvement stores will cut these free of charge.
- two 24” pieces
- two 28” pieces
- four 4” pieces
This should use up the entire 10 foot (120 inches) length of PVC.

Debbie Wolfe
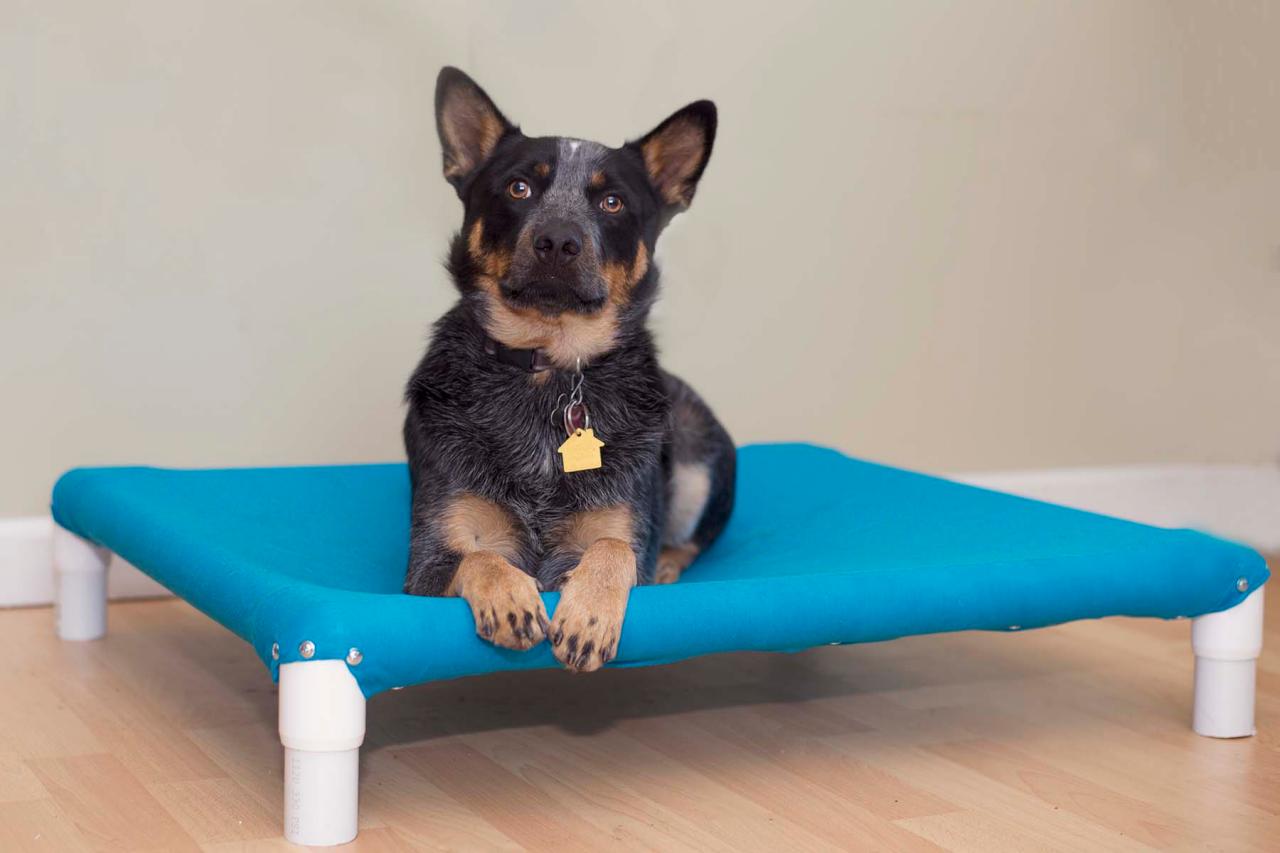
These cot style dog beds are popular in pet shelters and rescues. They get the dog off the cold floor and flexible bedding is easy on the joints. It's also easier to clean underneath this raised bed. Buying one of these cot style beds will cost anywhere from $60-$100. You can build one using PVC for less than $30.

Debbie Wolfe
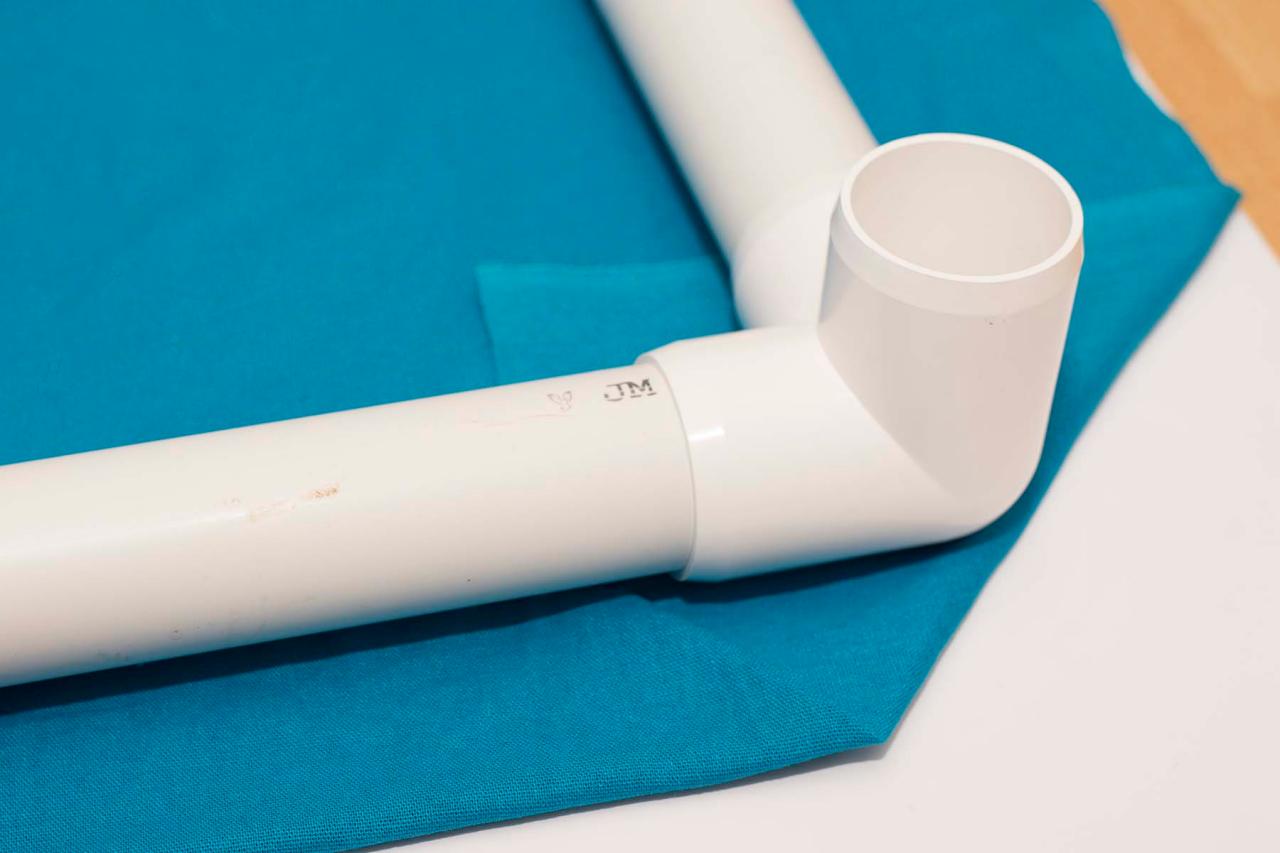
Build the Frame
Assemble the frame by connecting the 28 and 24 inch pipe pieces to the 3-way connectors. Make sure there are equal lengths of PVC on opposite sides to produce a frame that measures the finished dimensions. Use the mallet to pound each corner piece joint to secure them in place.

Debbie Wolfe

Debbie Wolfe
Lay out the Fabric
Center the frame on the fabric. If using a patterned fabric, make sure the pretty side is facing down (Image 1). Fold each corner of the fabric and slip the folded corner under the edge of the each 3-way corner piece (Image 2).

Debbie Wolfe
Fold the Edges
Along the long side of the frame (the 28 inch side) fold the cloth edge over about 1/2 inch and then fold a second time to form a double fold. The fabric should line up in the center of the PVC on the bottom side of the frame.

Debbie Wolfe

Debbie Wolfe
Secure the Fabric
Attach one latch screw through the fabric in the middle of the PVC (Image 1). Go slow and make sure that the screw penetrates all layers of fabric. Stop drilling as soon as the screws are flush with the fabric to prevent stripping the pipe and twisting the fabric. Continue adding screws along the length of the pipe until one side is secured. When you move on the opposite side of the bed, stretch fabric by pulling tightly (it helps to have someone help you at this point (Image 2). Add first screw at midpoint, then add the final screws evenly spaced. Repeat the same process for the 24 inch sides of the cot.

Debbie Wolfe

Debbie Wolfe
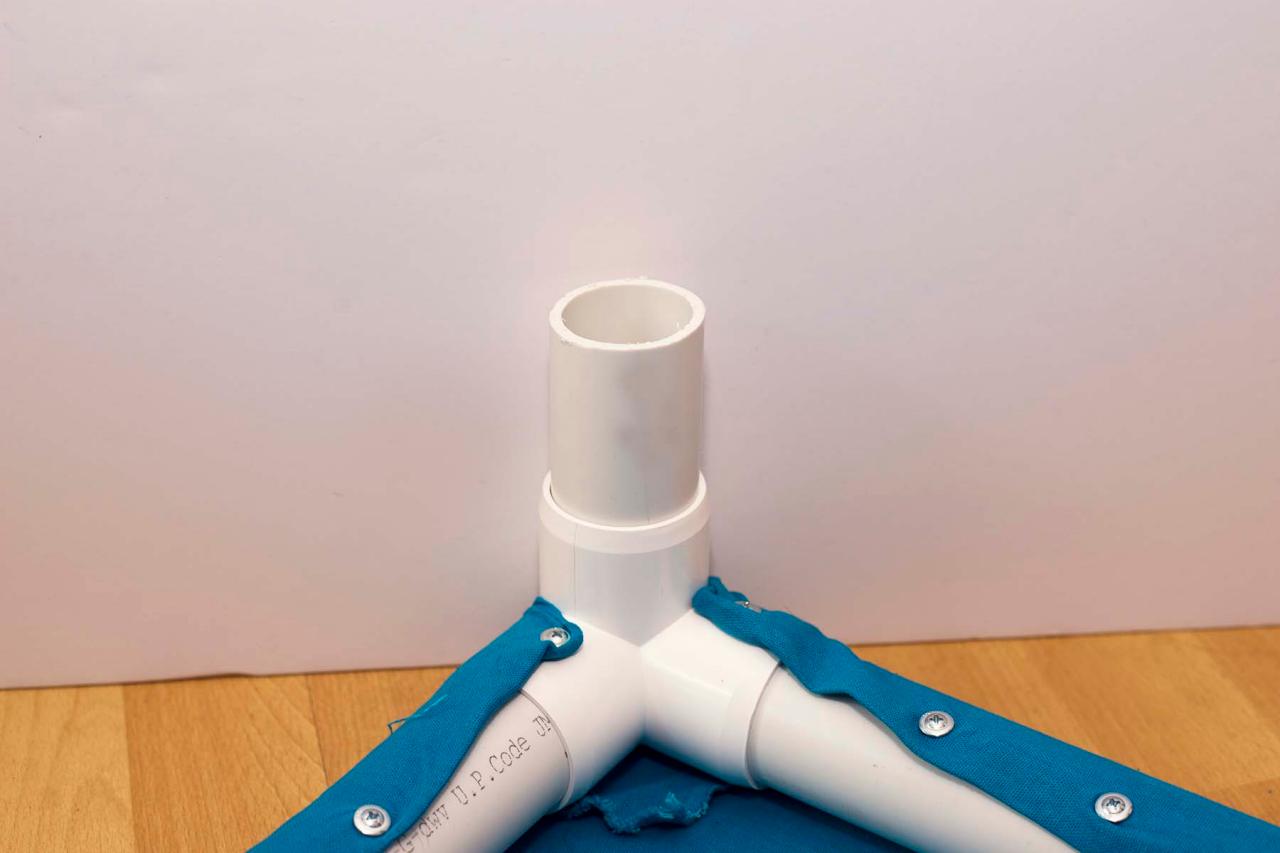
Secure the Corners
Flip the cot upright. Add the first corner screws in the center of each corner top. Turn cot onto its side and place a screw on each side of the corner pieces. Repeat at each corner. Secure the corner at the bottom of the cot near the legs with screws.

Debbie Wolfe
Add the Legs
Pop the four inch pieces of pipe into each corner.

Debbie Wolfe
Dogs of all ages will enjoy relaxing on their comfy cot bed.


