


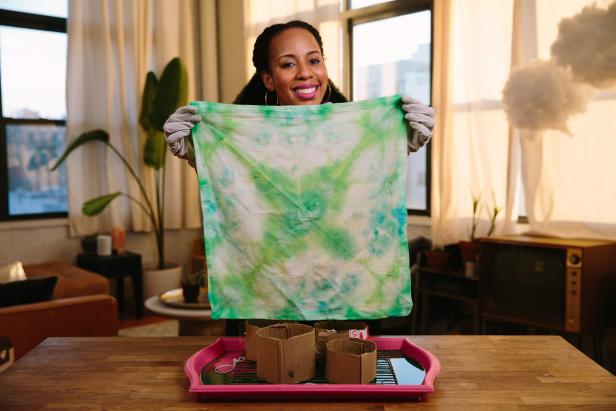
Ice Tie-Dye Napkins Four Ways
A tie-dye DIY so simple it only takes three ingredients: powder fabric dye, cotton napkins and ice.

Christine Han

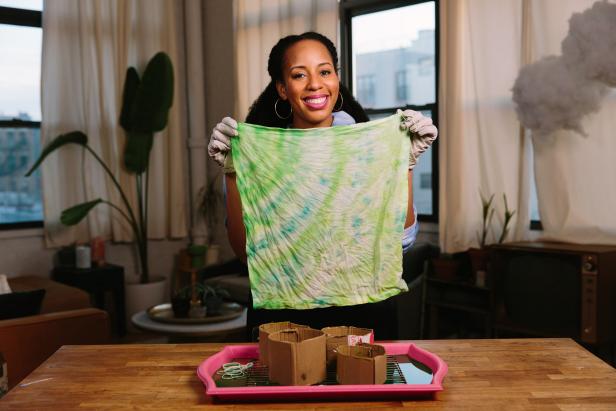
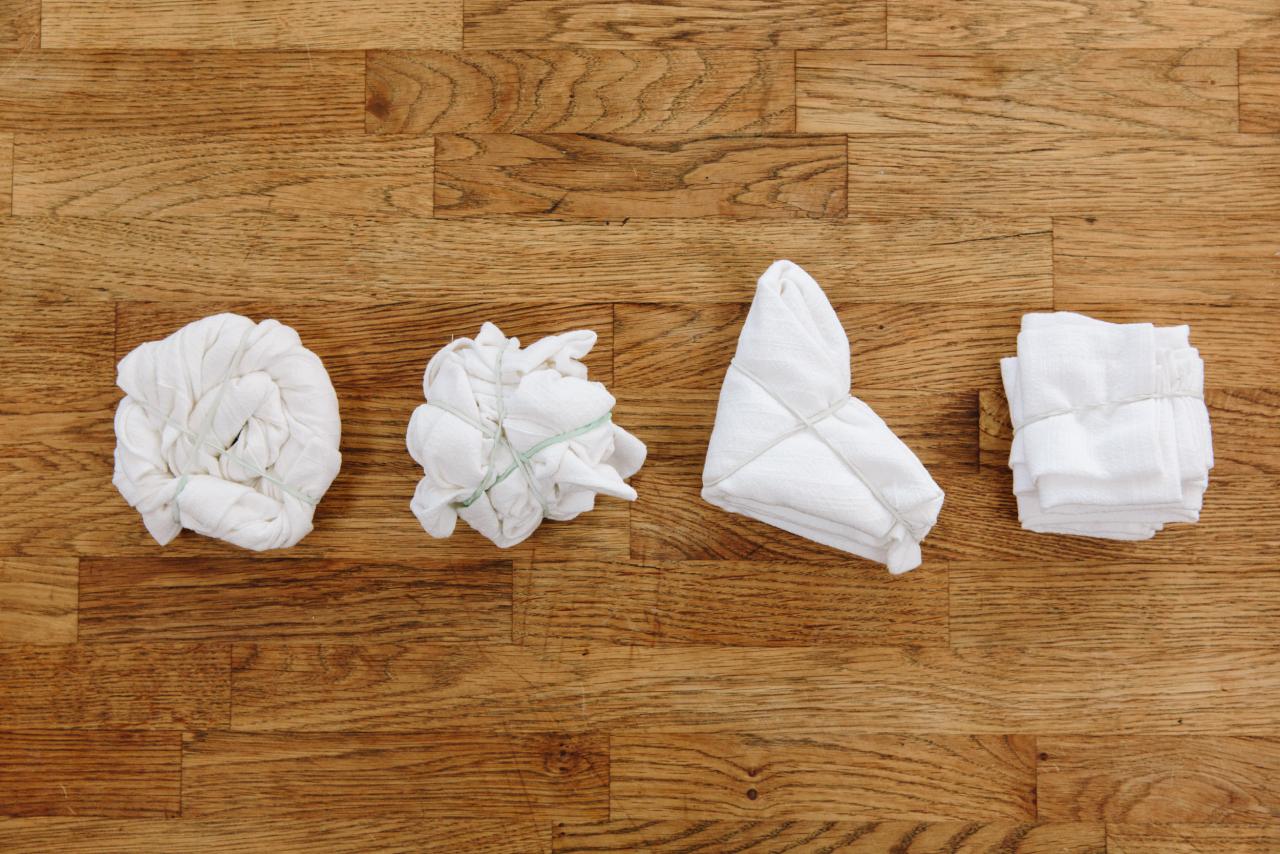
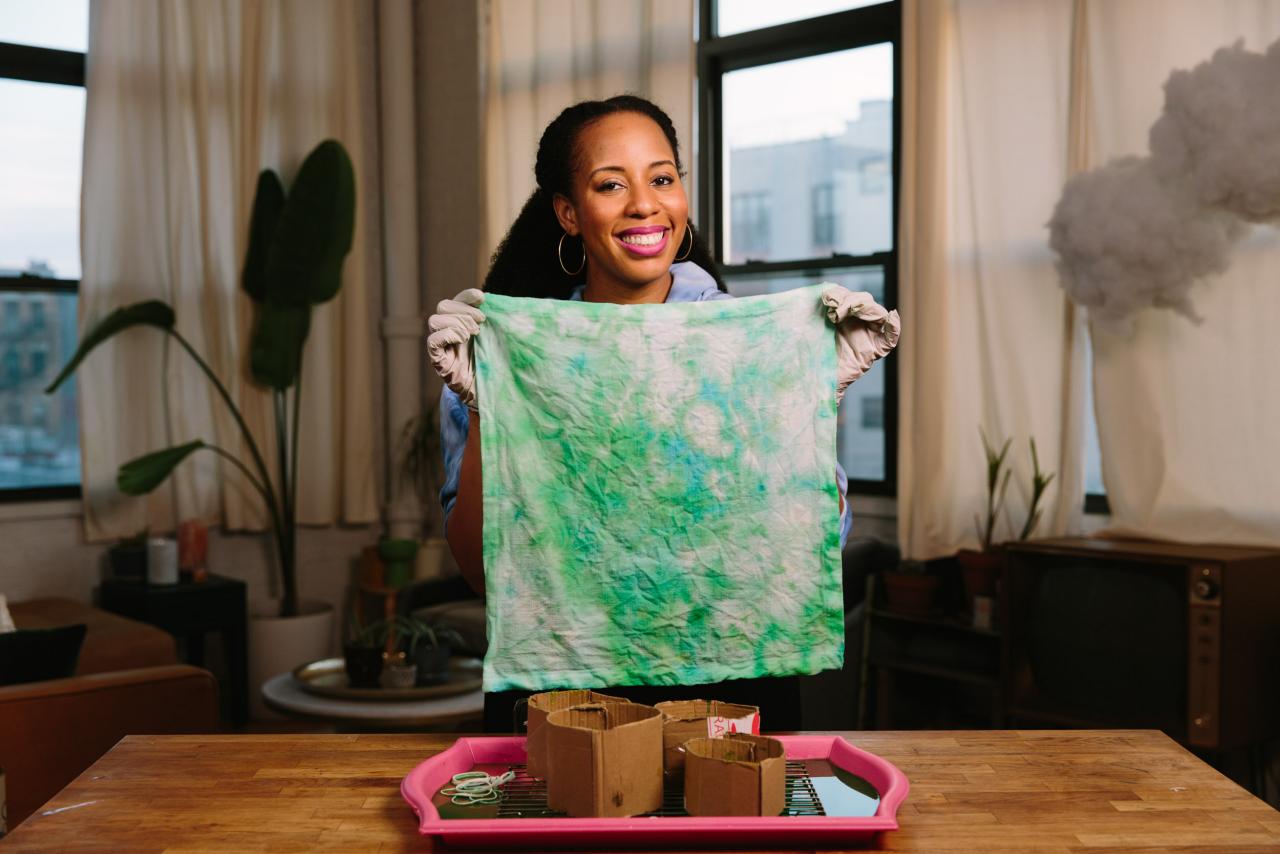
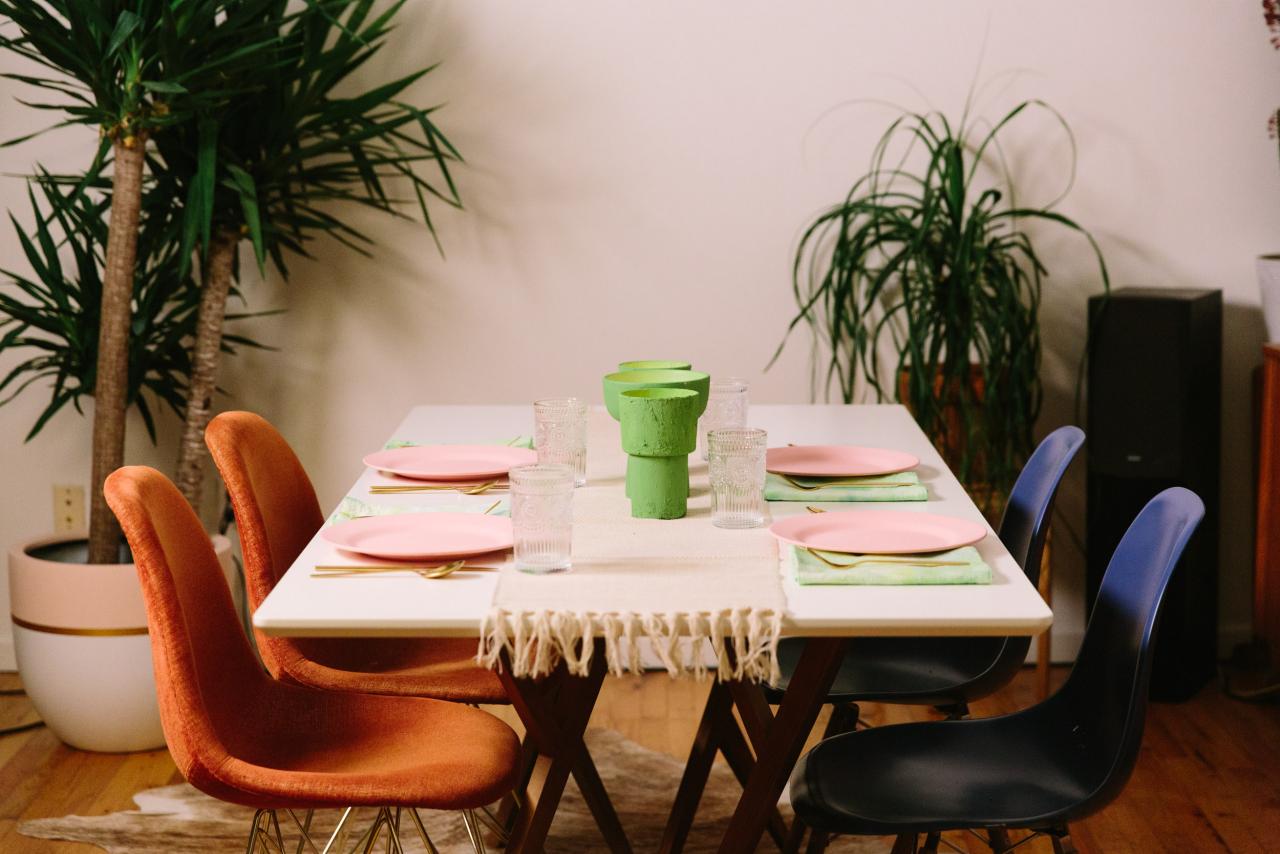
Tie-dye is a trend that's here to stay. Create a summery tablescape with bright, colorful napkins that take less time to make at home than you might think. Learn how to tie-dye using ice in a matter of minutes with a step-by-step guide by HGTV Handmade’s A.V. Perkins. Then make four different patterns to impress: Shibori, twist and turn, triangle and classic crumple.

Christine Han
Materials + Tools
- powder fabric dye
- white cotton napkins
- ice
- rubber bands
- scrap cardboard
- baking pan
- roasting rack
- protective gloves
Learn Four Tie-Dye Pattern Techniques

Christine Han
Shibori
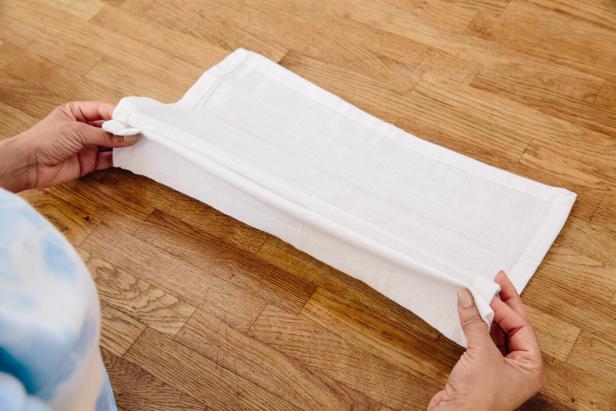
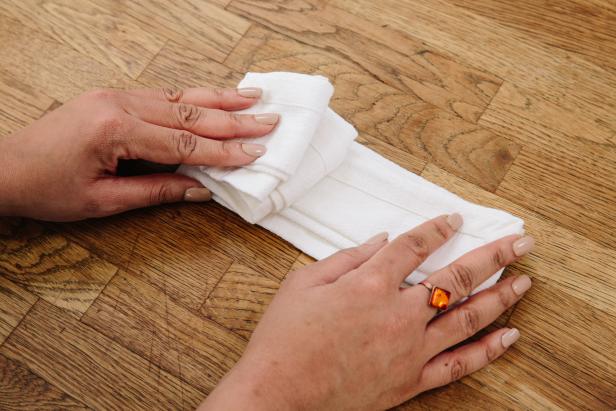
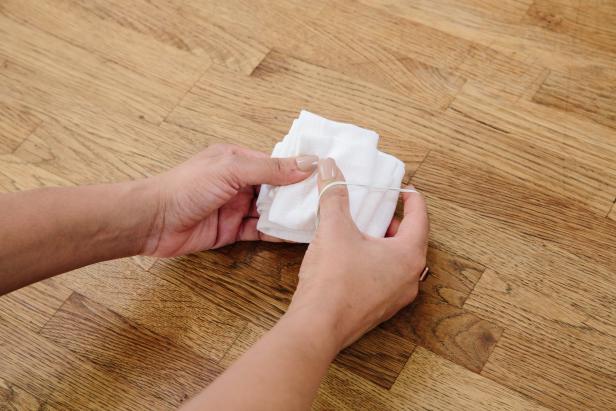
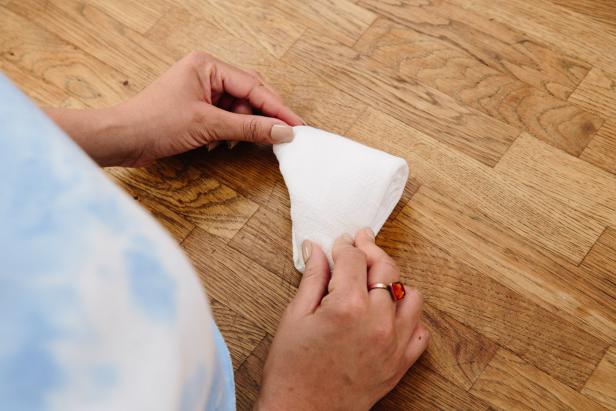
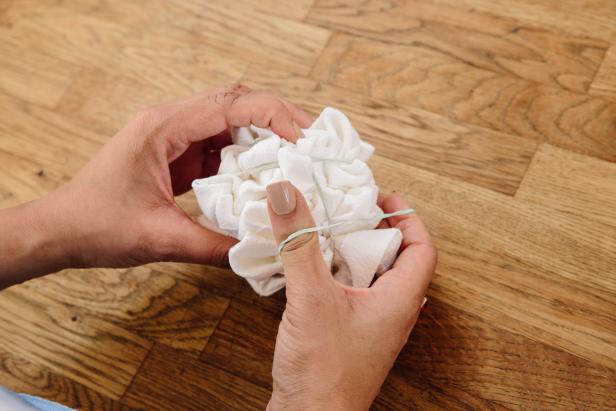
Start by folding the top of the napkin over itself in 2-inch folds all the way down, similar to an accordion (Image 1). Next, fold the napkin across in smaller 1-inch square shapes (Image 2). Wrap a rubber band tightly around the folded napkin (Image 3). The Shibori pattern will create a blocked tie-dye look (Image 4).
Christine Han
Christine Han
Christine Han
Christine Han
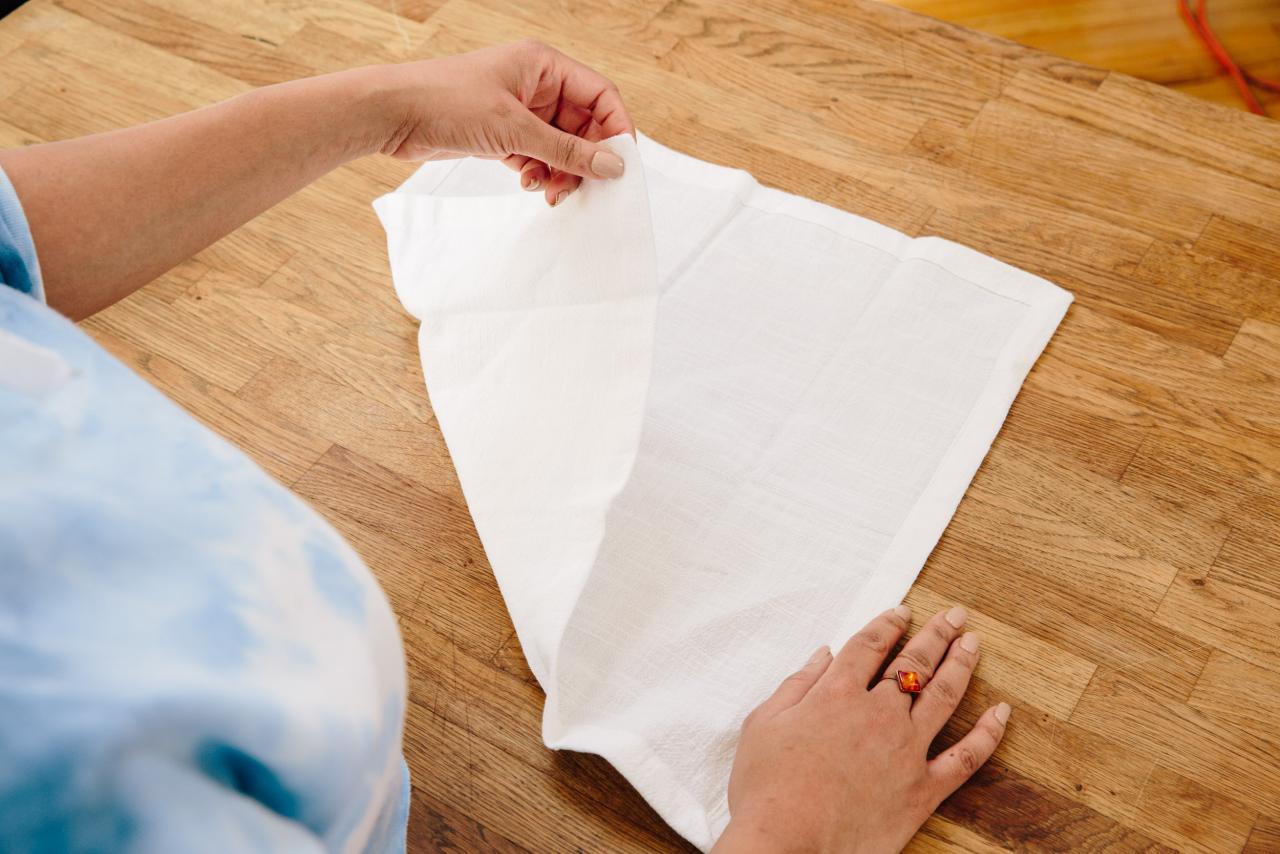
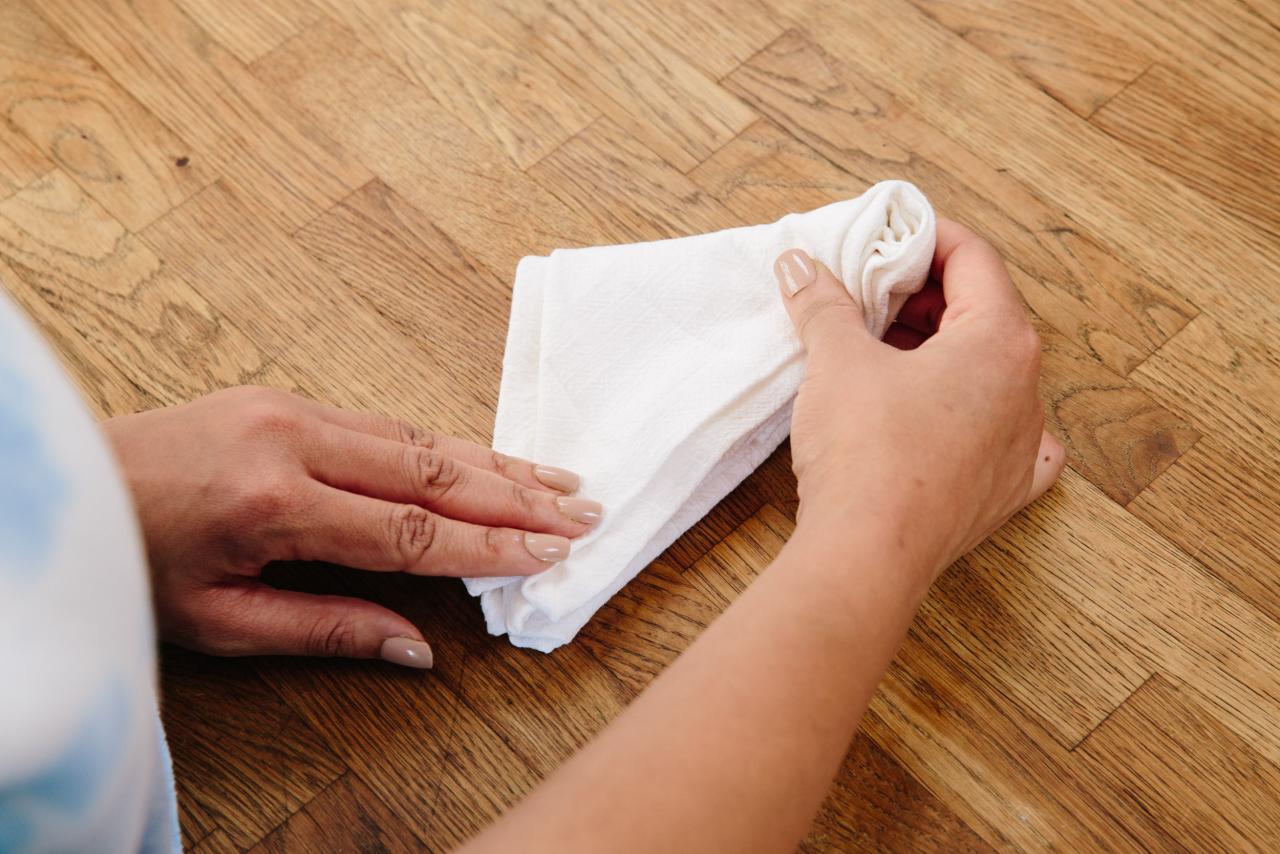
Triangle
Start by folding the napkin over itself to make a triangle shape (Image 1). Continue to fold the napkin over itself to create smaller and smaller triangle shapes (Image 2). Wrap two rubber bands around the tightly folded triangle napkin (Image 3). The triangle pattern will create an angled tie-dye look (Image 4).

Christine Han

Christine Han
Christine Han
Christine Han
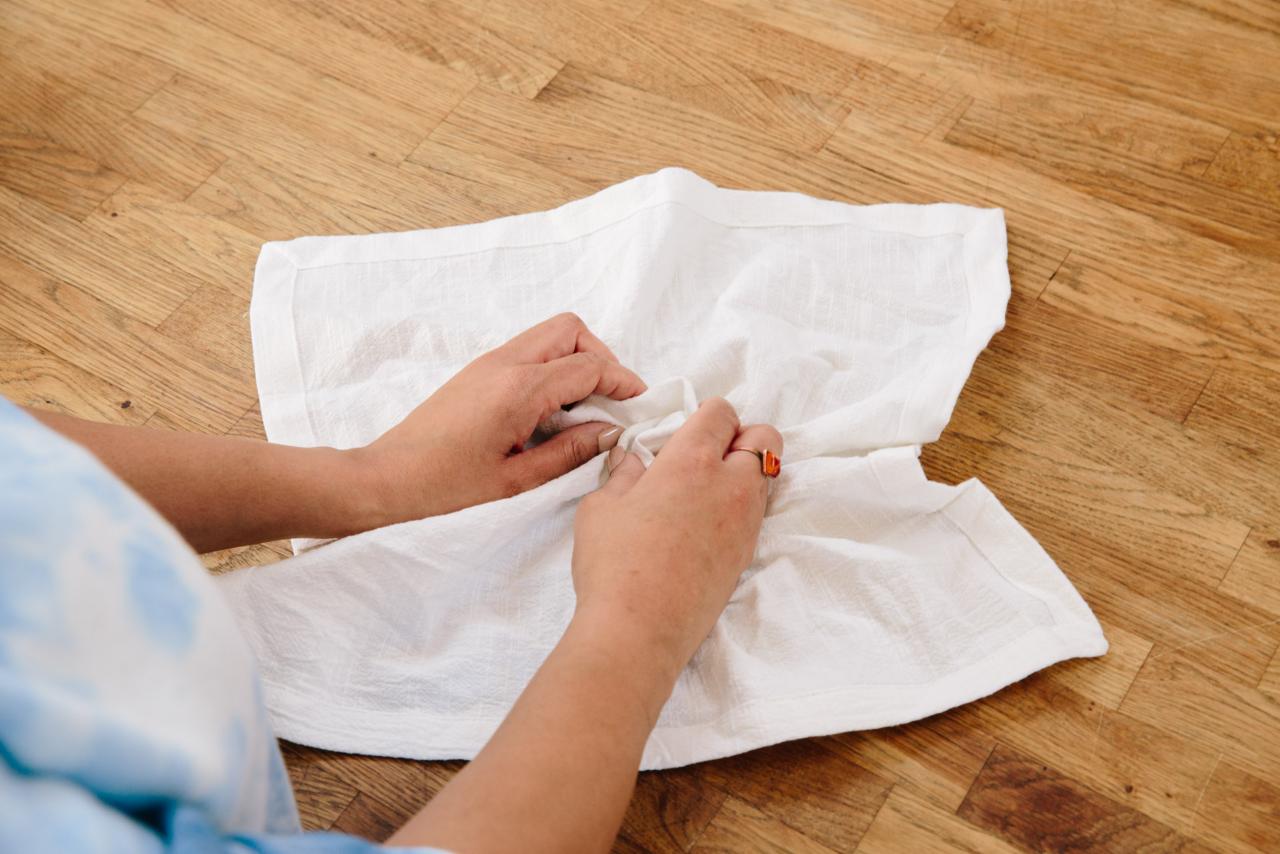
Crumple
Start in the center of the napkin and crumple the fabric together with your hands (Image 1). Crumple the napkin ball tightly and place several rubber bands around it to secure its shape (Image 2). The crumple technique will produce an abstract design (Image 3).

Christine Han
Christine Han

Christine Han
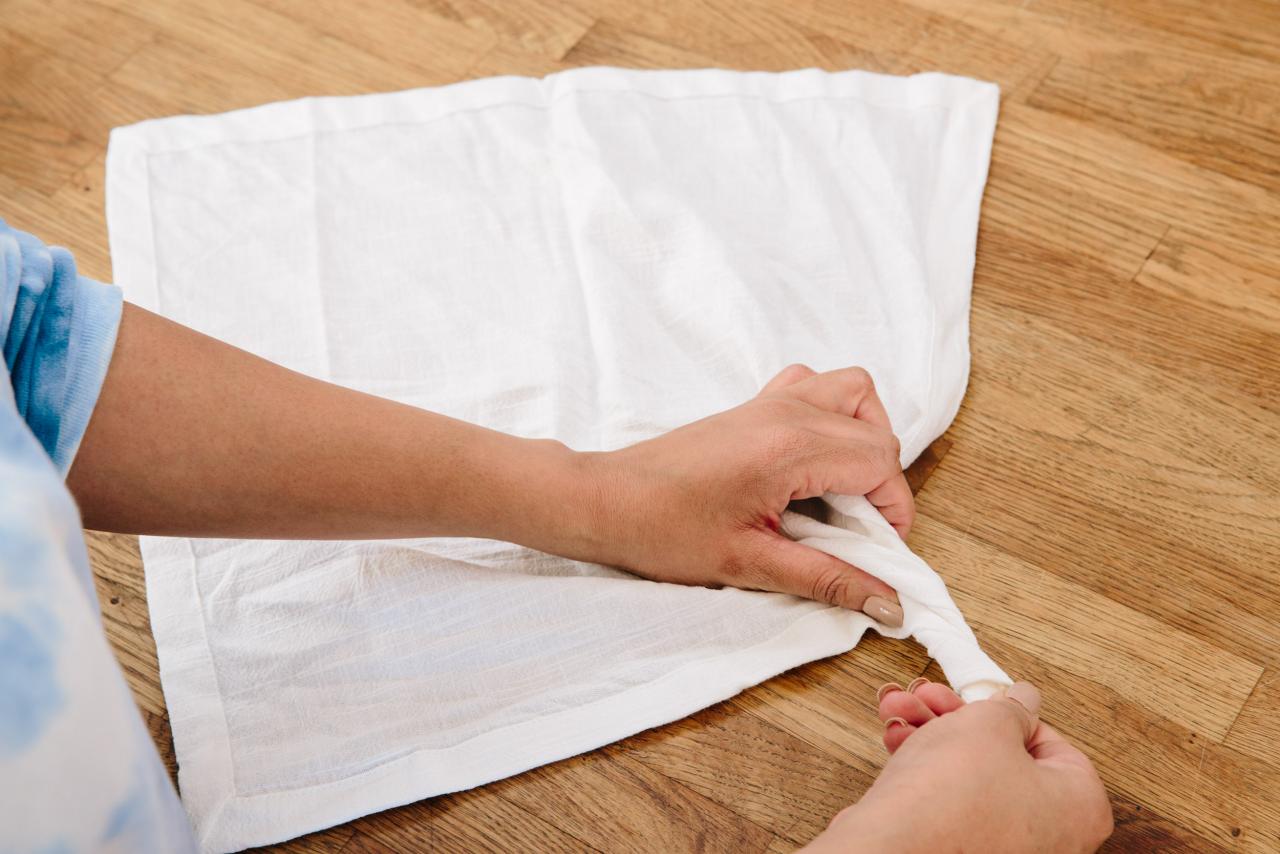
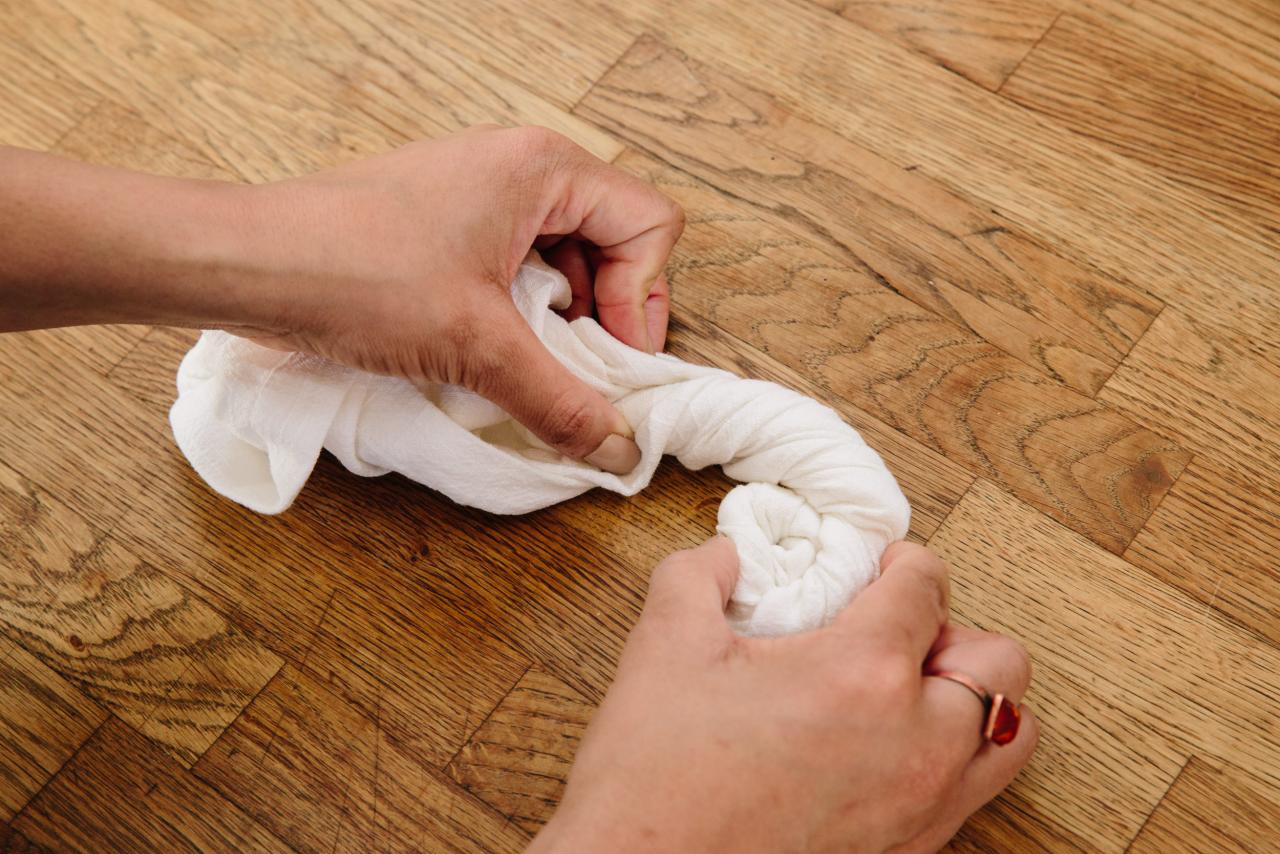
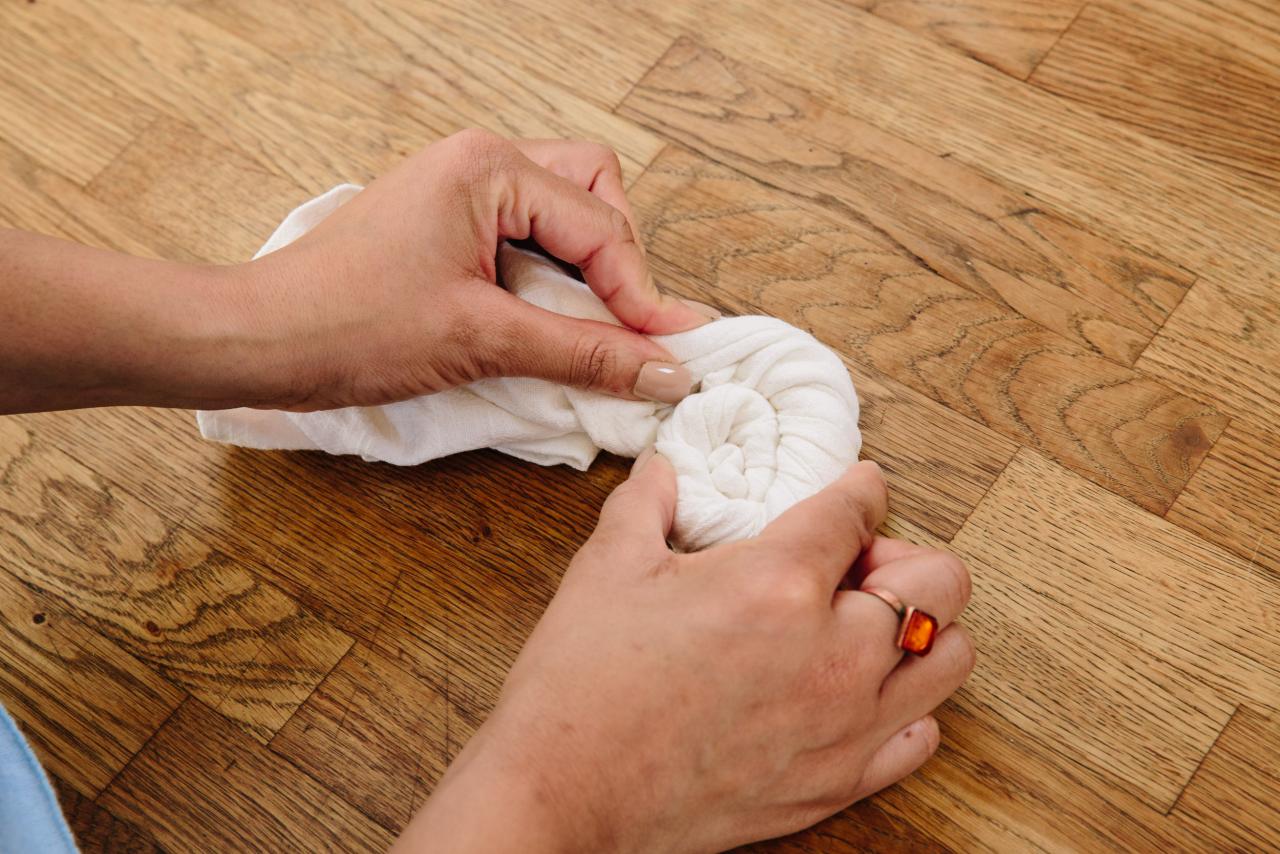
Twist + Turn
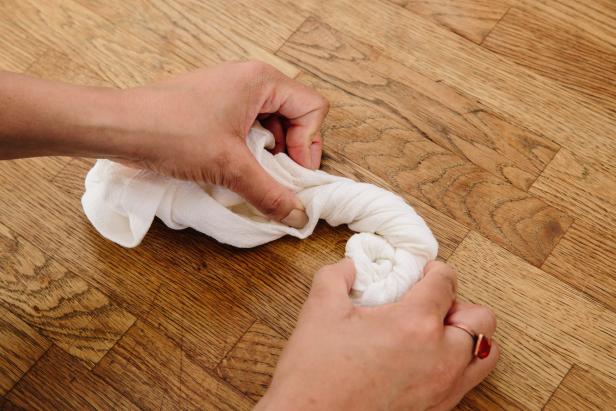
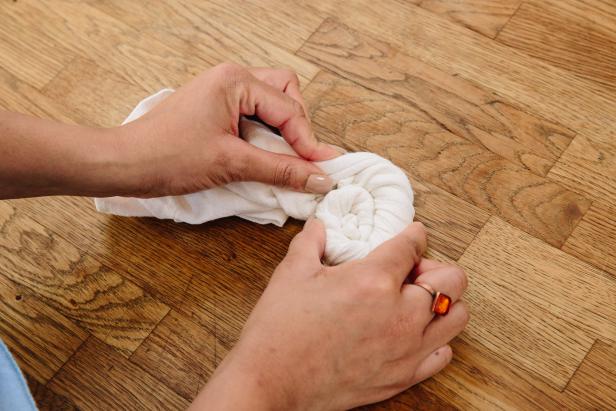
Start by twisting one corner of the napkin (Image 1). Keep twisting the napkin into a tight coil (Image 2) while shaping the napkin into a curled, seashell shape (Image 3). Place two rubber bands on the napkin to secure its shape. The twist and turn technique will produce a bold, circular color that becomes lighter across (Image 4).

Christine Han
Christine Han
Christine Han
Christine Han
How to Ice Tie-Dye
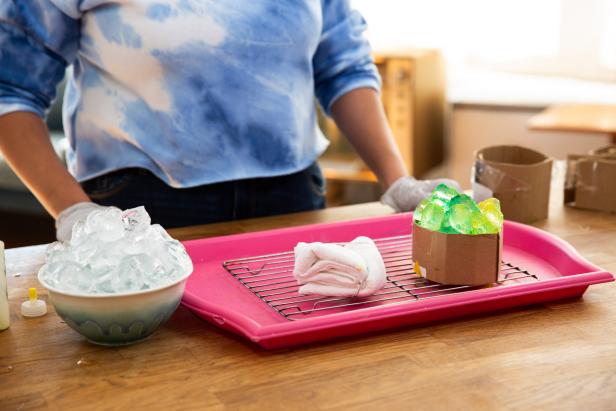
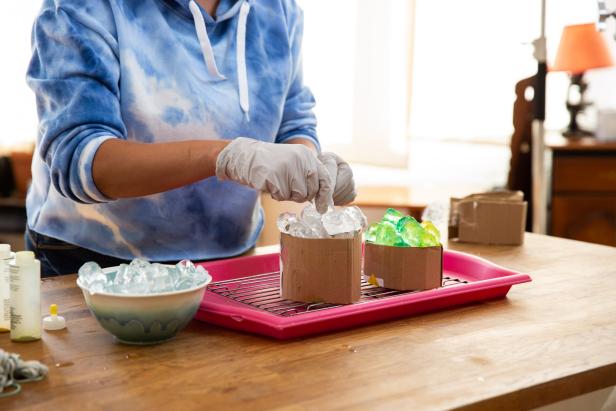
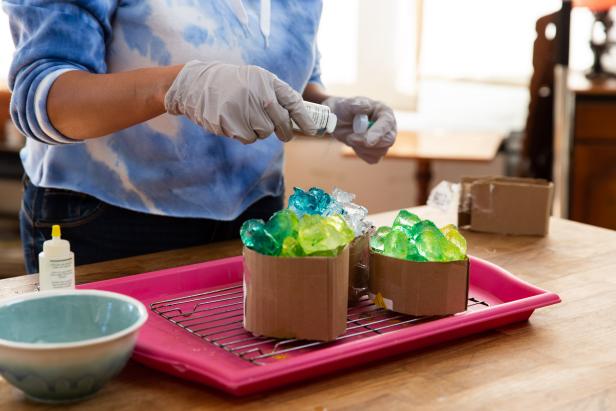
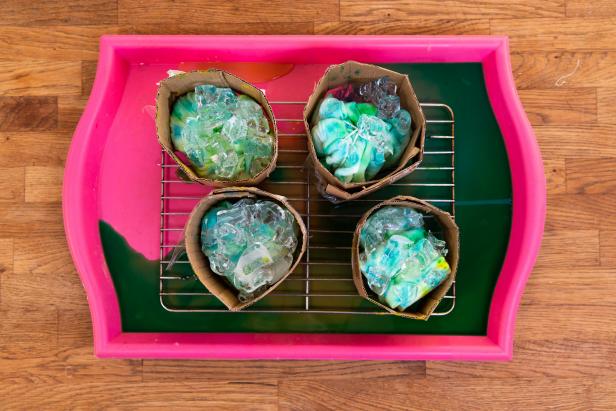
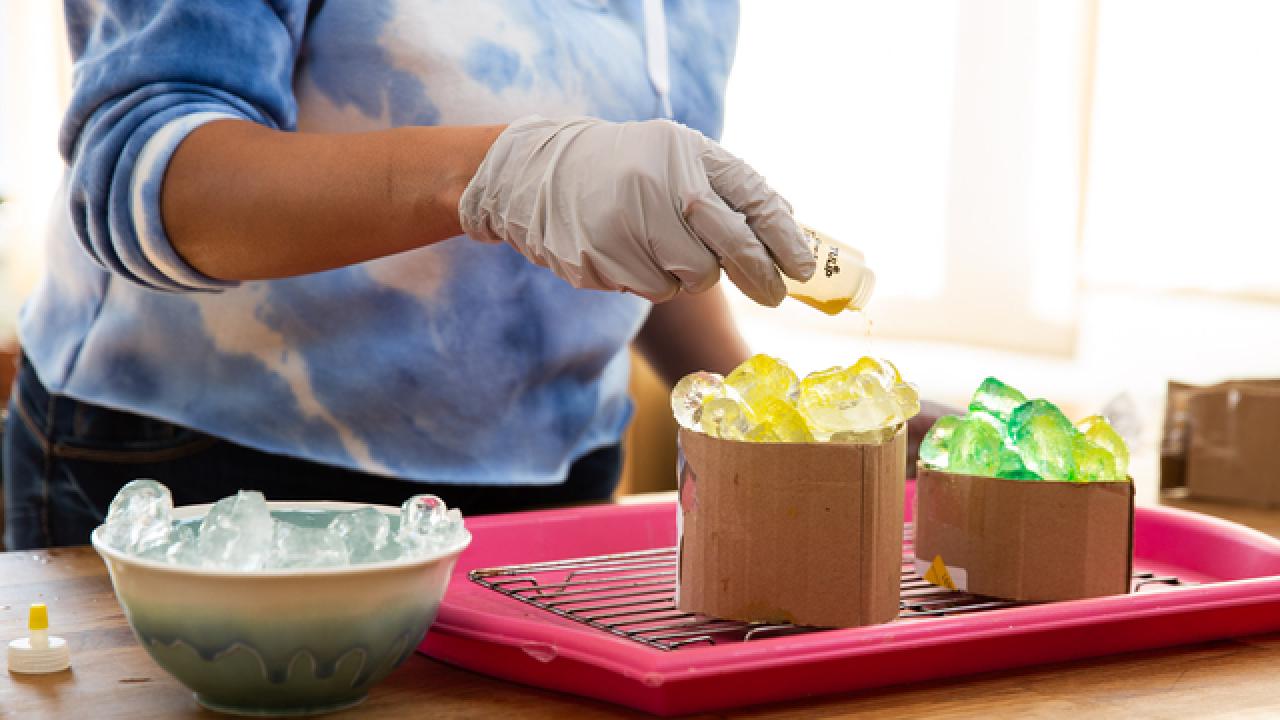
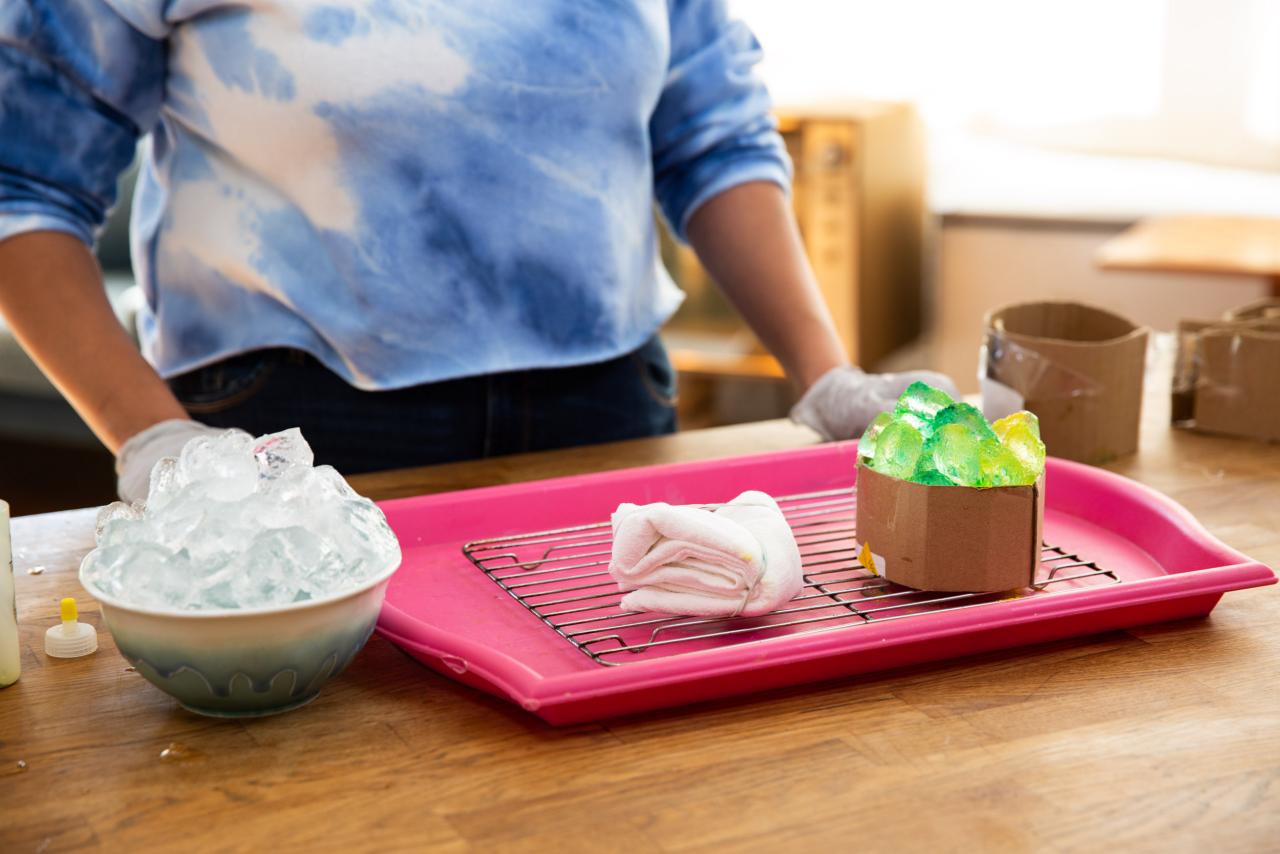
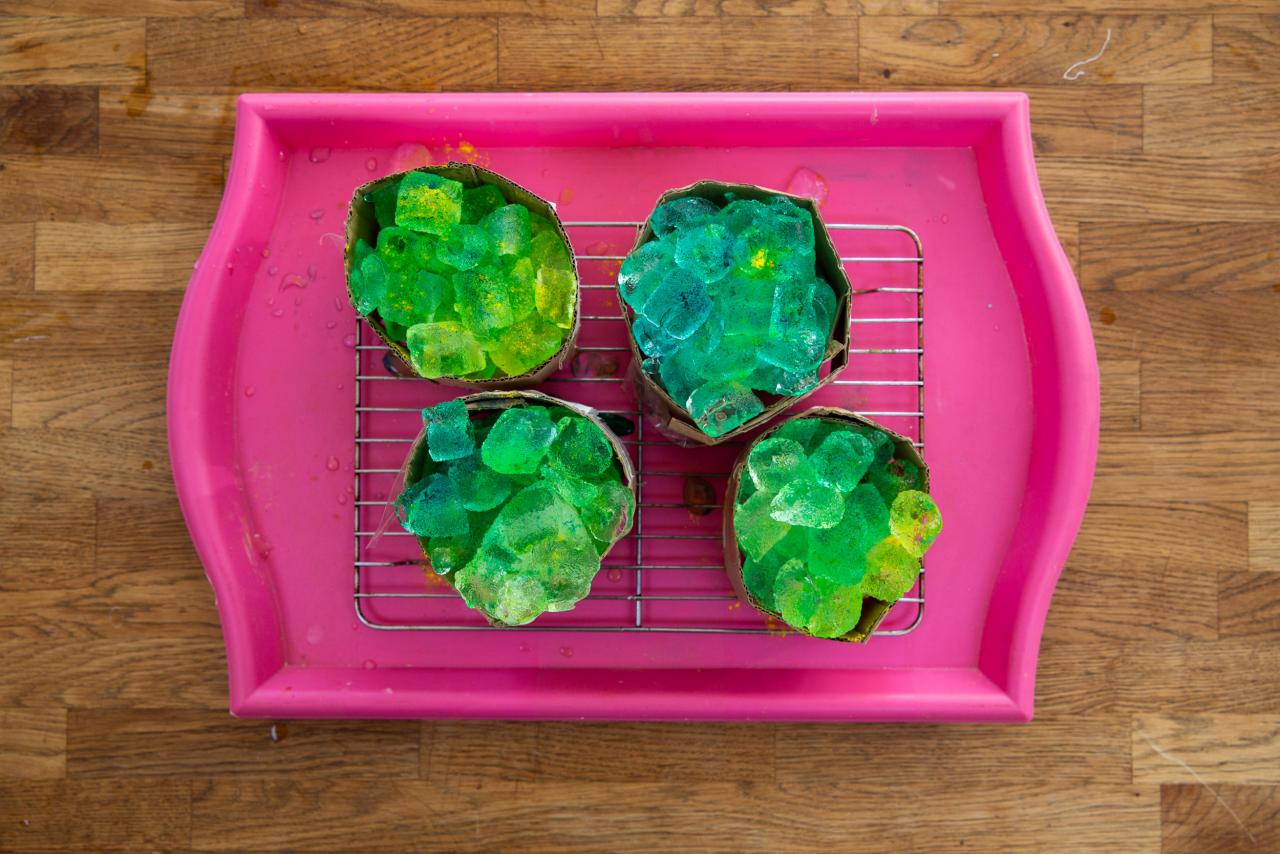
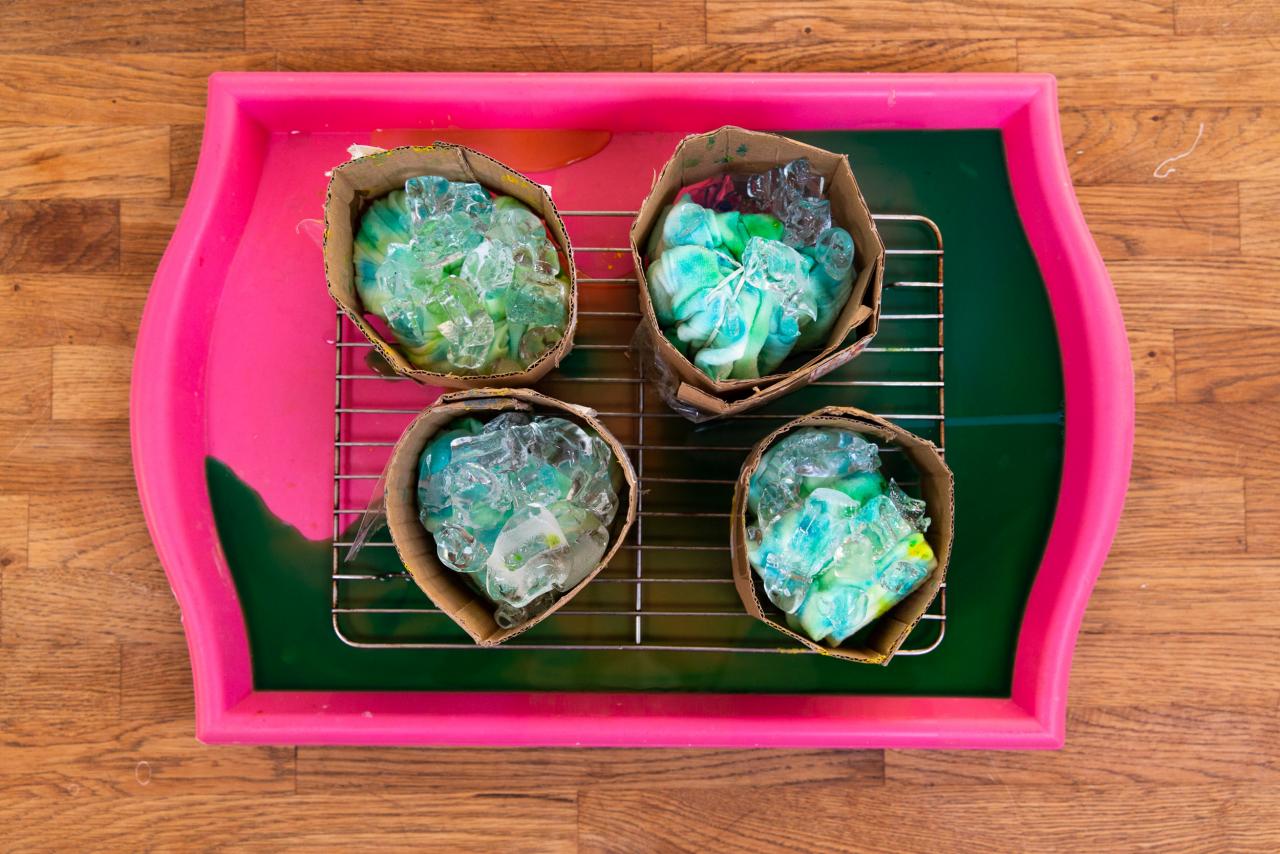
When working with dye, always wear protective gloves. Prepare a baking pan by placing a roasting rack inside. Next, put the folded napkins on the rack and place a piece of trimmed cardboard around each napkin (Image 1). Then, add a handful of ice to the top of each rolled napkin container (Image 2). Now sprinkle powder fabric dye onto each ice bundle (Image 3). Cover the ice with lots of dye for a more colorful napkin, or mix-and-match dyes for a multicolor look (Image 4). Let the ice melt completely (Image 5).
Christine Han
Christine Han
Christine Han

Christine Han
Christine Han
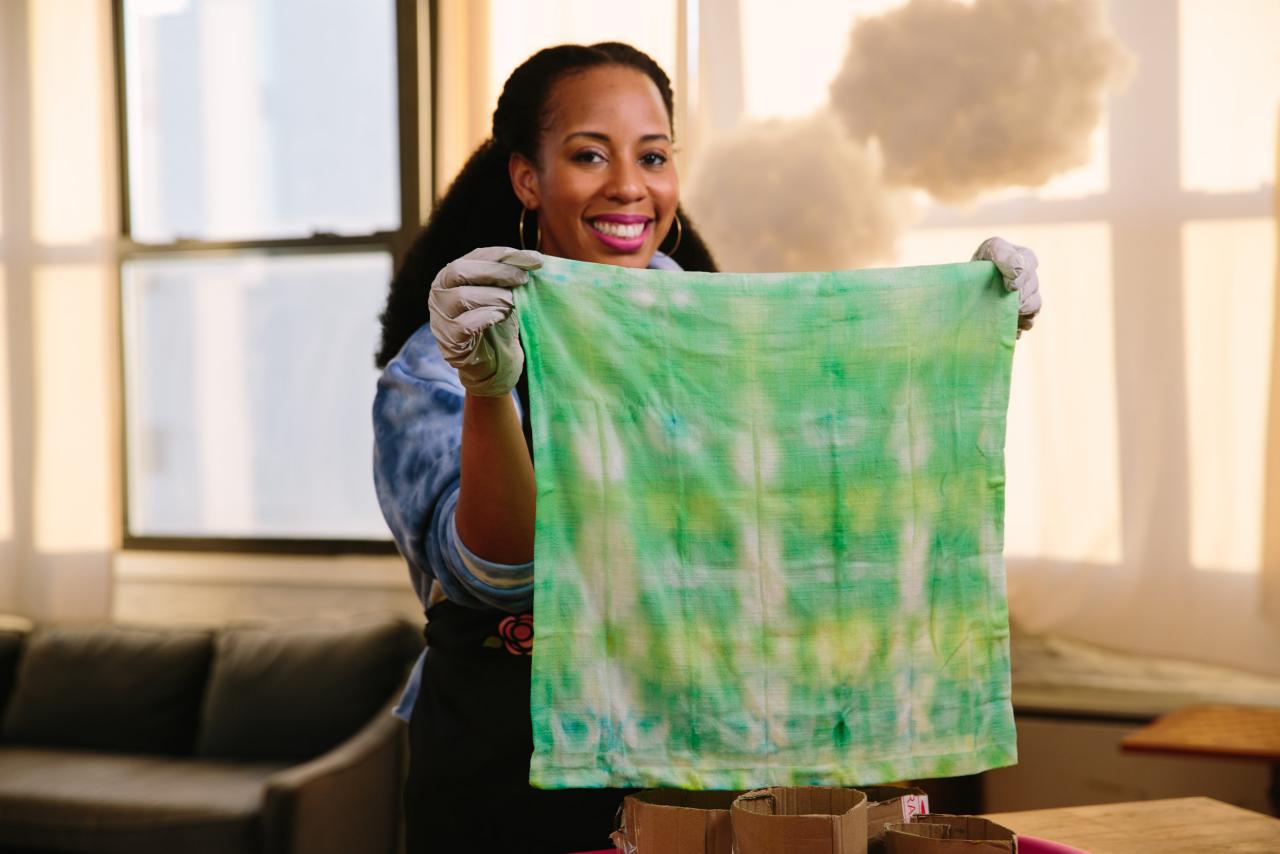
Rinse + Dry + Enjoy
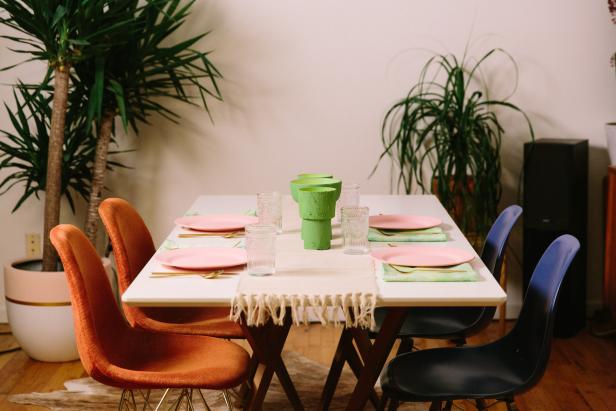
Prep these colorful napkins for use by rinsing them thoroughly in the sink with cold water. Once dry, pack them for a sunny, outdoor picnic or make a cheery tablescape for dinner with friends.
Christine Han
More Tie-Dye DIYs

The Basics: How to Tie Dye
Learn how to tie dye shirts and get the boho-chic look for less.

Make a Tie-Dye Shower Curtain
It only takes 24 hours to brighten up a basic bathroom.

Make Tie Dye With Fruit and Vegetables 10 Photos
Turn fresh fruit and vegetables into natural dye for beautiful tie-dyed t-shirts.


