


Make These Summer Camp-Inspired, No-Sew Felt Patches
Make memories with this throwback craft. These felt nature patches will take you back to those summer camp days.

Crafty Lumberjacks

Celebrate summer by designing and creating your own felt nature patches. Campers, glampers and backyard explorers of all ages love adding some color to their favorite accessories. The best part? It's a no-sew craft — all you need is a little bit of felt and iron-on adhesive.
Materials + Tools
- card stock
- pencil and/or markers
- felt
- iron-on adhesive
- iron
- cutting mat and ruler
- pin back clasp
- embroidery thread (optional)
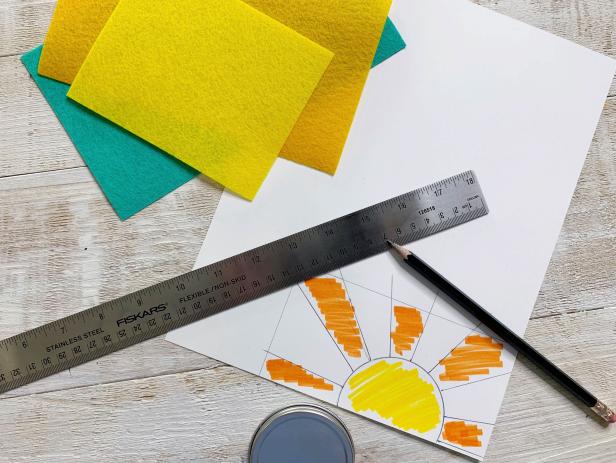
Design and Draw Patch
Sketch the idea for your patch on a piece of card stock. Start with the shape of your patch then draw the image inside. Keep it simple with easy shapes. Later you'll cut out the card stock pieces and use them as a template to transfer the design onto felt. Tip: Number your design pieces to make them easier to reassemble. Trace objects found around your home for crisp shapes. Not a great artist? Use clip art.
Crafty Lumberjacks
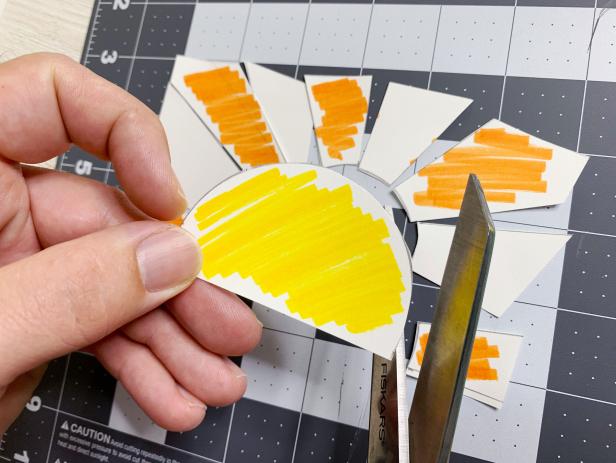
Cut Out Design
Cut out the pieces of your design to use as a template. If your patch is an odd shape, be sure to trace the shape of your patch before cutting out the inside design.
Crafty Lumberjacks
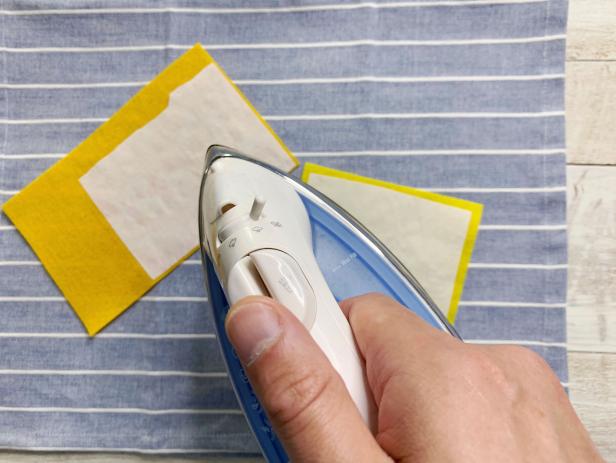
Add Iron-On Adhesive to Felt
Attach the iron-on adhesive to one side of the pieces of felt you need for your patch. Tip: Save felt by only using the size you need to create your design.
Crafty Lumberjacks
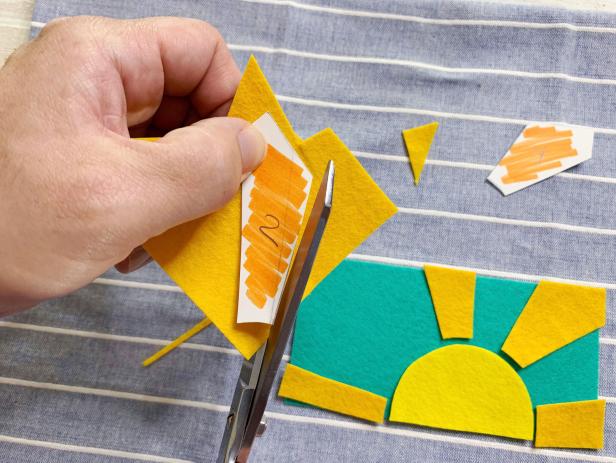
Cut Out Shapes
Hold the template piece on top of the felt piece that matches and cut out each shape. Tip: You can trace the template to the back on the adhesive, but remember to turn the template piece over so it doesn't come out backwards.
Crafty Lumberjacks
Peel and Assemble
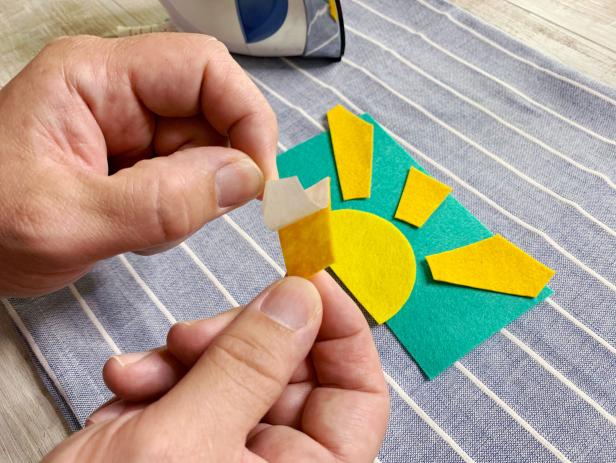
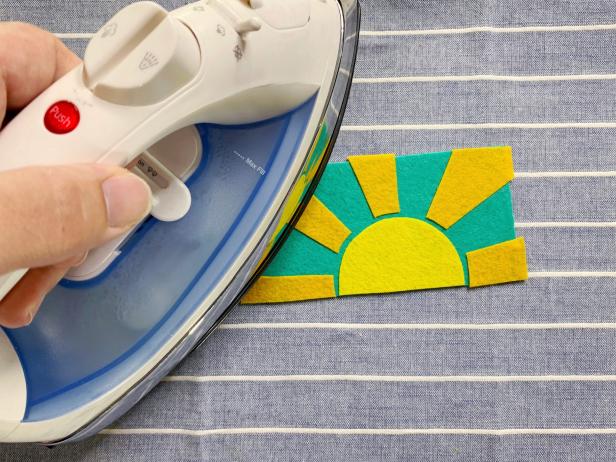
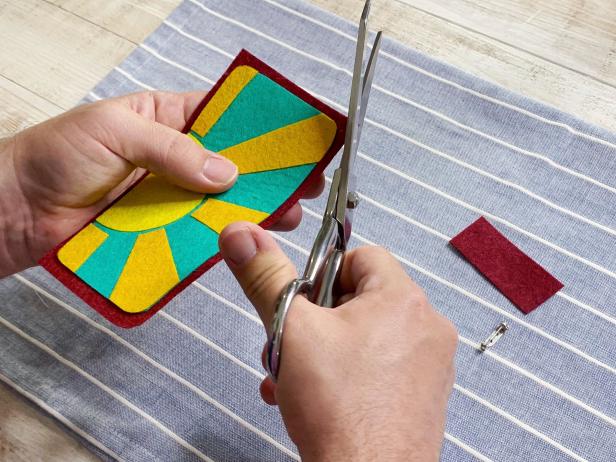
Peel the adhesive backing off each piece of felt, then recreate and assemble the patch you designed (Image 1). Working in small sections, firmly press down the iron to adhere the felt pieces (Image 2). Lift and repeat. Do not slide the iron across the patch or your design will shift. Trim any extra felt and adjust the design as needed as you go (Image 3).
Crafty Lumberjacks
Crafty Lumberjacks
Crafty Lumberjacks
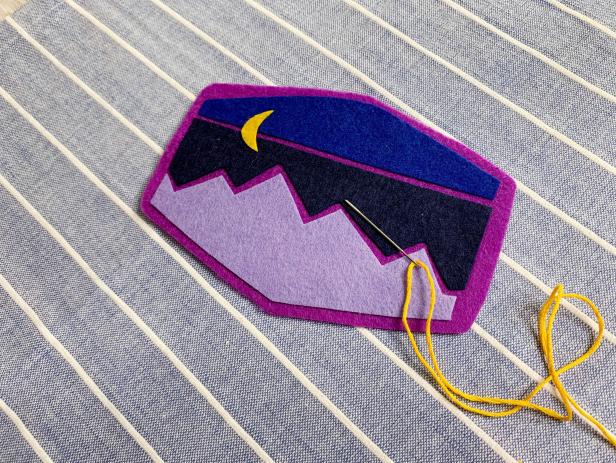
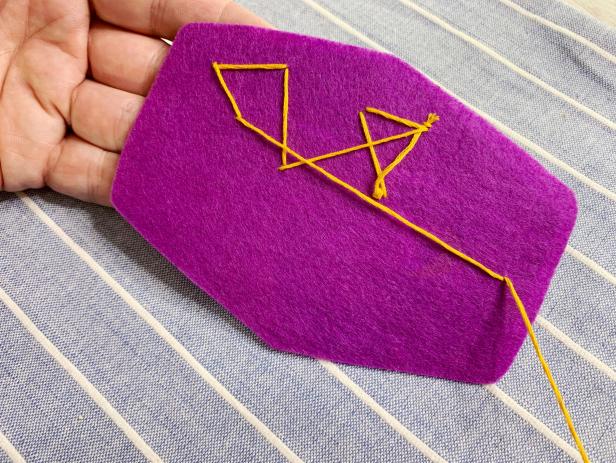
Add Embellishments (Optional)
Sew on small embellishments with embroidery thread for added detail. We created a starry sky on this mountainscape by adding a few stitches.
Crafty Lumberjacks
Crafty Lumberjacks
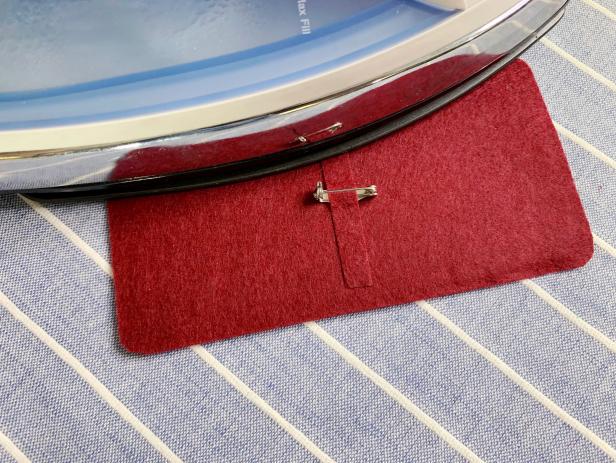
Add Pin Backing
Make the patch removable by adding a pin clasp backing. Cut a piece of scrap felt (with iron-on adhesive already attached) and loop a pin backing inside of it before ironing together. For a more permanent patch, cut a piece of adhesive the size of the patch and iron on to the back of the patch; when you're ready to adhere it, just peel off the backing and iron on.
Crafty Lumberjacks
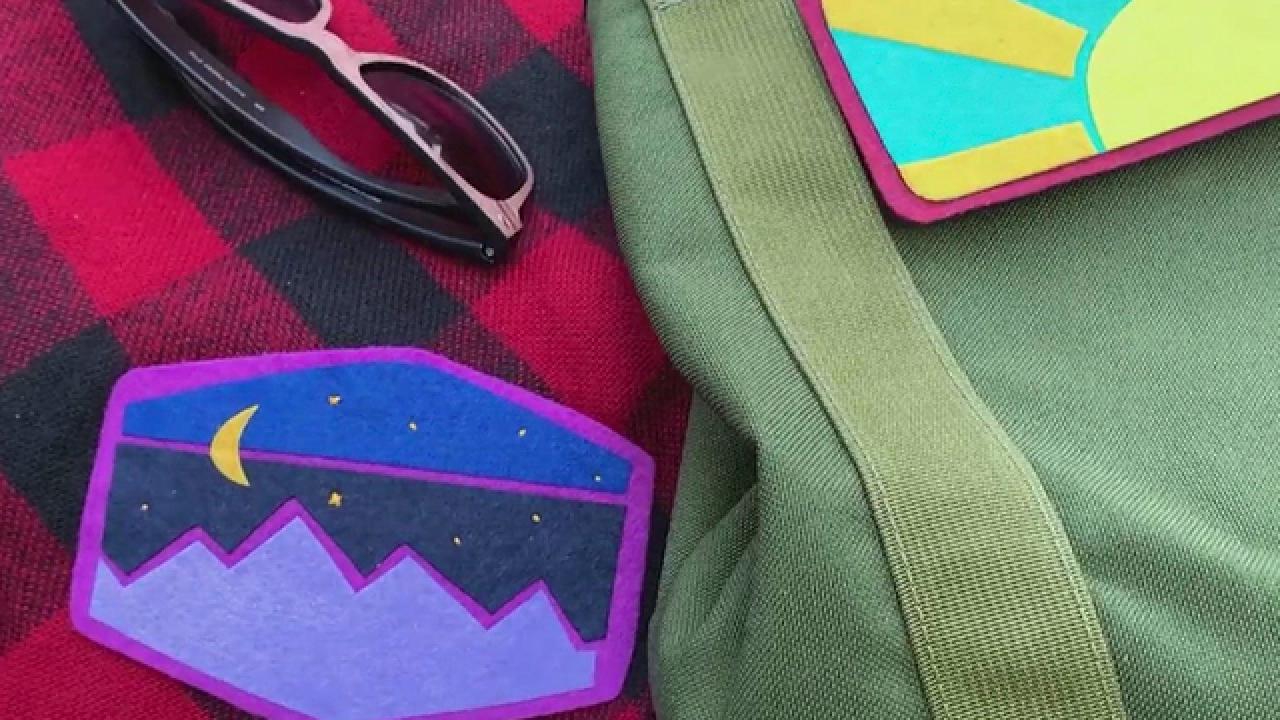
Add your patches to a tote bag, blanket, cooler or even a hat or T-shirt. Have a great day campers!
Crafty Lumberjacks
Throwback Crafts

Harness the Sun's Power to Make Custom Wall Art
Cyanotype is an inexpensive photo printing process that can be done at home with a few special materials.

8 Backyard Summer-Camp Themes 9 Photos
We’ve got ideas for theme weeks filled with activities and games to keep your kids learning and busy.


