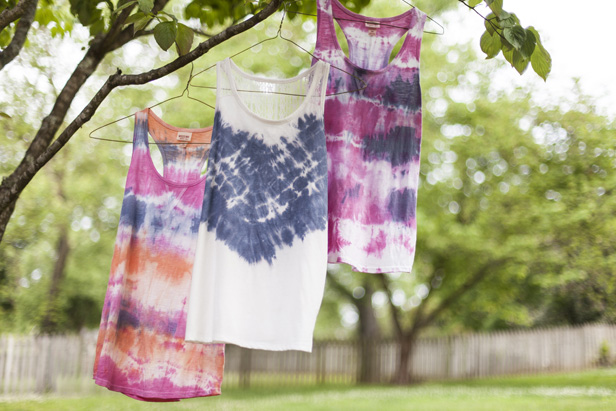
Summer Fashion: How to Tie Dye
Learn how to tie dye tops and get the boho-chic look on the cheap.
Warm weather and tie dyed tops just seem to go together. I can’t believe how easy it is to tie dye! And so cheap!
On a scale of one to five, one being totally doable and five being not-so-much, I give this project a one — as long as you have the supplies to ensure you don’t make a total mess. Check out our steps below to tie dye your own shirt!
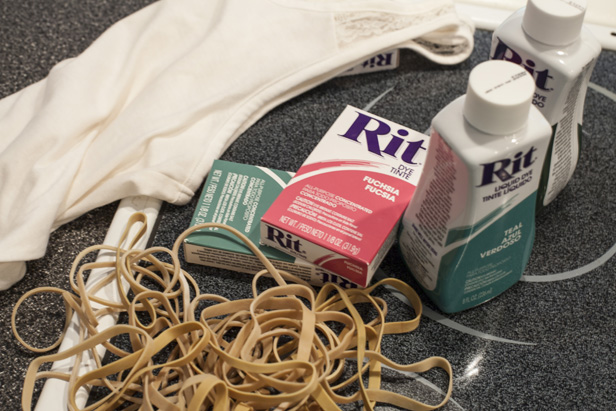
Gather Your Supplies
I found some cute white racerback tank tops for $8 at Target and you can find Rit Dye for about $2 at the grocery store or craft store.
SHOP: Rit Dye Supplies
Set Up a Work Station
This is a messy project. If you don’t have a utility sink and are doing this in your kitchen, cover your countertops and floors. You can also try this project outdoors.
Plan Your Pattern or Try to Have a Strategy
Have an idea of what kind of pattern or colors you want to use before you dye something. Rit has great examples of tie dye designs. Or don’t plan anything and just go crazy. Sometimes those turn out the best. But sometimes they look heinous, so if you’re starting out, don’t use anything expensive.

Make the Dye
If you’re using a store-bought boxed dye like Rit, follow the instructions and make the dye in a large plastic tub inside your sink. Trust me. You do not want to move dyed stuff from a tub to the sink to wring it out. It’s much cleaner if you keep it in the sink.
Rubber-band Your Shirt
Before you dye your shirt, wrap rubber bands very tightly around various parts of the fabric. You can bunch up or fold parts of the fabric and then rubber band areas or even tie knots in the fabric and rubber band it. Remember: Whatever areas you rubber band or knot will not be dyed.

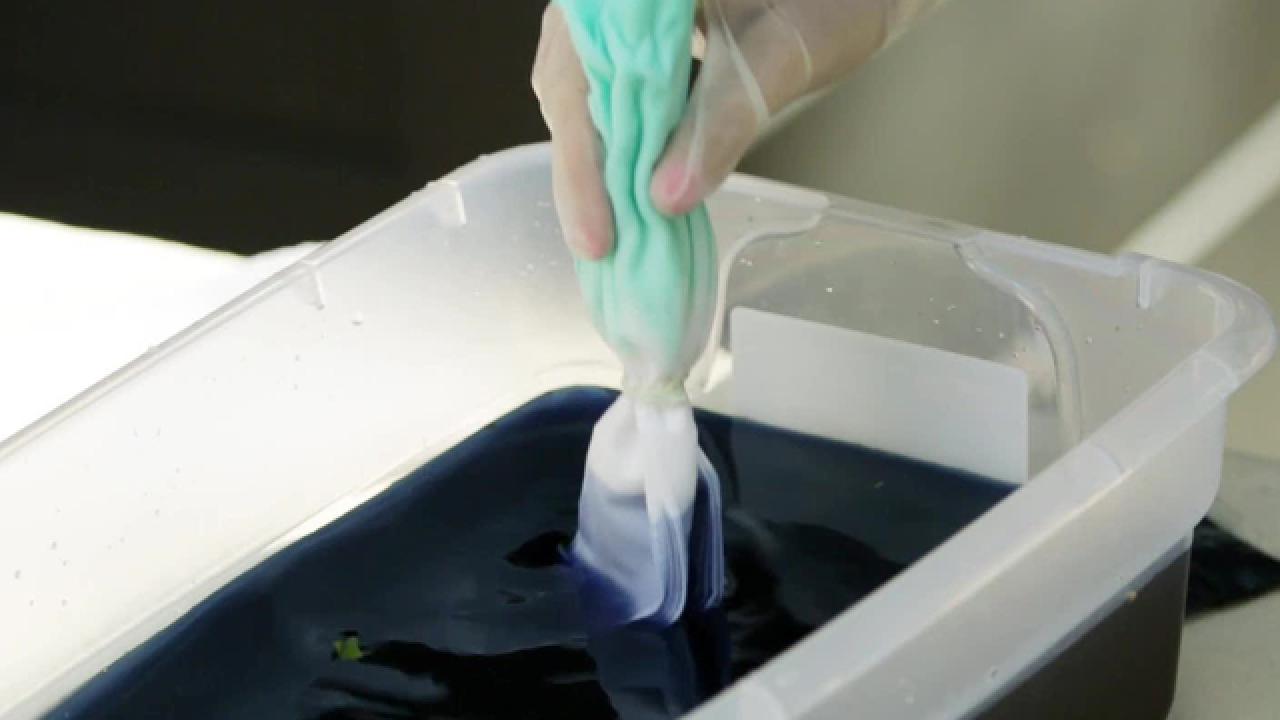
Dye It
Submerge your fabric with rubber bands into the dye. Review the instructions for your specific dye, but you’ll probably want to hold it for about 5 minutes. Note: You’ll probably want to wear plastic gloves while dyeing — unless you want to have purple hands for a day. (Speaking from experience.)

Squeeze Out Any Excess Dye
Remove the fabric from the plastic tub and wring out remaining dye. Again — gloves, people. That was my rookie mistake. (And even after the dye fades from your skin, it stays in your cuticles for a week.)

Rinse It
Hold the fabric under cold running water until the water from the fabric rinses out clear. Repeat steps 4-8 for additional colors but always rinse completely before moving on to a new color.

Wring It Out
Remove the rubber bands and check out your design. Hang to dry.

Set Dye
You don’t have to do this, but setting the dye helps the fabric retain the color so it won’t fade so much when you wash it. Fill your sink with a couple of inches of cold water. Mix equal parts salt and vinegar and pour into the sink. Submerge your dyed fabric into the water and let soak for an hour. Rinse with cold water.
Wash It
Hand wash with mild detergent or toss in the washing machine alone just in case the color bleeds in the wash. Hang to dry.