


3 All Too Easy Melt-and-Pour Soap Recipes
These four-ingredient recipes are perfectly fragrant, fun to make and great for beginners. If you can boil water, you can make soap!

Stephanie Diani

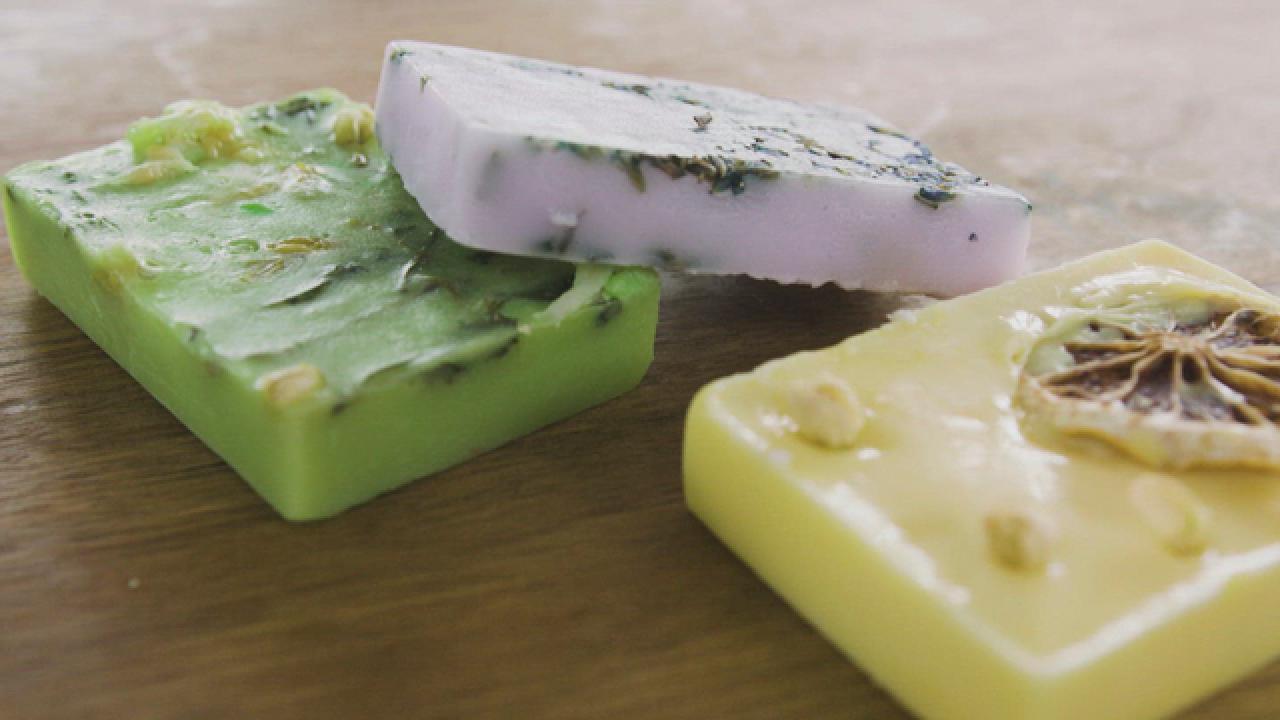
Traditional soap making can be a little overwhelming, but the popular melt-and-pour soap process is quite the opposite. HGTV Handmade’s A.V. Perkins shares a step-by-step guide for three different melt-and-pour bar soap recipes that are oh-so-easy to make. Whip up a batch of these lavender, lemongrass and peppermint bars, decorate with a cute wrap then give a few as gifts.
Materials + Tools
- shea butter melt-and-pour base
- water-based liquid dye
- essential oils
- silicone soap mold
- dried herbs or fruit
- double boiler
- glass measuring cup
- spatula
- knife

To make things even easier, A.V. used this all-in-one-kit that includes 2 pounds of shea butter soap base, two silicone molds, six fragrances and six soap dyes, plus basic tools to create handmade soaps. The kit also makes gifting easy by including decorative labels.
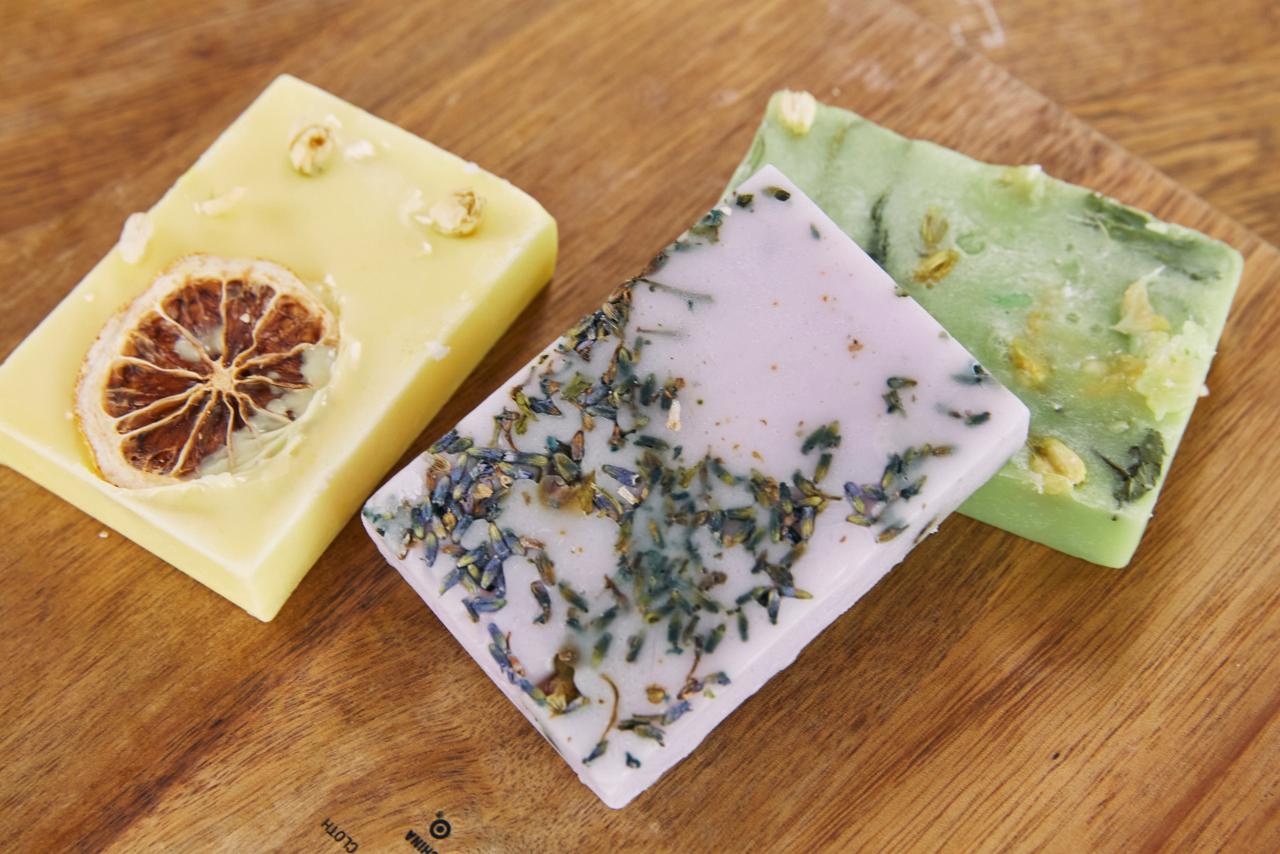
Lavender Soap Recipe
- 20-23 drops lavender essential oil
- purple water-based liquid dye
- dried lavender buds
- 4 ounces shea butter melt-and-pour base
Peppermint Soap Recipe
- 20-23 drops peppermint essential oil
- green water-based liquid dye
- dried mint
- dried jasmine buds
- 4 ounces shea butter melt-and-pour base
Lemongrass Soap Recipe
- 20-23 drops lemongrass essential oil
- yellow water-based liquid dye
- dried lemon slices
- 4 ounces shea butter melt-and-pour base

Stephanie Diani
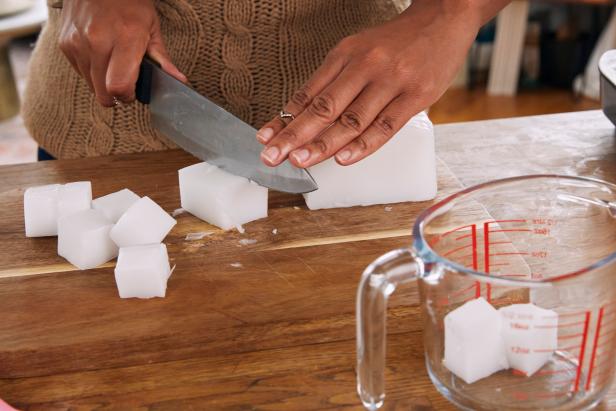
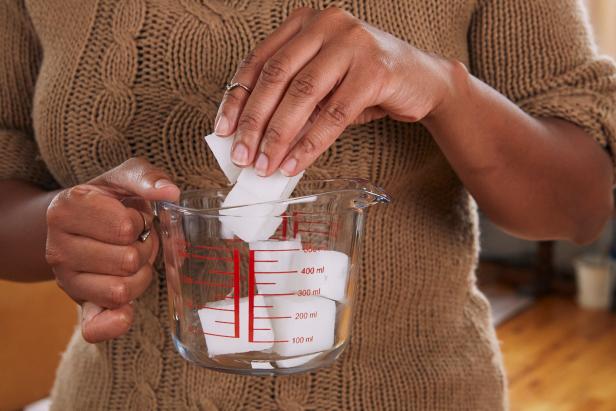
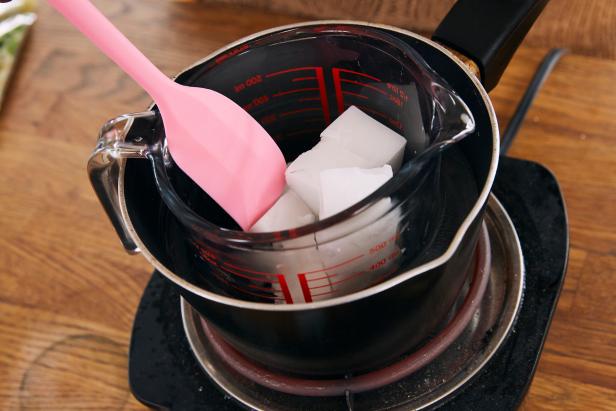
1: Cut Cubes + Melt Soap
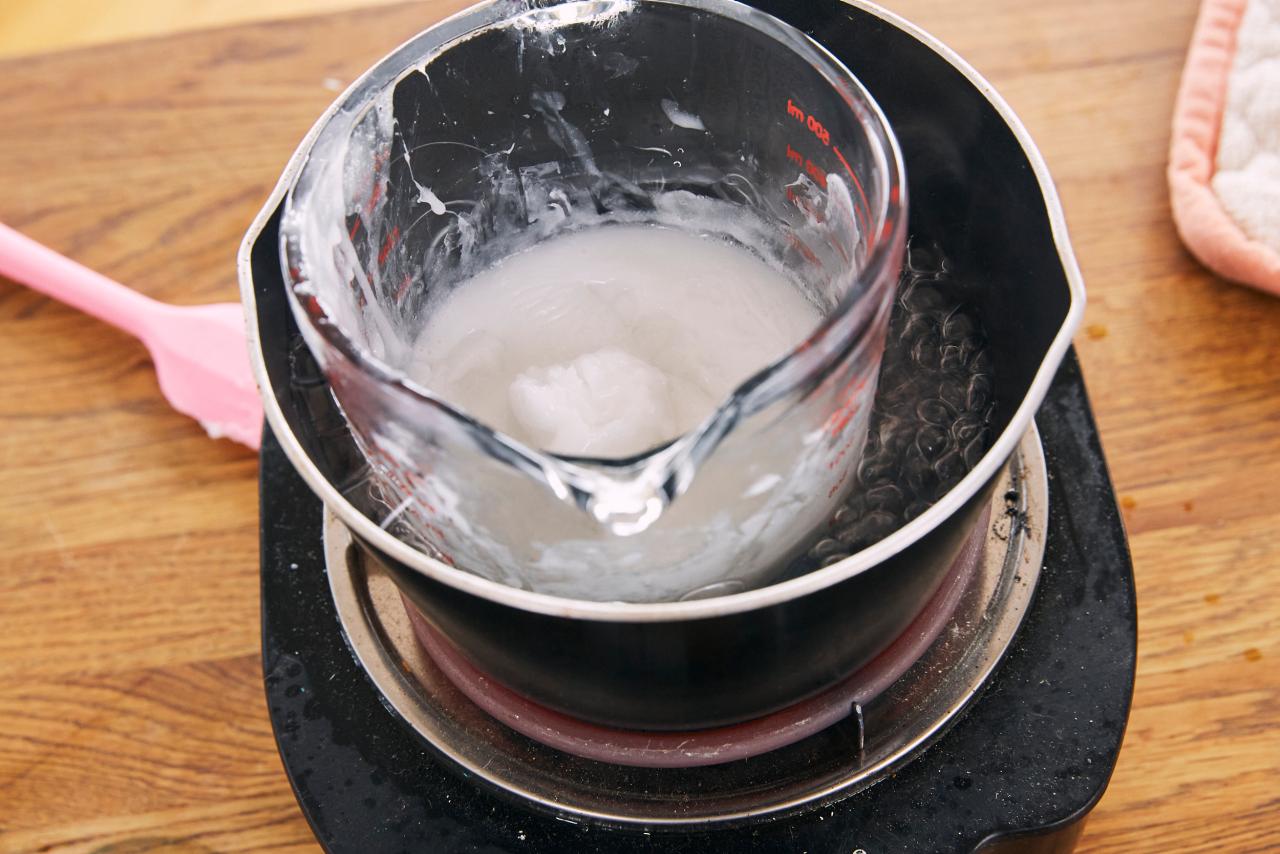
Use a knife to chop the shea butter melt-and-pour soap base into four columns. Each column will make about 1 ounce of melted soap; A.V.'s recipe calls for 4 ounces of melted soap per bar. Next, cut the columns into small cubes to help the soap melt faster (Image 1). Drop the squares into a glass measuring cup (Image 2). Note: As the melt-and-pour soap base is already cured, your kitchen tools will remain food-safe. Place the measuring cup and cubes into a double boiler on low-to-medium heat (Image 3) and stir with a spatula until melted (Image 4).
Stephanie Diani
Stephanie Diani
Stephanie Diani

Stephanie Diani
2: Add Oils + Dye + Dry Ingredients
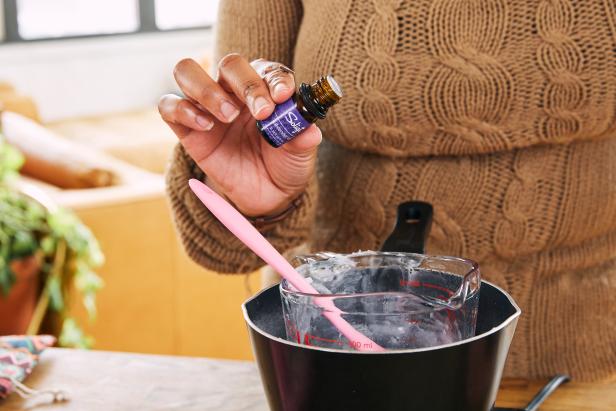
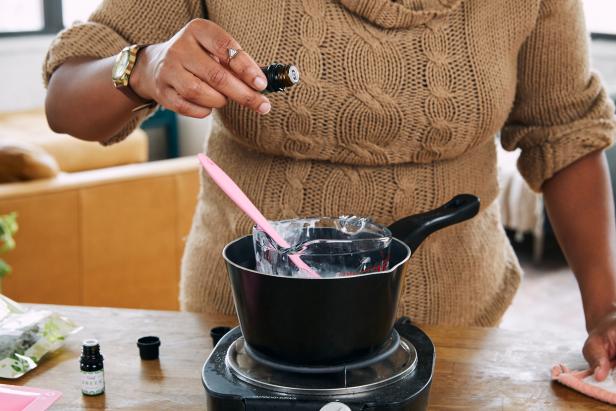
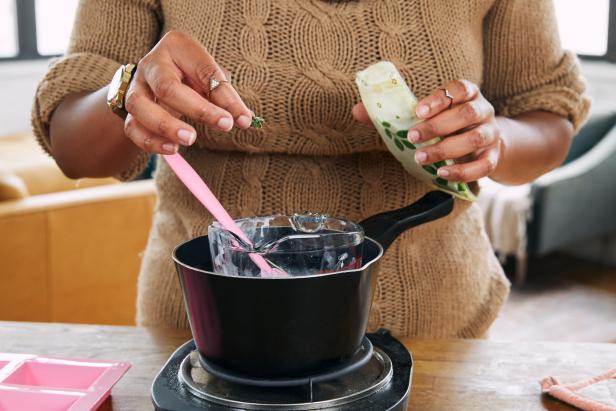
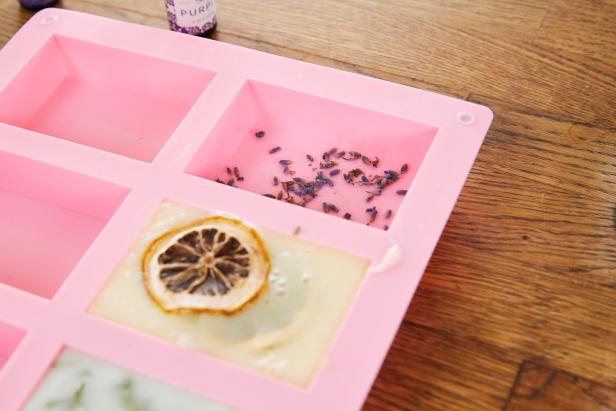
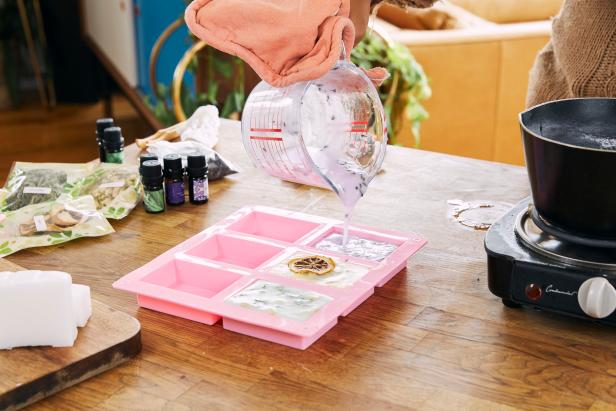
Once the soap is melted, add 20-22 drops of essential oil to the mixture and stir (Image 1). Note: Remember that essential oils are extremely concentrated and that some oils can be more harsh on the skin than others. Test any product you create with them for sensitivities. Next, add 3-4 drops of water-based liquid dye to the soap mixture and stir (Image 2). For added texture and fragrance, add dried ingredients like mint leaves or lavender buds to the melted soap (Image 3). Now add a layer of the same dried ingredients to the bottom of the silicone bar soap mold to give the soap a decorative top (Image 4). Use a potholder to remove the glass measuring cup from the double boiler and pour the soap into the silicone mold (Image 5). Let the soap mold sit overnight.
Stephanie Diani
Stephanie Diani
Stephanie Diani
Stephanie Diani
Stephanie Diani
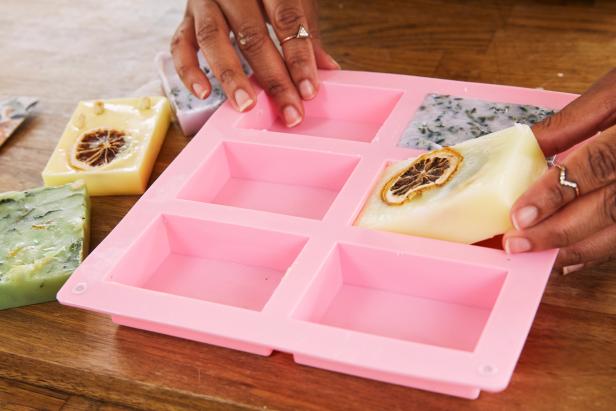
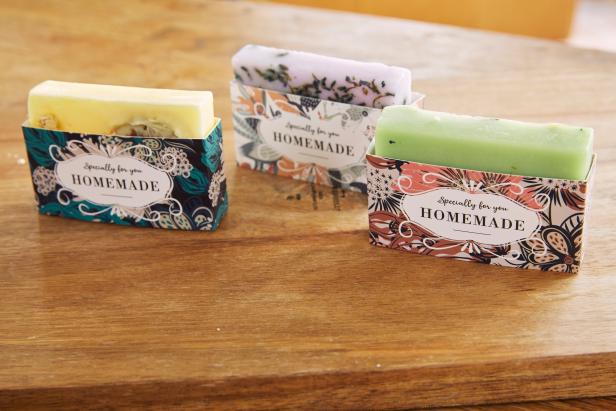
3: Dry + Decorate + Enjoy
Remove the soap bars from the silicone tray (Image 1). Optionally, wrap the beautifully textured, fragrant soap bars with decorative sleeves (Image 2) and share a few with your favorite friends (Image 3).
Stephanie Diani

Stephanie Diani
Stephanie Diani
Easy DIY Soap

Make Your Own Foaming Hand Soap
Save money and reduce waste by creating your own foaming soap.

How to Make Luxurious Felted Wool Soap
Scrub-a-dub-dub, this soap is totally perfect for an at-home spa day.

Clean and Green: How to Make Herbal Soap 5 Photos
Make your own all-natural soap with fresh ingredients from your garden.


