


Build Your Own Paper Unicorn Wall Sculpture With This Pattern Kit From Etsy
Make a large-scale, whimsical art piece entirely out of paper and glue.

Karen Kavett

I've always loved crafting out of paper, because it’s an inexpensive material that can be transformed in endless ways. So when I was scrolling through Etsy and saw Oxygami’s incredible papercraft patterns, I knew I had to try them for myself. I love doing jigsaw puzzles to calm my brain, and this project fills the same role, as there are many repetitive steps to keep your hands busy while you listen to music or a podcast.
This is not a quick project, but the pattern and supplies are inexpensive, so it’s perfect if you’re looking for a cheap new hobby with beautiful results that are sure to impress anyone who comes to visit.

Karen Kavett
What’s in the Pattern?
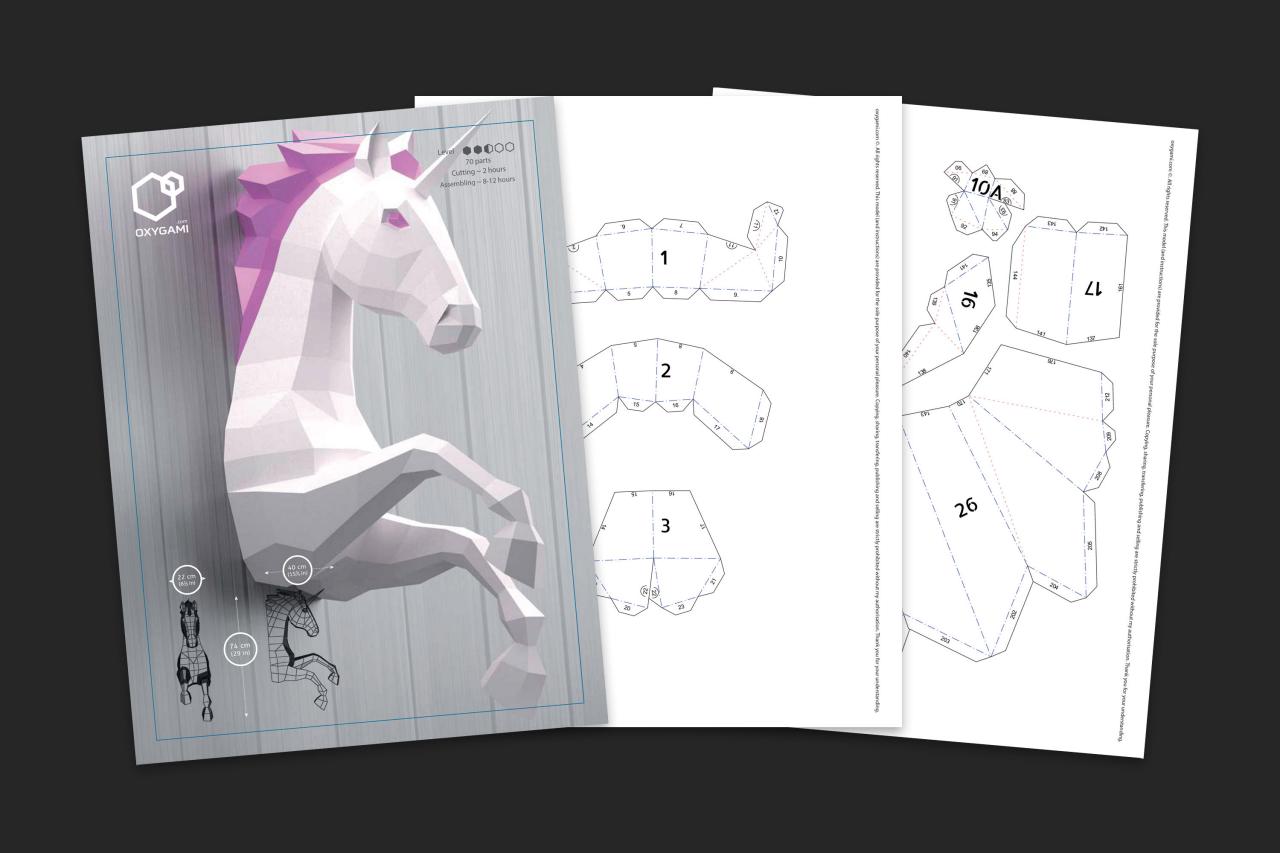
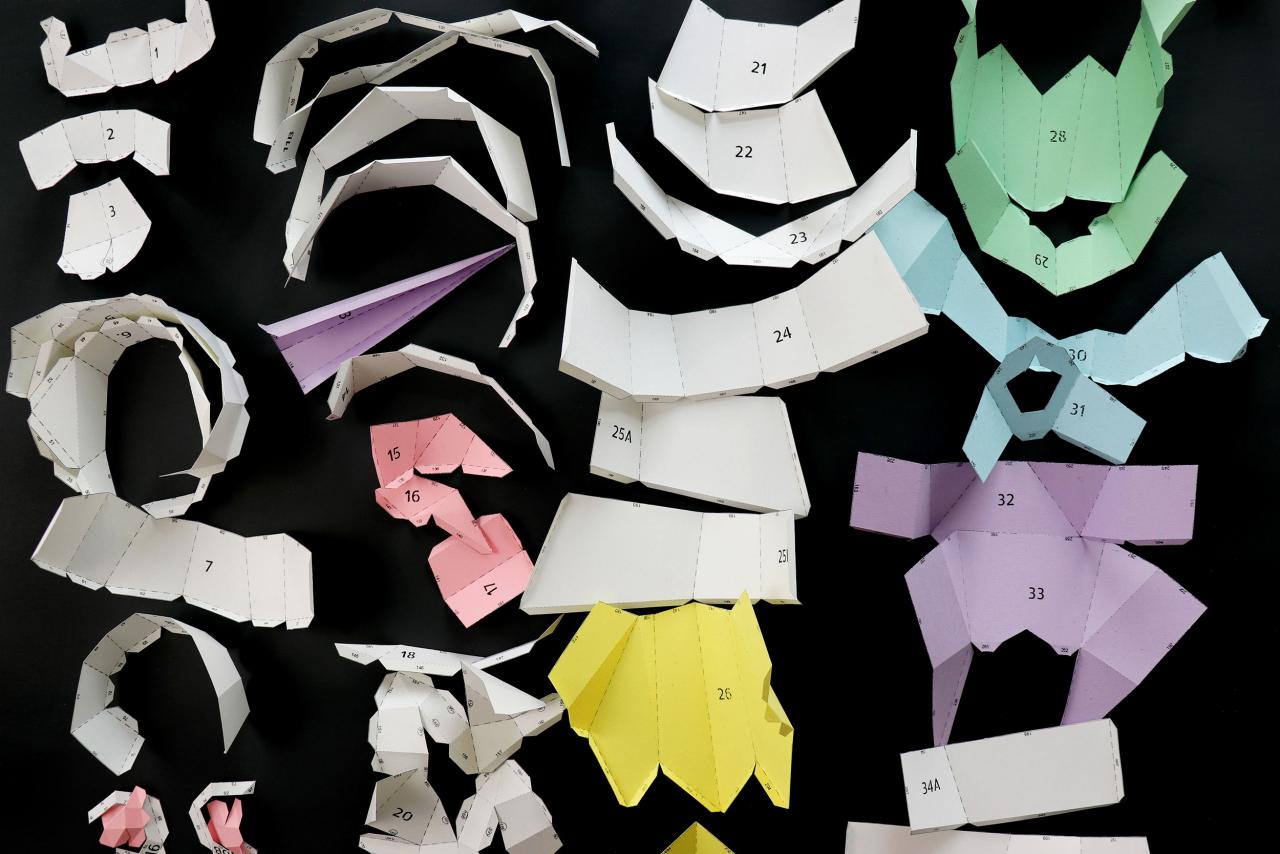
You can buy the papercraft unicorn pattern from Oxigami on Etsy for under $15. He also has plenty of other designs that range from $9 to $15, depending on their size and complexity. You’ll get an instant download of three PDFs — the instructions (in both English and French), the white shapes and the colored shapes.

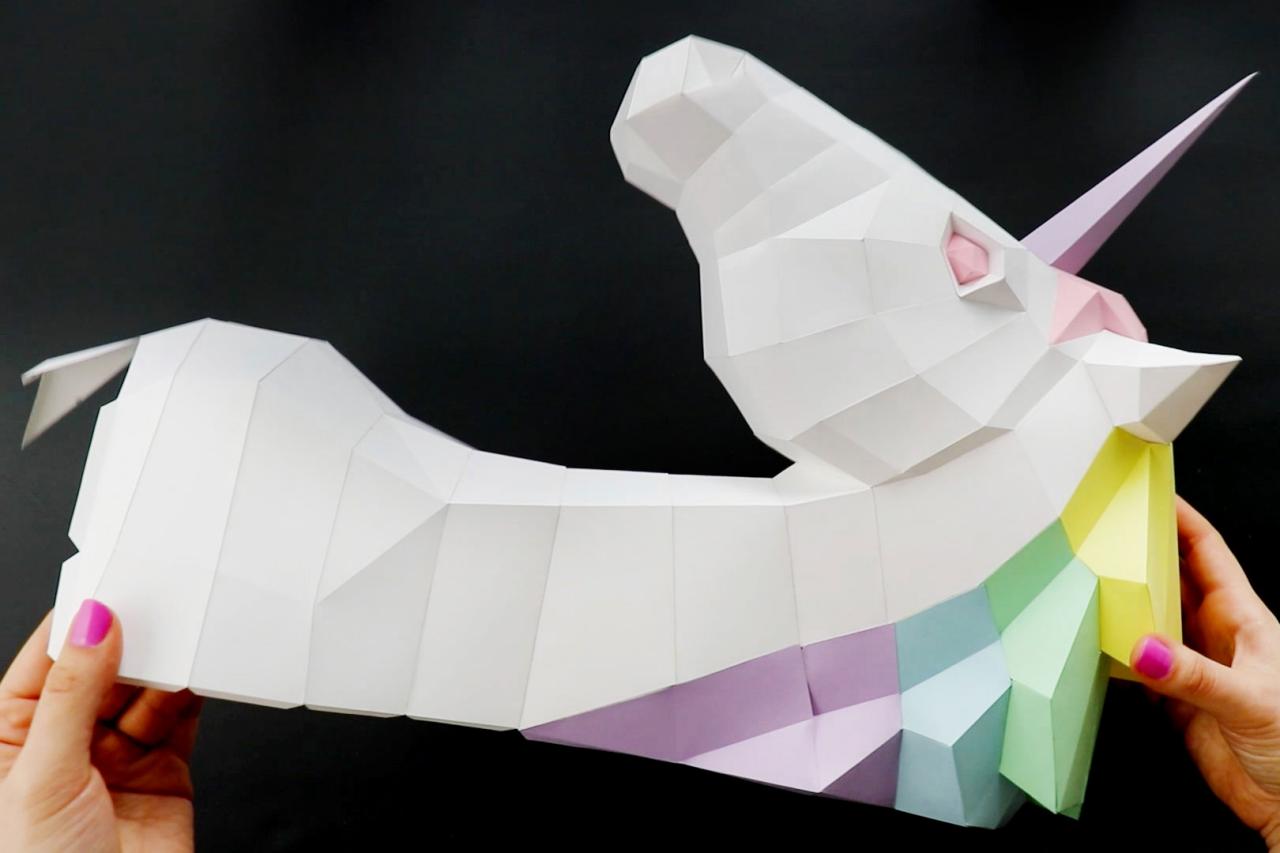
This is a downloadable PDF pattern that you will soon be turning into real 3D paper unicorn using scissors & glue. Get lost in the magic with an ethereal unicorn which seems to leap out of the wall. Make this low poly running unicorn together - on a rainy weekend, during the school holidays, or for a birthday party. And once you’re done, hang it in a bedroom, showcase it for their birthday and delight at your creative genius!
Print the PDFs onto card stock, printing the colored shapes onto any color of card stock you like. For that matter, the white shapes don’t even have to stay white — feel free to experiment with the colors to truly make it your own!
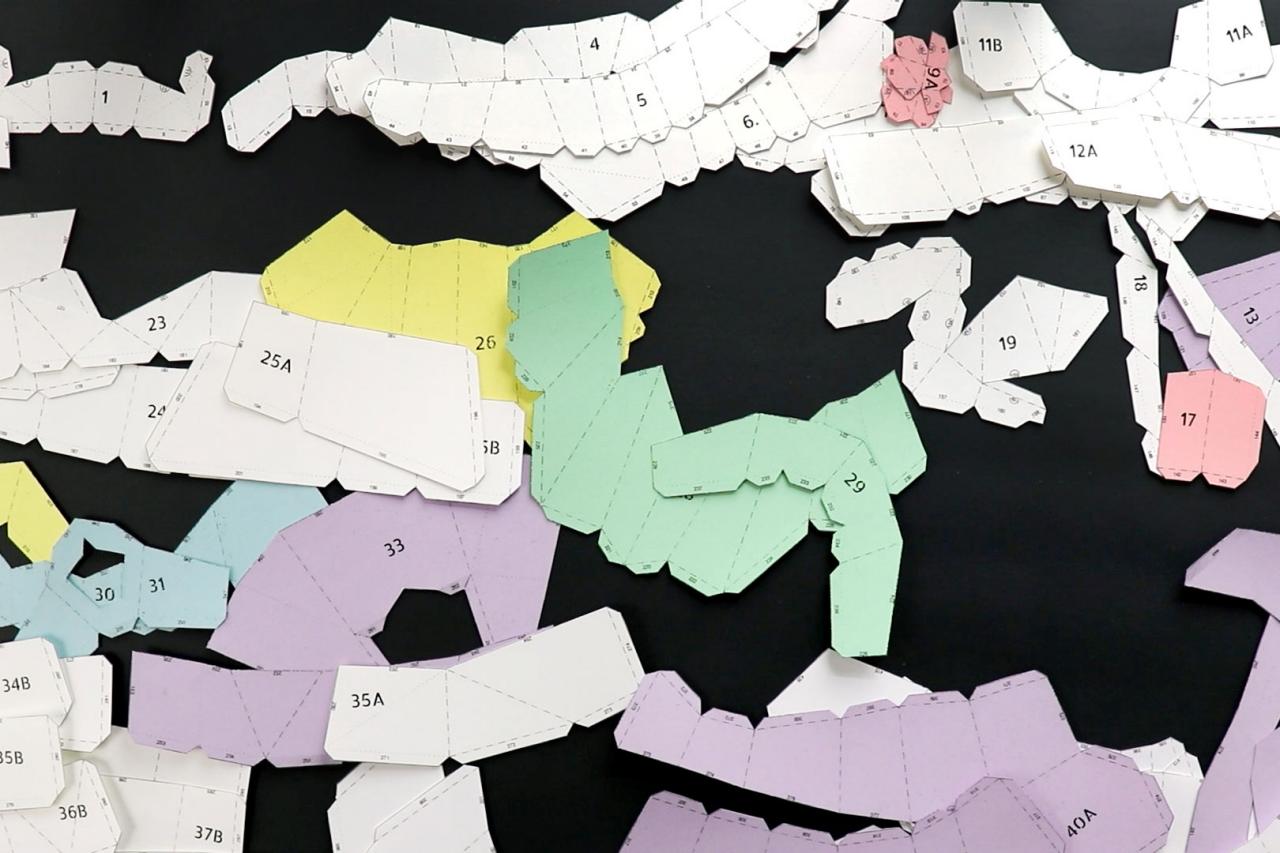
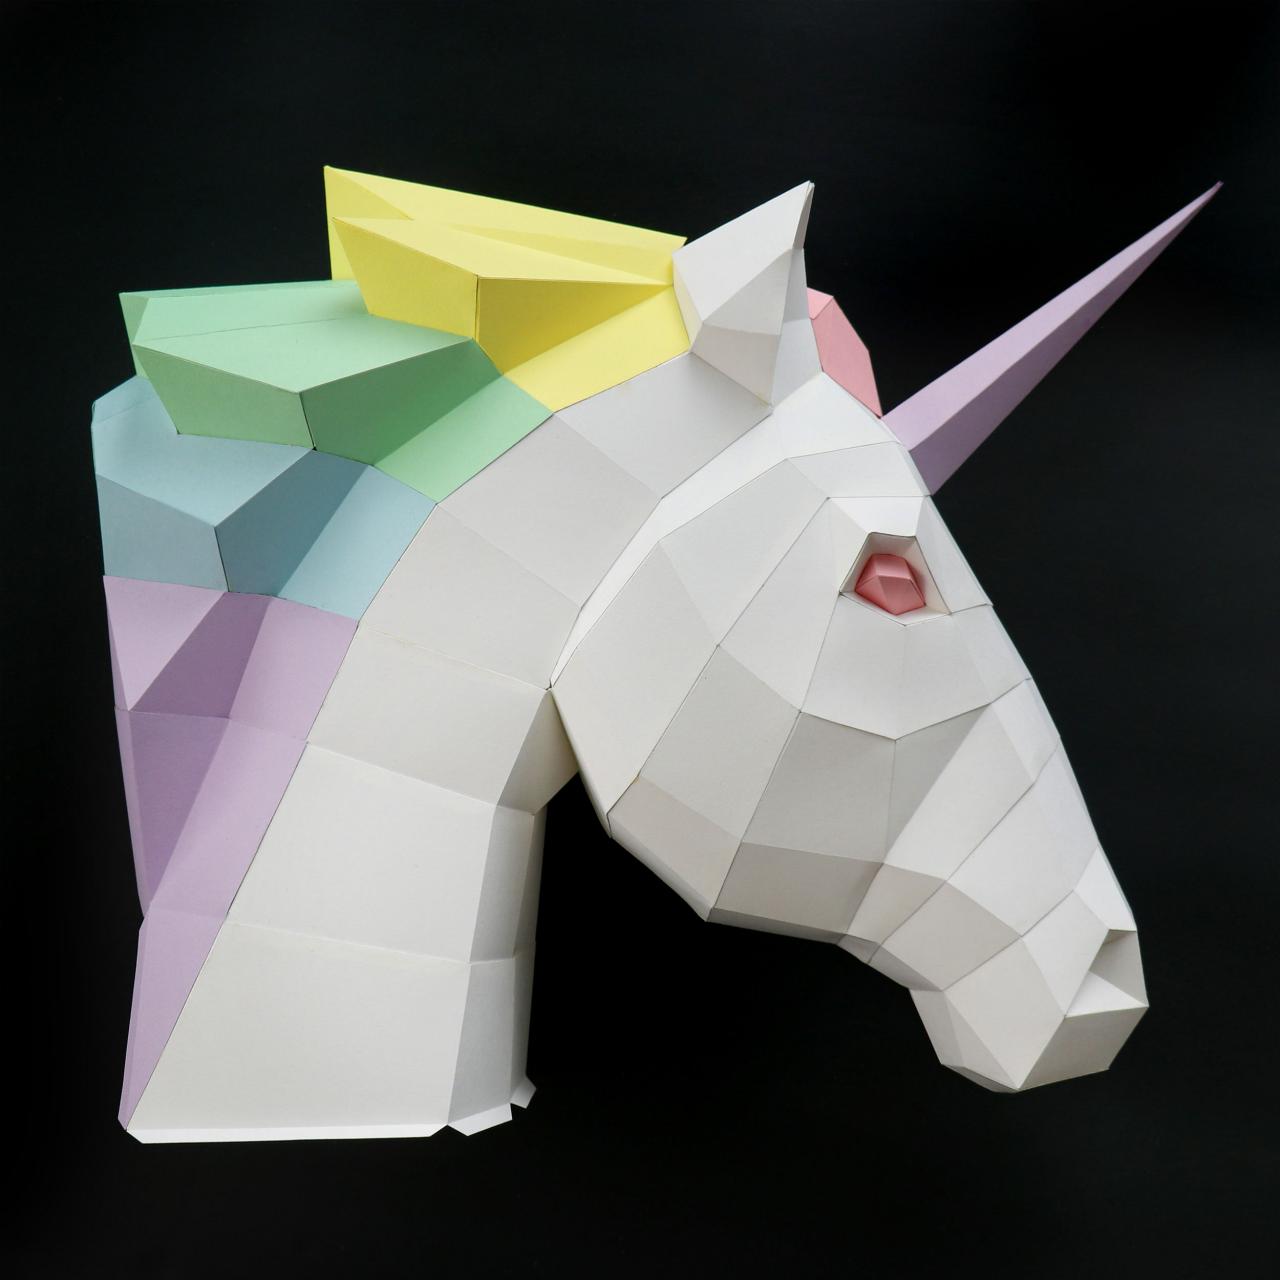
If you want to make your unicorn the same as mine, these are the colors that I used for each shape:
- Pink: 9A, 10A, 15, 16, 17
- Yellow: 26, 27
- Green: 28, 29
- Blue: 30, 31
- Purple: 13, 32, 33, 39A, 40A, 43A, 43B, 43C

Karen Kavett
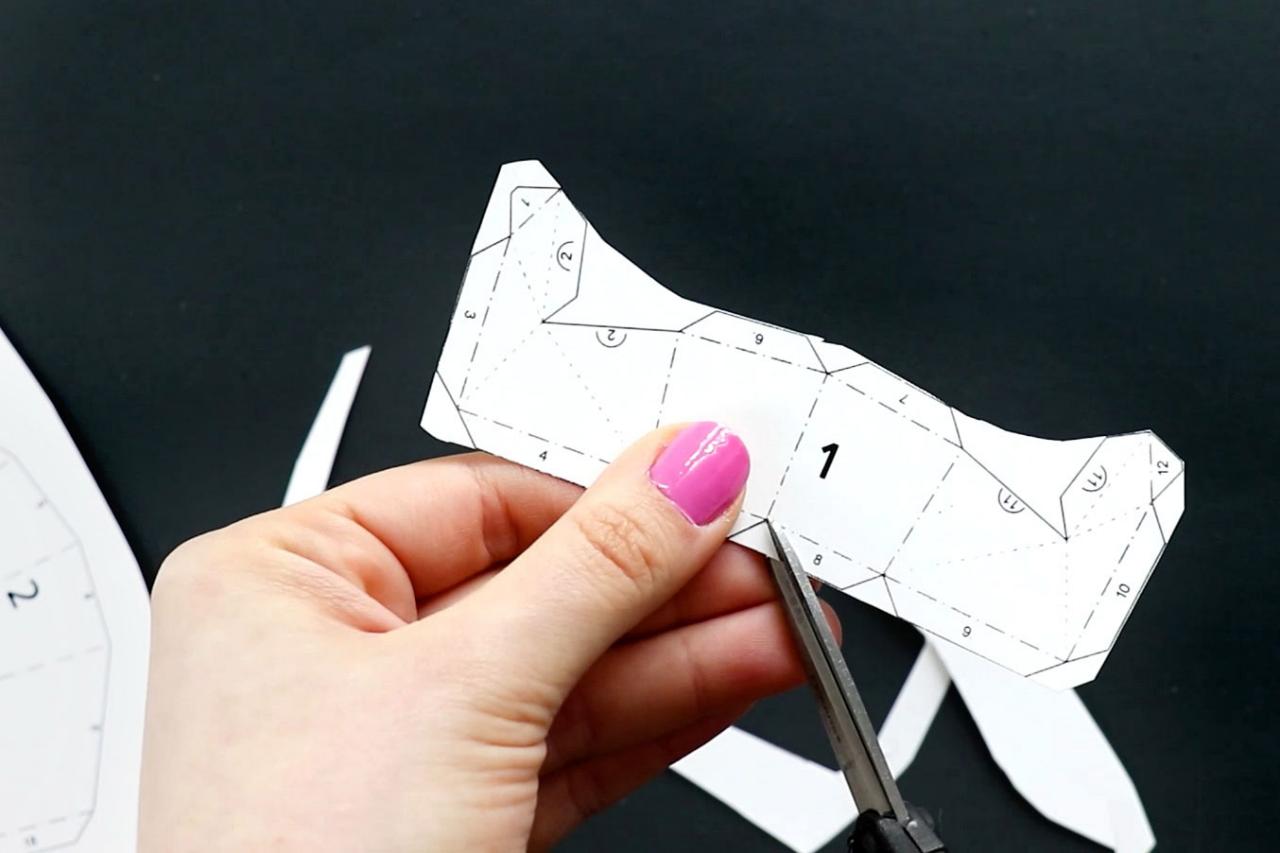
Cutting Out the Shapes
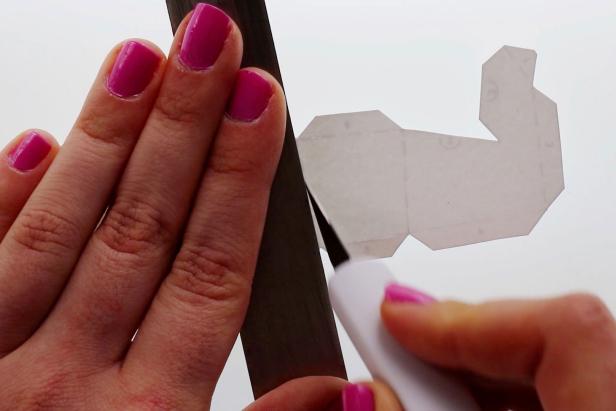
Next we’ll cut out the shapes, using small detail scissors to cut them out as accurately as possible (Image 1 & 2). If you’re handy with a Cricut or Silhouette die-cutting machine, you might be able to get the computer to do this step for you, but I prefer to spend a few hours doing it by hand. Plus, isn’t the whole point of crafting to get off of screens for a while?

Karen Kavett

Karen Kavett
Scoring and Folding
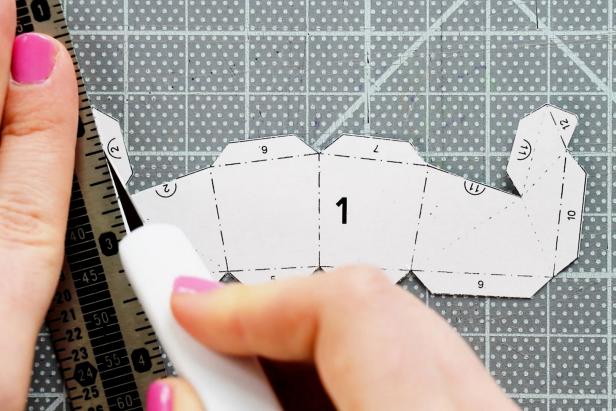
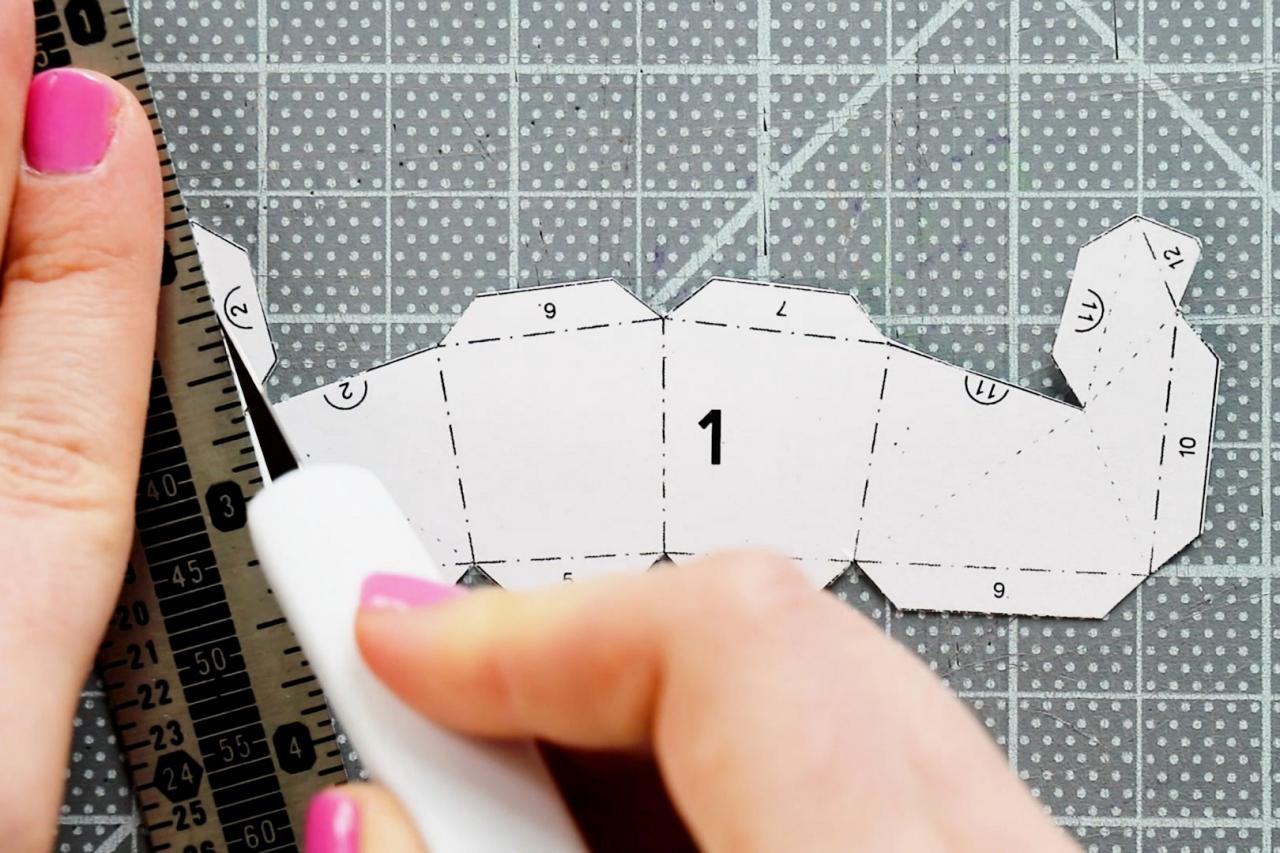
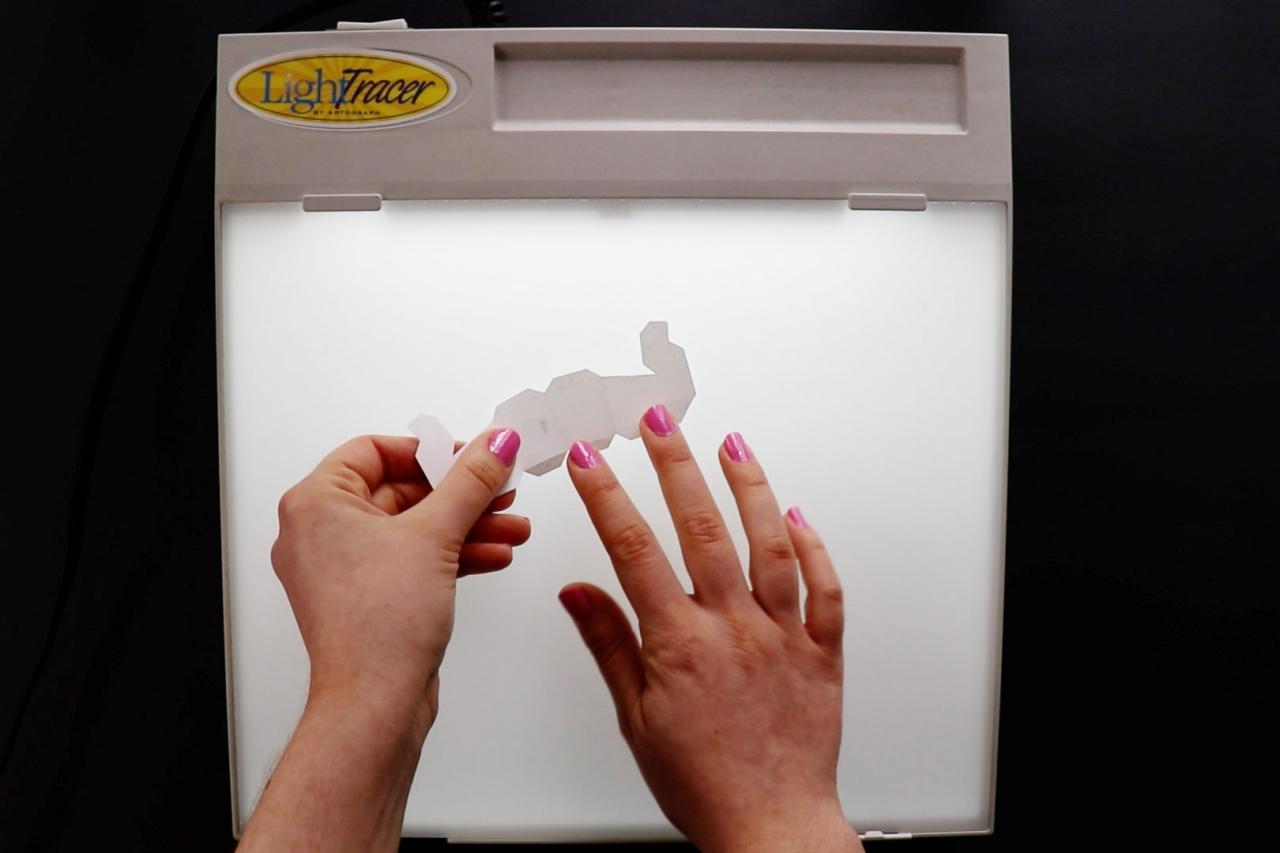
Before we start putting our unicorn together, we need to fold all of the shapes. It’s best to use a craft knife to score them before folding, to ensure perfectly straight lines.
Score along the smaller dotted lines using a cutting mat, ruler and craft knife (Image 1). Be sure not to cut all the way through the paper. Then flip the shape over and score the long dotted lines on the backside (Image 2). You can use a lightbox to see the lines through the paper if necessary (Image 3).
Karen Kavett
Karen Kavett

Karen Kavett
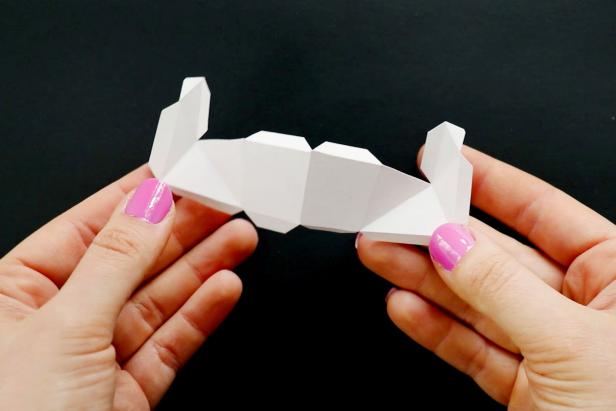
Carefully fold along all of your score lines (Image 1), folding away from the side that you scored. Repeat for all of the shapes (Image 2).
Karen Kavett

Karen Kavett
Gluing
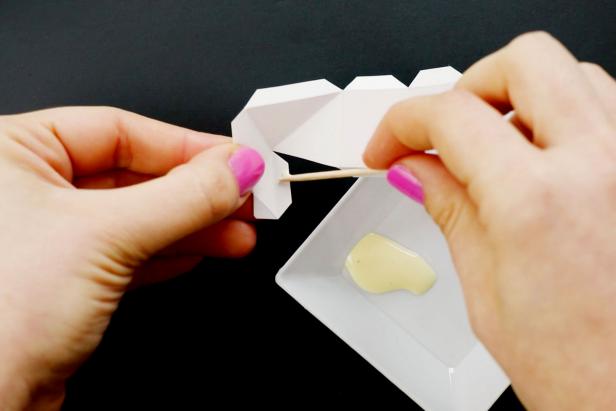
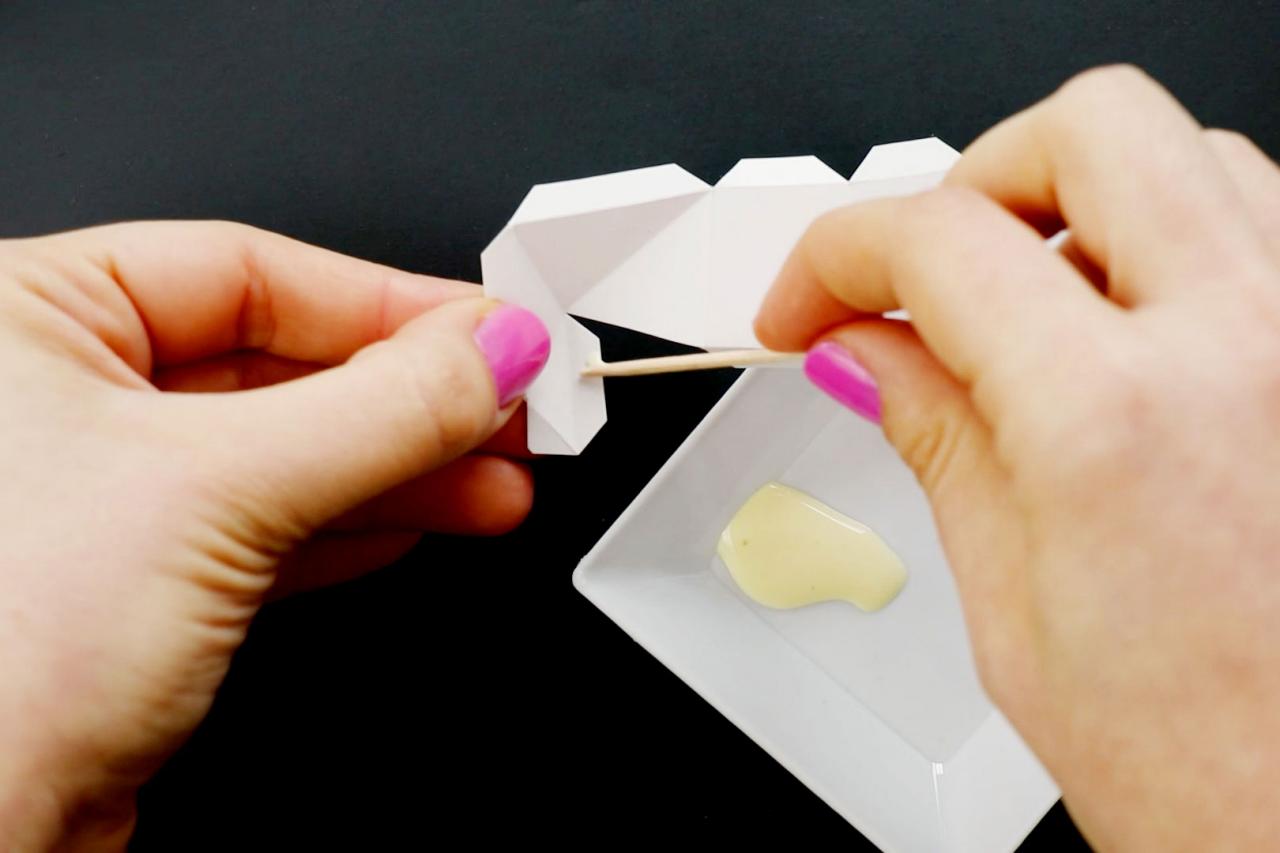
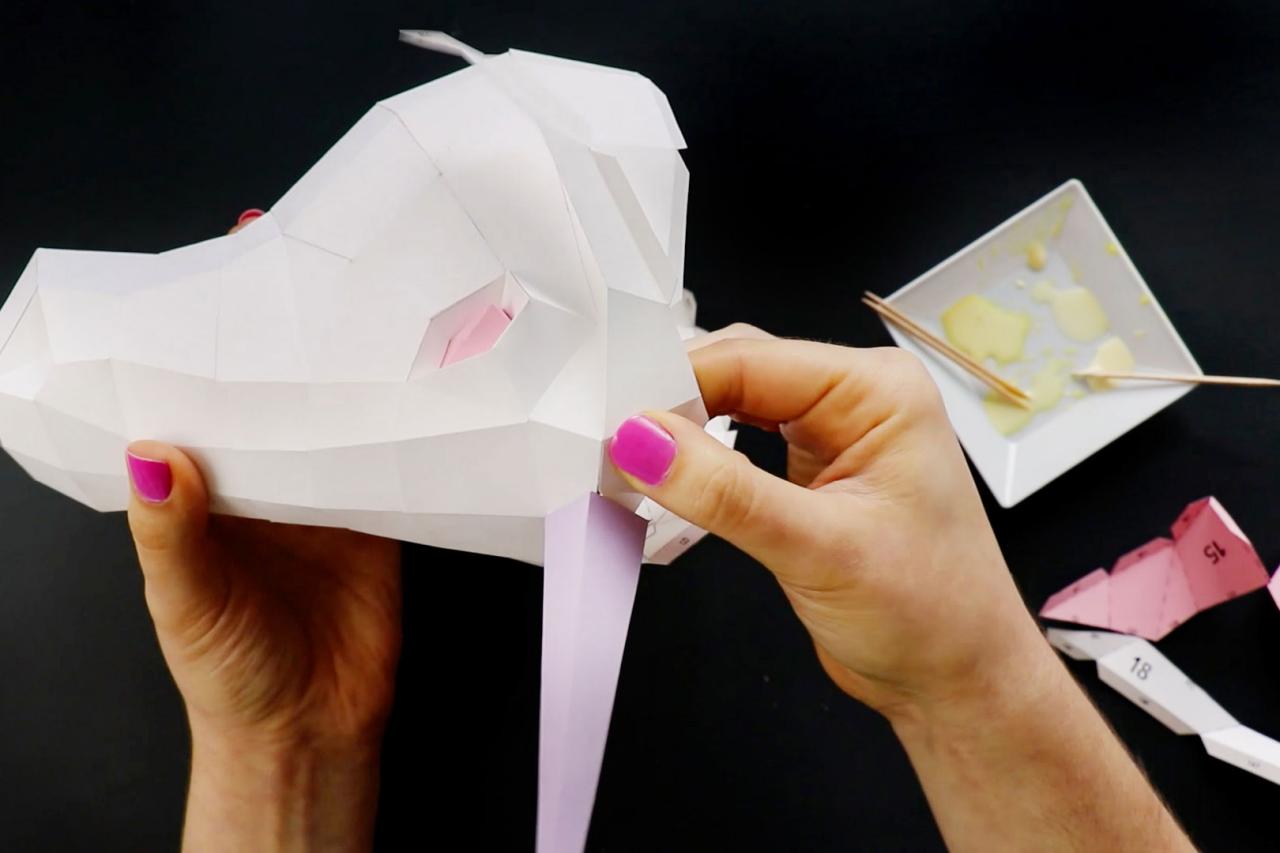
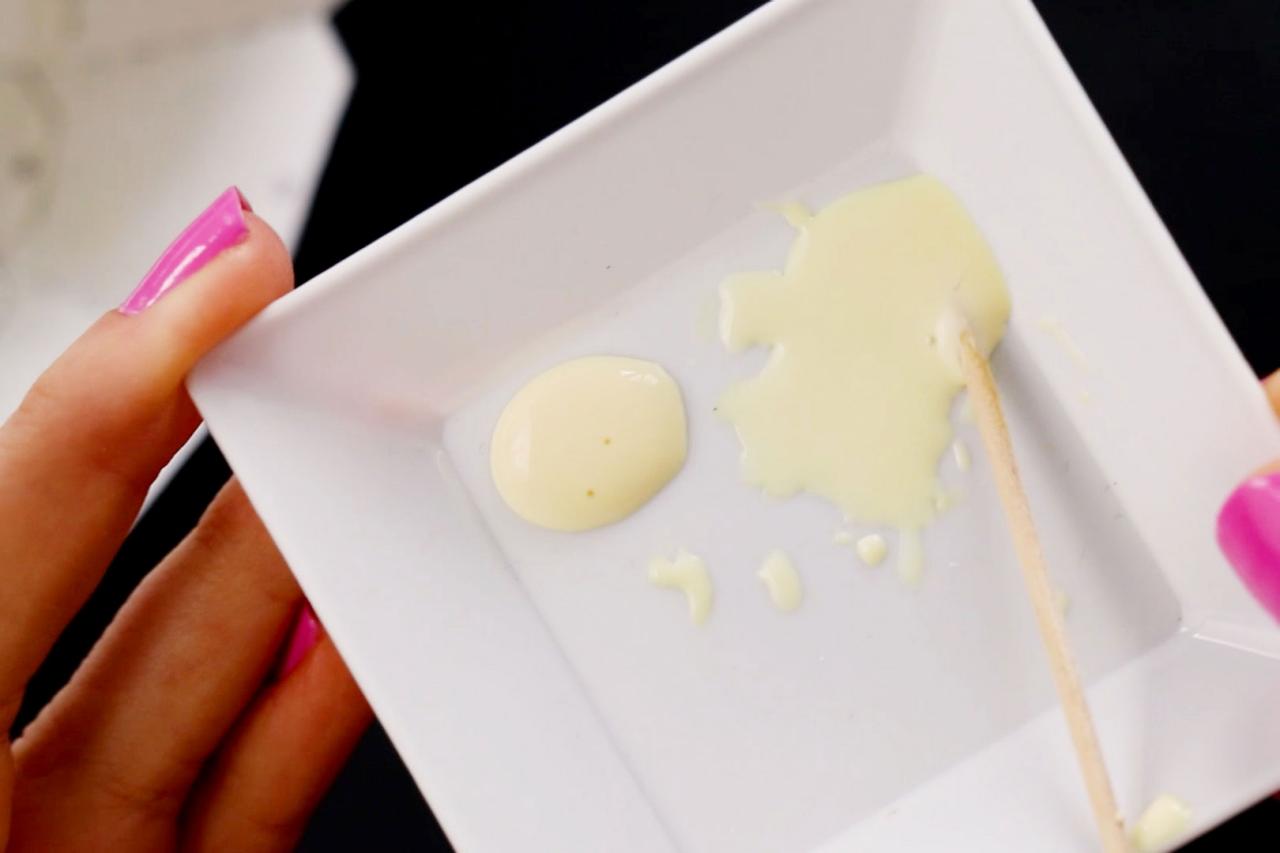
Look at your cut-out shapes and note any numbers with circles around them. Those connect within the same shape, so you can glue them first. Dab on some glue with a toothpick and hold the tab in place for about 10 seconds while the glue sets (Image 1 & 2). I like to use wood glue and toothpicks to assemble my papercraft creations, but any school glue or similar PVA glue should also work. Be sure that the tab ends up on the printed side of the paper so that you have a clean exterior.
Karen Kavett

Karen Kavett
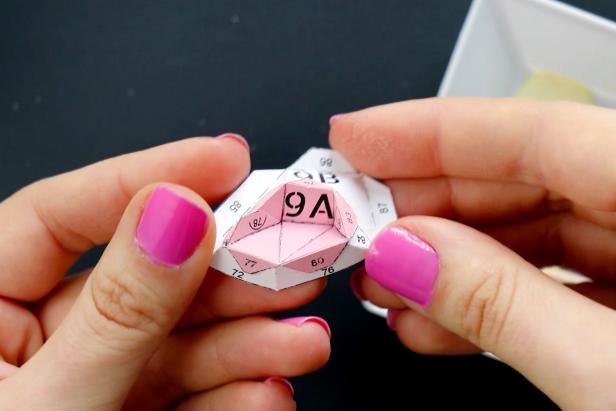
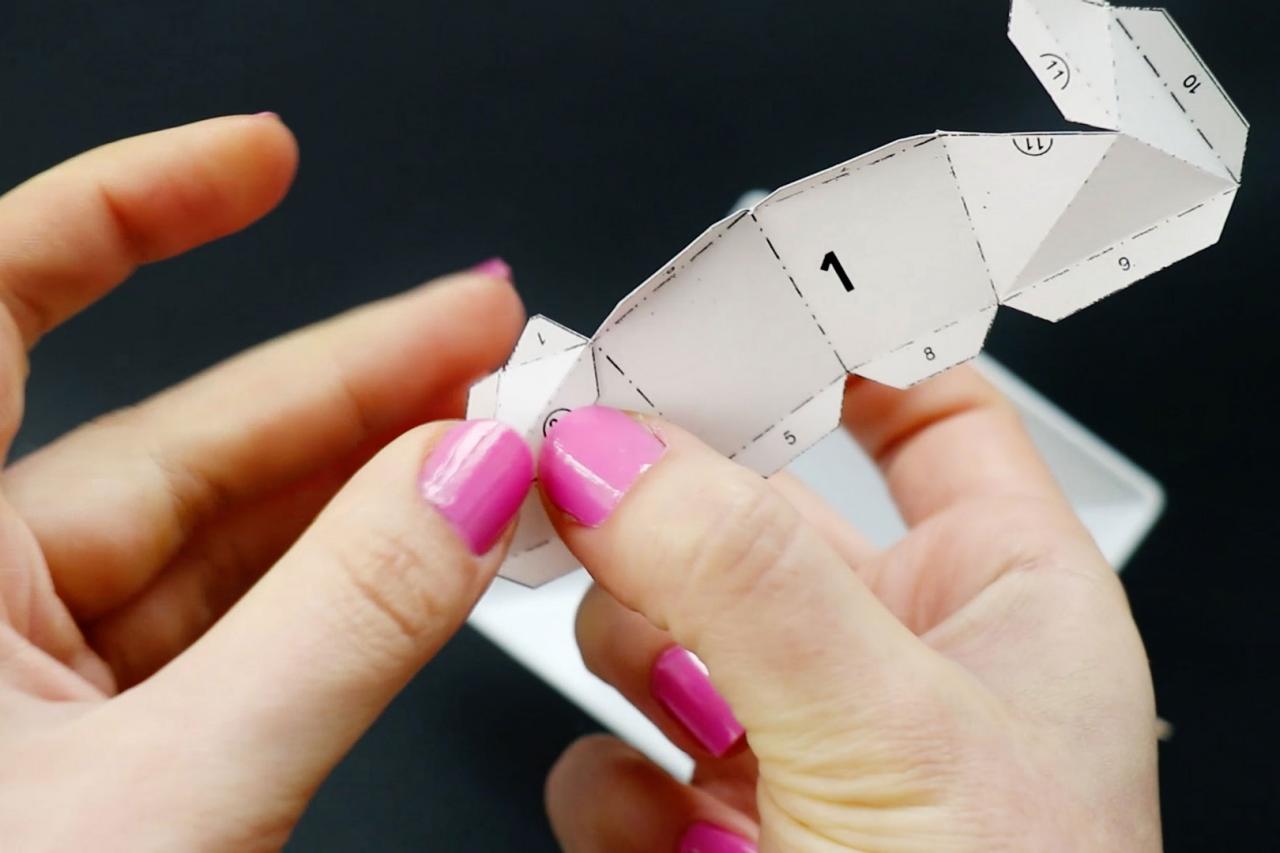
Then follow the instructions to know what order to attach the shapes together, and start assembling your unicorn (Images 1, 2 & 3). Each tab has a matching number on its adjoining piece, so pay attention to where you’re gluing to ensure you’re following the directions exactly. Some of the smaller shapes can get a little tricky, so check and double check what you’re doing before applying the glue.
Karen Kavett

Karen Kavett

Karen Kavett
Tips and Tricks
Don’t try to do it all at once! I worked on this over four days, and it’s a great project to chip away at little by little.
When you’re attaching two pieces together, always start from the middle and work your way out to each side.

Karen Kavett
Only pour a little glue at a time onto your dish. It dries quickly, and fresh glue is much easier to apply and manipulate.

Karen Kavett
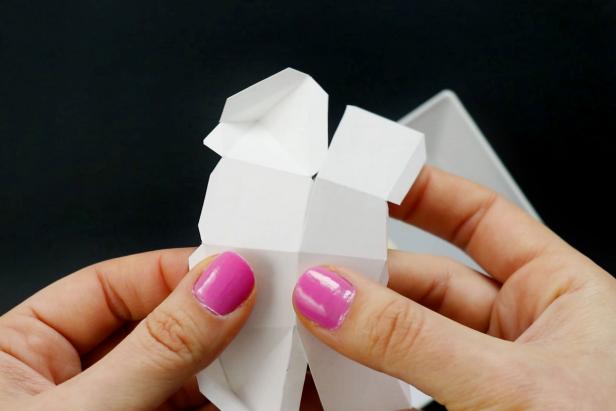
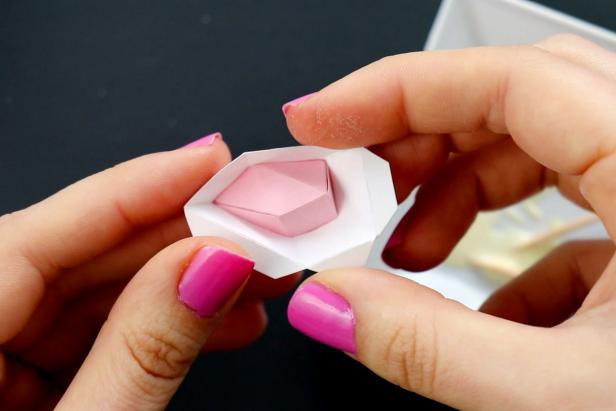
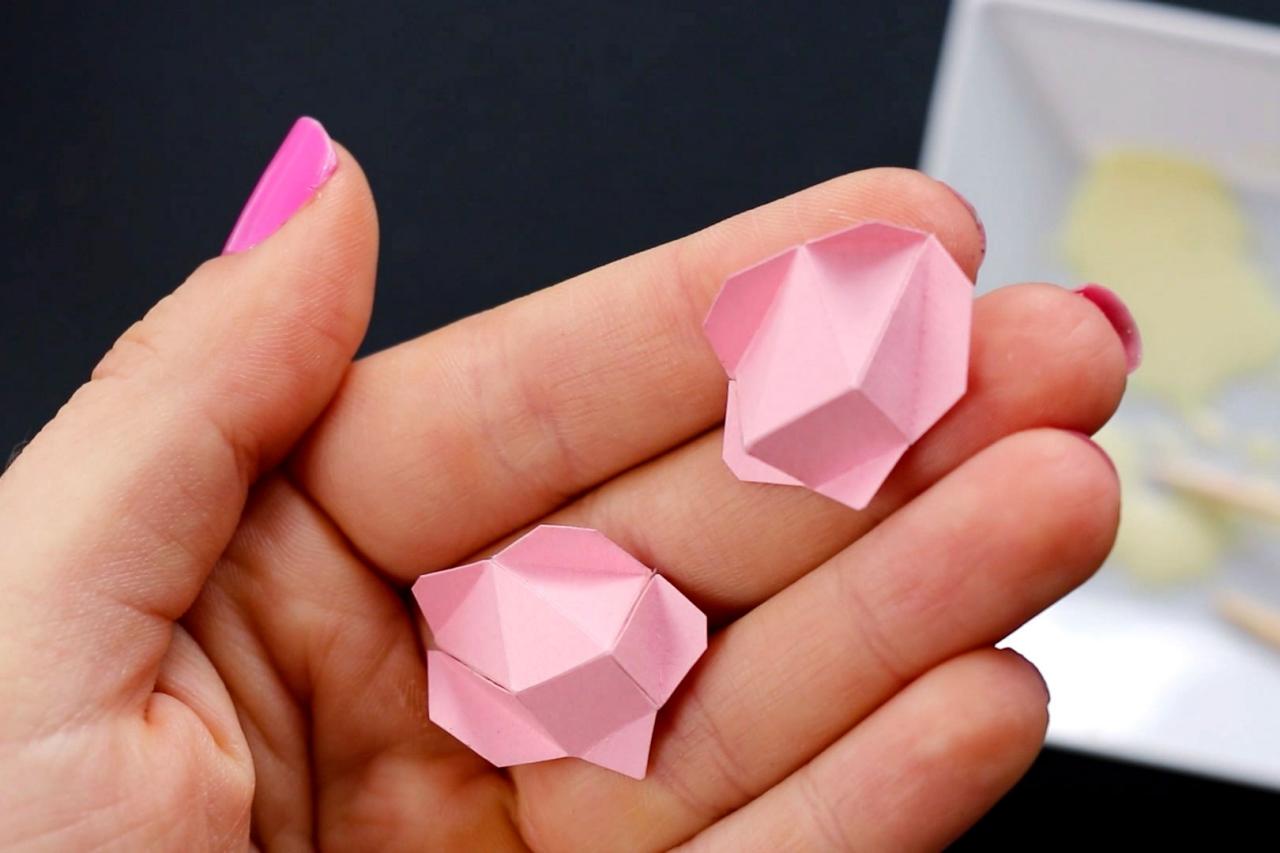
I found that the eyes were the trickiest part of the whole thing. I included some photos so you can see what they’re meant to look like before attaching them to the main shape.

Karen Kavett
Karen Kavett
Karen Kavett
Hanging It Up
The great part about this project is that it’s extremely lightweight, so you can hang it on just a thumbtack, nail or adhesive hook. Note that it is for decorative purposes only and can easily be crushed, so keep this in mind if you have kids or pets.
Feel free to dress it up as much as you want with glitter, paint or any other embellishments. I think this is such a fun project, and the final result is extremely impressive. If you decide to try this, I hope you have as much fun with it as I did.

Karen Kavett
Karen Kavett
More Paper Crafts From Karen

Origami Paper Wreath
Add a burst of color year-round with this simple paper wreath project.

Paper Teacup Gift Boxes
Download the free pattern and customize them to your heart's content.

Confetti Paper Crafts
Make every day a party with these colorful confetti decorating projects.


