


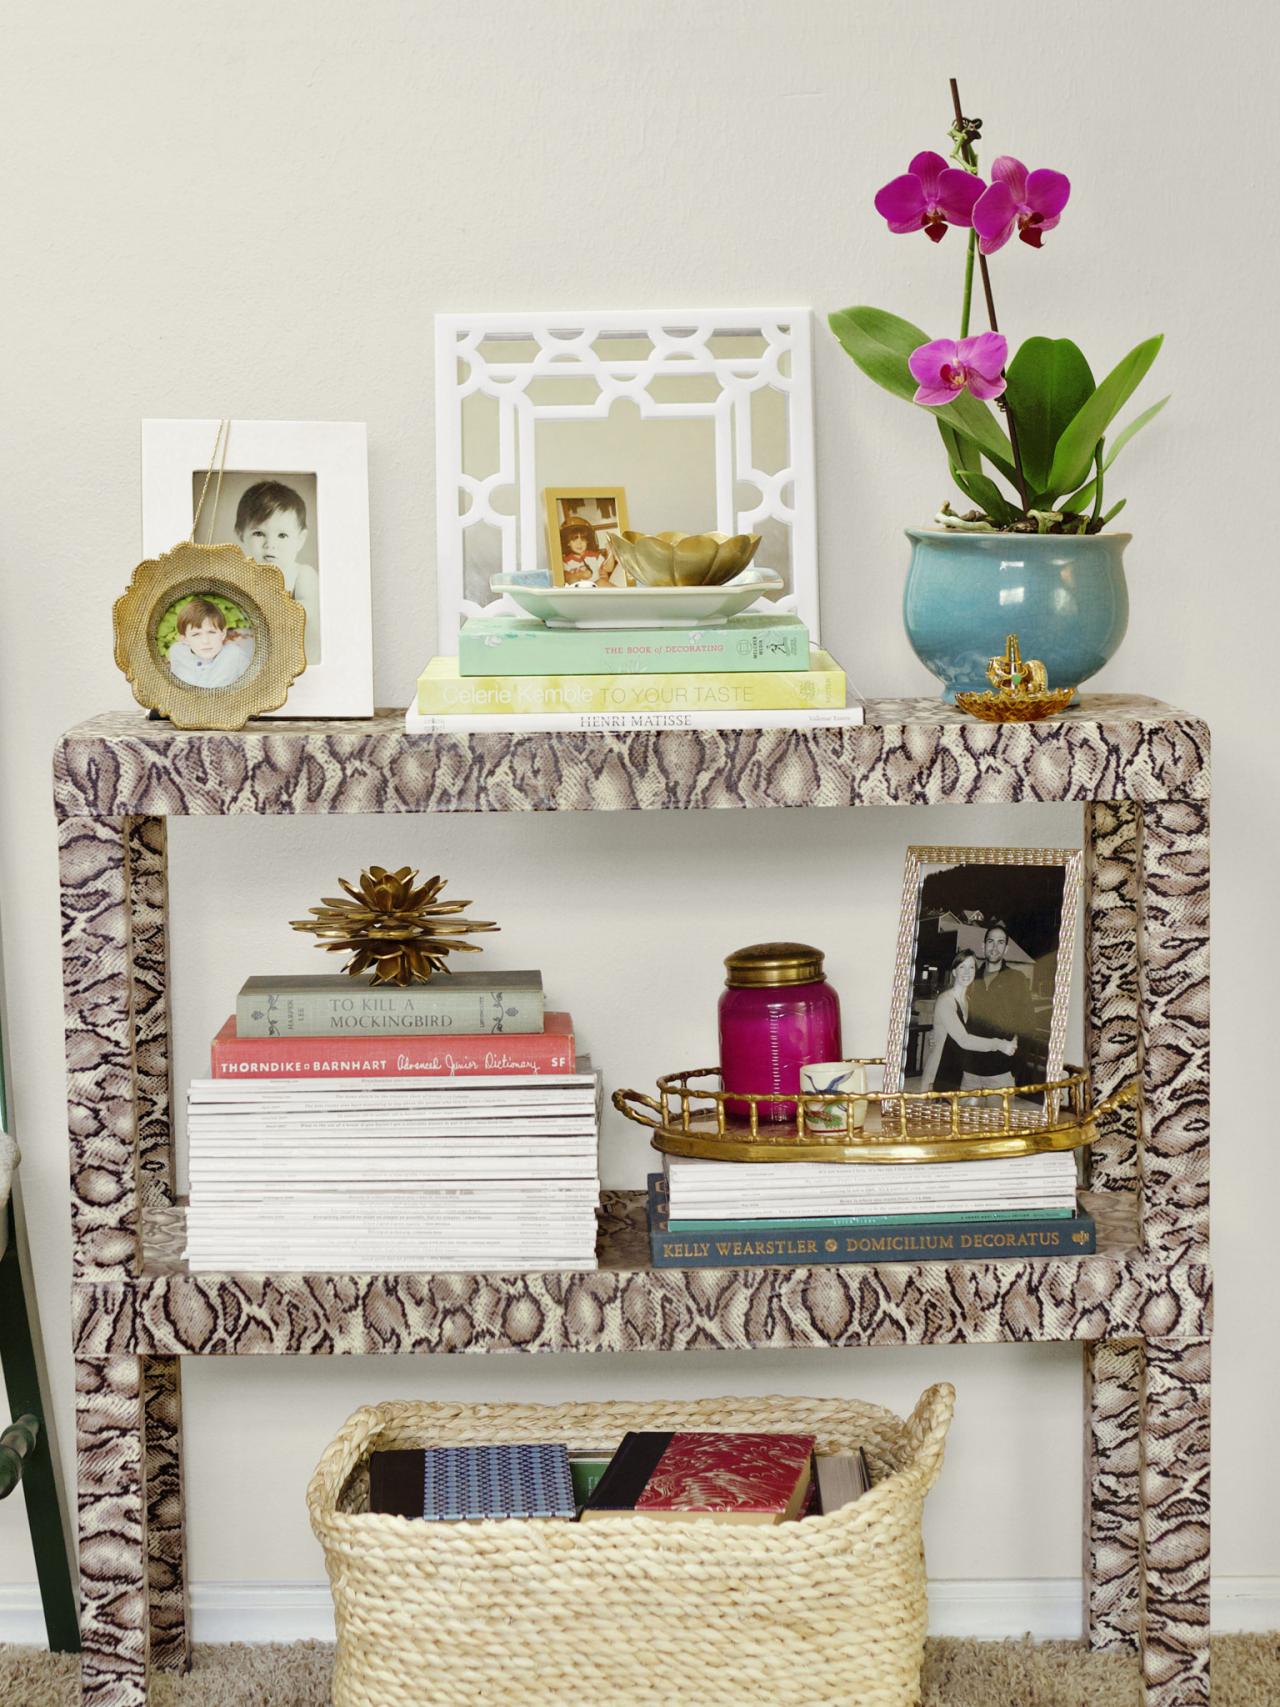
How to Make Fabric-Wrapped Shelves
Re-create this trendy piece on a budget with this step-by-step from a crafty blogger featured in HGTV Magazine.

RX-HGMAG012_DIY-Projects-120-a-3x4
Photo by: Courtesy of Emily Hart
Courtesy of Emily Hart

Emily Hart, a stay-at-home mom from Oklahoma City and home design blogger at recentlytheblog.com, creates DIY masterpieces. She enjoys turning off-the-shelf furniture and accessories into upgraded custom pieces. Her motto: "Patience and a willingness to do some digging go a long way when it comes to DIY."
Materials Needed:
- 2 plain side tables
- fabric scissors
- light- to medium-weight fabric
- glossy Mod Podge and sponge brush
Step 1
Wipe down the two tables (you’re going to stack them to create a shelving unit). Measure the length and width of one tabletop, including its apron, and one leg (the height and the width of all four sides combined). Cut fabric to these measurements, adding 1/2 inch to each side. You’ll have 10 pieces of fabric (two tops, eight legs).
Step 2
Brush Mod Podge onto a table leg, and cover with fabric, smoothing out air bubbles with your hands. Cover the rest of the legs and the tabletops, slightly overlapping the fabric if necessary, and adding more Mod Podge so the fabric sticks.
Step 3
Add extra layers of Mod Podge over the fabric, and let dry. Stack one table on top of the other, or secure with an industrial-strength adhesive, like E6000 ($5 for 2 ounces, crafts stores).


