


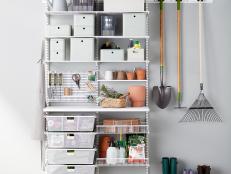
How to Make a Wall-Mounted Screwdriver Rack
Custom chic: dip screwdrivers in plastic coating and mount to keep them within arm's reach.


Materials Needed:
- (1) 2"x2" table leg, 28" long
- locking pliers
- yardstick
- pencil
- dowel jig (optional)
- drill and assorted bits
- 12 screwdrivers
- string
- painters' tape
- scissors
- plastic dip, black
- plastic dip, colors or acrylic paint
- 12 small disposable cups
- (2) 1-1/2" L-brackets
- (8) 1" wood screws
Preparing the Rack


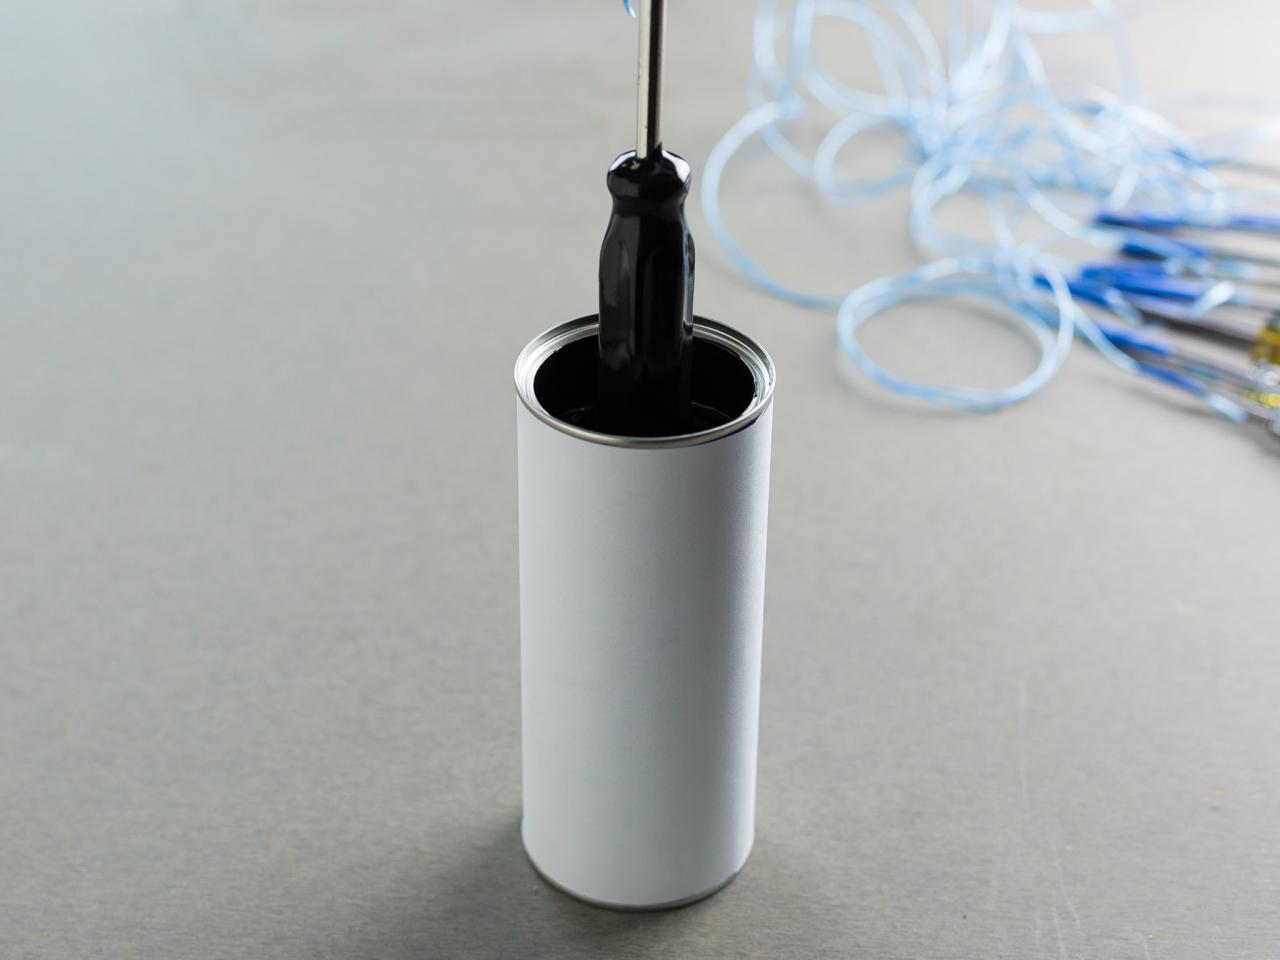
Remove the screw at the end of the table leg with a pair of locking pliers and discard (Image 1).
Find the center of the table leg along one long side. Draw a line with a yardstick and pencil from one end to the other of the long side through the center. Measure in 3 inches from the end and make an X on the line. Make another mark every 2 inches after that, with the last one 3 inches from the opposite end. Lay the screwdrivers out to determine their order.
Drill holes at each of the X marks to accommodate the screwdrivers. Note: to make holes as straight and vertical as possible, use a dowel jig to keep the drill bit lined up correctly (Image 2). Consider using different drill bits to fit the screwdrivers width. Be sure to consider the head of flathead screwdrivers, which can sometimes be wider than their shaft. Paint, stain and/or seal the leg as desired.
Dipping the Screwdrivers


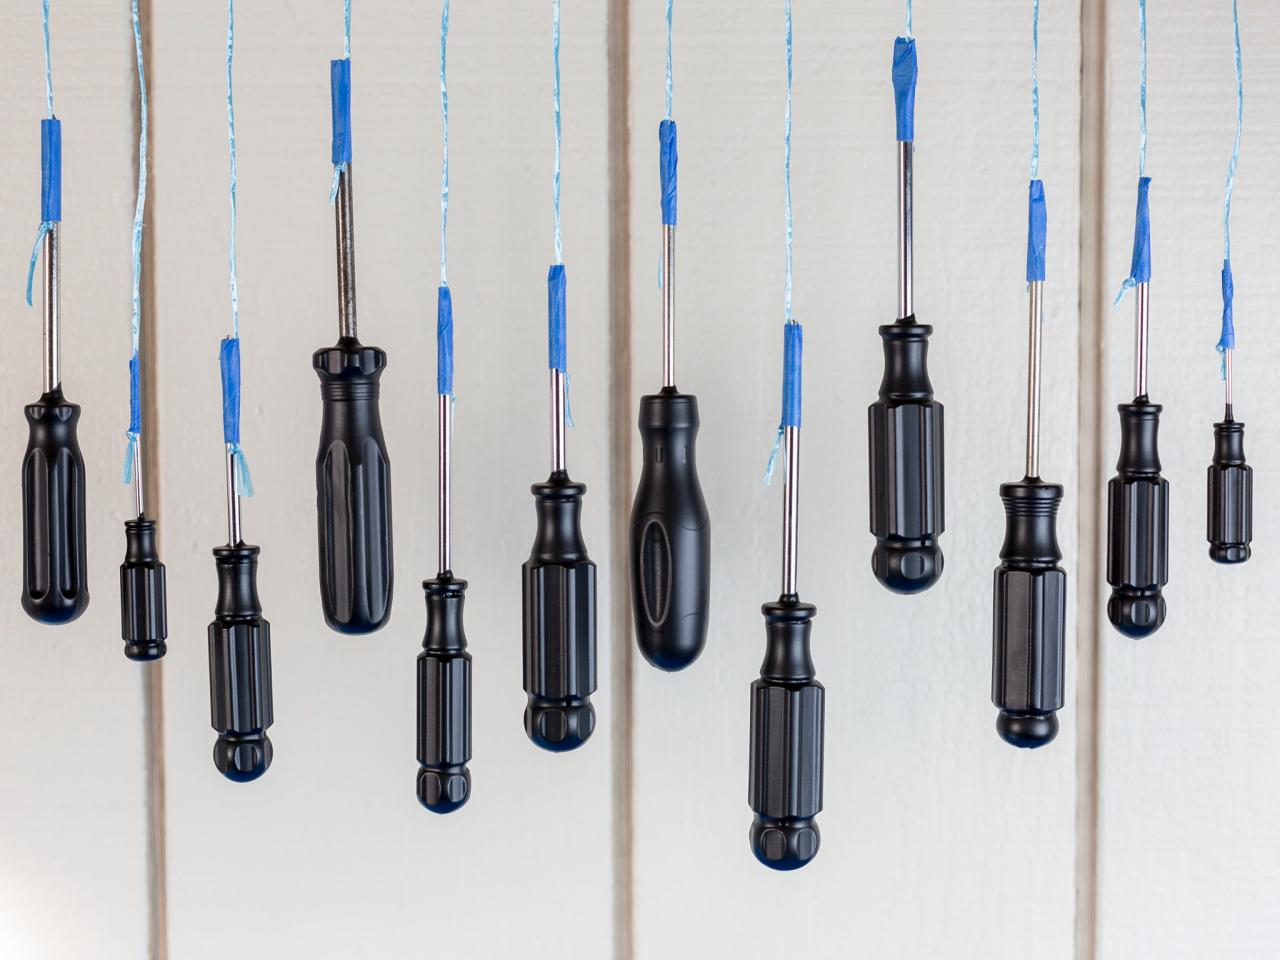
Cut 12 lengths of string at least 18” long. Tie a small knot in one end. Attach the knotted ends to the tips of the screwdrivers with the knot sticking out of the bottom of the tape to prevent slipping. Dip the screwdrivers in plastic dip according to the provided instructions (Image 1).
Hang the dipped screwdrivers from a rod with protective paper or dropcloth below to catch any drips. Allow to hang until completely dry (Image 2).
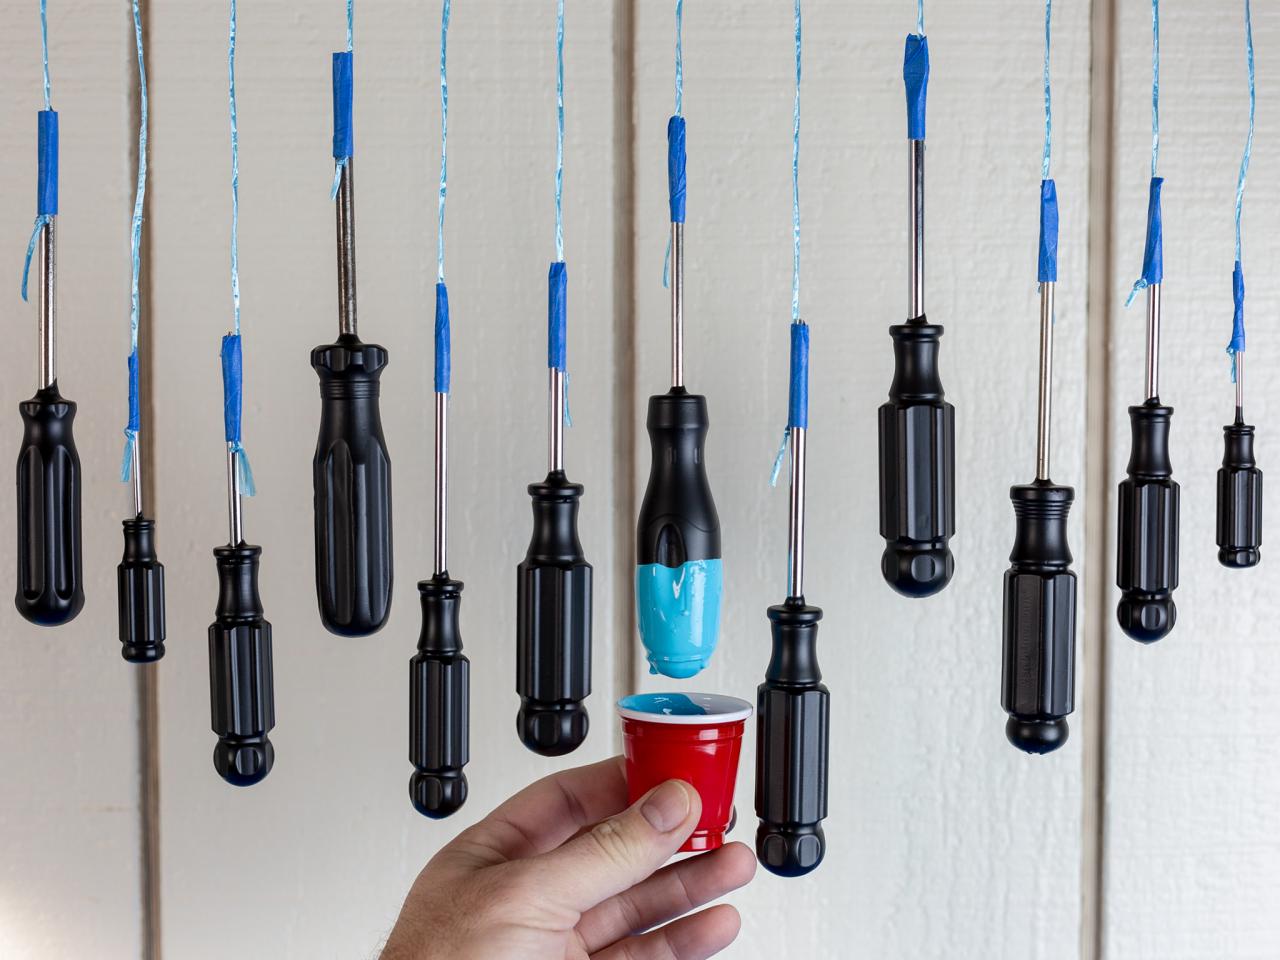
With the screwdrivers still hanging, fill small disposable cups with colored plastic dip or acrylic paints. Dip the ends of the screwdrivers in the cups and gently shake off any excess (Image 3). Allow the dipped screwdrivers to dry completely.
Hanging the Rack


Determine where the holder will hang on the wall. Mark the center spot and measure 14 inches in both directions using a level (Image 1).
Install an L-bracket 1-inch in from both ends of the line by screwing it into the wall (Image 2). Use anchors if necessary.
Lay the holder on the L-brackets and secure the L-bracket to the holder with wood screws (Image 3). Arrange dried, dipped screwdrivers in the pre-drilled holes.


