


How to Mount a Staghorn Fern
Take these beauties out of the pots, and put them on the walls in minutes with this simple DIY tutorial.


Every space could use a little greenery, so turn your regular house plant into cheap wall decor with this mounted staghorn fern tutorial.
Materials Needed
- cedar wood plank
- staghorn fern
- pencil
- drill + drill bit
- 2" stainless steel screws (4)
- moss
- scissors
- 15-lb nylon cord
- 2 rust-proof eyebolts
- rust-proof chain
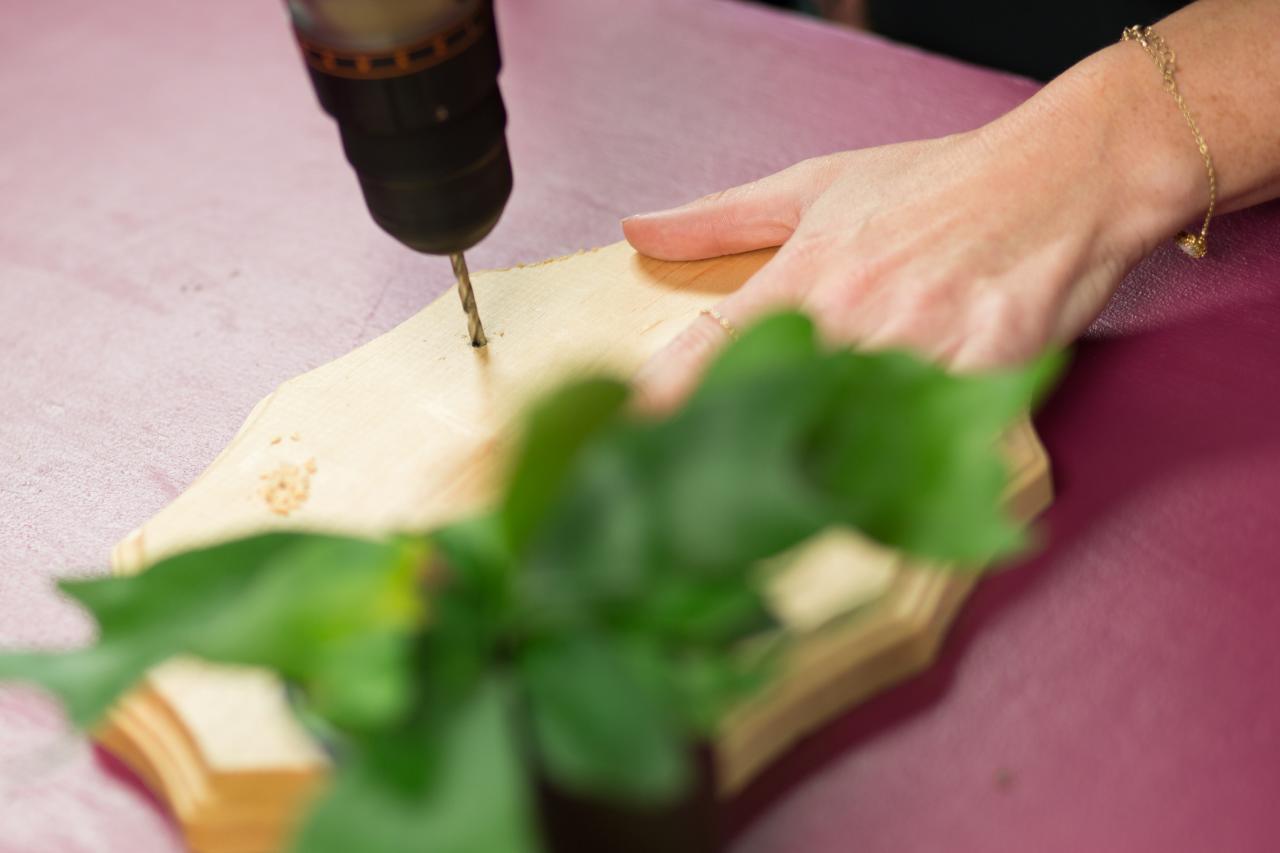
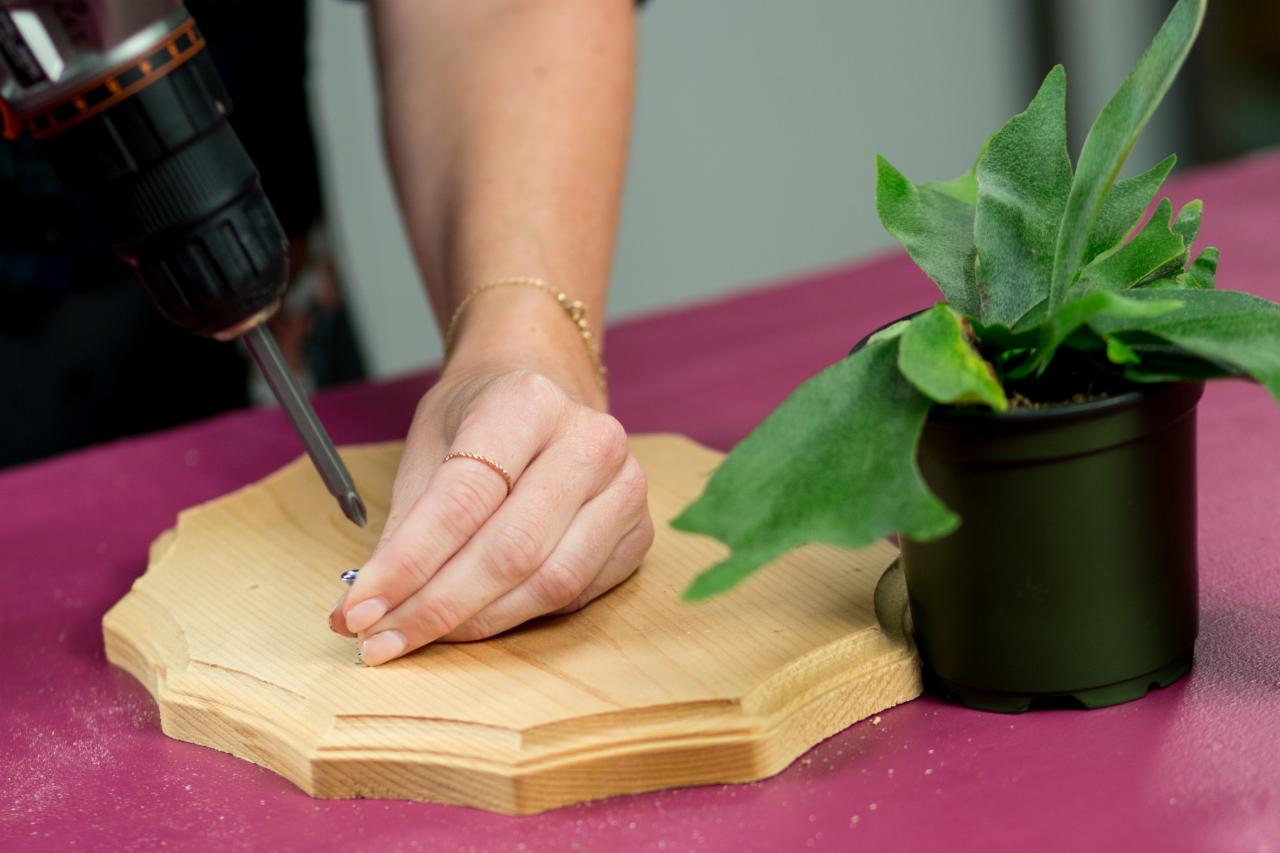
Measure and Drill


Place the potted fern in the center of the wood plank, making sure that a sterile leaf is turned toward the top. Use a pencil to roughly mark four equal corners around the plant. Drill a hole in each of the marks, and then screw in stainless steel screws.
Add the Plants


Dip a handful of moss in warm water, and then arrange it on the plank in between the screws. Repeat until the space is covered. Pull the fern from the pot and remove any loose soil. Place it on the plank in the center of the moss.
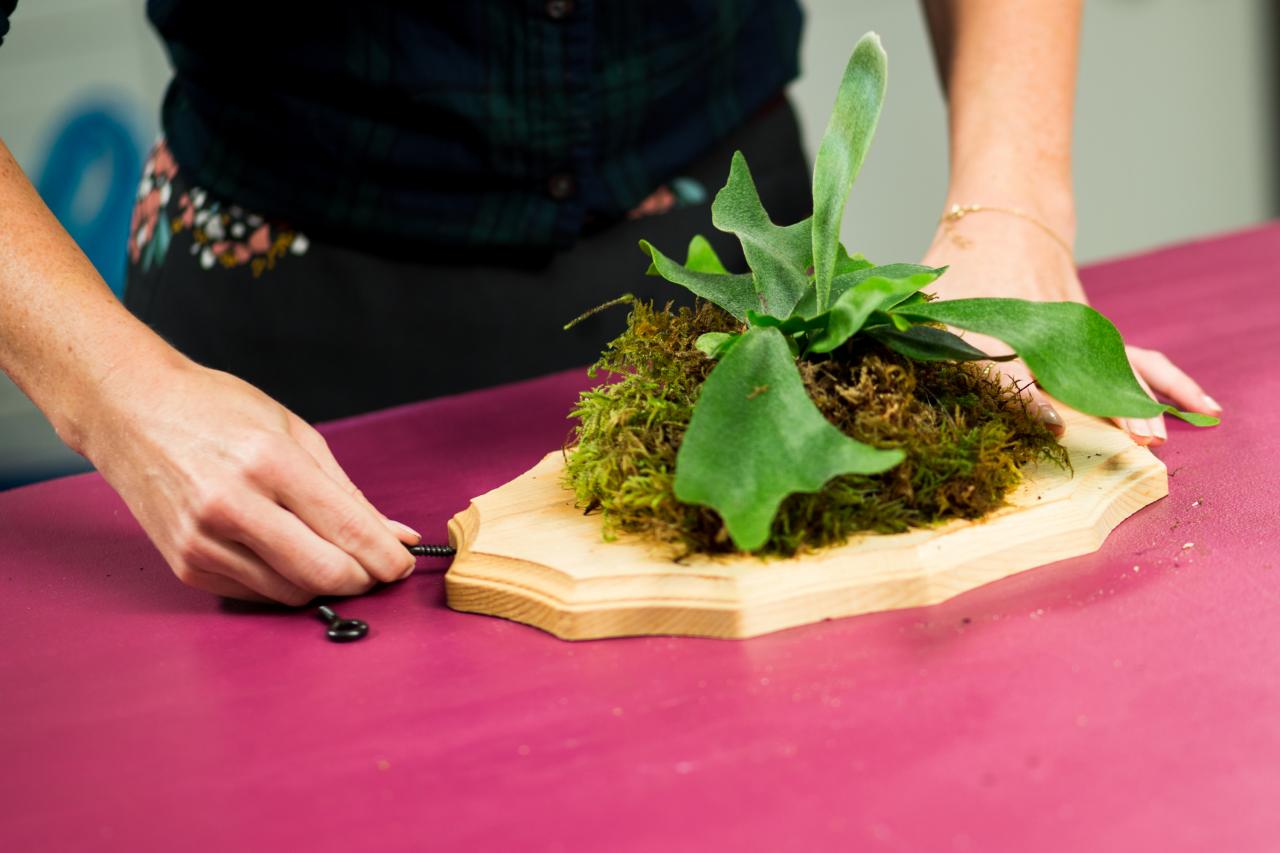
Secure


Wrap the nylon cord around one of the screws and tie it off, then wrap it around the rest of the screws and over the plant to secure the fern. Add more moss to fill in space and cover the screws, wrapping with more nylon cord as you go to secure it. Cut any excess cord.
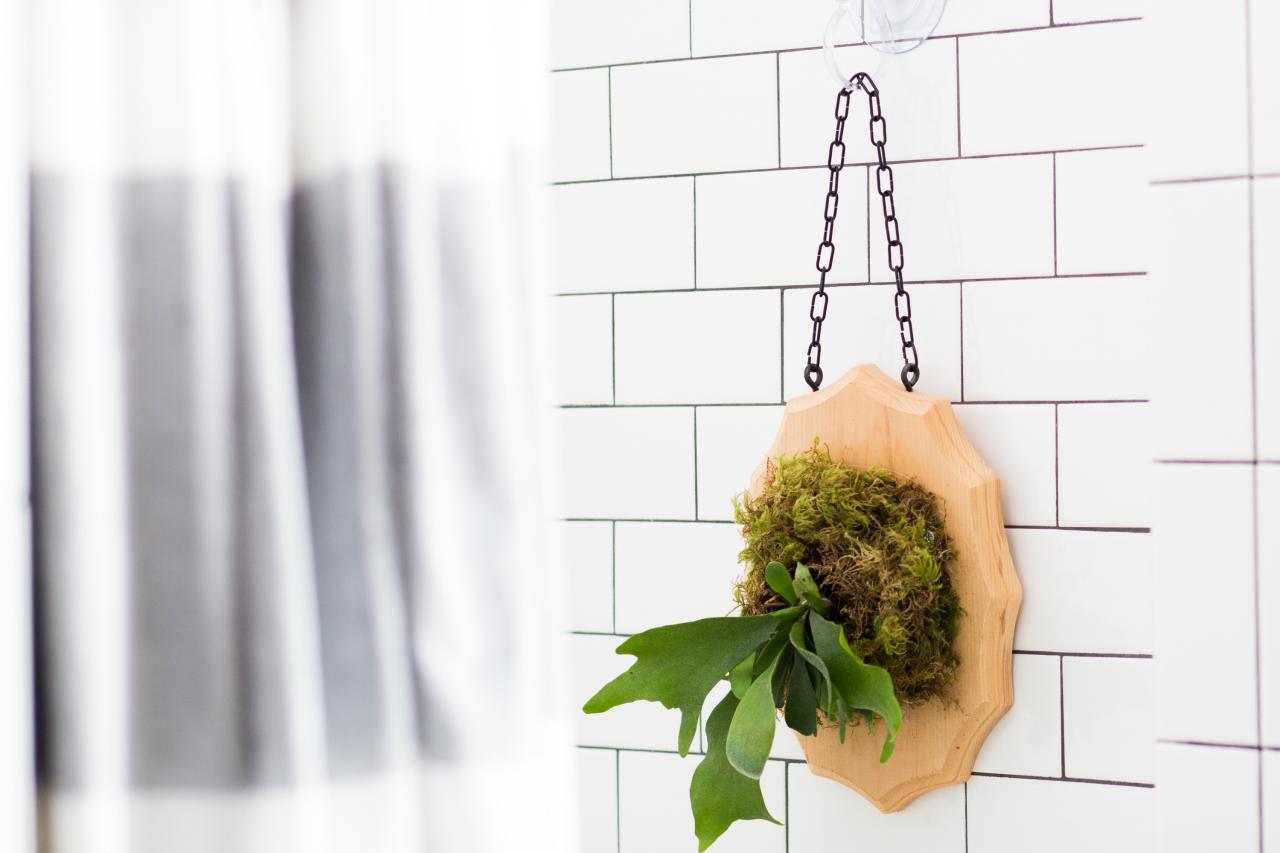
Hang


Screw the rust-proof eyebolts into the top of the plank, attach a rust-proof chain to each of the bolts, and hang!


