


5 DIY Graduation Money Gifts
Gift money to your favorite grad with one of our fun and clever DIYs. Because who doesn't love money, right?

Karen Kavett

GRADUATION CAP CARD

Karen Kavett
Materials + Tools
- black paper
- ruler
- scissors
- hot glue gun + sticks
- metallic marker
- pencil
- button
- washi tape
- embroidery thread
- metallic string
- money

Karen Kavett
Karen Kavett

Karen Kavett

Karen Kavett

Karen Kavett
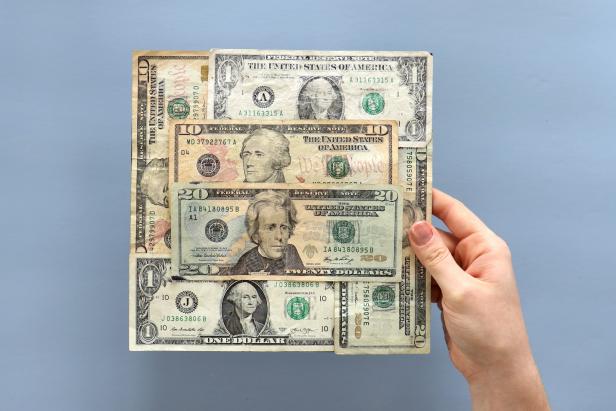
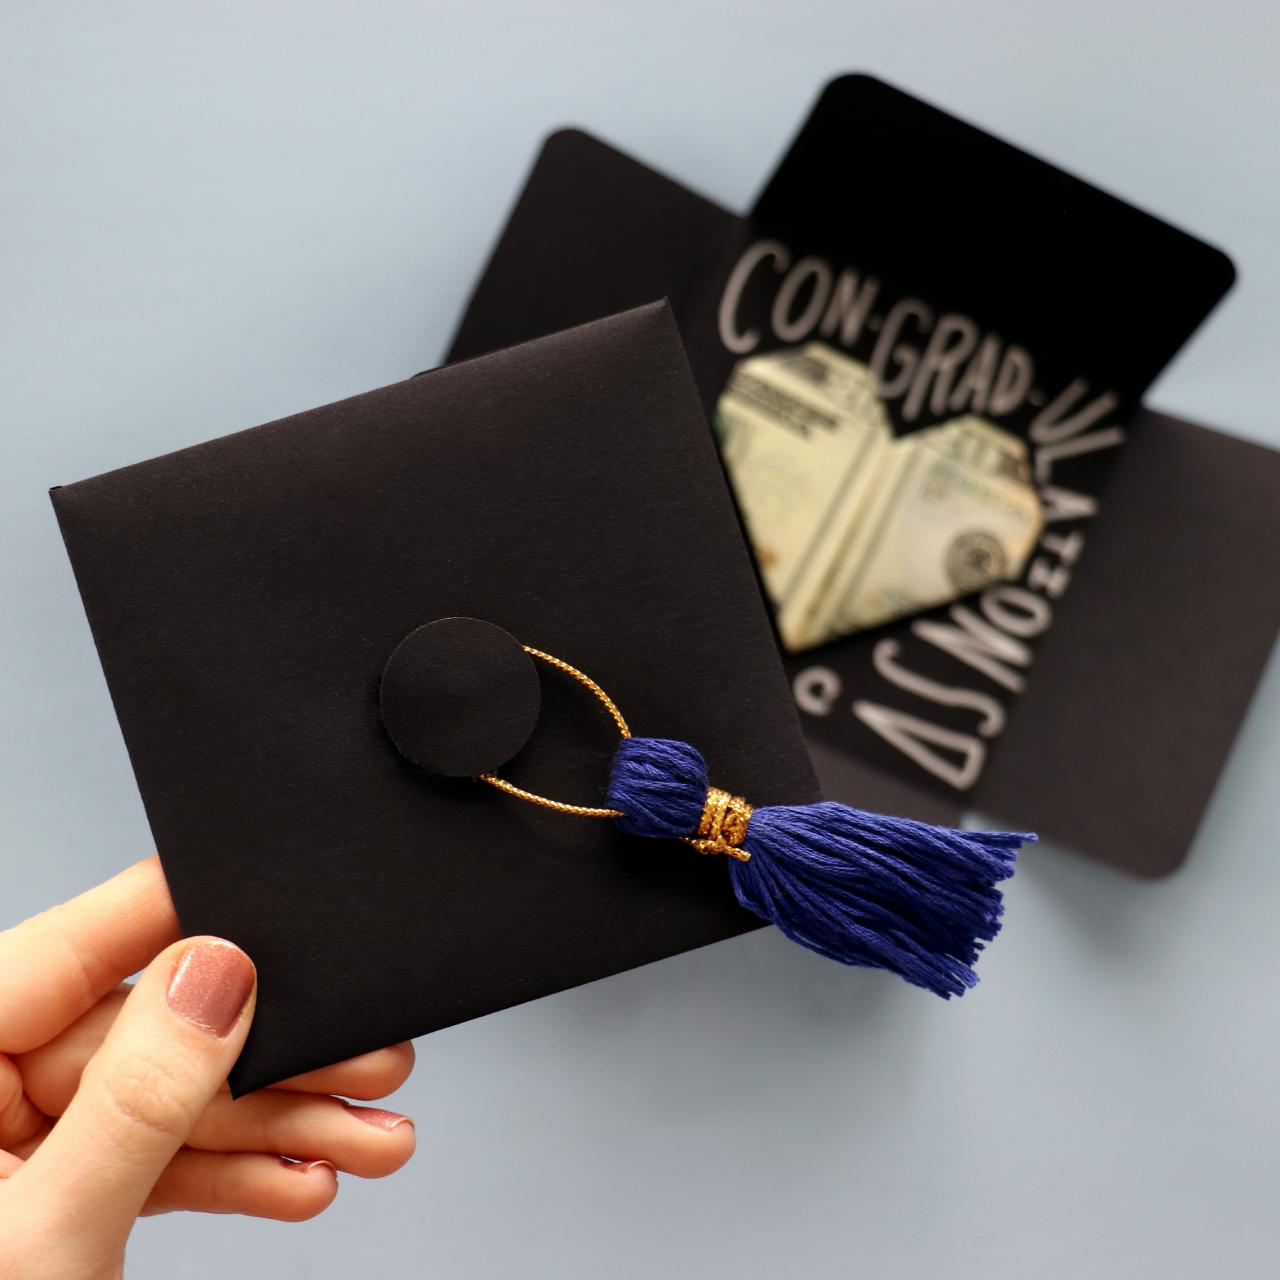
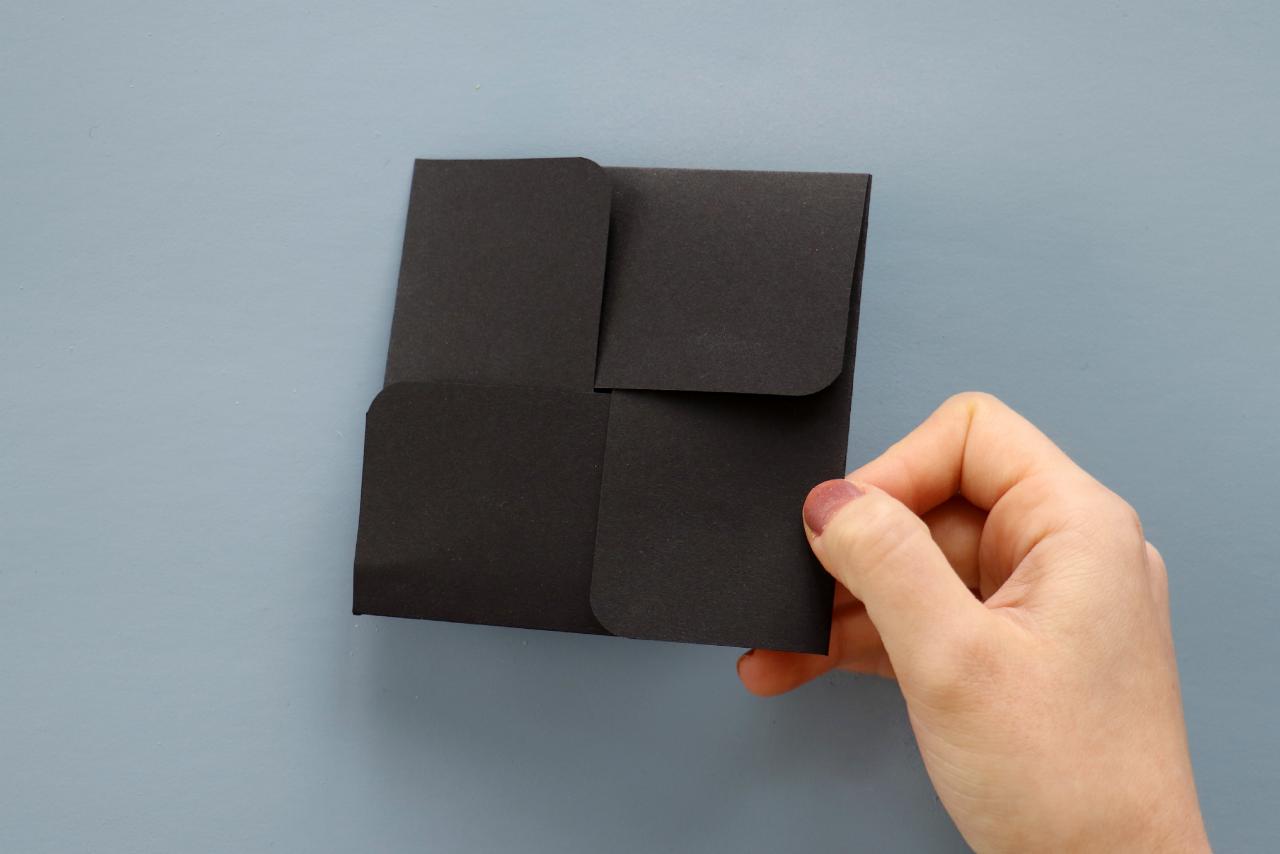
Using a ruler and pencil, draw a grid on black paper with a 4-inch square in the center and 2-inch tabs coming off each side. Cut it out to get a plus sign shape. Optionally, use a corner punch or scissors to round the corners. Fold each tab into the center, overlapping the tabs, to close up the card (Image 1).
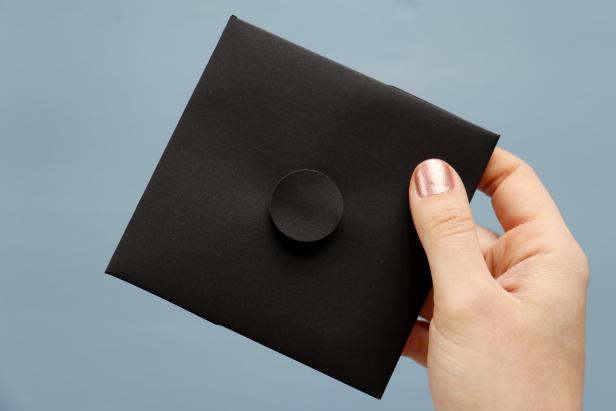
Use a circle punch or scissors to cut out a circle of the black paper. Next, glue the button onto the center of the cap. Then, glue the paper circle on top of the button (Image 2). For the tassel, wrap embroidery thread around your fingers 30 times. Wrap the metallic string around the top then cut through the bottom loop with scissors to create the tassel fringe. Thread more string through the top of the tassel and glue it around the button to get a mini graduation cap design (Image 3).
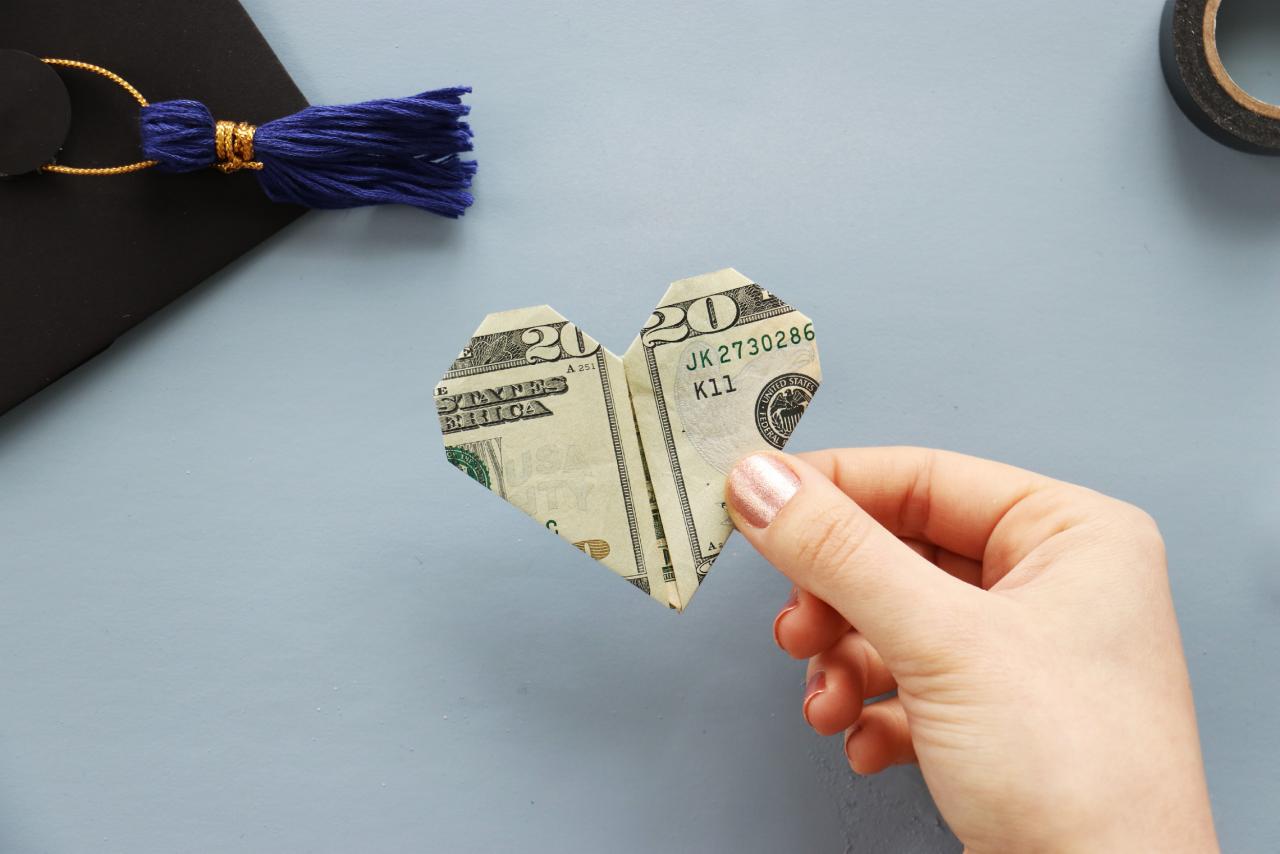
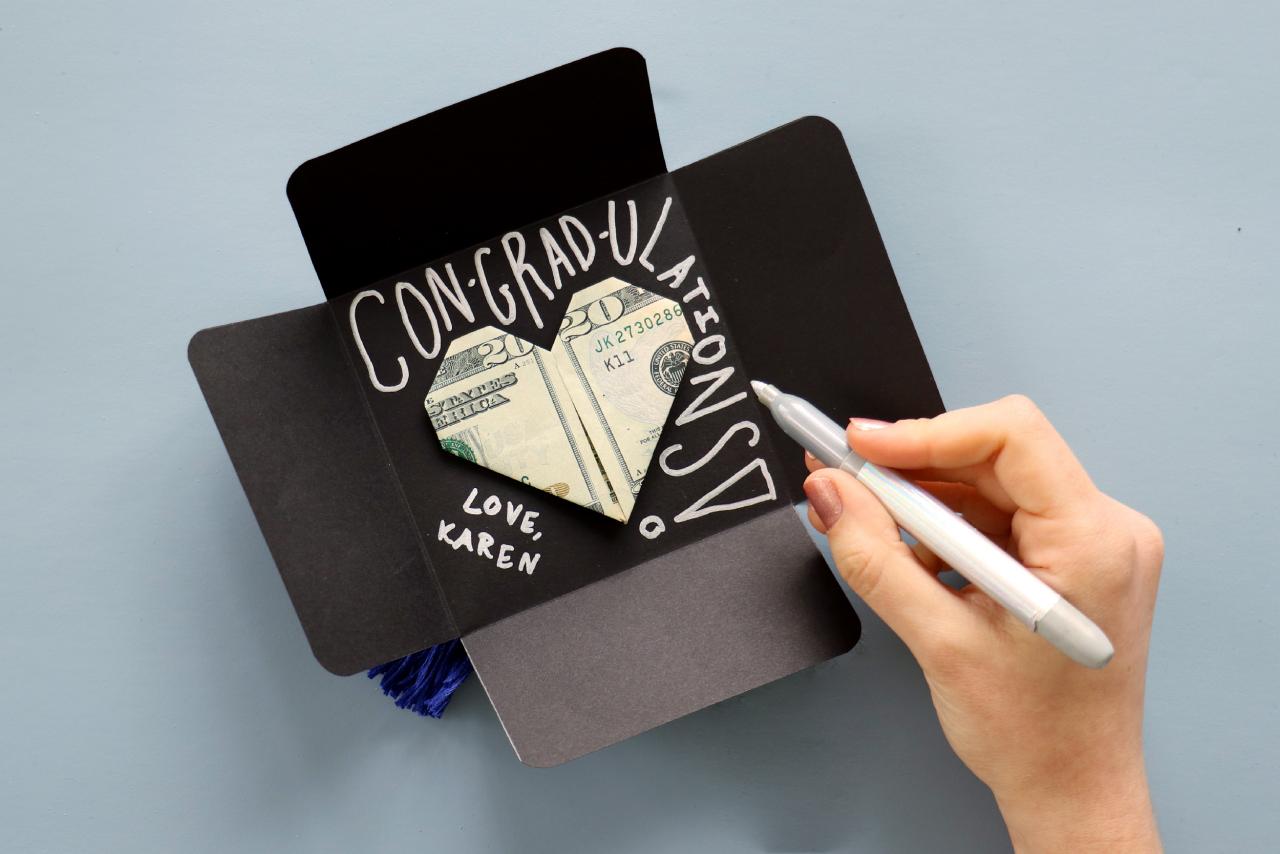
To make a heart out the money, fold the two ends of a bill to the center. Flip the bill over and fold the bottom corners to the center. Pull down the top edge and press down. Fold smaller triangles in the top center to create a heart (Image 4). Use a loop of washi tape to tape the heart to the center of the card. Use a metallic marker to write your message inside (Image 5). Close the card up and secure it with a small piece of washi tape.
MINI DIPLOMA
.jpg.rend.hgtvcom.616.616.suffix/1569848941101.jpeg "DIY Graduation Money Gift: Money Diploma")
Karen Kavett
Materials + Tools
- cardstock
- clear tape
- red ribbon
- roll of quarters
- scissors
- pencil

Karen Kavett

Karen Kavett
.jpg.rend.hgtvcom.616.616.suffix/1569848940898.jpeg)
Karen Kavett
For all those laundry mat visits, turn a roll of quarters into a mini diploma. Start by cutting a strip of paper slightly wider than the roll of quarters (Image 1). Add a little message to the grad on the inside of the paper then tape one side of the paper to the roll of quarters. Roll it up and tape down the other end (Image 2). Tie on a piece of red ribbon and trim the excess (Image 3).
CASH GRADUATION CAP
Karen Kavett
Materials + Tools
- cutting mat
- black cardboard
- black cardstock
- black washi tape
- tassel
- button
- clear tape
- metallic string
- hot glue gun + sticks
- craft knife
- pencil
- 10 bills (any denomination)
Karen Kavett
Karen Kavett

Karen Kavett
Karen Kavett

Karen Kavett
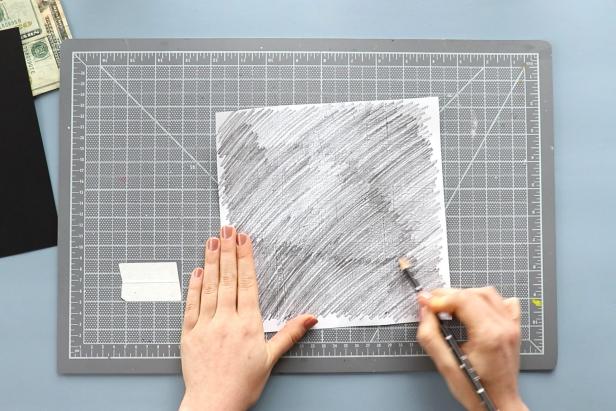
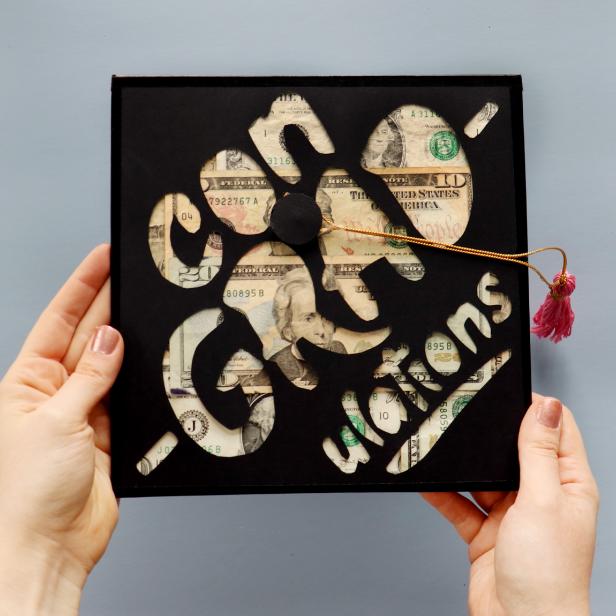
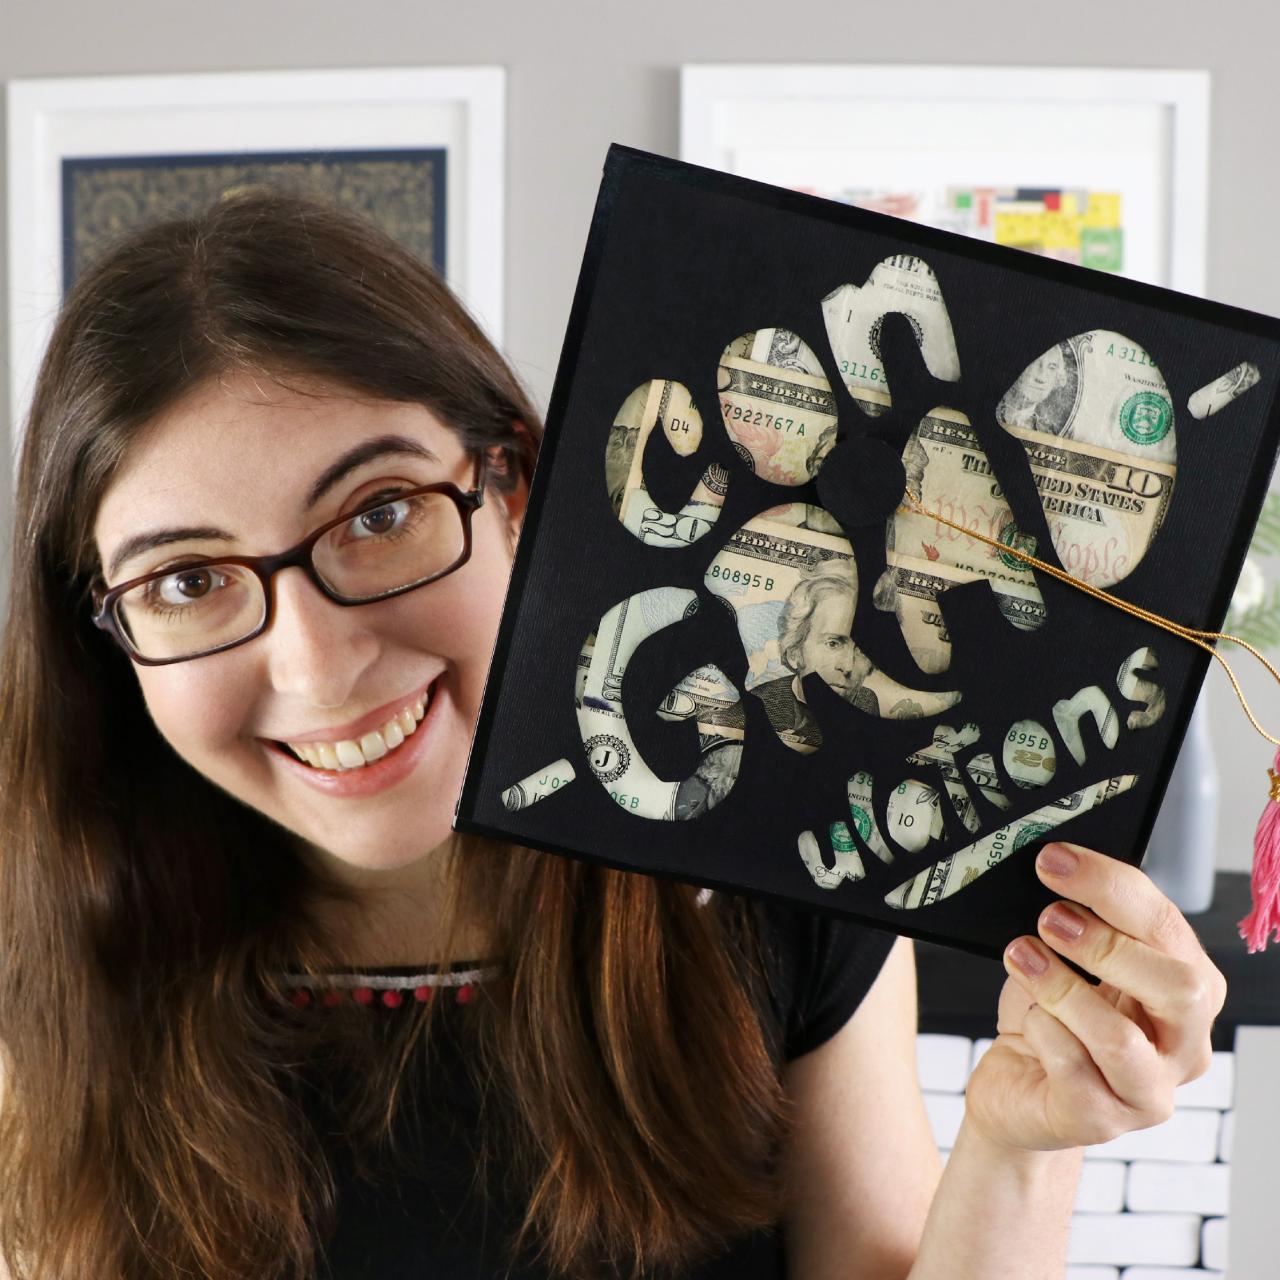
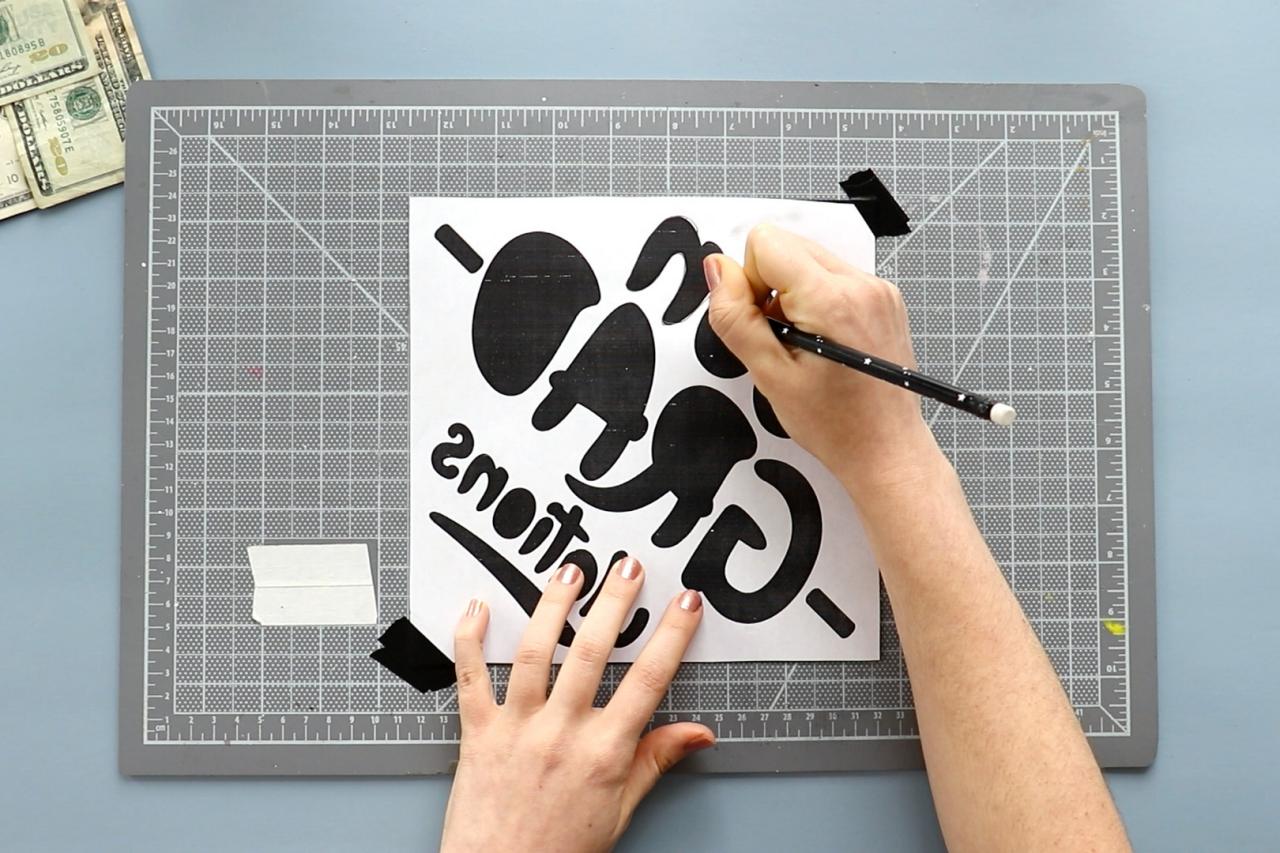
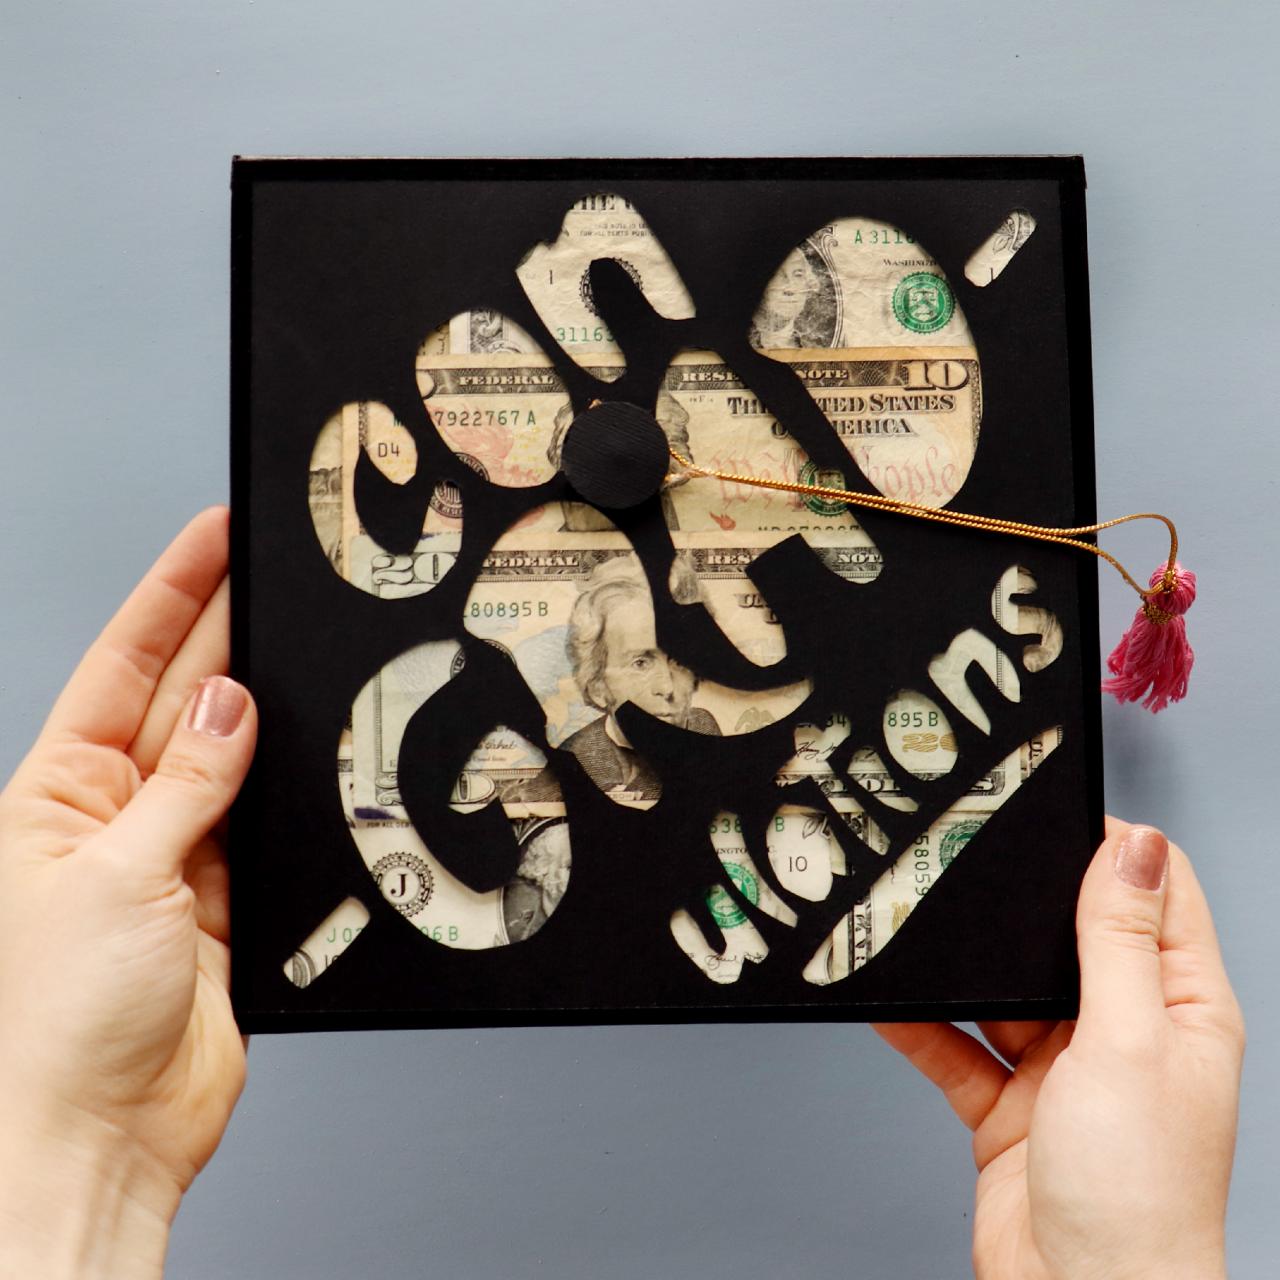
Begin by cutting an 8” x 8” piece of black cardboard. Use loops of tape to cover it with six bills of money (Image 1). Print out our pattern or draw your own on a piece of paper. Shade the back of the printed paper with a pencil (Image 2). Tape it on top of an 8” x 8” piece of black cardstock and trace over the outlines of the lettering (Image 3). This will transfer the design onto the cardstock. Then, cut out the letters with a craft knife. Place the cut-out cardstock on top of the cash. Attach all sides together with black washi tape.
Just like the first project, hot glue a button and black paper circle to the center. Loop string through the top of a tassel and glue around the button so it resembles a graduation cap (Image 4). To finish it off, fold four bills in half lengthwise. Tape them together into a circle and use washi tape to tape the circle to the bottom of your cap (Image 5).
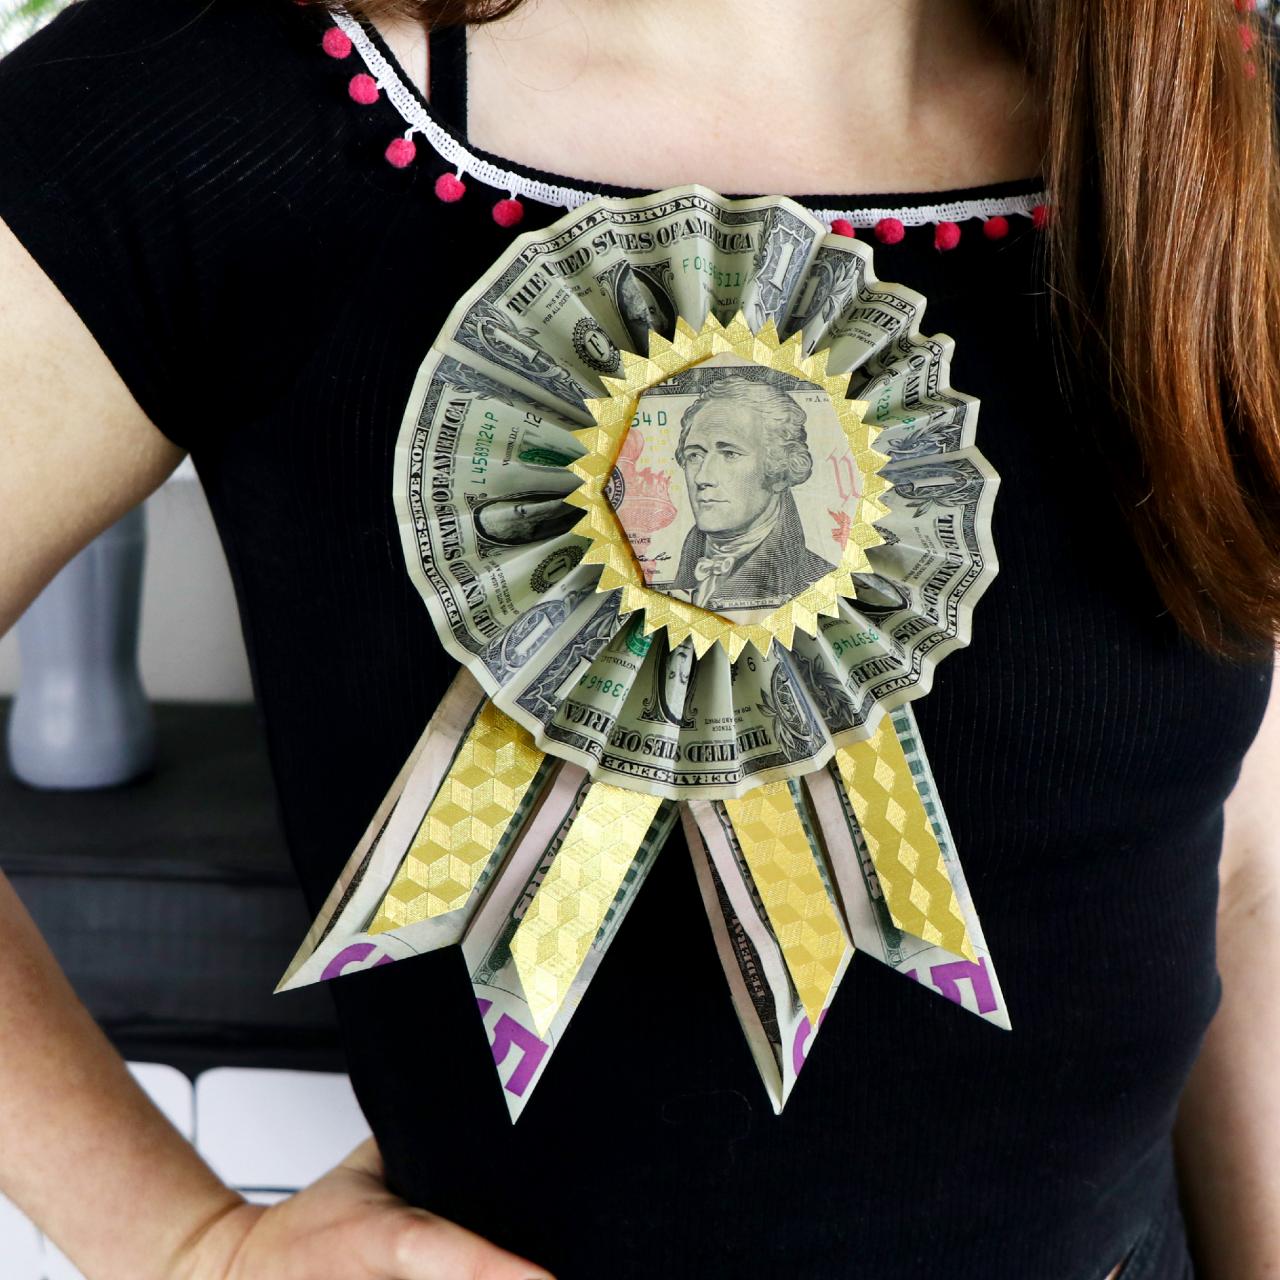
MONEY MEDALLION

Karen Kavett
Materials + Tools
- gold paper
- duct tape
- clear tape
- flat-backed pin
- scissors
- pencil
- 10 bills (any denomination)

Karen Kavett

Karen Kavett

Karen Kavett

Karen Kavett

Karen Kavett
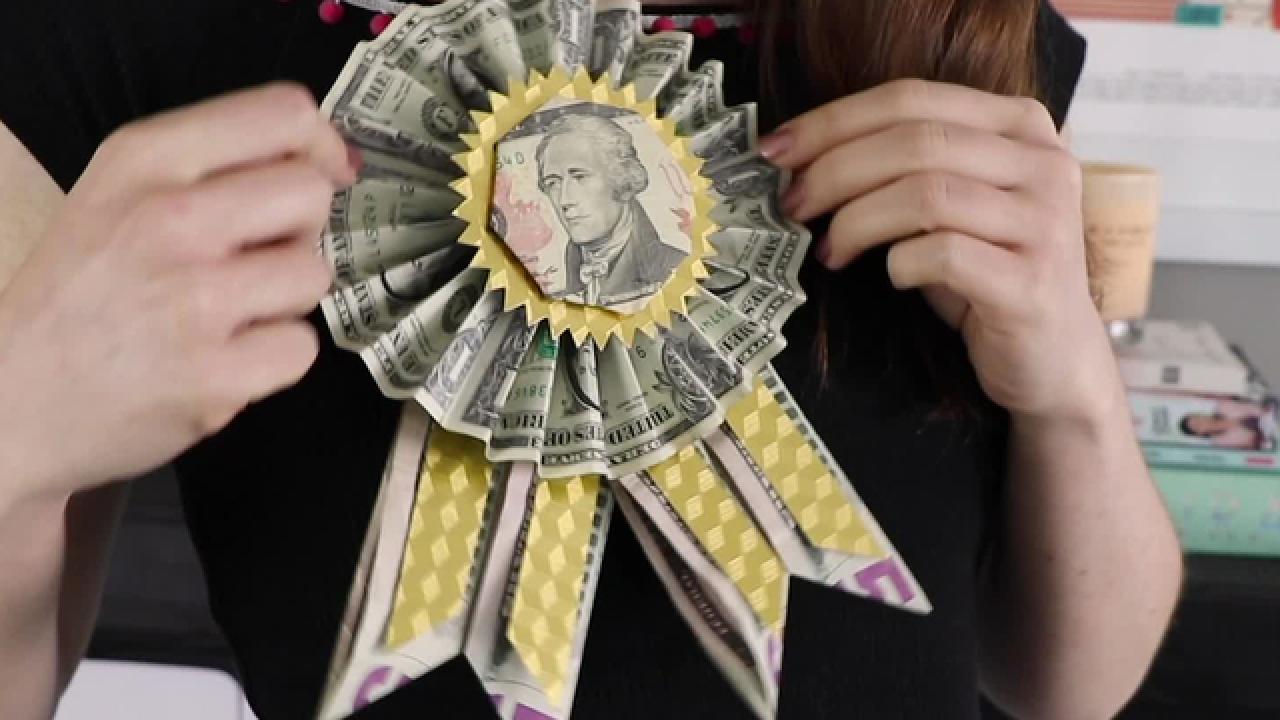
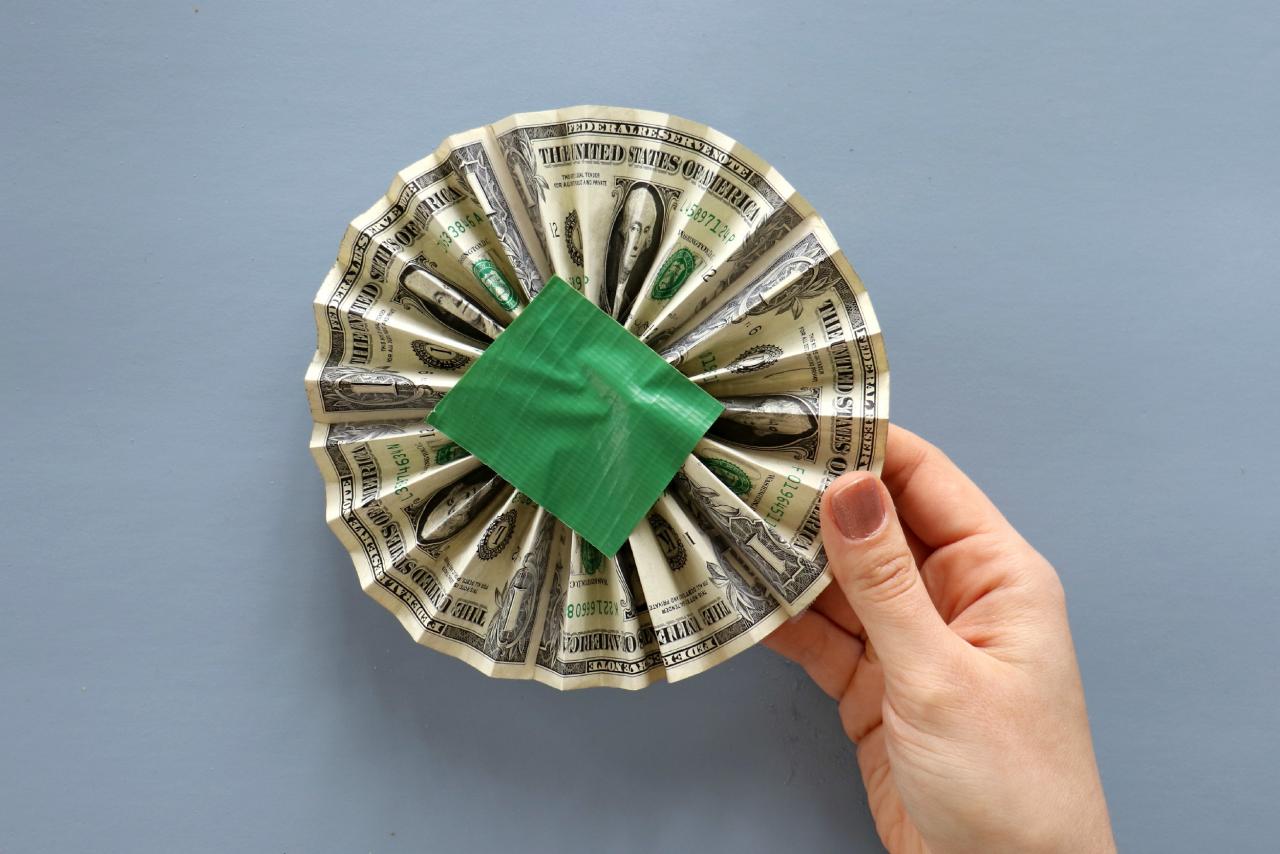
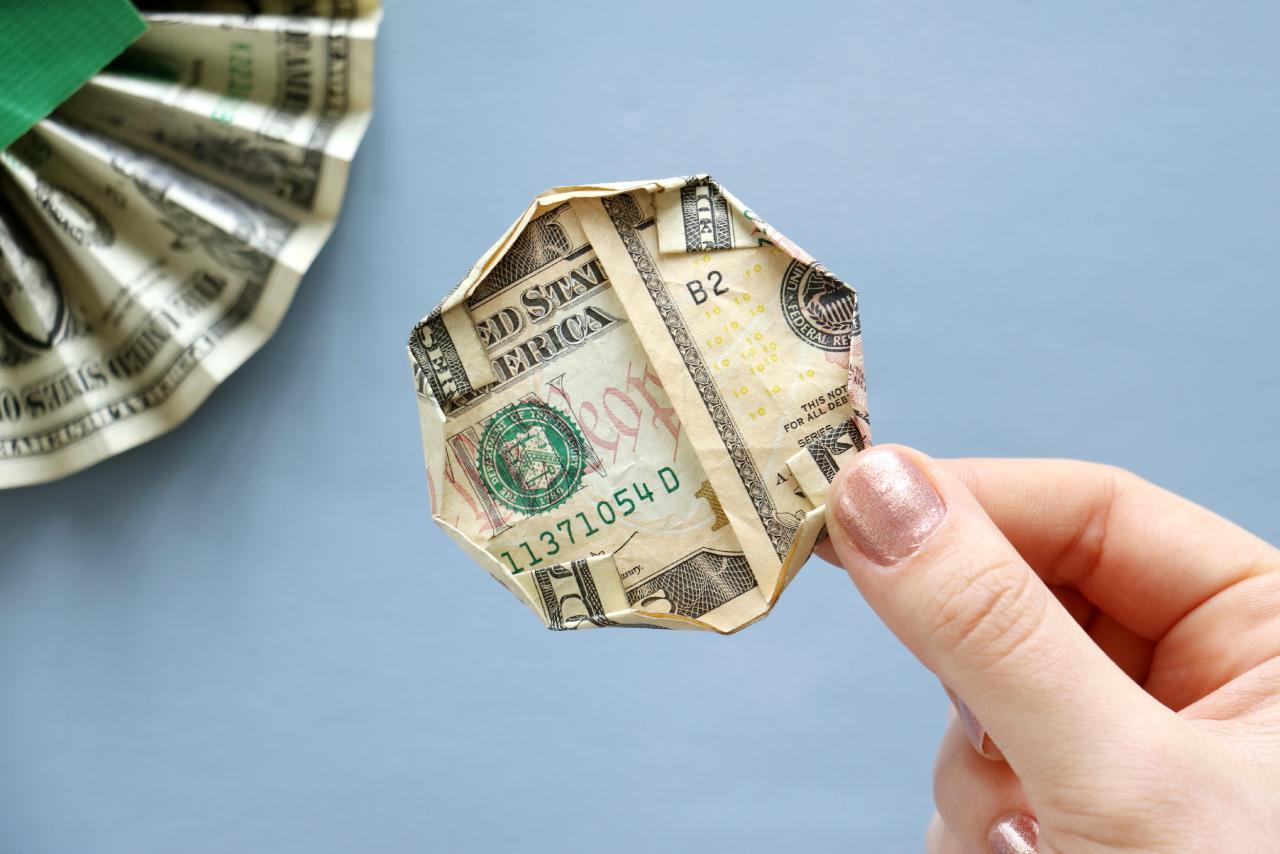
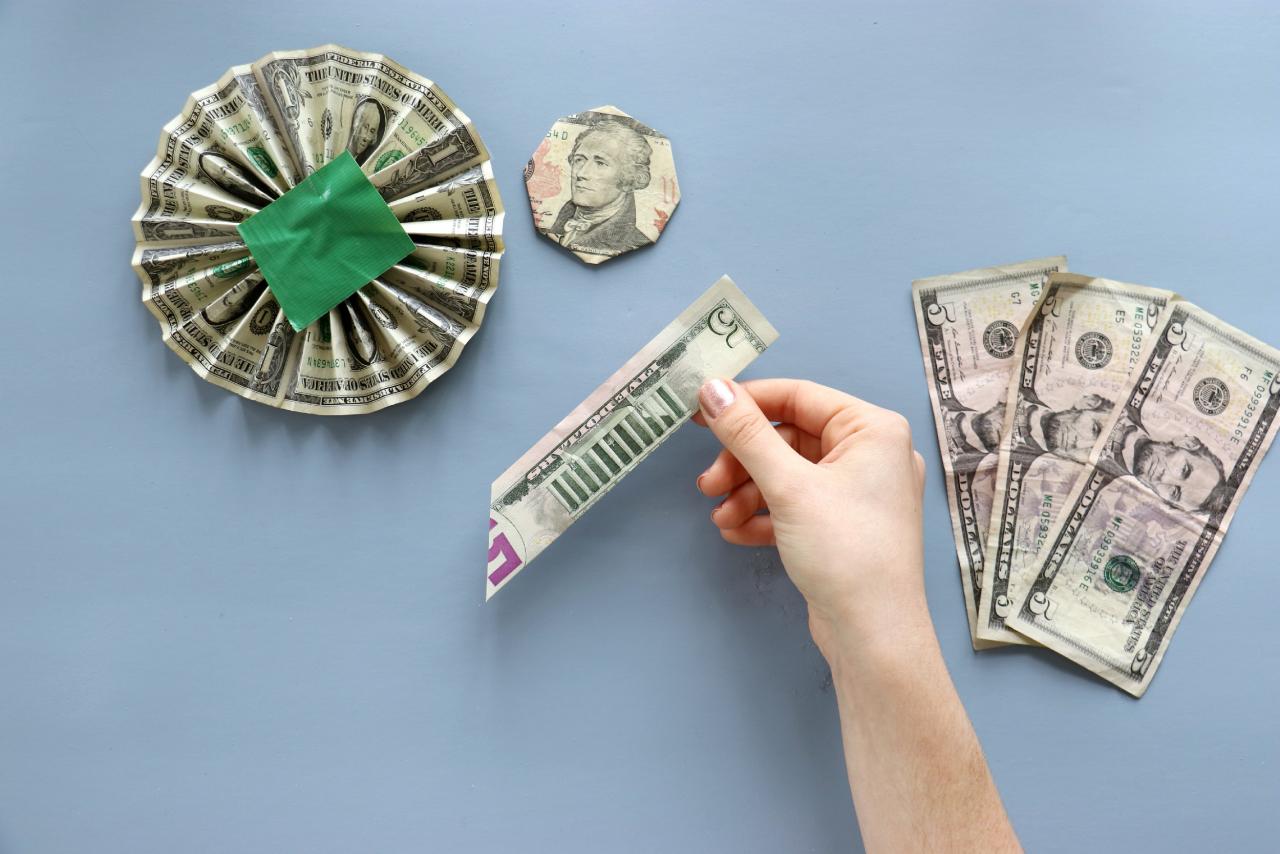
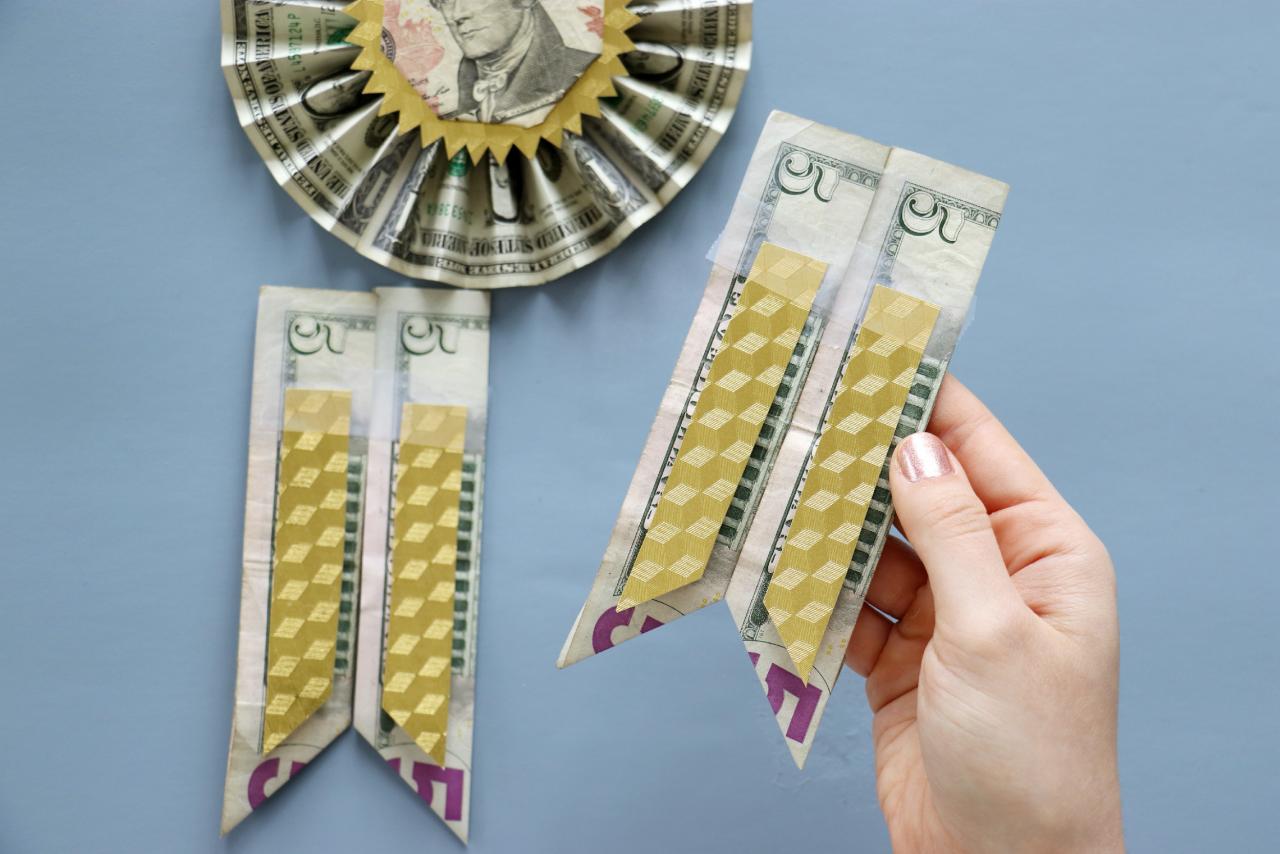
Accordion fold five bills. This step works best with newer, crip bills instead of worn bills. Tape the ends together to get a large loop and carefully press it together into a medallion shape. Use small pieces of duct tape on both sides to lightly hold it together (Image 1). For the center of the medallion, fold a bill into a square. Next, fold in the corners to get an octagon then fold in the corners again to get a circular shape. Use clear tape to hold down the folds on the back (Image 2). For the last four bills, fold them in half lengthwise, folding the bottom into a triangle to get a ribbon shape (Image 3). Repeat to make four in total.
Next, cut a circle from gold cardstock then cut small triangles all the way around to get a starburst shape. With the same cardstock, trace and cut out four ribbon shapes that are smaller than the bills.
To assemble the medallion, use loops of tape to attach the gold starburst and circular bill to the center of the medallion (Image 4). Use more tape to secure the ribbons together, adding the gold pieces on top of them (Image 5). Line everything up, carefully flip the medallion over and tape it all in place. Optionally, tape a flat-backed pin to the back of the medallion to make it wearable.
CASH CARD

Karen Kavett
Materials + Tools
- blank card
- 2 bills (any denomination)
- clear tape
- black paper
- markers
- pencil
- scissors
Karen Kavett
Karen Kavett
Karen Kavett
Karen Kavett
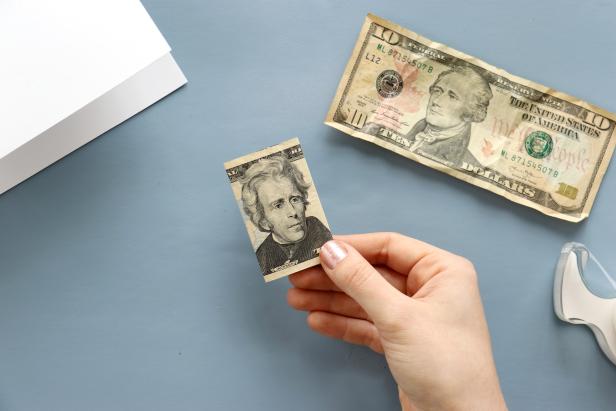
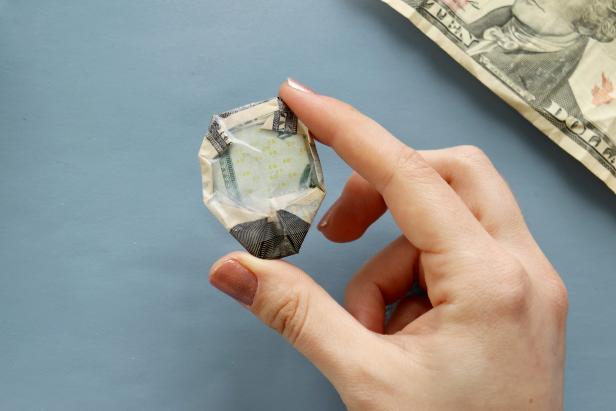
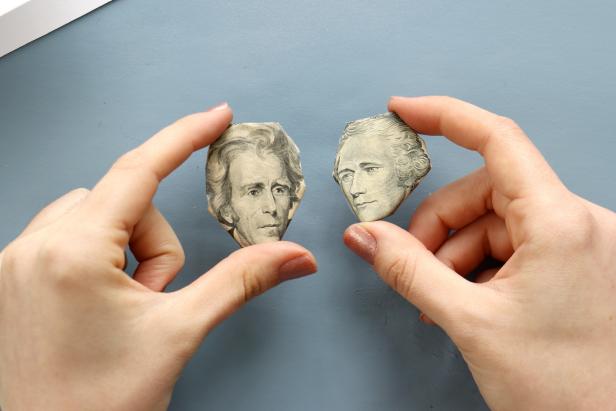
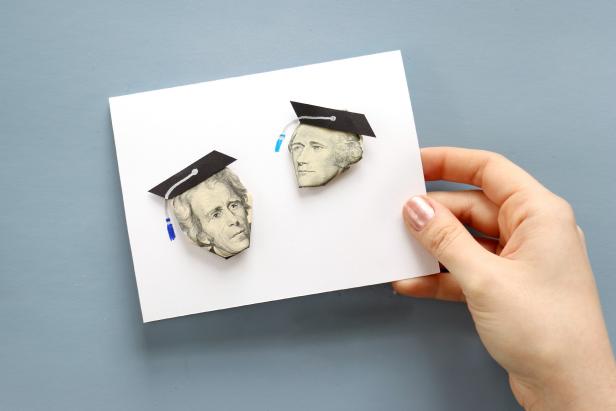
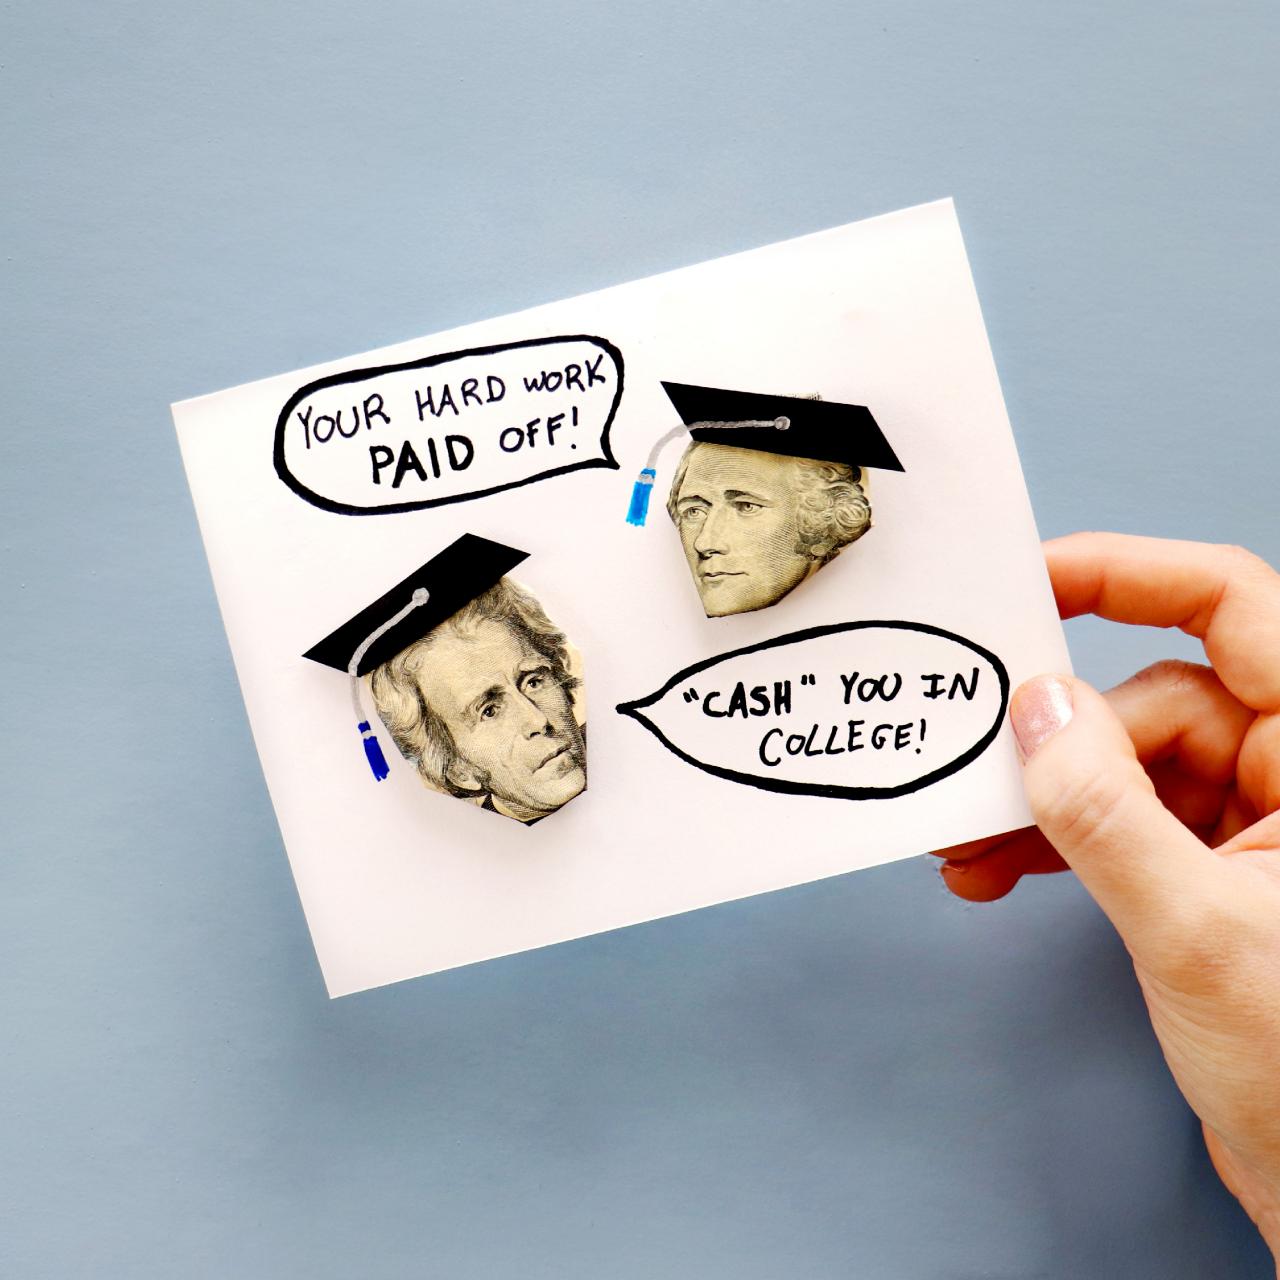
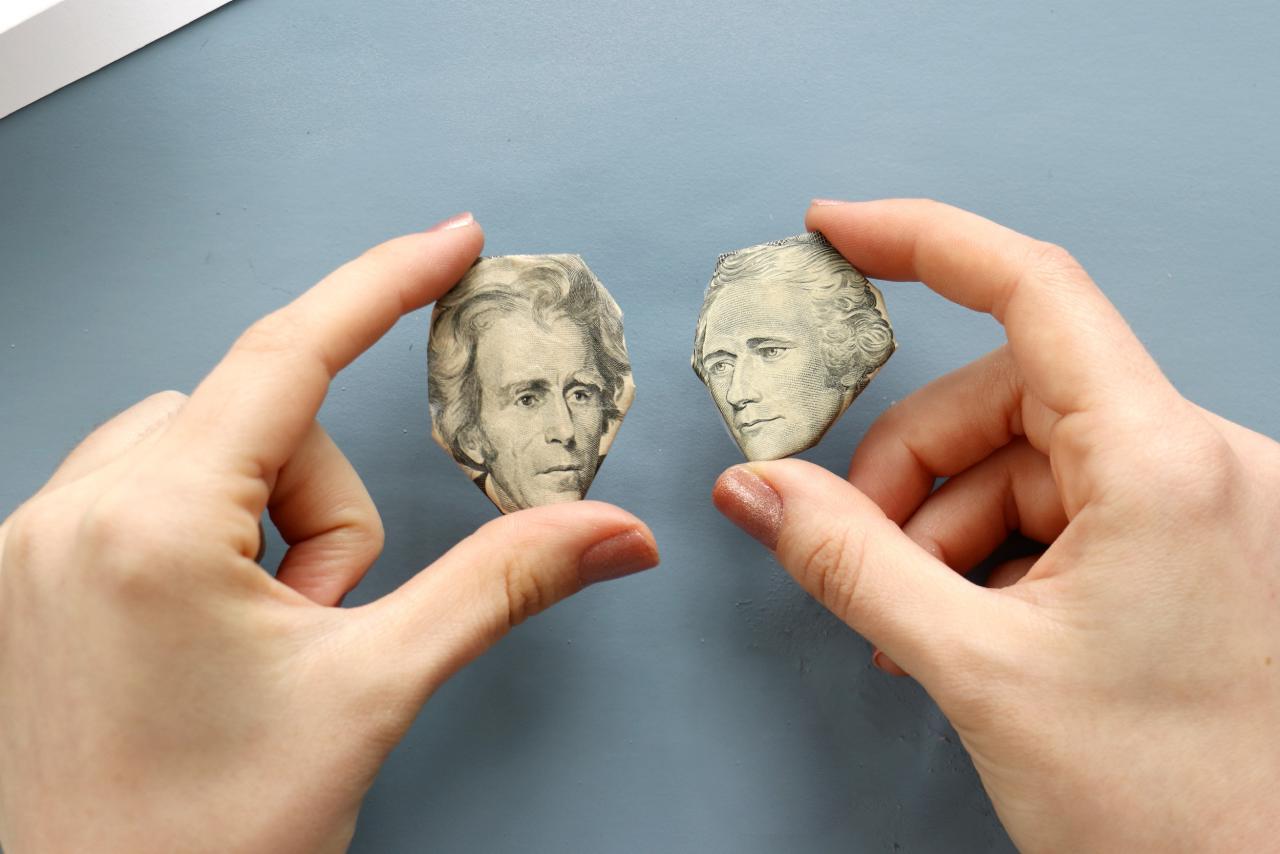
Fold back the sides of a bill to get a small rectangle (Image 1). Continue folding back the edges to get just the president’s face. Use tape to hold down the folds so it lays flat (Image 2). Repeat with a second bill (Image 3). Add a loop of tape to the back and secure to the card. Next, cut graduation caps out of black paper and use small rolls of tape to attach them to the card on top of the money. Draw on tassels with metallic and colorful markers (Image 4). Add speech bubbles with punny phrases to finish it off.


.jpg.rend.hgtvcom.1280.1280.suffix/1569848941101.jpeg)
.jpg.rend.hgtvcom.1280.1280.suffix/1569848940898.jpeg)