


How to Dry Your Wedding Bouquet With Silica
Weddings cost enough. With this incredible DIY, you're about to save big on flower preservation.


Jalynn Baker
It may take a few more steps than simply flipping your bouquet upside down for a few weeks, but this pro-approved drying method yields some seriously impressive results. Get ready to hear, "Shouldn't you put these flowers in some water?"
Materials Needed
- bouquet
- garden shears
- air-tight box with lid
- silica crystals
- floral wire
- floral stakes
- floral tape
- ribbon
- pins
Cut Stems + Assemble
Jalynn Baker
Start by deconstructing your bouquet. This part may seem scary, but we promise it’s going to be okay. Be sure to take a picture of the arrangement, because we’ll be putting it back together later. Fill the bottom of an airtight plastic container with silica crystals. Cut the stems off each bloom, leaving only an inch or two.
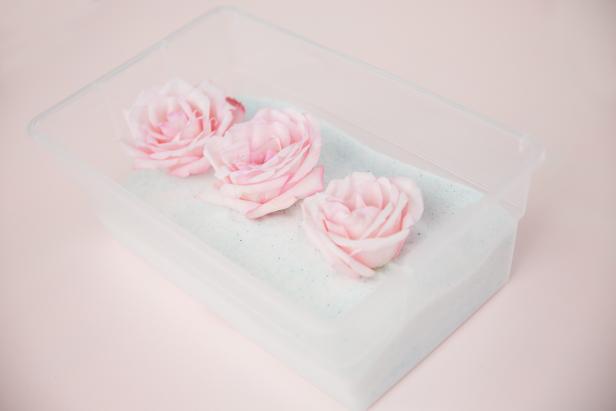
Fill Petals

Jalynn Baker
To dry out your petals perfectly, the flowers have to be inserted into the crystals vertically with the blooms pointing upward. Leave a little room between the flowers so they do not overlap. Next, slowly pour more crystals to fully cover the petals, making sure to also fill the area between each petal while retaining the flower's shape. Cover the box, and let the flowers dry for three to five days.
Note: While silica beads will also work, we found that crystals are easier to fit between petals and do not leave the undesirable dimples that beads often do.
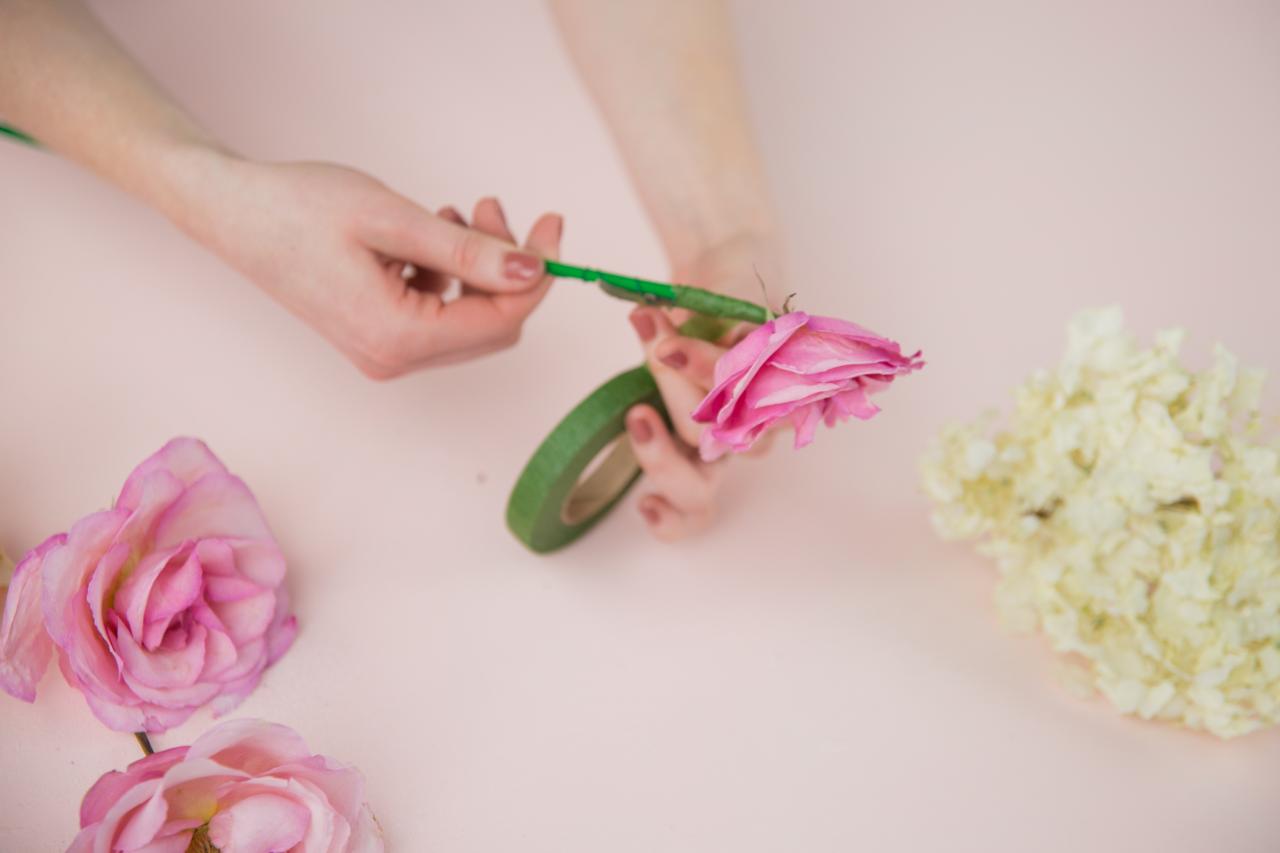
Create New Stems

Jalynn Baker

Jalynn Baker

Jalynn Baker

Jalynn Baker
Once your flowers have had time to dry, carefully pull them out of the box, gently shaking out any excess silica. Puncture the stem with floral wire, and begin wrapping down the stem and onto a green floral stake. Next, cover the stem and stake with green floral tape. Repeat these steps with each flower.
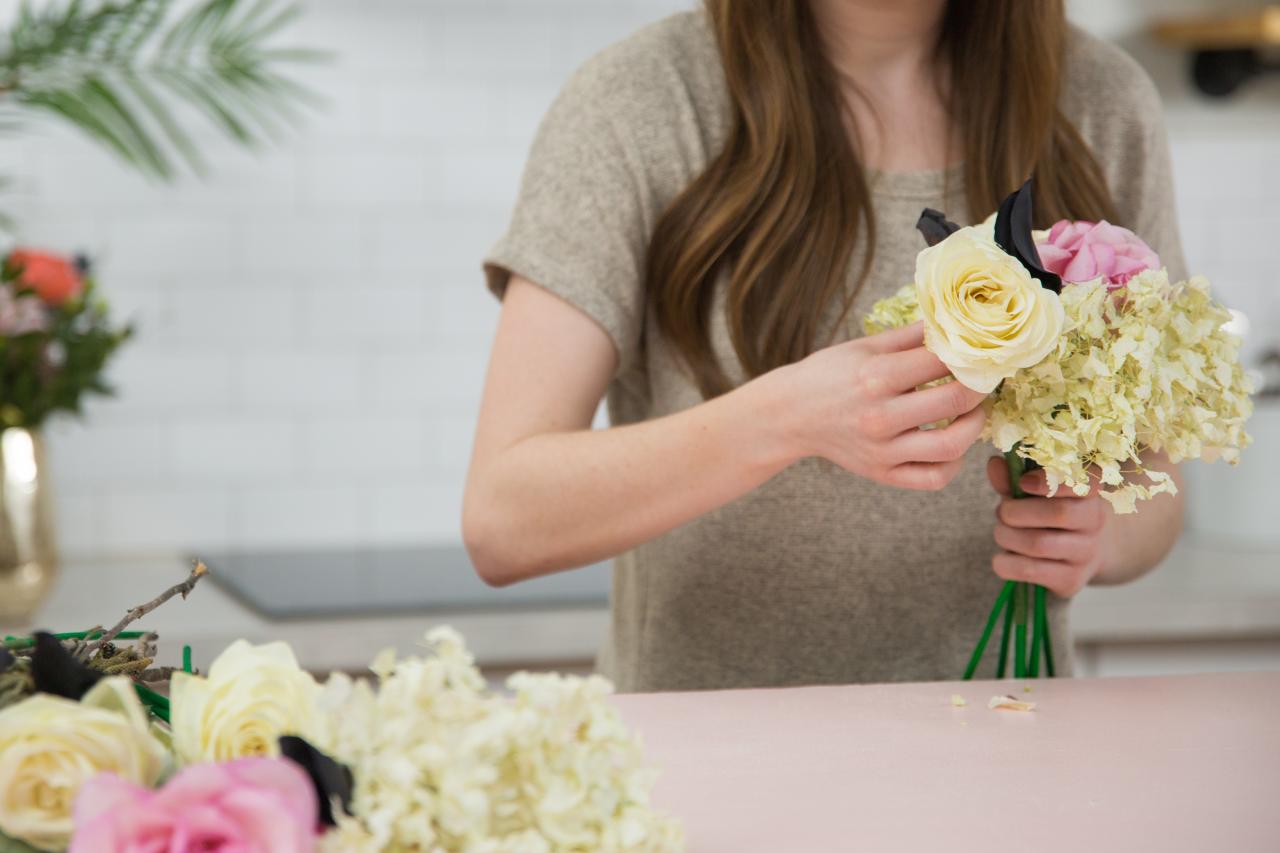
Reassemble Bouquet

Jalynn Baker

Jalynn Baker

Jalynn Baker
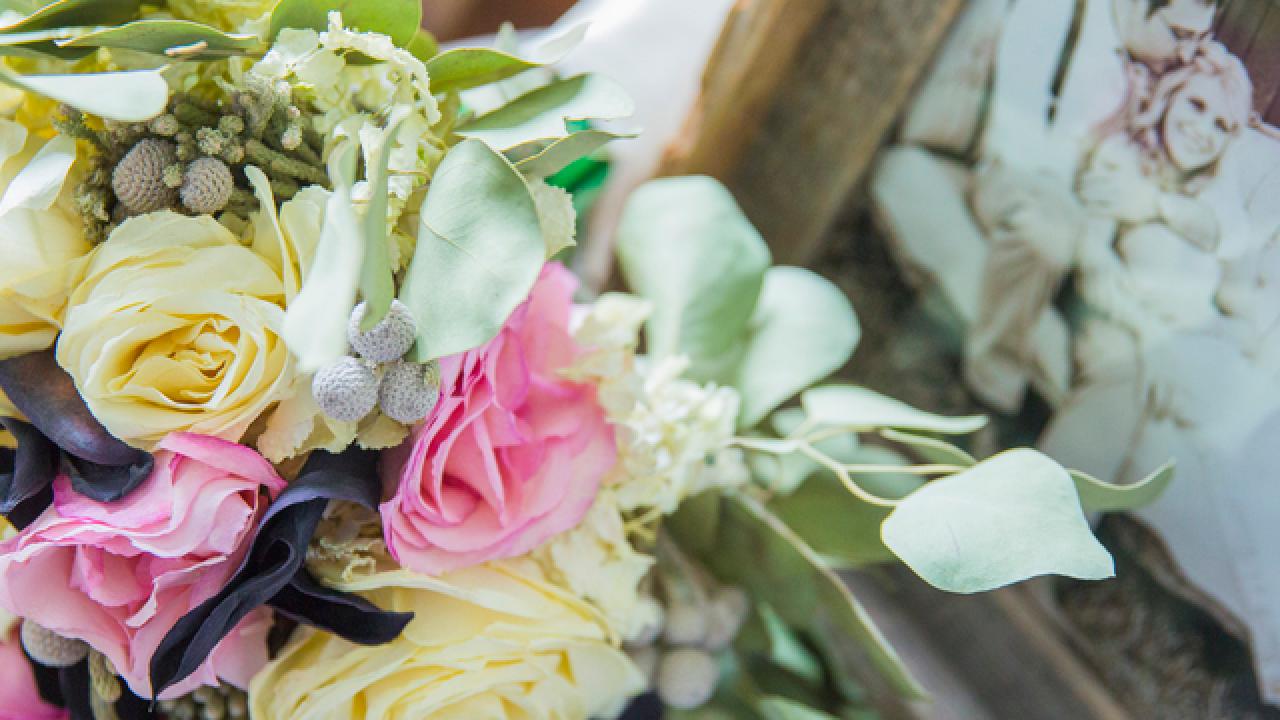
Now we reach the moment you’ll be glad you took those pictures. Carefully recreate the look of your pre-dried wedding bouquet. When you're happy with your new bouquet, use floral tape to hold the stems together. Even out the ends of the floral sticks with garden shears.
Wrap + Display

Jalynn Baker

Jalynn Baker
Starting as close to the bottom of the flowers as possible, begin wrapping the stems with ribbon. Once you’ve reached the end of the stems, use pins to secure the ribbon. Now all that's left to do is sit back and admire your handy work.
Pro Tip: Display your bouquet in a glass cloche or box to avoid dust and protect it for years to come.


