


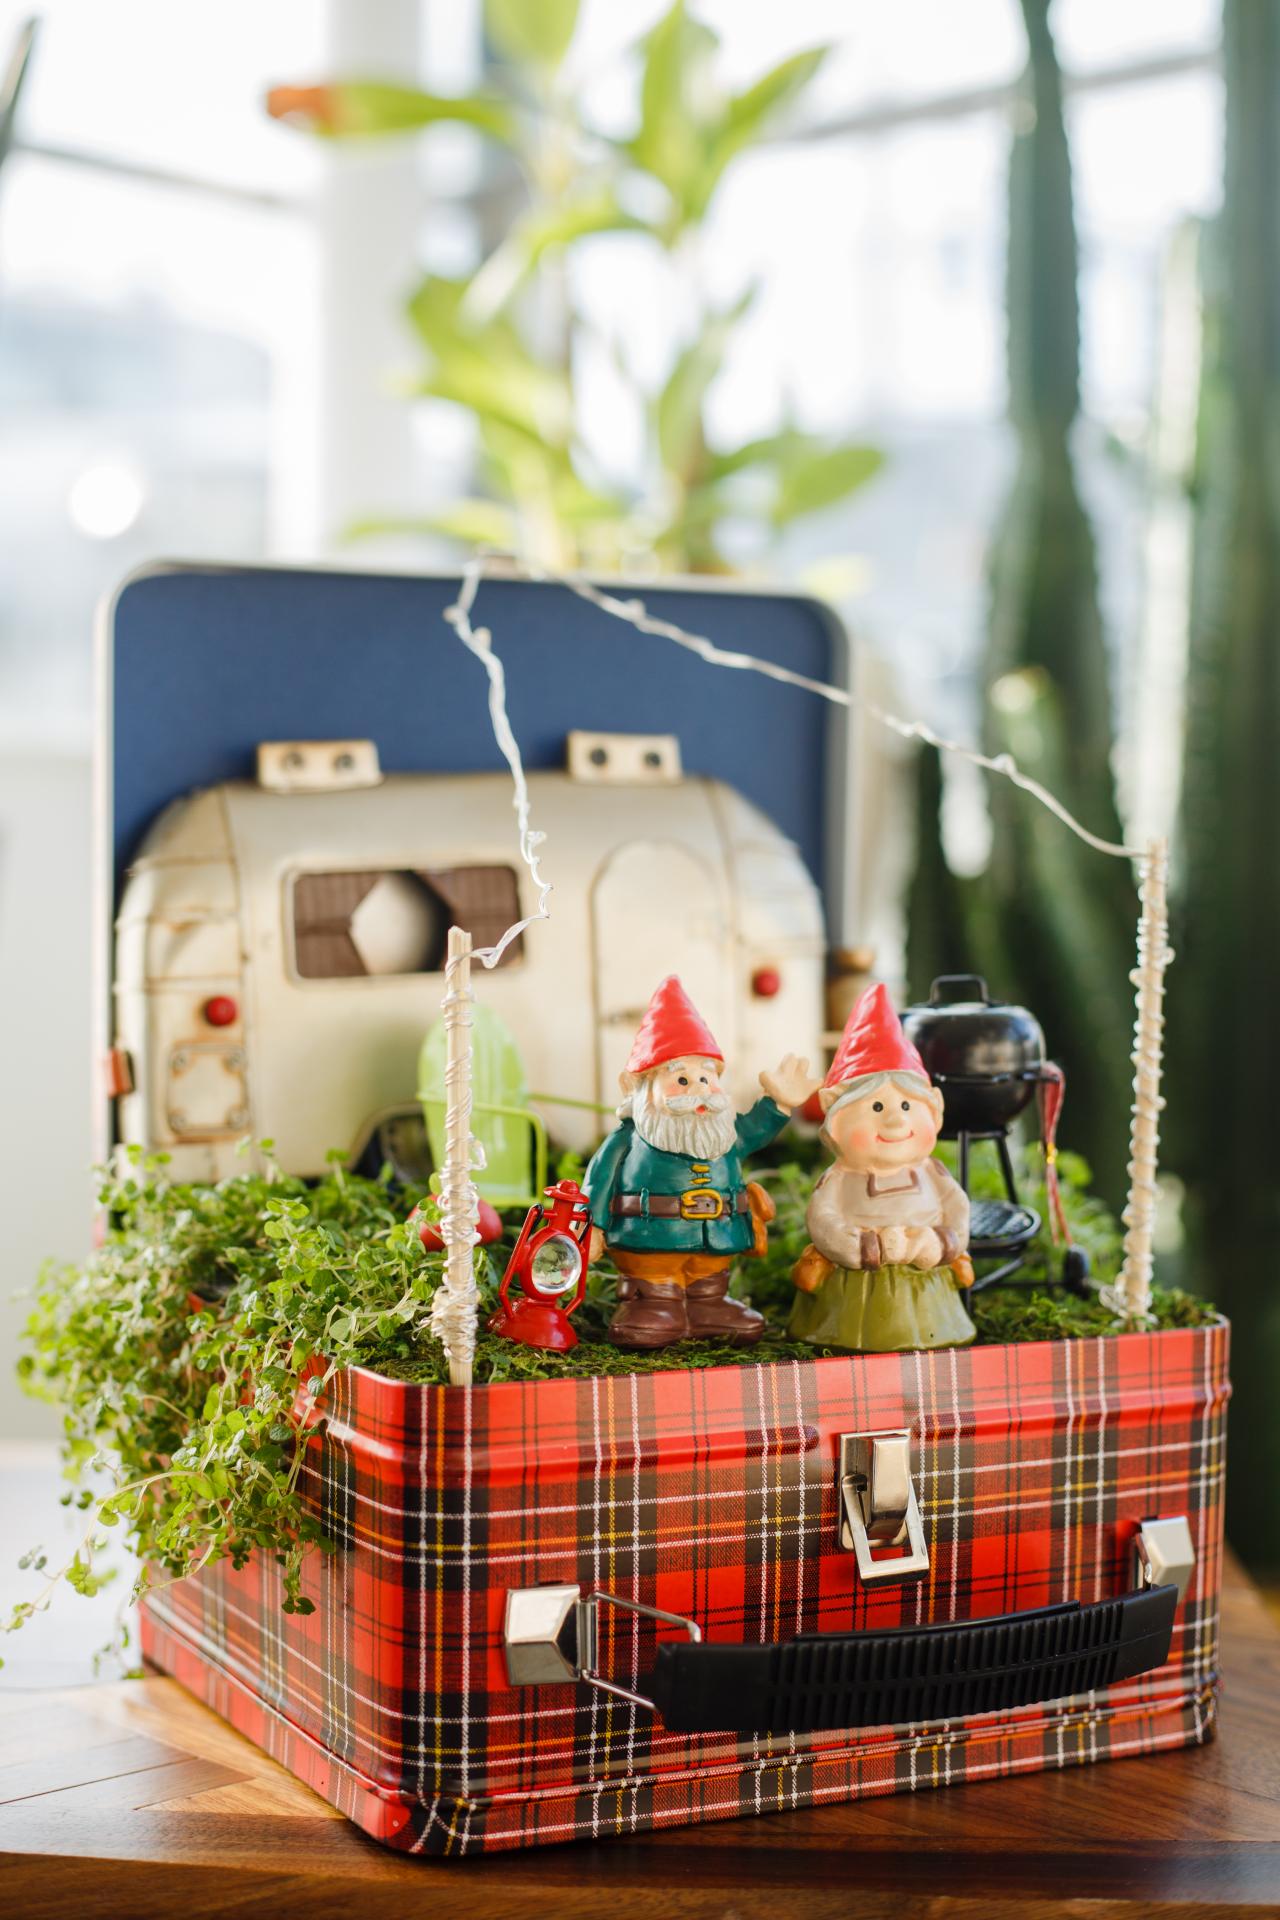
DIY Gnome Garden Getaway
Gnomes and fairies need weekend getaways too! Create this camping-inspired garden in your favorite vintage lunchbox in just a few simple steps.

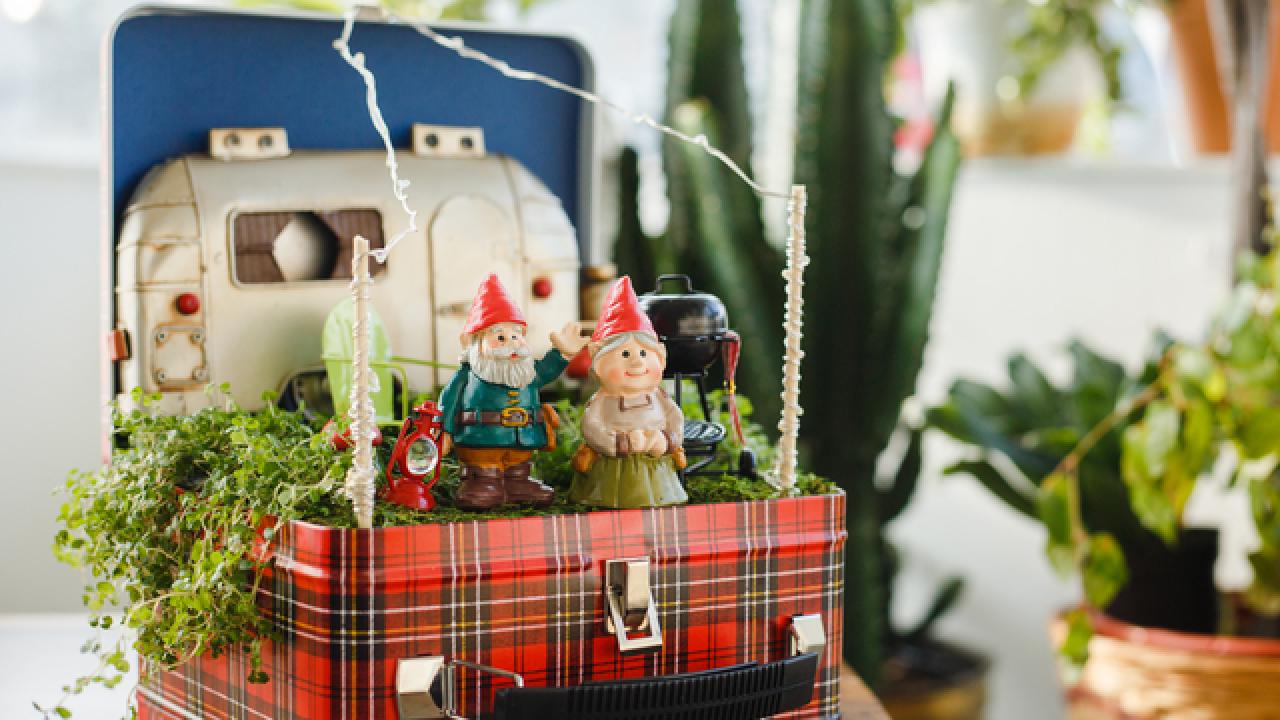
Fairy gardens may be a distant childhood memory, but it doesn't have to stay that way. Create a tiny, camping-inspired garden that's like an adorable tabletop getaway. This mini scene will have lovers of bitty things and greenery addicts alike drooling.

Jalynn Baker
Materials Needed
- metal lunch box
- construction paper
- double-sided tape
- scissors
- floral foam block
- peel-and-stick moss
- moss-like plants
- dollhouse pieces
- battery-operated twinkle lights
- kabob sticks
- gnome or fairy figurines
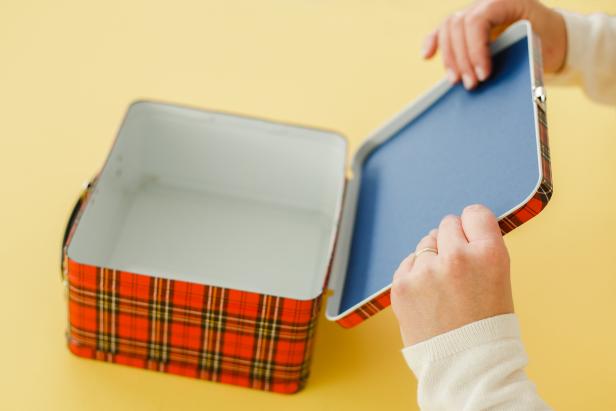
Create Clear Sky
Jalynn Baker
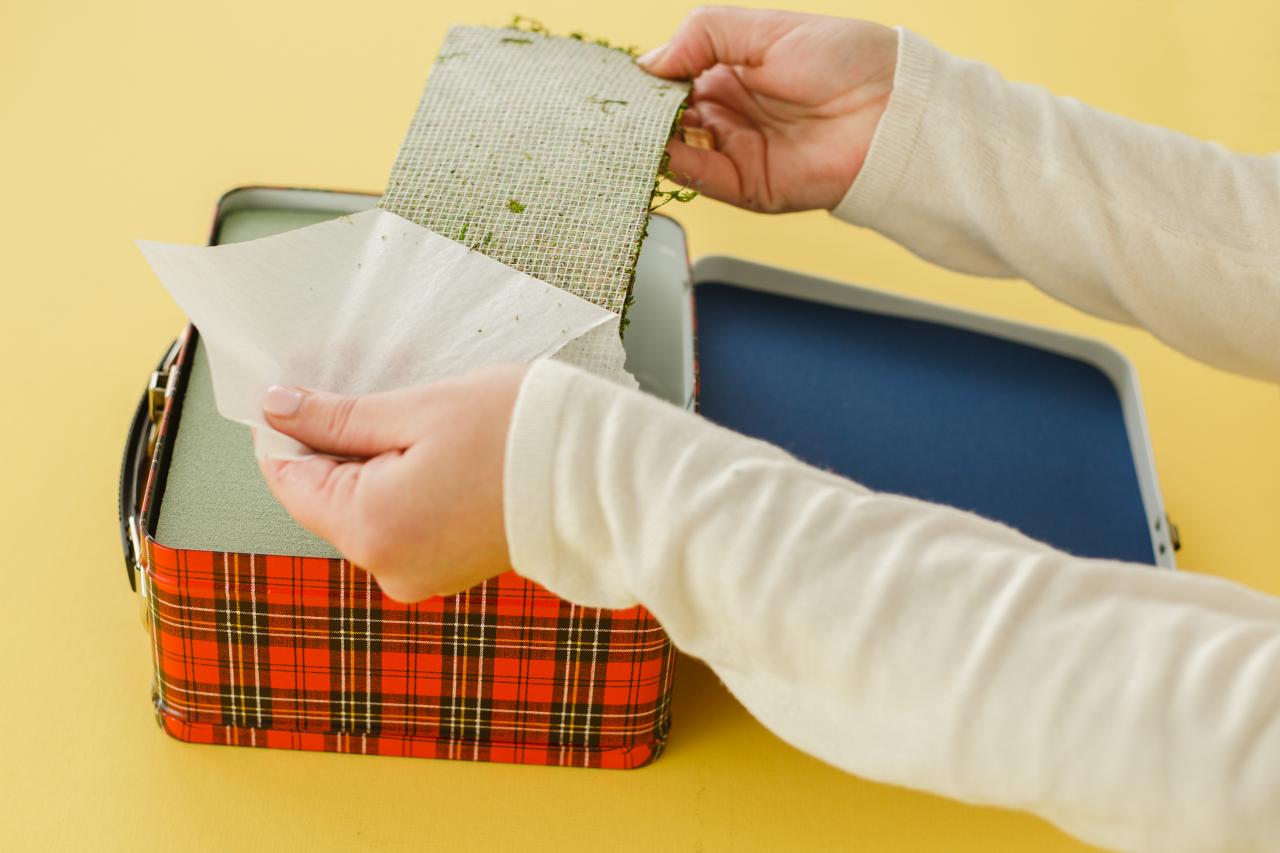
Begin your petite garden by prepping the lunch box top. Cut a piece of blue construction or card stock paper to fit the lid of the lunch box. Attach with double-sided tape to create a clear, blue sky for the gnomes or fairies to relax under.
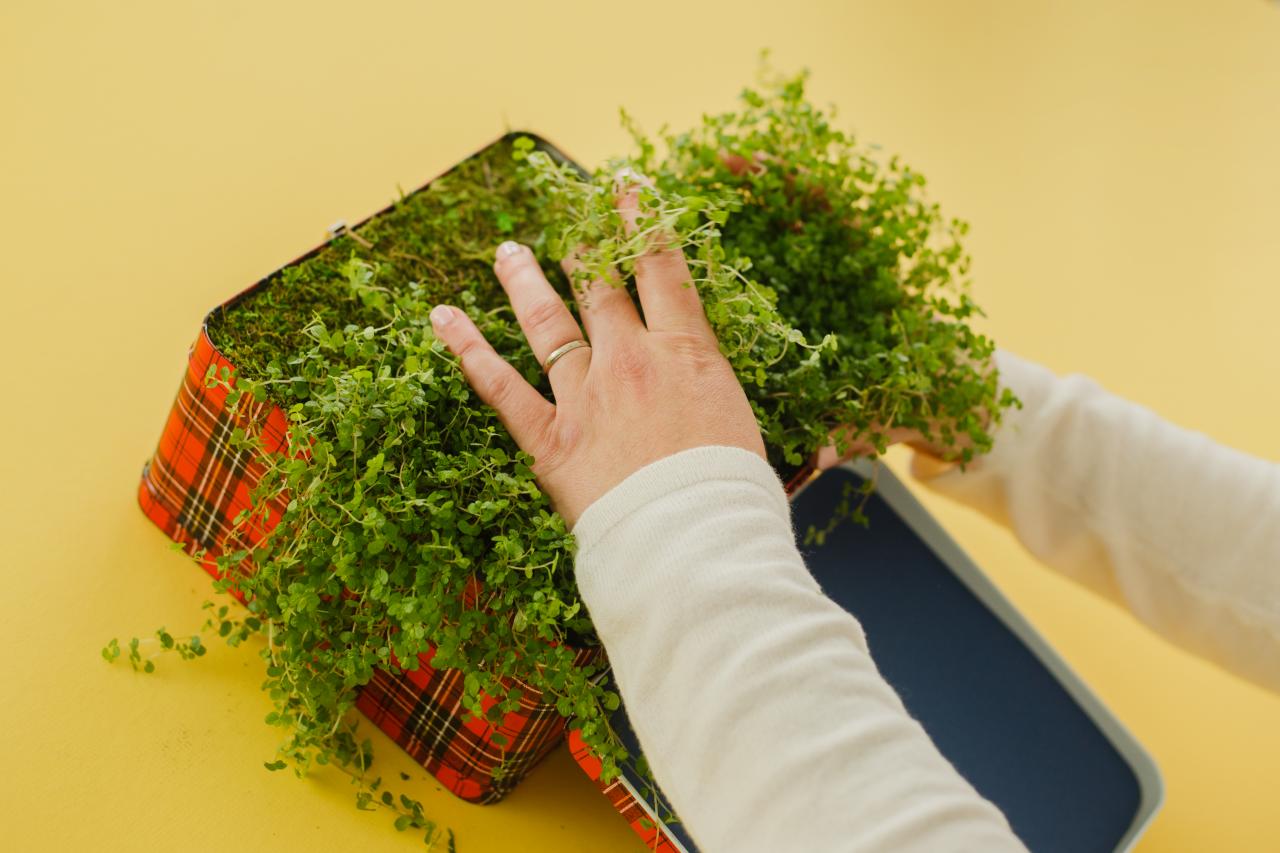
Add Lush Grass

Jalynn Baker

Jalynn Baker
Create a soft place to play by adding some greenery to the lunch box, creating the perfect grassy nook. Cut a piece of floral foam block down to a size that will fit into half of the lunch box. Insert the foam and cover with a piece of peel-and-stick moss. Fill the remaining half of the lunch box with a couple small, lush plants.
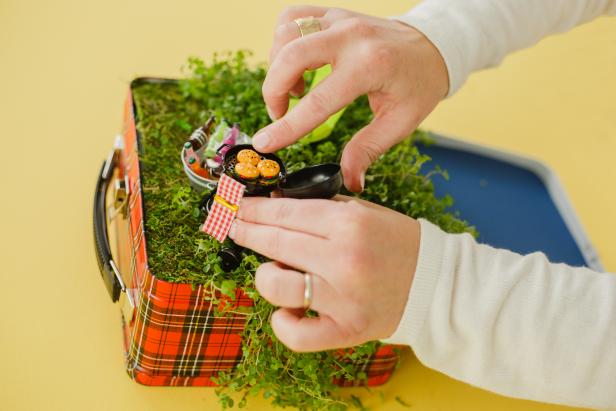
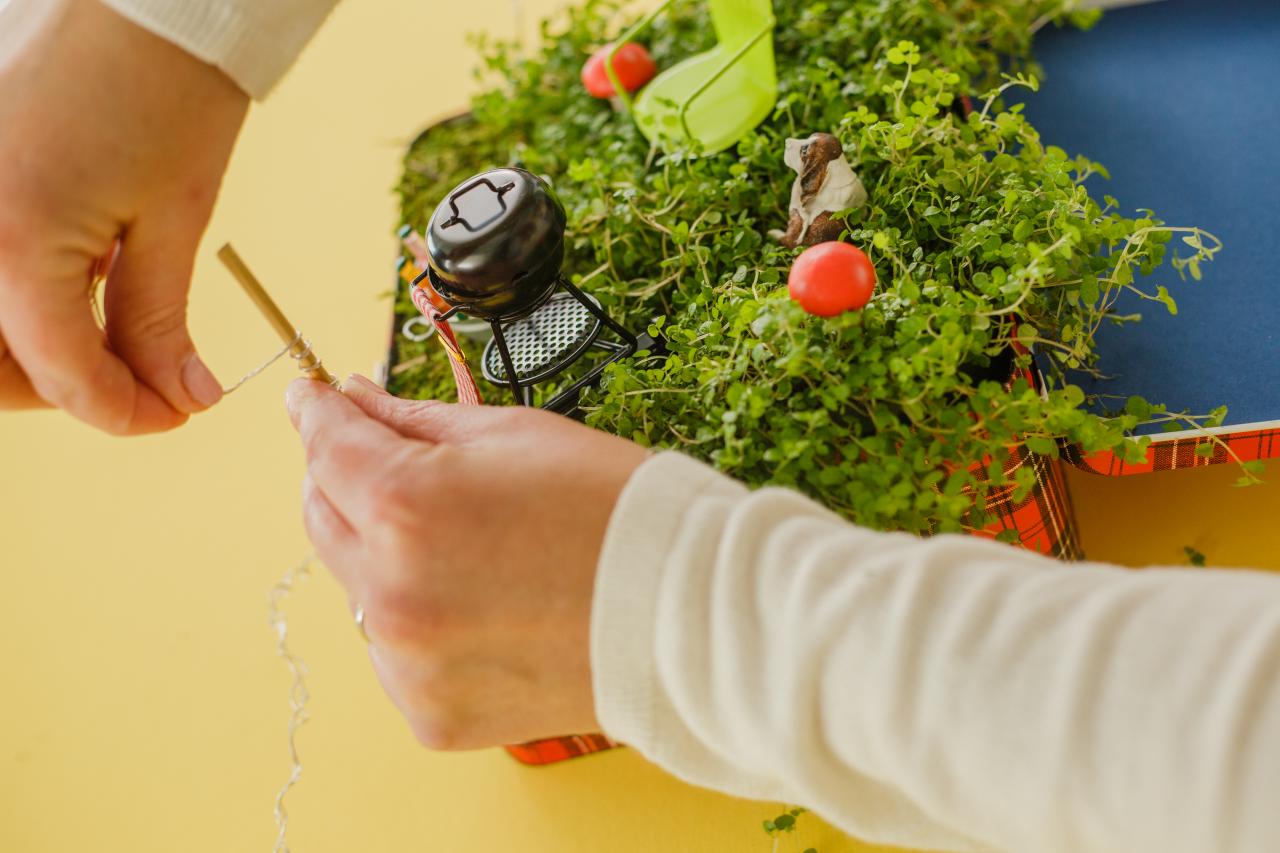
Bring It to Life
Jalynn Baker
Add a few more miniatures to really bring your garden to life. Since we chose to create a camping-inspired garden scene, we added the necessities: a grill, drinks and of course, a gnome’s best friend.
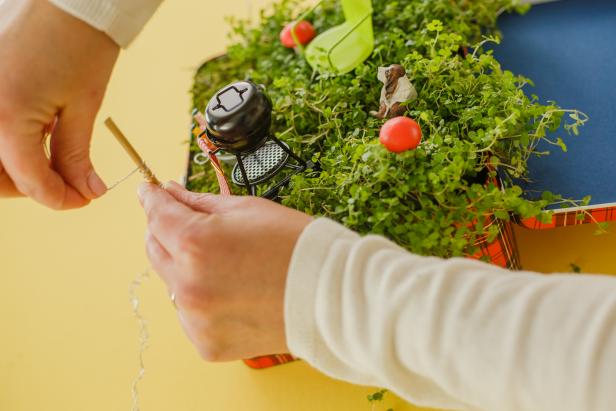
Lights, Camera, Action!
Jalynn Baker

Jalynn Baker

Jalynn Baker
Cut wooden skewers in half, and stick them down into the floral foam block at the front of the lunch box. Make space next to the plants for the twinkle light’s battery pack to be concealed, and wrap your lights around the sticks and up the lunch box. Just turn on the lights to illuminate the fantastical scene. Be sure to remove the battery pack before watering.


