


Easy-Breezy Tropical Leaf Art
Need art — on a budget? We got you! Turn fresh or faux monstera, palm or fern leaves into textural fabric art with our handy-dandy trick for turning leftover chalk paint into DIY spray paint.
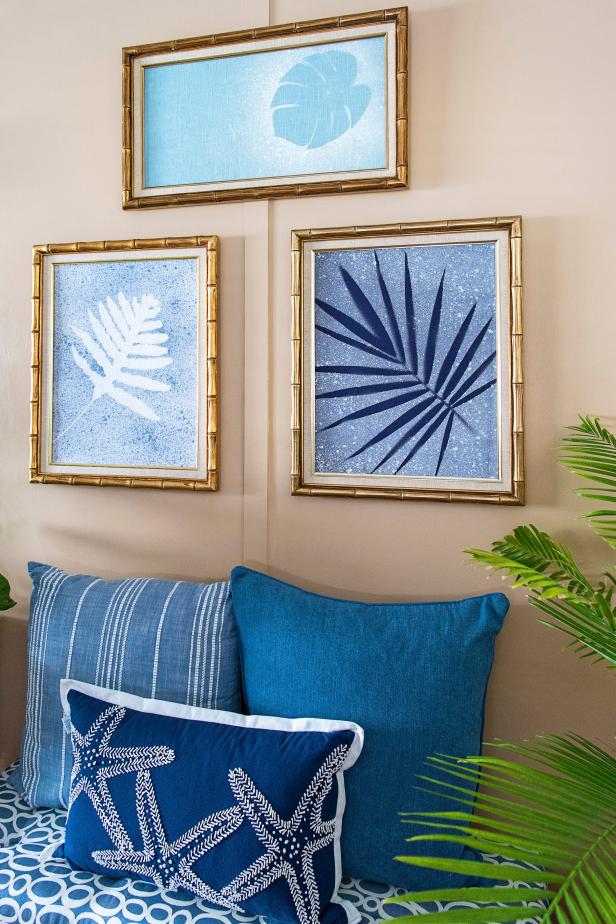

Photo by: Sarah Busby; Styling by H. Camille Smith
Sarah Busby; Styling by H. Camille Smith
Materials Needed
- linen or cotton fabric (we used pale blue, navy and white)
- chalk paint in colors that contrast with your chosen fabrics
- textile medium
- spray bottle with mist functionality
- large tropical leaves with an interesting silhouette
- scissors
- straight pins
- leftover shipping cardboard
- painter’s tape
- drop cloth or plastic to protect work surface
- glue stick
- large frames with glass and a cardboard backing
- framing materials: glazier's points and a flathead screwdriver or heavy-duty tape
Thoroughly Protect Work Area
This is one painting project that is legitimately messy so you'll need to protect not only the surface you'll be working on but also any adjacent areas (walls, floor, your clothing, etc.) that you don't want splashed with paint.
Create Sprayable Chalk Paint
This is really the key takeaway to this project. If, like me, you have too much chalk paint sitting around, this is a great trick to use some up. To make notoriously thick chalk paint sprayable, you'll need to thin it out — a lot. I found that a mix of roughly equal parts chalk paint, textile medium and water well shaken in a spray bottle worked best — but — the amount of water you'll need will depend on the thickness of your chalk paint and the sprayer bottle you use so getting the ratio just right will require a bit of trial and error. Start with my recommended mix of equal parts chalk paint/textile medium/water, shake it well to mix, then try spraying, using the bottle's mist setting, onto a disposable surface. If the paint is still too thick to spray, continue adding a few drops of water, then testing, until you get a sprayable mix.

Sarah Busby
Loosely Note Frame's Opening
To give yourself a rough guideline for positioning the leaves, use painter’s tape to mark an area that’s slightly larger than your chosen frame’s opening on the fabric. Tip: Removing the frame's glass and using it as a template is a quick way to note the opening.

Sarah Busby
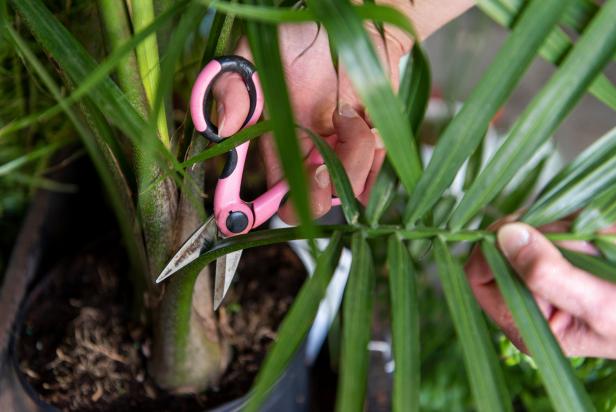
Cut Tropical Leaves
To keep your chosen fresh leaves flexible, wait to cut them till you're ready to begin painting. Note: You can also use faux leaves for this project but be sure to opt for rubber or plastic versions. True silk (read: fabric) leaves will absorb the paint and create a mess. Instead, the rubbery/plastic leaves resist the paint (just like real leaves) creating the silhouette effect you want.
Sarah Busby
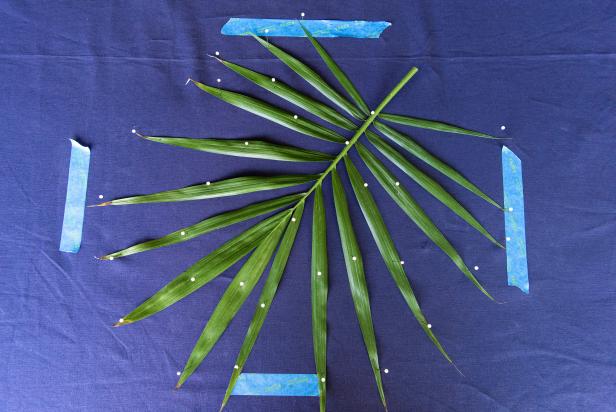
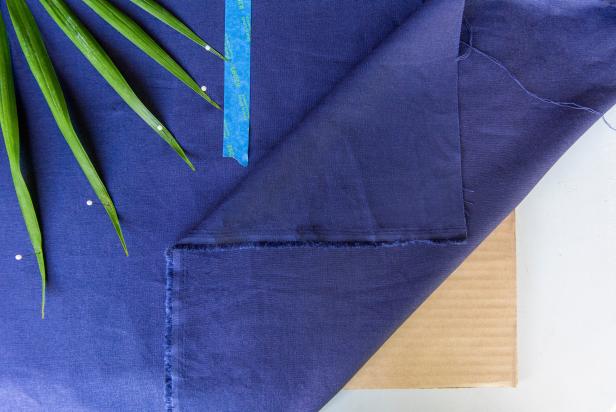
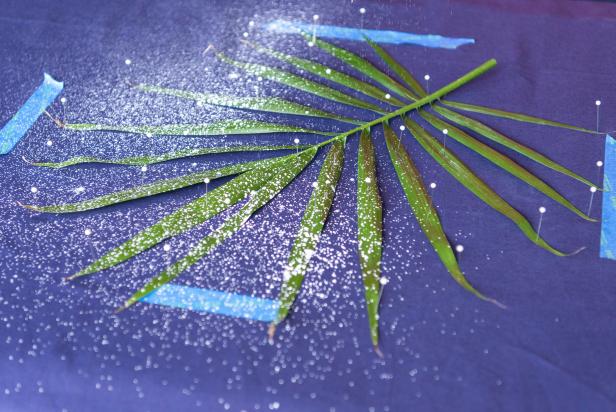
Pin Leaf to Fabric + Cardboard
To create a clear silhouette, you'll need to make the leaf, either fresh or faux, as flat as possible. Pinning it to the fabric is the easiest way to accomplish this. Start by placing a bit of leftover shipping cardboard onto your work surface, cover with the fabric ensuring that the area you designated with painter's tape is directly over the cardboard. Position your leaf, then, starting along the leaf’s stem and working out to each frond’s end, pin it in place (Image 1). The cardboard is necessary because it creates a pinnable layer under the fabric (Image 2).
Sarah Busby
Sarah Busby
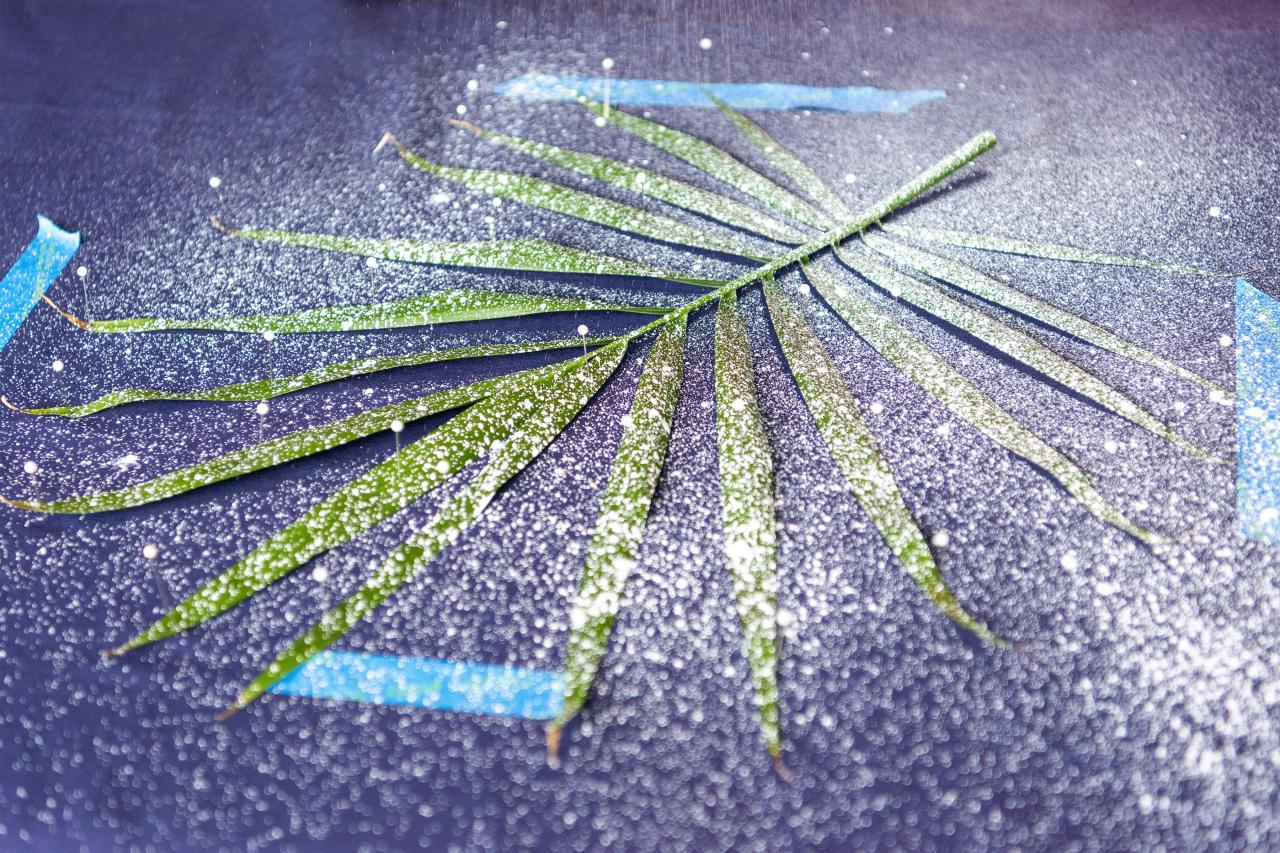
Spray With Paint
Now you’re ready to spray, adding as little or as much paint as you want. First, test the spray pattern on a disposable surface (spare cardboard or fabric) to ensure you're comfortable with the amount of paint that's spraying — you'll want to use the misting function — and adjust the spray tip smaller or wider, if necessary. Hold the bottle about 10-12 inches directly above the surface of the pinned leaf and begin spraying, moving the bottle over the surface for even coverage (Images 1-3). Tip: Spraying directly down, not at an angle, works best and minimizes chances that you'll spray paint under the edges of the pinned leaf.
Sarah Busby

Sarah Busby

Sarah Busby
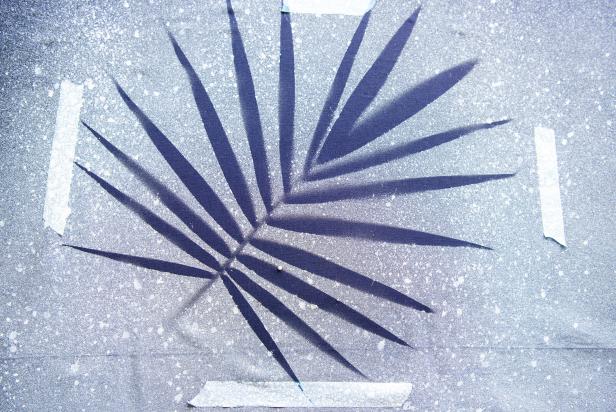
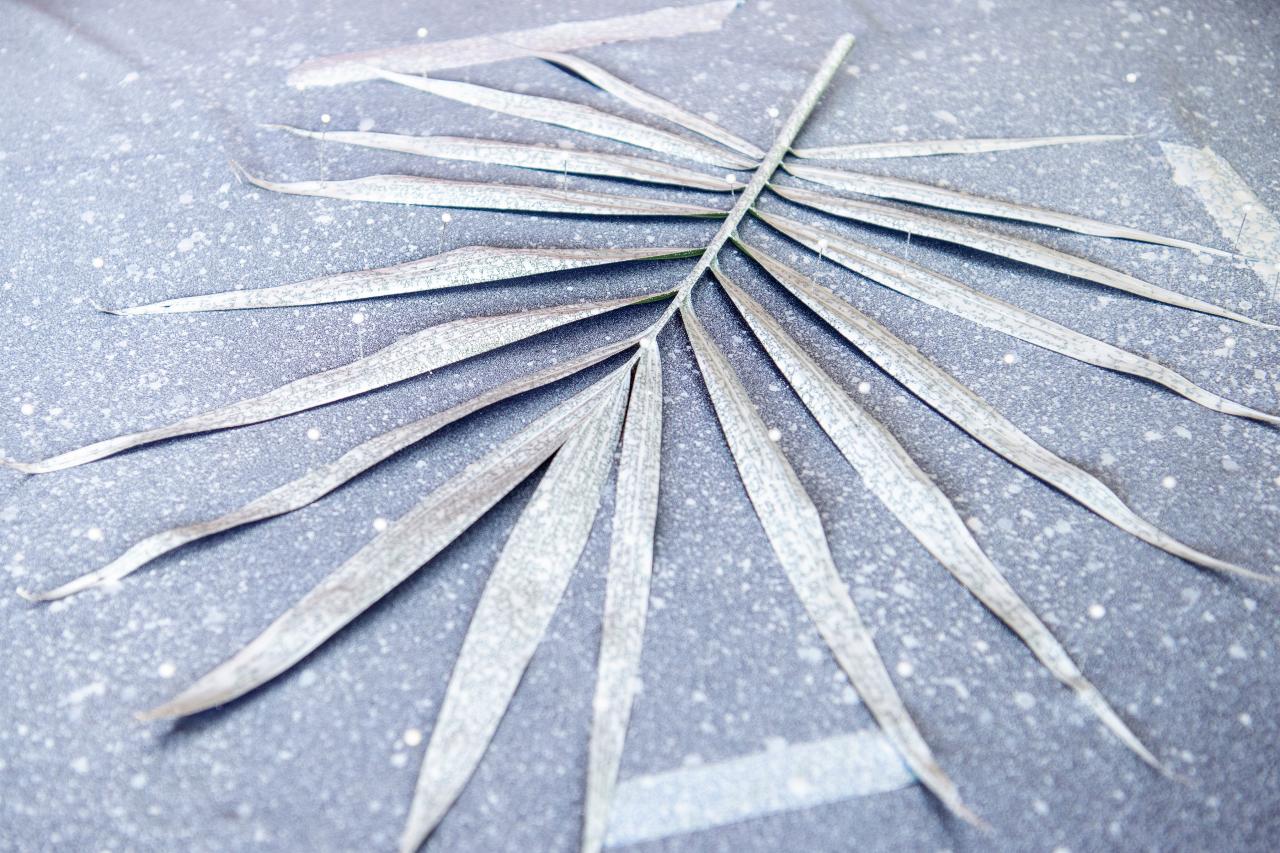
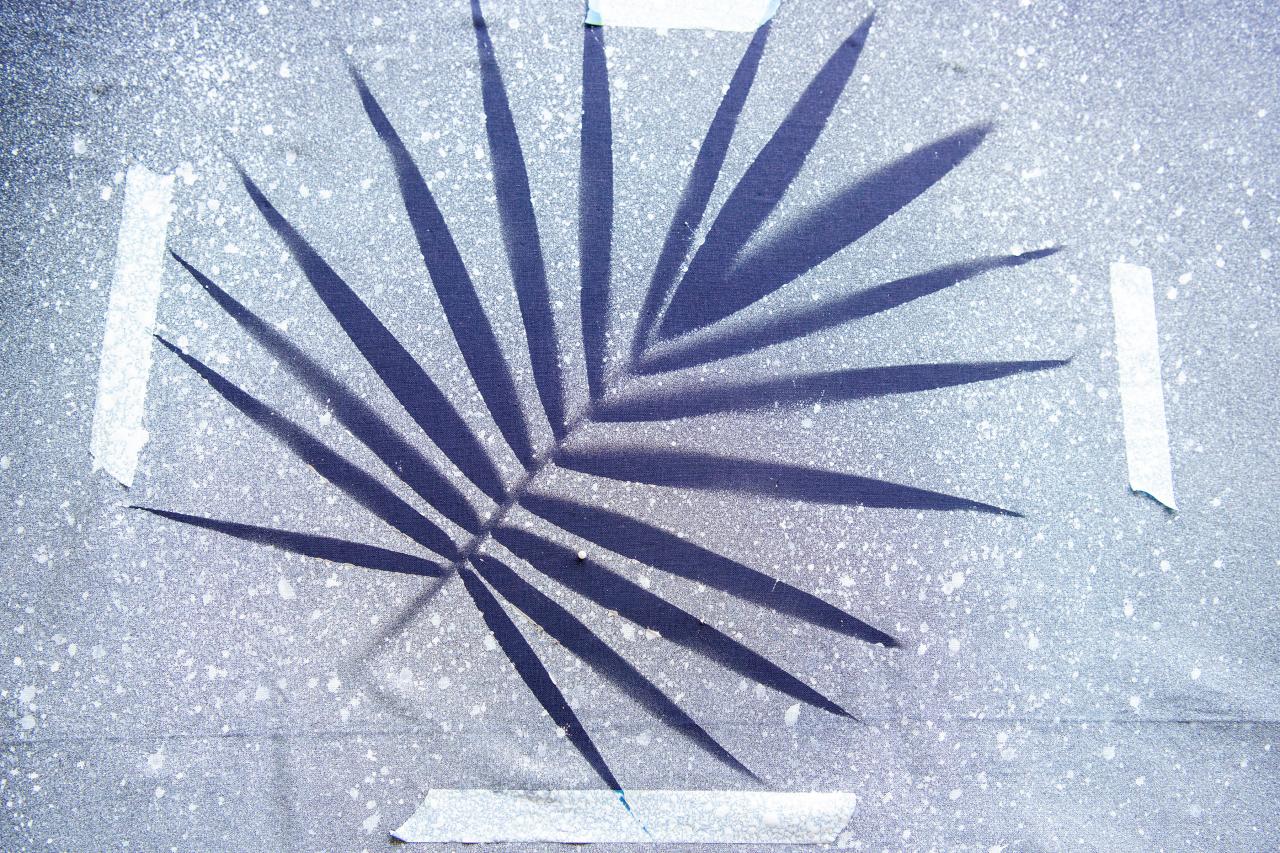
Remove Pins and Lift Leaf
Although it's not necessary to let the paint thoroughly dry, give the paint on the leaf a little drying time to prevent dripping wet paint onto your fabric when you lift the leaf. Carefully remove pins, then lift the leaf off the fabric (Image 1) and admire your finished design (Image 2).

Sarah Busby
Sarah Busby
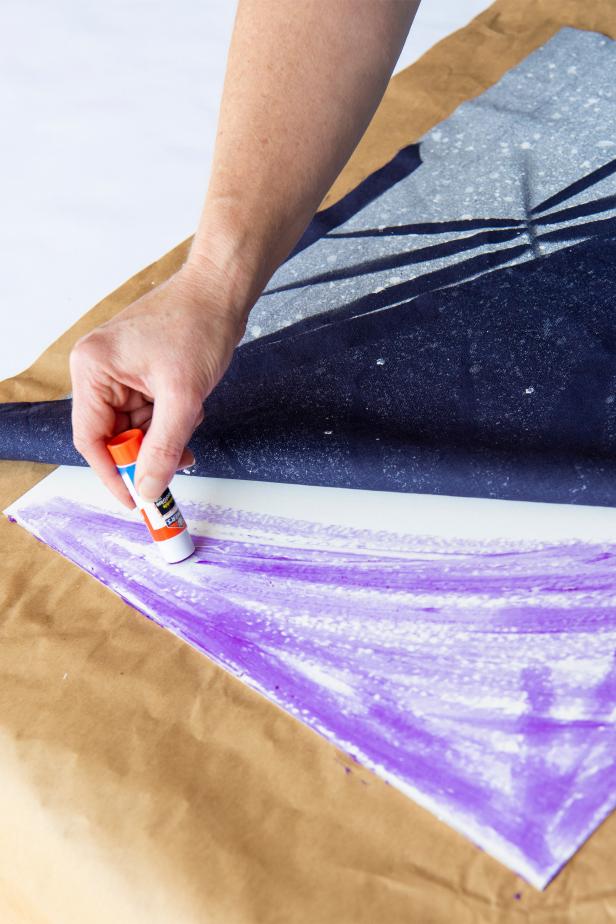
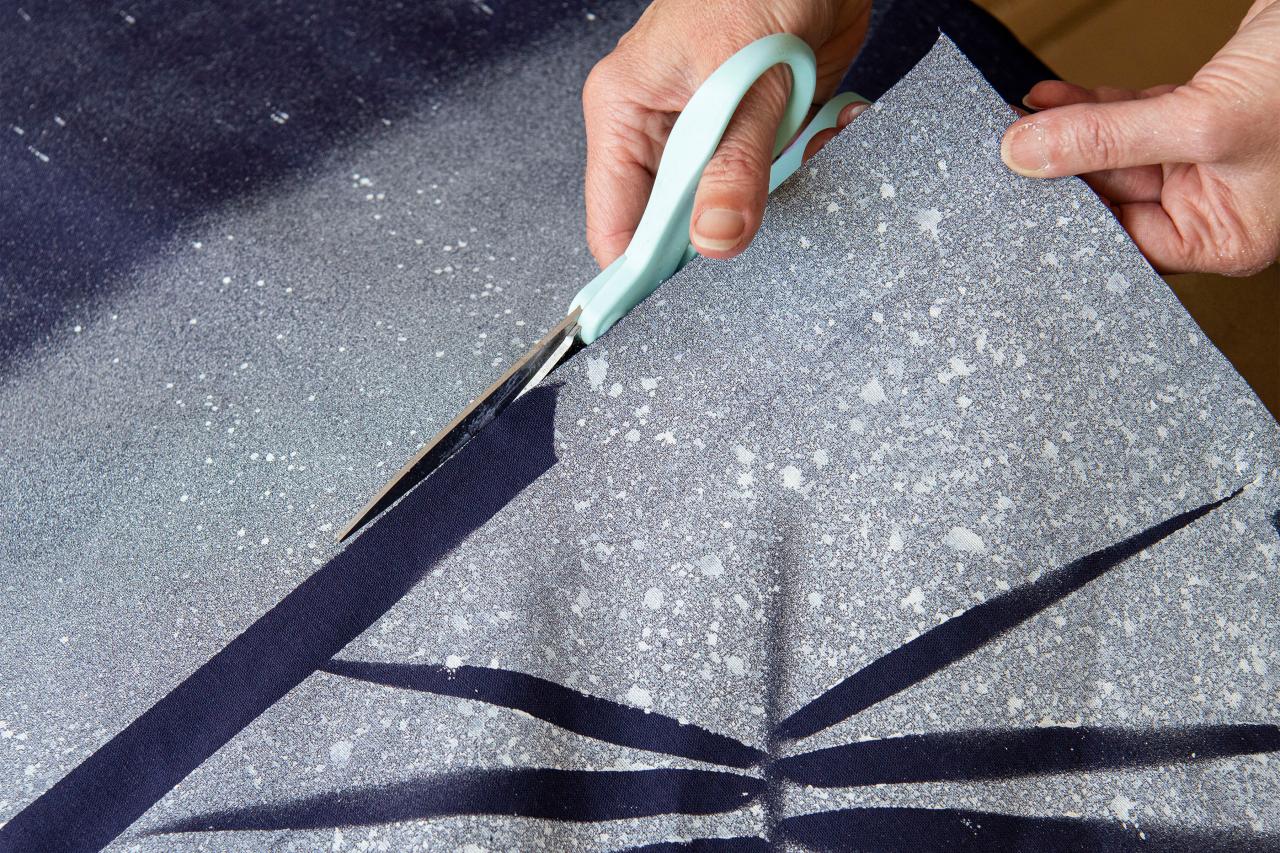
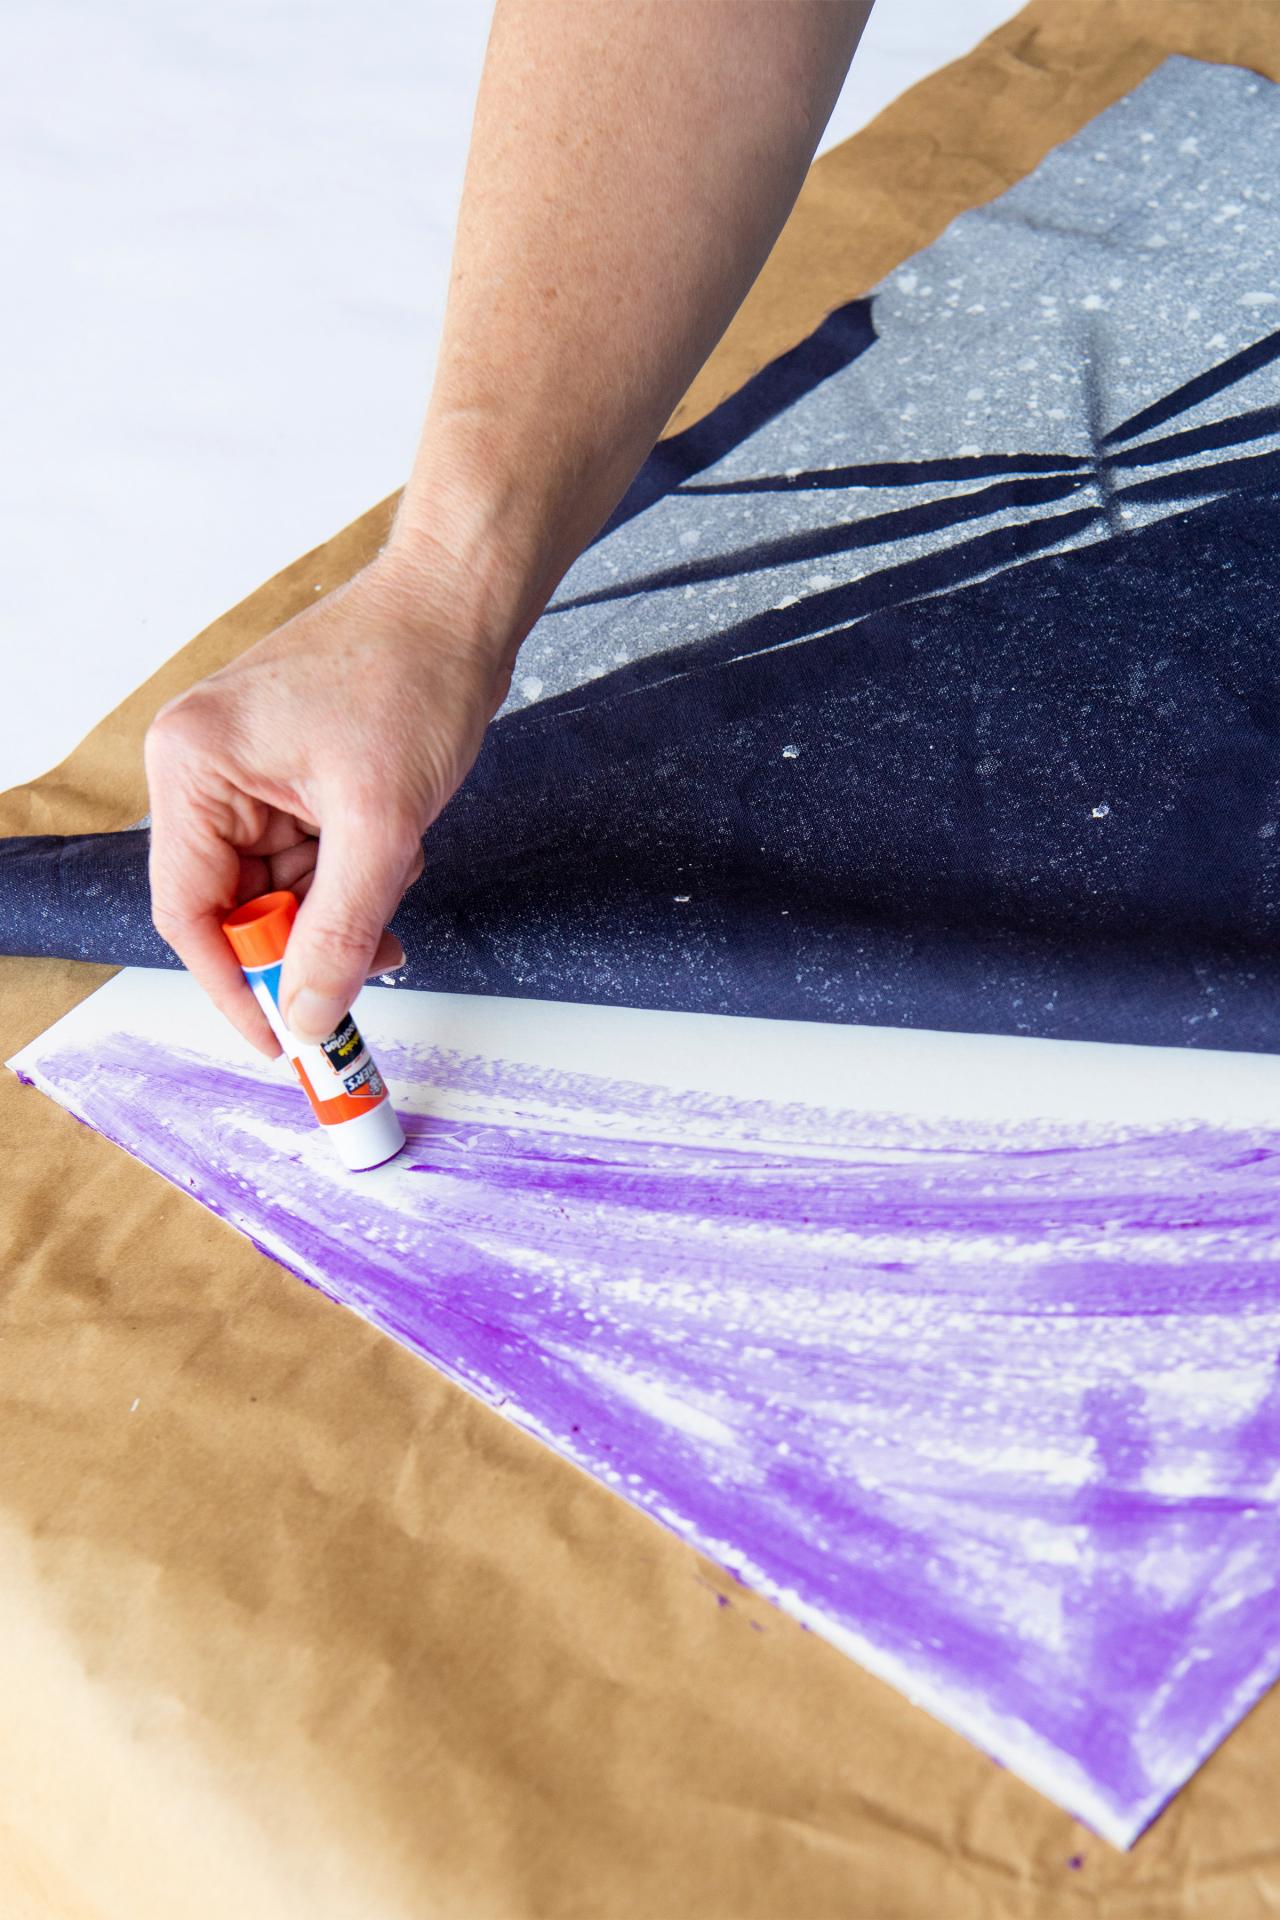
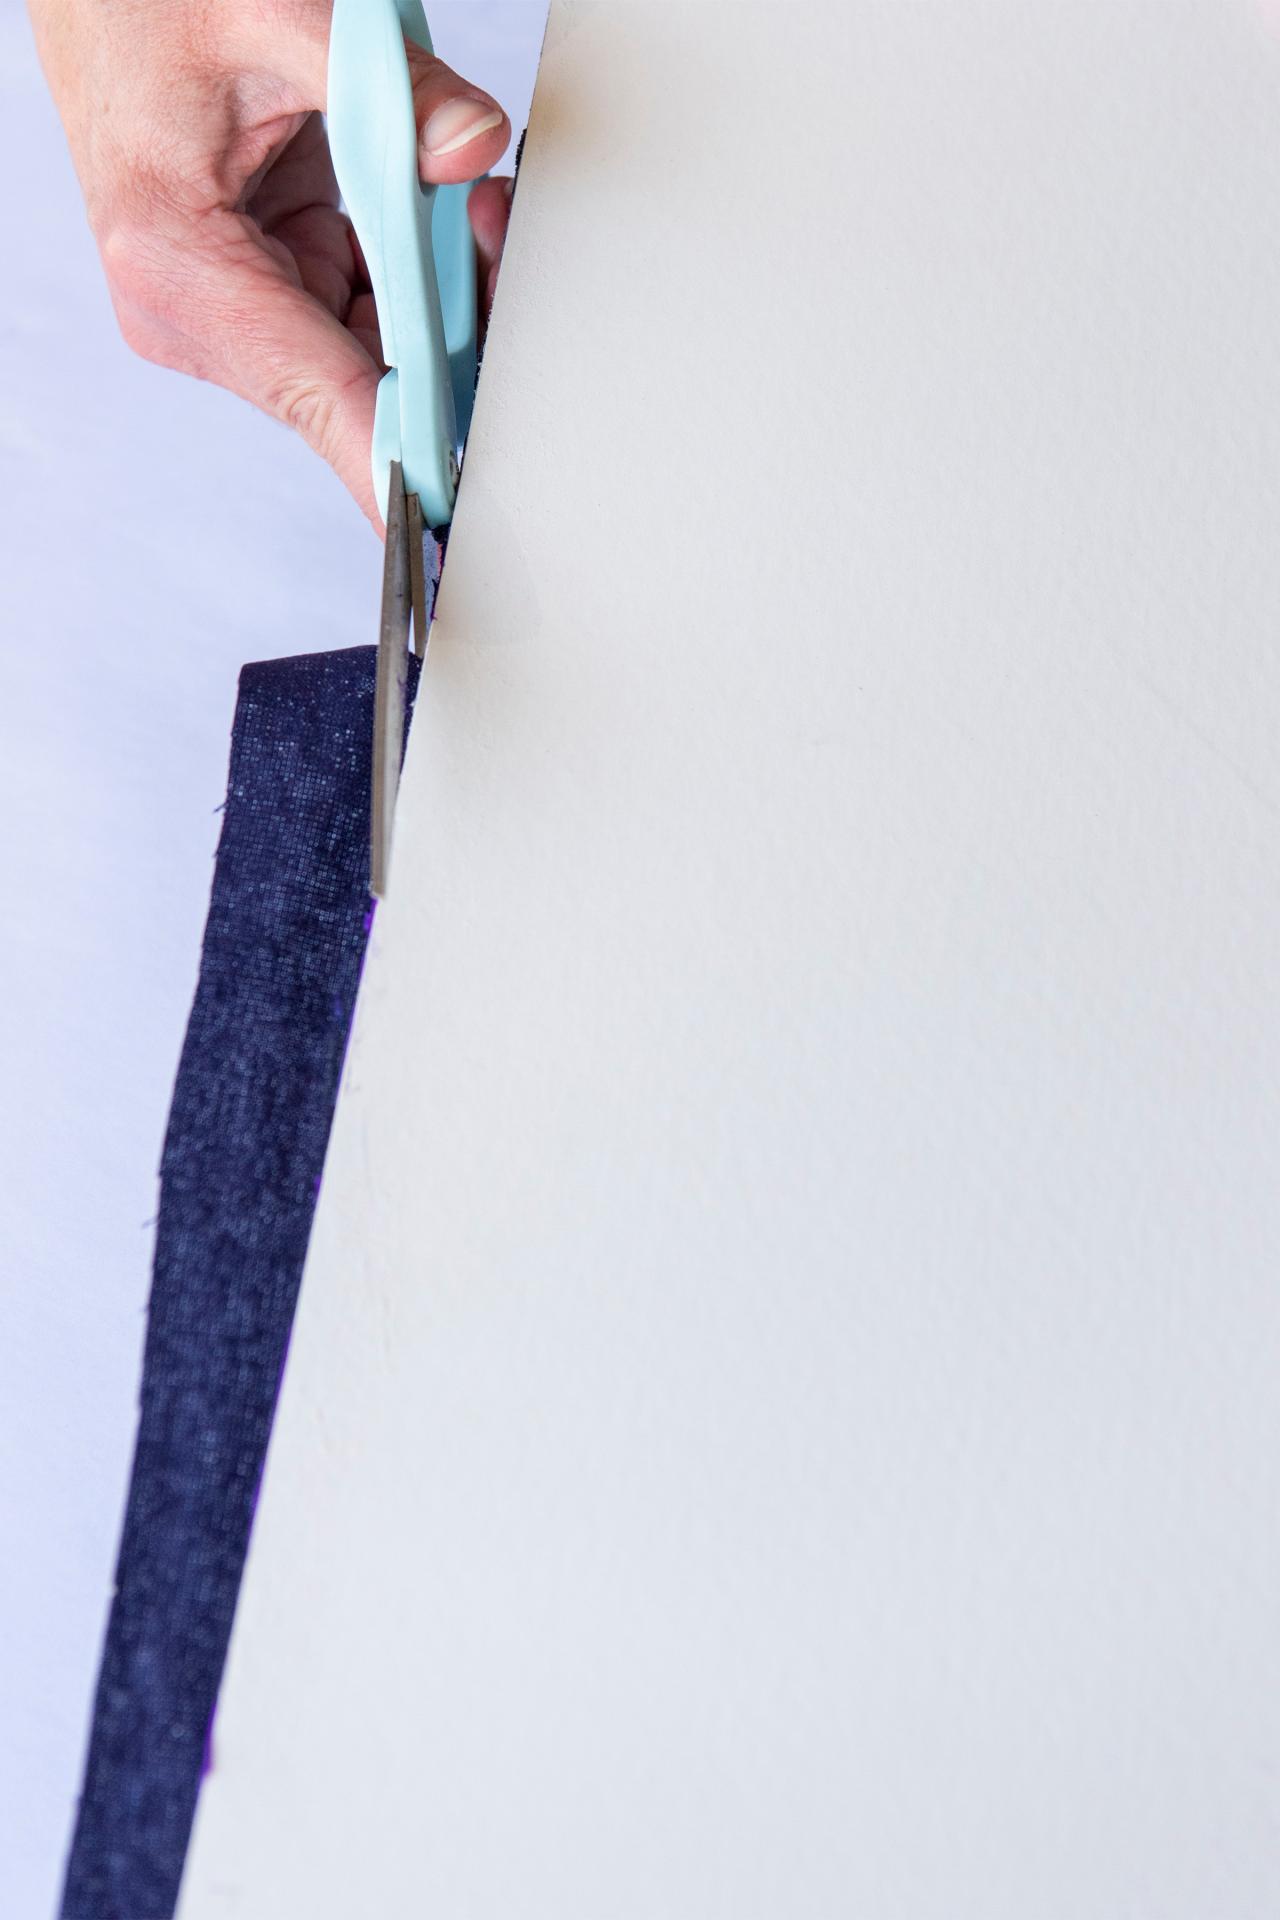
Cut Out + Attach to Backing
Using scissors, cut out a wide area around your sprayed design, using your taped marks as a guide (Image 1). Place the empty frame over your painted leaf, determine final placement, then use a glue stick to attach fabric to the frame's backing (Image 2) and cut off the excess fabric (Image 3).

Sarah Busby
Sarah Busby

Sarah Busby
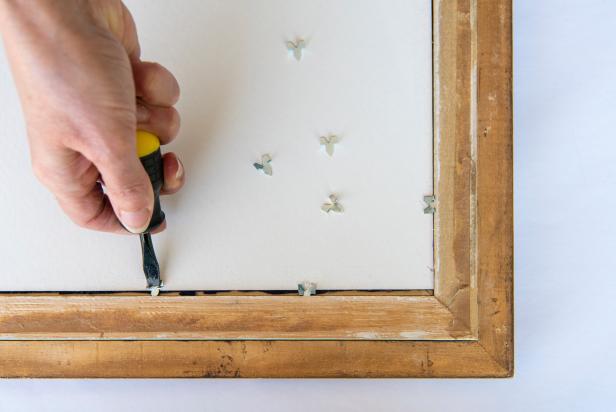
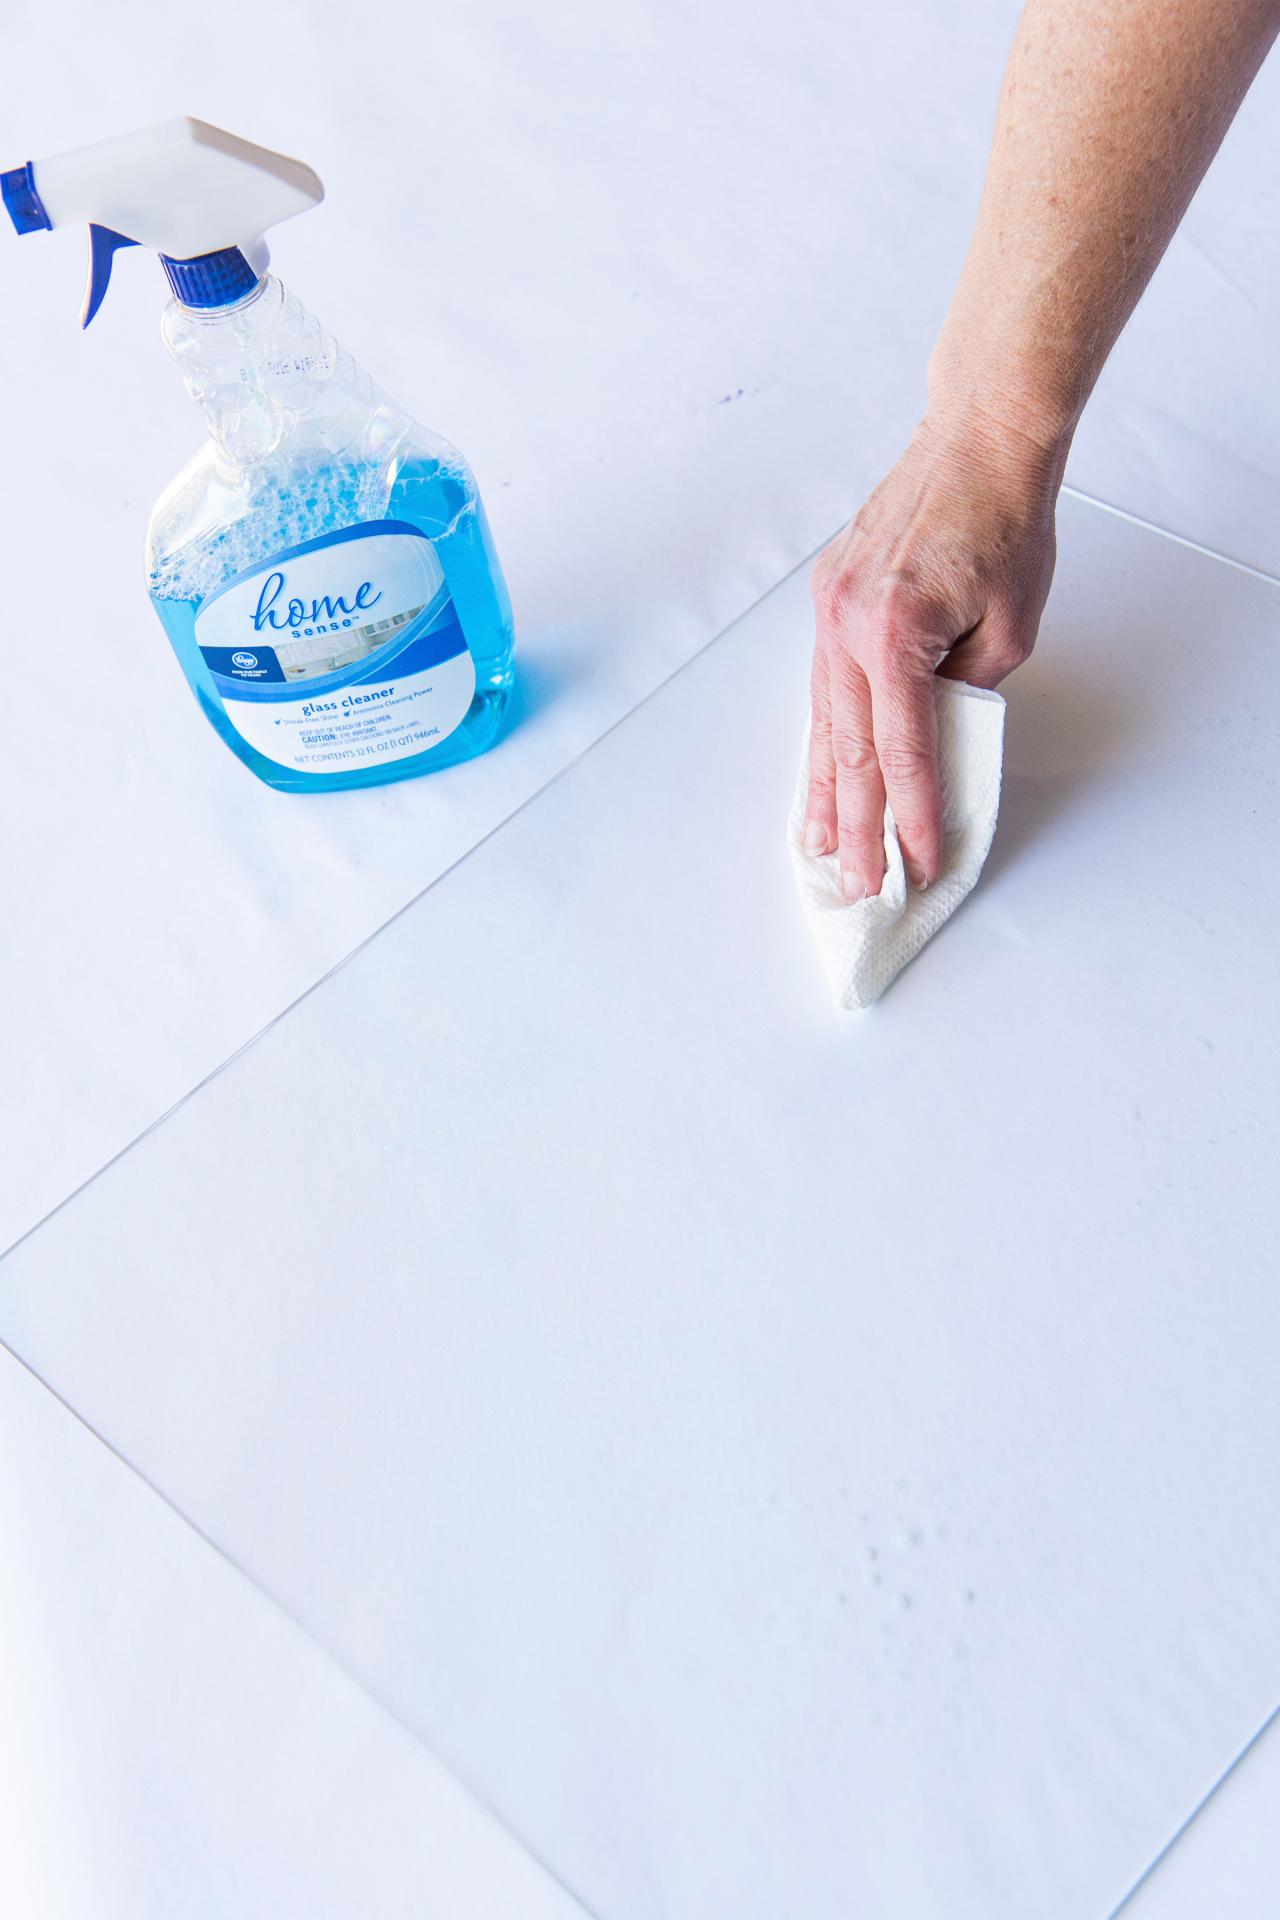
Clean Glass + Secure in Frame
Thorougly clean both sides of your frame's glass (Image 1) and replace in the frame. Top glass with the leaf silhouette, leaf side to the glass, then secure in the frame with glazier's points or heavy-duty tape (Image 2).

Sarah Busby
Sarah Busby
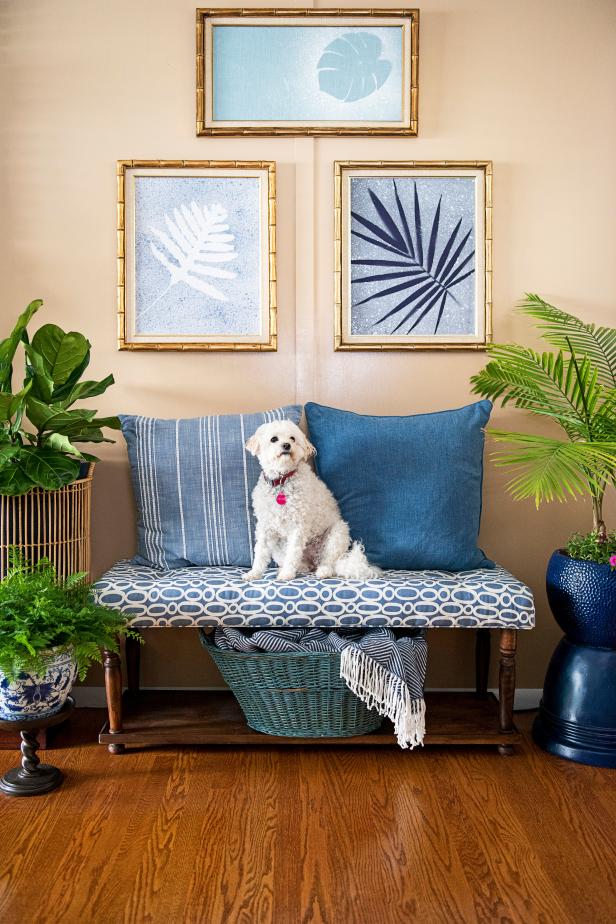
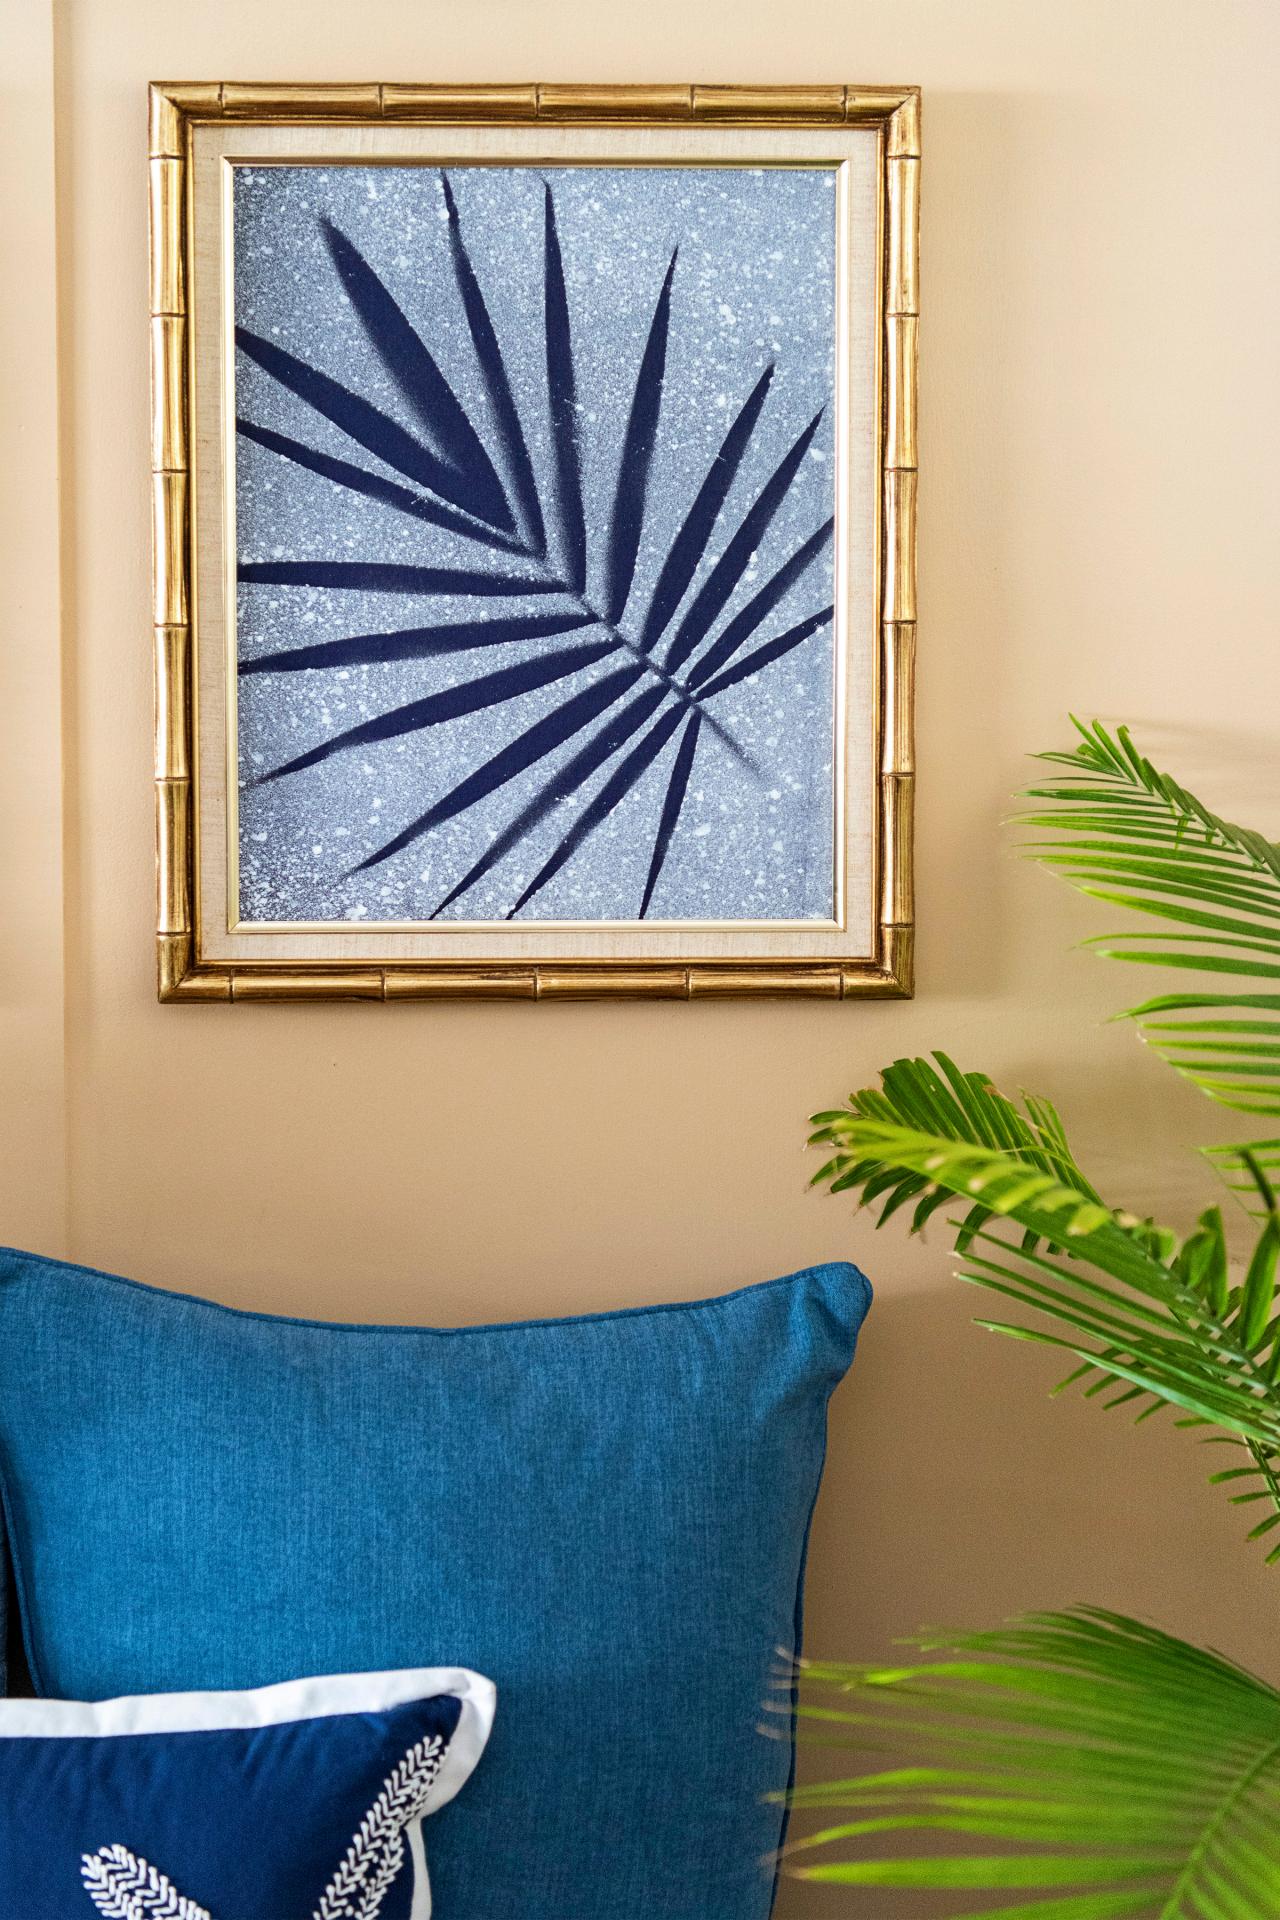
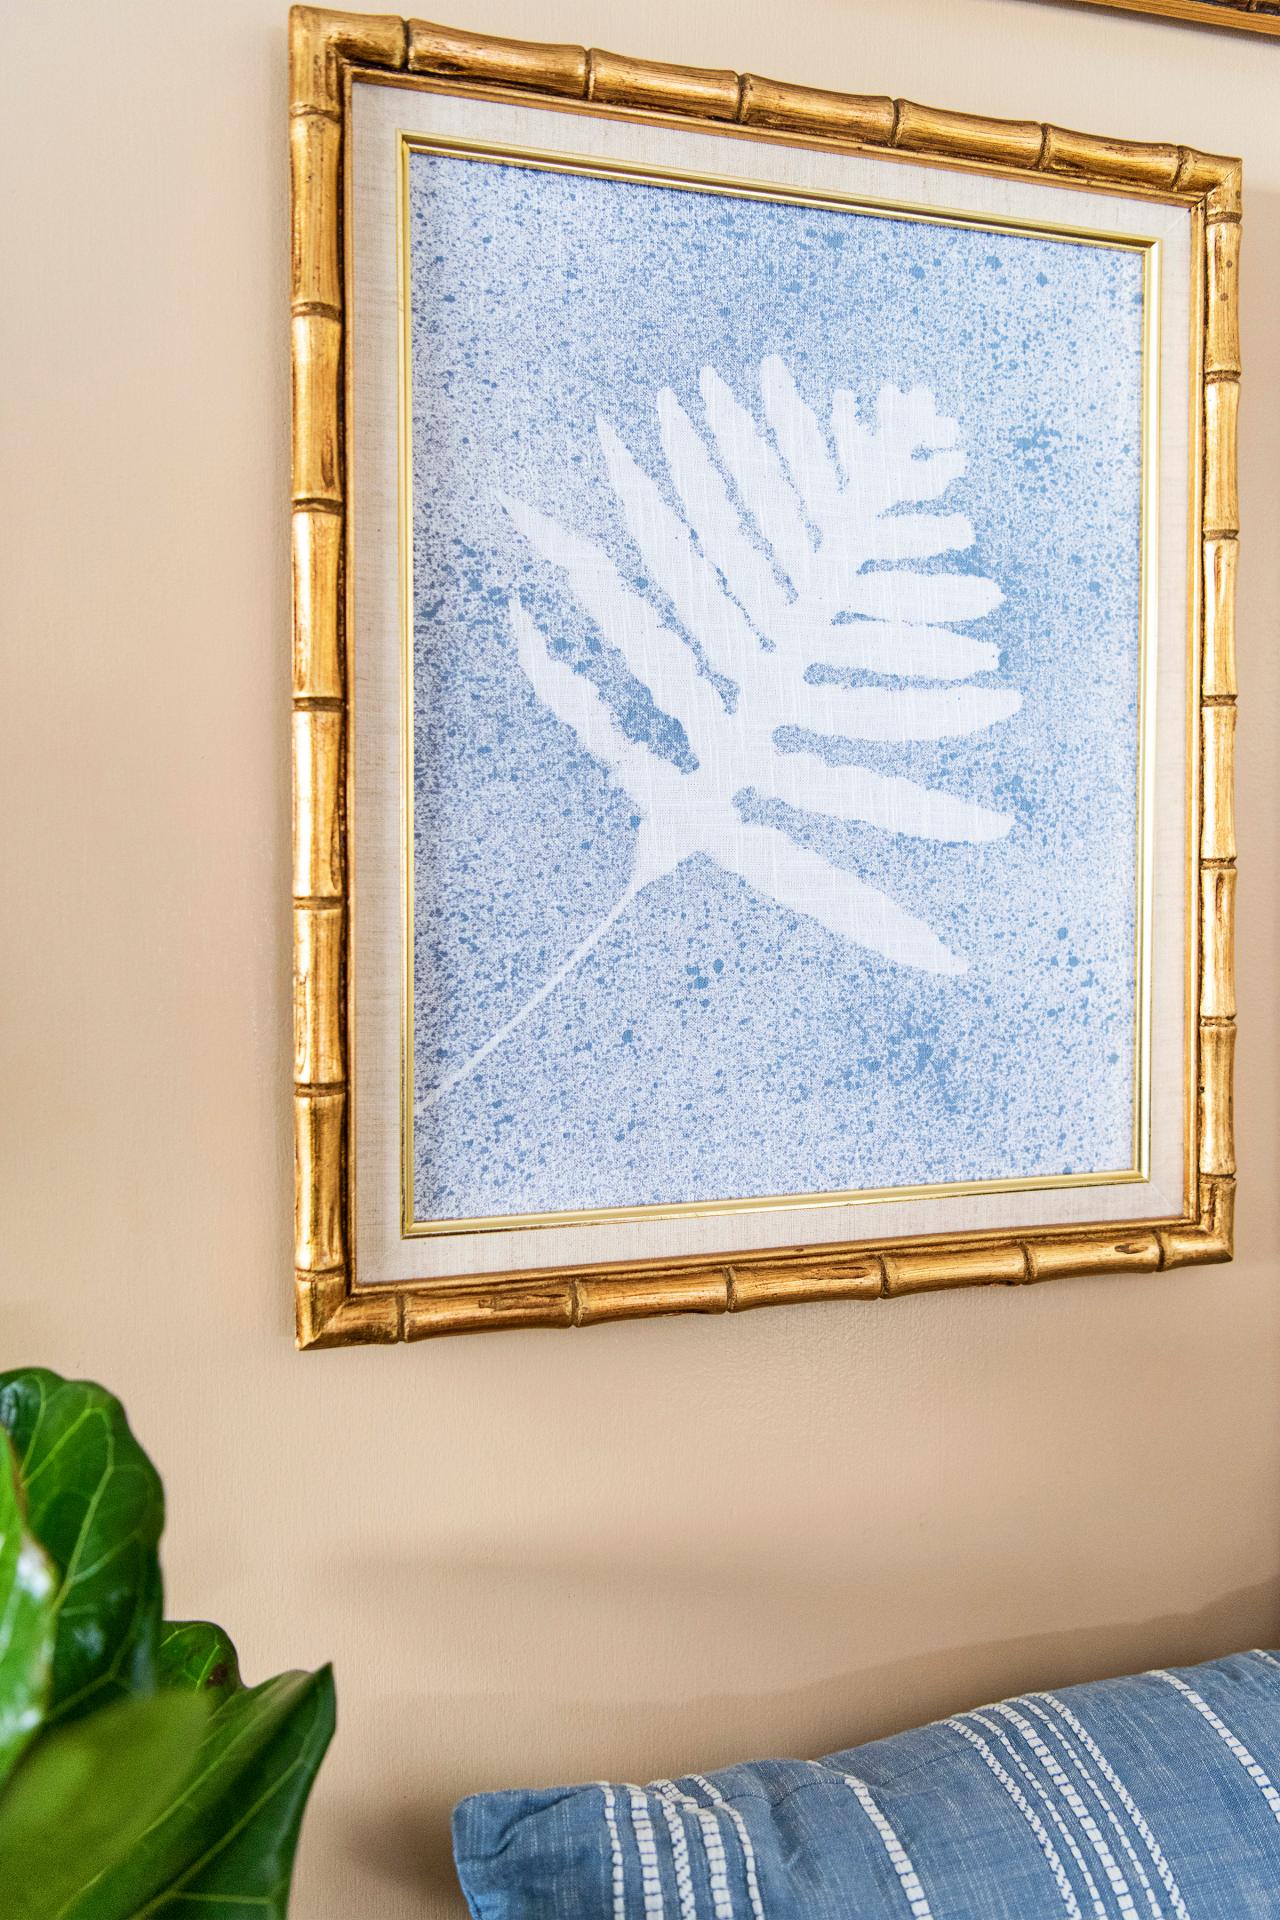
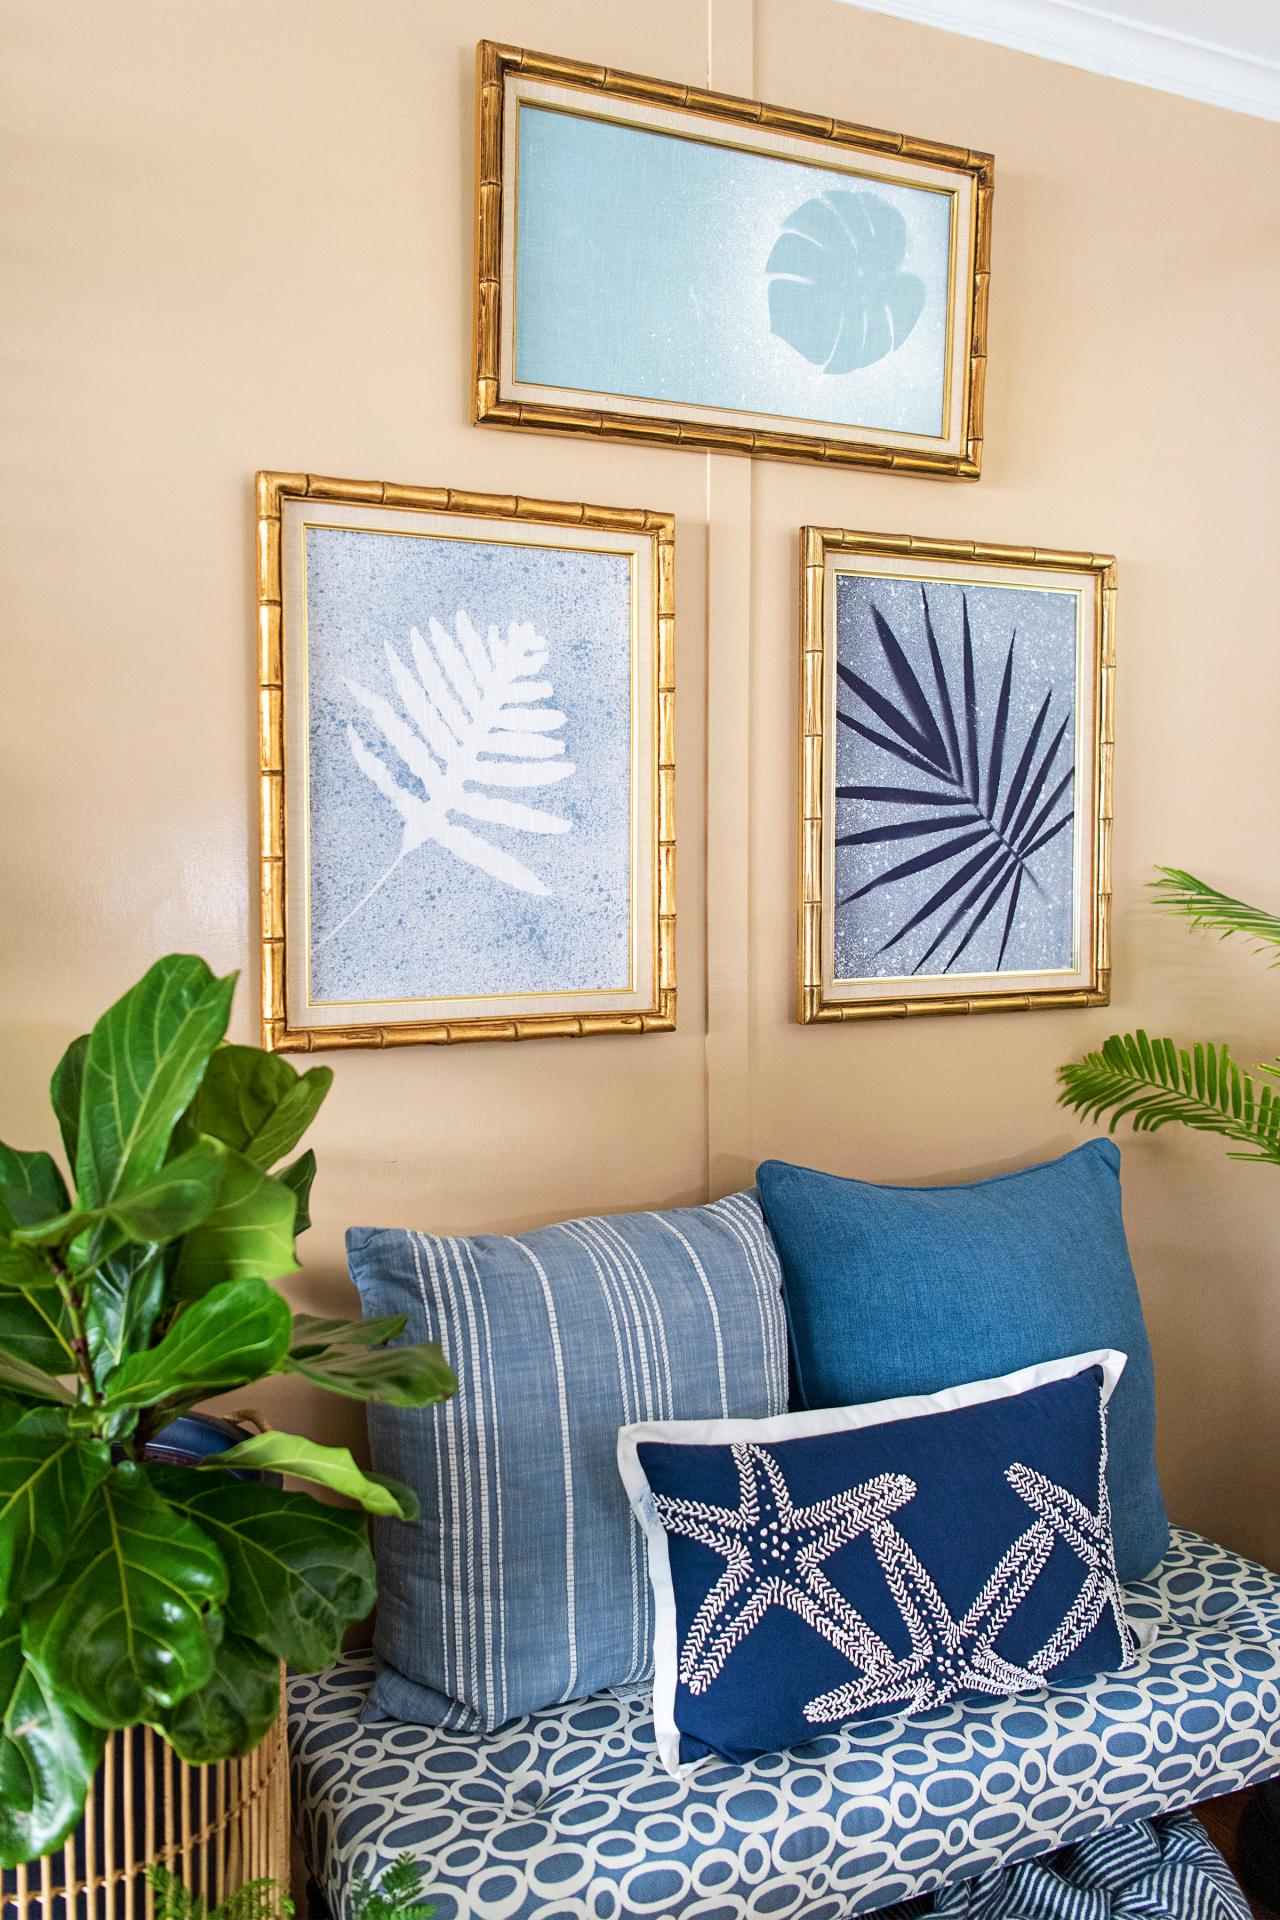
Proudly Display
Hang your finished leaf art in an entryway, bedroom, living room or any room that could use a coastal or tropical refresh (Images 1-4). Once you master mixing up the sprayable chalk paint, this project is so easy that you can use the same method to create an artful silhouette of any everyday objects with an interesting and recognizable outline. Other objects to try: seashells, rubber duckies, toy cars or even vintage cutlery or old tools.
Sarah Busby; Styling by H. Camille Smith

Sarah Busby; Styling by H. Camille Smith

Sarah Busby; Styling by H. Camille Smith

Sarah Busby; Styling by H. Camille Smith
Photo By: Sarah Busby; Styling by H. Camille Smith
Photo By: Sarah Busby; Styling by H. Camille Smith
Photo By: Sarah Busby; Styling by H. Camille Smith
Photo By: Sarah Busby; Styling by H. Camille Smith
.jpg.rend.hgtvcom.231.174.suffix/1557428455508.jpeg)


