


How to Upcycle Castoff Cans Into Beachy Planters
Your houseplants need a vacation — and with this easy upcycle you can turn kitchen castoffs into pretty pots that bring a taste of the tropics to any room of your home.


Photo by: Sarah Busby; Styling by H. Camille Smith
Sarah Busby; Styling by H. Camille Smith
Materials Needed
- clean, empty metal food cans
- bamboo slat table runner
- woven jute placemats
- hot glue gun and glue sticks
- heavy-duty scissors
- potted plants that fit your chosen cans
- gold or brass spray paint
- painter's tape
- razor blade or utility knife
- optional: preserved moss
Clean Cans + Remove Labels
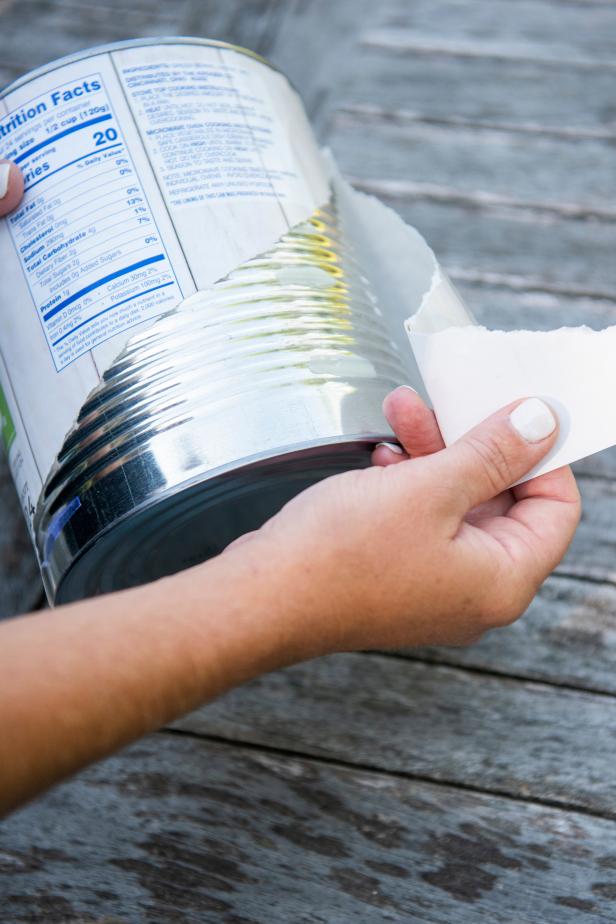
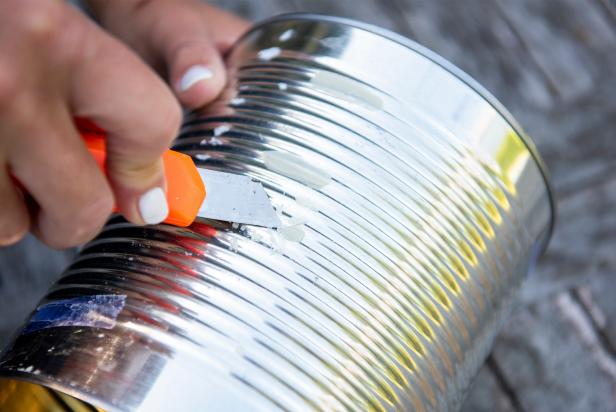
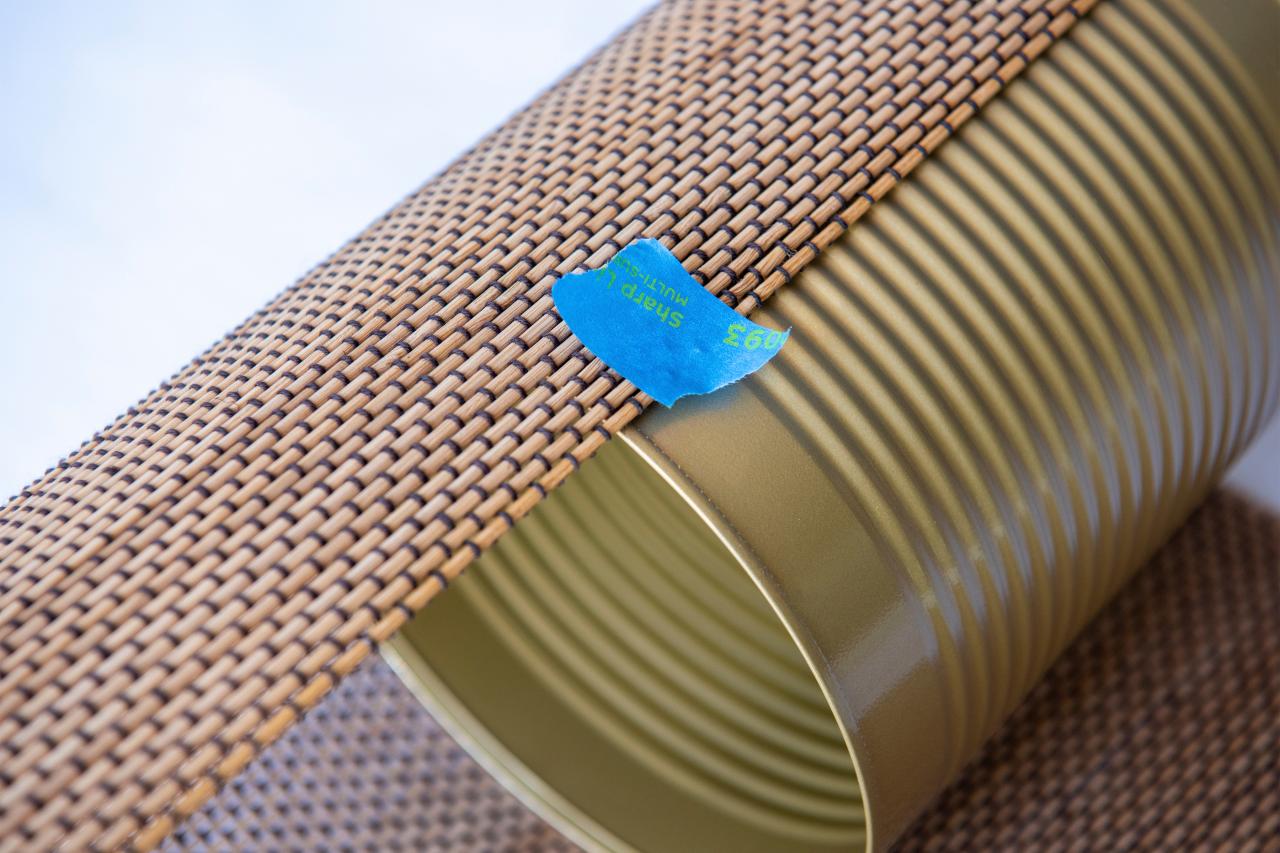
Raid your recycling bin for cans, large or small, that'll fit your chosen plants. For ours, we used a #10 can of green beans (the family-size version at your local grocery store) and a standard coffee can. First, throughly clean the cans inside and out and peel off the paper labels (Image 1). Use a razor blade or utility knife to remove any leftover glue (Image 2).
Sarah Busby
Sarah Busby
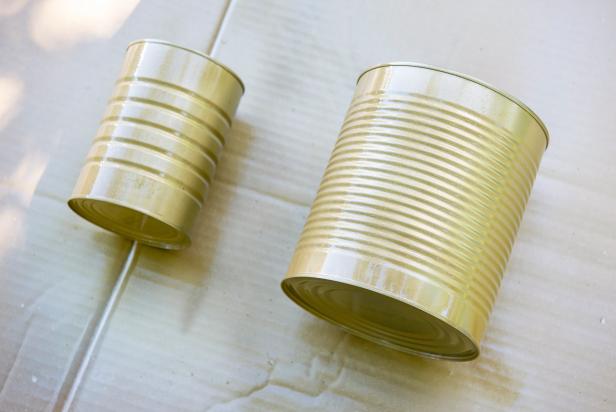
Spray Paint Cans
On a disposable surface, like leftover shipping cardboard, paint cans' exterior and top and bottom rims with gold or brass spray paint.
Sarah Busby
Wrap a Can in Bamboo Slats
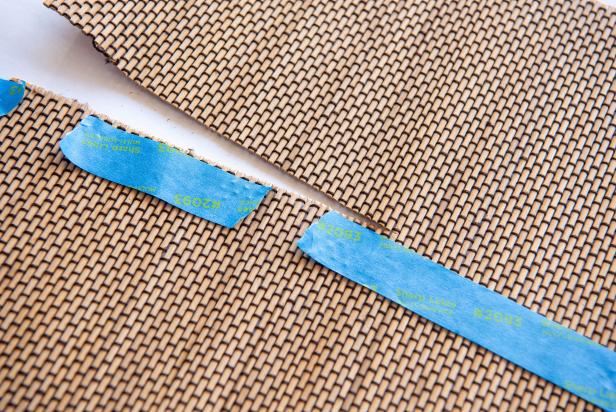
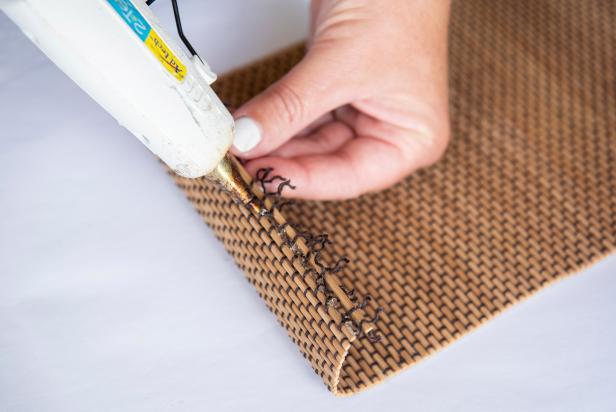
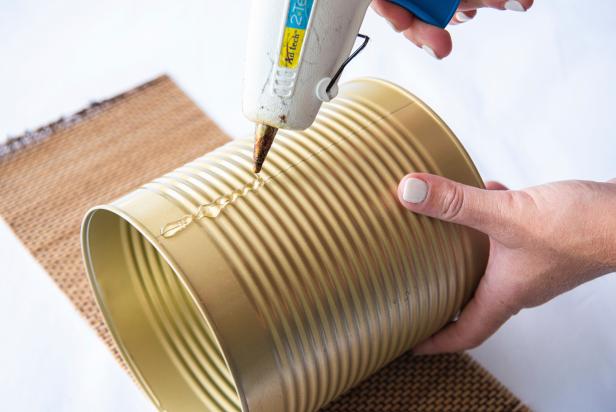
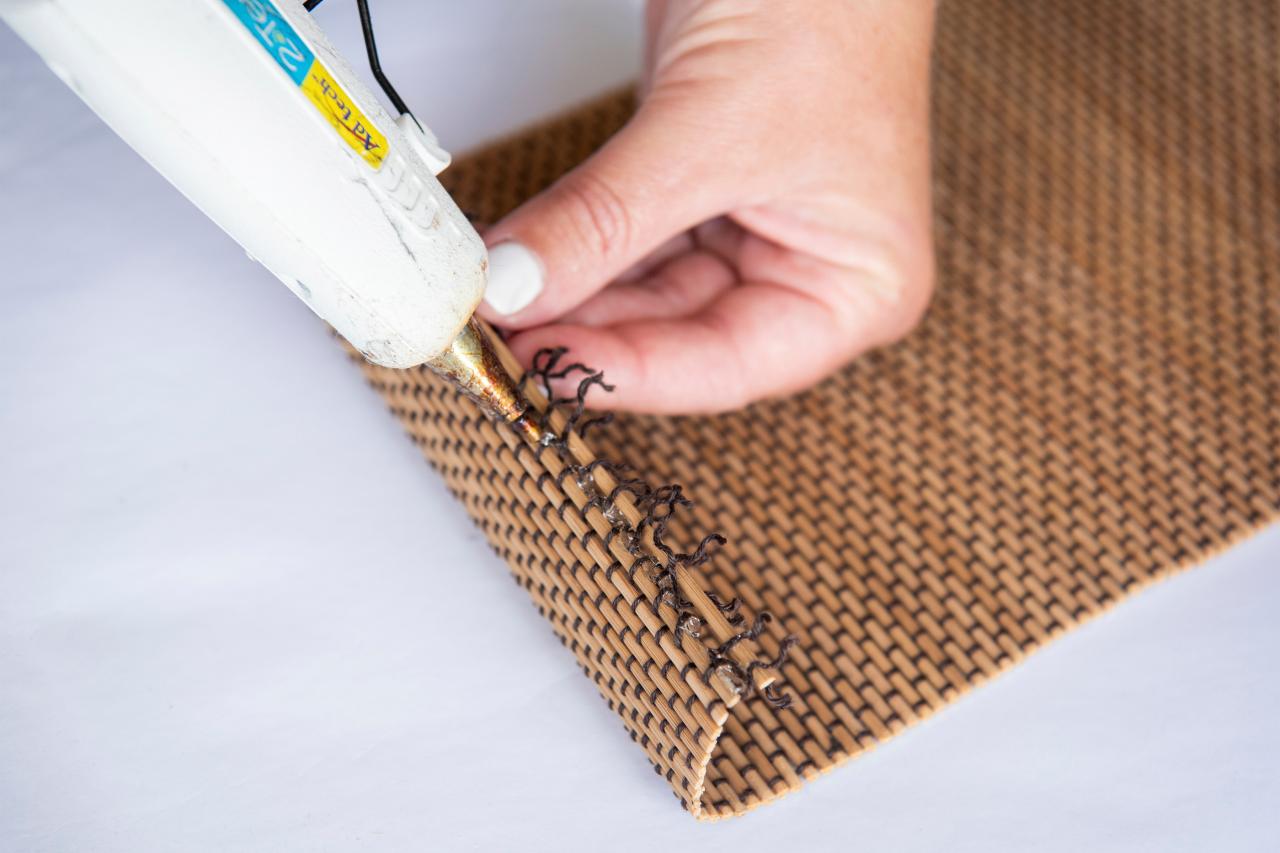
We used a bamboo slat table runner for this project. Inexpensive, readily available and easy to cut with scissors, this added the perfect amount of trendy natural texture — plus, the runner's stitched design and finished edges and ends make it easy to cut the material with minimal worry of fraying. First, roll the runner around your can to determine where you'll cut along the stitches, then note it with a bit of blue painter's tape (Image 1). Unroll the runner and continue marking where you'll cut by following along the runner's stitched line and adding pieces of tape, then cut along the taped line (Image 2). Wrap the runner around the can to also determine where to cut off the excess, allowing for a little overlap, then use a line of hot glue to prevent the cut end from unraveling (Image 3). To attach the runner, add a bead of hot glue to the can (Image 4), then push the cut end (that you just secured) into the glue. Continue adding lines of hot glue to the can, then attaching the runner, till the can is fully covered. Create a clean end by overlapping the cut end with the runner's finished edge (Image 5).

Sarah Busby
Sarah Busby
Sarah Busby
Sarah Busby

Sarah Busby
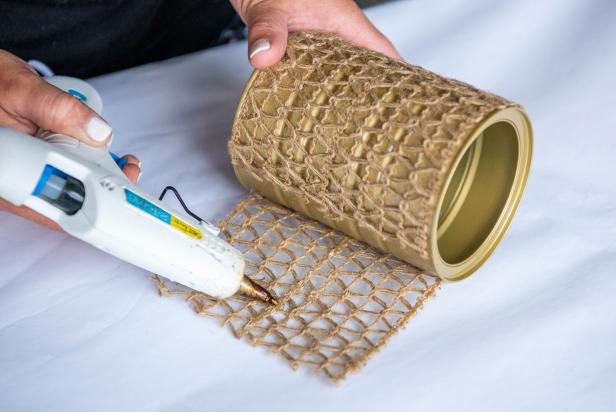
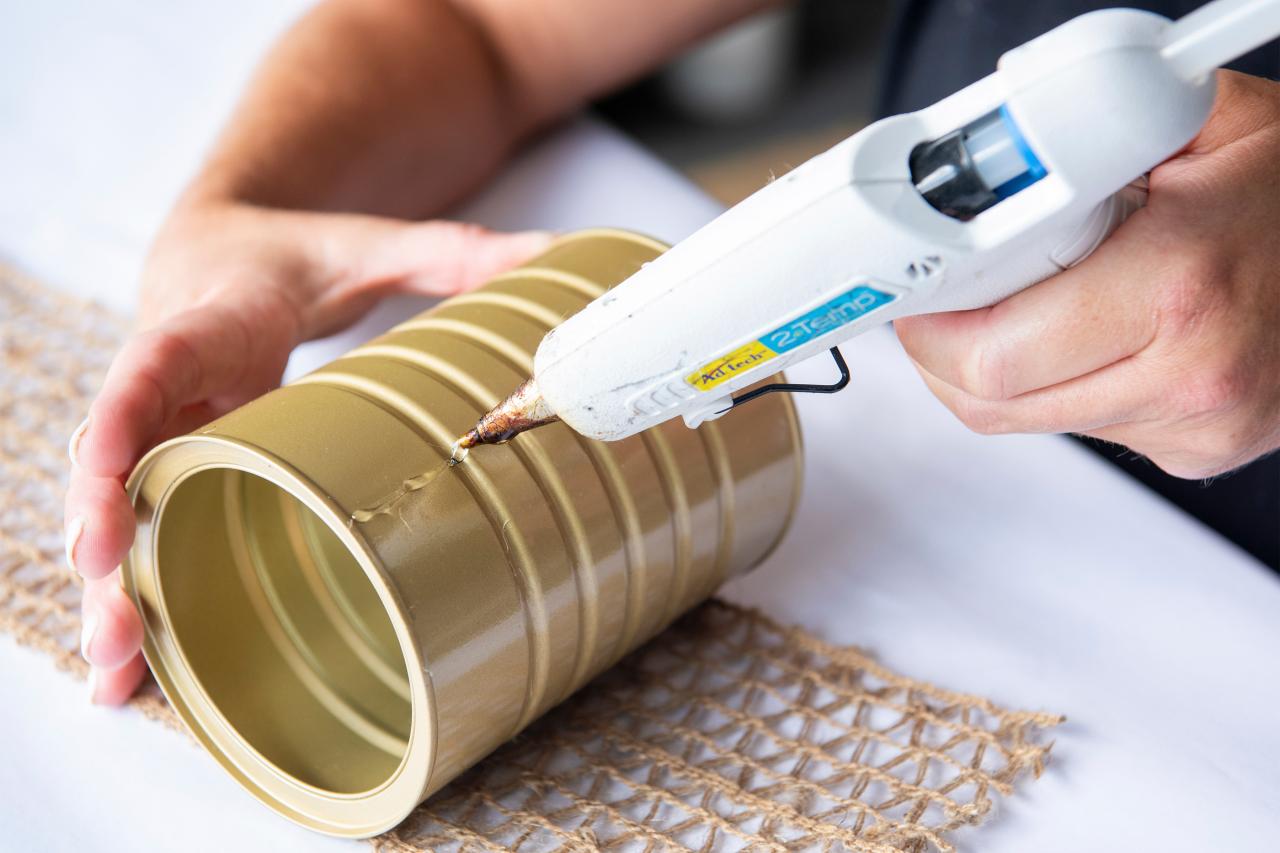
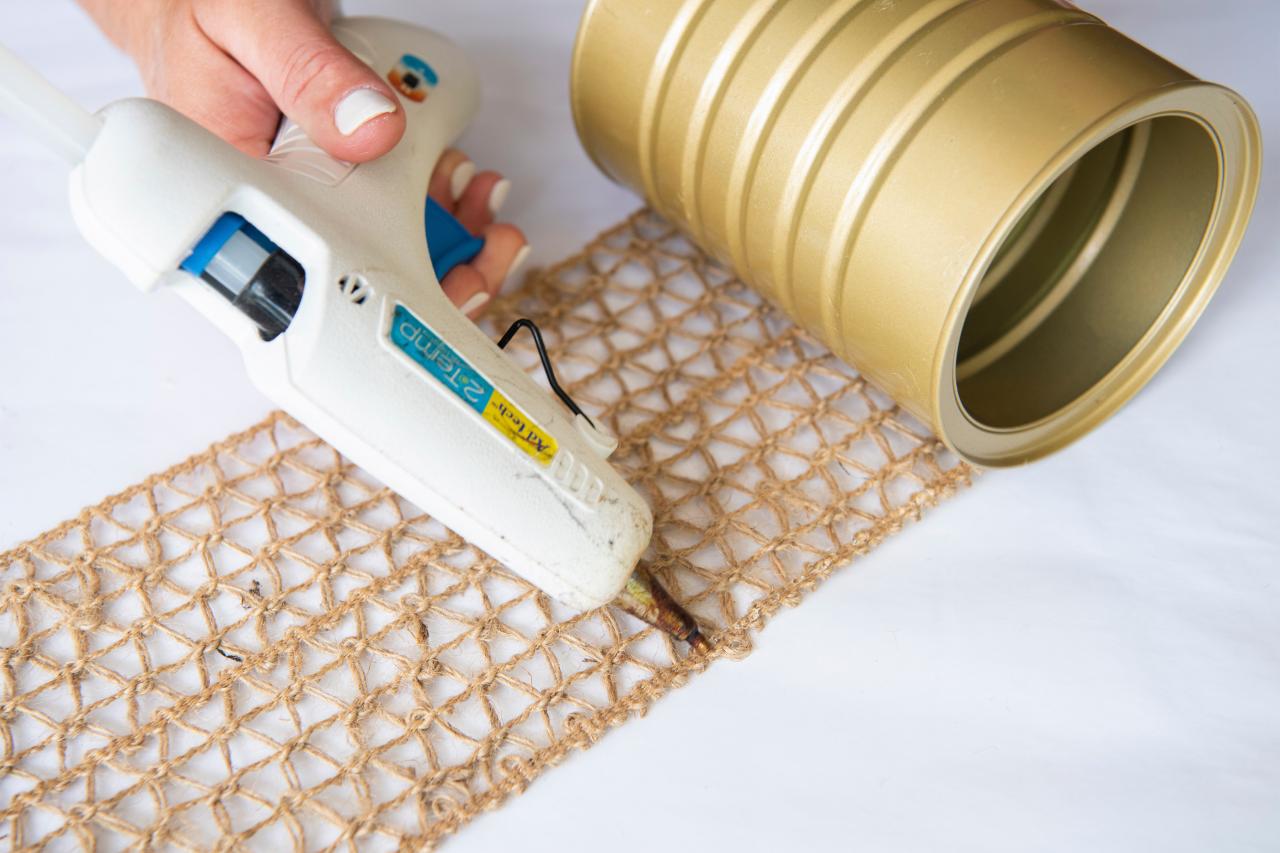
Wrap a Can in Woven Jute
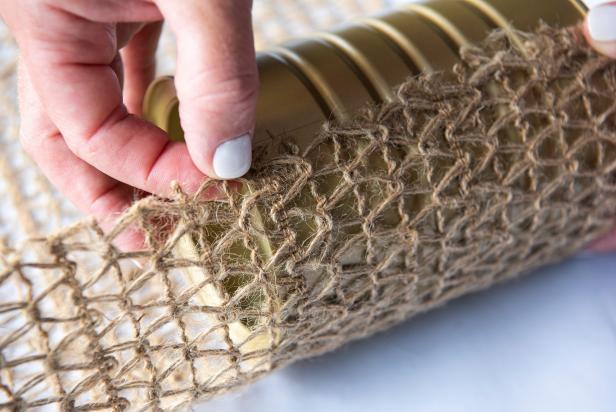
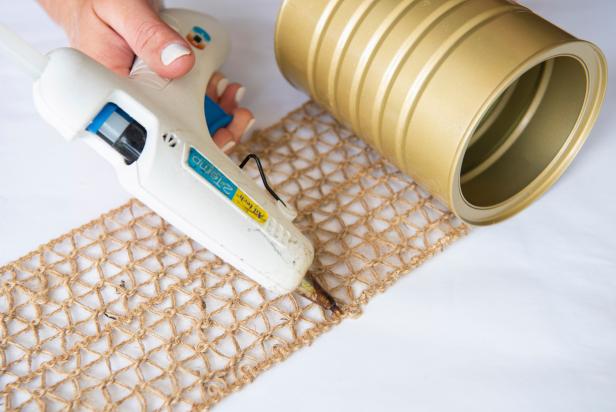
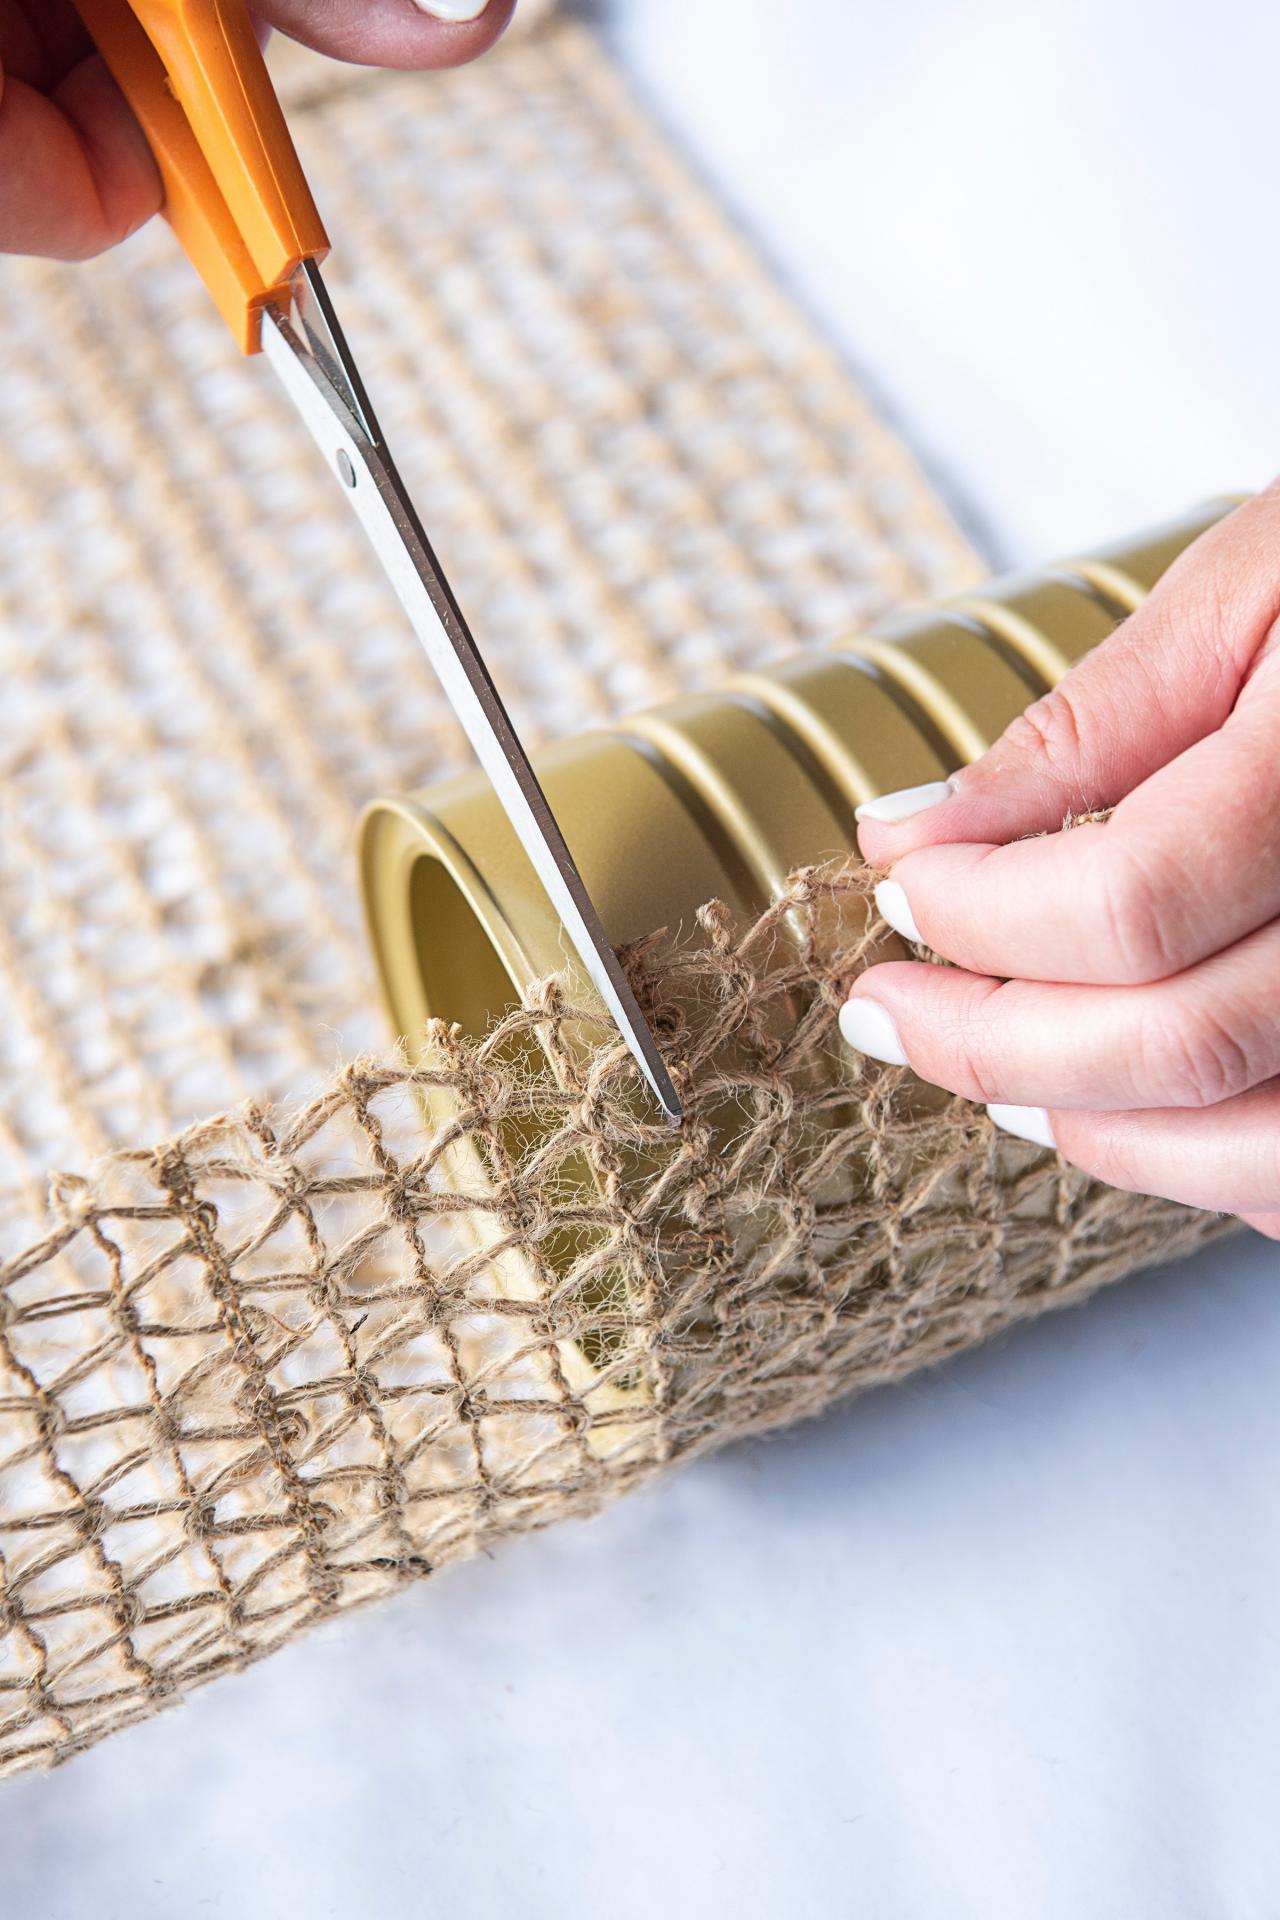
First, wrap the woven material around your painted can to determine where you'll cut (Image 1), then cut along one of the material's horizontal lines (Image 2). When you've cut a section that's the proper length and height to wrap the can with a bit of overlap, add a line of hot glue to secure one end (Image 3). Rolling the can as you go, continue adding hot glue to sections of the woven material, then pressing it onto the can (Image 4). Finally, create a finished seam by slightly overlapping the material, then hot-gluing it in place (Image 5).
Sarah Busby

Sarah Busby

Sarah Busby
Sarah Busby
Sarah Busby
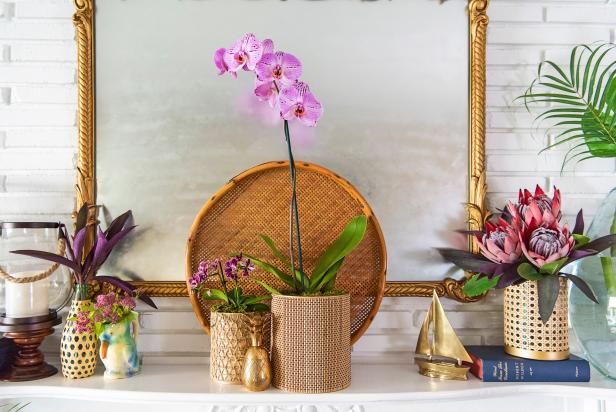
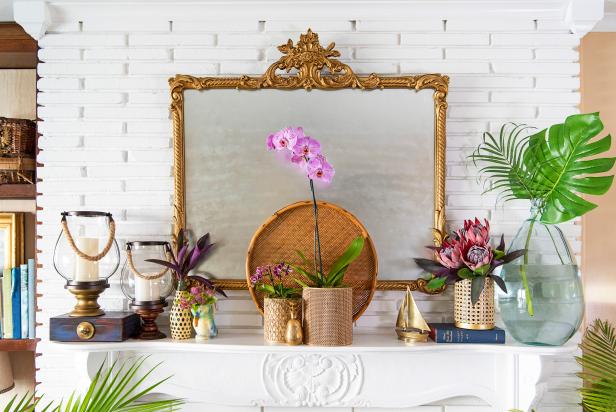
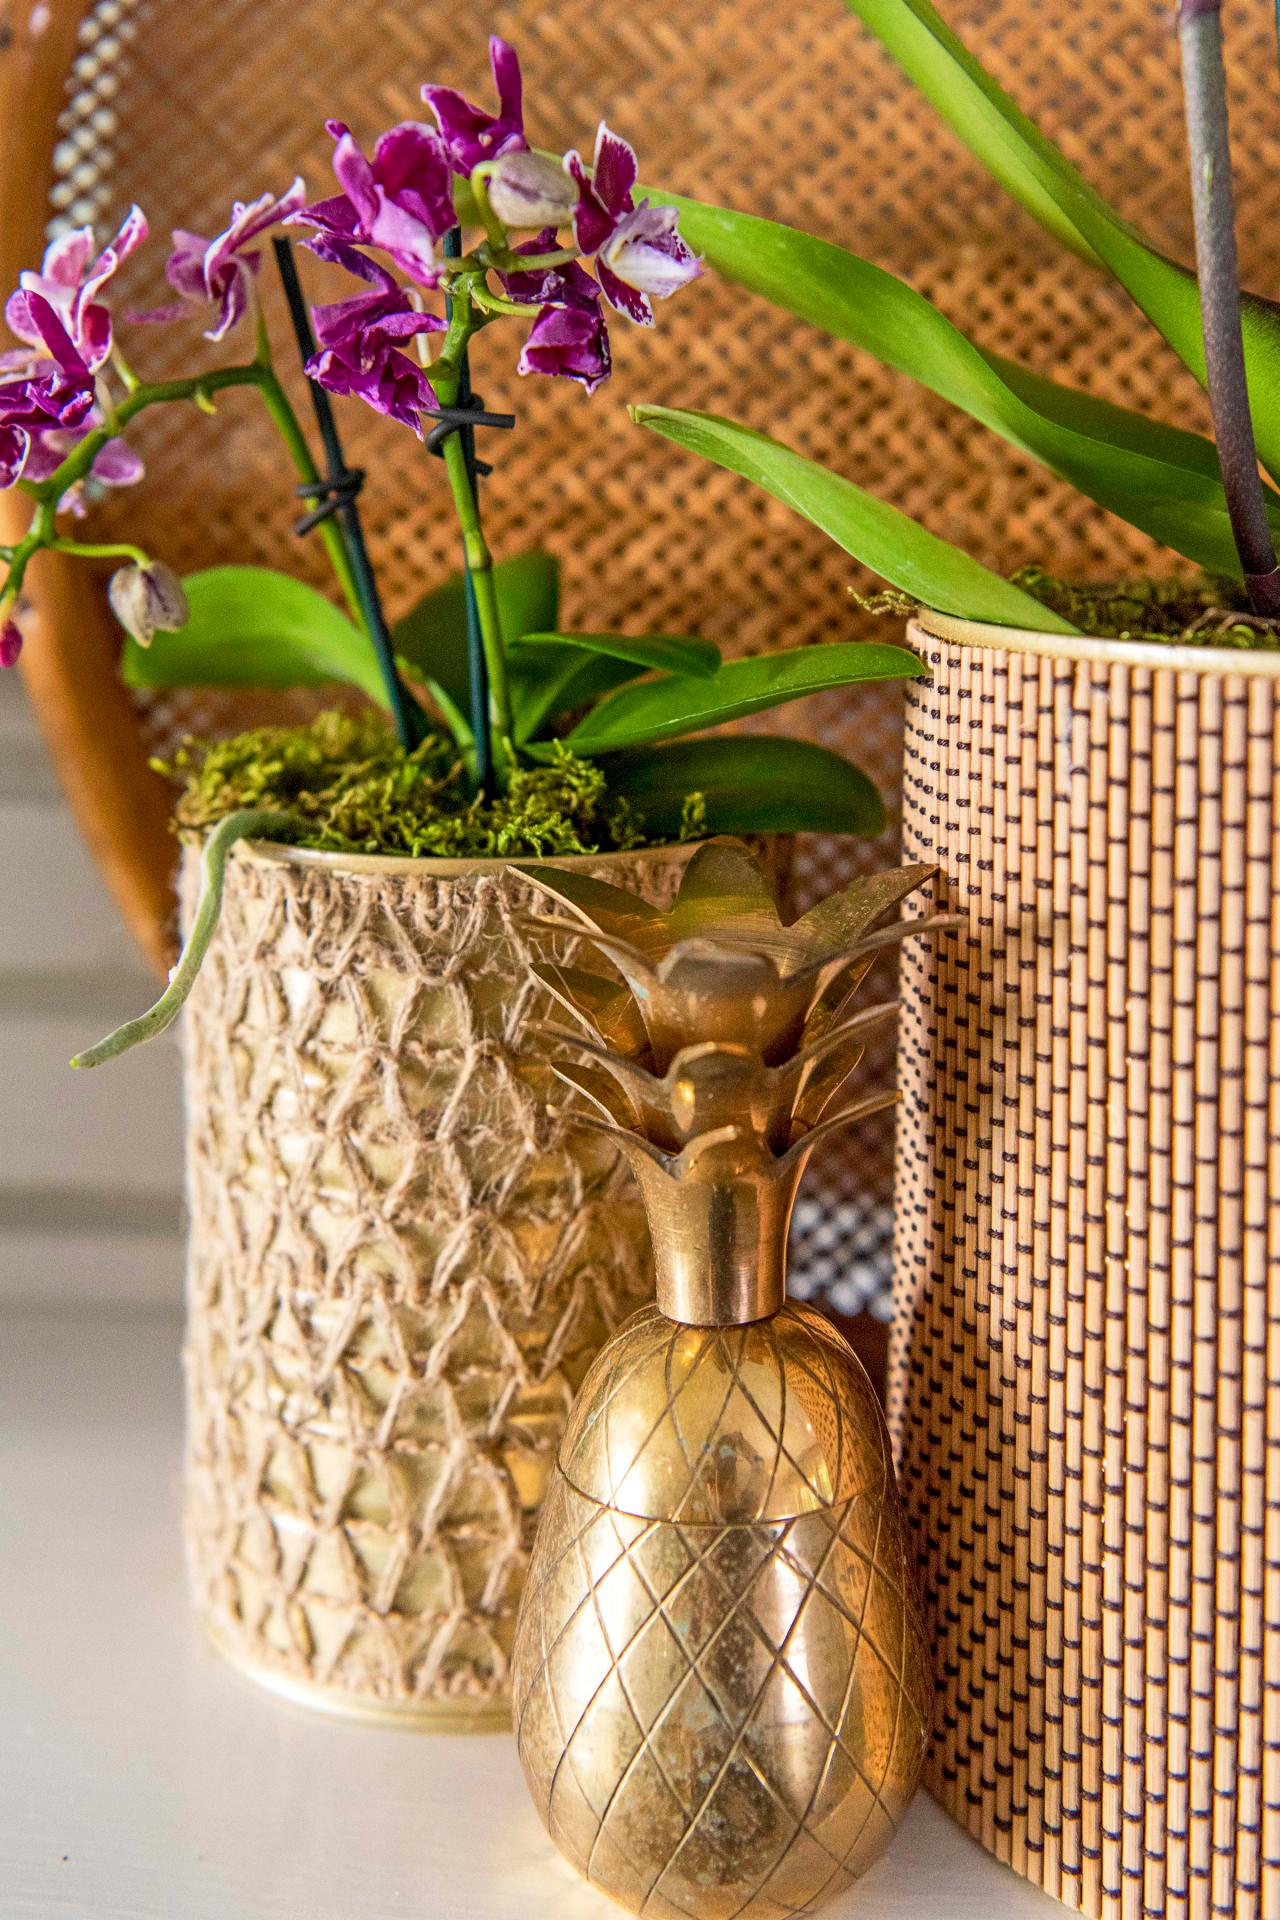
Add Potted Plants
Leaving the plants in their nursery pots, just slide your chosen plants into their beachy new cachepots. Optional: For a pretty finishing touch, add a layer of preserved moss to the top of each pot.

Photo by: Sarah Busby; Styling by H. Camille Smith
Sarah Busby; Styling by H. Camille Smith
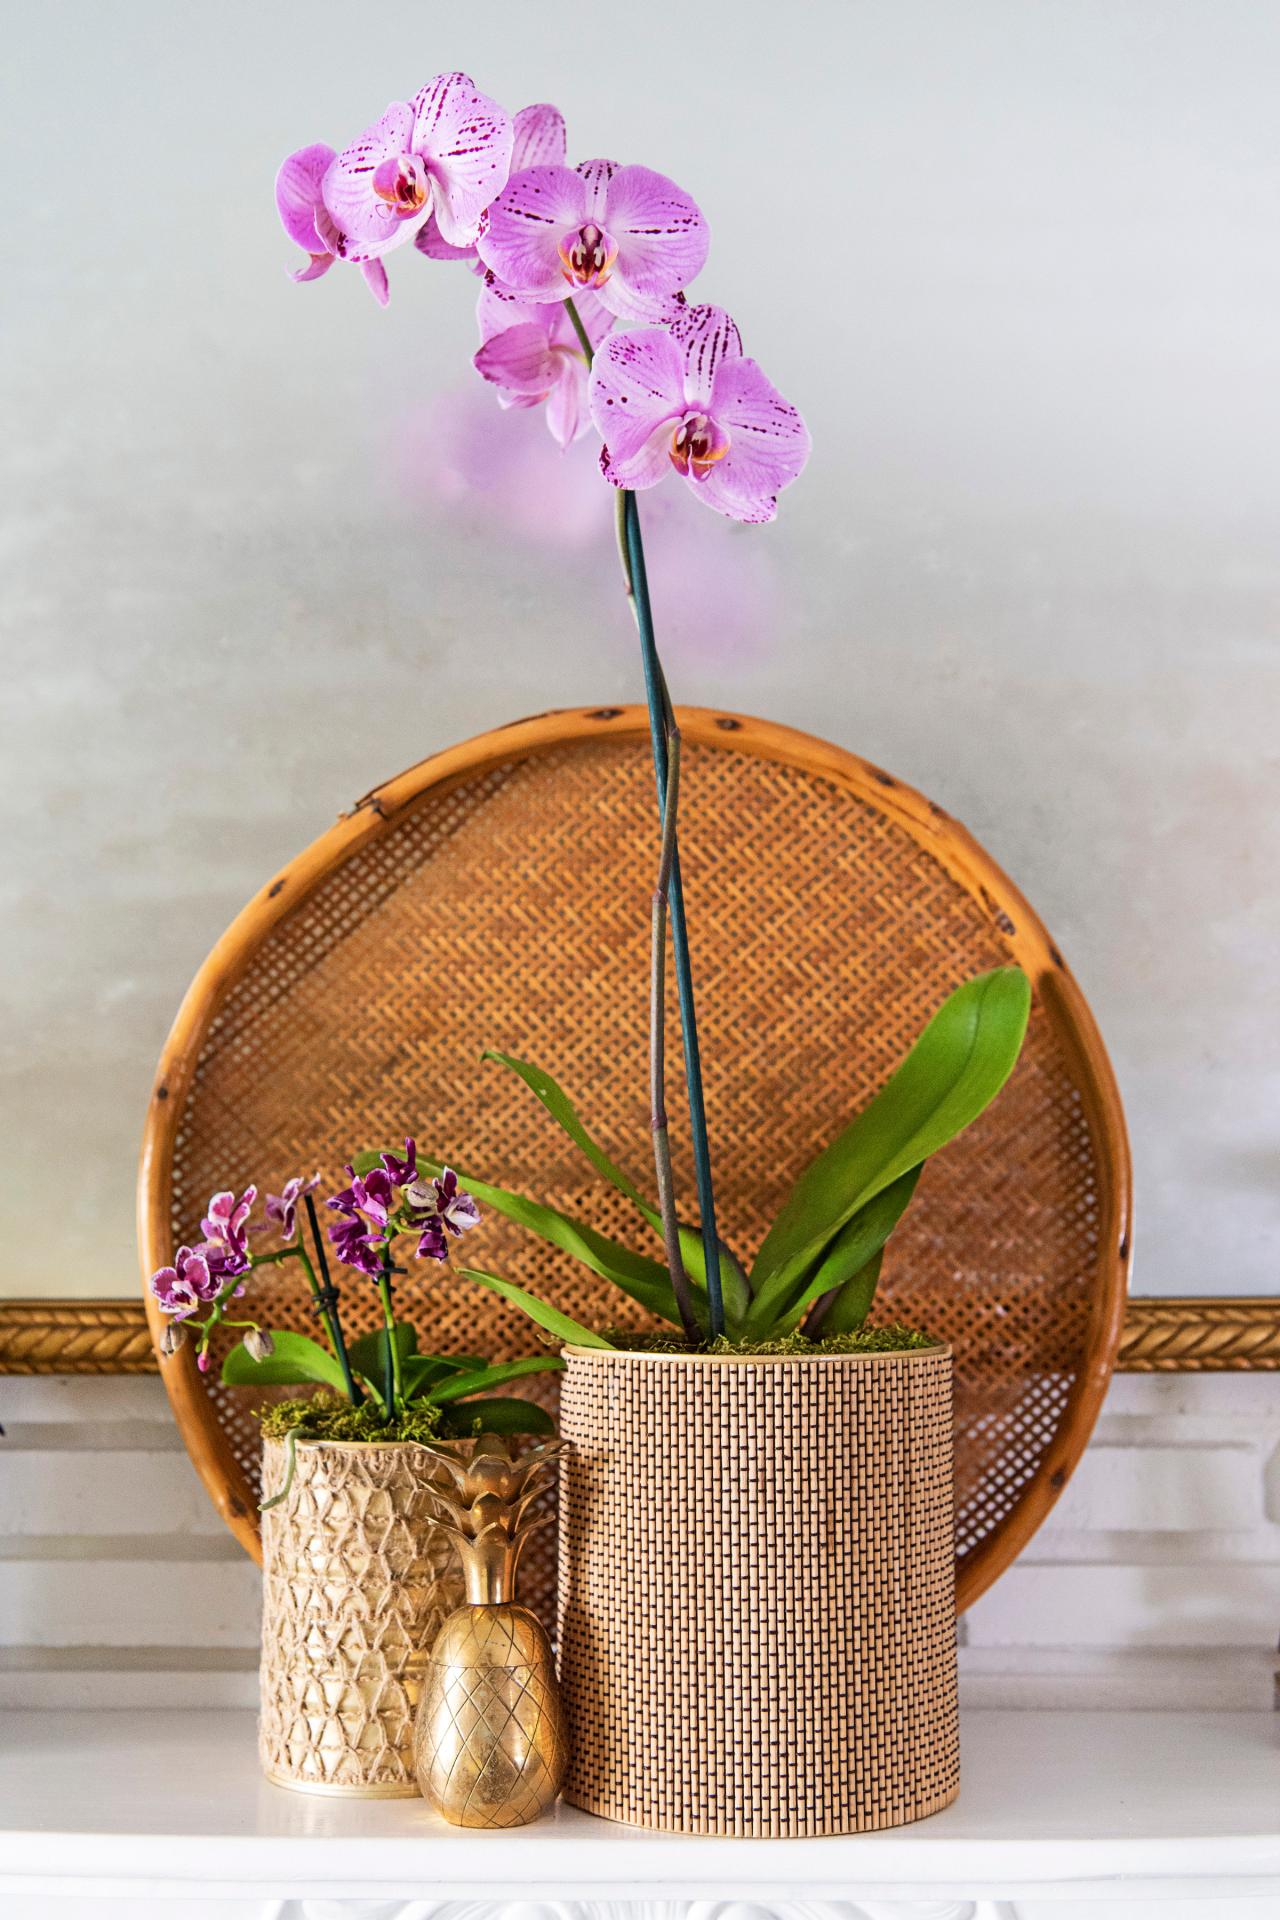
Display for a Tropical Touch
Perfect for adding a laidback beachy vibe, these upcycled cans look like trendy (and pricey!) accessories — only you'll know how easy and inexpensive they were to craft. Display them with other tropical-inspired touches for a beachy grouping that'll make every day feel like vacay (Images 1 and 2).
Sarah Busby; Styling by H. Camille Smith
Sarah Busby; Styling by H. Camille Smith
Photo By: Sarah Busby; Styling by H. Camille Smith
Photo By: Sarah Busby; Styling by H. Camille Smith


