


Fill Blank Walls With Modern Crayon Art

Original_Michelle-Edgemont-Melted-Crayon-Art_h

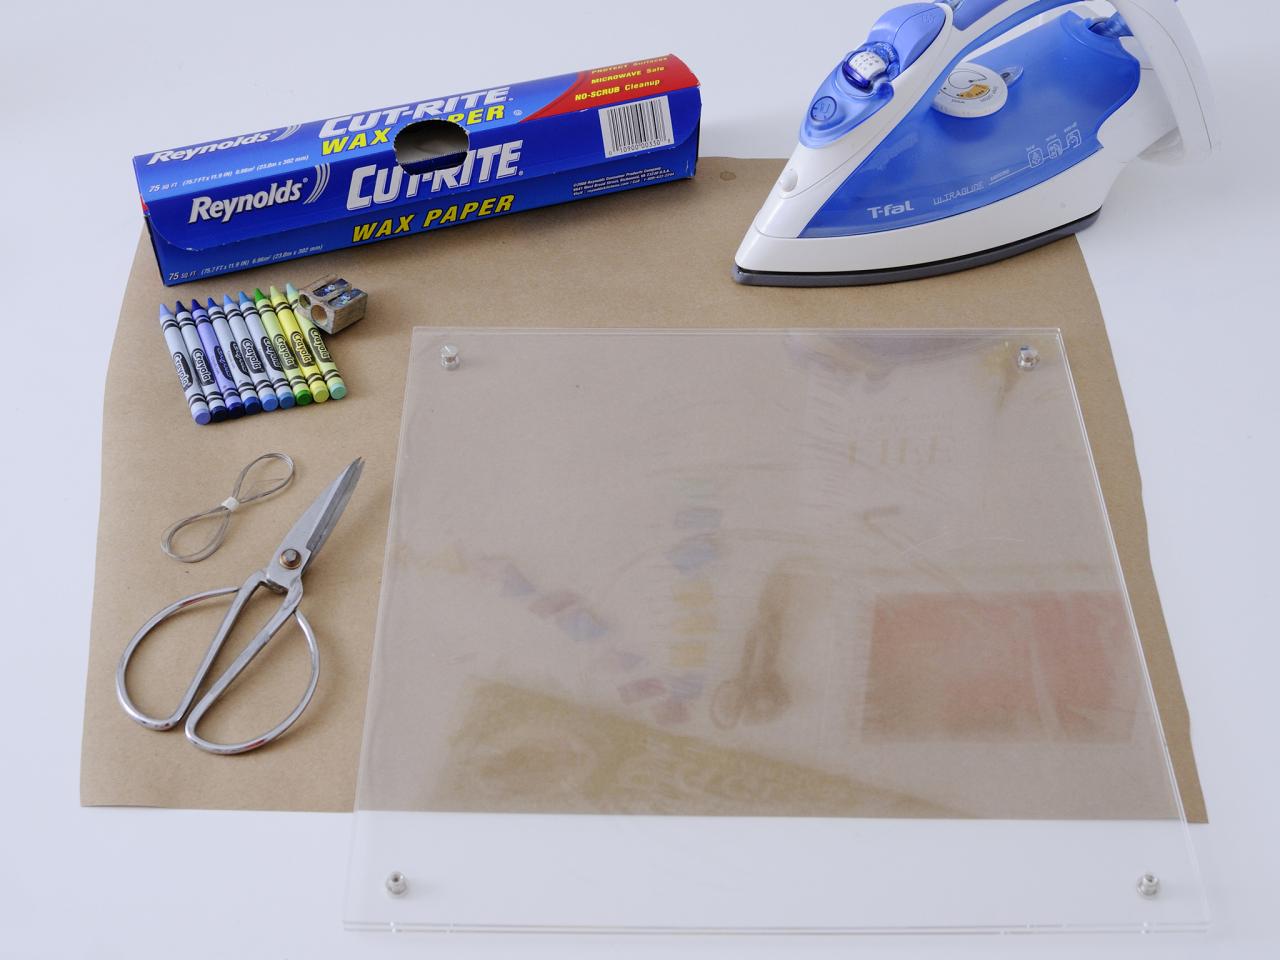
Materials Needed:
- roll of wax paper
- 2 large pieces kraft paper
- 9 crayons in similar hues
- iron
- scissors
- clear, acrylic frame
- pencil sharpener
Group Crayons
Separate the nine crayons into three groups of three. Each group should have a similar color story. For example, we did a blue and teal group, a light blue group and a green group. We're going to melt each group of colors together, so they need to be complementary.

Original_Michelle-Edgemont-Melted-Crayon-Art-Materials_h
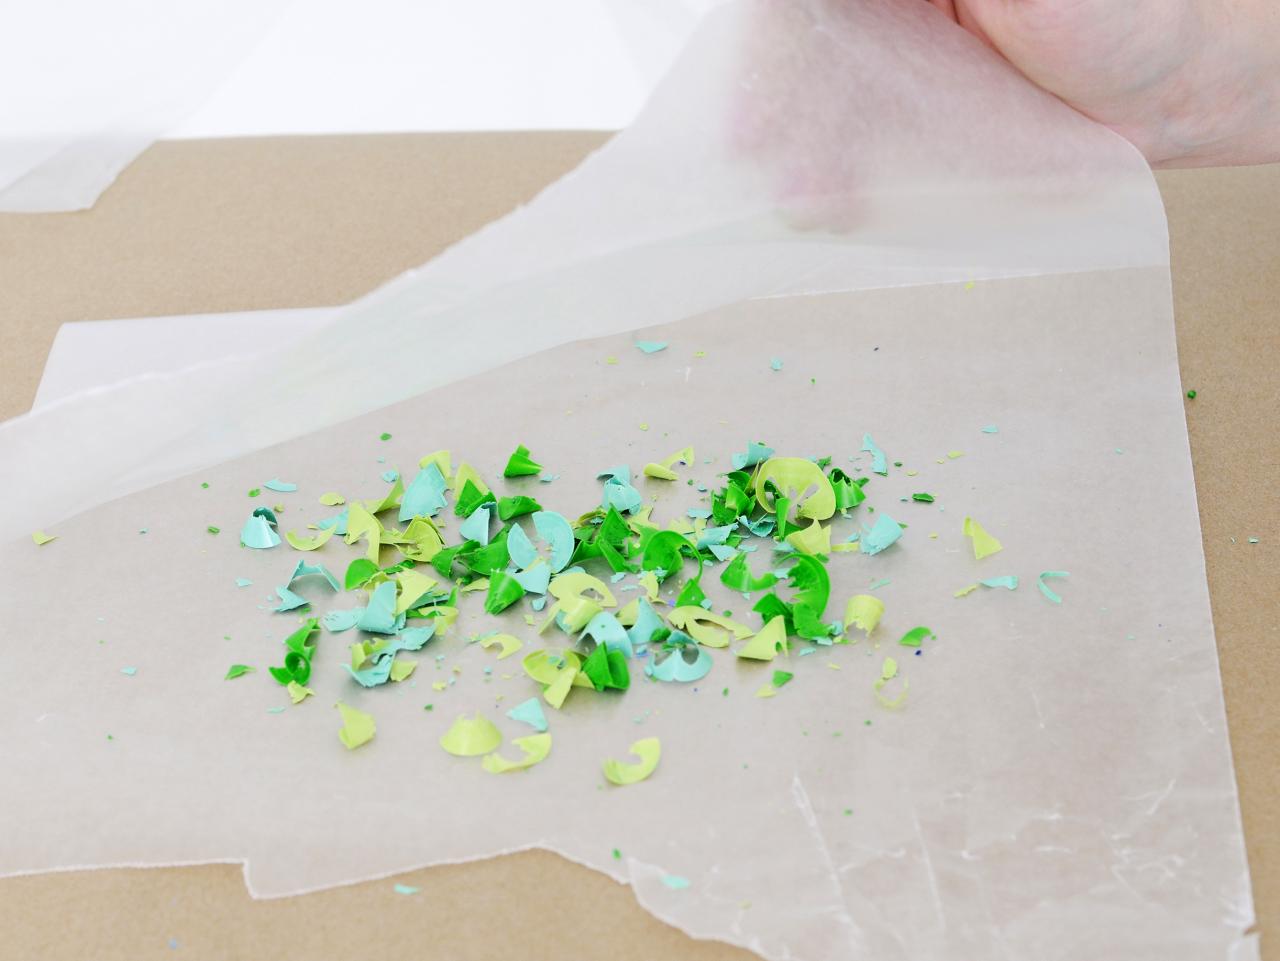
Prepare Wax Paper
Cut a piece of wax paper about 20" long, fold in half, then unfold. Place this on top of one piece of kraft paper.

Original_Michelle-Edgemont-Melted-Crayon-Art-Step-1-Waxed-paper_h
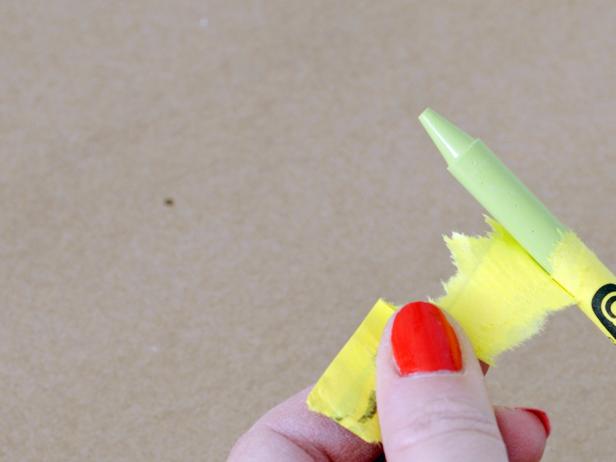
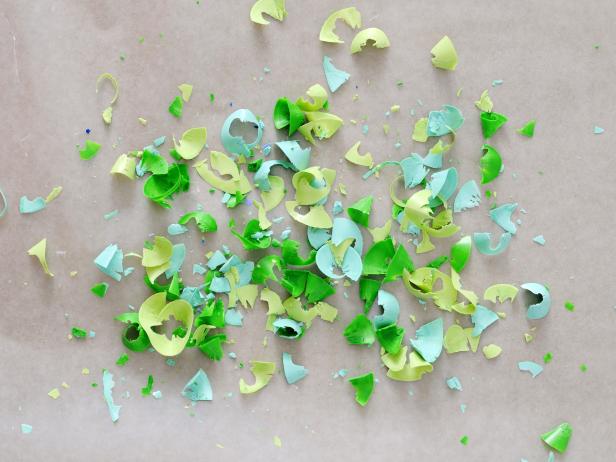
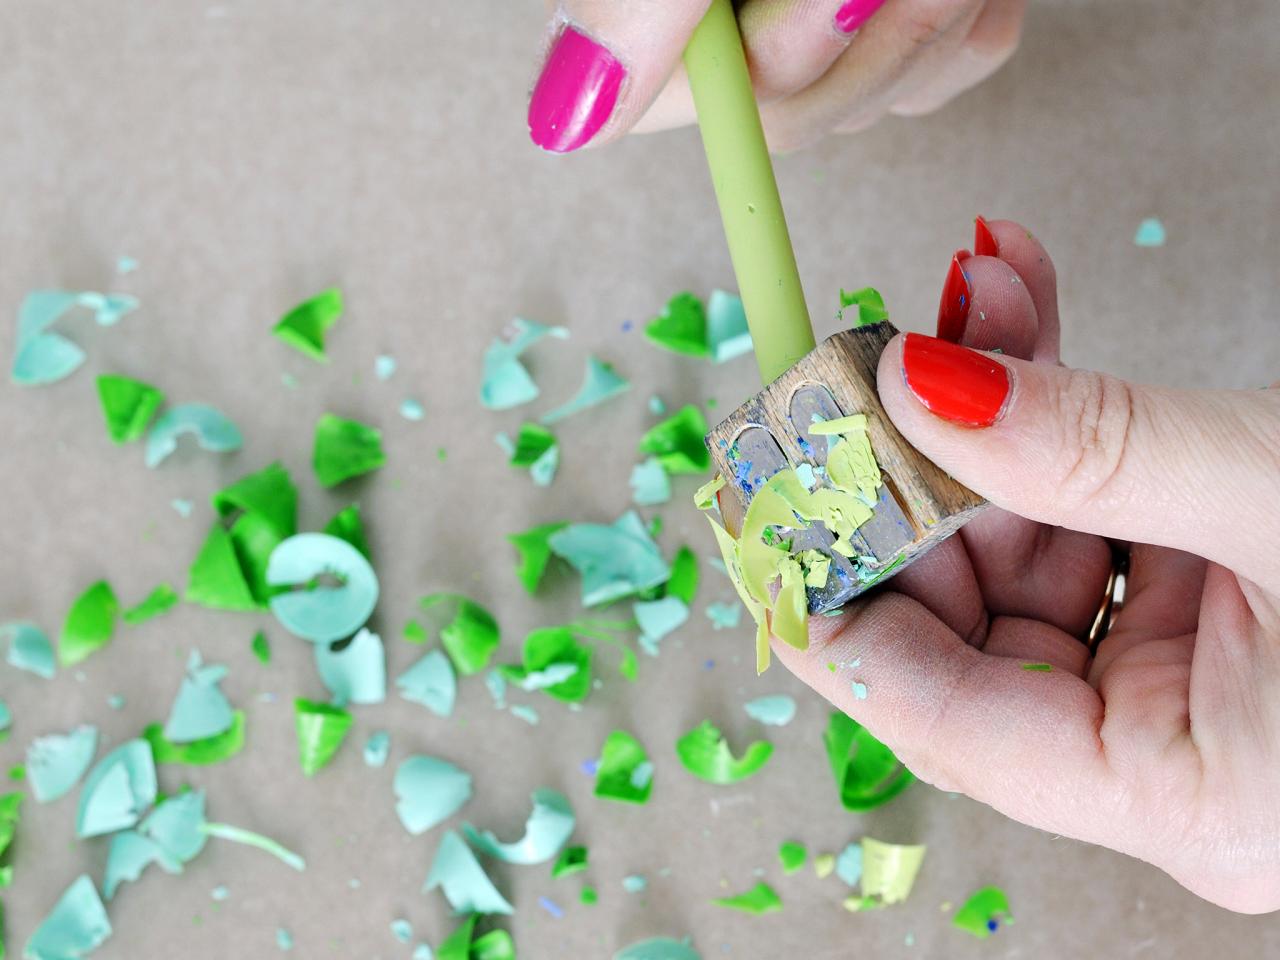
Shave Crayons Onto Wax Paper
Peel the paper labels off the crayons. Hold the pencil sharpener over the wax paper and sharpen the crayon to create shards. Keep twisting the crayon until 1/3 of it has been turned into wax shards. Then, take the next color of crayon in the group of 3 you’re working with and shred 1/3 of it over the wax paper. Repeat with final crayon.

Original_Michelle-Edgemont-Melted-Crayon-Art-Step-2-Peel-and-Shave-Crayons_h
Original_Michelle-Edgemont-Melted-Crayon-Art-Step-2b-Peel-and-Shave-Crayons_h
Original_Michelle-Edgemont-Melted-Crayon-Art-Step-3-Create-Melted-Crayon-Sections_h
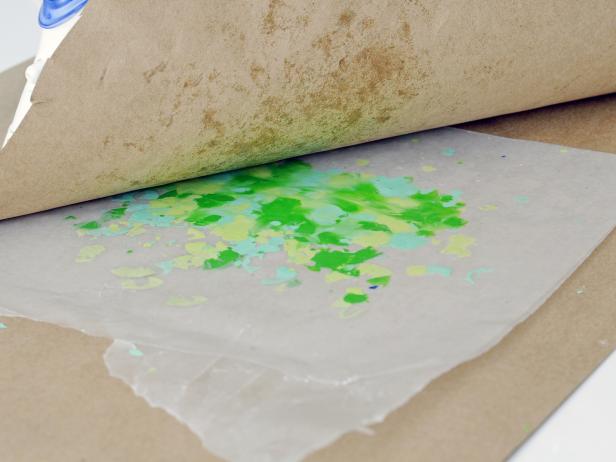
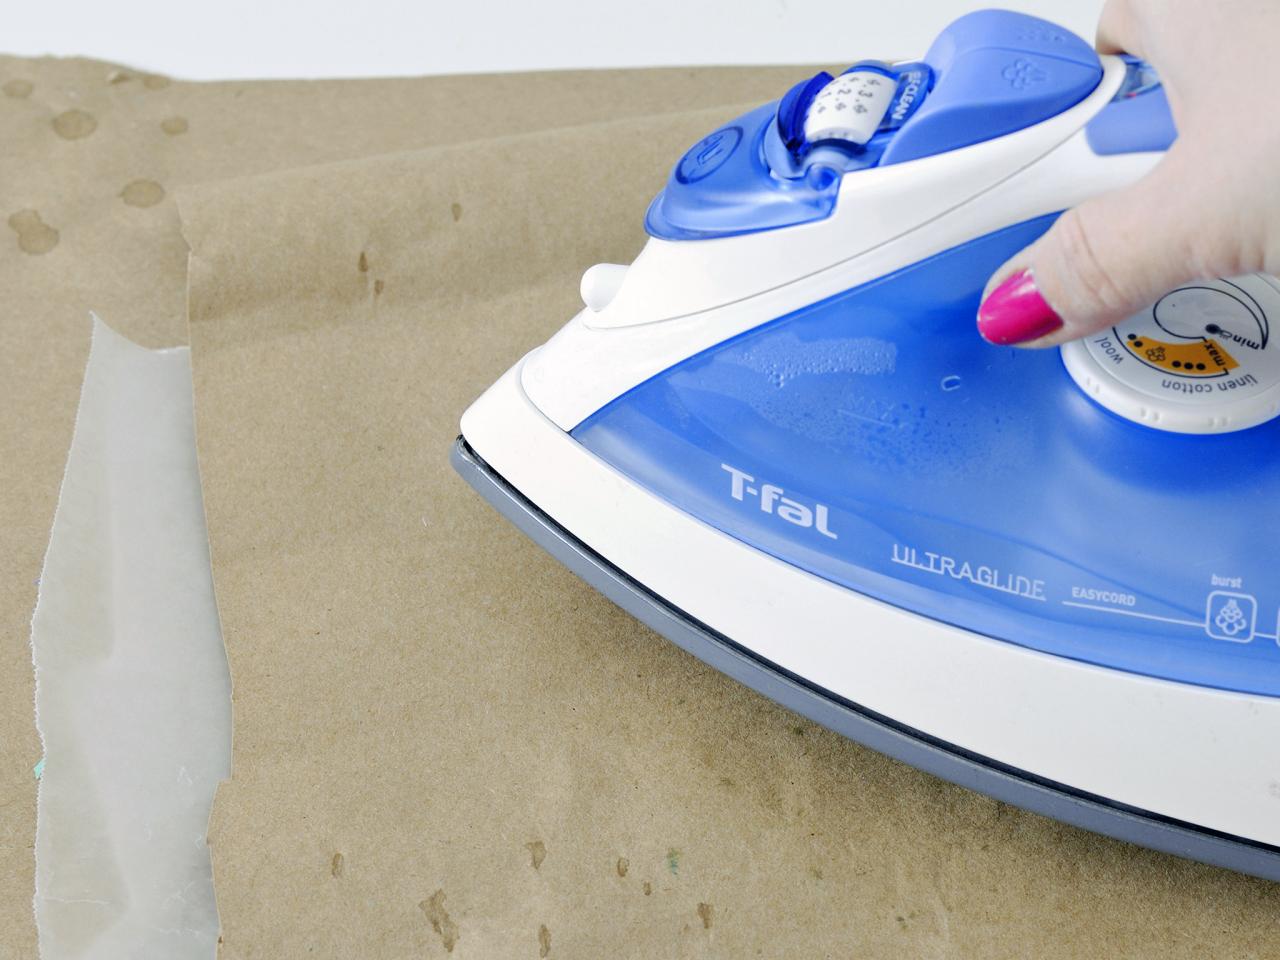
Melt Crayon Shavings Between Wax Paper
Heat iron to lowest setting. Fold the wax paper over the wax. Place the other piece of kraft paper over the folded wax paper. Iron over the kraft paper until the crayon wax melts, checkong it every few seconds. The colors will melt together to create an abstract pattern.
Repeat the shaving and melting process with the first color group, then with the other two groups of crayons and additional pieces of wax paper. Create two melted crayon wax paper pieces for each color group.


Original_Michelle-Edgemont-Melted-Crayon-Art-Step-3b-Create-Melted-Crayon-Sections_h
Original_Michelle-Edgemont-Melted-Crayon-Art-Step-3d-Create-Melted-Crayon-Sections_h
Original_Michelle-Edgemont-Melted-Crayon-Art-Step-3c-Create-Melted-Crayon-Sections_h
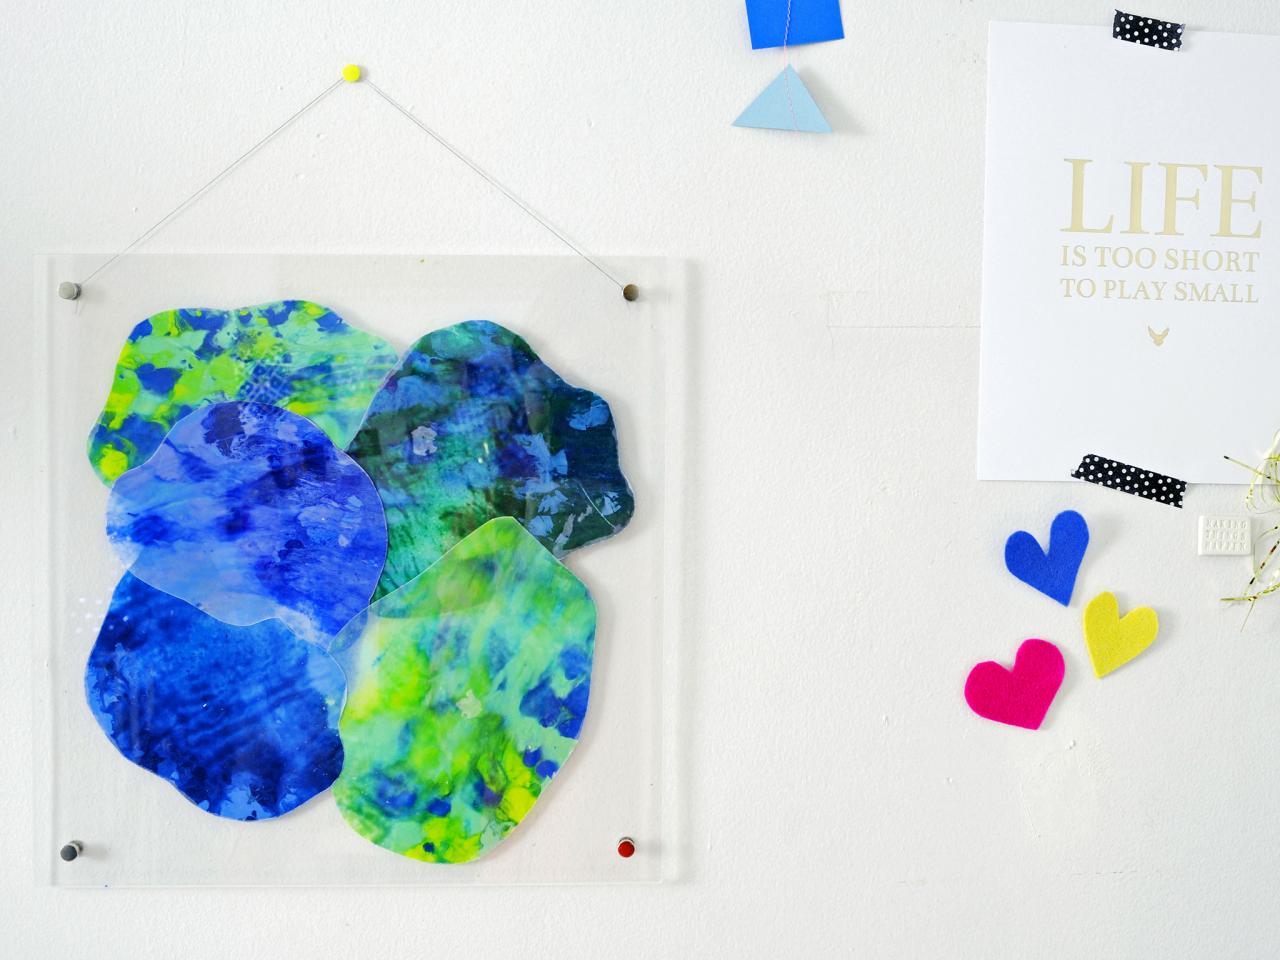
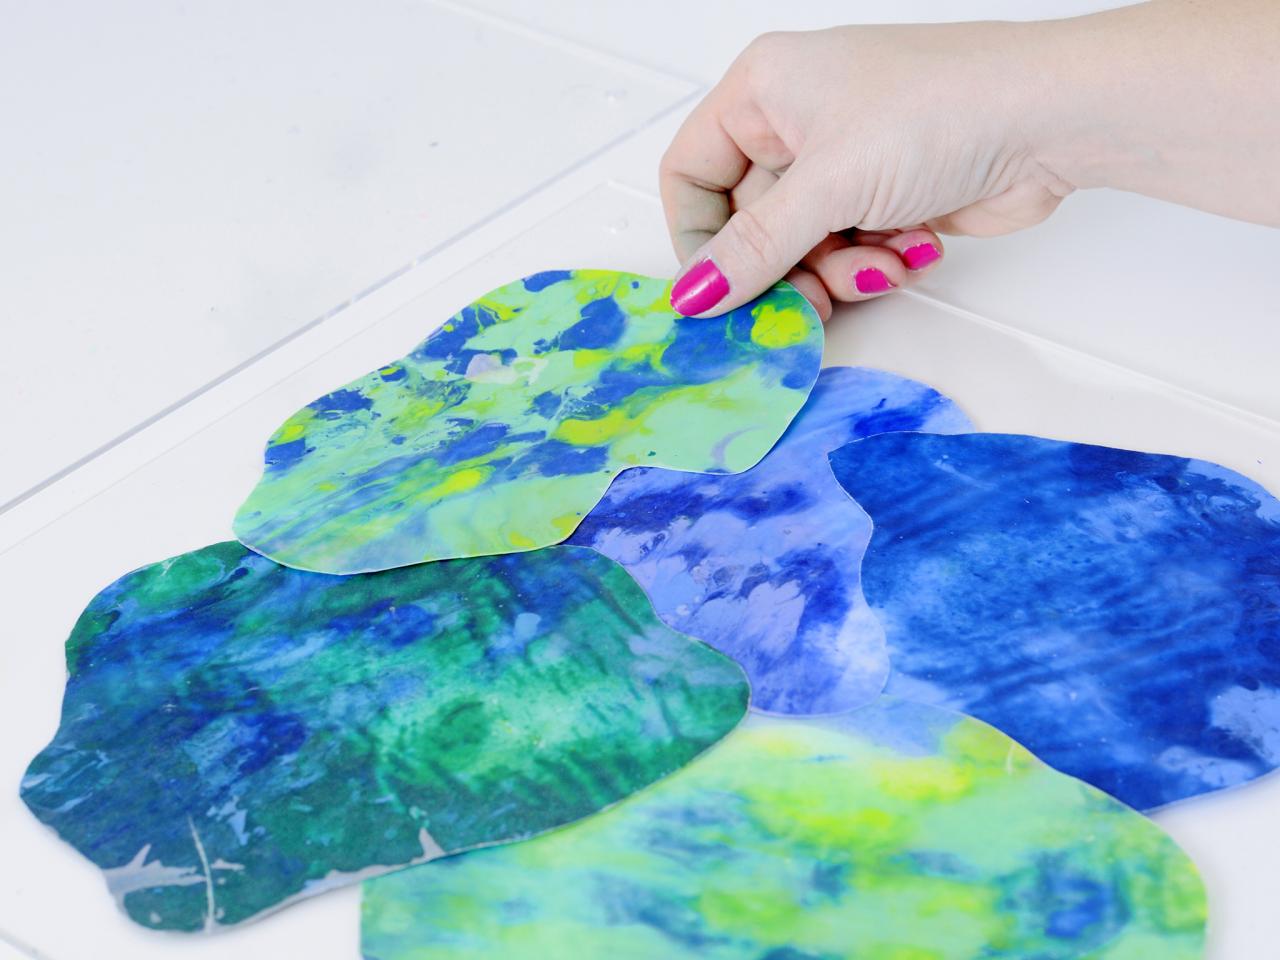
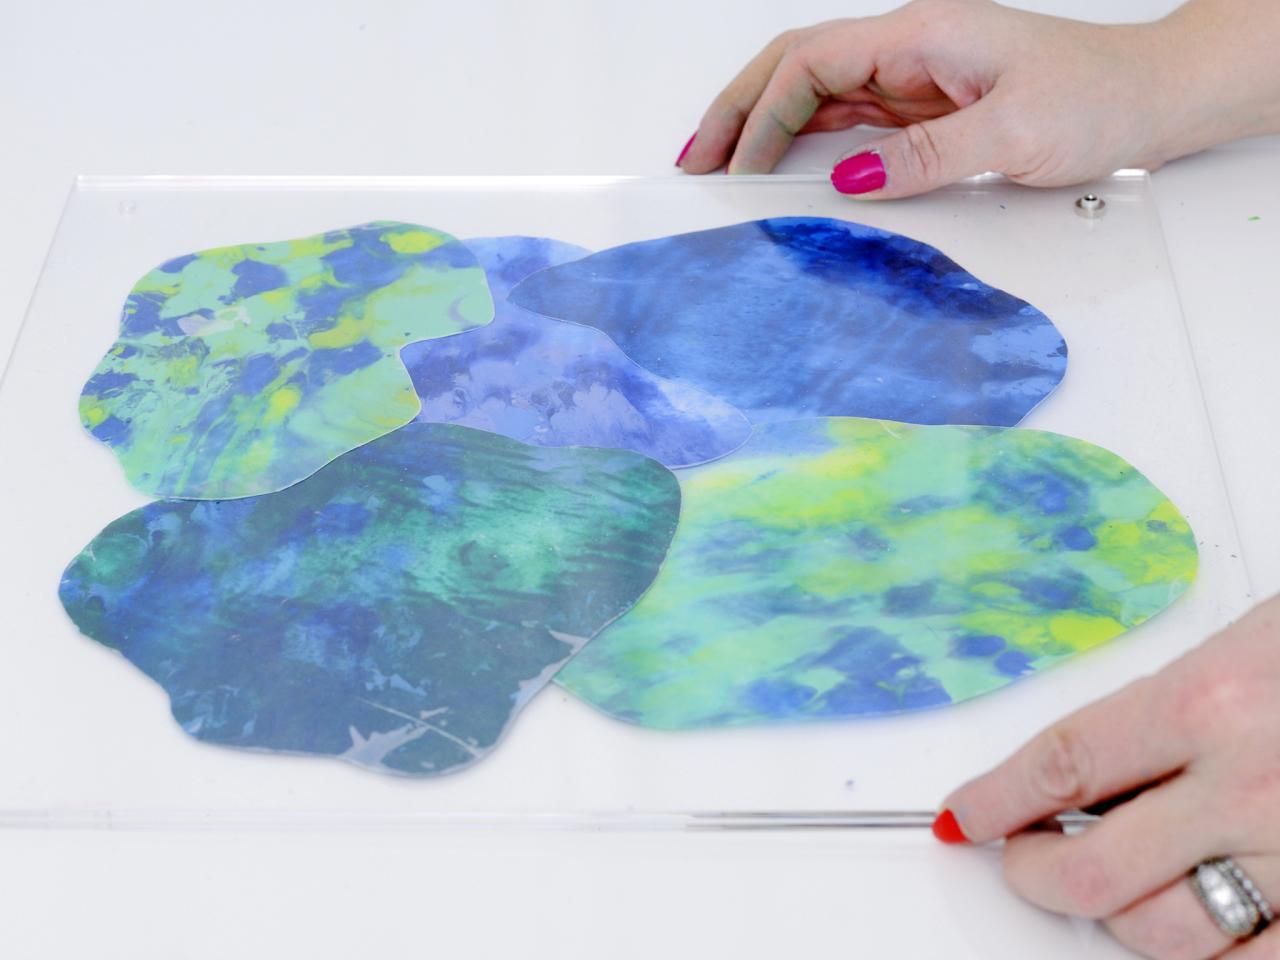
Cut Out and Arrange Designs
Using scissors, cut around the wax paper crayon designs to create organic shapes. Open the acrylic frame and arrange the crayon shapes in an abstract fashion, layering the shapes on top of each other. When you're happy with the design, put the frame back together, holding the shapes in place.


Original_Michelle-Edgemont-Melted-Crayon-Art-Step-4-Arrange-Melted-Crayon-Cutouts_h
Original_Michelle-Edgemont-Melted-Crayon-Art-Step-4b-Arrange-Melted-Crayon-Cutouts_h
Original_Michelle-Edgemont-Melted-Crayon-Art-Step-4c-Arrange-Melted-Crayon-Cutouts_h
Hang and Enjoy
Hang on a white wall around your favorite things.

Original_Michelle-Edgemont-Melted-Crayon-Art-Beauty_v


