


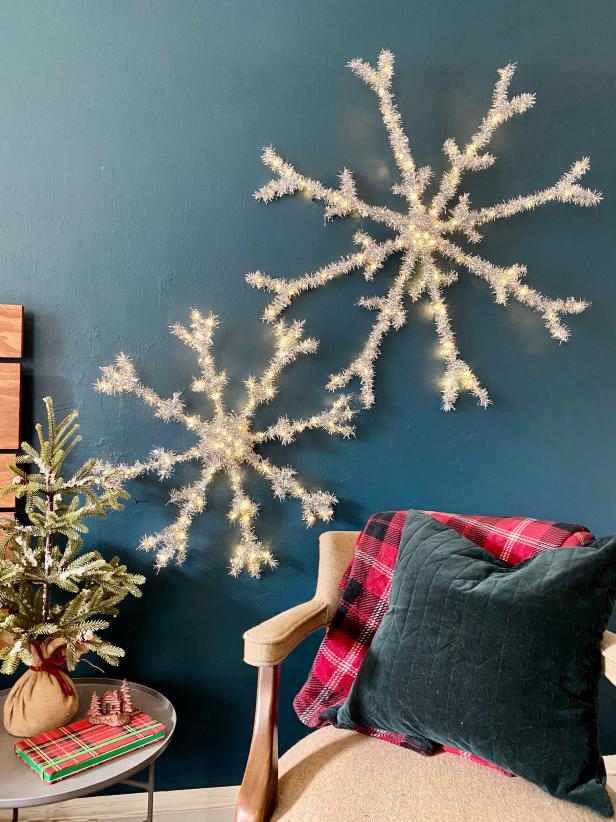
Turn Wire Hangers Into Oversized, Light-Up Snowflake Decorations
Transform clumsy wire hangers into twinkling snowflakes in a few easy steps with materials you probably already have on hand.

Crafty Lumberjacks

If you like to clean and purge before decorating for the holidays, this is the perfect upcycle for you. Use what you have to make a festive impact: Turn those old wire hangers into larger-than-life, light-up snowflake holiday decorations you can keep up all winter long and use year after year.
Materials + Tools
- wire hangers
- wire cutters
- duct tape
- tinsel garland
- scissors
- battery-operated fairy lights
- silver floral wire
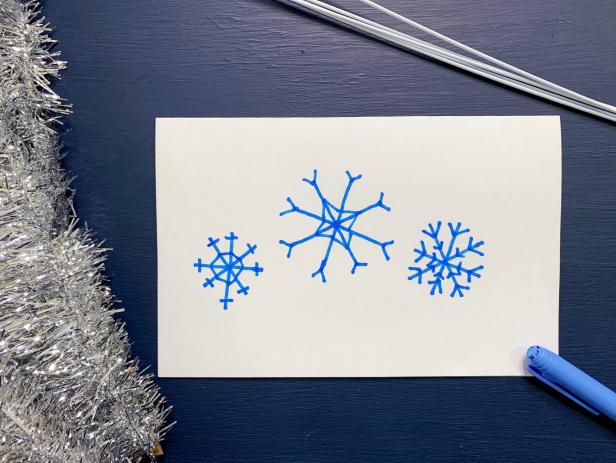
Design Snowflakes
Find inspiration for your snowflakes online. For best results and easy assembly, choose a simple image without a lot of detail or design your own snowflake pattern. Measure the space where you would like to hang the snowflakes to determine their size.
Crafty Lumberjacks
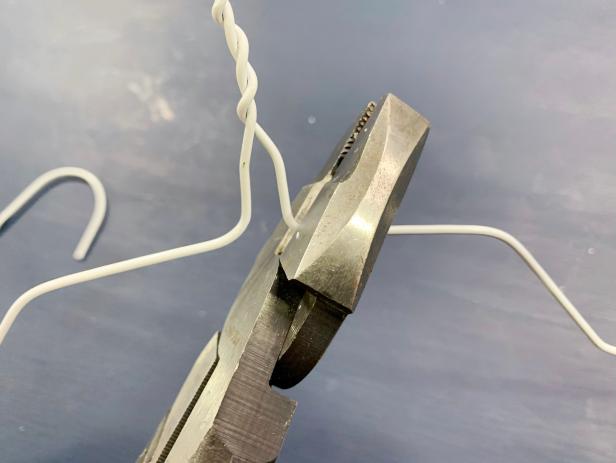
Cut + Straighten Hangers
Use wire cutters to cut four hangers, cutting away the top hooks of each hanger. Use the wire cutters or pliers to carefully bend and straighten the hangers. This method will give you the most wire to work with. Don’t worry if the hangers aren't perfectly straight; the tinsel is very forgiving and will hide any imperfections.
Crafty Lumberjacks
Cut + Assemble Spokes
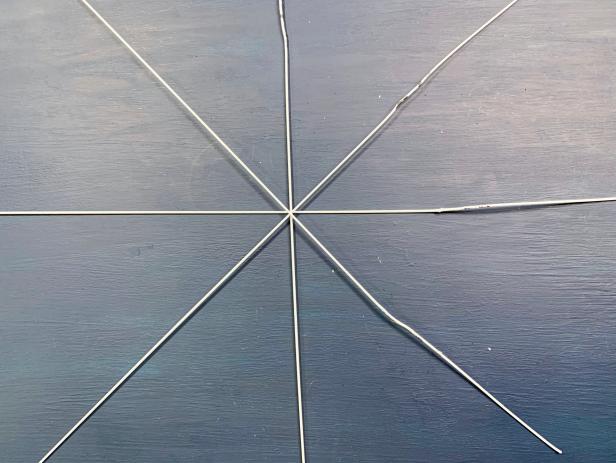
Using your design and measurements as a guide, determine the length of your snowflake's spokes and use wire cutters to cut the hangers down to size. Tip: You should be left with some extra hanger wire. Keep this for the snowflake details.
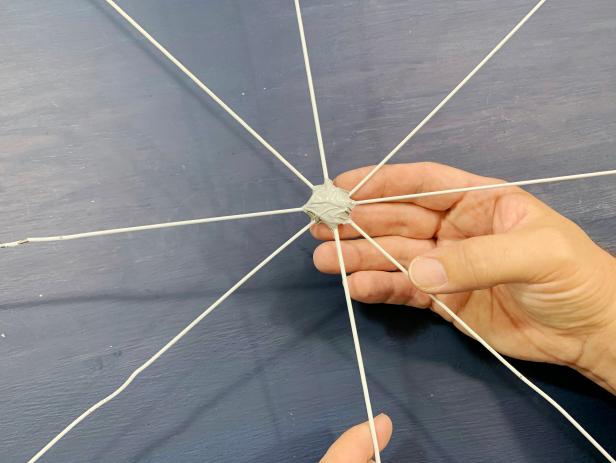
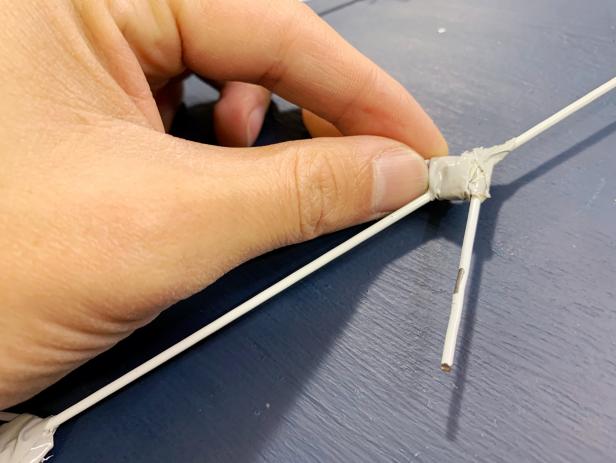
Lay out two pieces of hanger wire to create a plus sign with the center points meeting in the middle (Image 1). Tape them in place using small pieces of duct tape. Lay the remaining hangers in an "X" shape on top to create your spokes. Secure all the pieces with tape (Image 2).
Crafty Lumberjacks
Crafty Lumberjacks
Create Snowflake Details
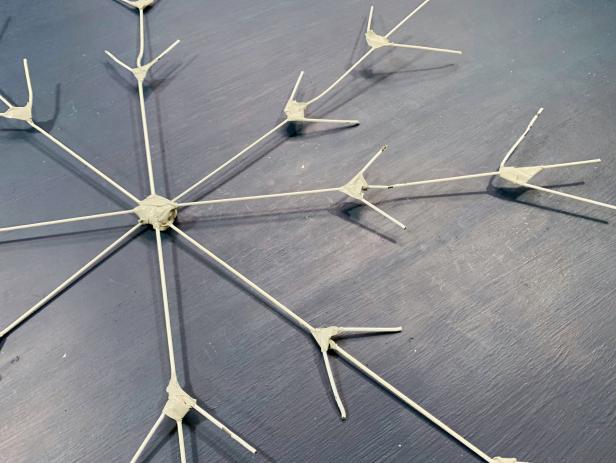
Cut the leftover hanger wire, straightening it out if necessary, into eight large pieces and eight small pieces. We'll use this to detail the snowflake spokes, so reference your design. Get as creative as you wish with the details, but keeping them simple works best. Bend each piece in the middle to create a “V” shape before taping it into place along the spokes (Image 1). Tape the larger V's towards the end of each spoke and tape the smaller V’s towards the center point (Image 2 + 3).
Crafty Lumberjacks
Crafty Lumberjacks

Crafty Lumberjacks
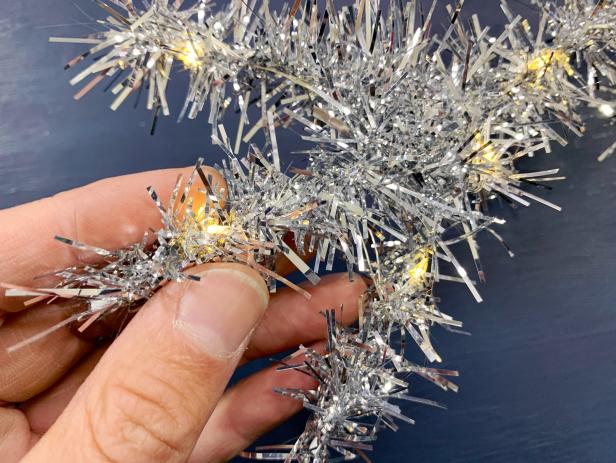
Wrap With Tinsel
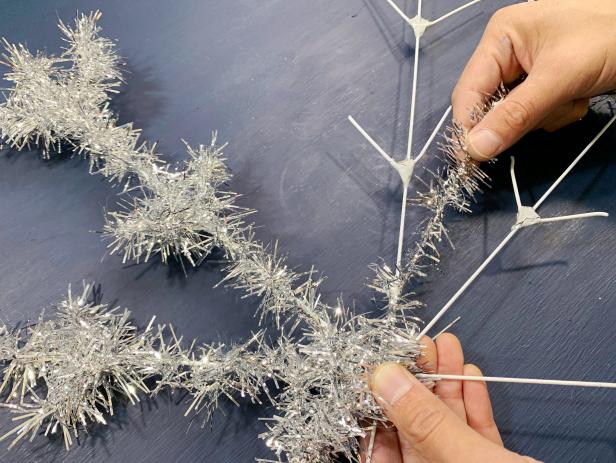
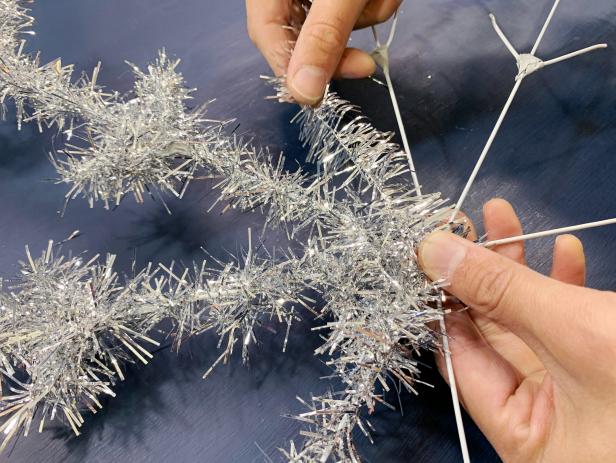
Starting at one end of a spoke, tightly wrap tinsel around to cover the entire snowflake (Image 1). You can cut the tinsel down to smaller pieces to make it easier to wrap. Tip: If the tinsel does not have wire, use a hot glue gun to glue down the edges.
Loosely wrap a piece of tinsel around the center point where the spokes meet, weaving the tinsel over and under each spoke (Image 2). This will bulk up the center and help hide the lights' battery pack.
Crafty Lumberjacks
Crafty Lumberjacks
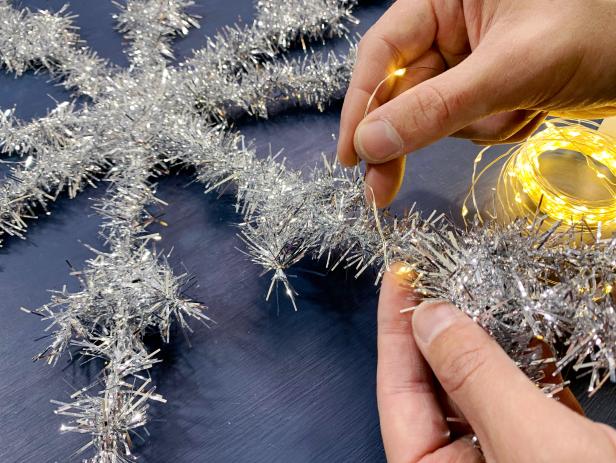
Wrap With Lights
Place the battery pack in the center of the snowflake. Wrap the lights, working from the tips to the center (Image 1 + 2). Pay close attention when wrapping the lights to make sure you have enough to evenly wrap each spoke. Depending on the size of your stars and the length of your snowflake, you may need to either double-wrap the spokes with lights or only take the lights halfway up the snowflake's spokes.
Crafty Lumberjacks
Crafty Lumberjacks
Secure + Hide Battery Pack
Place the battery pack on the center of the snowflake. Cut two long pieces of silver floral wire and wrap each piece tightly around the front of the snowflake and over the battery pack, creating an "X" shape to secure (Image 1). Use more floral wire if needed. Use more floral wire to hang in the desired location (Image 2).

Crafty Lumberjacks
Crafty Lumberjacks
Holiday Decorating Crafts

How to Make Paper Snowflakes
A great winter or Christmas craft to make with kids, you can let it snow inside by creating your very own wintry flurry of paper snowflakes.

Make an Embroidery Hoop Holiday Wreath
Make an elegant, oversized (but lightweight!) holiday wreath with an embroidery hoop and faux boxwood greenery.

Make Festive Tomato Cage Yard Gnomes
Add whimsy and cheer to your holiday decor by creating no-sew, larger-than-life gnomes out of tomato cages.


