


How to Make a Cardboard Christmas Tree
From the crafter who brought you the cardboard fireplace, meet the recycled cardboard Christmas tree.


Shipping boxes piling up from another round of online shopping? Reuse them to create this 3D cardboard Christmas tree that you can actually decorate and give your home eco-friendly, festive flair.

Materials + Tools
- cardboard (for best results, use pieces that are at least 48" x 16")
- Christmas Tree pattern
- pencil
- cardboard box sealing tape
- scissors
- craft knife
- cutting mat
- paint and paintbrush or spray paint
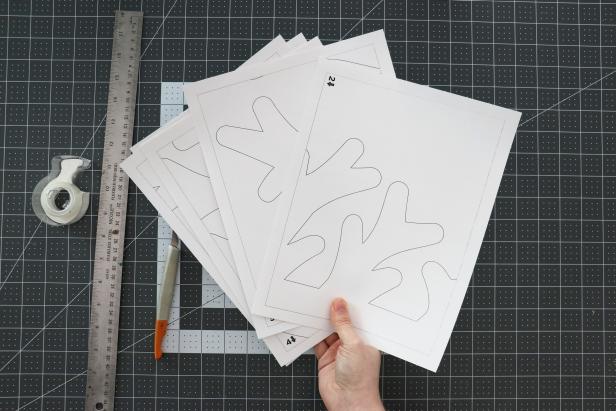
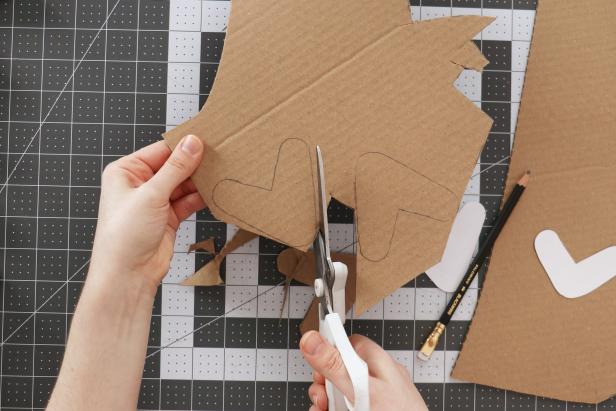
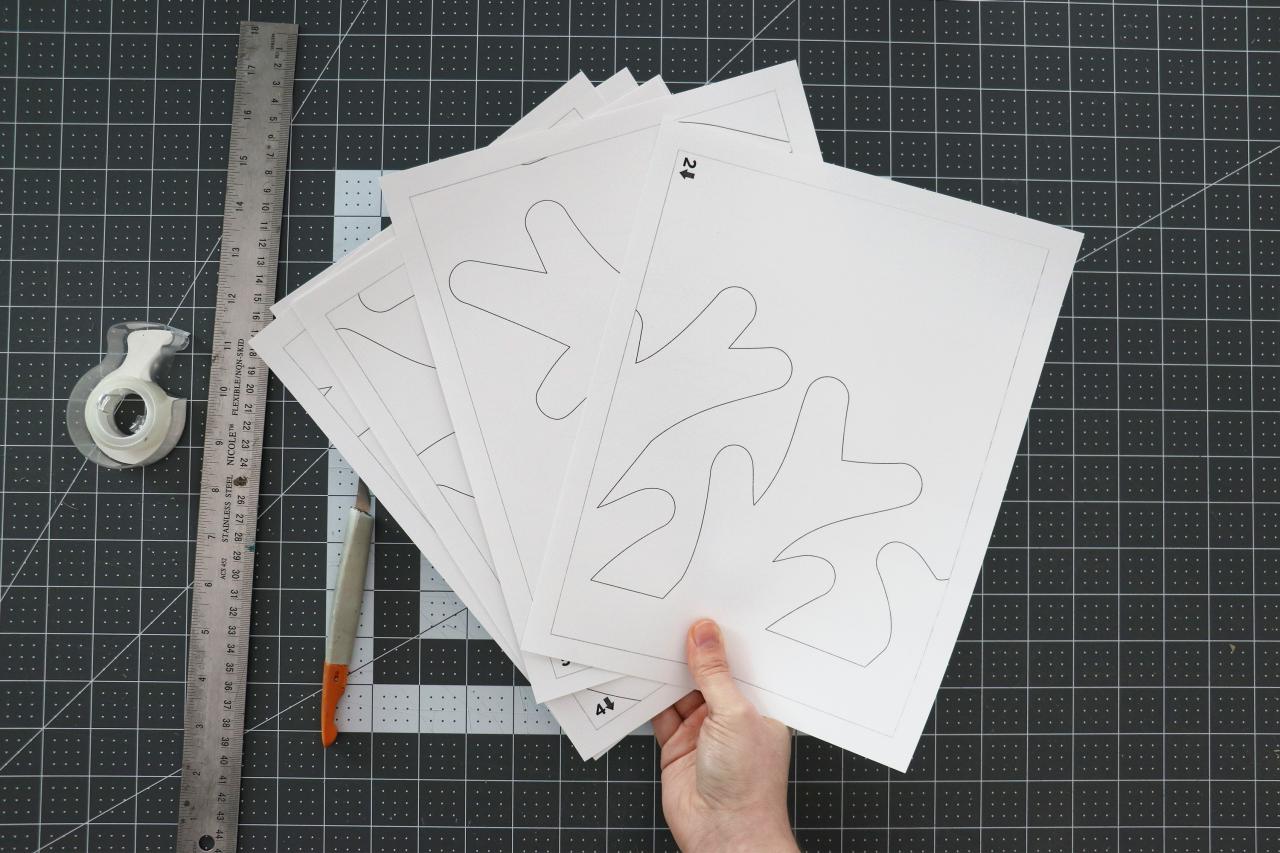
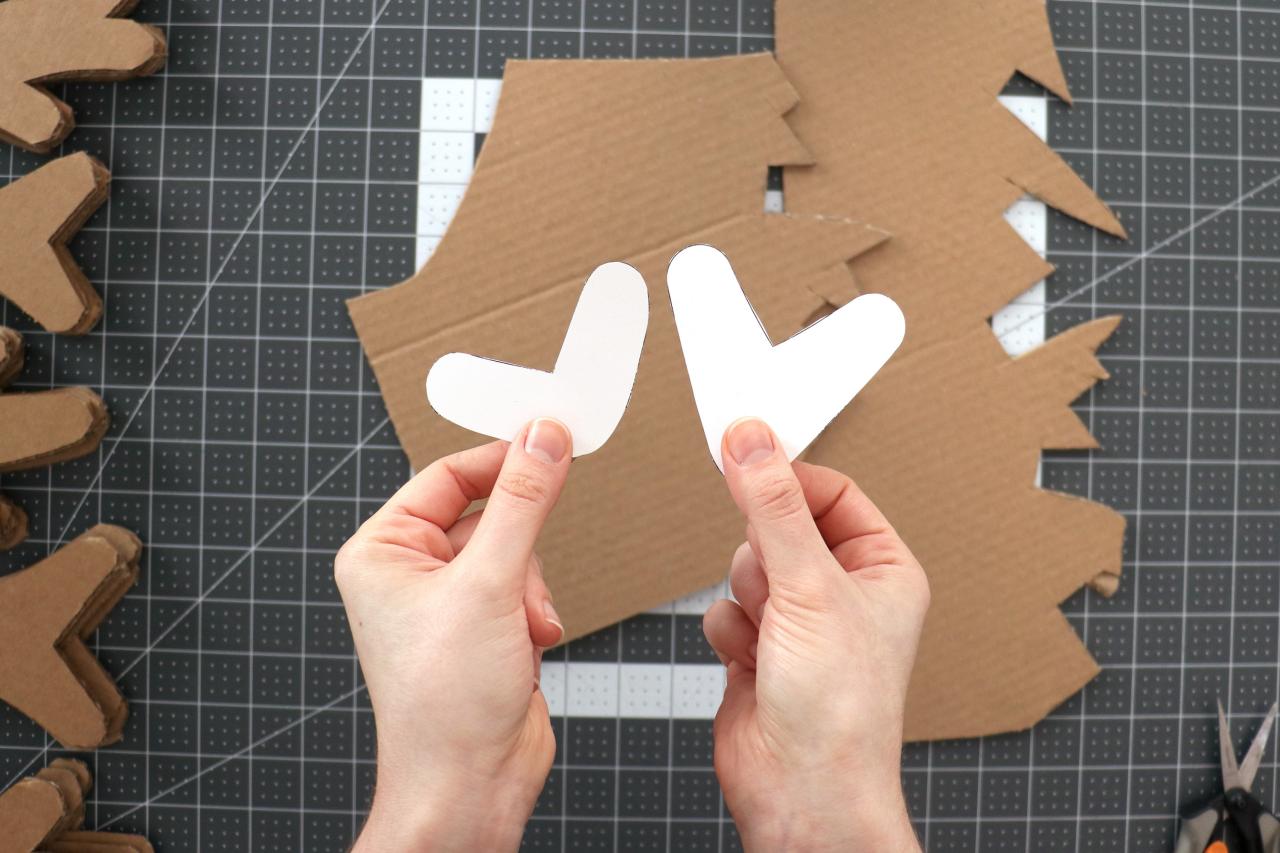
Print + Prepare Pattern
Print the Cardboard Tree pattern onto card stock (Image 1). Cut away the two smaller "V" shapes from the first page and set them aside. Follow the guide arrows on the pattern pages to tape the tree together and cut it out (Image 2 +3).

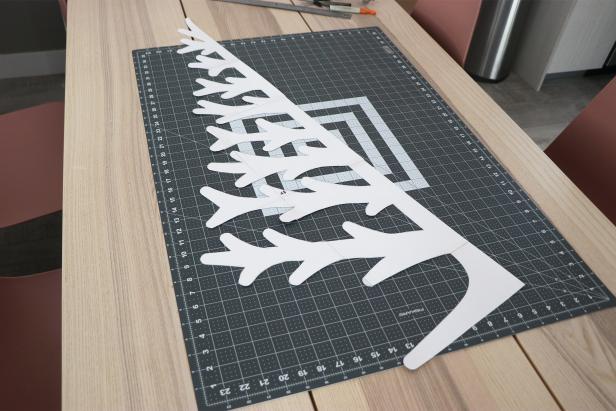
Trace + Cut
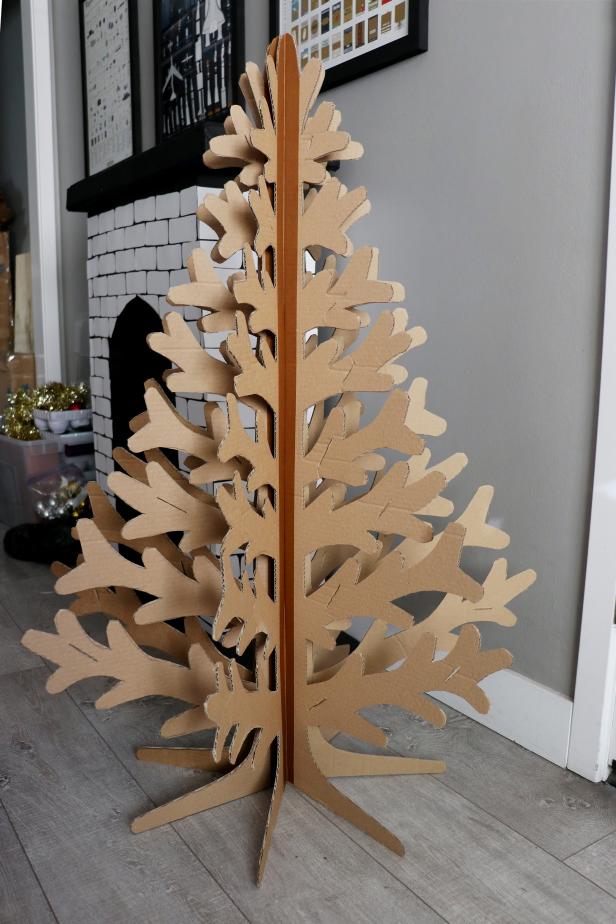
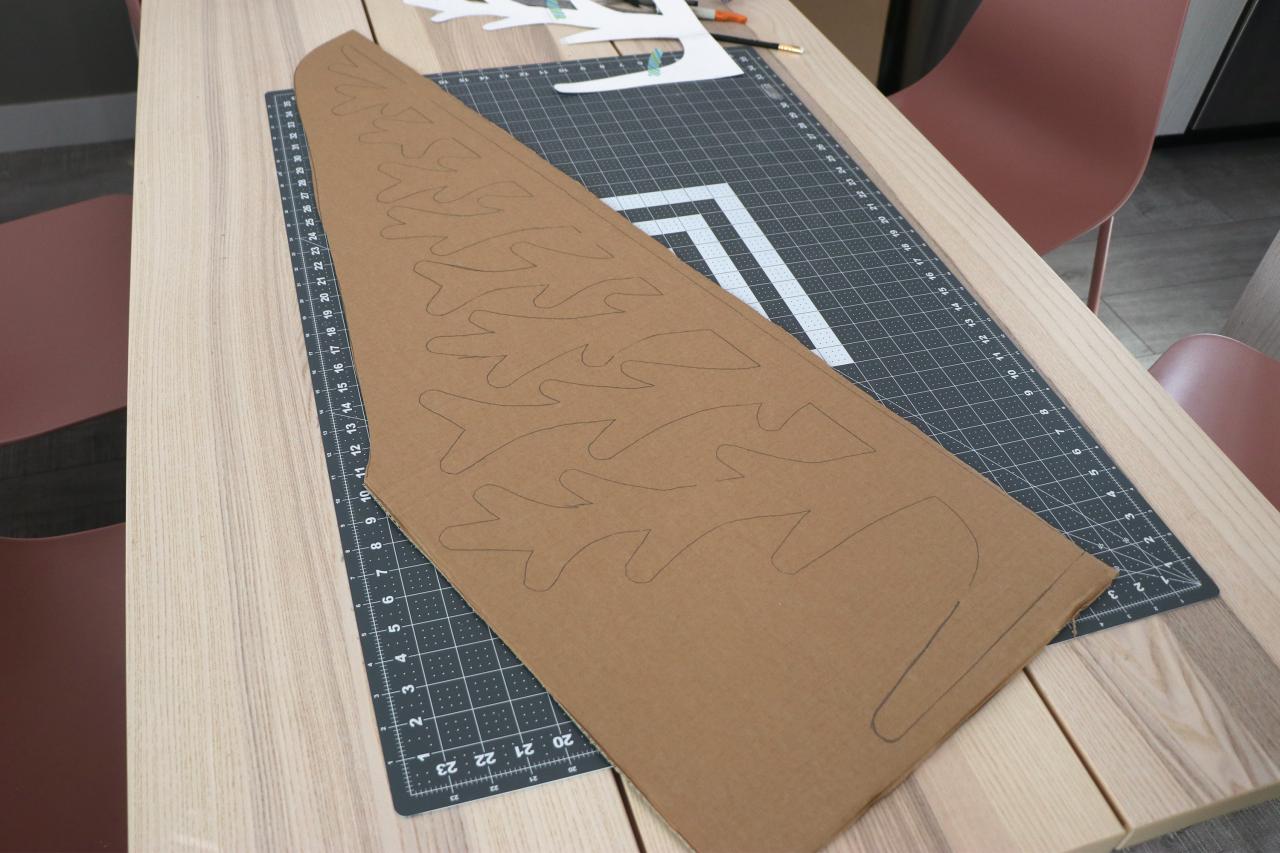
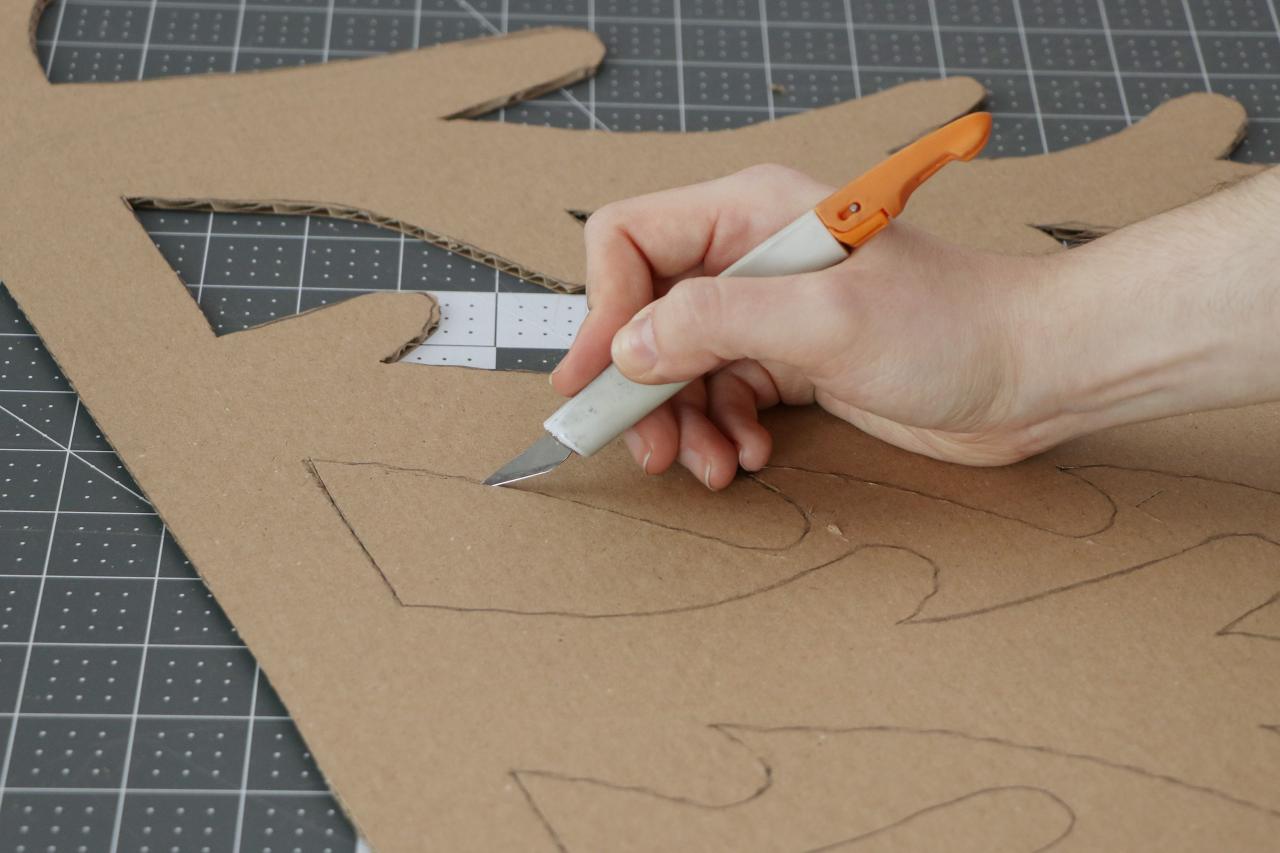
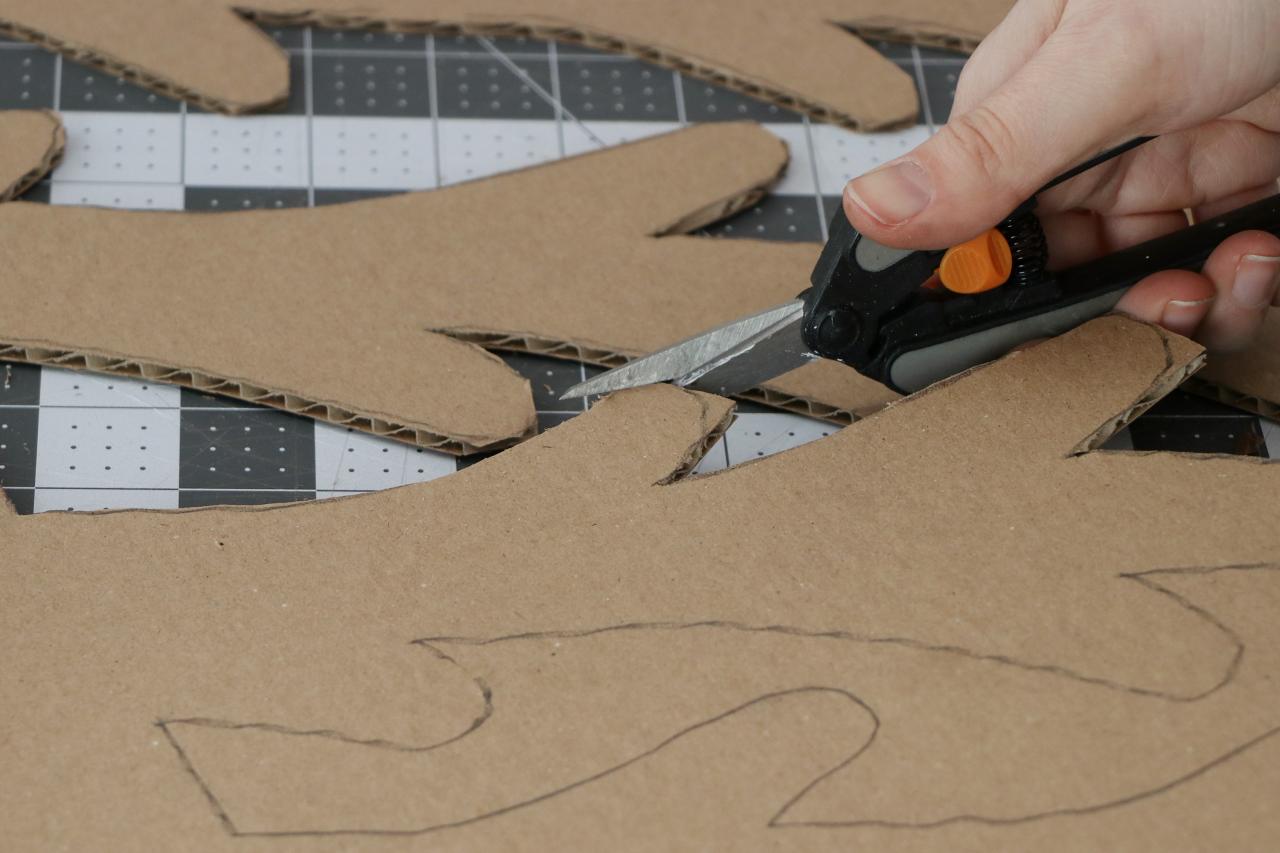
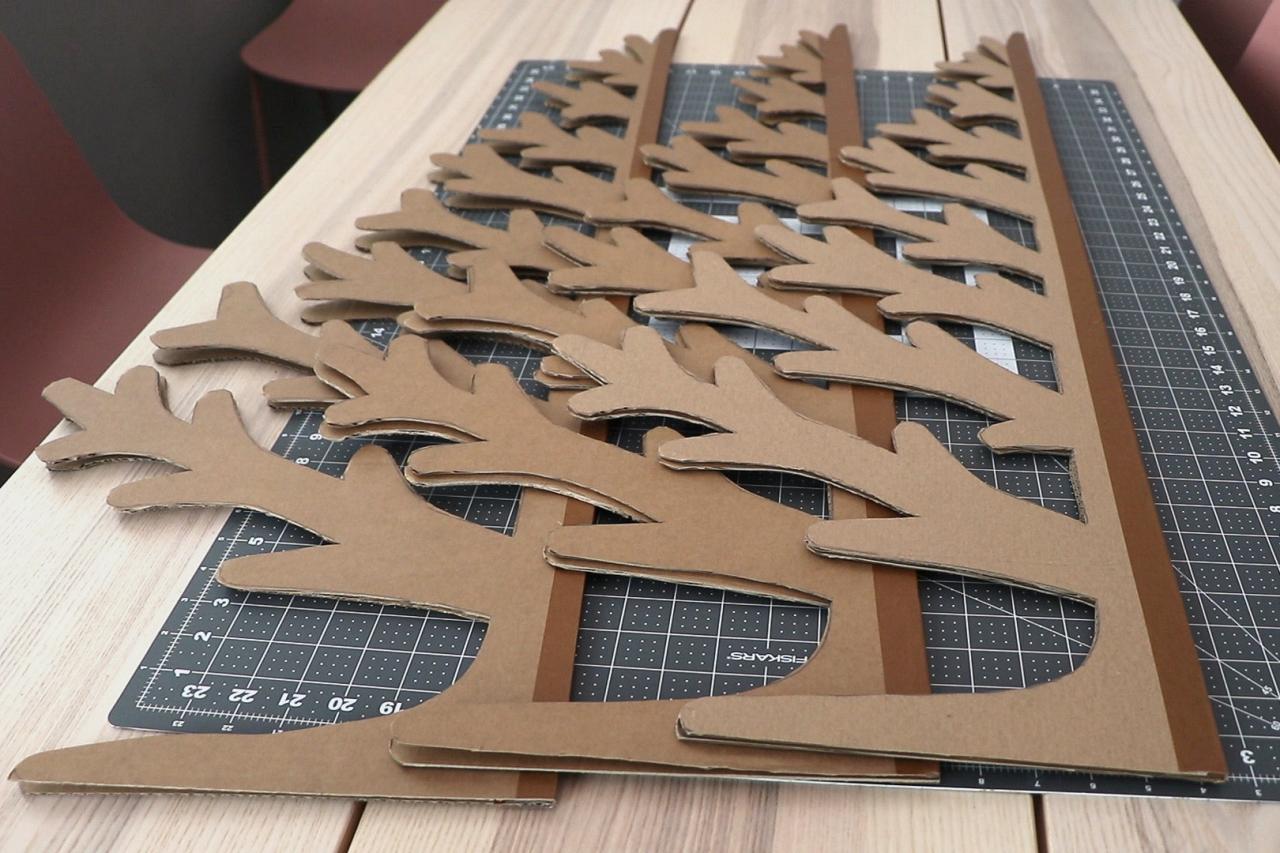
Trace the tree pattern onto a large piece of cardboard (Image 1). Cut it out with a craft knife (Image 2 +3) and set aside the leftover cardboard. Use scissors to get smoother, rounded edges on each of the branches (Image 4). Repeat this to make six Christmas tree halves (Image 5). Tip: To make the taped pattern fit on one piece of cardboard, you'll need at least a 48" x 16" piece of cardboard. If you don't have a piece that large, you can carefully tape multiple pieces of cardboard together.
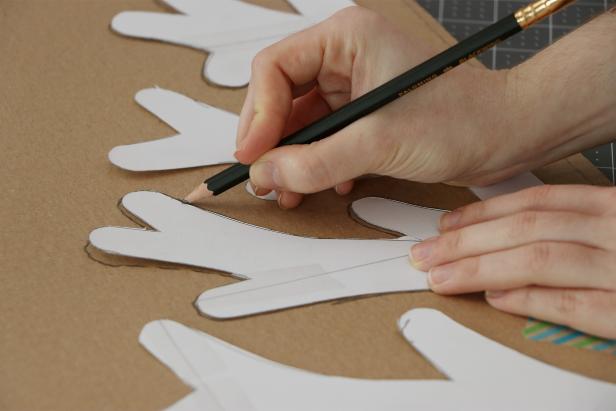


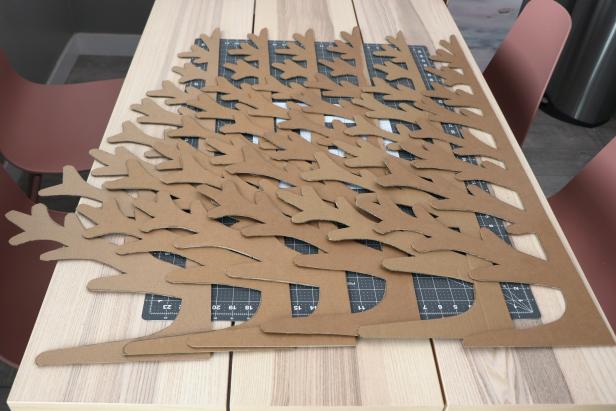
Cut Branches
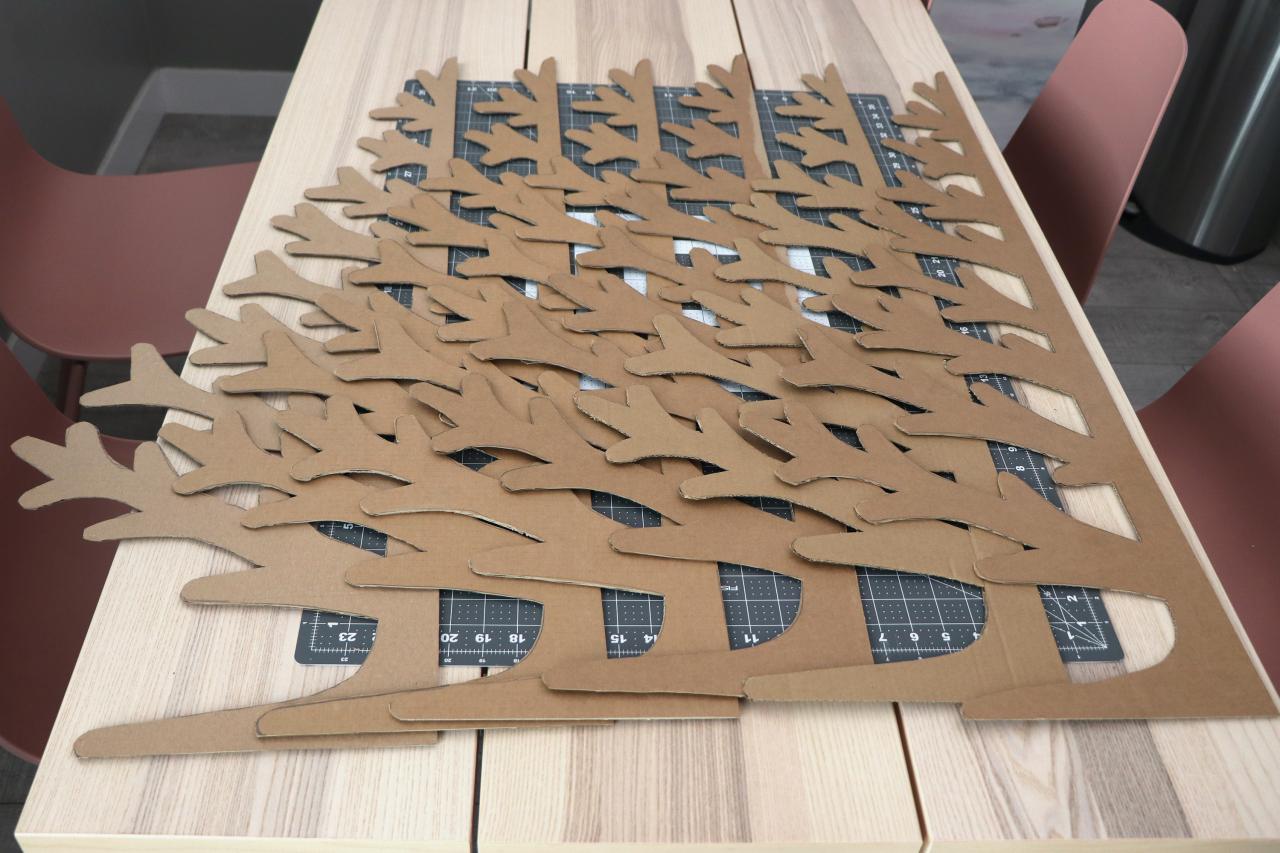
If you haven't already, cut out the "V" shapes from the first page of the pattern (Image 1). Trace them onto the leftover cardboard and cut them out (Image 2). Cut out as many branches as you would like — we used about 35 on our tree (Image 3).


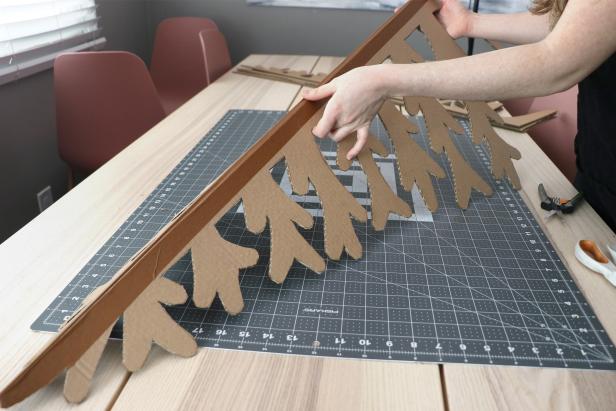
Tape Together Tree Halves
Working vertically, tape two of the tree halves together on one side (Image 1). Then fold one tree half on top of the other and tape the other edge (Image 2). The two tree halves should open and close like a book. Be sure to trim any excess tape. Repeat this process with the rest of the tree halves (Image 3). Tip: You can use any tape for this, but I'm using an industrial strength packing tape made specifically for cardboard.
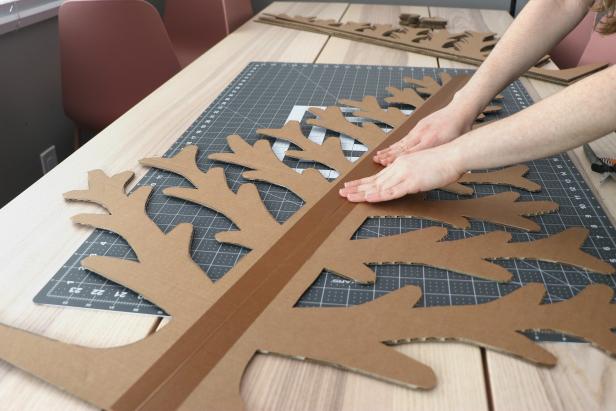

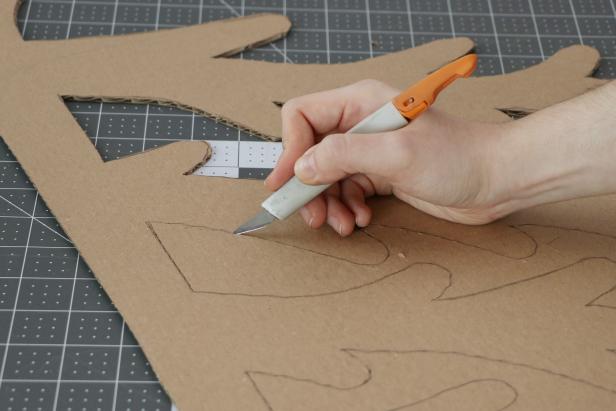
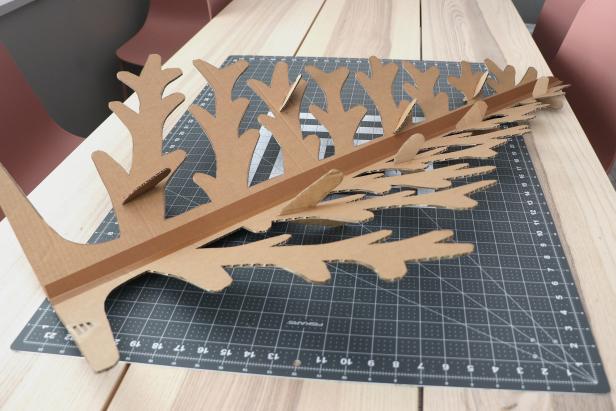
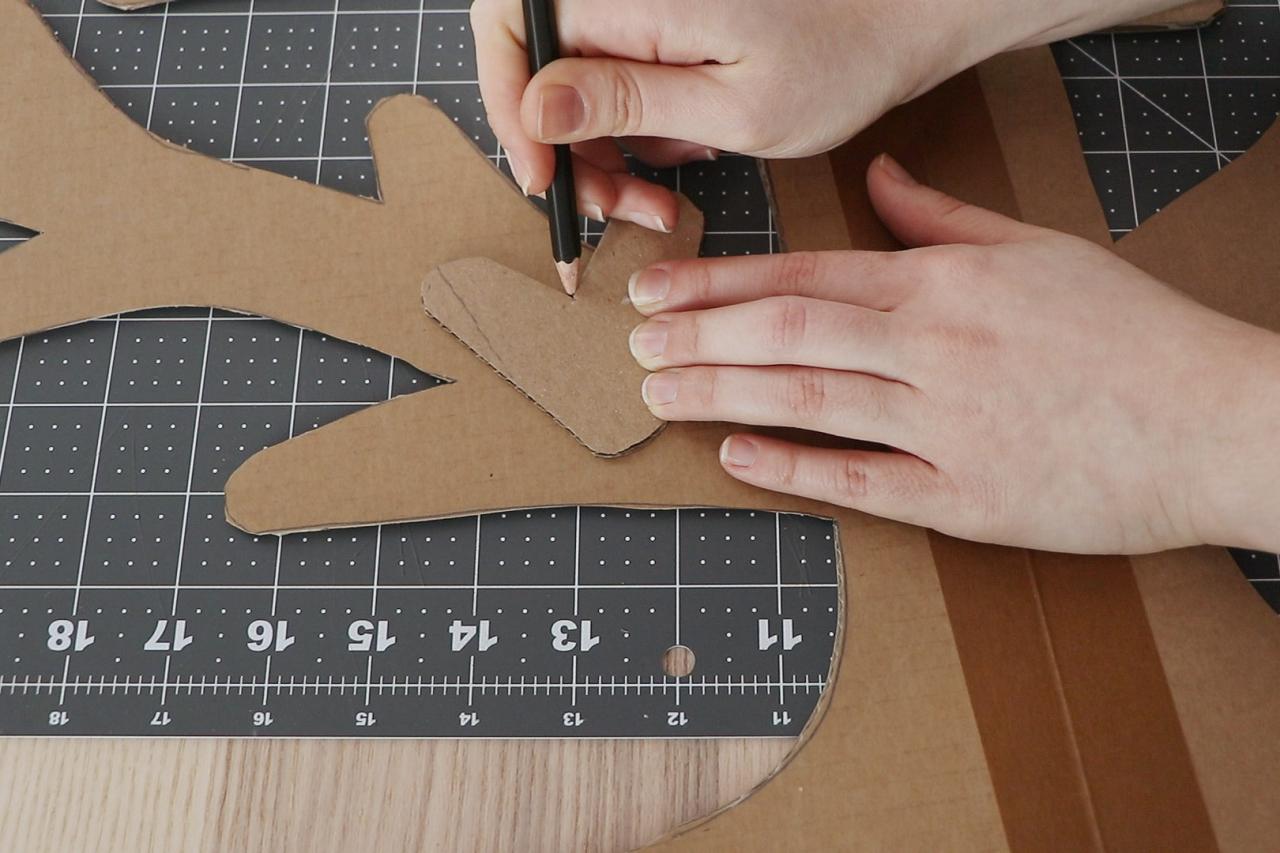
Insert Branches
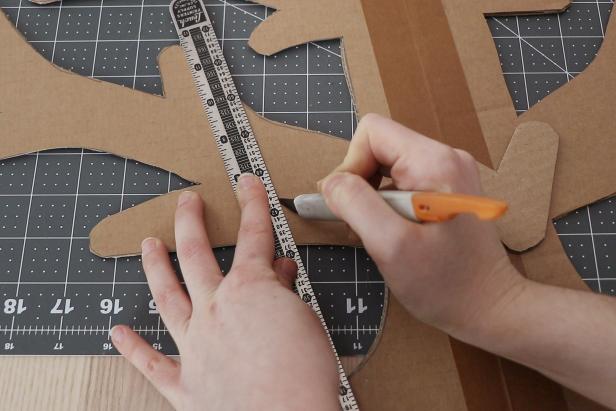
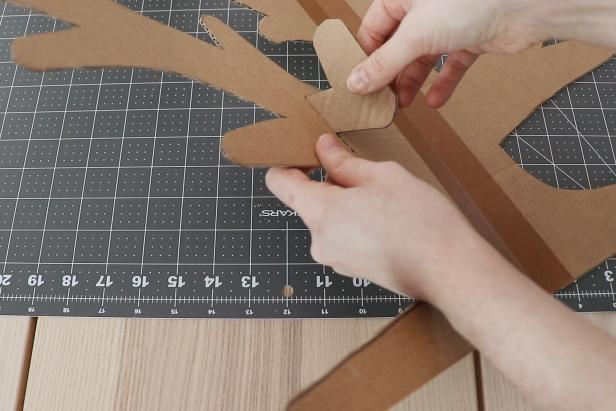
Decide where you want each branch to go, then mark the inside and bottom of the "V" with a pencil (Image 1). Then, using a ruler as a guide, cut along the points to create a slit for the branch to slide into (Image 2). Carefully insert the branch to ensure it fits, then adjust the slit if necessary (Image 3). Repeat for all the branches (Image 4). Remove the branches and set aside.

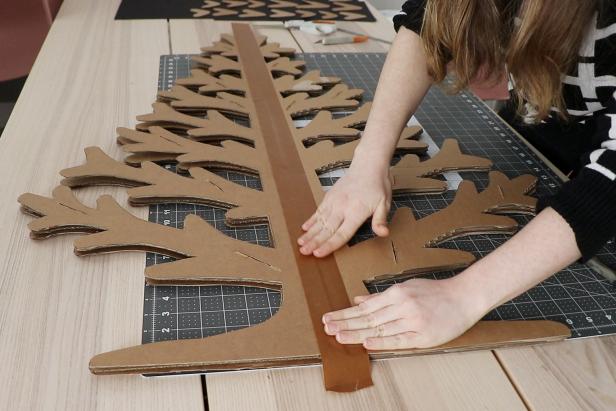
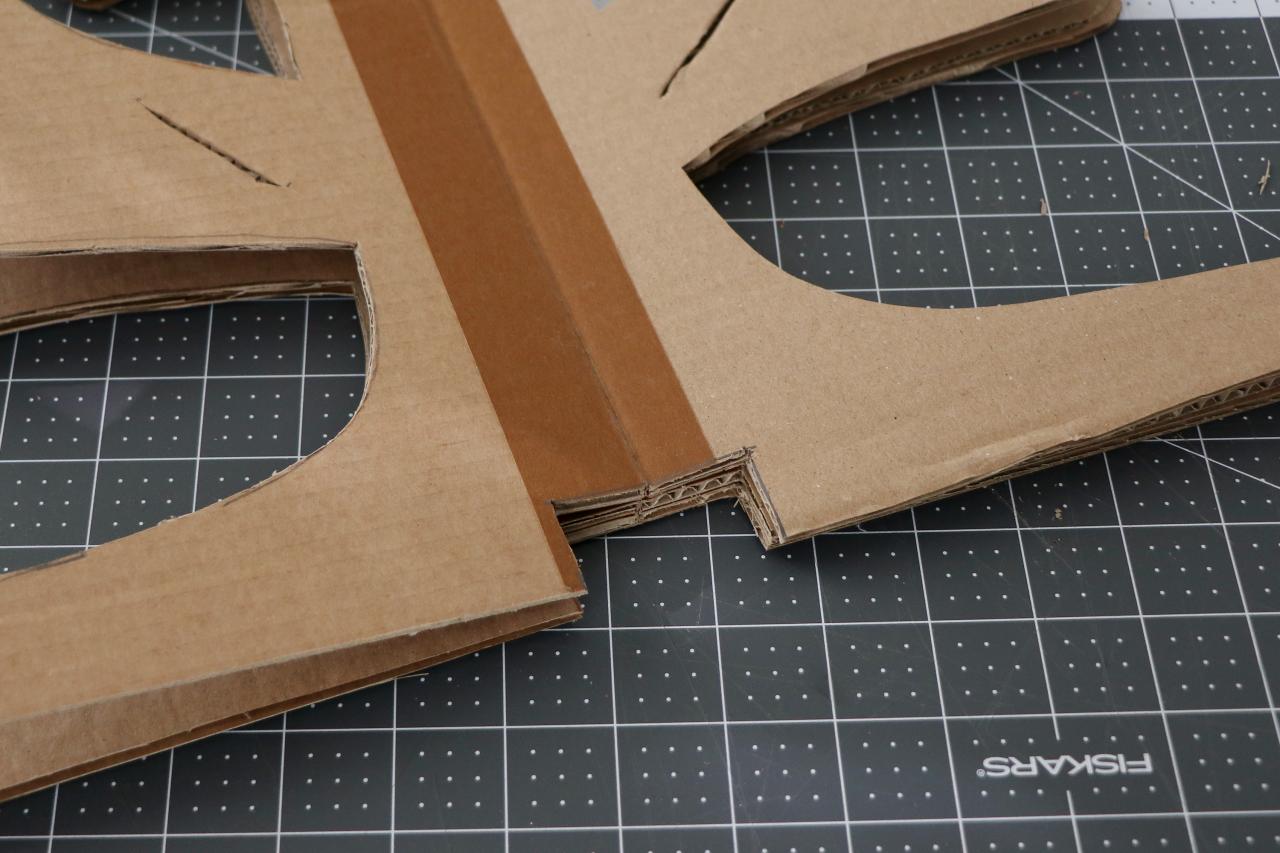
Tape Tree Together
Now assemble the three tree pieces: bring together two taped tree seams, then tape those together (Image 1). You'll have three seams total to tape together.
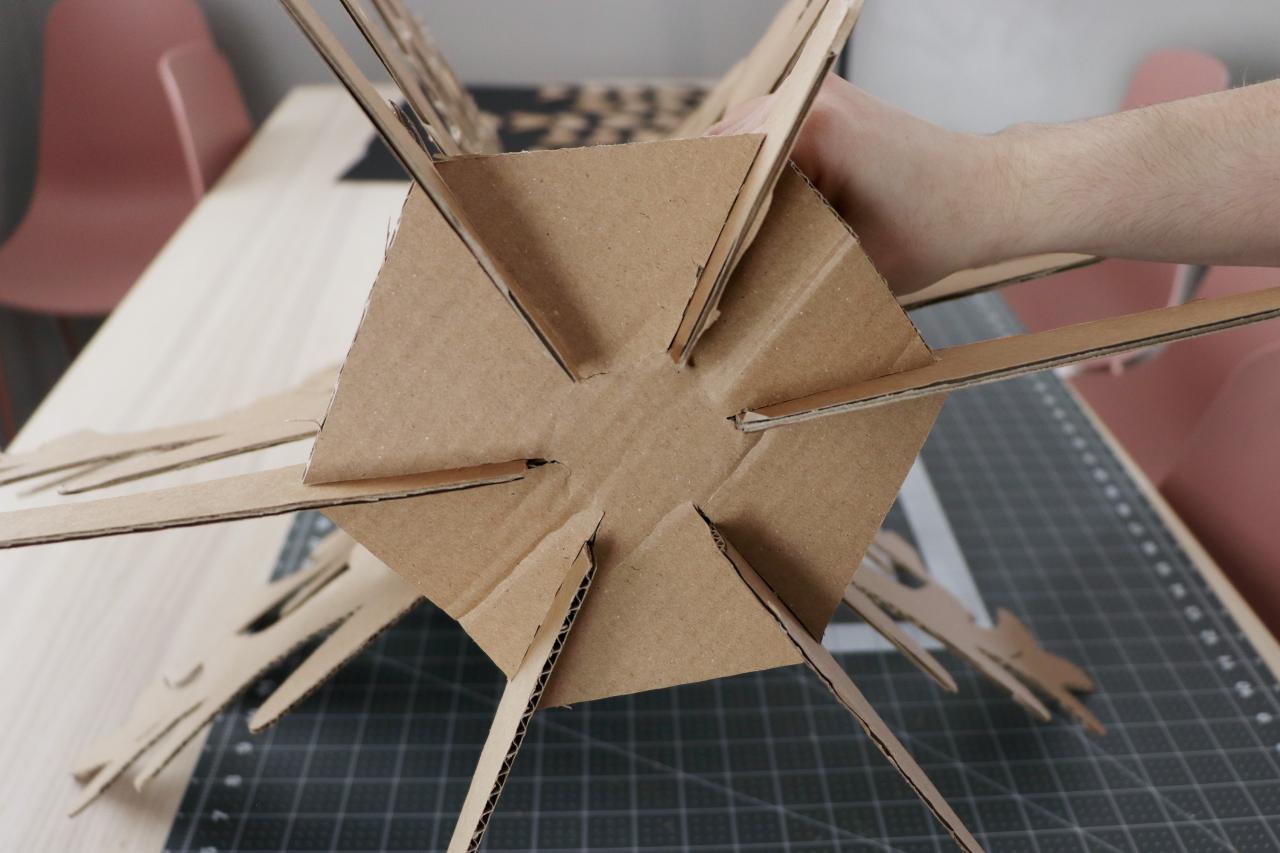
Cut and Attach Base
Now grab the base template from the last page of the pattern (Image 1). Trace it onto cardboard and cut it out. Measure and cut a 1" x 2" rectangle centered on the bottom of the tree (Image 2). Attach the tree to the base so each tree segment is equally spaced (Image 3).


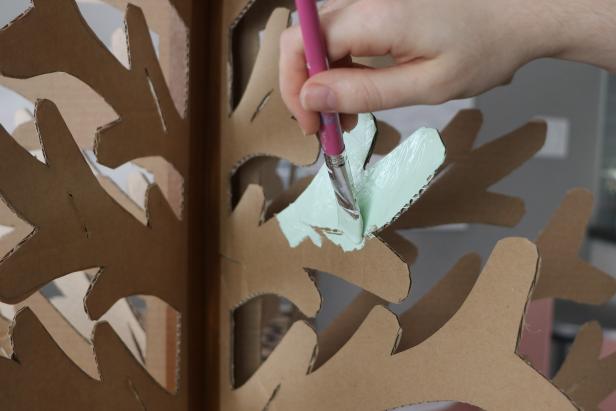
Paint
Paint your tree any color you like. Be sure to paint the extra branches as well. Let the paint dry overnight. Tip: I used a pale green acrylic paint and a paintbrush, but I'd recommend spray painting as this took forever to paint.
Decorate + Enjoy
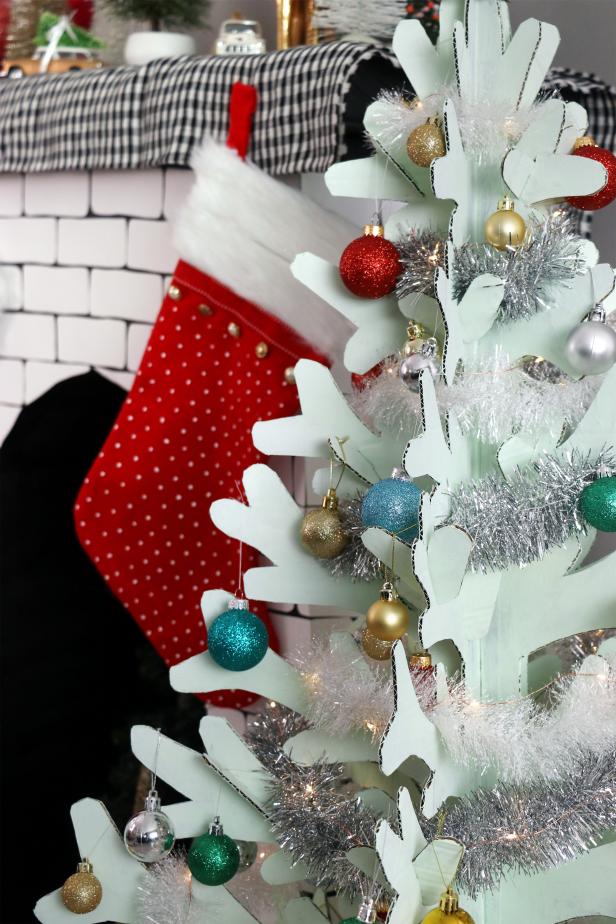
Once the paint is dry, put the branches back in place and then trim your tree with a tree skirt, tinsel and lightweight ornaments.


How to Make a Cardboard Holiday Fireplace
Save those TV boxes from Black Friday and turn them into a charming fireplace for Christmas.
More Christmas Crafts from Karen

DIY Paper Christmas Tree Forest Advent Calendar
Count down the days until Christmas with this festive, budget-friendly Advent calendar centerpiece.

5 Removable Christmas Sweater Designs
Get festive without ruining your favorite sweater.

Embroidery Hoop Christmas Card Display
Make a cute holiday cardholder with this simple embroidery hoop hack.

15 Free, Printable Christmas Wrapping Paper Designs 15 Photos
The finishing touch on the perfect gift is just a printer away. Did we mention they're free?

15 Free, Printable Christmas Cards Everyone Will Love 15 Photos
Send a season's greetings to your friends and family with our free holiday card and invitation templates.

10 Christmas Cards for Single People 23 Photos
Single this holiday season? Grab the wine and make these punny Christmas cards with our free, printable templates.


