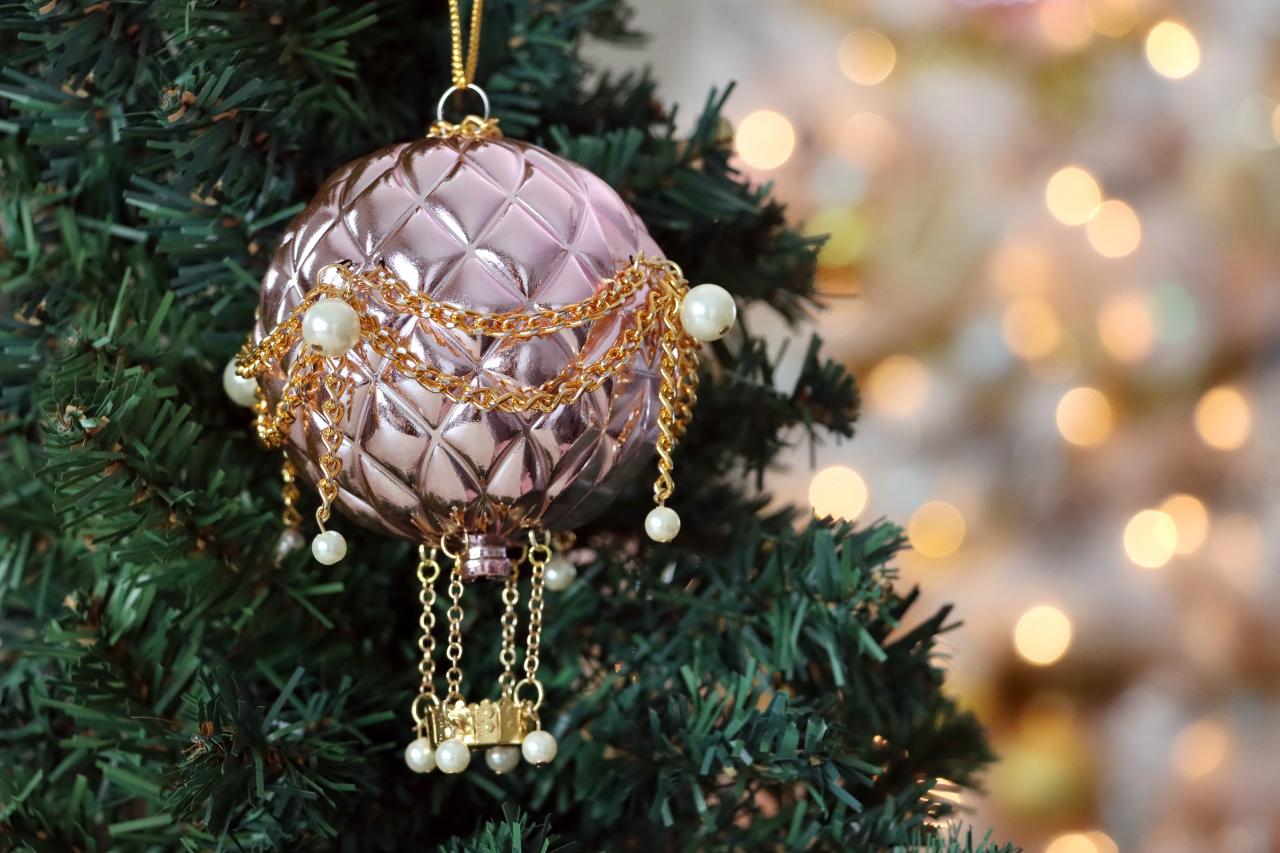
Who knew that you could turn an old Christmas ornament upside down and transform it into a glam hot air balloon ornament? This fun holiday project will be the centerpiece of your Christmas tree, and is the perfect DIY for jewelry makers, as it uses many of the same techniques and supplies.
We're sorry, there seems to be an issue playing this video. Please refresh the page or try again in a moment.If you continue to have issues, please contact us here.
Loading Video...
DIY Hot Air Balloon Ornament
08:58
Karen Kavett transforms a plain holiday bauble into a beautiful hot air balloon ornament.
SAFETY TIP: We will be drilling into the ornament, so be sure your ornament is made of plastic rather than glass.
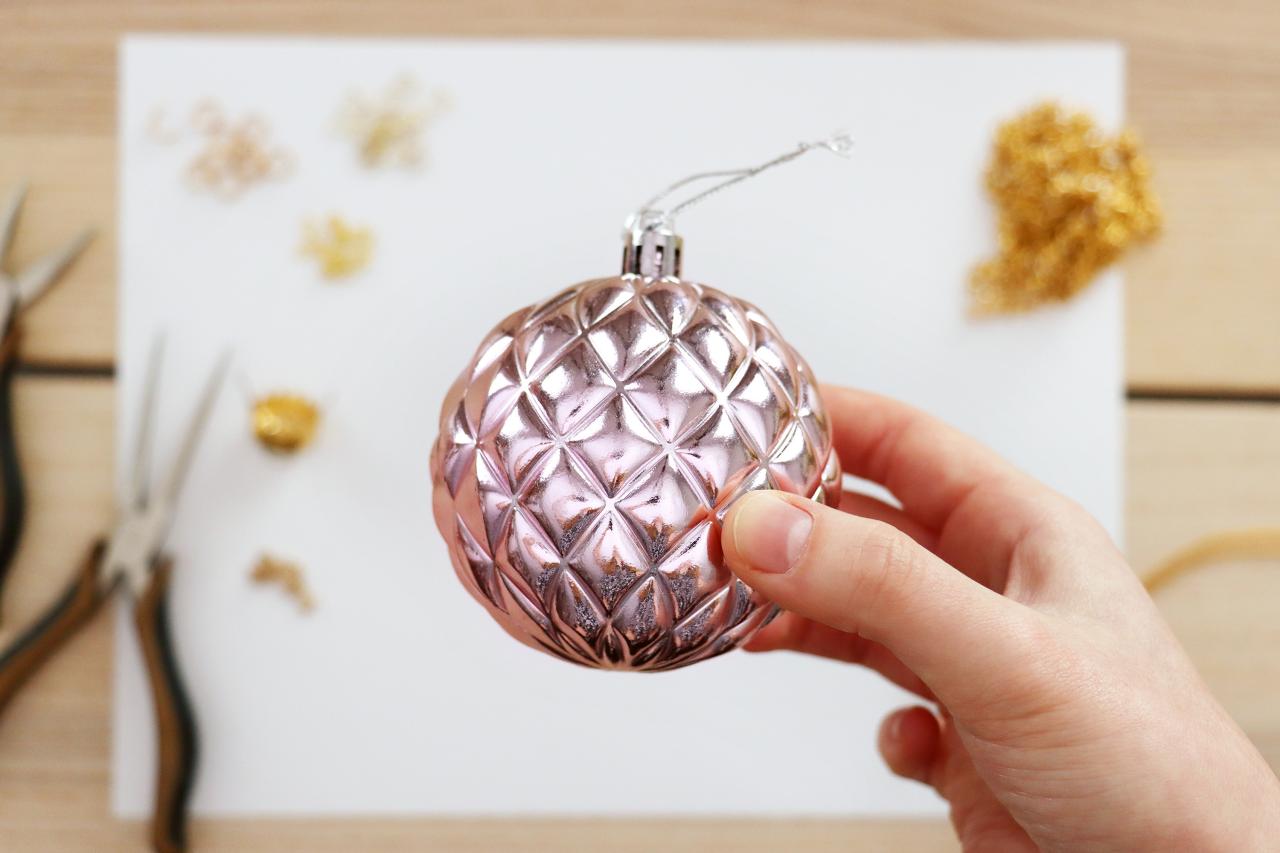
Choose ornament
Choose your ornament. We’re using a 3” ornament with a quilted texture that resembles a hot air balloon. SAFETY TIP: We will be drilling into the ornament, so be sure your ornament is made of plastic rather than glass.
Photo by: Karen Kavett
Karen Kavett
Add a Wire Hanger
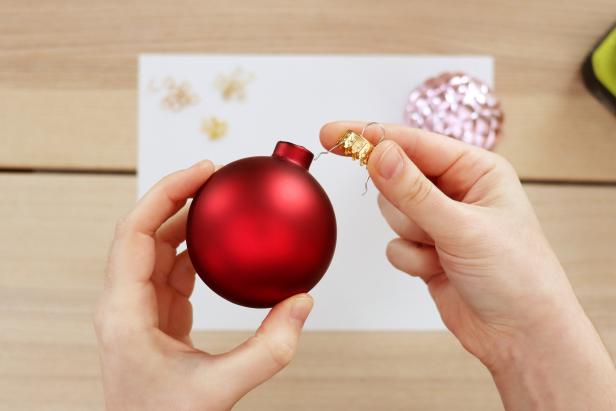
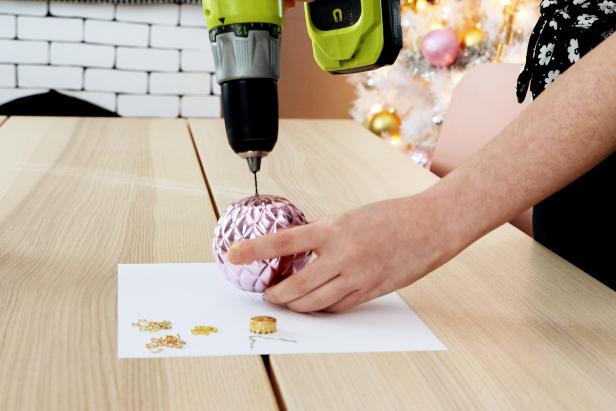
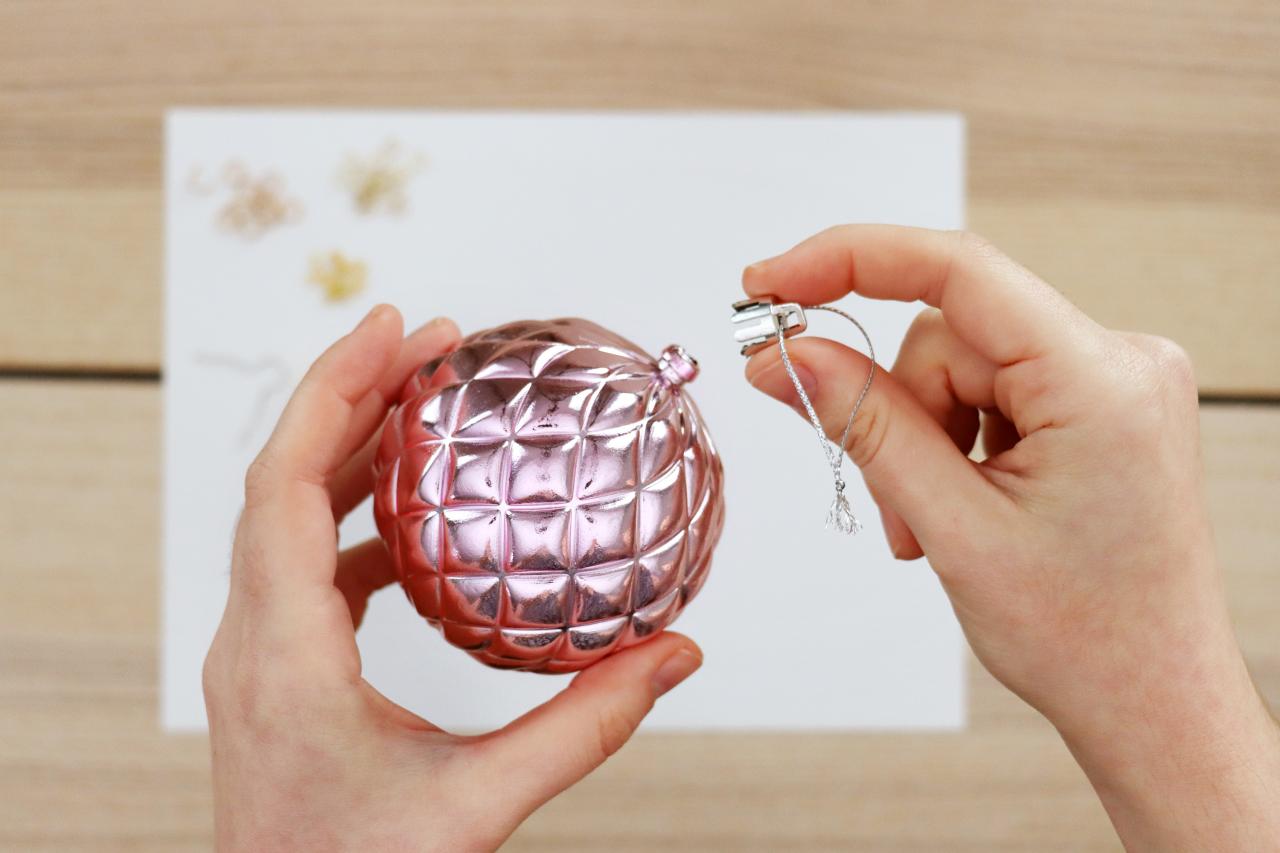
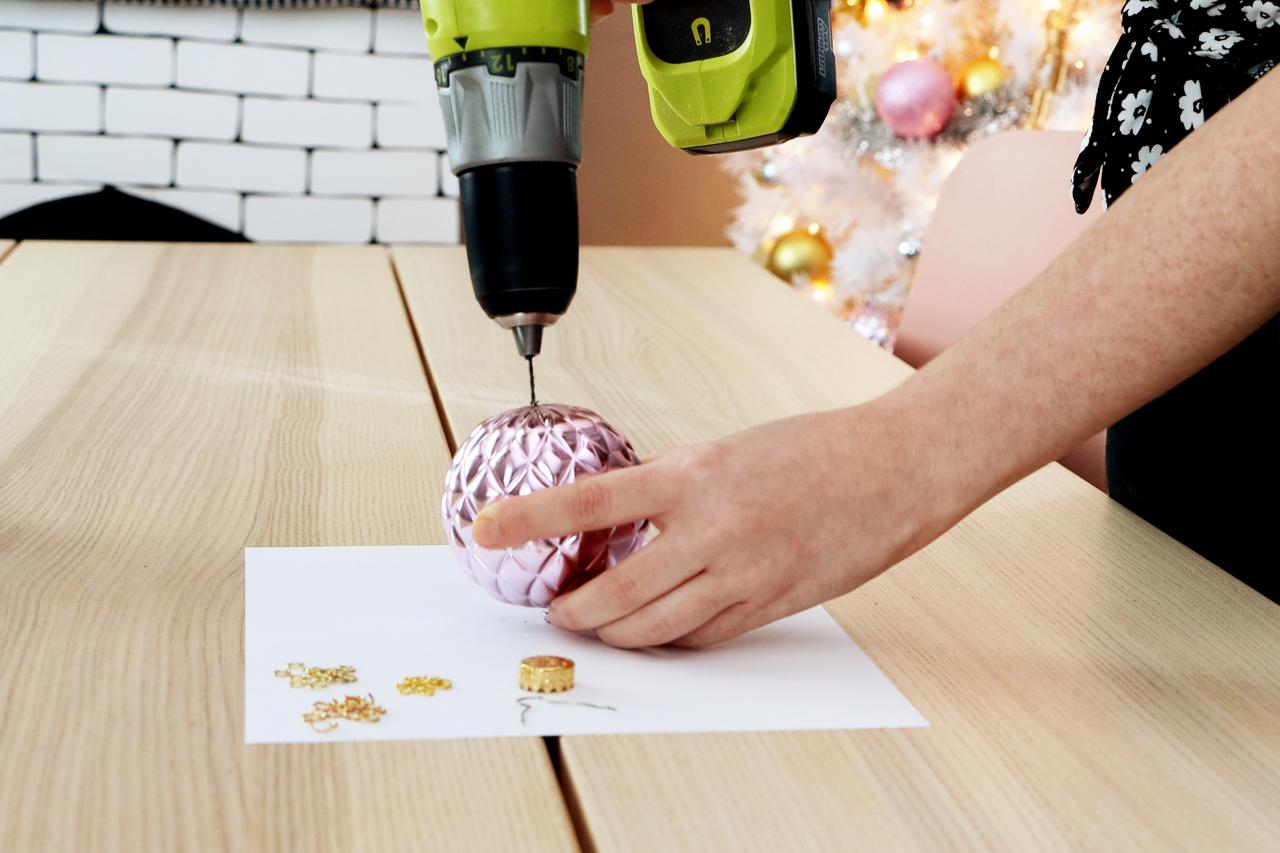
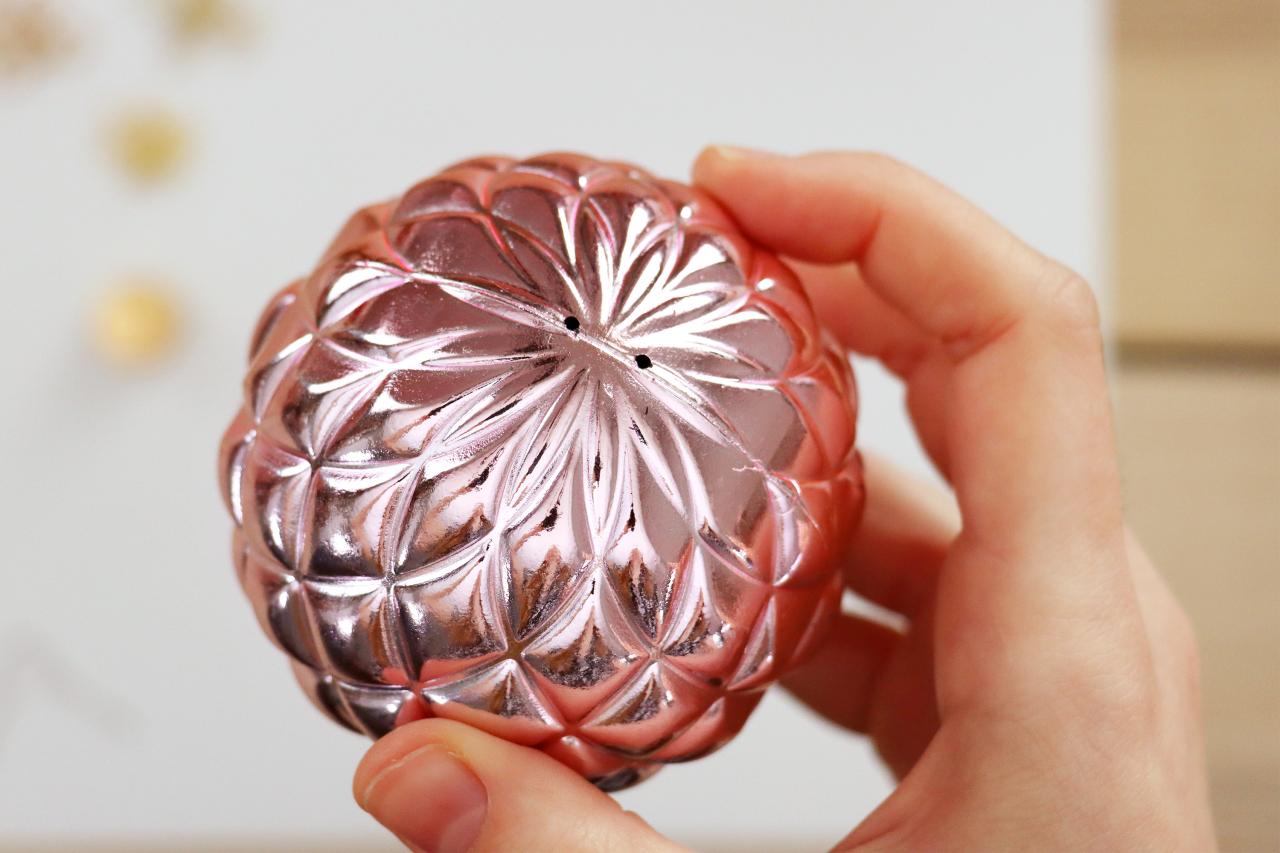
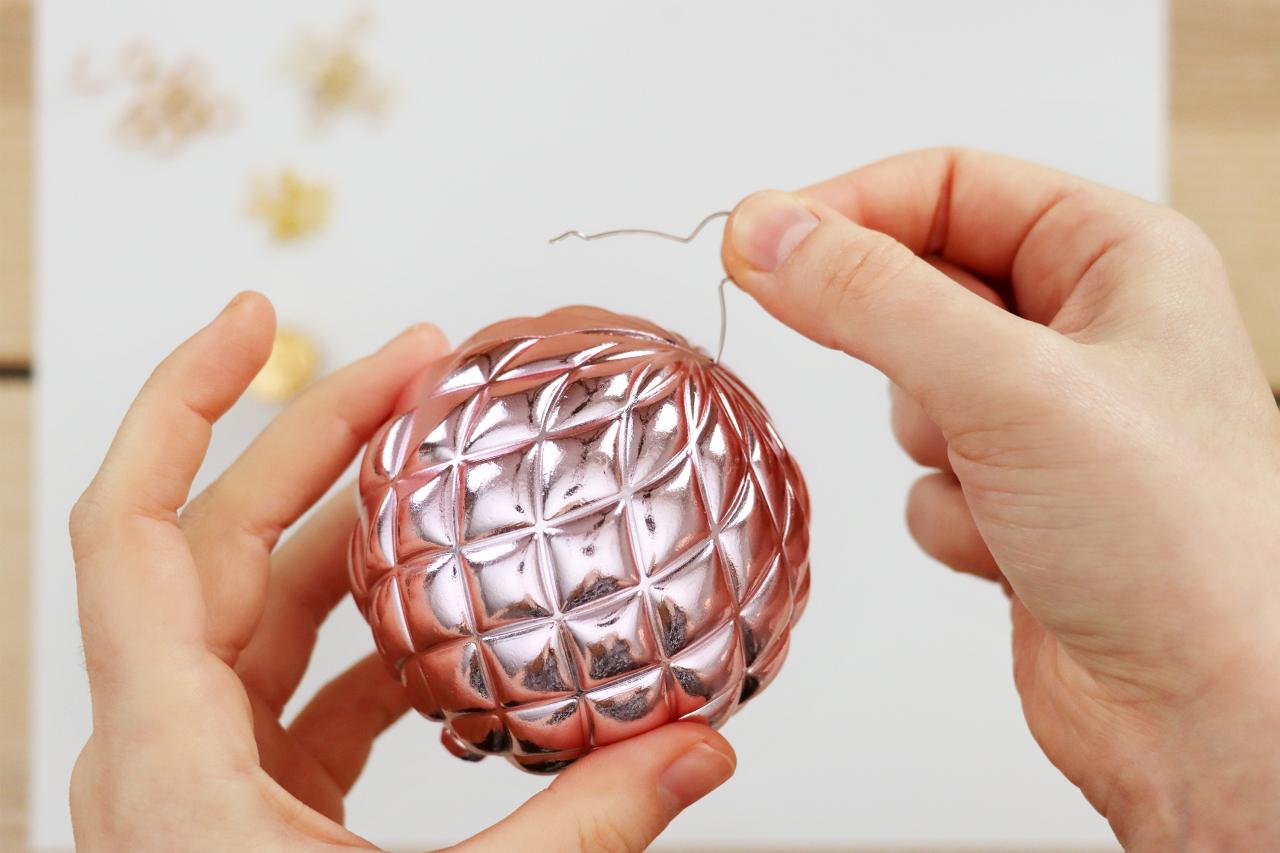
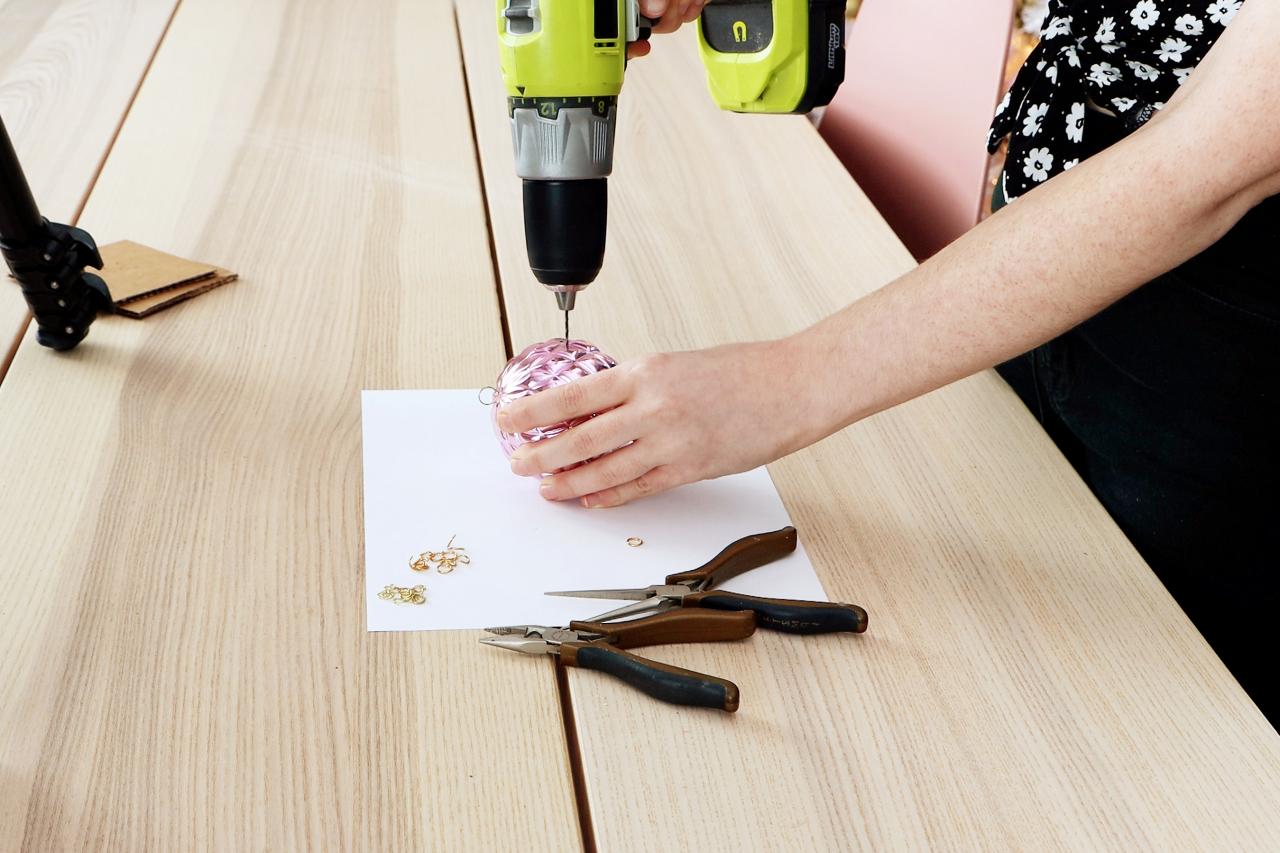
Remove the wire hanger and cap from a spare ornament (Image 1). Remove the cap from the hot air balloon ornament (Image 2). Use a 1/16-inch drill bit to drill two holes in the bottom of the ornament (Images 3 + 4). Insert the wire hanger so that you can hang the ornament upside down (Images 5 + 6).
Karen Kavett
Karen Kavett
Karen Kavett
Karen Kavett
Karen Kavett
Add hanger
Remove the wire hanger and cap from a spare ornament. Remove the cap from the hot air balloon ornament. Use a 1/16” drill bit to drill two holes in the bottom of the ornament. Insert the wire hanger so that you can hang the ornament upside down.
Photo By: Karen Kavett
Add hanger
Remove the wire hanger and cap from a spare ornament. Remove the cap from the hot air balloon ornament. Use a 1/16” drill bit to drill two holes in the bottom of the ornament. Insert the wire hanger so that you can hang the ornament upside down.
Photo By: Karen Kavett
Add hanger
Remove the wire hanger and cap from a spare ornament. Remove the cap from the hot air balloon ornament. Use a 1/16” drill bit to drill two holes in the bottom of the ornament. Insert the wire hanger so that you can hang the ornament upside down.
Photo By: Karen Kavett
Add hanger
Remove the wire hanger and cap from a spare ornament. Remove the cap from the hot air balloon ornament. Use a 1/16” drill bit to drill two holes in the bottom of the ornament. Insert the wire hanger so that you can hang the ornament upside down.
Photo By: Karen Kavett
Add hanger
Remove the wire hanger and cap from a spare ornament. Remove the cap from the hot air balloon ornament. Use a 1/16” drill bit to drill two holes in the bottom of the ornament. Insert the wire hanger so that you can hang the ornament upside down.
Photo By: Karen Kavett
Make the Basket for Your Hot Air Balloon Ornament
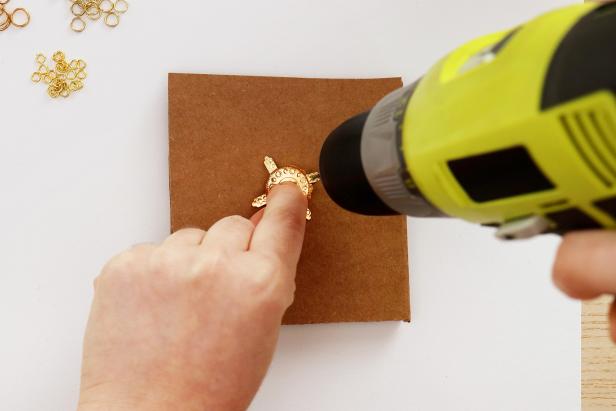
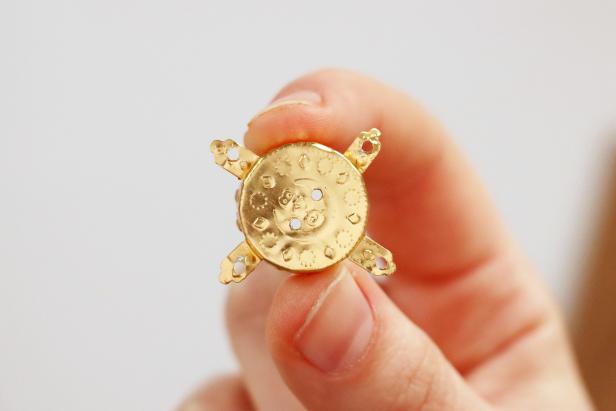
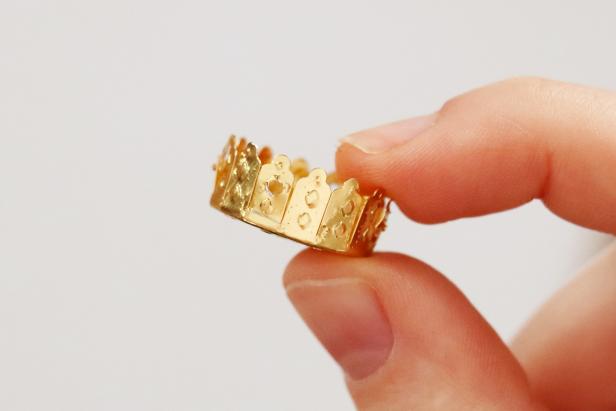
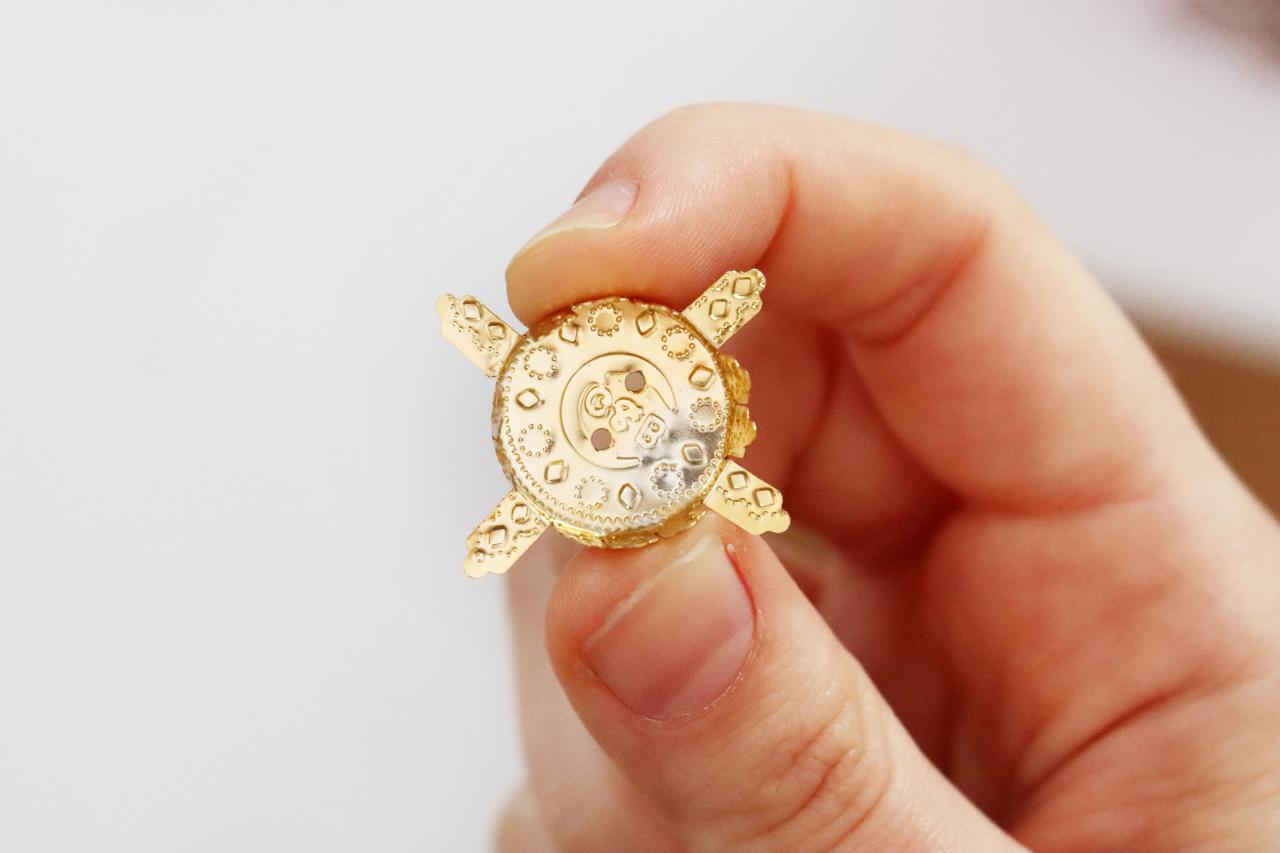
We’re going to use the original gold ornament cap as the hot air balloon basket. Fold back four evenly spaced tabs (Image 1). Carefully drill a hole into the top of each one, putting down two pieces of corrugated cardboard underneath to protect your table (Images 2 + 3). Fold the tabs back up (Image 4).
Karen Kavett
Karen Kavett
Karen Kavett
Karen Kavett
Make basket
We’re going to use the gold ornament cap as the hot air balloon basket. Fold back four evenly spaced tabs. Carefully drill a hole into the top of each one, putting down two pieces of corrugated cardboard underneath to protect your table. Fold the tabs back up.
Photo By: Karen Kavett
Make basket
We’re going to use the gold ornament cap as the hot air balloon basket. Fold back four evenly spaced tabs. Carefully drill a hole into the top of each one, putting down two pieces of corrugated cardboard underneath to protect your table. Fold the tabs back up.
Photo By: Karen Kavett
Make basket
We’re going to use the gold ornament cap as the hot air balloon basket. Fold back four evenly spaced tabs. Carefully drill a hole into the top of each one, putting down two pieces of corrugated cardboard underneath to protect your table. Fold the tabs back up.
Photo By: Karen Kavett
Make basket
We’re going to use the gold ornament cap as the hot air balloon basket. Fold back four evenly spaced tabs. Carefully drill a hole into the top of each one, putting down two pieces of corrugated cardboard underneath to protect your table. Fold the tabs back up.
Photo By: Karen Kavett
Add the Chains to Complete the Basket
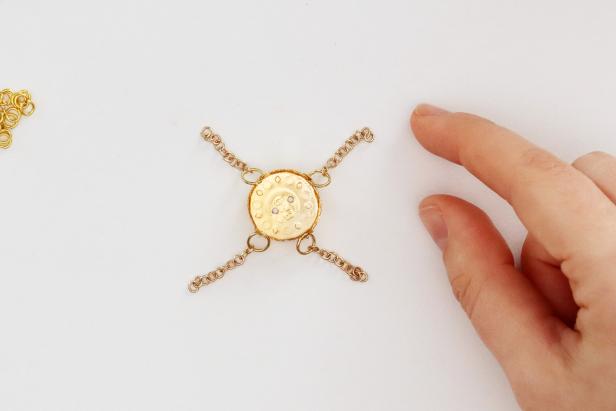
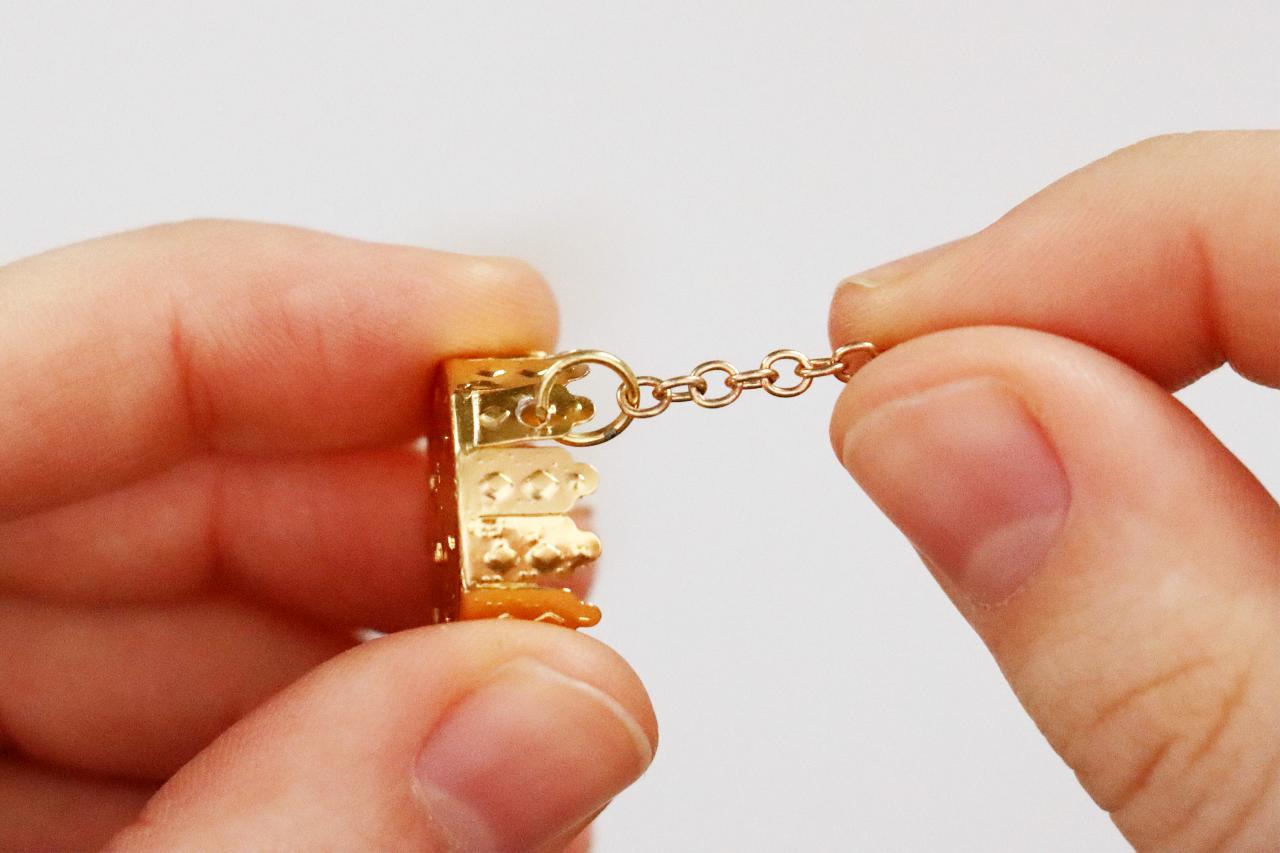
Cut four pieces of small gold chain measuring around 1 inch. Count the links in the chain to ensure each piece of chain is exactly the same length as the rest. Use gold jump rings to attach the chains to the holes you drilled in the basket (Image 1). Set it aside for later (Image 2).
Karen Kavett
Karen Kavett
Add chains
Cut four pieces of small gold chain measuring around 1”. Count the links in the chain to ensure each piece of chain is exactly the same length as the rest. Use gold jump rings to attach the chains to the holes you drilled in the basket. Set it aside for later.
Photo By: Karen Kavett
Add chains
Cut four pieces of small gold chain measuring around 1”. Count the links in the chain to ensure each piece of chain is exactly the same length as the rest. Use gold jump rings to attach the chains to the holes you drilled in the basket. Set it aside for later.
Photo By: Karen Kavett
Add Jump Rings to the Ornament
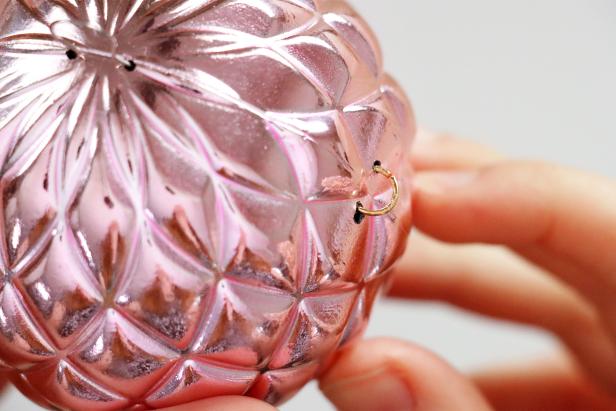
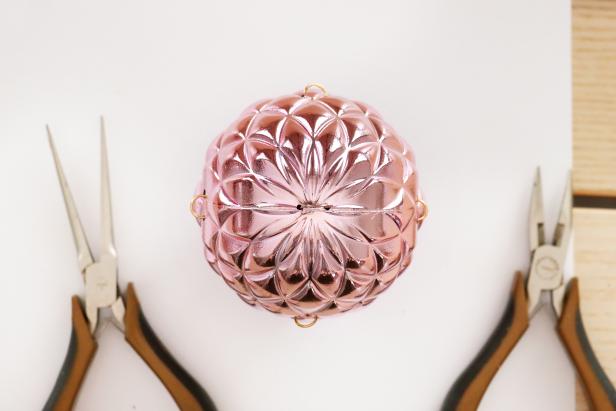
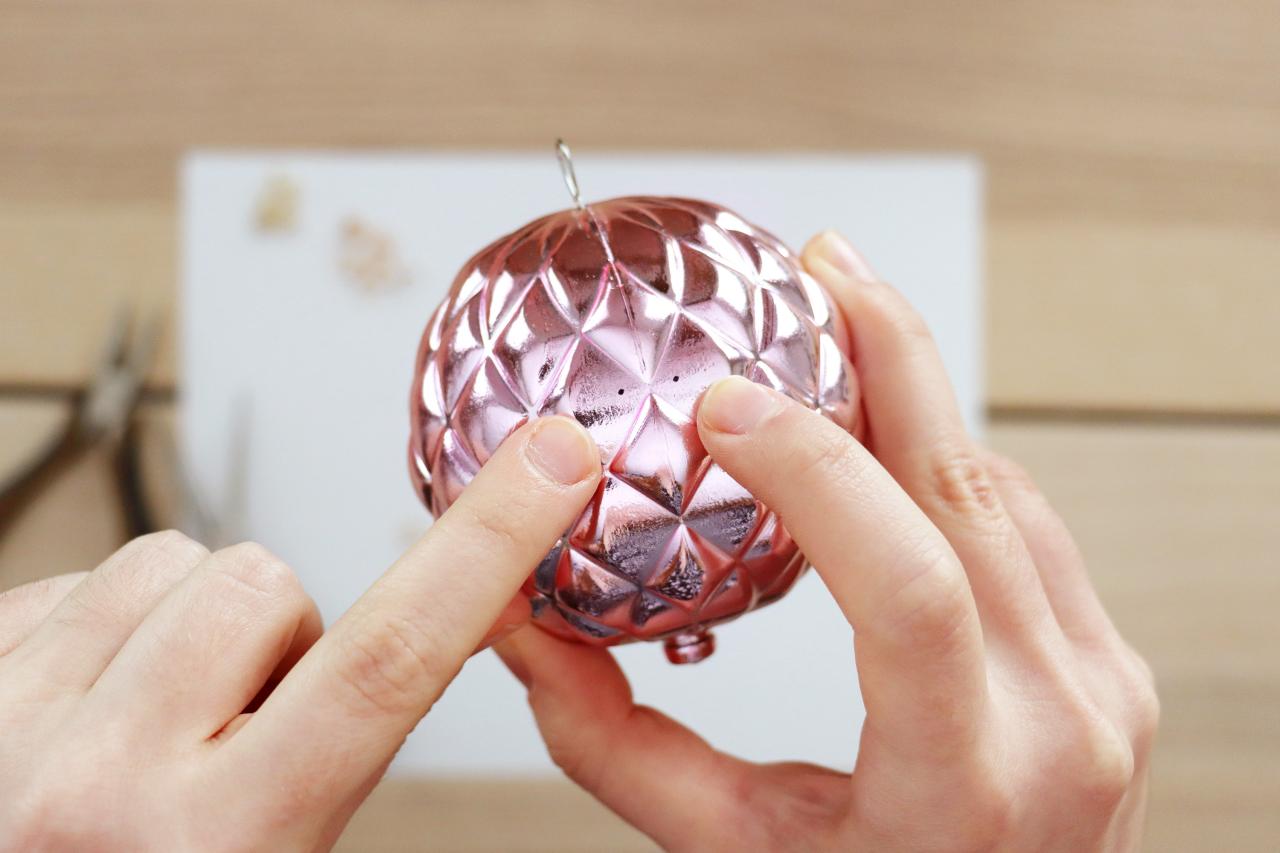
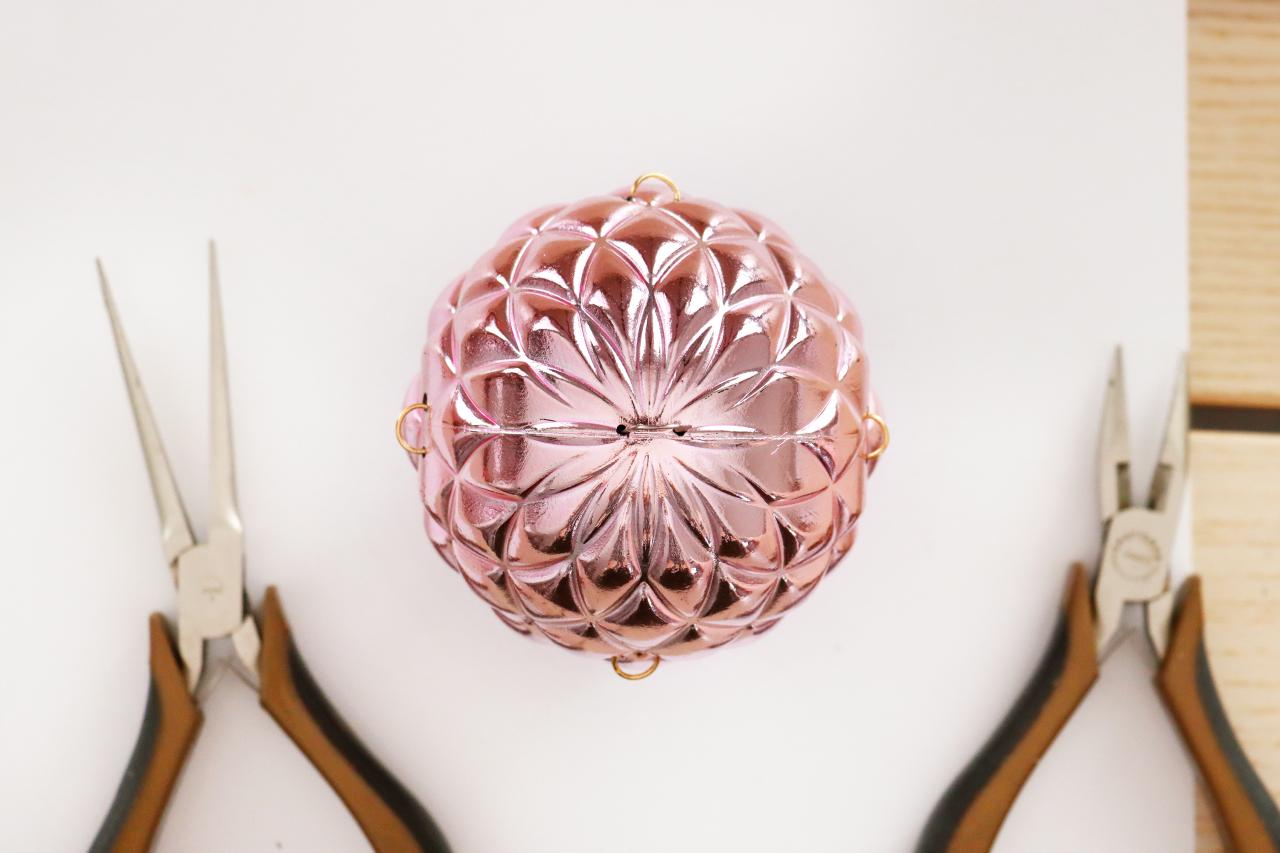
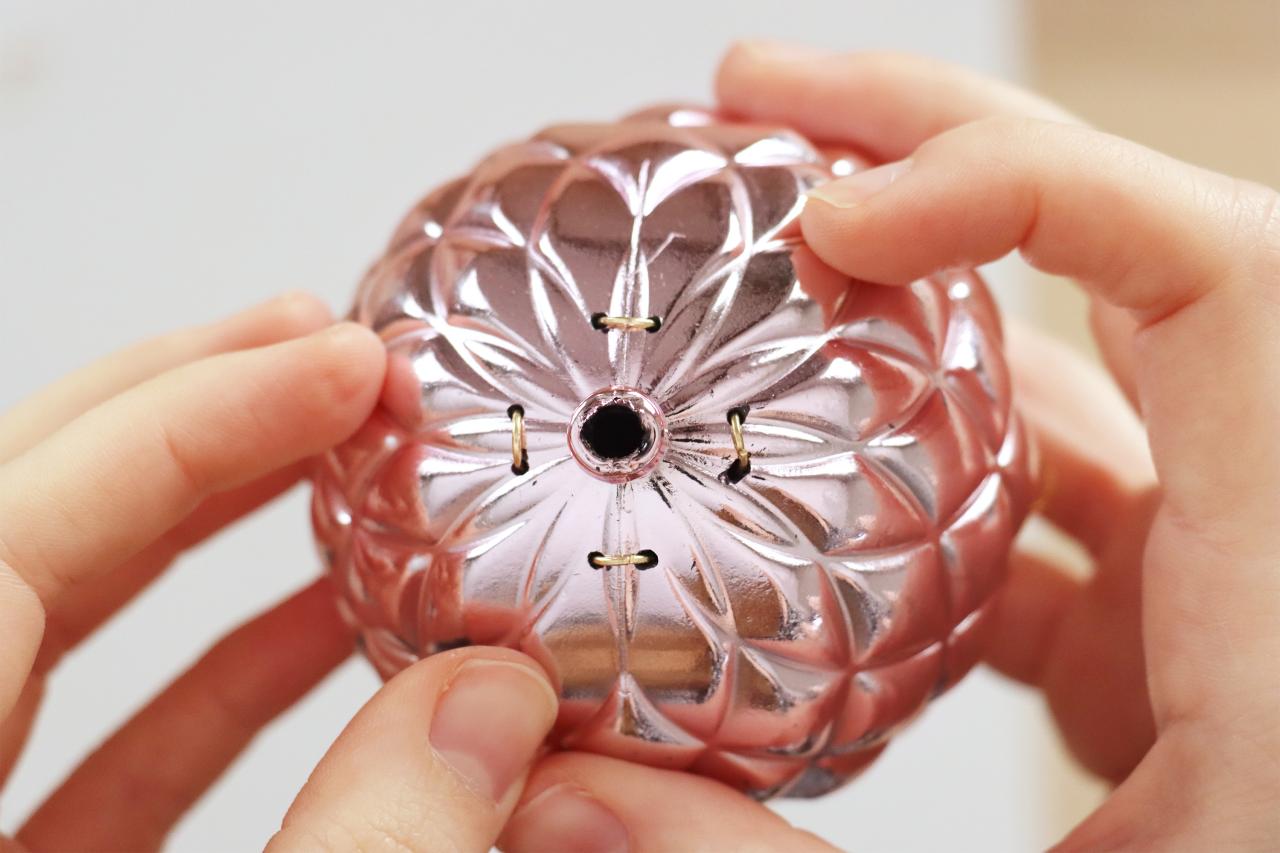
Mark two dots on the side of your ornament that are the same width apart as the width of your jump ring (Image 1). Drill holes in those two spots (Image 2). Open up the jump ring and insert it into one hole so that the end comes out of the other hole. Close it with jewelry pliers so you have a jump ring hanging off the side of the ornament (Image 3). Repeat this to have four jump rings evenly spaced around the ornament (Image 4). Add four smaller jump rings the same way to the bottom of the ornament (Image 5).
Note: Adding jump rings to the sides of the ornament is the trickiest part of this project, so you may want to practice on a spare ornament or drill slightly larger holes to give yourself more wiggle room.
Karen Kavett
Karen Kavett
Karen Kavett
Karen Kavett
Karen Kavett
Add jump rings to the ornament
Mark two dots on the side of your ornament that are the same width apart as the width of your jump ring. Drill holes in those two spots. Open up the jump ring and insert it into one hole so that the end comes out of the other hole. Close it with jewelry pliers so you have a jump ring hanging off the side of the ornament. Repeat this to have four jump rings evenly spaced around the ornament. Add four smaller jump rings the same way to the bottom of the ornament. Note: Adding jump rings to the sides of the ornament is the trickiest part of this project, so you may want to practice on a spare ornament or drill slightly larger holes to give yourself more wiggle room.
Photo By: Karen Kavett
Add jump rings to the ornament
Mark two dots on the side of your ornament that are the same width apart as the width of your jump ring. Drill holes in those two spots. Open up the jump ring and insert it into one hole so that the end comes out of the other hole. Close it with jewelry pliers so you have a jump ring hanging off the side of the ornament. Repeat this to have four jump rings evenly spaced around the ornament. Add four smaller jump rings the same way to the bottom of the ornament. Note: Adding jump rings to the sides of the ornament is the trickiest part of this project, so you may want to practice on a spare ornament or drill slightly larger holes to give yourself more wiggle room
Photo By: Karen Kavett
Add jump rings to the ornament
Mark two dots on the side of your ornament that are the same width apart as the width of your jump ring. Drill holes in those two spots. Open up the jump ring and insert it into one hole so that the end comes out of the other hole. Close it with jewelry pliers so you have a jump ring hanging off the side of the ornament. Repeat this to have four jump rings evenly spaced around the ornament. Add four smaller jump rings the same way to the bottom of the ornament. Note: Adding jump rings to the sides of the ornament is the trickiest part of this project, so you may want to practice on a spare ornament or drill slightly larger holes to give yourself more wiggle room.
Photo By: Karen Kavett
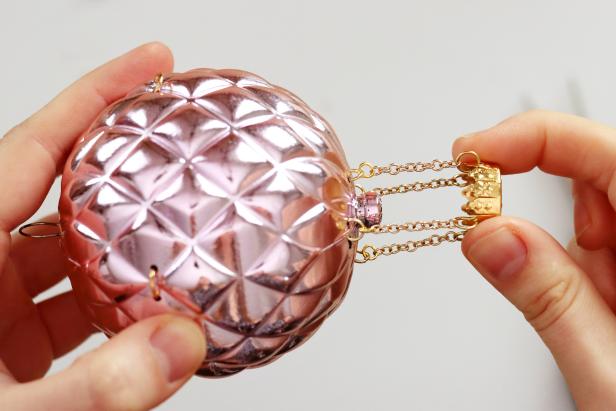
Attach the Basket to Your Ornament
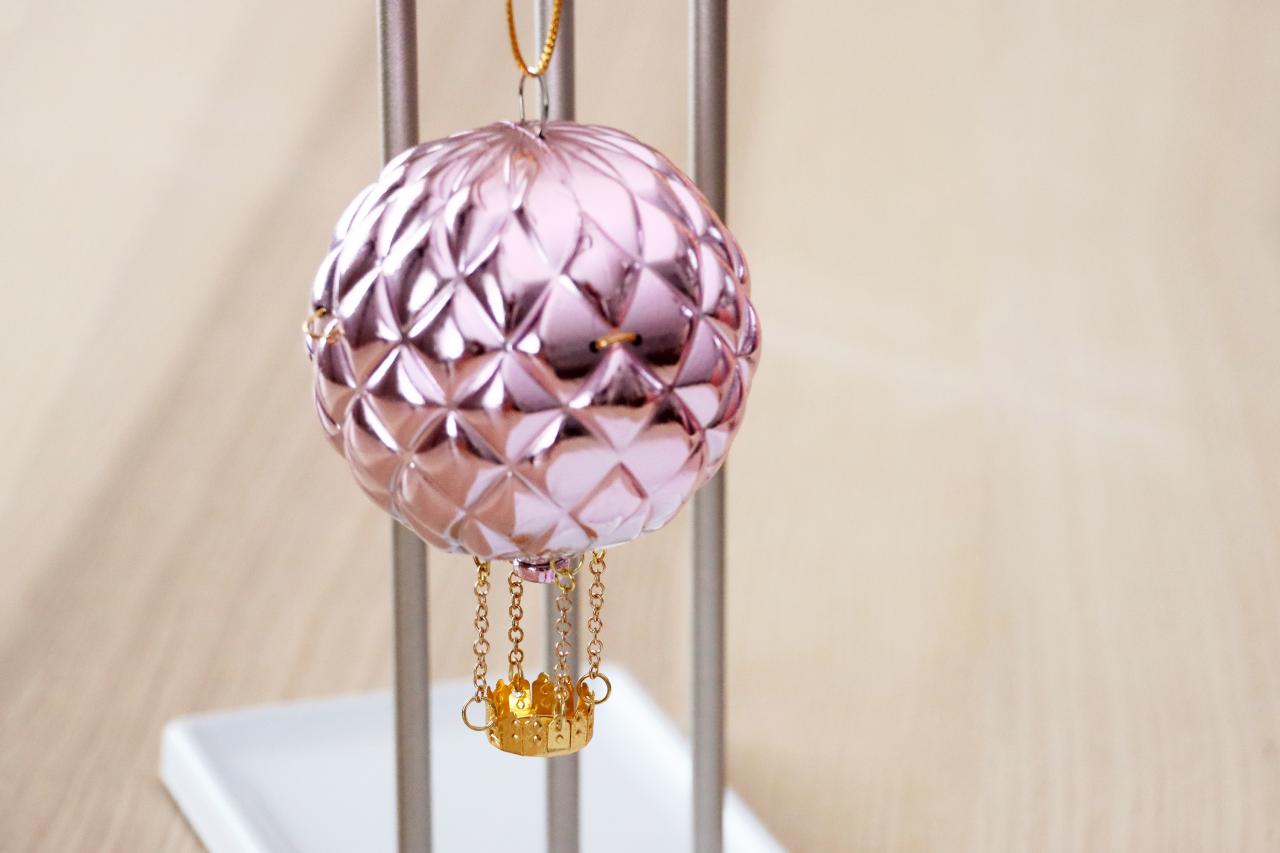
Use small jump rings to attach the four chains on the basket to the jump rings on the bottom of the ornament (Image 1). At this point, it is easier to work with the ornament if it is hanging up, so we added a loop of string as a hanger (Image 2) and hung it on a necklace stand (Image 3).
Karen Kavett
Karen Kavett
Karen Kavett
Add the basket
Use small jump rings to attach the four chains on the basket to the jump rings on the bottom of the ornament. At this point, it is easier to work with the ornament if it is hanging up, so we added a loop of string as a hanger and hung it on a necklace stand.
Photo By: Karen Kavett
Add the basket
Use small jump rings to attach the four chains on the basket to the jump rings on the bottom of the ornament. At this point, it is easier to work with the ornament if it is hanging up, so we added a loop of string as a hanger and hung it on a necklace stand.
Photo By: Karen Kavett
Add the basket
Use small jump rings to attach the four chains on the basket to the jump rings on the bottom of the ornament. At this point, it is easier to work with the ornament if it is hanging up, so we added a loop of string as a hanger and hung it on a necklace stand.
Photo By: Karen Kavett
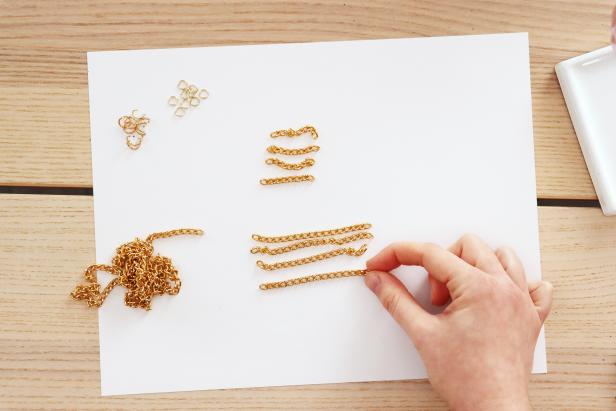
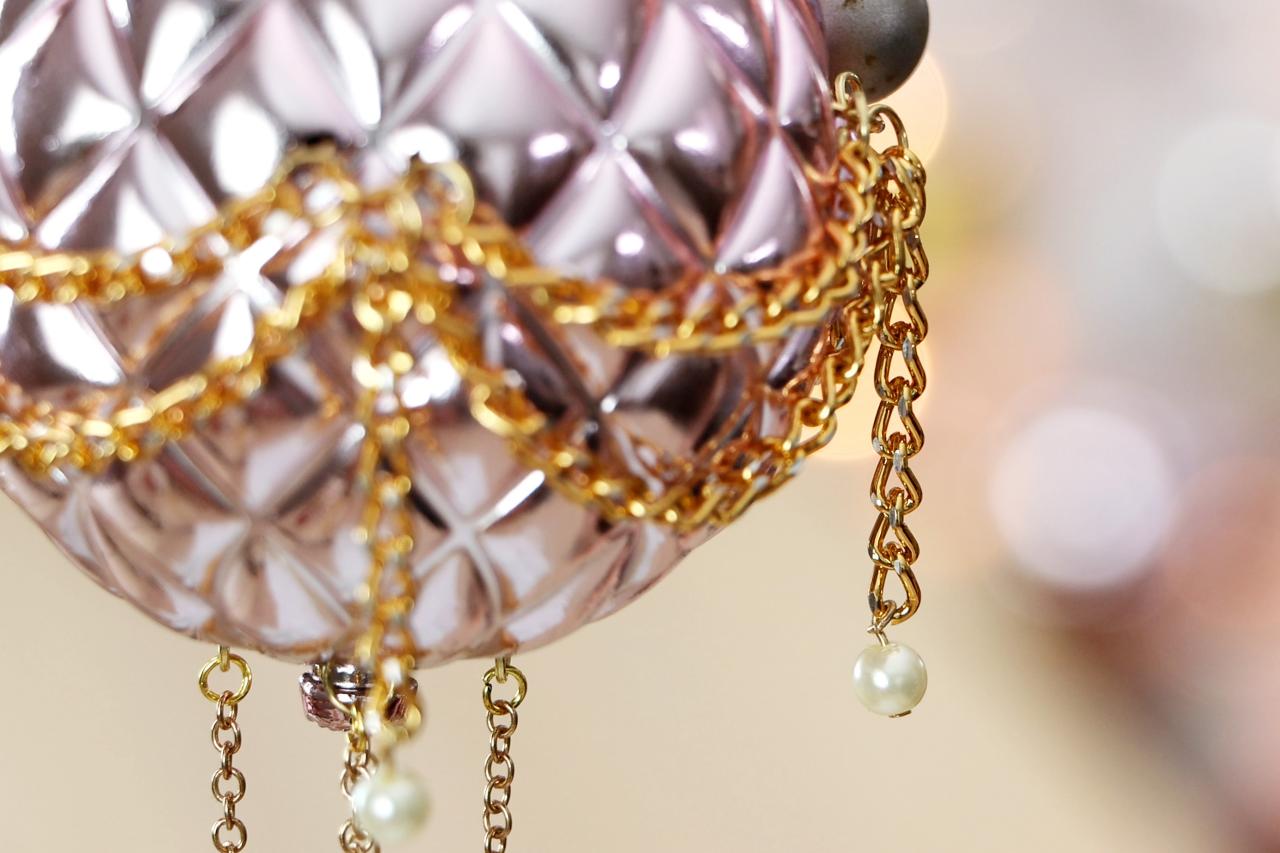
Add Chains
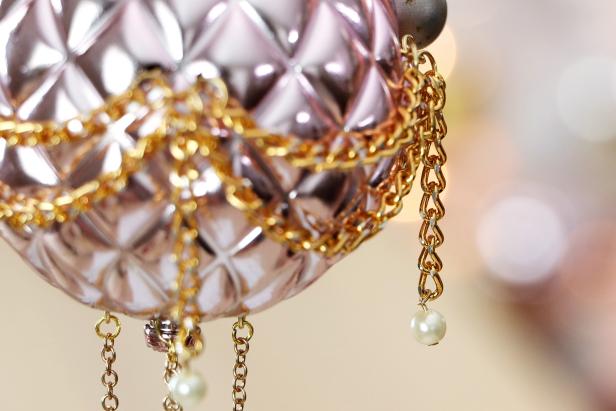
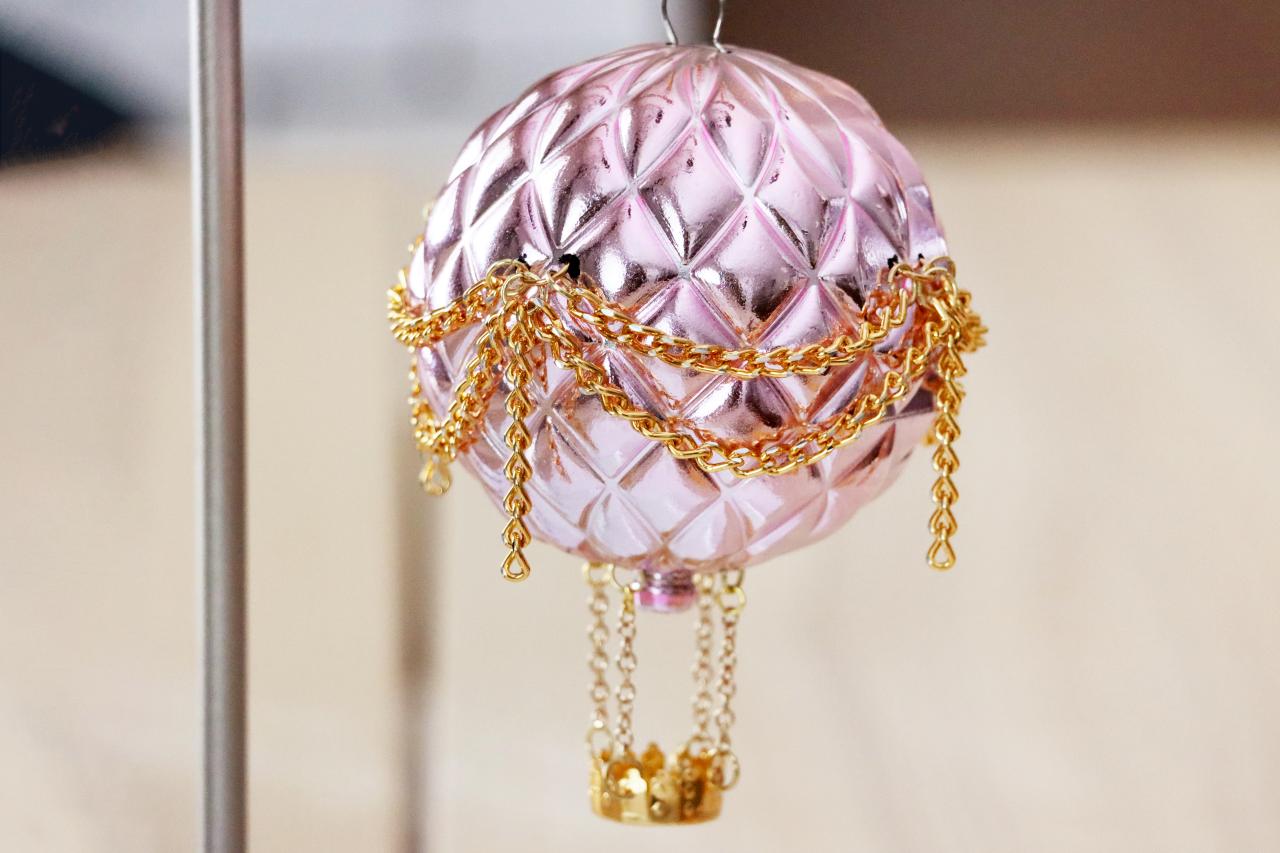
Cut four pieces of chain measuring around 1 1/2 inches, and four more pieces measuring around 3 inches each. Count the links to ensure each piece of chain is the exact same length (Image 1). Use jump rings to attach the longer pieces arching between the anchor points on the sides of the ornament, with the shorter pieces hanging down between them (Image 2). Feel free to embellish this as much as you like - for ours, we added a second row of chains all the way around (Image 3).
Karen Kavett
Karen Kavett
Karen Kavett
Add chains
Cut four pieces of chain measuring around 1½” and four pieces measuring around 3”. Count the links to ensure each piece of chain is the exact same length. Use jump rings to attach the longer pieces arcing between the anchor points on the sides of the ornament, with the shorter pieces hanging down between them. Feel free to embellish this as much as you like - for ours, we added a second row of chain all the way around.
Photo By: Karen Kavett
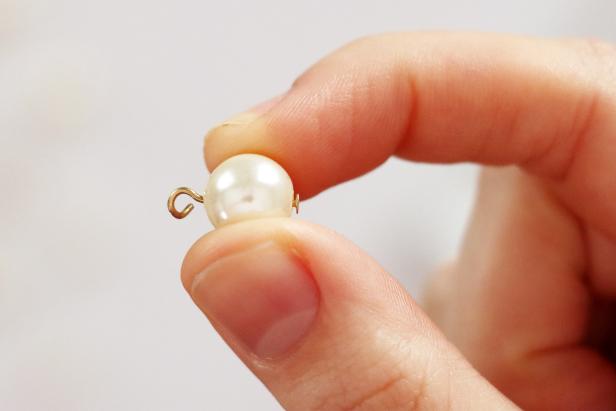
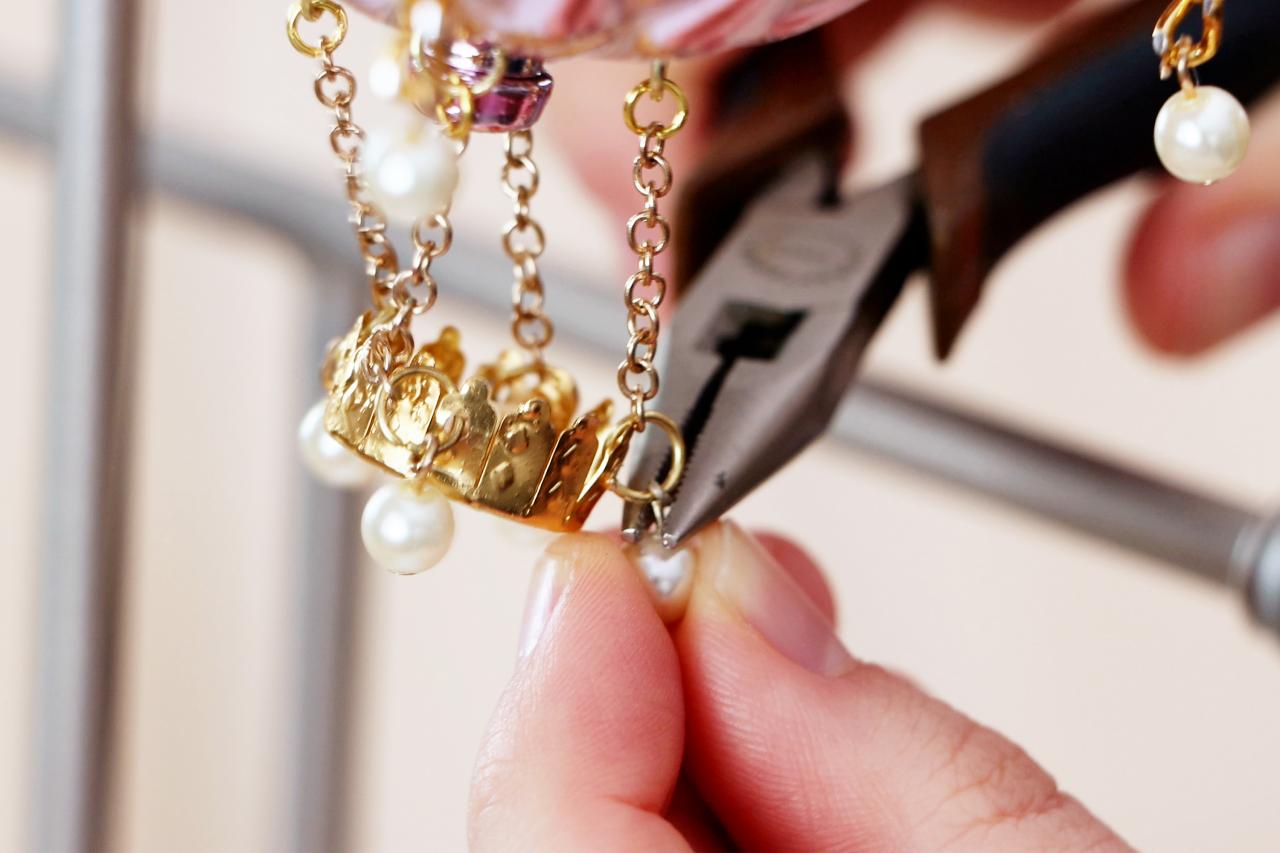
Add Pearls
Add pearl charm beads (Image 1) to the ends of the chains, around the basket, and at the anchor points on the sides of the ornament (Images 2 + 3). If you don’t have pearl beads, you can decorate it with any charms you like.
Karen Kavett
Karen Kavett
Karen Kavett
Add pearls
Add pearl charm beads to the ends of the chains, around the basket, and at the anchor points on the sides of the ornament. If you don’t have pearl beads, you can decorate it with any charms you like.
Photo By: Karen Kavett
Add pearls
Add pearl charm beads to the ends of the chains, around the basket, and at the anchor points on the sides of the ornament. If you don’t have pearl beads, you can decorate it with any charms you like.
Photo By: Karen Kavett
Add pearls
Add pearl charm beads to the ends of the chains, around the basket, and at the anchor points on the sides of the ornament. If you don’t have pearl beads, you can decorate it with any charms you like.
Photo By: Karen Kavett
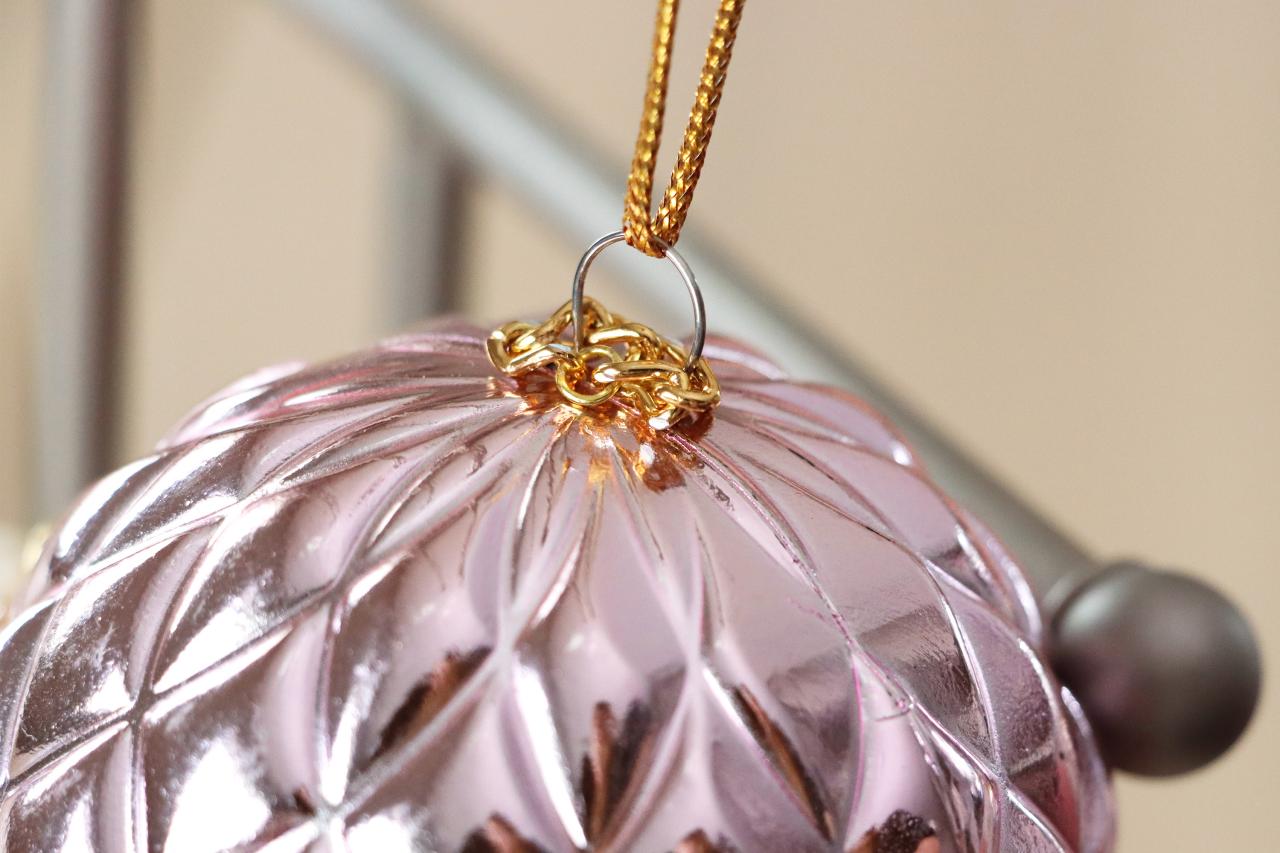
Add a Chain to the Top
Add a small loop of chain around the hanger and secure it with a jump ring to finish the top of the ornament.
Add chain to the top
Add a small loop of chain around the hanger and secure it with a jump ring to finish the top of the ornament.
Photo by: Karen Kavett
Karen Kavett
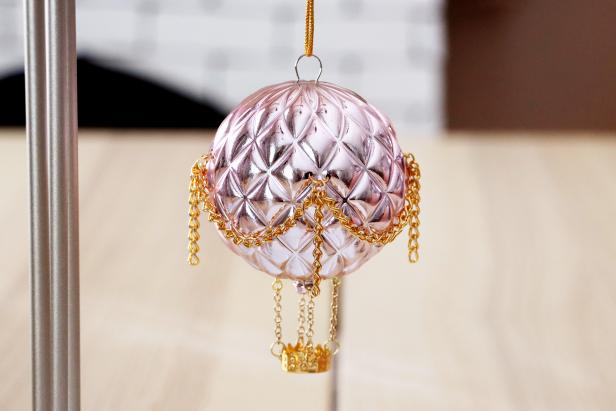
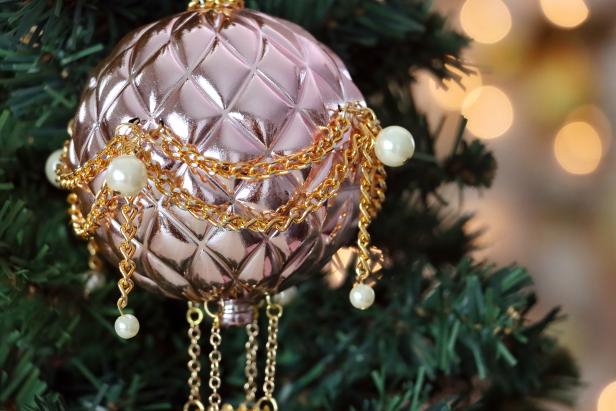
Trim the Tree With Your DIY Hot Air Balloon Ornament
That’s it! We’ve made a glitzy, glam hot air balloon ornament that will bring some sparkle to any Christmas tree.
Karen Kavett
Karen Kavett
Hang on your tree
That’s it! We’ve made a glitzy, glam hot air balloon ornament that will bring some sparkle to any Christmas tree.
This unique Christmas tree forest pom-pom wreath only uses a few supplies, but creates a cozy and festive addition to your holiday decorating. And the best part is that it’s easily customizable to match your own Christmas color scheme.
Don’t just throw your leftover Christmas scraps in the waste bin after the holidays. Get crafty and turn them into DIY greeting cards that you can give to family and friends all year long.
Subscribe now to get our latest decorating tips, household hacks and more delivered to your inbox daily.
By entering your email address, you agree to our Terms of Use
and acknowledge the Privacy Policy.
HGTV and
its affiliates
may use your email address to provide updates, ads, and offers.
To withdraw your consent or learn more about your rights, see the
Privacy Policy.
Follow Us Everywhere
Join the party! Don't miss HGTV in your favorite social media feeds.


