


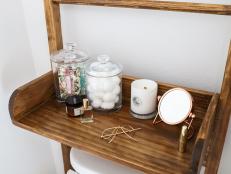
DIY Recessed Medicine Cabinet With Oversized Mirror
Get the best of both worlds with a chic, oversized bathroom mirror that boasts secret storage.

Cassidy Garcia

Medicine cabinets, though once a staple in every bathroom, have become less and less popular. This is a real shame, because who doesn't want hidden storage behind their mirror? Because of dwindling popularity, most medicine cabinets on the market today are either too small, too drab or too expensive. So, we set out to make our own that was extra-large, ultra-chic and, best of all, super affordable. By turning a standard, metal-framed mirror into a medicine cabinet, we achieved luxurious results at a fraction of the cost.
How to Make the Cabinet Insert
There are a variety of ways to make the cabinet portion of the medicine cabinet. You could simply buy a cabinet niche insert, build a cabinet yourself and mount it between the studs, or even build a cabinet box to mount on the wall itself. If you don't want to go to the trouble of mounting a cabinet within the wall, this may be the easiest option. We chose to mount our cabinet within the wall because we wanted the mirror to sit flush with the wall.
Materials Needed
- 2x4 x 8’ pine board
- 1x5 x 8’ poplar board
- measuring tape
- stud finder
- finish nail gun or hammer and nails
- table saw
- router (optional)
- miter saw
- carpentry pencil
- jab saw
- drywall
- drywall knife
- drywall joint compound
- corner bead
- drywall nails
- drywall screws
- drill + bits
- sandpaper
- wood stain
- polyurethane or penetrating oil
- construction adhesive
Cut Cabinet Niche
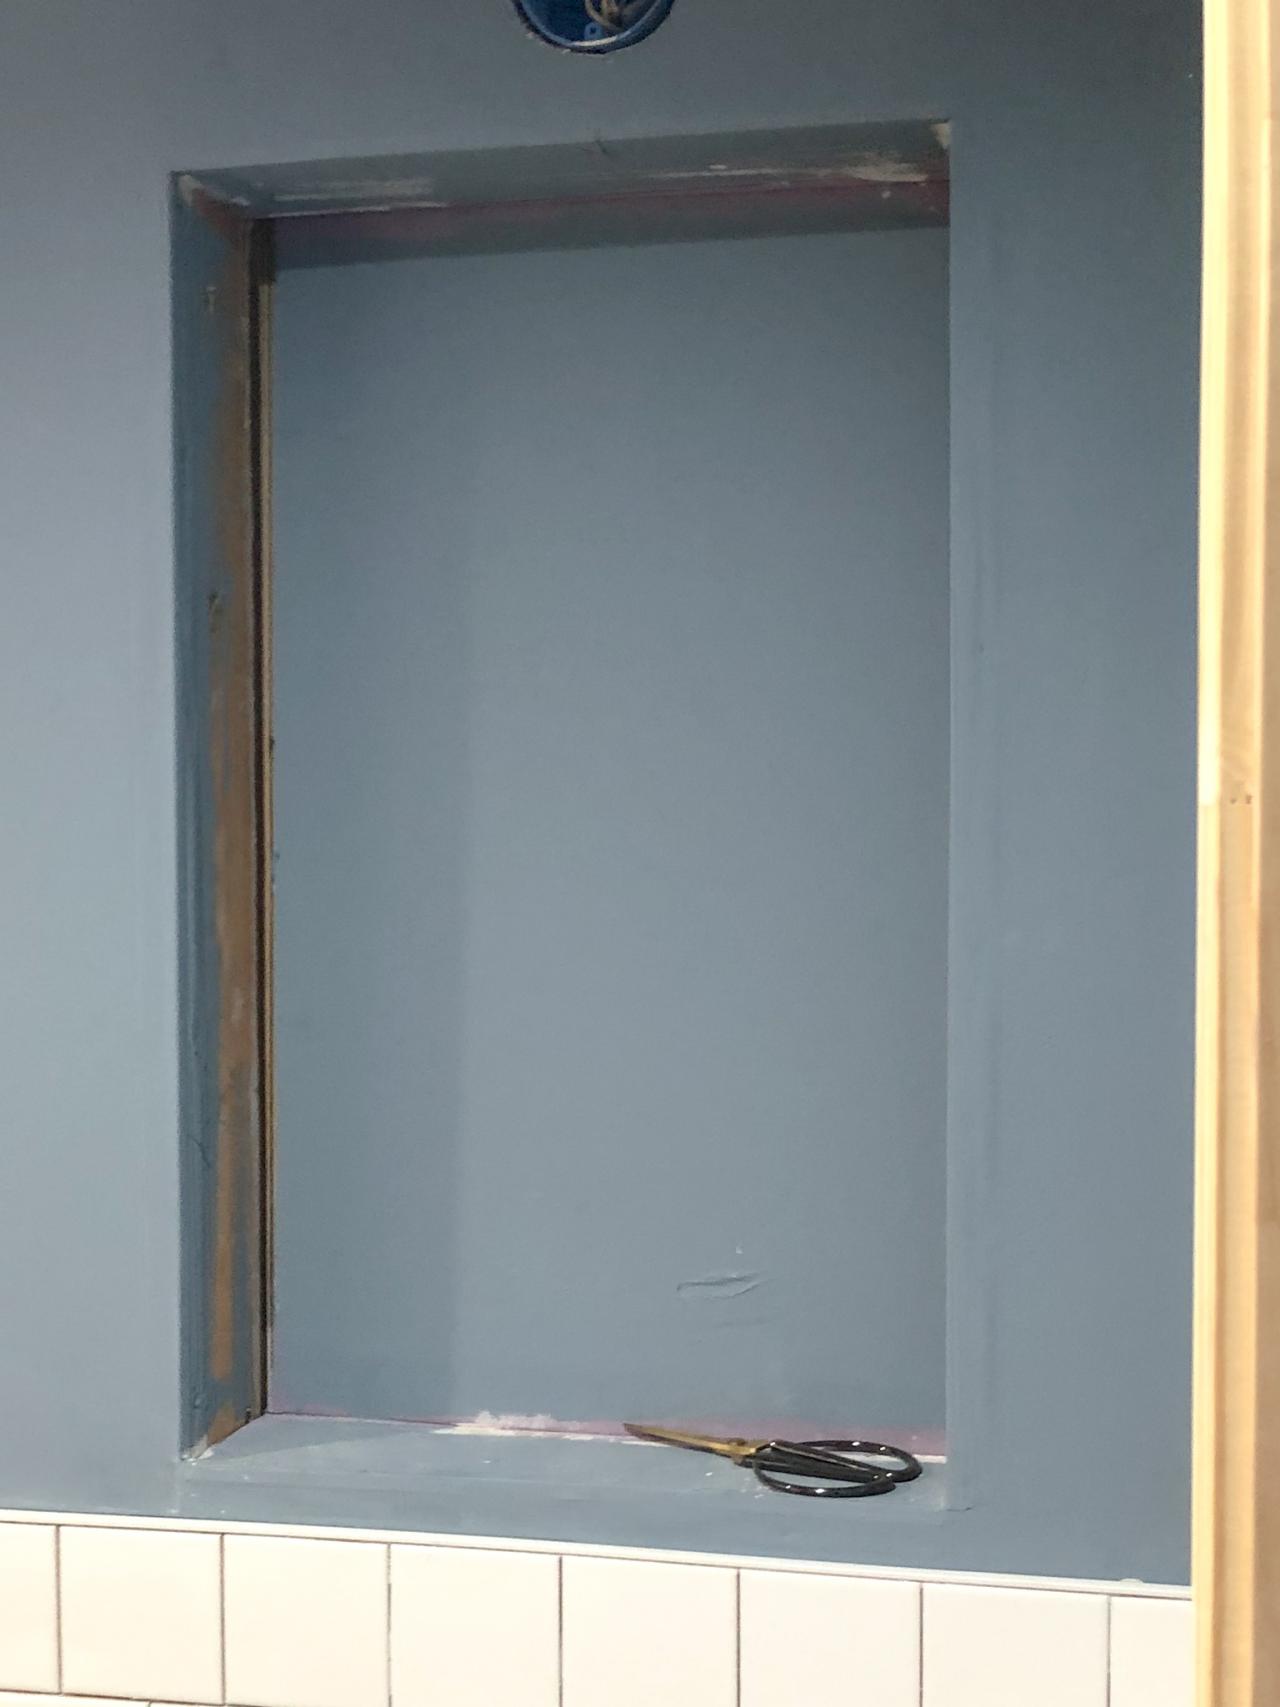
In our bathroom, creating a niche in the wall for the cabinet insert was as easy as measuring our desired hole and cutting out the drywall between two studs using a jab saw. The odds of always having a cabinet-sized hole centered above your sink aren’t great, so you may have to cut into the studs with a reciprocating saw and reframe, or simply choose to have your niche slightly off center as we did here. Remember that if your mirror is larger than the hole and centered above the sink, the niche will be covered most of the time anyway, so it comes down to your preference and what makes the most sense for your situation.
Once you’ve cut the drywall, measure and cut two 2x4 pieces to fit horizontally in the top and bottom of the hole, then screw them into the existing studs. Drywall the wall area around the hole as normal and cut a piece to fit in the back of the cabinet. Since you can’t run drywall screws through the back piece without it coming out the other side, secure the piece using construction adhesive. Finish the outer corners around the edge using corner bead, tape off all joints and mud as usual (Images 1 & 2). New to drywall? Learn how to hang and finish drywall here.

Kamron Sanders

Kamron Sanders
Pro Tip: When cutting into a wall, always turn off the electricity to prevent the risk of electrical shock. If your medicine cabinet's position requires you to remove or alter any of the home's framing, follow the proper code for your area when reinforcing the framing.
Measure and Cut Cabinet Pieces
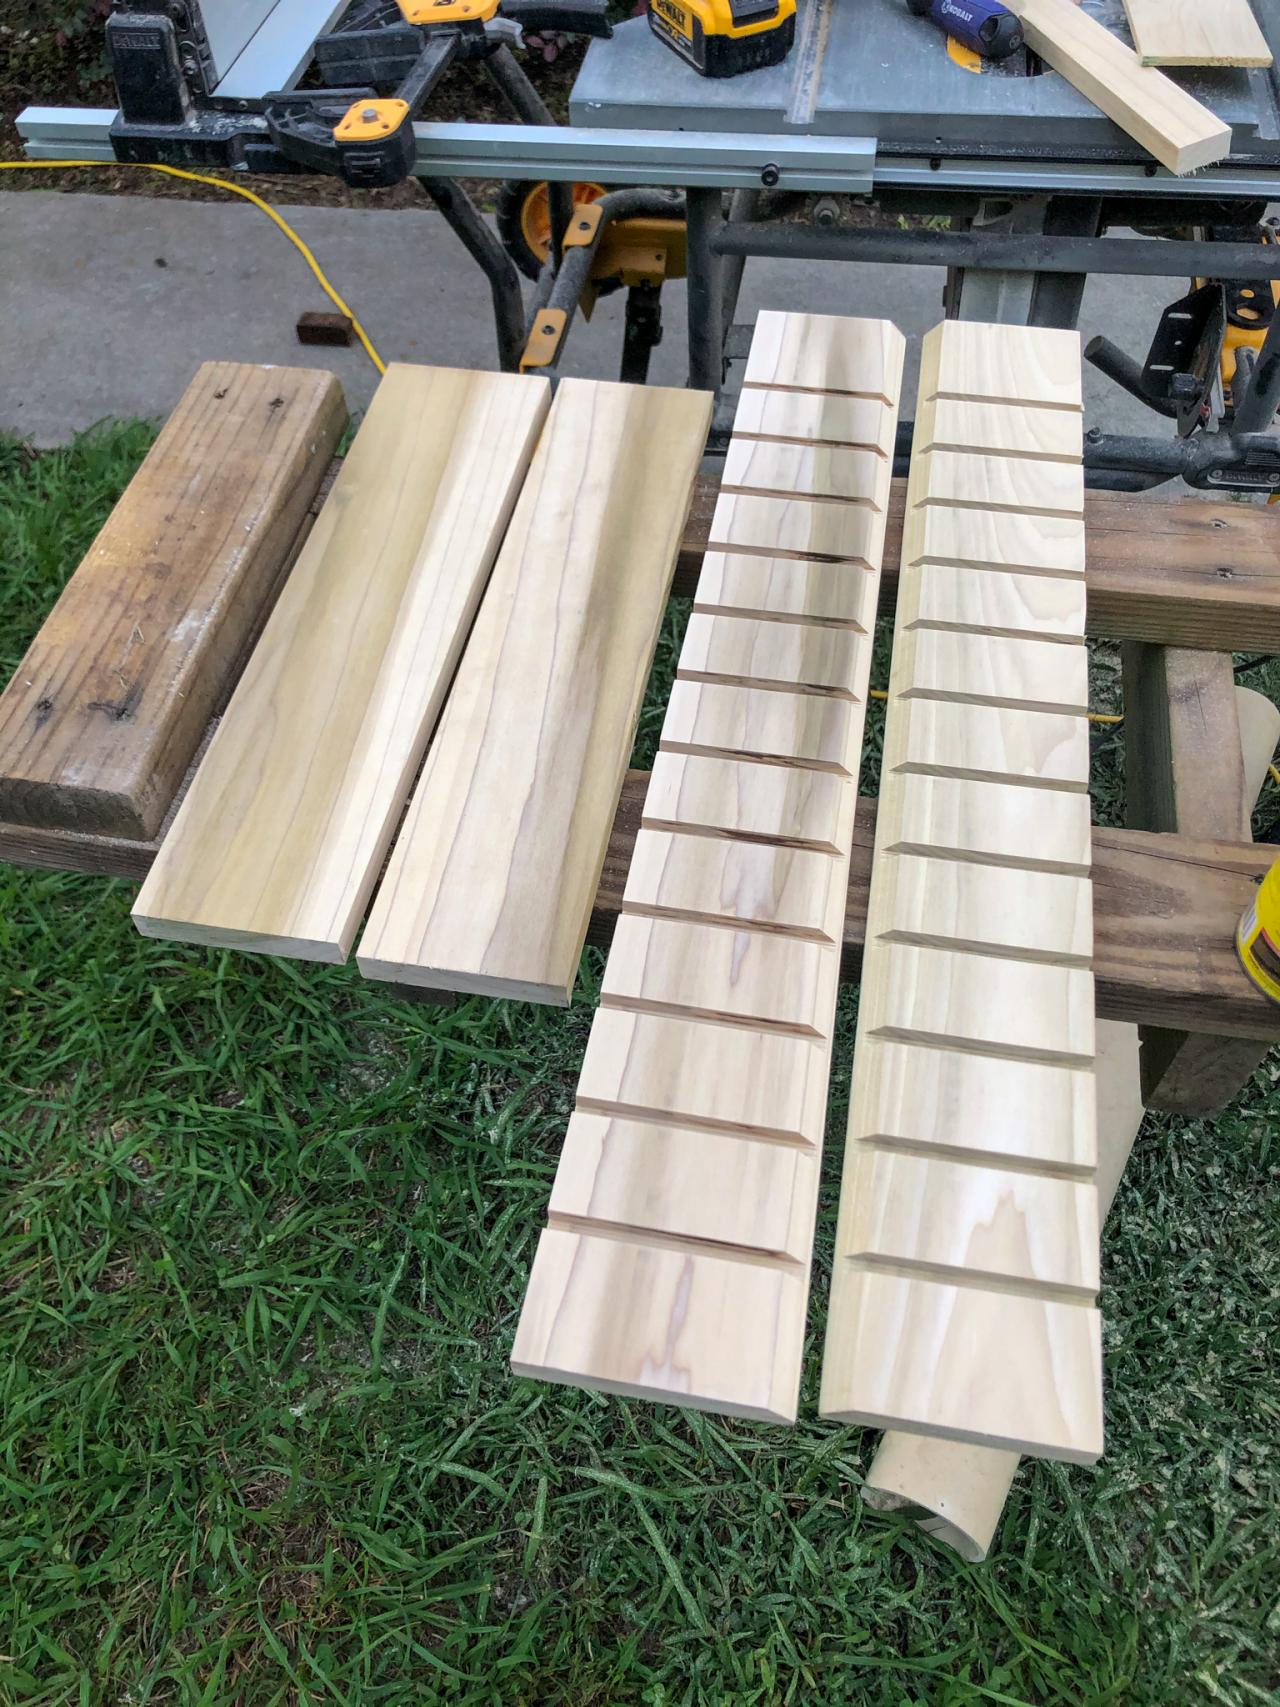
Our desired look for this cabinet was wood around the edges with drywall in the back. Since we already mounted the drywall in the back of the cabinet, all that is left to do is cut the wood pieces and mount them in place. To do this, first measure across the top and bottom of the niche. Use these measurements to cut two pieces of 1x5 boards to length. Once cut, measure the depth of both the top and bottom of the niche, then use a table saw to rip the boards to where they will sit flush with the outer drywall. Once cut, have a helper hold the two pieces in place and get measurements for the side pieces. Repeat the measuring and cutting process for the length and the depth.
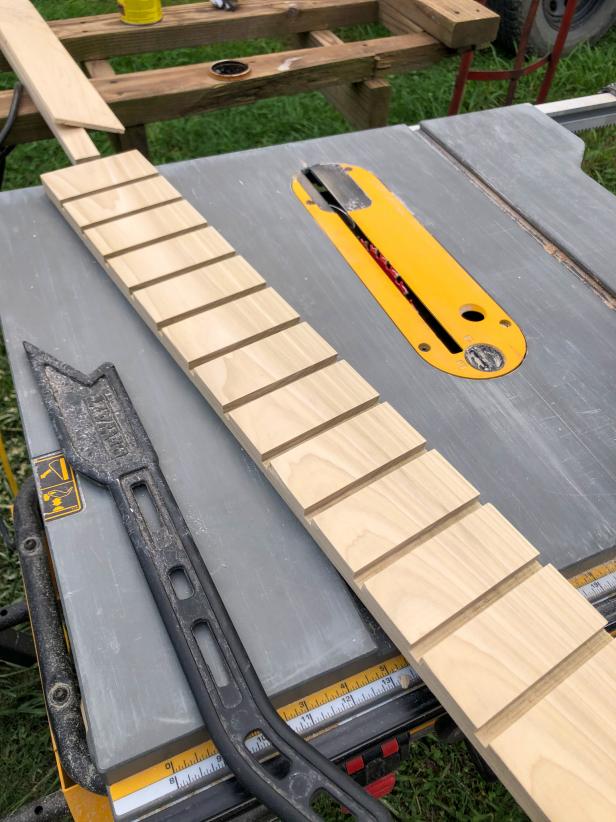
Cut Dados
Once all pieces are cut and you’ve ensured they fit, it’s time to cut the slots for the adjustable shelves. Use your table saw or a router to cut 1/4-inch by 1/4-inch dados every 2 inches down the length of each side piece (Image 1). For a decorative touch, we chose to route the edges of the side pieces (Image 2).
Kamron Sanders

Kamron Sanders
Mount Cabinet and Cut Shelves
To mount the boards you’ve cut for the cabinet, start by holding the top and bottom boards in place and slide the sides into place. If they are not snug enough to stay in place on their own, have a helper assist you. Once mocked up, use a finish nail gun or a hammer and finish nails to secure the boards to the frame. Once they are secured, measure from left dado to right dado to find the length of your shelves. Cut the shelves to length, then rip them to the proper depth using your table saw. You can make as many or as few shelves as you need.

Kamron Sanders
Finish Cabinet
For a sleek finished look, fill in any gaps surrounding the cabinet with drywall mud and sand smooth. Do a final sanding on all wood pieces, then stain with your desired stain color. Seal the cabinet with either a polyurethane or penetrating oil following the manufacturer’s instructions.

Kamron Sanders
How to Make the Swinging Mirror
Materials Needed
- metal-framed mirror (preferably wood-backed)
- piano hinge
- rivet gun + rivets
- drill + bits
- cutting oil or water
- C-clamps
- scrap wood
- marker
- measuring tape
- painter's tape
- wood glue
- screwdriver
- self-drilling wood screws
- magnetic clasps
Shop This Project


Choose a Mirror
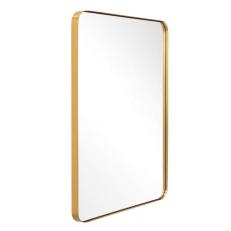
Since the mirror is the star of the show and will be opened and closed frequently, it's important to choose one that's not only stylish but also sturdy. Look for a mirror with a metal frame or a thick wood backing. For our medicine cabinet, we chose a large mirror with a gold metal frame.
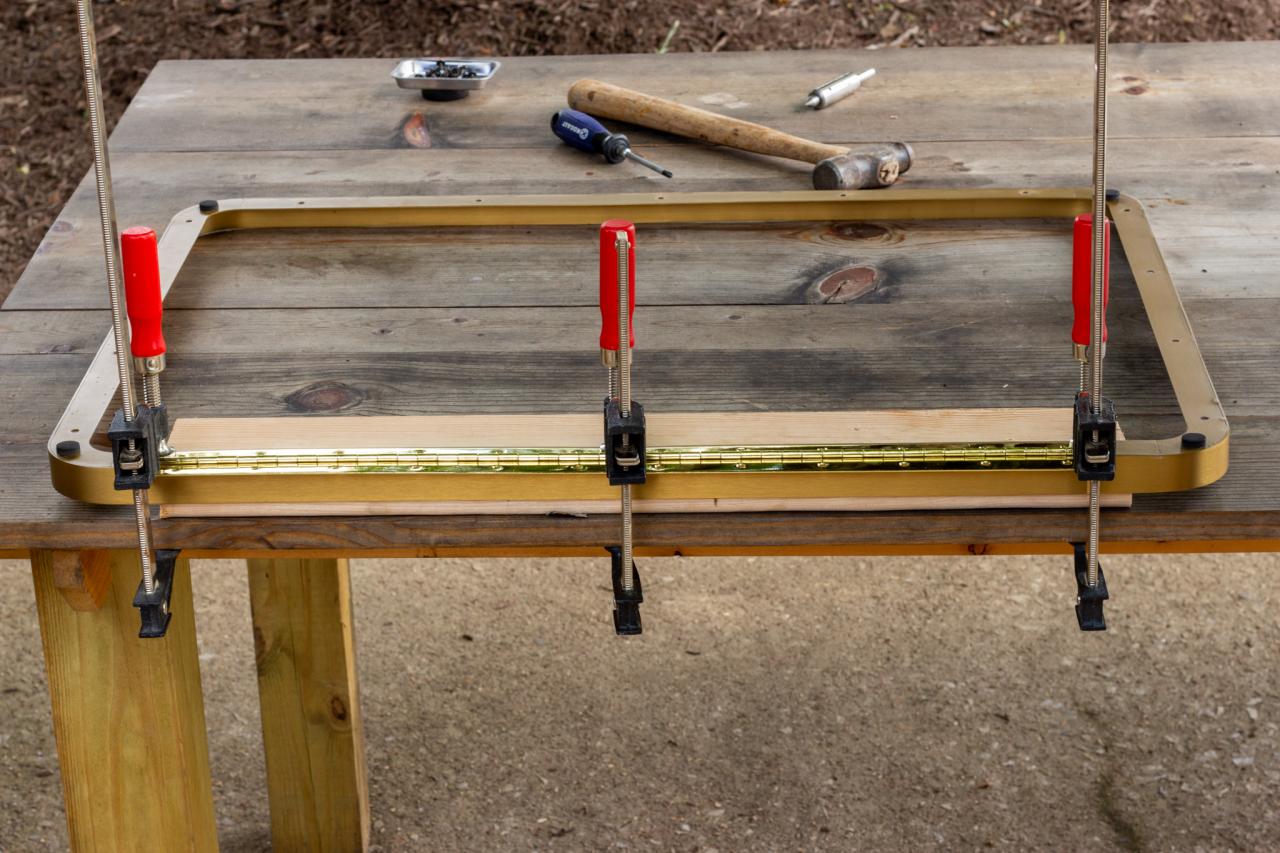
Disassemble Mirror
Start by removing the metal frame from the mirror itself and setting the glass and backing out of harm's way (Images 1 & 2). Secure the frame to a work surface using clamps, placing a scrap board between as a backing for drilling and the piano hinge on top of the frame (Image 3).

Kamron Sanders

Kamron Sanders

Kamron Sanders
Drill Mirror and Hinge
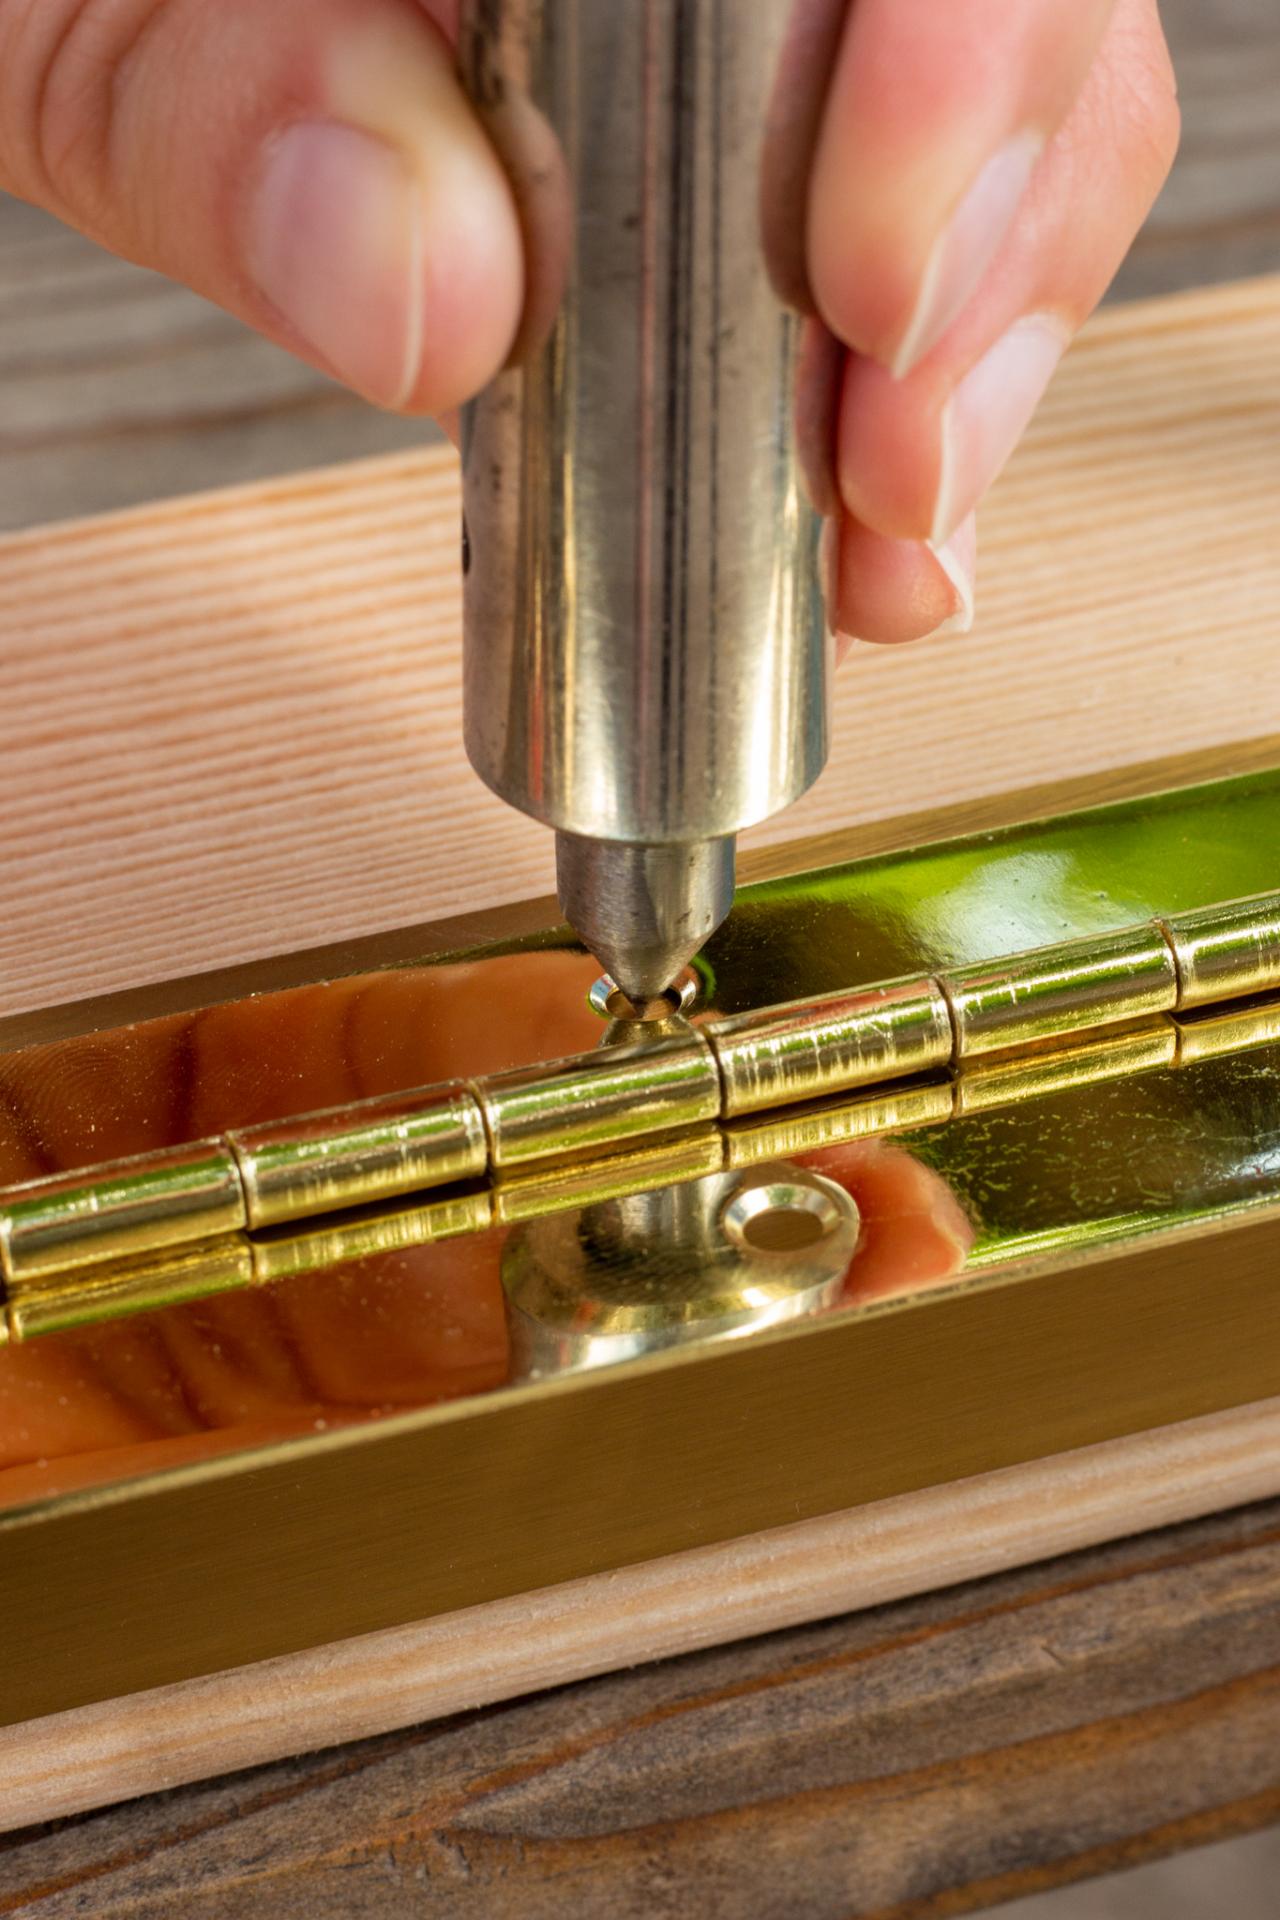
You should use 3/16-inch rivets to attach the hinge to the frame, so you will need a 3/16-inch drill bit. However, to aid in accuracy, it can be helpful to start with a smaller bit. First, mark the center of each hole with a center punch, then drill a pilot hole with the small bit (Images 1 & 2). Next, drill out each hole with the 3/16-inch bit (Image 3). The metal will most likely be soft, but if the bit is having difficulty and getting too hot, water or cutting oil should be applied while cutting.

Kamron Sanders

Kamron Sanders

Kamron Sanders
Mark Recessed Relief Holes
Before you start riveting the hinge to the frame, you need to use the holes as a template to drill relief holes in the mirror’s wood backing. Release the clamps and set the scrap board and hinge to the side. Place the mirror back in the metal frame and mark the wood backing at every hole.

Kamron Sanders
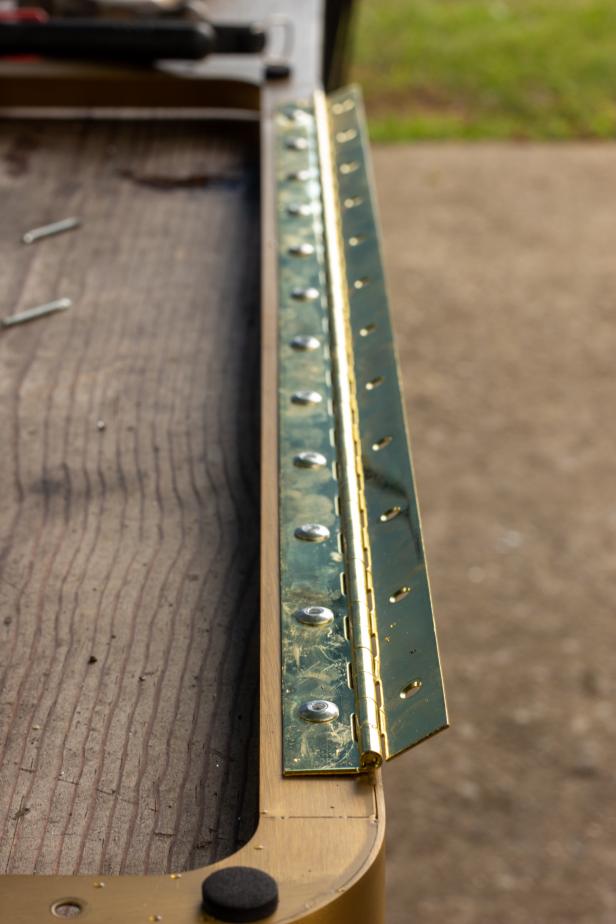
Attach Hinge to Frame
Place the hinge in the proper direction and attach using the rivet gun (Images 1 & 2).

Kamron Sanders
Kamron Sanders
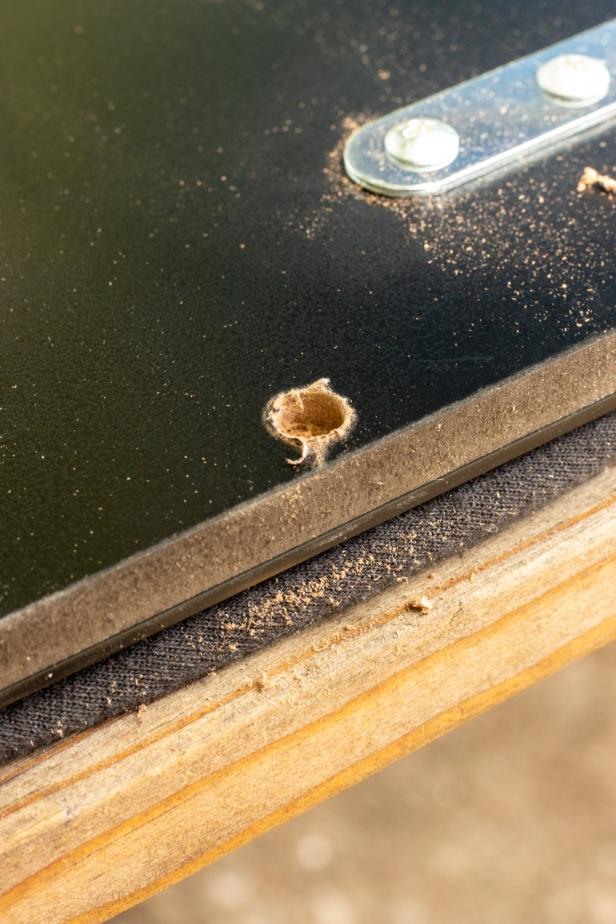
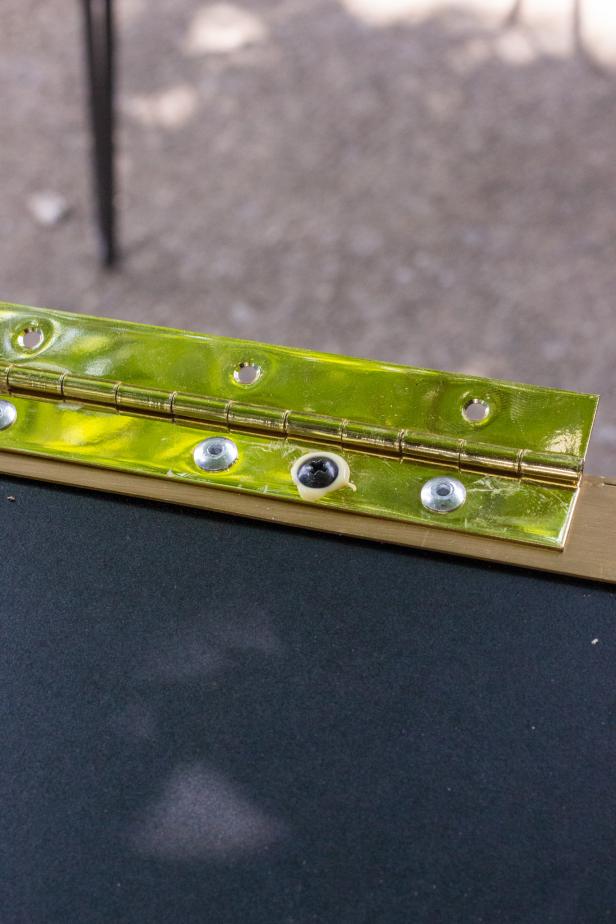
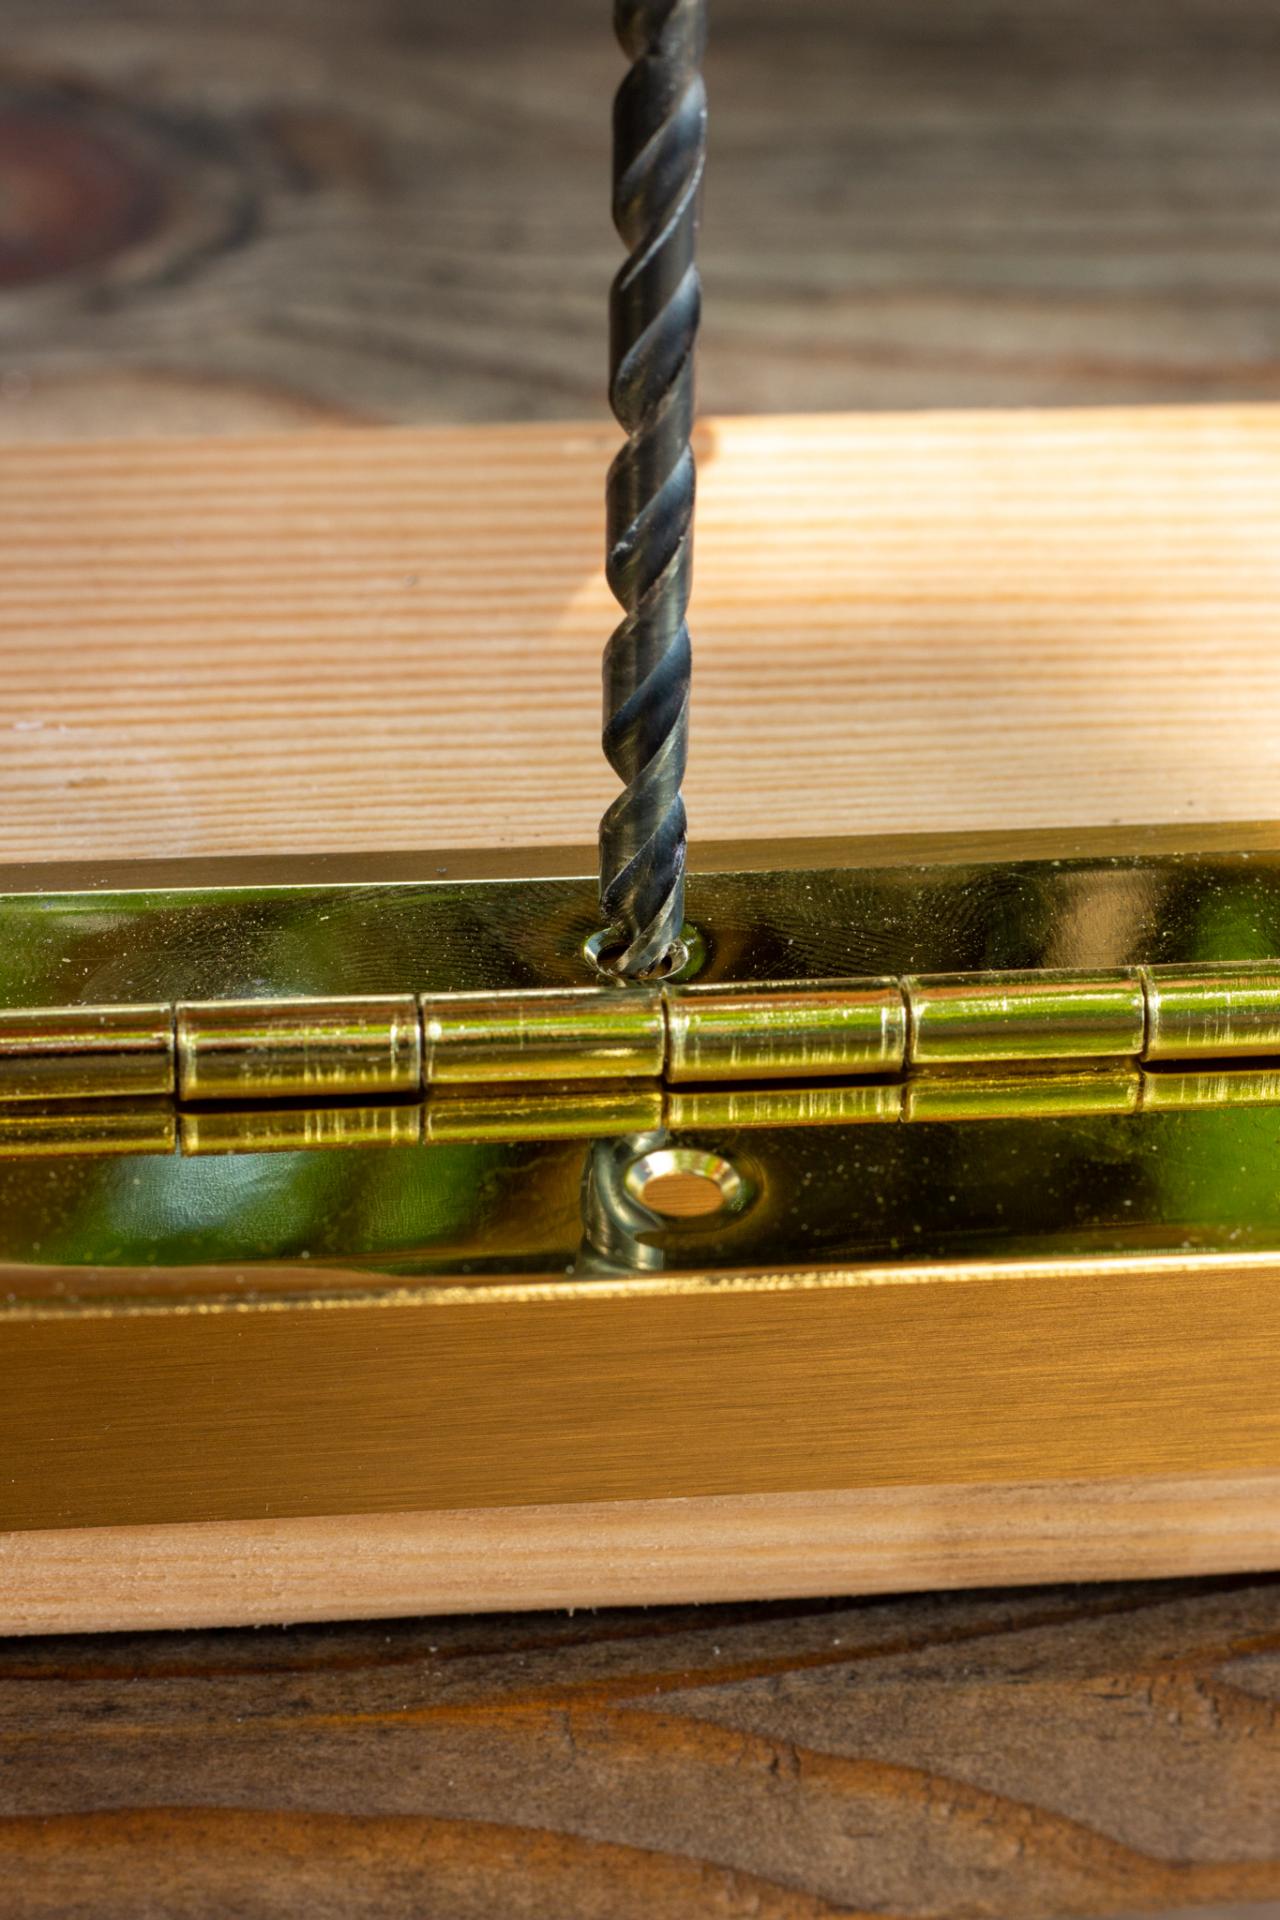
Drill Recessed Relief Holes
Use a measuring device to get a measurement of the rivet sticking out beneath the frame. Choose a drill bit that is thicker than the rivet and use painter’s tape to mark the bit at the length of the rivet (Image 1). The tape will serve as a guide to prevent drilling through the mirror. Drill out the relief holes at each marked spot (Image 2).

Kamron Sanders
Kamron Sanders
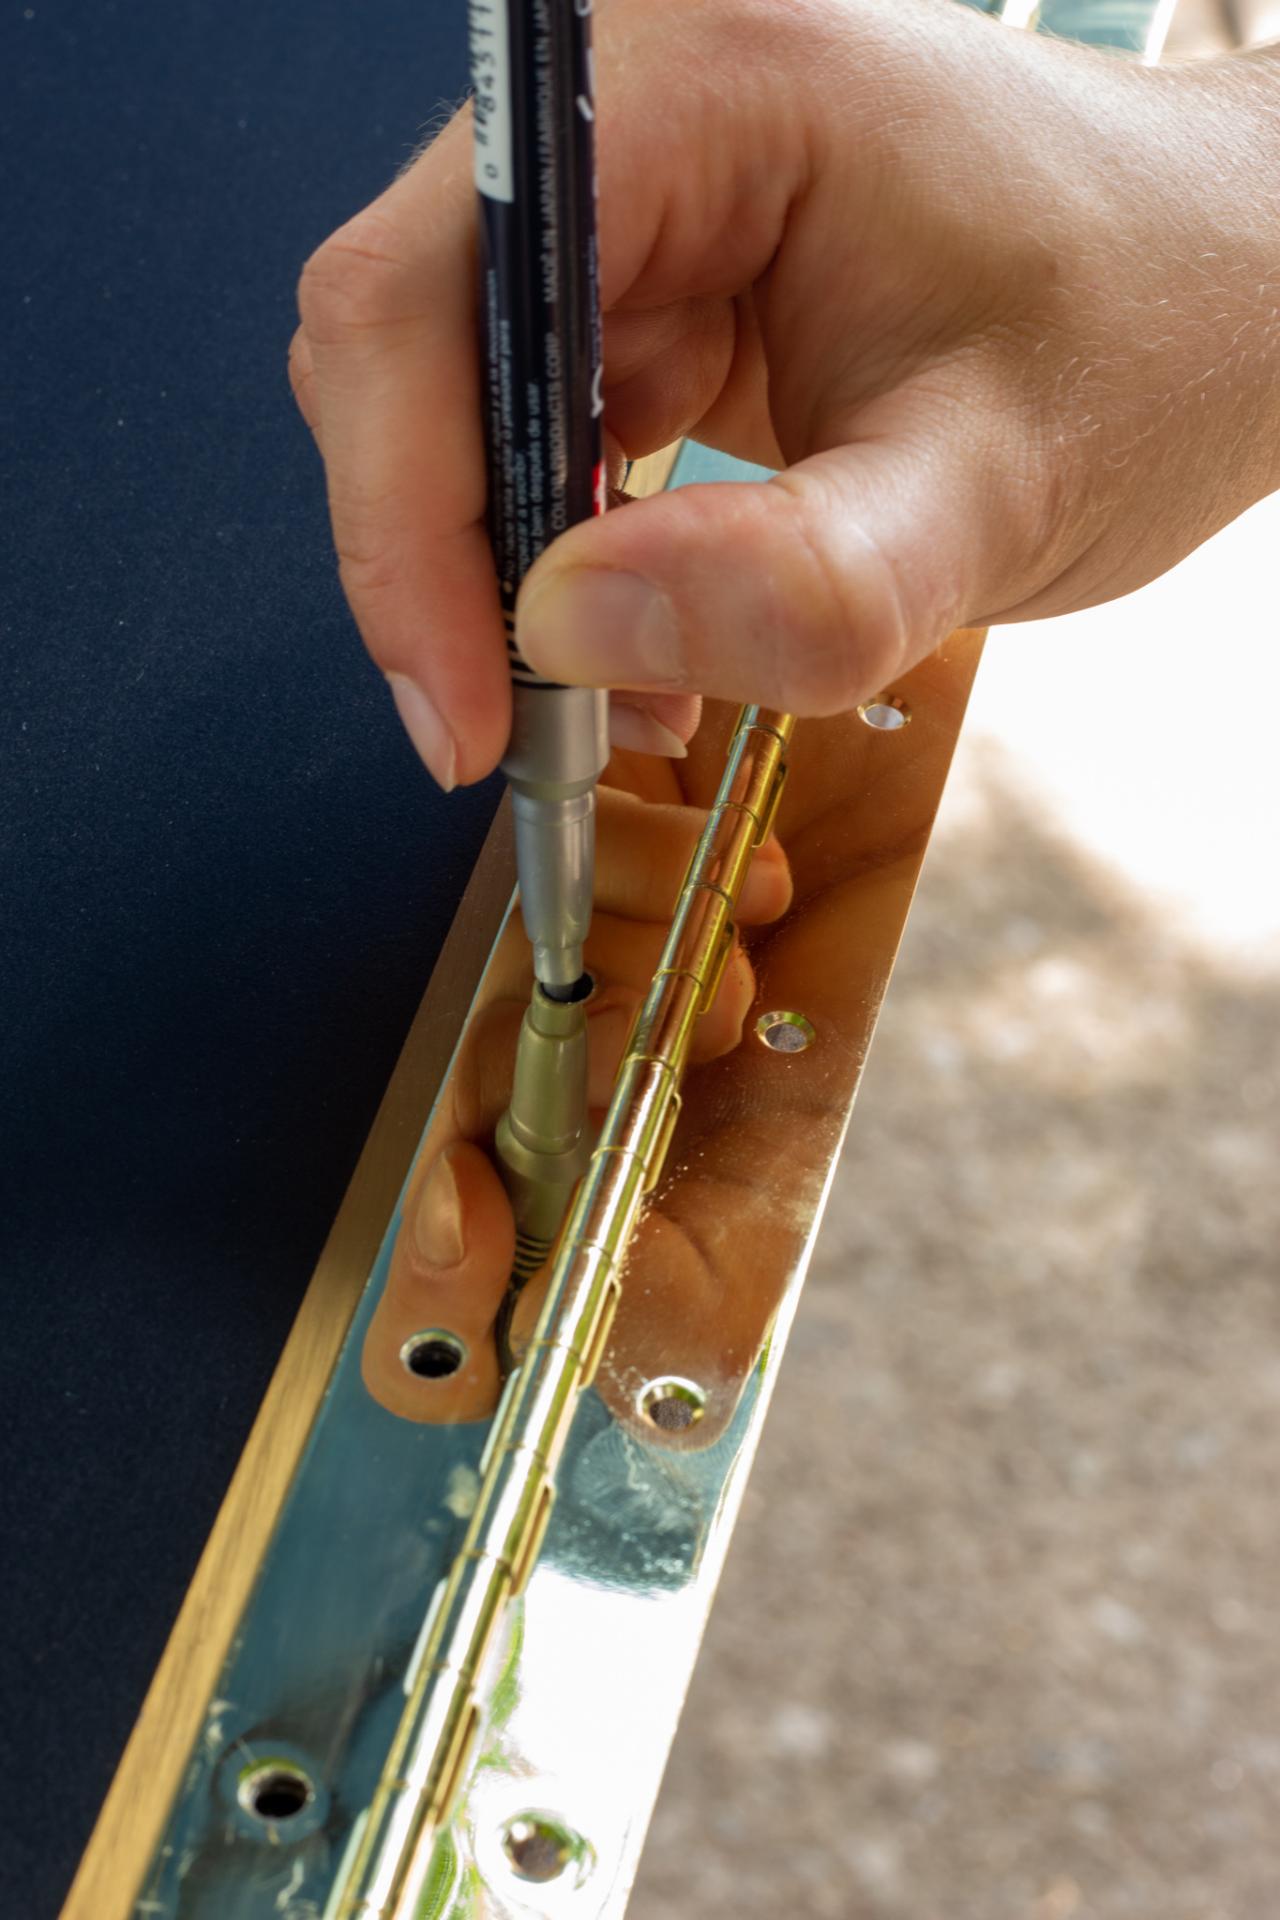
Reassemble Mirror
Begin carefully reassembling the mirror. Because of the piano hinge’s position, it likely covered some of the original screw holes and new ones will need to be drilled. Use the same taped drill bit method to drill out a few new holes for the mirror’s hardware (Image 1). As a safety measure, we filled every screw hole with wood glue to help them stay in place (Images 2 & 3).

Kamron Sanders
Kamron Sanders

Kamron Sanders
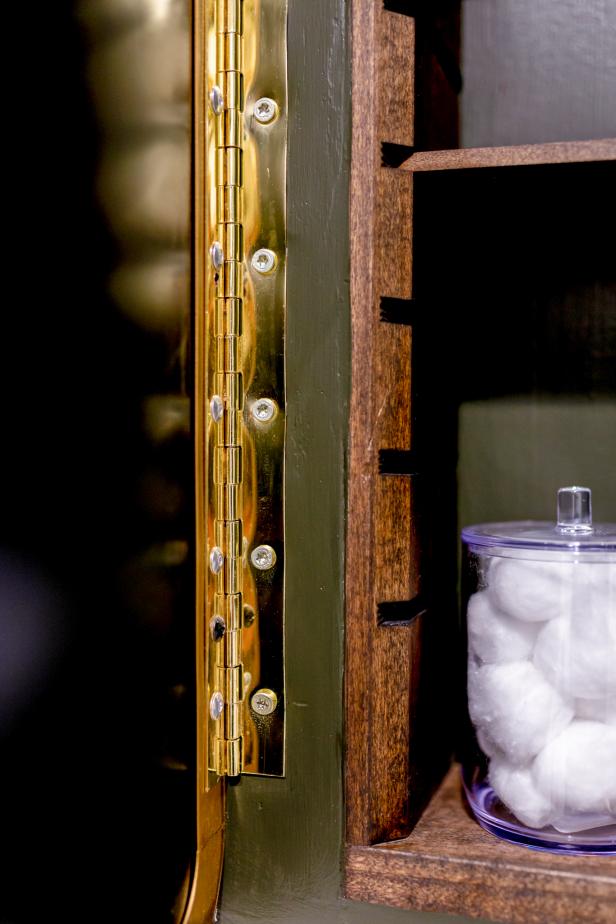
Mount Mirror
It’s time to mount the mirror. This mirror will be heavy, so it is imperative that you screw into a stud with long wood screws or use heavy-duty drywall anchors (Images 1 & 2). If you are framing yourself, save yourself the trouble and put a board in the wall to screw the hinge to. Have a helper hold the mirror while you fasten it in place.

Kamron Sanders
Cassidy Garcia
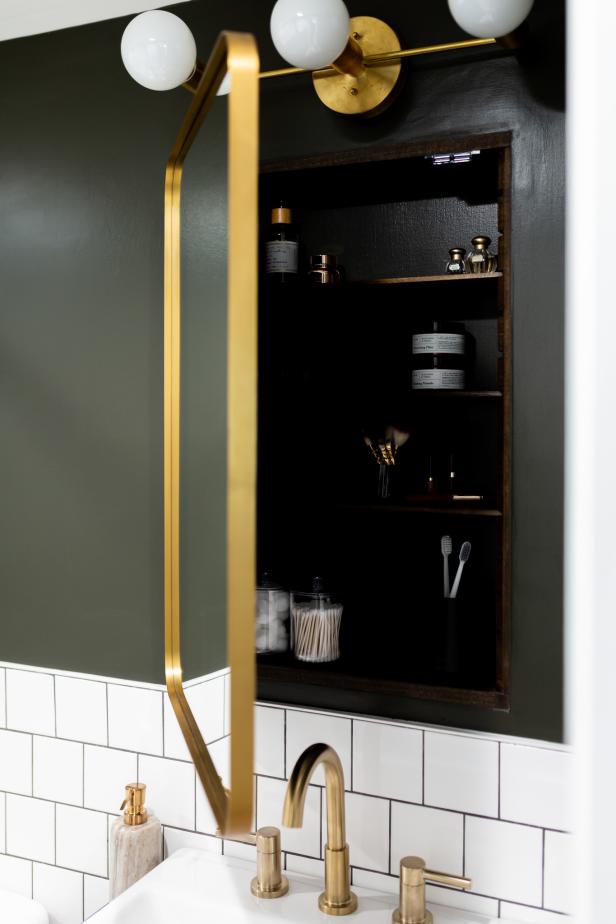
Final Steps
To keep the mirror from opening itself, install a magnetic catch on the upper inside of the cabinet and the back of the mirror. Now, step back and enjoy your handiwork!
Cassidy Garcia
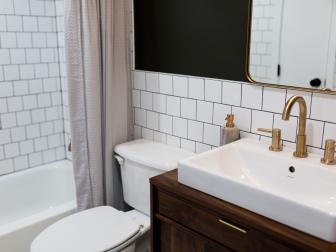
See the Full Makeover 22 Photos
Find out exactly what it took to go from dark, dated and dingy to light, bright and airy in this small bathroom.


