


How to Treat Pallet Wood for Indoor Use
Follow these guidelines to choose the right pallets for your project and prepare them for use inside your home.

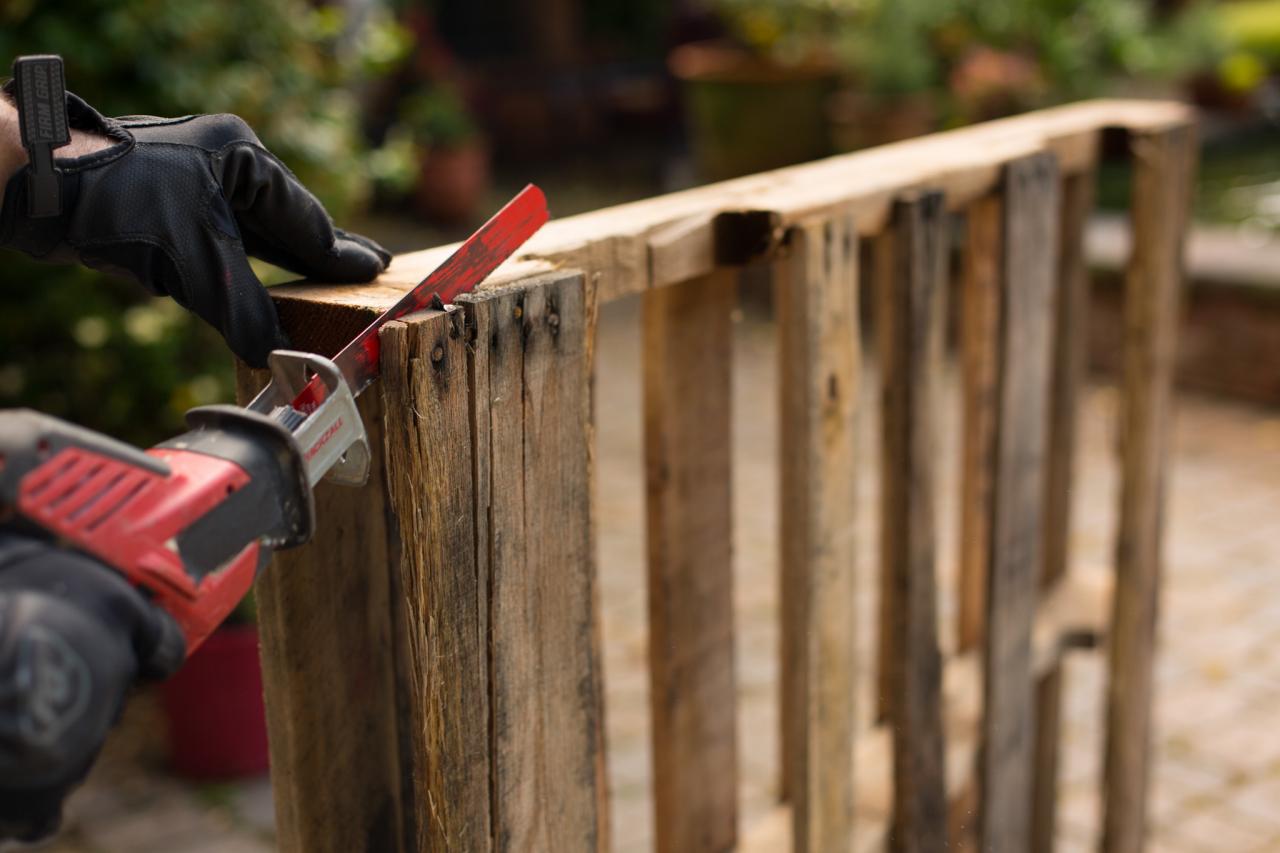
Disassemble Pallets
Using a reciprocal saw cut the pallets apart until they are fully disassembled.

Photo by: Flynnside Out Productions
Flynnside Out Productions
Pallet wood has a major bonus and a few huge disadvantages. First off, it’s usually free. Craigslist is often teeming with offers of free pallets, and you can also often persuade stores and warehouses to give extras to you for free. But the disadvantage is that it’s often impossible to know how they were used, how long they were in service, and whether they’re safe for indoor use or harboring nasty mold, bacteria, chemicals or other nefarious substances.
Check each pallet for stamps indicating how they were used and whether they’ve been treated with chemicals. Avoid painted or dyed pallets and steer clear of those used for food transport—which have a higher risk of harboring harmful bacteria—or obviously left outside for long periods of time. You don’t want pallets that have repeatedly soaked up unknown liquids or been exposed to wildlife.
If you want to make something out of pallet wood, like furniture, art or hardwood floors, it’s important to be choosy about the pallets before taking them home. A good rule of thumb is to look them over first. See any weird spots, discoloration or stains? Smell anything weird? Say no, and find better ones. It’s a lot of work to deconstruct each pallet manually—not to mention they take up a lot of space to transport—so make sure it’s worth your time by choosing pallets in the best possible condition on the front end.
Even if they look OK at first glance, you’ll want to clean them before getting started with your project. Scrubbing the wood with bleach or soapy water and/or rinsing it with a power washer are good methods. Let the sun do a bit of cleaning, too, if you can—leave your washed pallets outside in full sun so they dry out completely and benefit from the disinfecting powers of UV rays.
What you do next depends on how you want to use the pallets. If your plans involve leaving the pallets intact, you may want to use a hand-held sander to smooth them out, remove surface-level dirt and prep them for painting.
If you want to use the pallets for individual pieces of wood to construct into something new, you’ll have to deconstruct them. You can manually pull each plank apart using a crowbar or the claw end of a hammer. This is the most time-consuming way to take pallets apart but will ultimately result in having the longest planks. Take care not to split the wood when you do this. It may take some practice to get the hang of it.
You could also consider using a reciprocating saw to cut right through the nails. Keep in mind that nail remnants will stay in the wood if you do this, which may not be ideal depending on your plans for the wood. Cutting through the edges of the pallets just on the other side of the nails will free the wood more quickly, but will also give you shorter pieces to work with.
If you want to use the wood to make a hardwood floor, you’ll want to feed each piece through a planer. This will smooth out the surface and make the edges even. It’ll also have the added bonus of removing surface-level discoloration and dirt. Doing this is a time-consuming process but ultimately will feel rewarding—aside from logging the wood yourself, hardwood floors don’t get much more DIY than this.


