


Make a Mobile Dog Bed From Shipping Pallets


Materials Needed:
- discarded wooden shipping pallet
- measuring tape
- pencil or marker
- hand saw
- drill or screw gun
- wood screws
- orbital sander
- sanding pads
- casters
- 1/8" drill bit
- paint or stain
- stain pad or paint roller handle
- roller sleeves
- paint pan
- sealer
- painter's rags
- stencil
- spray paint
- pillow-style dog bed
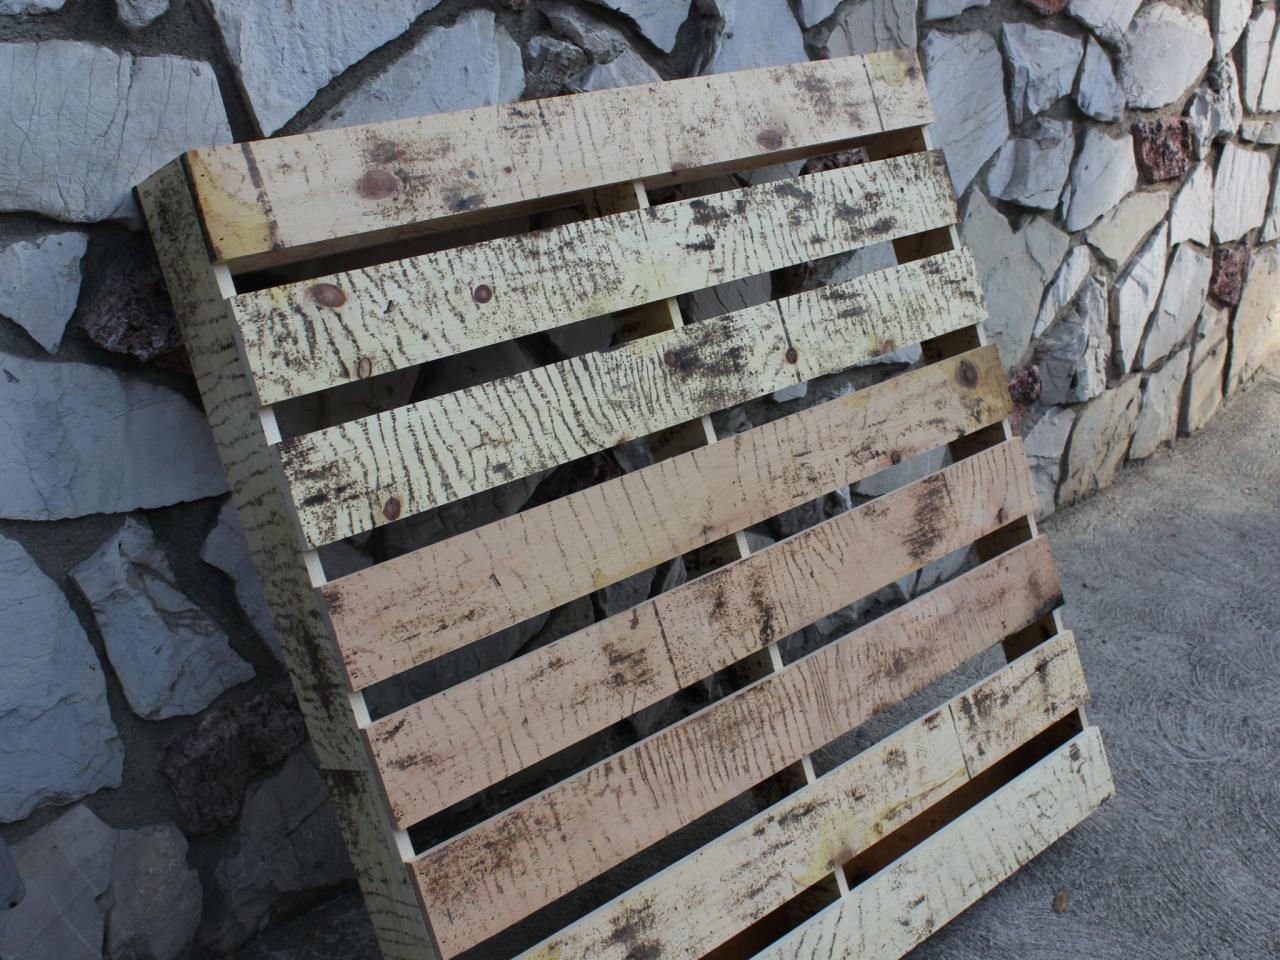
Choose the Proper Shipping Pallet
A shipping pallet is a flat transport structure, typically made of wood, used to support heavy freight. In order for this project to work, it’s important to choose a pallet with intact wood planks and structurally sound support boards. Search local markets, salvage yards and other businesses that routinely send or receive large goods. Though they'll typically be grateful for help in freeing up storage space, ask a staff member for permission before walking away with a pallet.

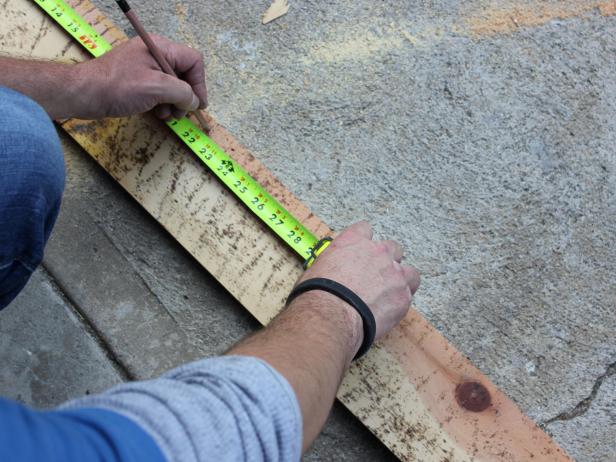
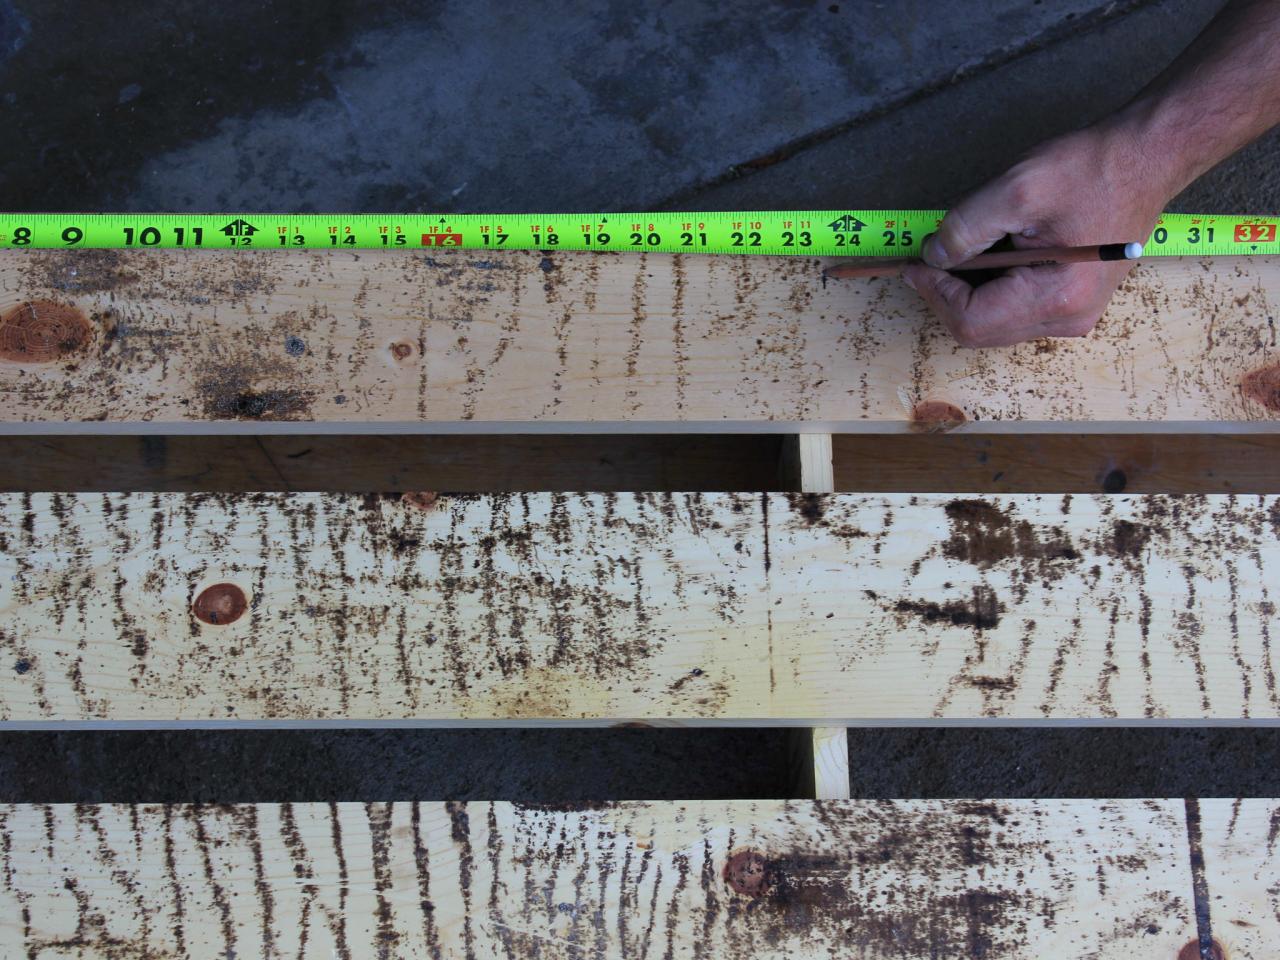
Measure and Mark
Tailor the bed to complement the size of your dog. Small dogs are best fit for beds with 12” of depth and 18” of length. Medium-sized dogs fit well into beds with 16” of depth and 24” of length. And for large dogs, it’s best to stick with 24” of depth and 36” of width. Once dimensions are determined, measure and mark a line along the top and bottom pallet planks using measuring tape and pencil or marker.
Tip: If using a pre-sewn pillow-style dog bed for the cushion, refer to its dimensions before formulating the design plan.

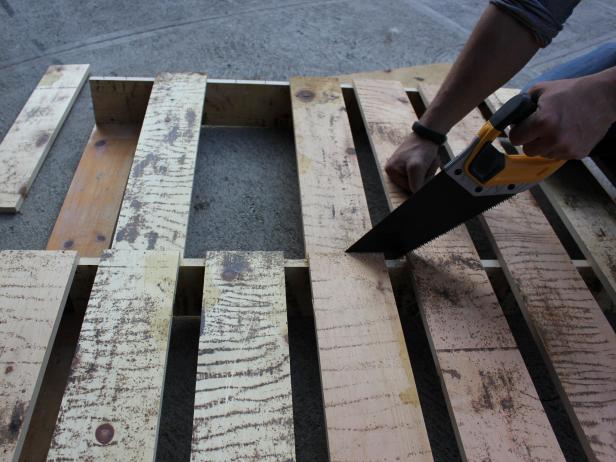
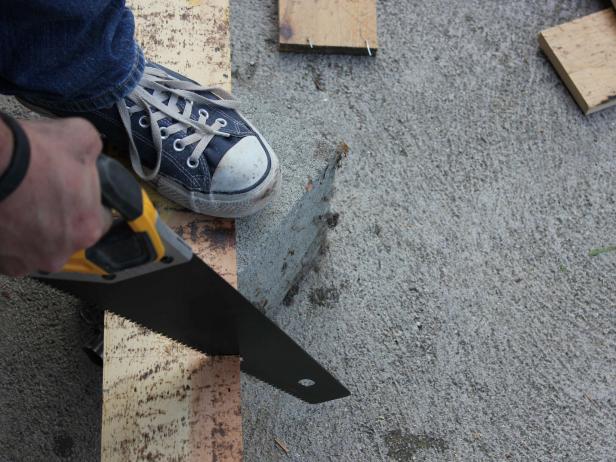
Cut Planks to Size
Referring to mark made with pencil or marker, cut top planks to size using saw. Turn over and repeat with bottom planks.
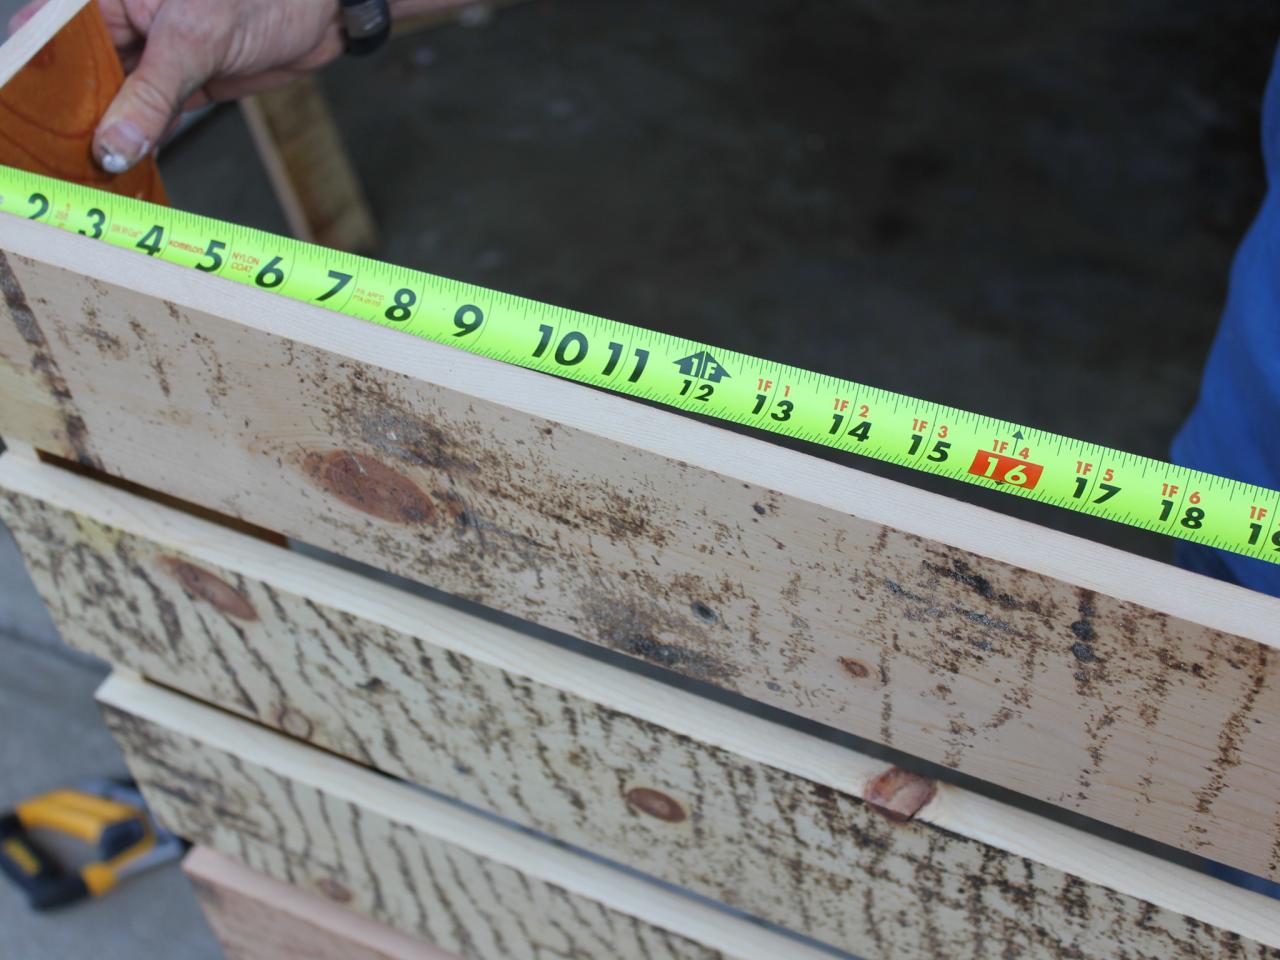
Measure Side Openings
For a more finished, cohesive look, cap off the pallet’s open ends with discarded planks cut to size. To ensure a tight fit, use measuring tape to determine proper dimensions needed to fill the open gap.
Tip: Pallets shift a lot during transport, so not all sides will be exactly the same. It’s important to measure each open end individually to ensure the proper fit.

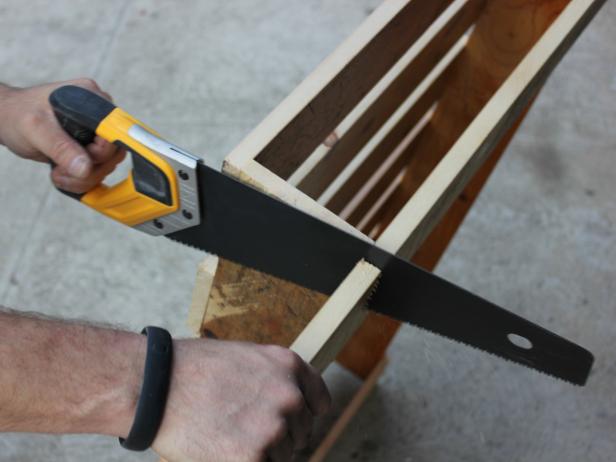
Mark and Cut End Caps
Once proper dimensions are taken, mark each of the two discarded planks to the proper size of side openings with pencil or marker.
Referring to marks, cut discarded planks into end caps using saw.
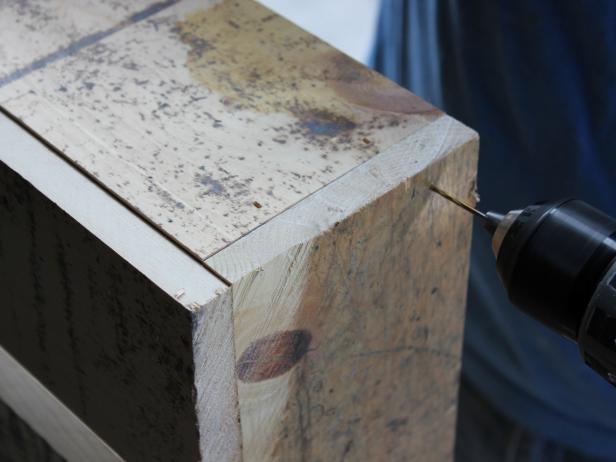
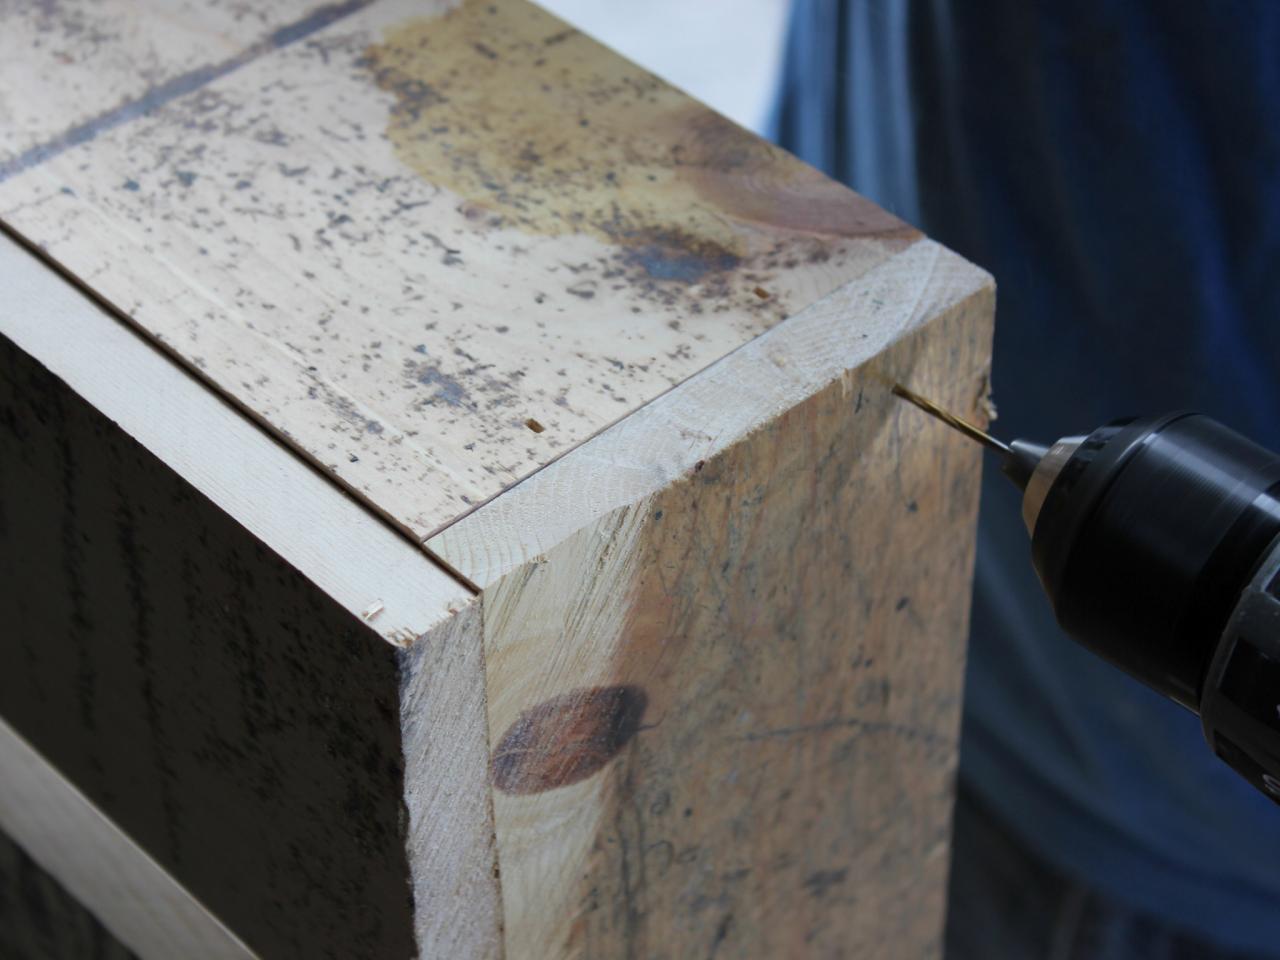
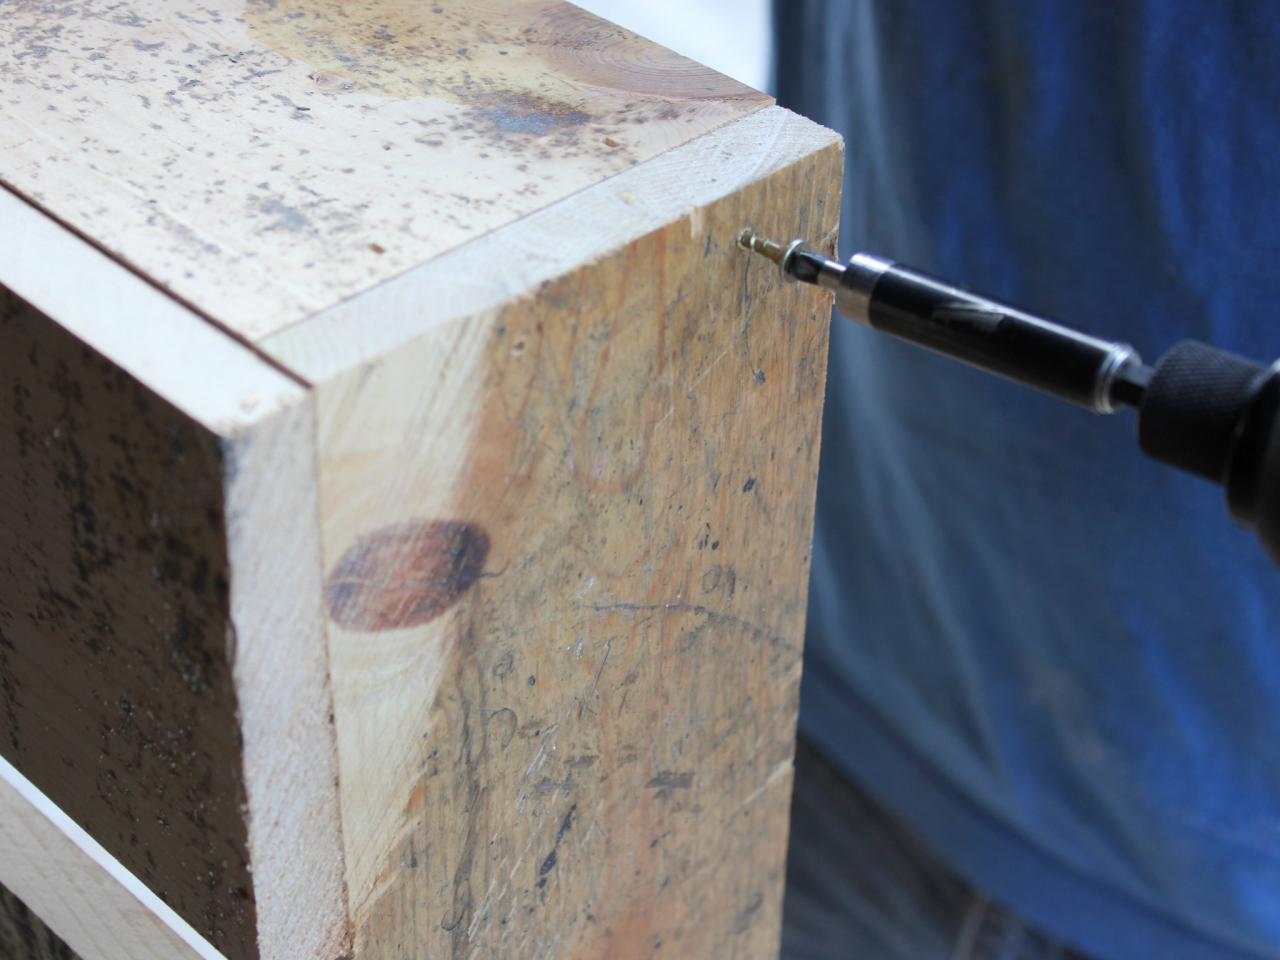
Drill End-Cap Holes and Attach
Using a drill bit and drill, pre-drill holes through the cut end cap and into the side of the pallet.
Attach end caps to open gap, then secure through pre-drilled holes with wood screws.

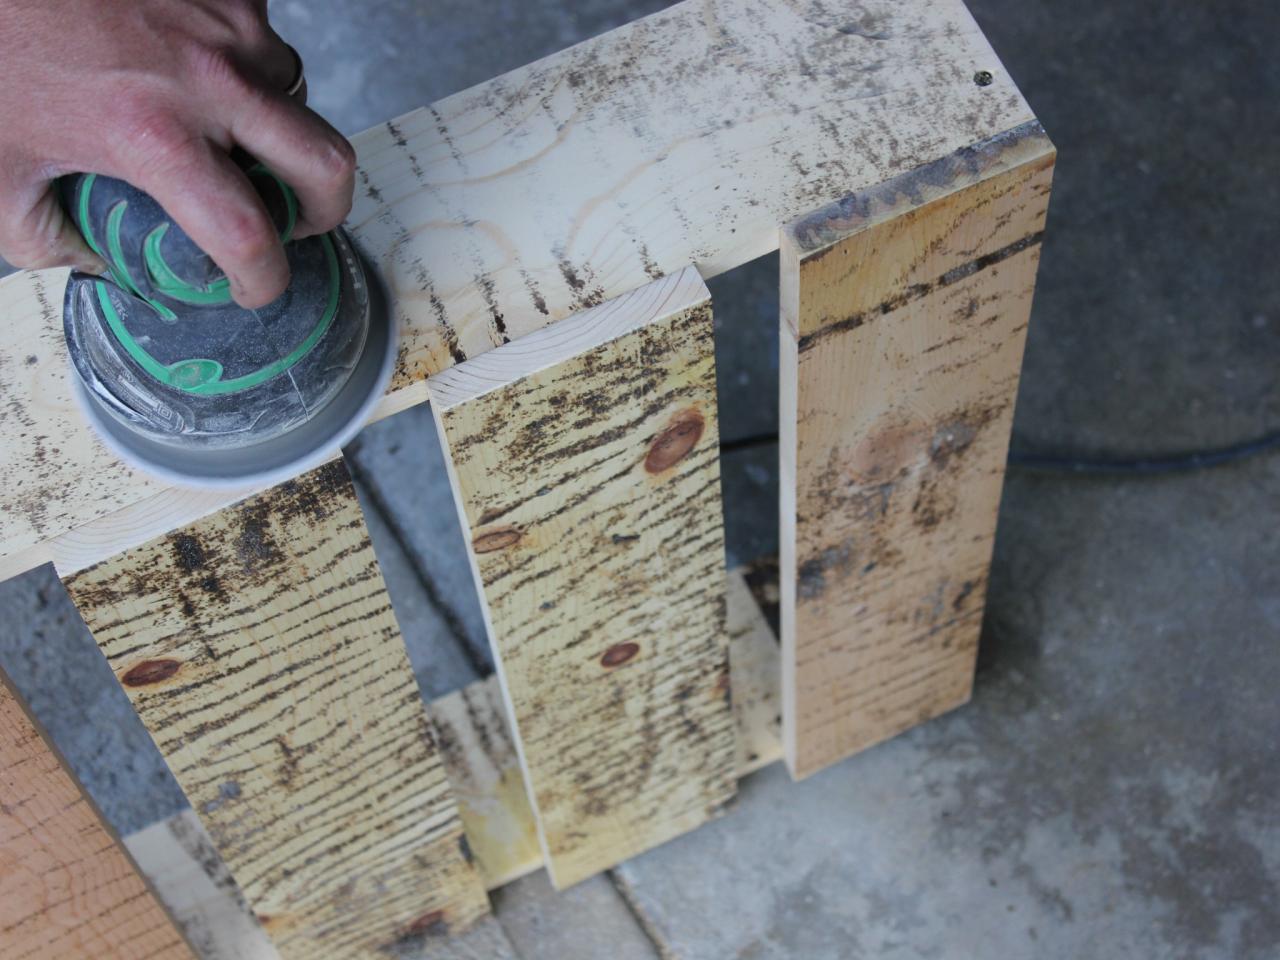
Sand Finish
To protect pets and pet owners from splinters, lightly sand all surfaces of the pallet using orbital sander and sanding pads.

Customize With Paint or Stain
Depending on the intended overall look, customize the surface of the wood with stain or paint.
Tip: For a weathered look, consider diluting paint with water, then applying with a rag and wiping off excess so that wood grain shows through.
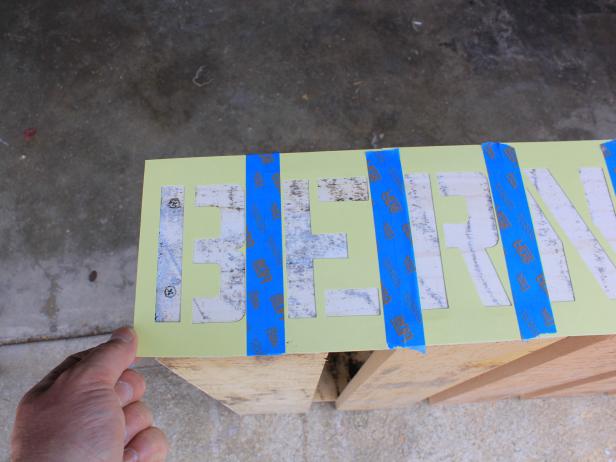
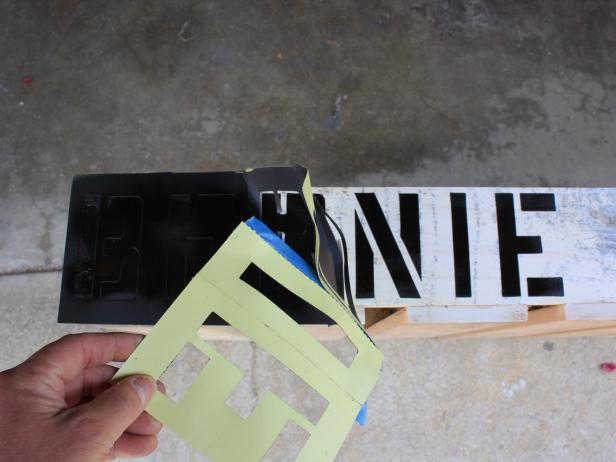
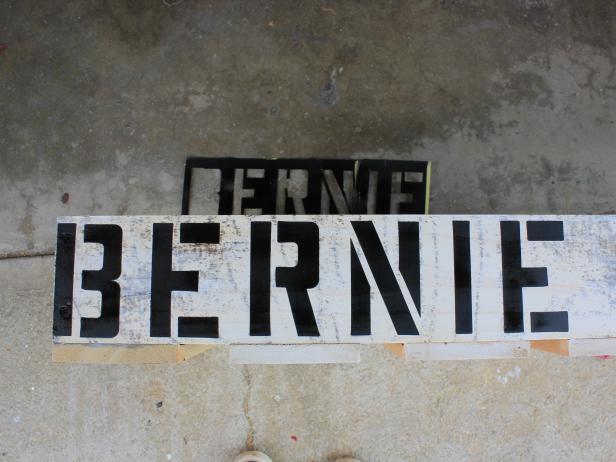
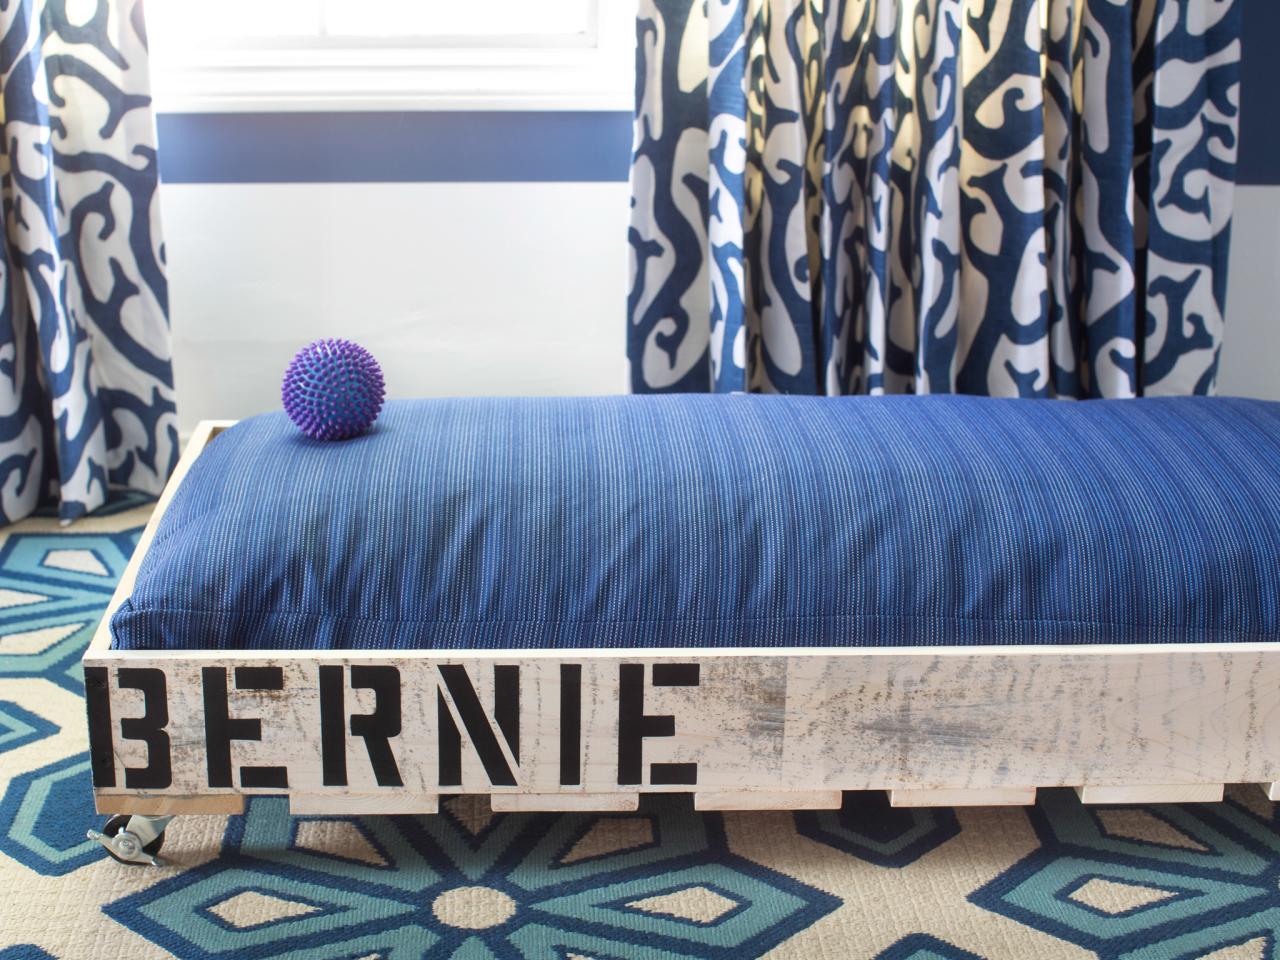
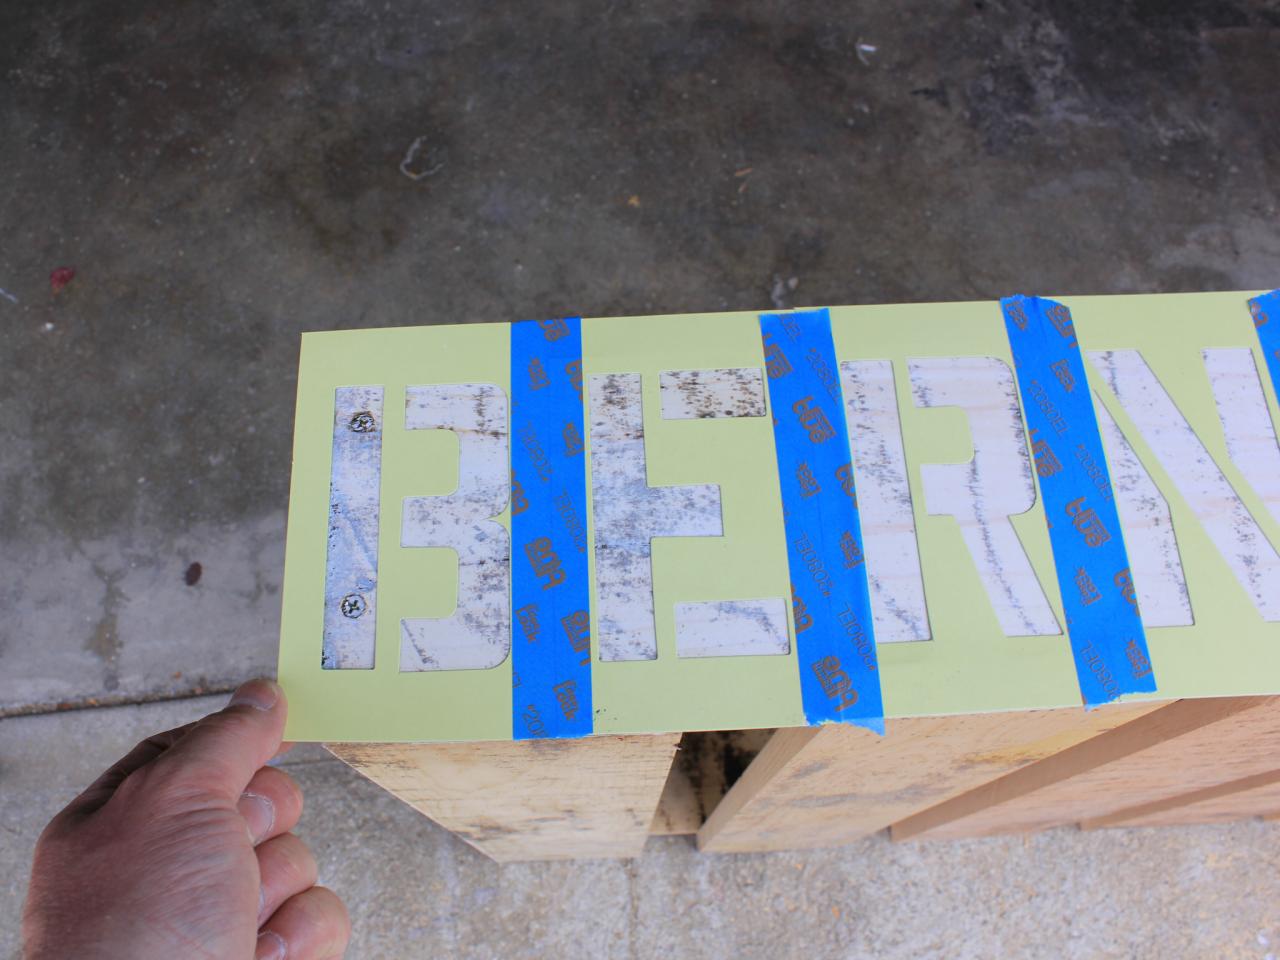
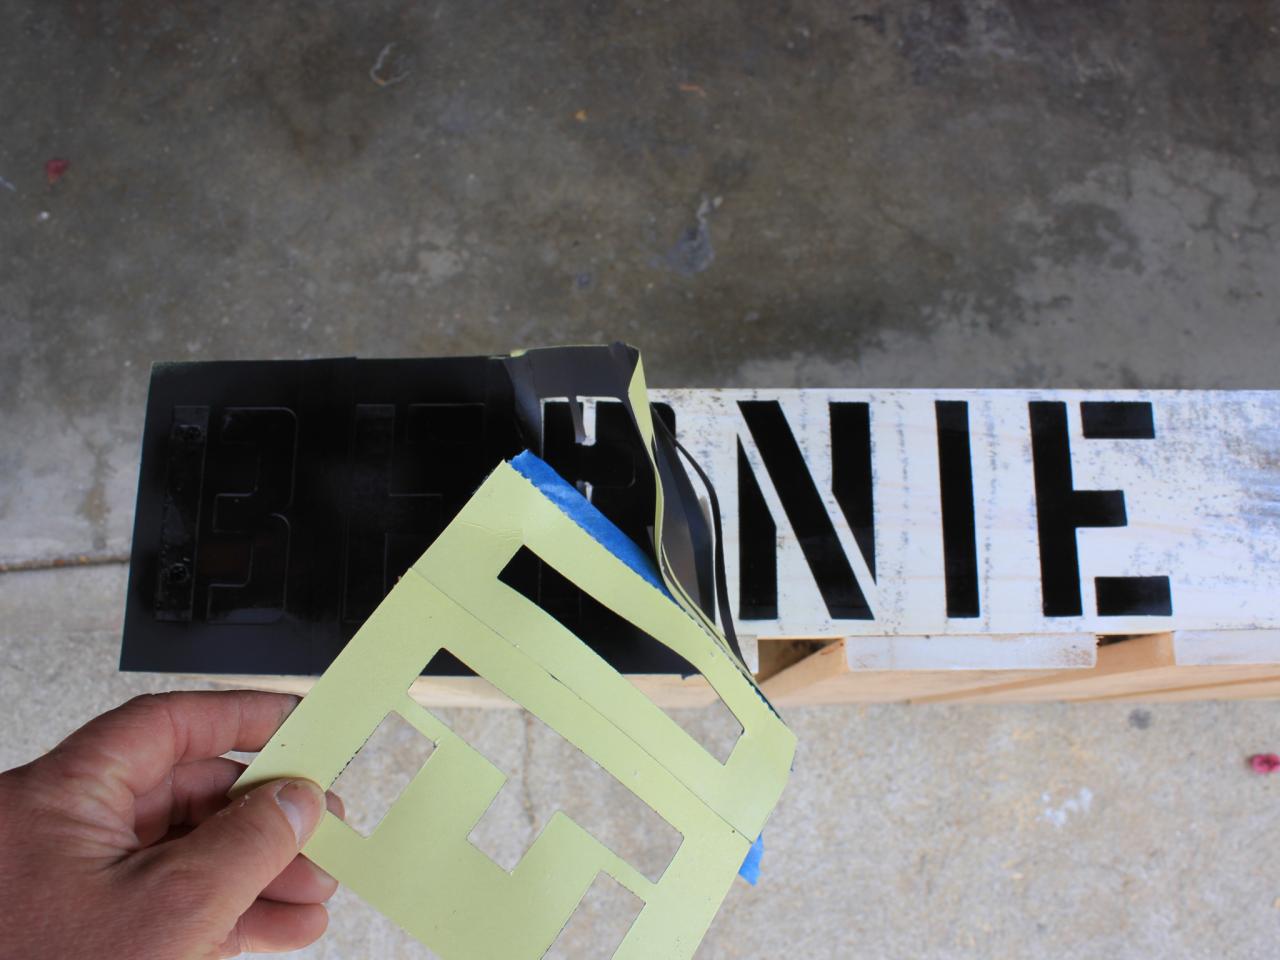
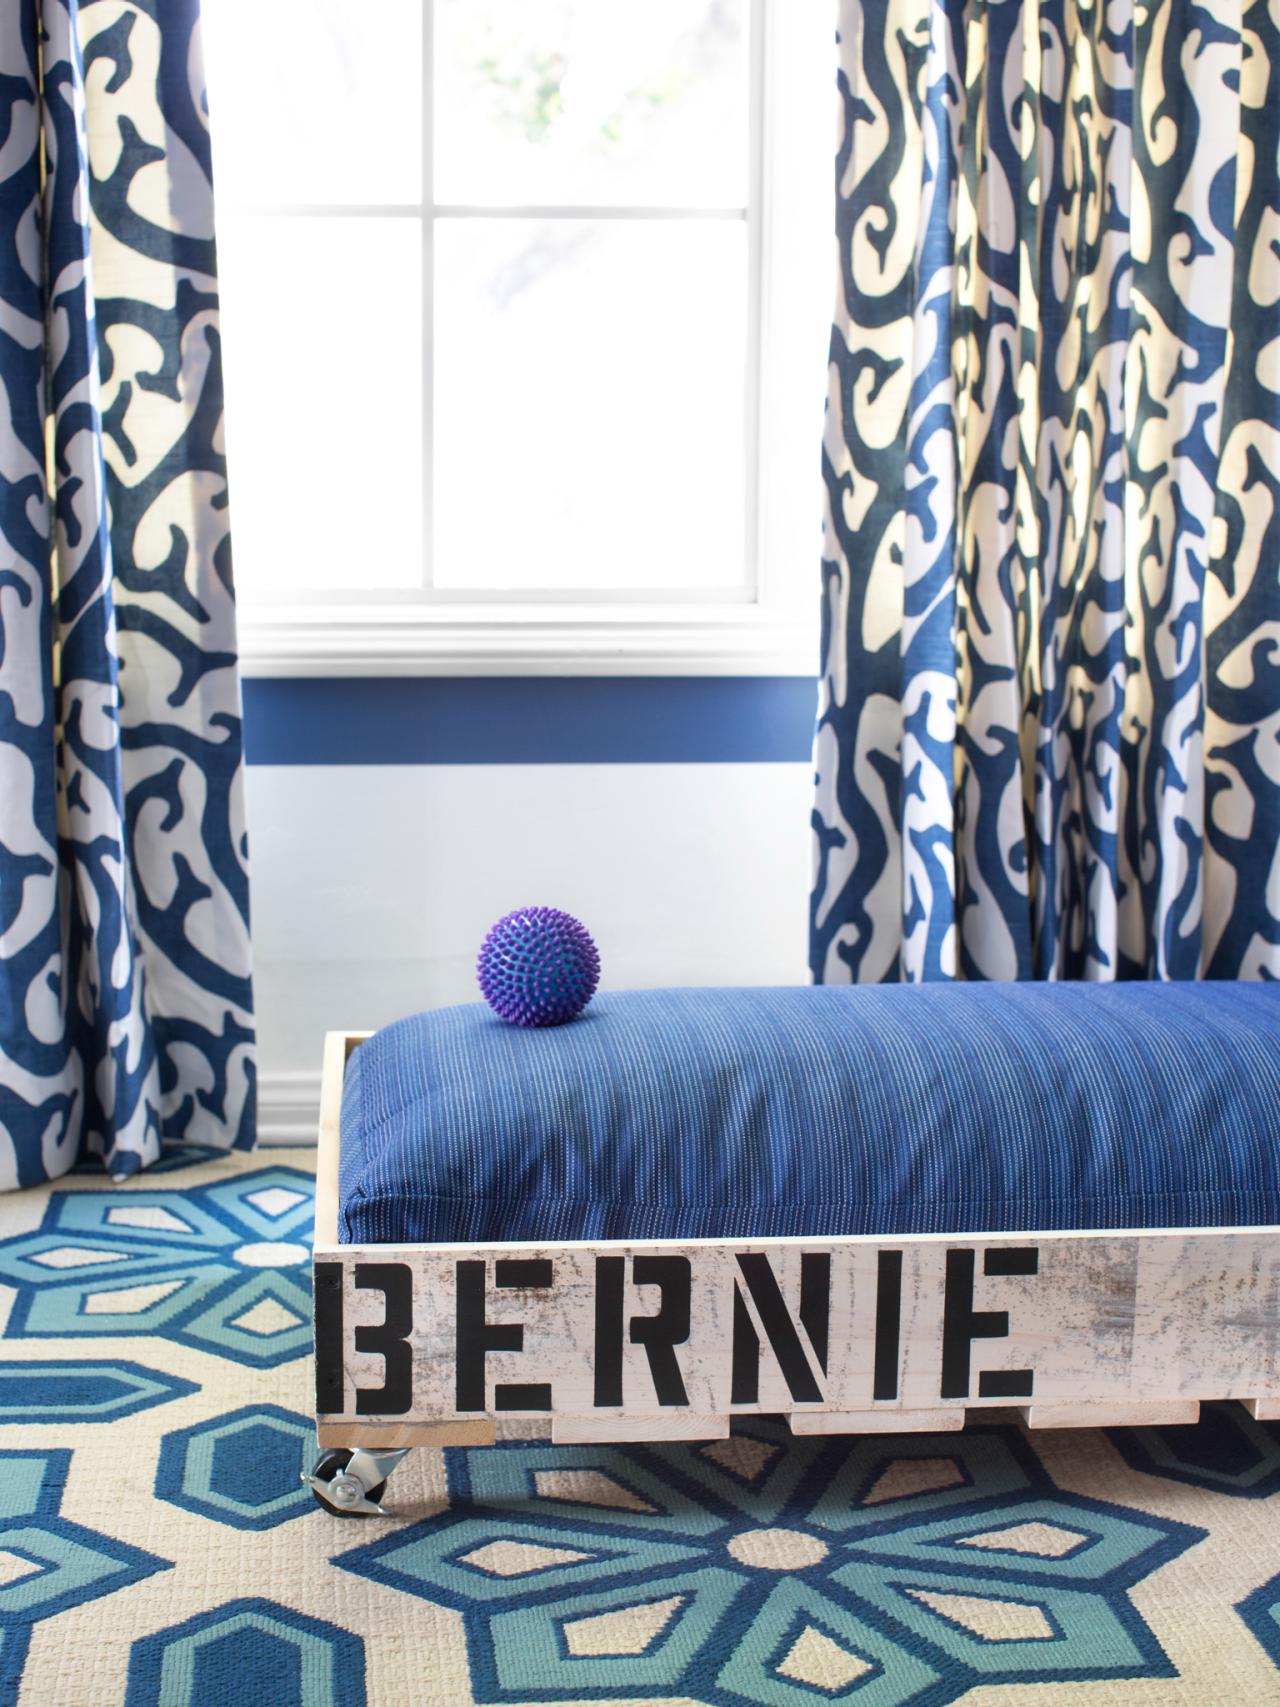
Stencil Name
Place stencil along front horizontal plank of wood. Use painter’s tape to keep it in place, then spray on paint. After about 10 minutes, remove stencil.
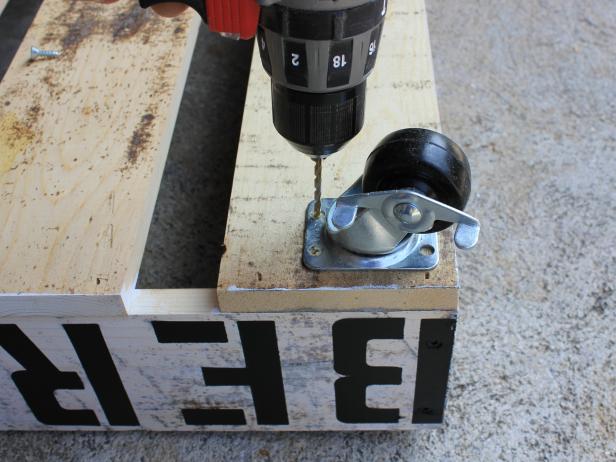
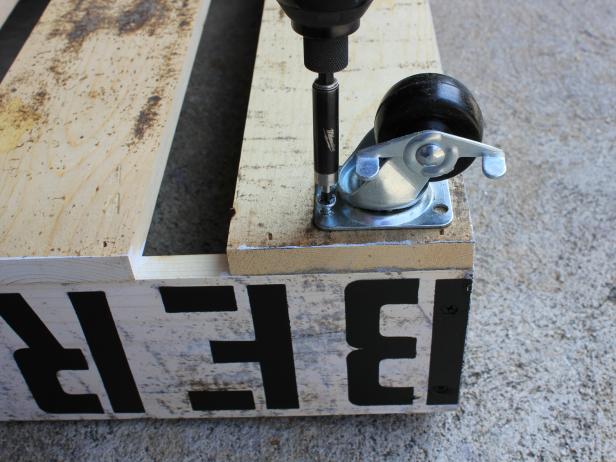
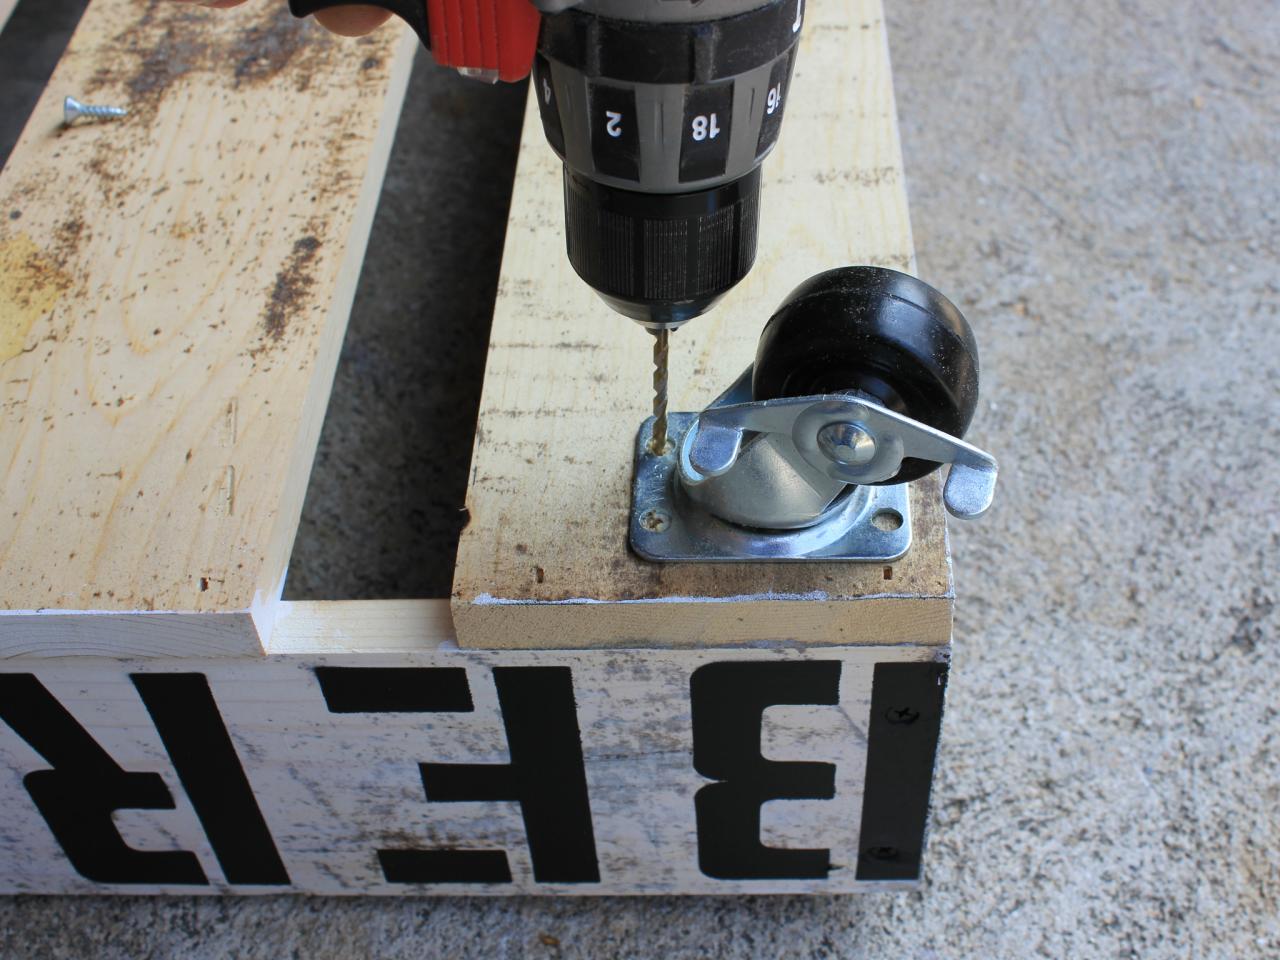
Add Casters
Arrange four casters along the bottom wood planks, spaced roughly three inches in from each of the four edges. Use a drill to create a hole for each, then screw them securely in place using a drill or screw gun.
Add Pillow
Place a cushion inside of opening to create a soft surface for your dog. Now it's ready for Fido to enjoy!


