


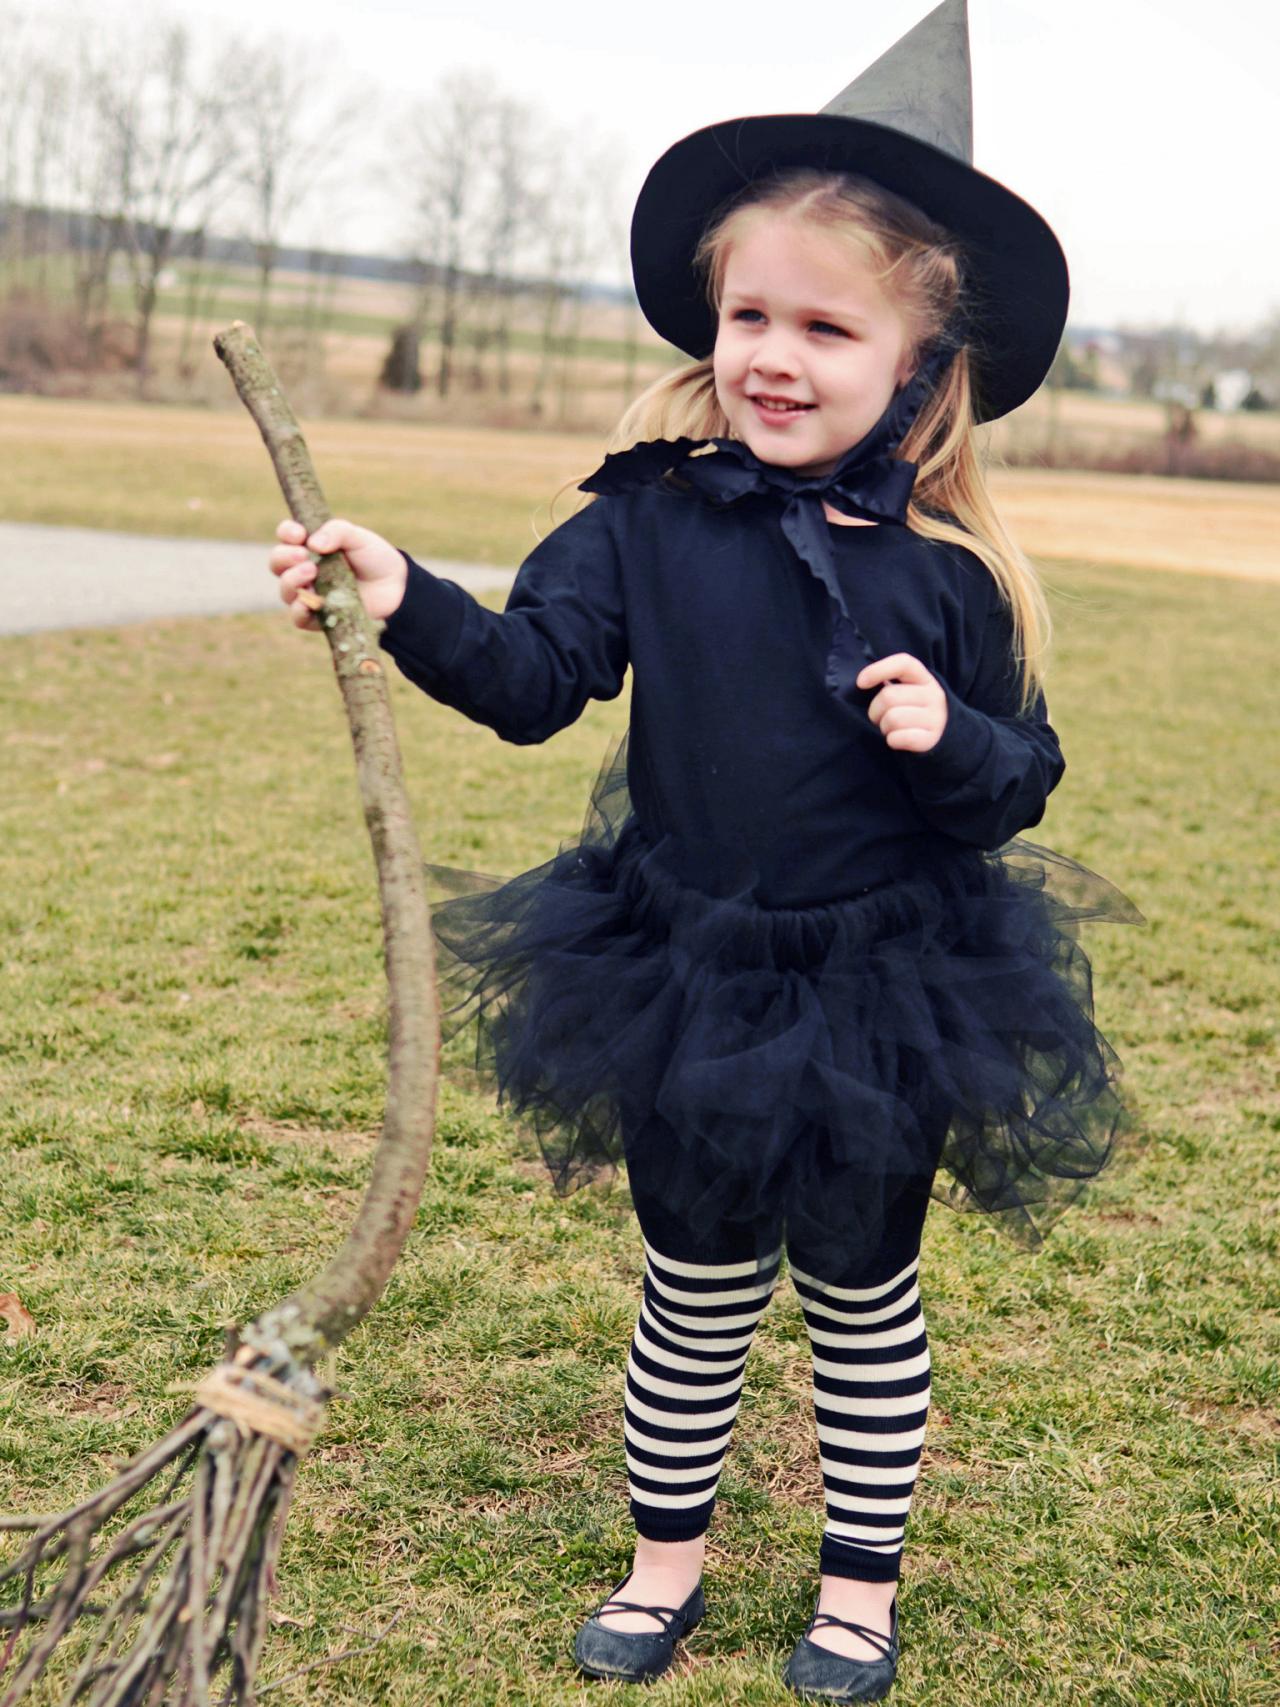
Make a Kid's Witch Costume for Halloween
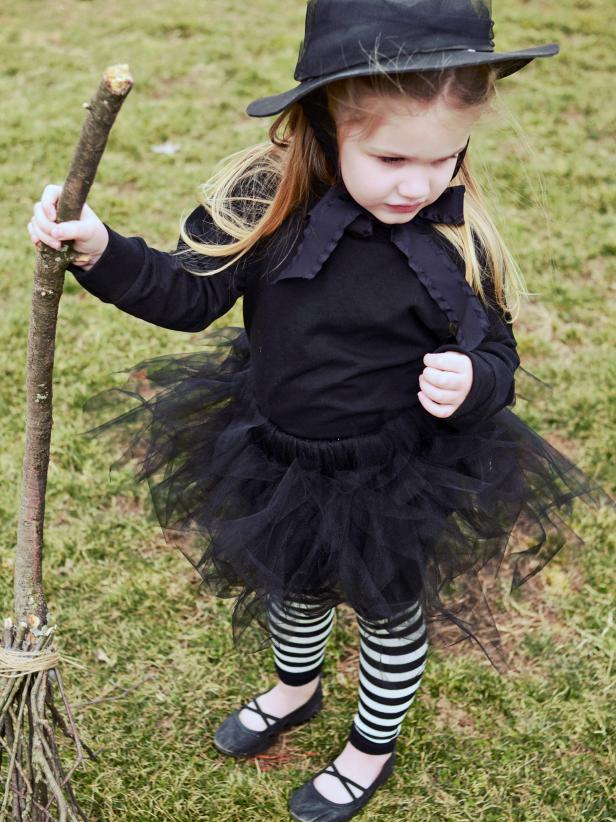
A no-sew tutu, pointy craft-foam hat, DIY broom and striped tights are paired with a black T-shirt for a wee witch's costume that's cute enough to cast a spell on even the biggest Halloween humbugs.

Make a Tyke's Witch Costume Without a Sewing Machine
Even the biggest Halloween humbugs will be delighted with this cute, handmade witch costume made from a no-sew tutu and foam hat, and paired with striped tight and a black t-shirt. This little girl even carries a pint-size broom fashioned with a stick and twigs for more authenticity.

Materials Needed:
- long-sleeved black T-shirt
- 2 pieces black foam
- 4 yards black tulle
- 1" wide black elastic band
- 2-1/2 yards black ribbon
- sewing tape measure
- ruler
- pencil
- scissors
- hot glue gun and glue sticks
- 15-20 small twigs
- 3' stick or dowel rod
- 2' hemp twine
Make Tutu Waistband
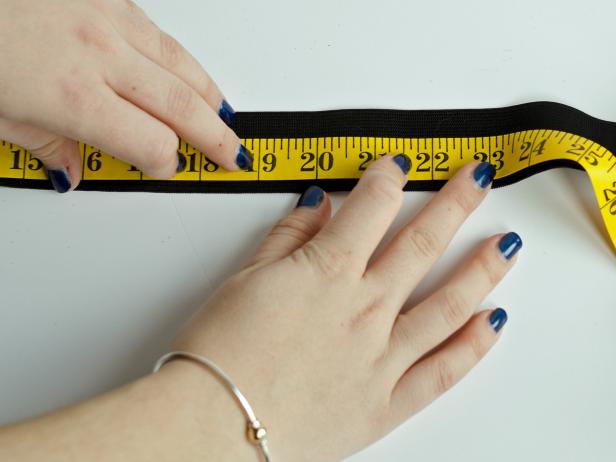
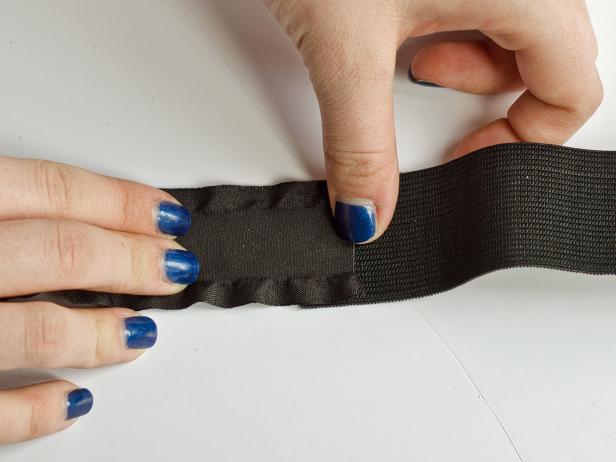
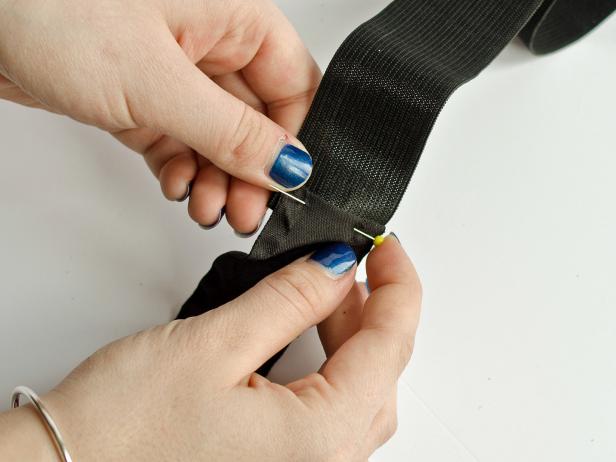
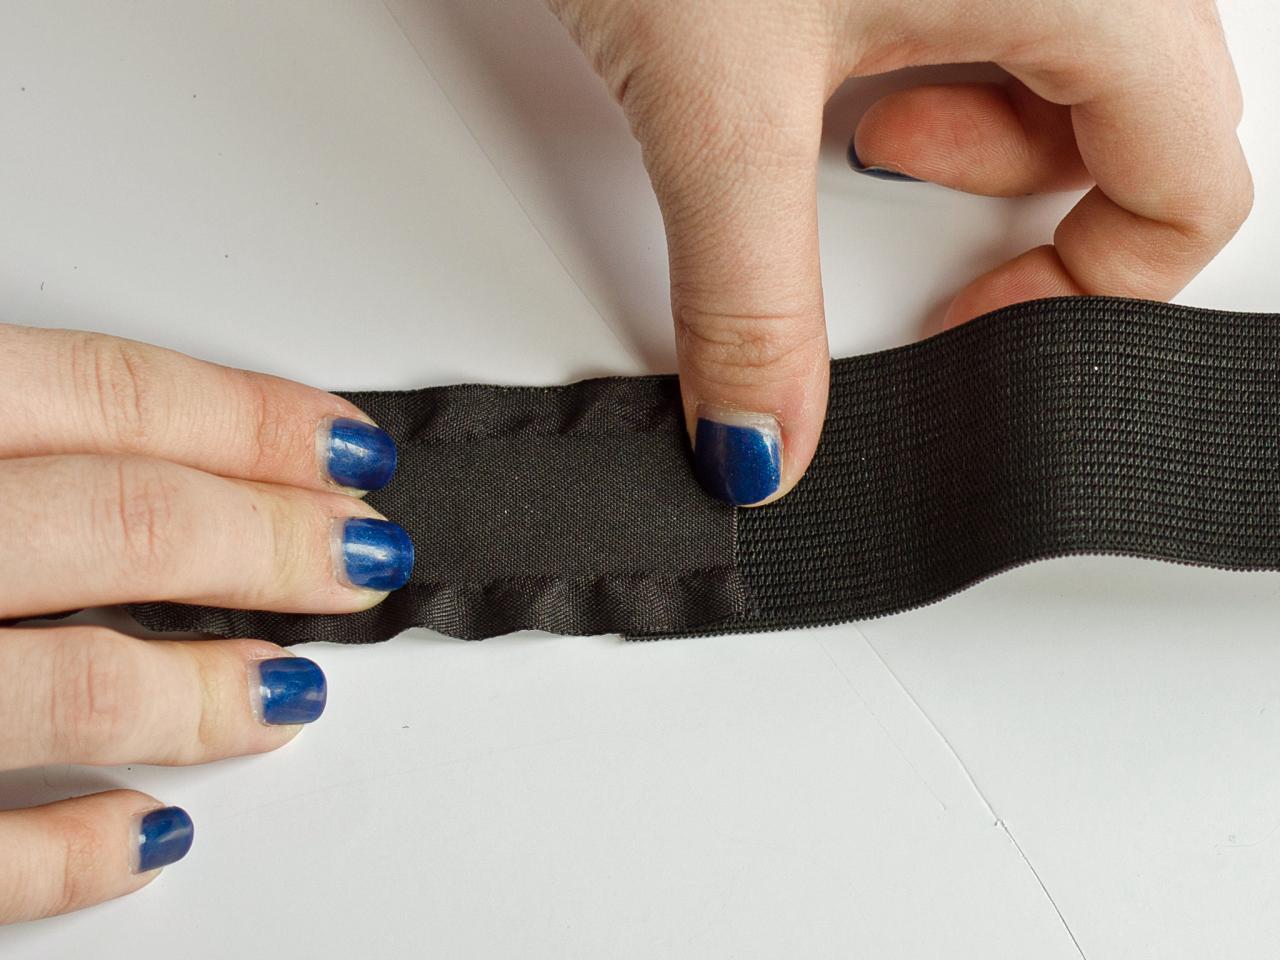
Measure child's waist then transfer that measurement to black elastic band (Image 1). Mark with a pencil then cut band at marked line. Cut two 20-inch pieces of black ribbon then fold one ribbon over each end of elastic band (Image 2). Pin to secure then sew (Image 3).
Child's Witch Costume: Measuring to Make a Waistband for a Black Tutu
To make tutu's waistband, measure the child's waist then transfer that measurement to a black elastic band. Mark the measurement with a pencil, then cut the elastic band at the marked line.
Making a Child's Witch Costume: Sizing the waistband
After measuring the child's waist and transferring the measurement to a black elastic band, Step 1B in creating a waistband for the tutu is to mark the measurement with a pencil. Cut the band at the marked line.
Making a Waistband for a Witch's Costume: Securing the Ribbon to the Band
Once the black ribbon has been folded over each end of the elastic band, Step 1C in making a waistband for the witch's costume is to pin the ribbon to secure it onto the elastic band. Sew in place.
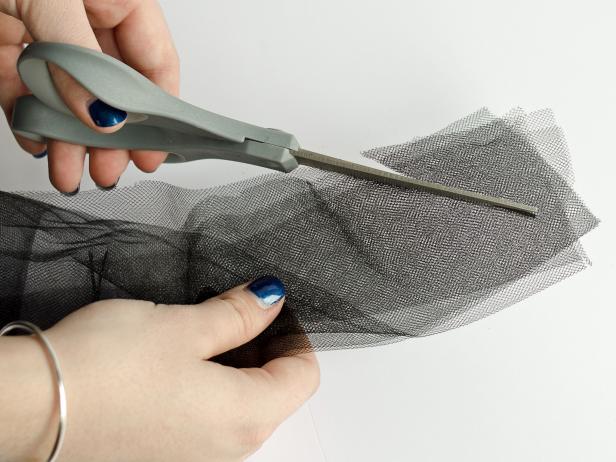
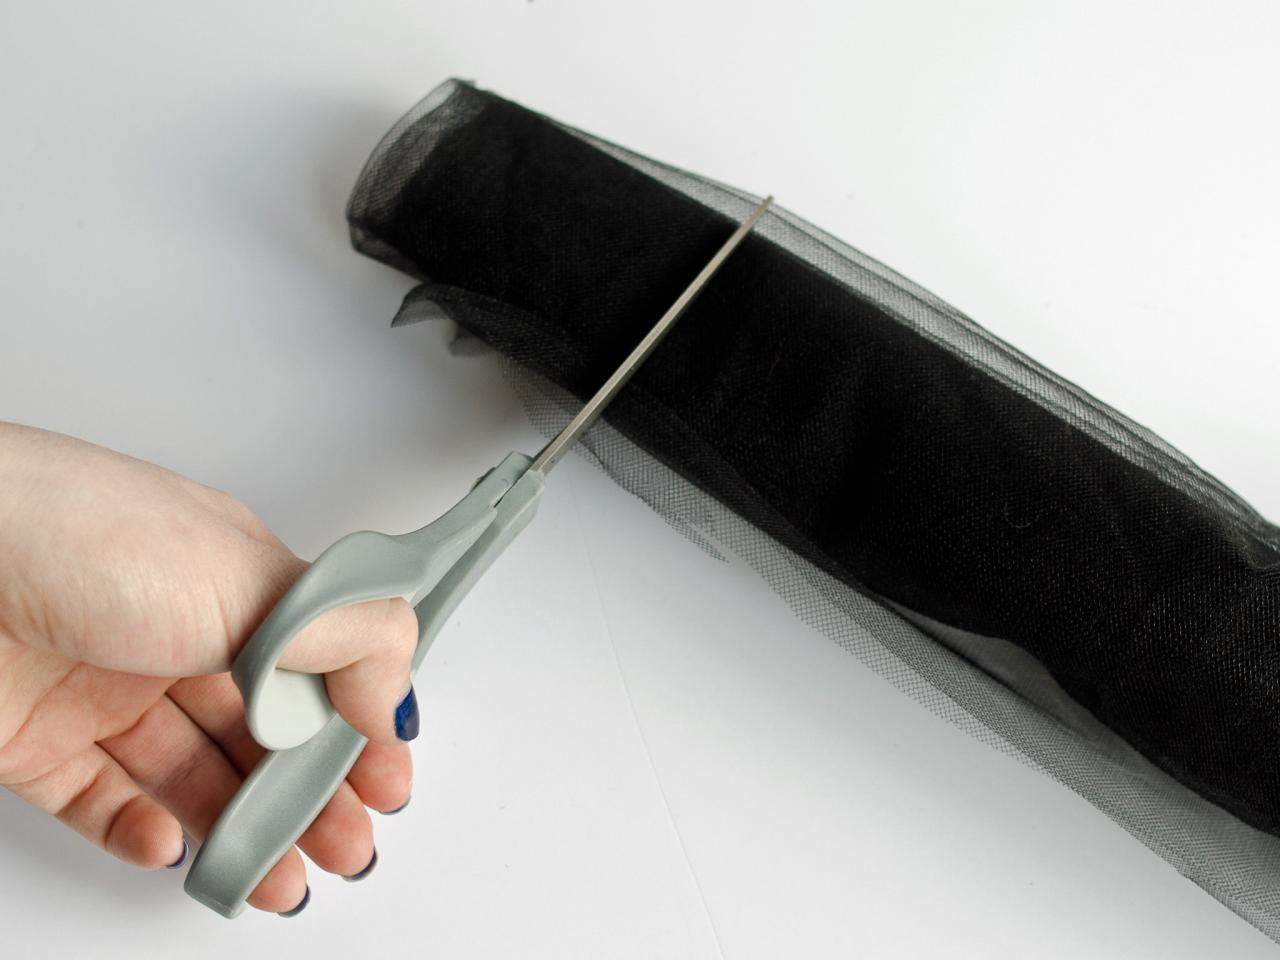
Cut Tulle
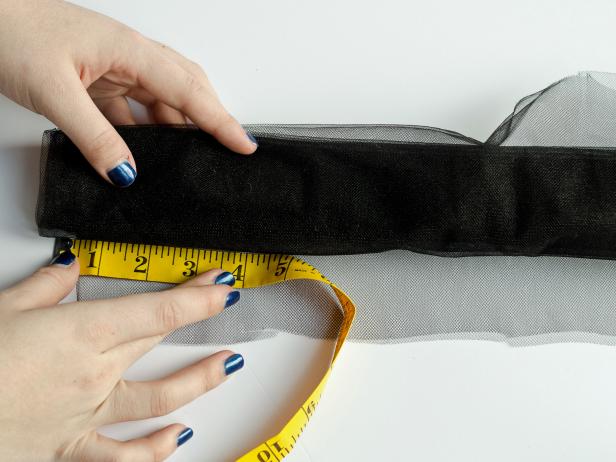
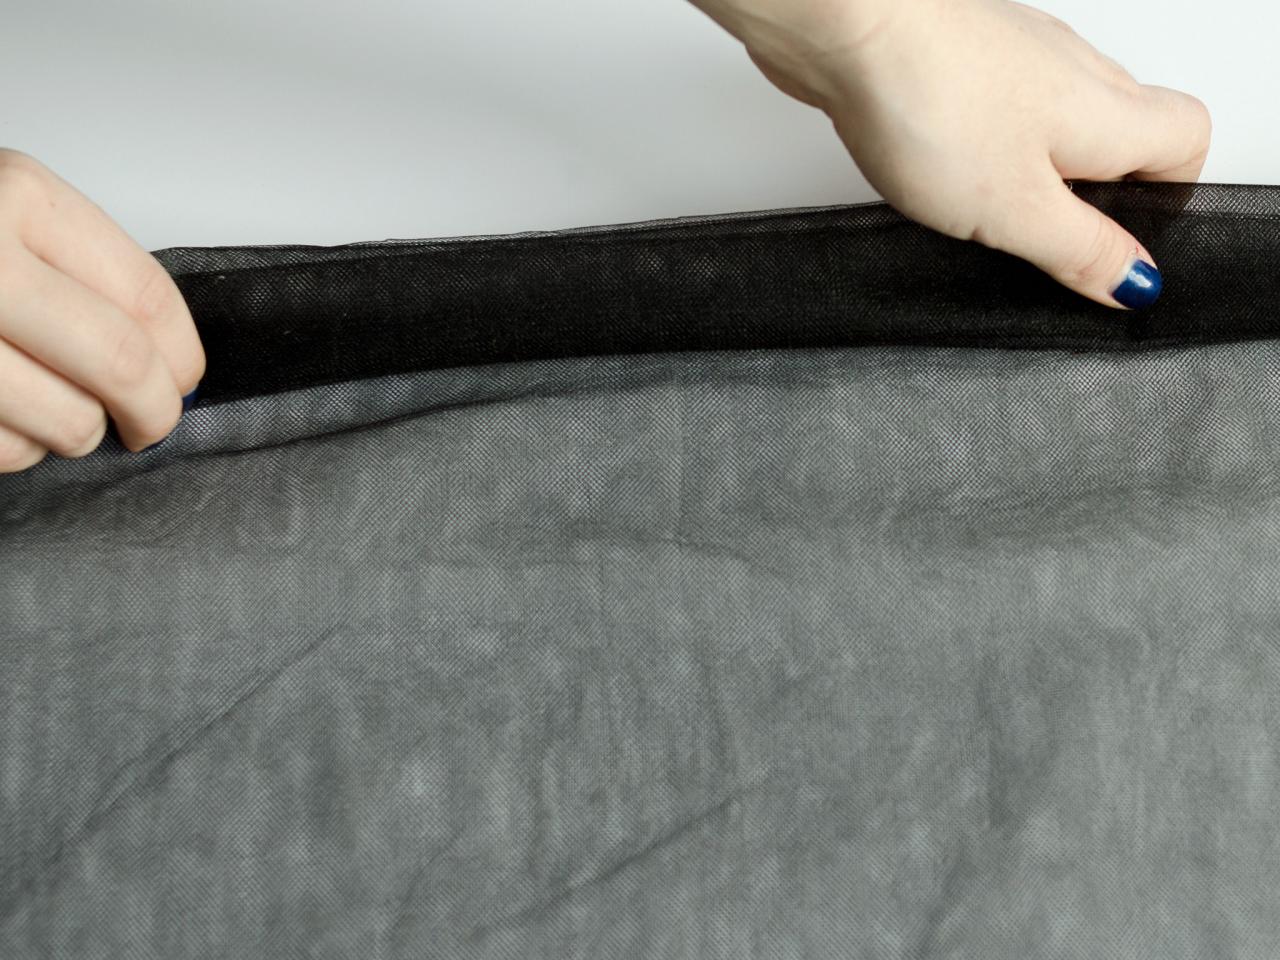
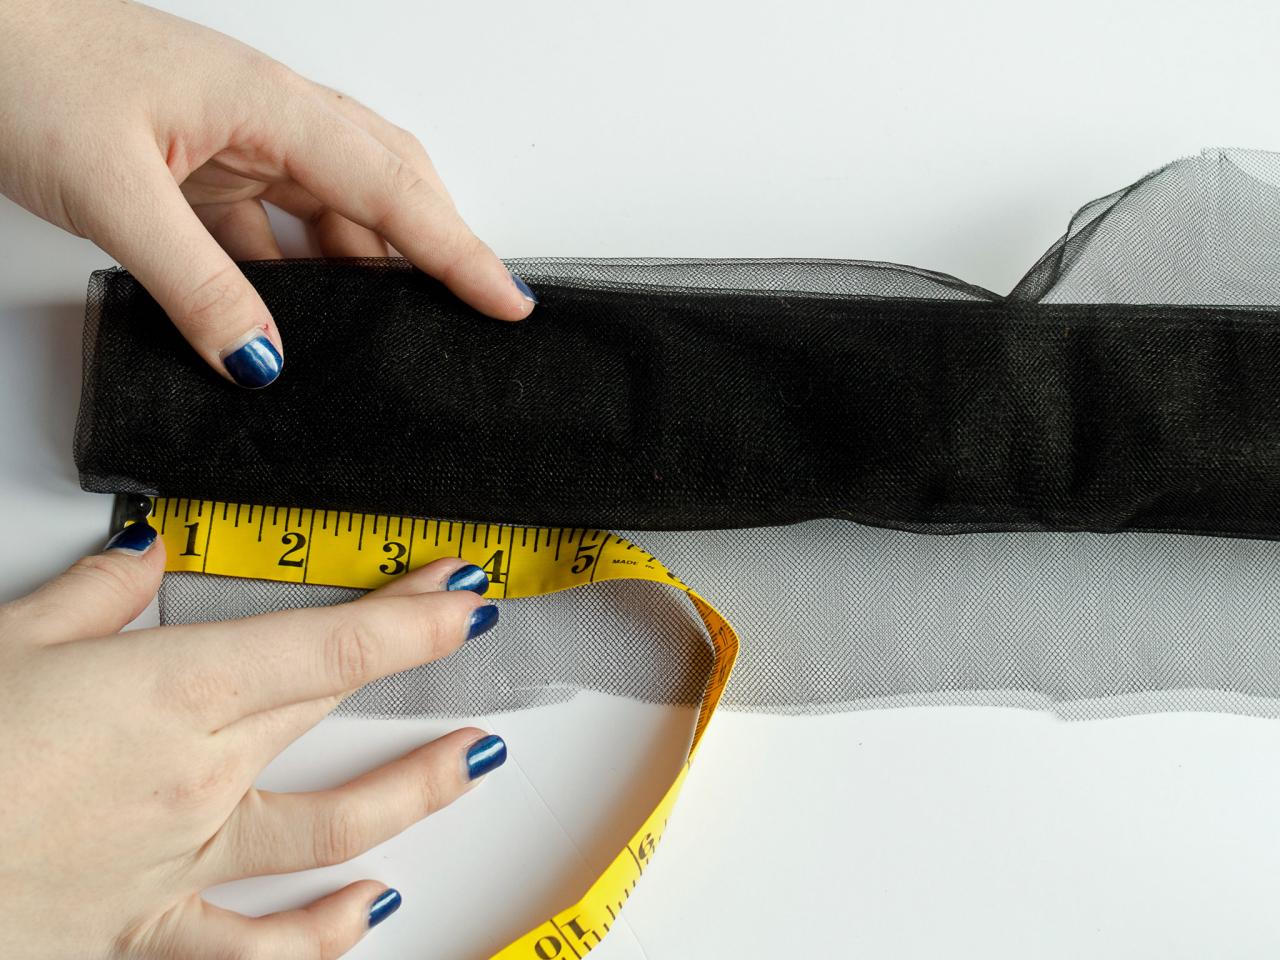
Cut black tulle into pieces that are approximately 25 to 30 inches wide with sharp scissors, varying the lengths to give the tutu a jagged edge (Image 1). Roll tulle, measure, then cut in three-inch sections (Images 2 and 3). Set aside one 25- to 30-inch-wide piece of 3-inch wide tulle to embellish hat. Next, cut strips in half by folding lengthwise and cutting at fold (Image 4). Finally, cut all ends at an angle to emphasize the jagged look (Image 5).


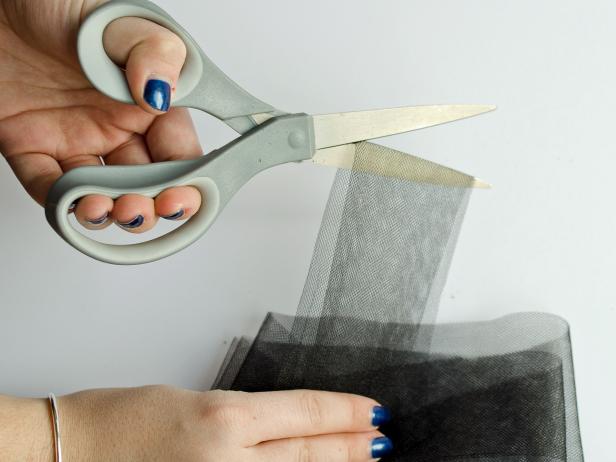
Making a Witch's Costume: Cutting the Tulle
Cut black tulle into pieces that are approximately 25 to 30 inches wide with sharp scissors, varying the lengths to give the tutu a jagged-edged look.
Making a Tutu for Witch's Costume: Rolling and Measuring the Tulle
After you have cut the black tulle in pieces that are approximately 25 to 30 inches wide, varying the length to give the tutu a jagged appearance, Step 2 B in making a tulle tutu for a child's witch costume is to roll the tulle and measure it. It will then be cut in 3-inch sections.
Cutting Tulle When Making a Child's Witch Costume for Halloween
After cutting the black tulle into pieces that are approximately 25 to 30 inches wide with sharp scissors, Step 2C in making a tutu is to cut the tulle in three-inch sections once it is rolled and measured.
Halloween Witch Costume
Creating a Witch's Costume: Cutting Tulle Ends for a Tutu
Step 2E in fashioning a tulle skirt for a child's Halloween costume is to cut the ends of the tulle at an angle to emphasize a jagged look. This step is done after you have cut tulle strips in half by folding them lengthwise and cutting them at the fold.
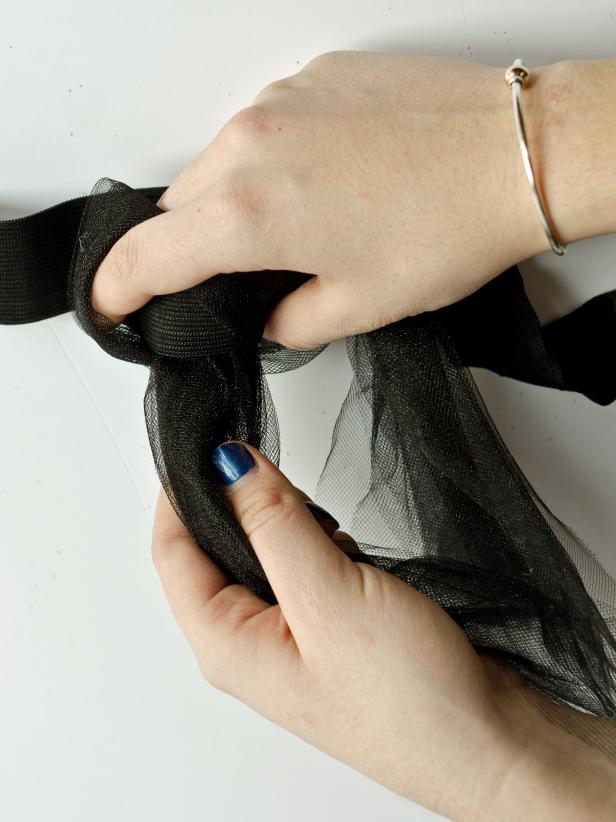
Make Tutu
Stack 2-4 strips of tulle together and fold in half to form a loop (Image 1). Wrap loop around elastic band and pull ends through loop's center to attach the tulle strips to the elastic (Image 2). Repeat with remaining strips, sliding them close together, until the entire elastic band is covered.
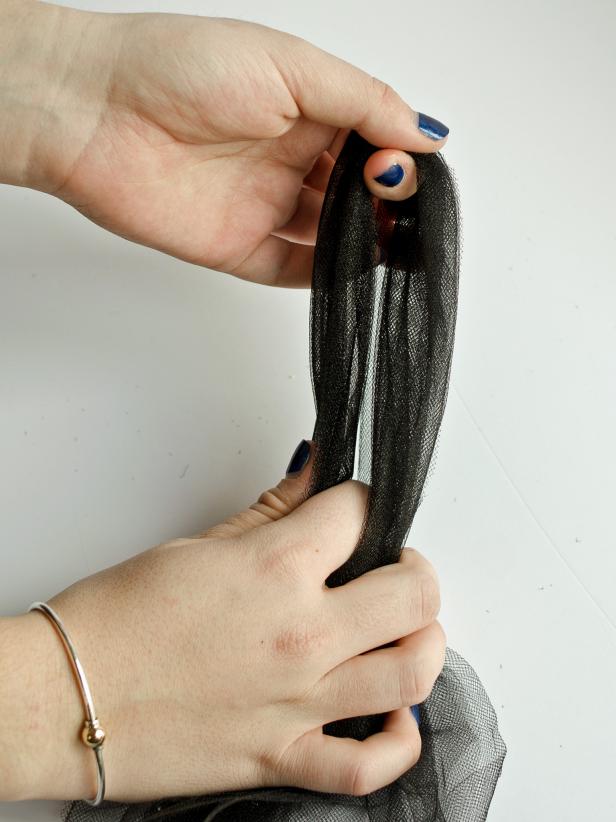
Making a Tutu as Part of a Kid's Witch Costume for Halloween
To begin making a child's tutu, stack 2-4 strips of tulle together and fold in half to form a loop. These loops will be used to wrap around and cover an elastic band.
Halloween Witch Costume
Step 3B in making a tutu as part of a child's witch costume is attaching tulle to an elastic band. After you have created a loop of tulle, wrap it around an elastic band and pull the ends through loop's center. This action will attach the tulle strips to the elastic band. Repeat with the remaining strips sliding them close together until the entire elastic band is covered.
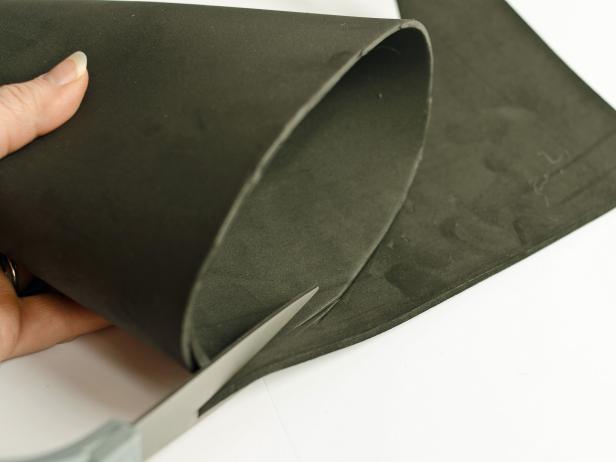
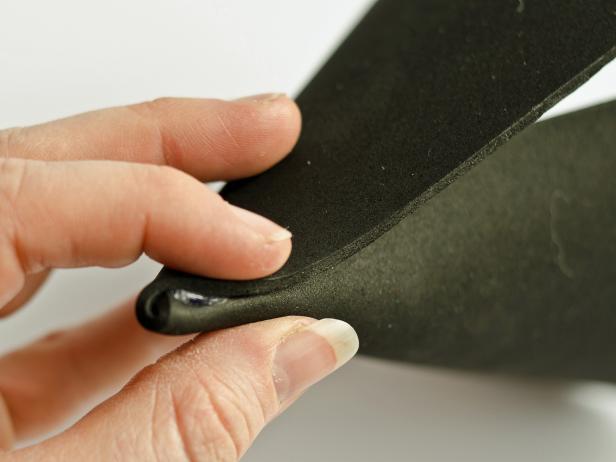
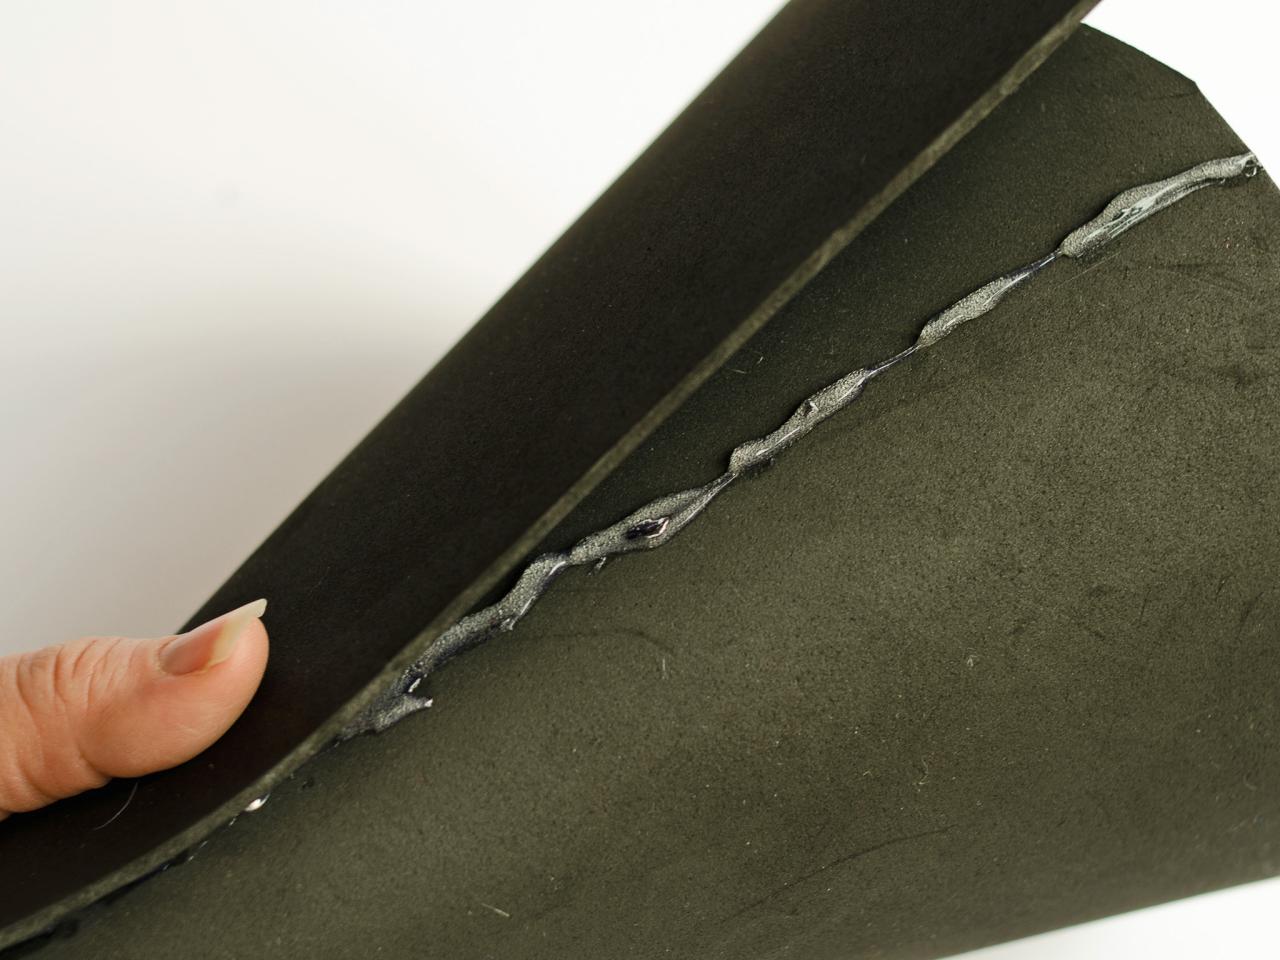
Form Cone for Hat
Roll one foam sheet to form a cone (Image 1). Place cone on child's head to make sure it will fit; if not, adjust the size. Draw a straight line with a ruler and pencil to mark excess foam to be cut (Image 2). Use scissors to cut off the excess foam then trim along the cone's bottom to make it straight (Image 3). Apply a dab of hot glue where foam overlaps at tip and squeeze until glue cools (Image 4). Apply a small bead of hot glue down remainder of seam and press overlapping foam onto it (Image 5). Hold in place until glue cools. Tip: Applying a small amount of glue will prevent squeeze-out.
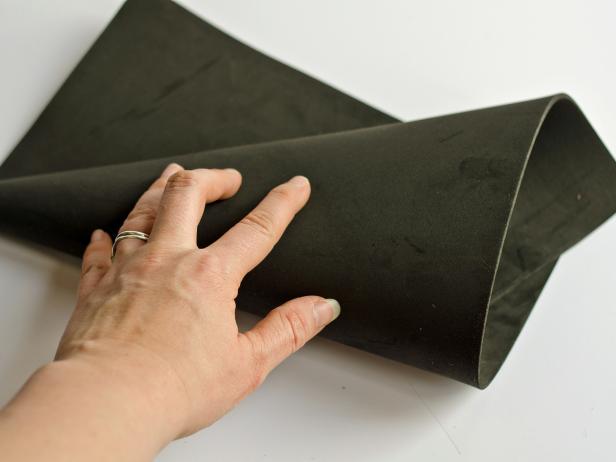


Making a Witch's Hat: Forming the Cone Shape
The first step in creating a cone for a witch hat is to roll one foam sheet to form a cone. Place cone shape on the child's head to make sure it will fit; if not, adjust the size.
Making a Witch's Cone Hat: Measuring for a Proper Fit
After rolling the foam cone and adjusting it on the child for size, Step 4B in making a witch's hat is draw a straight line with a ruler and pencil to mark excess foam that must be cut for a proper fit.
Cutting Excess Foam from a Cone Shape to Create a Halloween Witch's Hat
After you adjust the rolled foam sheet for the child's head size and mark the excess foam to be cut from the roll, Step 4C is to cut the foam away from the roll. Use scissors to cut off the excess foam. Finally, trim along the cone's bottom to make sure it is straight.
Halloween Witch's Hat: Gluing Foam Where it Overlaps at Tip
Once the foam is measured for fit and the excess is cut away, Step 4D in making a cone witch's hat is to apply a dab of hot glue where the foam overlaps at the tip of the cone. Squeeze the material with your fingers until the glue cools.
Making a Witch's Hat: Gluing and Holding Seam in Place for Cone
Step 4E in making a witch's hat for a child's Halloween costume is to apply a small bead of hot glue down the remainder of cone's seam and press the overlapping foam onto it. Hold the glue in place until it cools. Tip: Applying a small amount of glue will prevent squeeze-out.
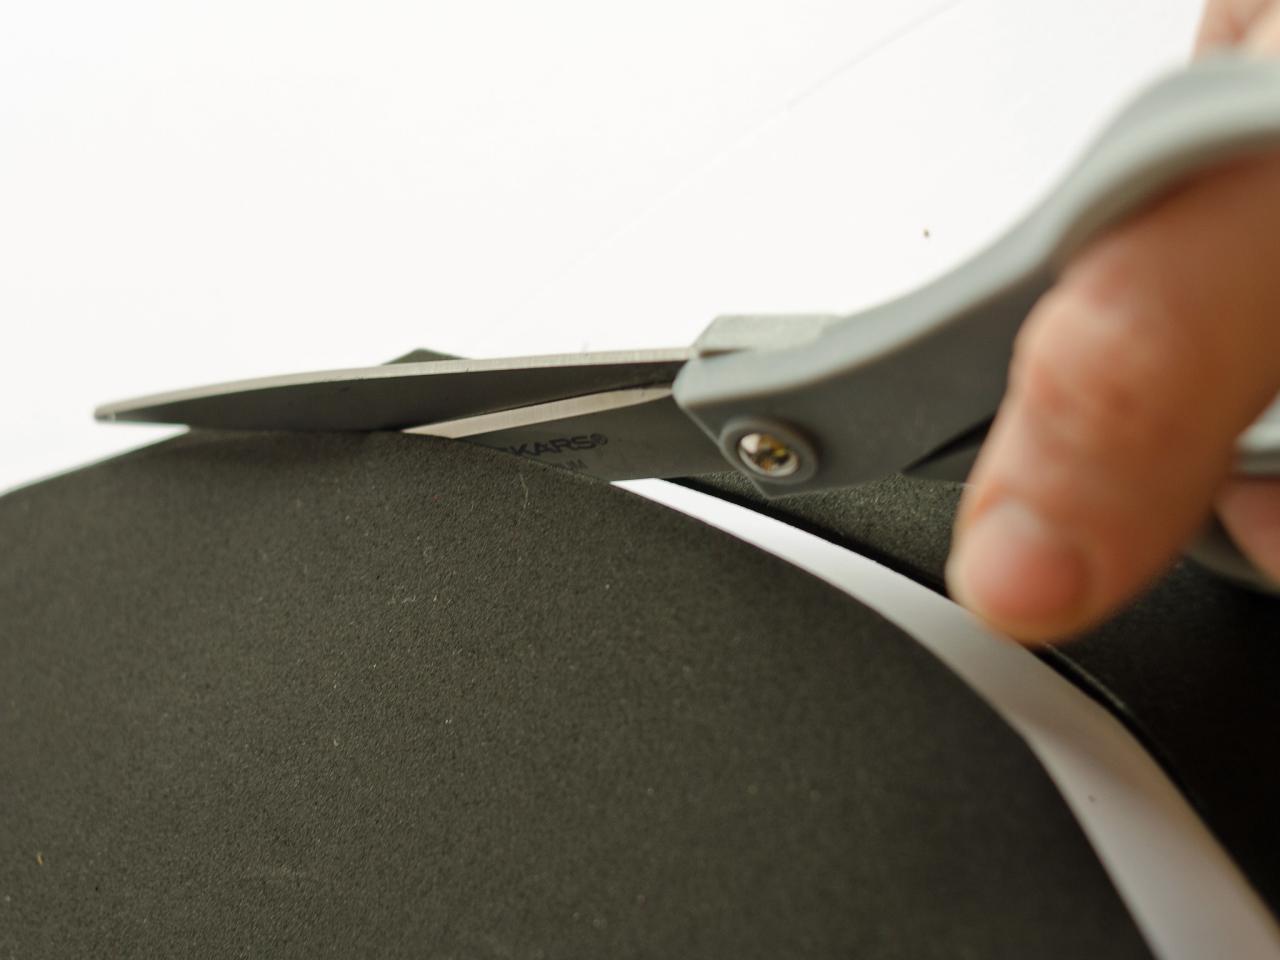
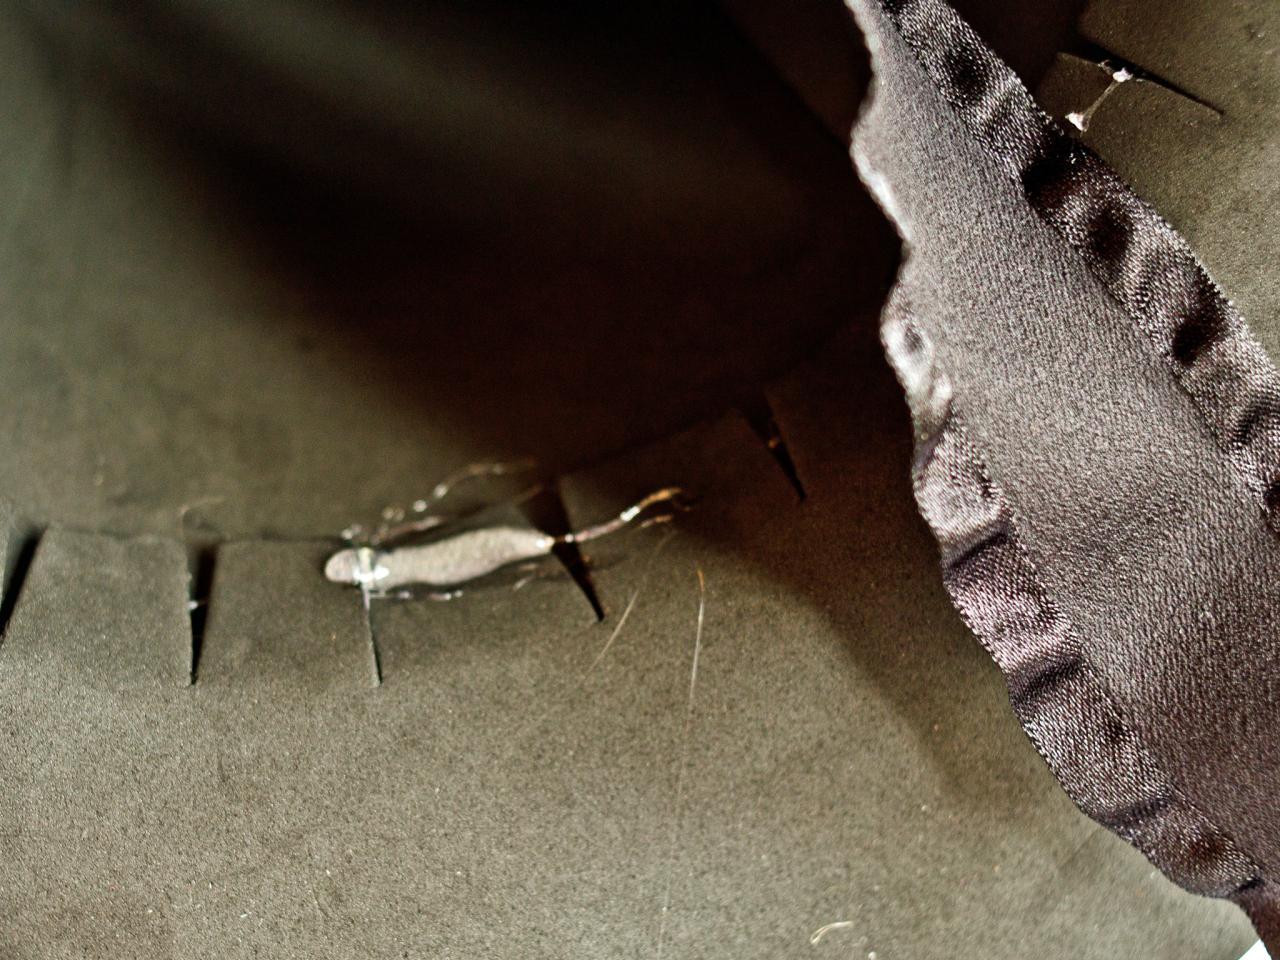
Create Hat Brim
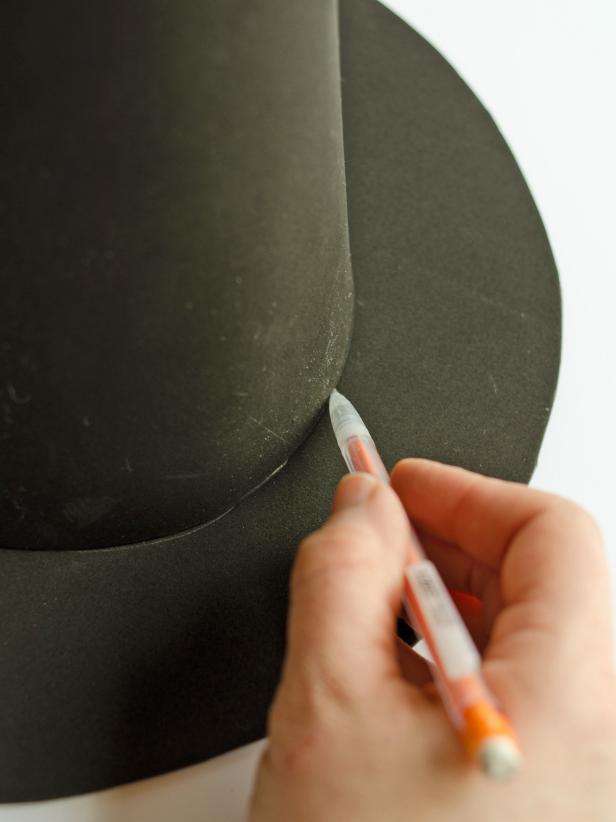
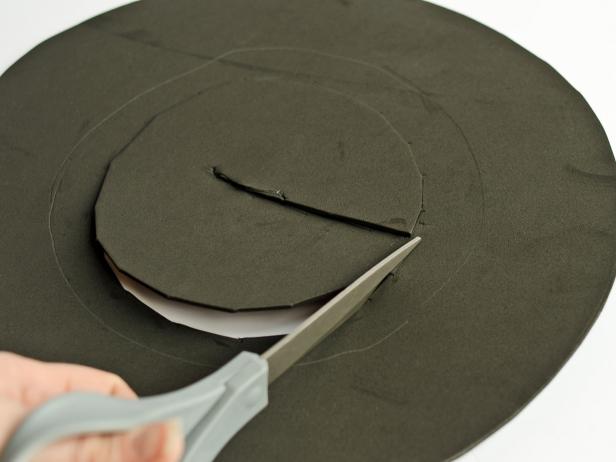
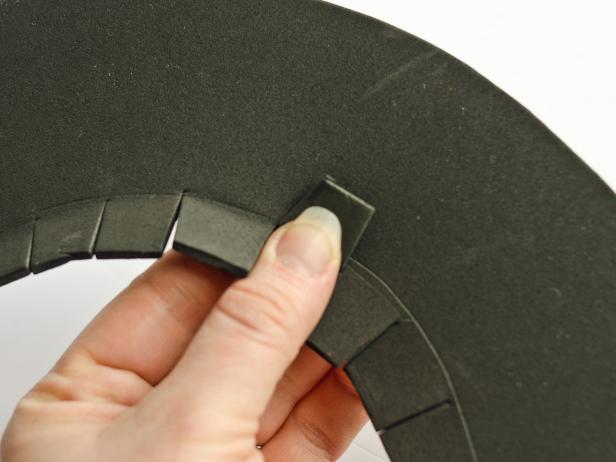
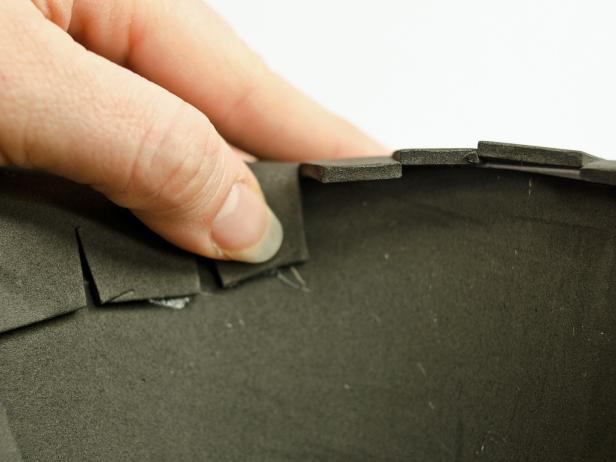
On second piece of foam, trace around a large dinner plate with a pencil then cut out circle with sharp scissors (Image 1). Set cone on top of circle and center. Trace around base of cone with a pencil (Image 2). Cut about 1/2" inside traced line and remove inner circle (Image 3). Cut 1/2" excess into tabs and fold over to crease (Image 4). Apply dabs of glue inside base of cone and press tabs into glue to secure cone to hat's brim (Image 5). Hold in place until glue cools. Repeat until all tabs are glued to inside of hat.
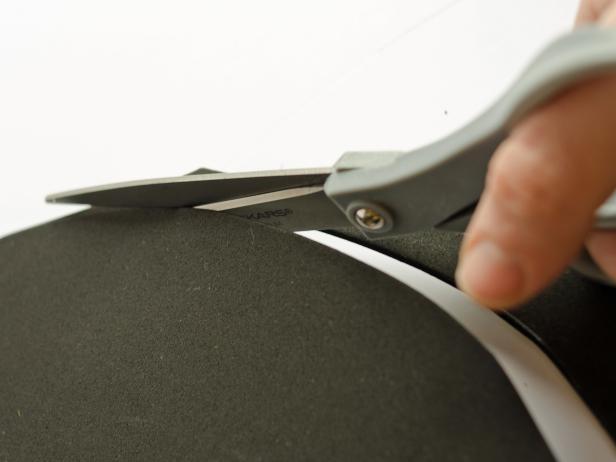
Making a Witch's Hat: Cutting Out a Brim
To create a brim for a witch's hat, the first step is to trace a large dinner plate with a pencil on a second piece of foam. Cut out the traced circle with a sharp scissors.
Making a Witch's Hat: Tracing a Cone Shape onto a Foam Circle
To create a brim for a witch's hat, Step 5B is to set the cone on top of the circle and center it. Trace around base of cone with a pencil. (This is done after you have traced around a dinner plate with a pencil on the second piece of foam and cut out the circle for this brim shape.)
Making a Witch's Hat: Cutting Around the Base of a Cone to Remove its Inner Circle
Step 5C in making a witch's hat is to use a scissors and cut about 1/2" inside the base of the cone's traced line and remove the inner circle. This is done after the cone is set and centered on the top of the circle and it is traced with a pencil around its base.
Making a Witch's Hat Brim: Cutting Fabric Tabs and Folding Around the Inner Circle
After you have set and centered the cone on top of the circle and traced the cone around it, Step 5D in making a brim for witch's hat is to cut the excess in 1/2/ inch tabs around the circle. Fold over the tabs to crease them.
Halloween Witch's Hat Brim: Gluing Cut Tabs to Inside the Base
Step 5E in making the brim for a witch's hat is to apply dabs of glue inside the base of thecone and press the cut tabs into the glue to secure the cone to the hat's brim. Hold the glue in place until it cools. Repeat the process until all tabs are glued to the hat's interior.
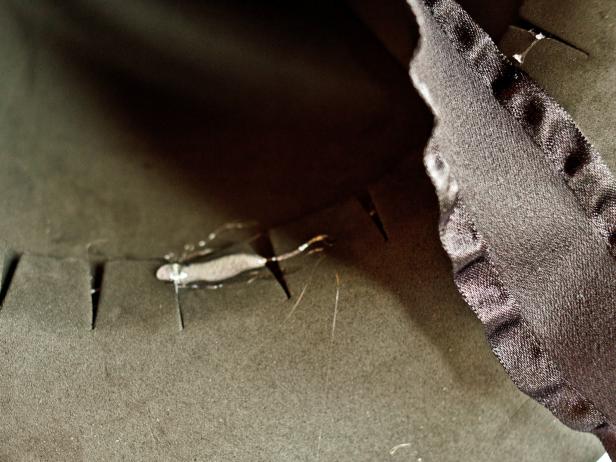
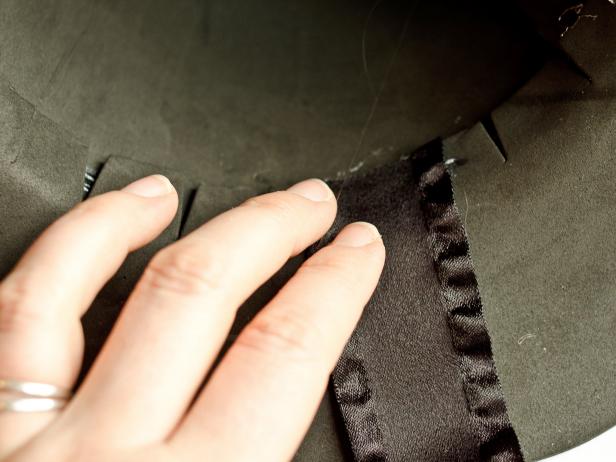
Embellish Hat
Tie reserved piece of tulle around hat (Image 1). Secure with a simple knot in back held in place with a dab of hot glue. Cut black ribbon into two 20-inch lengths; these will tie around child's chin and help hat to stay put. Attach ribbon's ends to inside of witch's hat with beads of hot glue (Images 2 and 3).
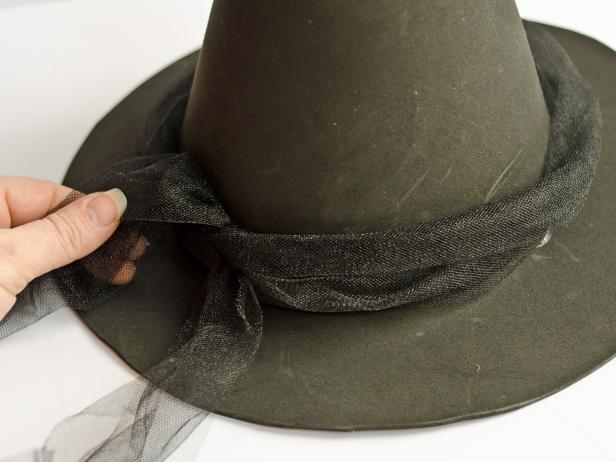
Embellish a Handmade Witch's Hat: Adorning the Hat with Tulle
To embellish the witch's hat, tie a reserved piece of tulle around it. Secure the tulle with a simple knot in the back, held in place with a dab of hot glue.
Create Ties for a Witch's Hat Using Ribbon and Hot Glue
Step 6B in making ties for a witch's hat is to attach the ends of ribbon to the inside of the hat with beads of hot glue.
Making and Embellishing a Witch's Hat: Gluing Ribbon Ties in Place Inside the Hat
After cutting the black ribbon into two 20-inch lengths , Step 6C in making a witch's hat is to glue the ribbon's ends to inside of the witch's hat with beads of hot glue. Hold the ribbons in place until the glue cools.
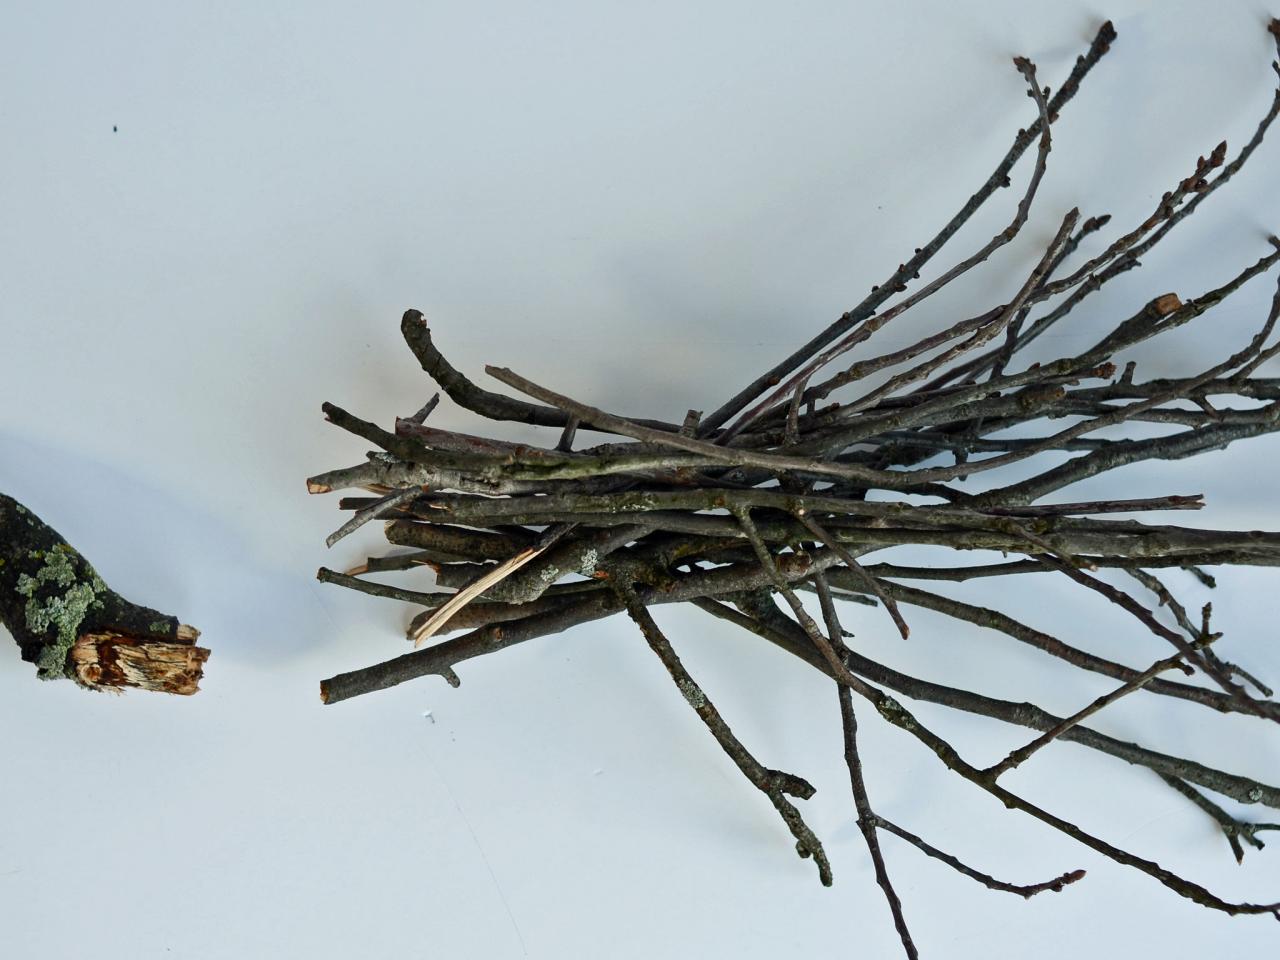
Make Broom
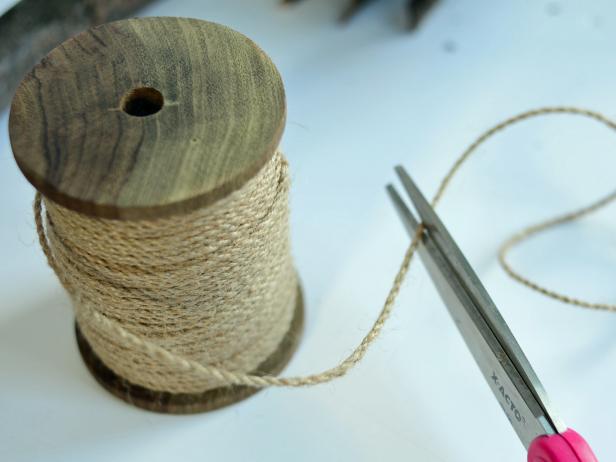
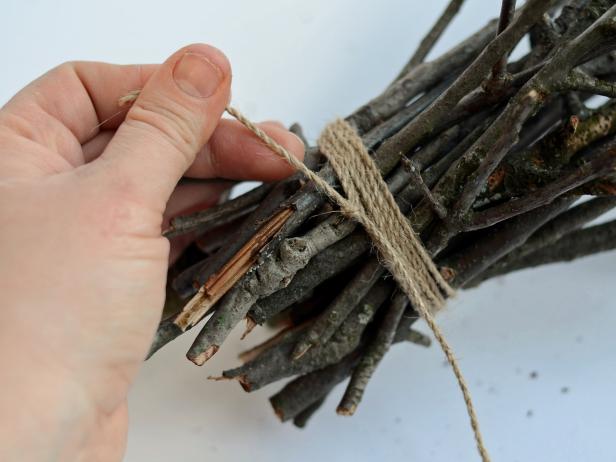
Purchase a dowel rod or find a stick that's approximately 3' long and 3/4" in diameter. Collect 15-20 twigs to fill out bottom of broom (Image 1). Bunch twigs around base of stick (Image 2). Trim a 2-foot length of twine with scissors (Image 3) then wrap twine tightly around bunched twigs to secure them to base of stick (Image 4). Add a few dabs of hot glue to loose sticks, if necessary. Tip: This broom is simply a costume prop and should not be used as a toy.
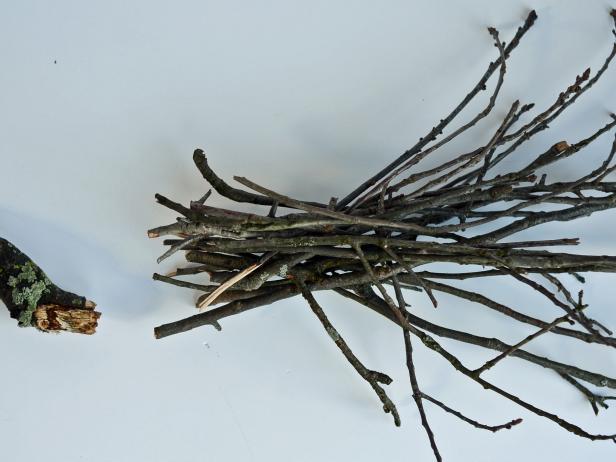
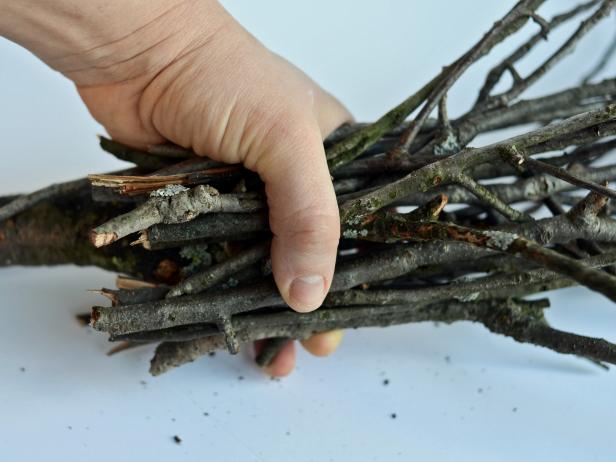
Making a Broom as Part of a Child's Halloween Witch Costume
Step 7A in creating a witch's costume is to fashion a broom as an accessory piece. Purchase a dowel rod or find a stick that's approximately 3 inches long and 3/4 inch in diameter. Collect 15-20 twigs to fill out bottom of broom.
Making a Witch's Broom: Bunching Gathered Twigs Together
Step 7B in making a witch's broom as an accessory for a child's costume is to bunch 15-20 twigs together around the base of a 3-inch stick or dowel rod.
Cutting Twine for a Broom as Part of a Halloween Witch's Costume
Step 7C in making a broom as an accessory for a child's Halloween witch's costume is to trim hemp twine to wrap around gathered twigs.Trim a 2-foot length of twine with a scissors.
Making a Witch's Broom: Wrapping Twine Around Bunched Twigs
After trimming a 2-foot length of twine with scissors, Step 7D in creating a witch's broom is to wrap the twine tightly around the bunched twigs to secure them to the base of the larger stick. Add a few dabs of hot glue to any loose sticks, if necessary. Tip: This broom is a costume prop and should not be used as a toy.
Sweet, Scary and No-Sew: Make a Child's Witch's Costume with Ballet Flair
A no-sew tutu, pointy craft-foam hat, DIY broom and striped tights are paired with a black T-shirt for a wee witch's costume that's cute enough to cast a spell on even the biggest Halloween humbugs.


