


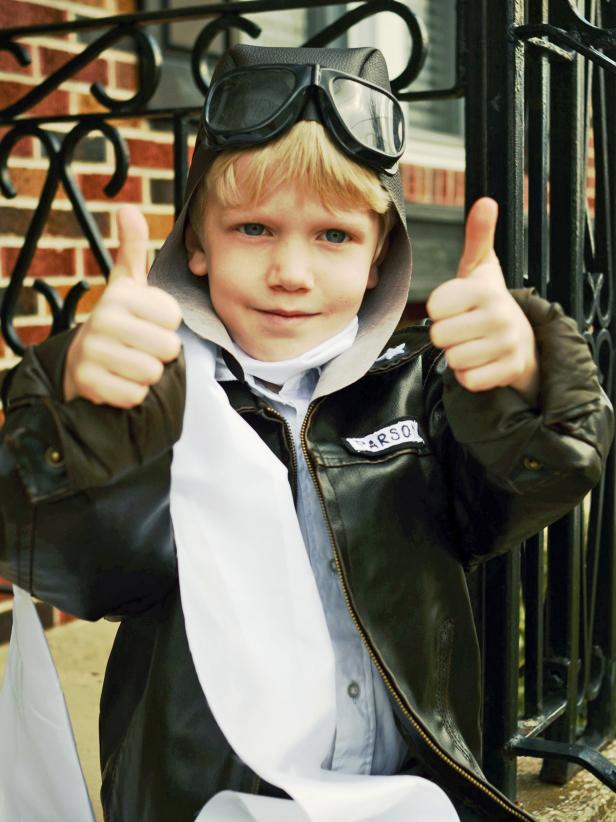
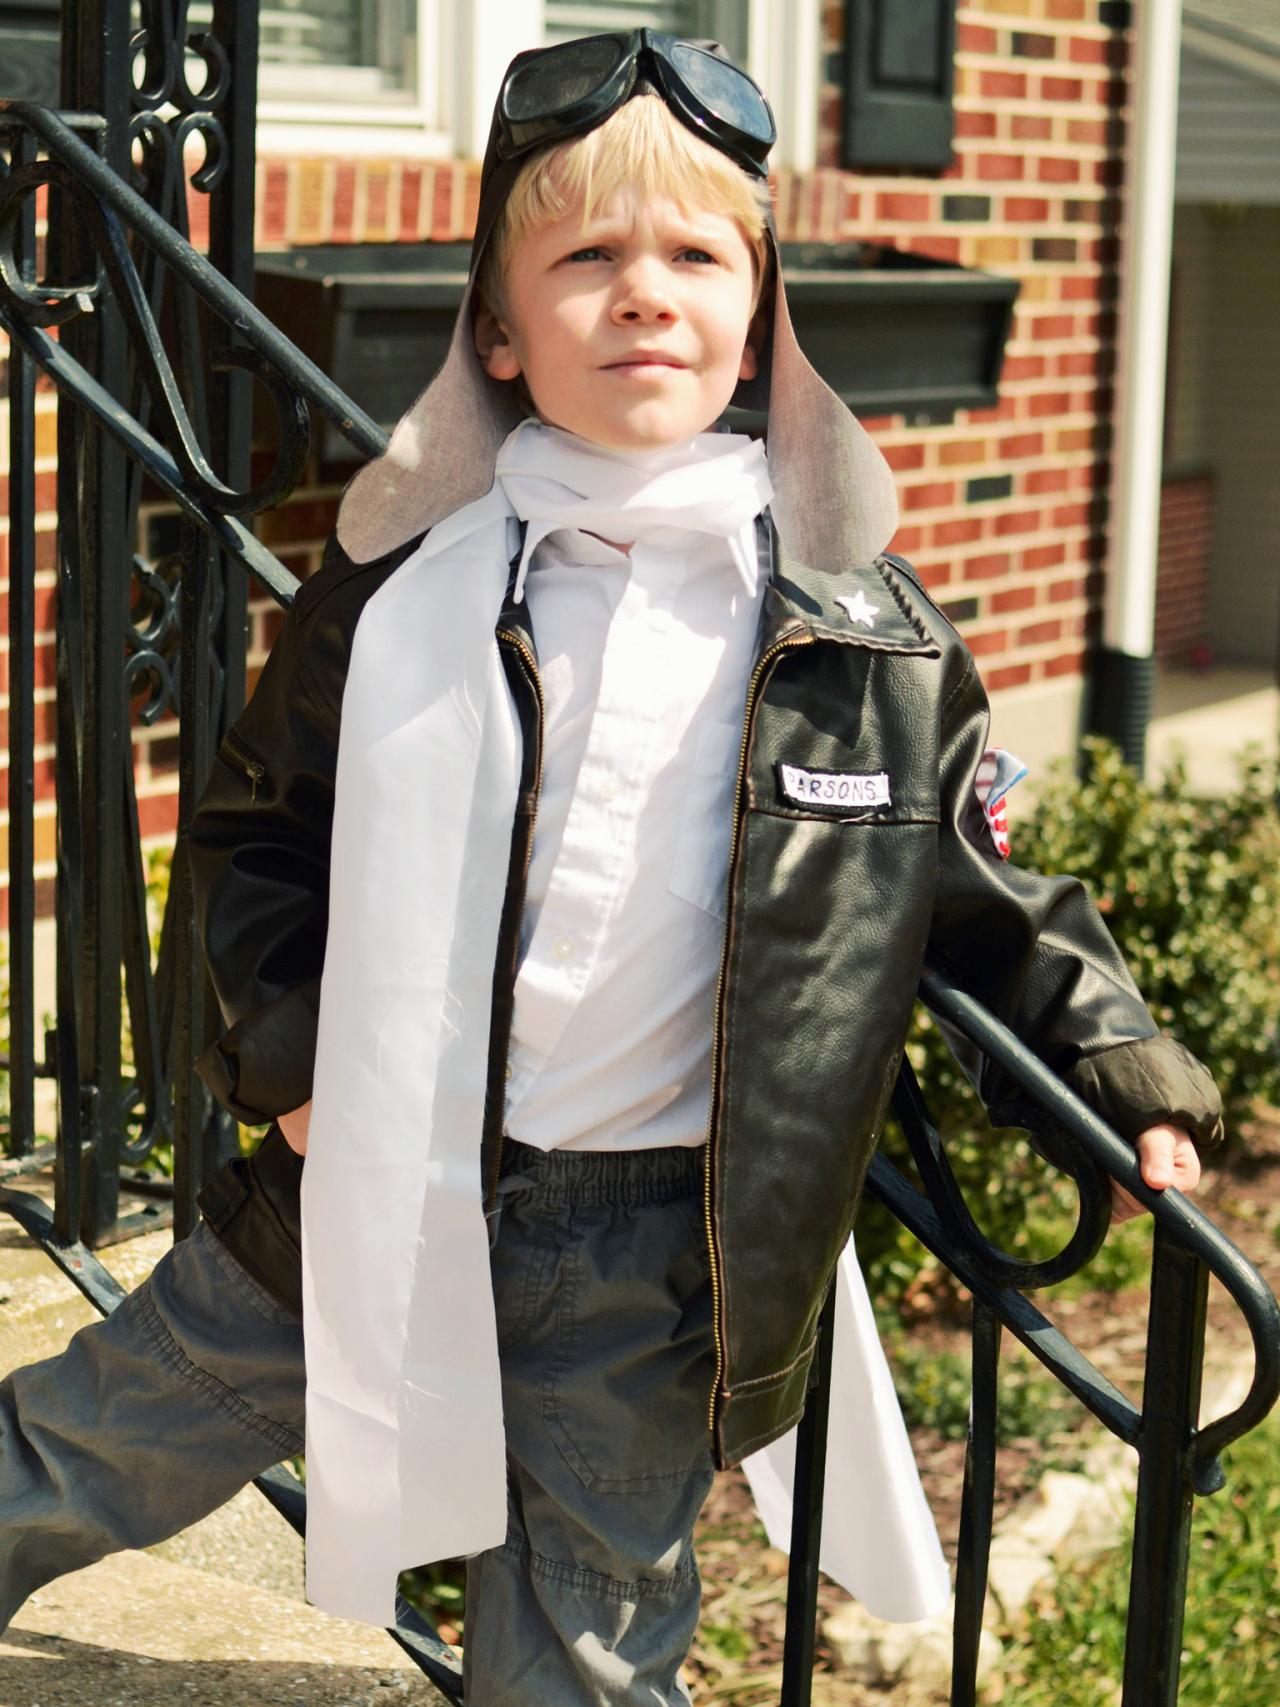
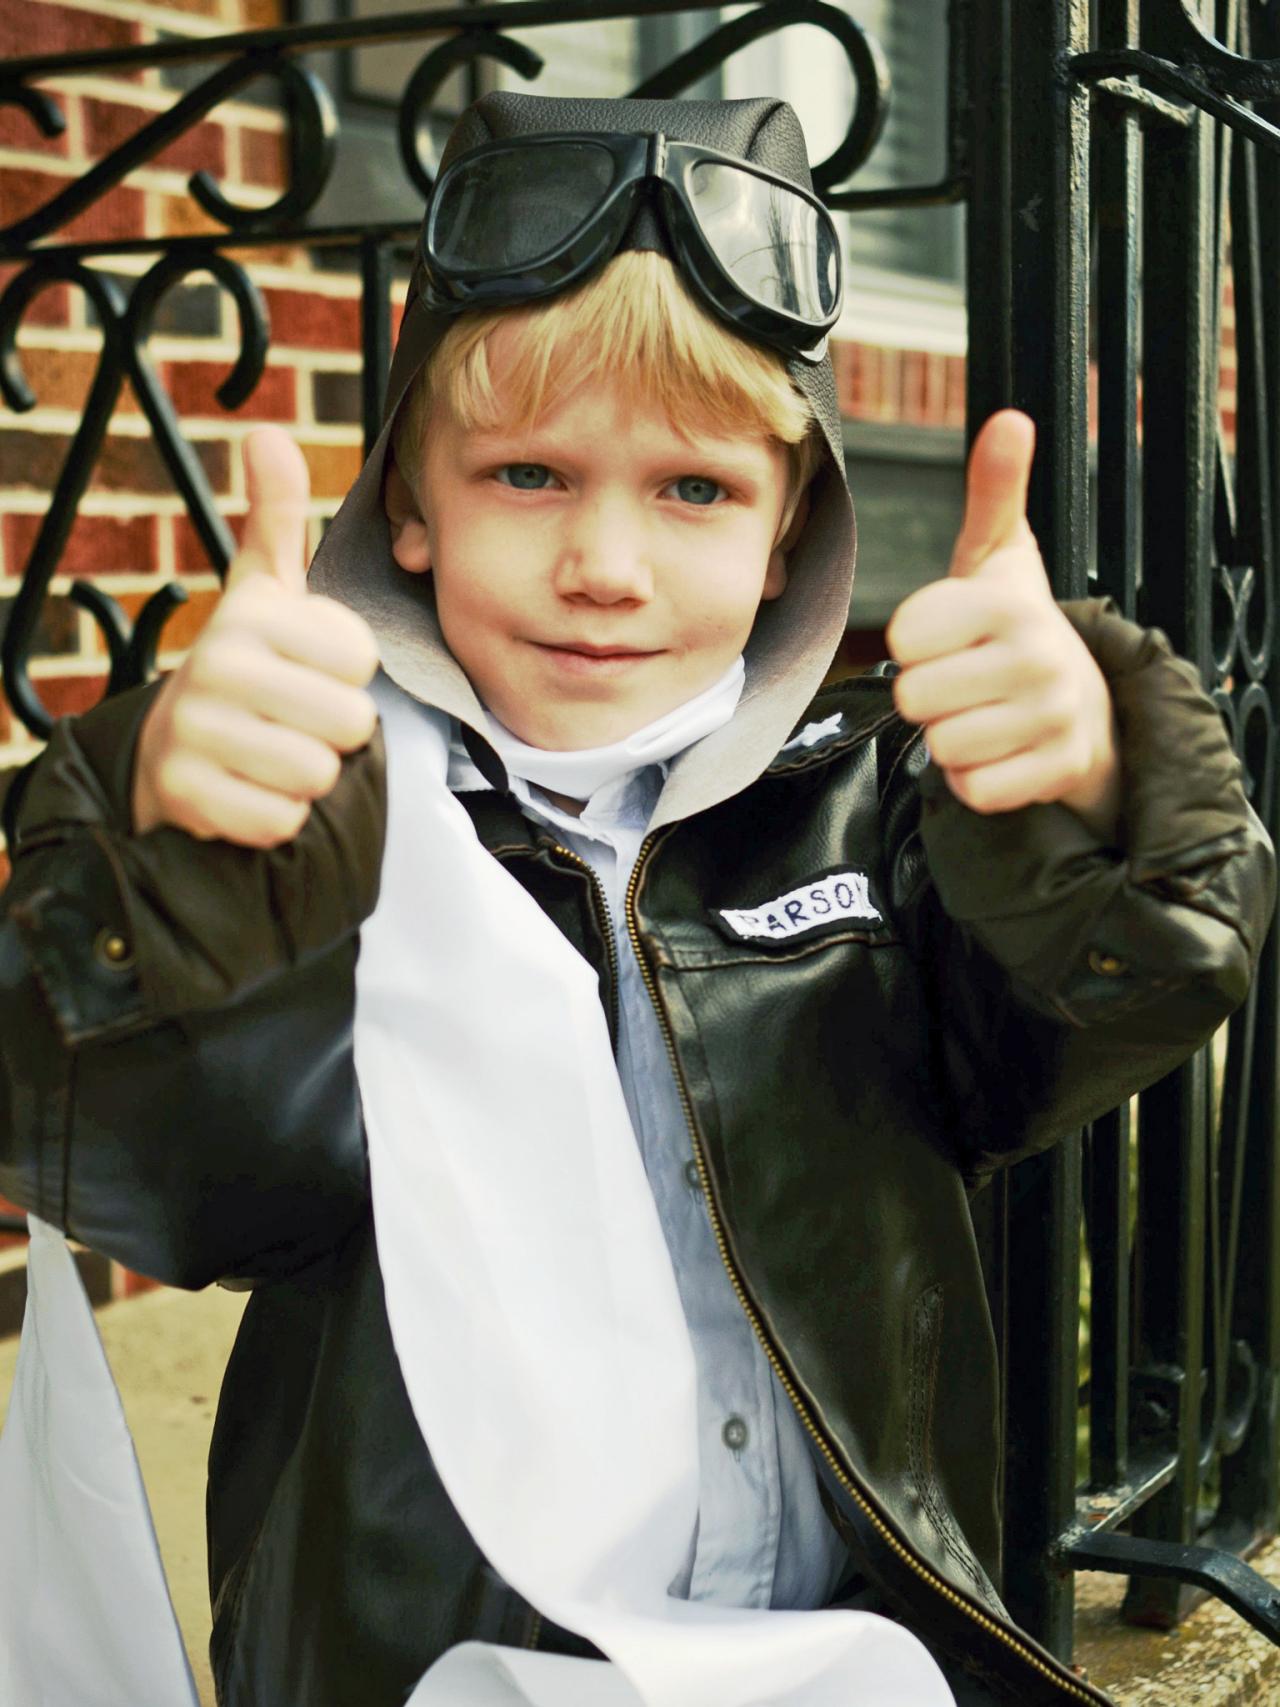
Make a Kid's Pilot Costume for Halloween
Your little one's imagination will take flight in this vintage aviator costume. Embellish everyday clothing with handmade felt patches, then add a custom-made scarf and bomber hat to bring the look together.

Make a Kid's Pilot Costume for Halloween
Your little one's imagination will take flight in this vintage aviator costume. Embellish everyday clothing with handmade felt patches, then add a custom-made scarf and bomber hat to bring the look together.

Materials Needed:
- brown jacket
- goggles (some welder's goggles look similar to aviation goggles)
- 1/2 yard white faux silk
- 1/2 yard brown faux leather
- fabric glue
- no-fray fabric glue (optional)
- white twill tape
- 4 felt quarters: 1 black, 1 white, 1 blue and 1 red
- paper
- pencil
- permanent marker
- pins
- brown all-purpose cotton thread
- scissors
- sewing machine
Make Scarf
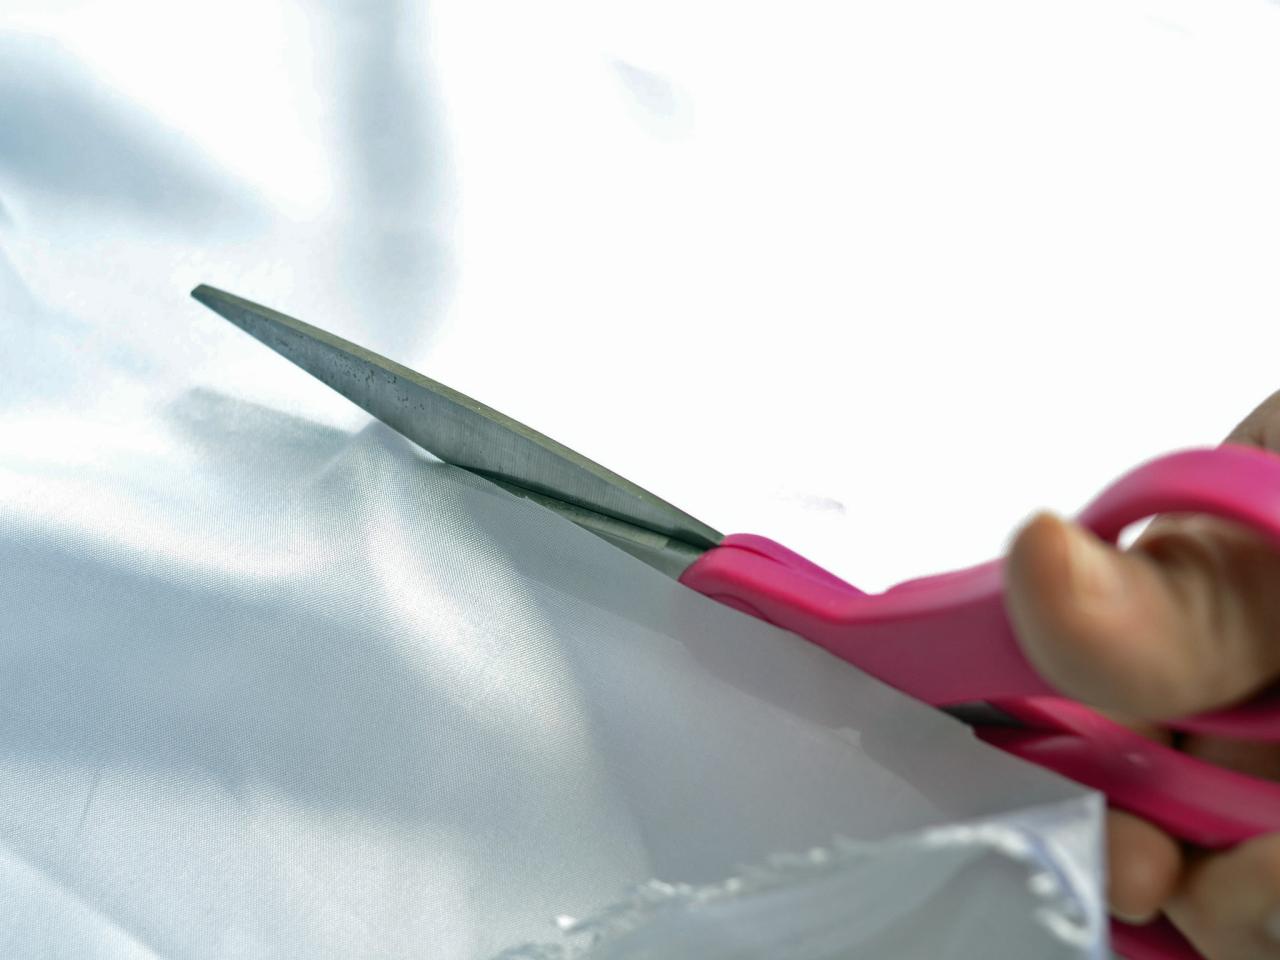
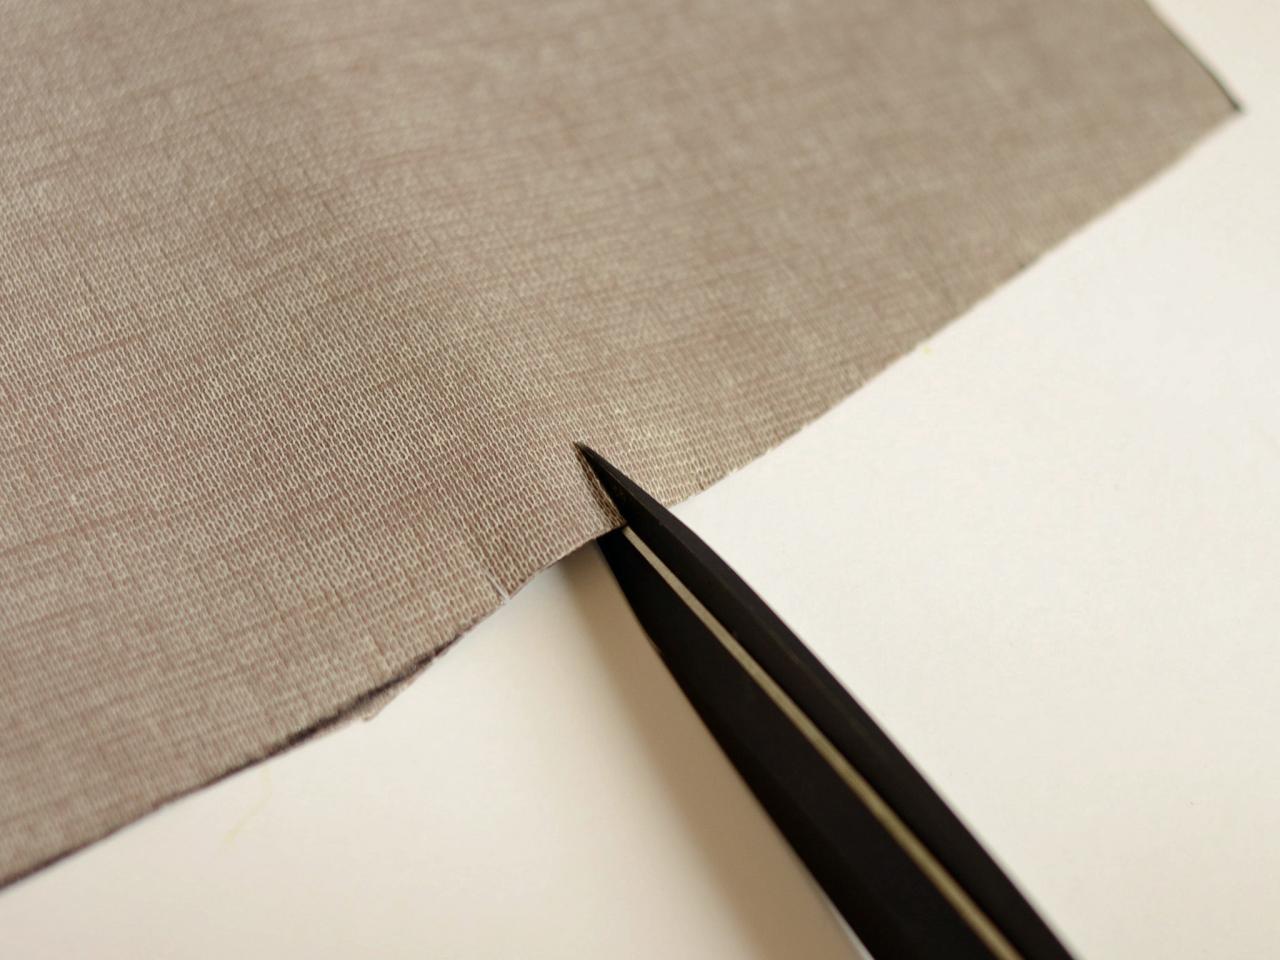
With sharp scissors, cut white imitation silk fabric width-wise into two 6-inch-wide pieces (Image 1). Line up ends together then sew to make one long 6-inch-wide scarf (Image 2). Don't worry about the seam, it will be hidden behind jacket's collar. If desired, edges of scarf can be hemmed or treated with no-fray fabric glue, but this step is only necessary for fabrics that fray.

Make Scarf
With sharp scissors, cut white imitation silk fabric width-wise into two 6-inch-wide pieces.
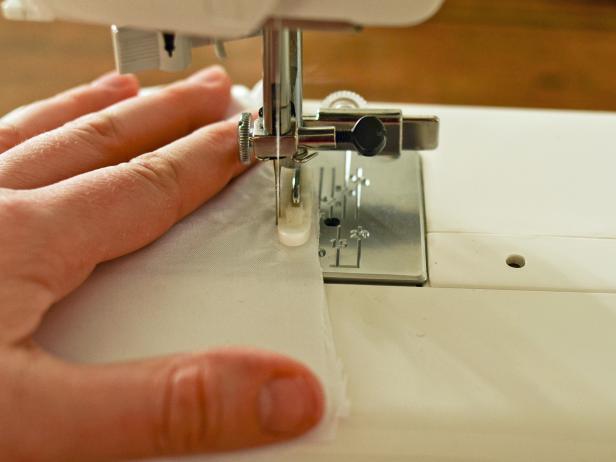
Make Scarf
Line up ends together then sew to make one long 6-inch-wide scarf. Don't worry about the seam, it will be hidden behind jacket's collar. If desired, edges of scarf can be hemmed or treated with no-fray fabric glue, but this step is only necessary for fabrics that fray.
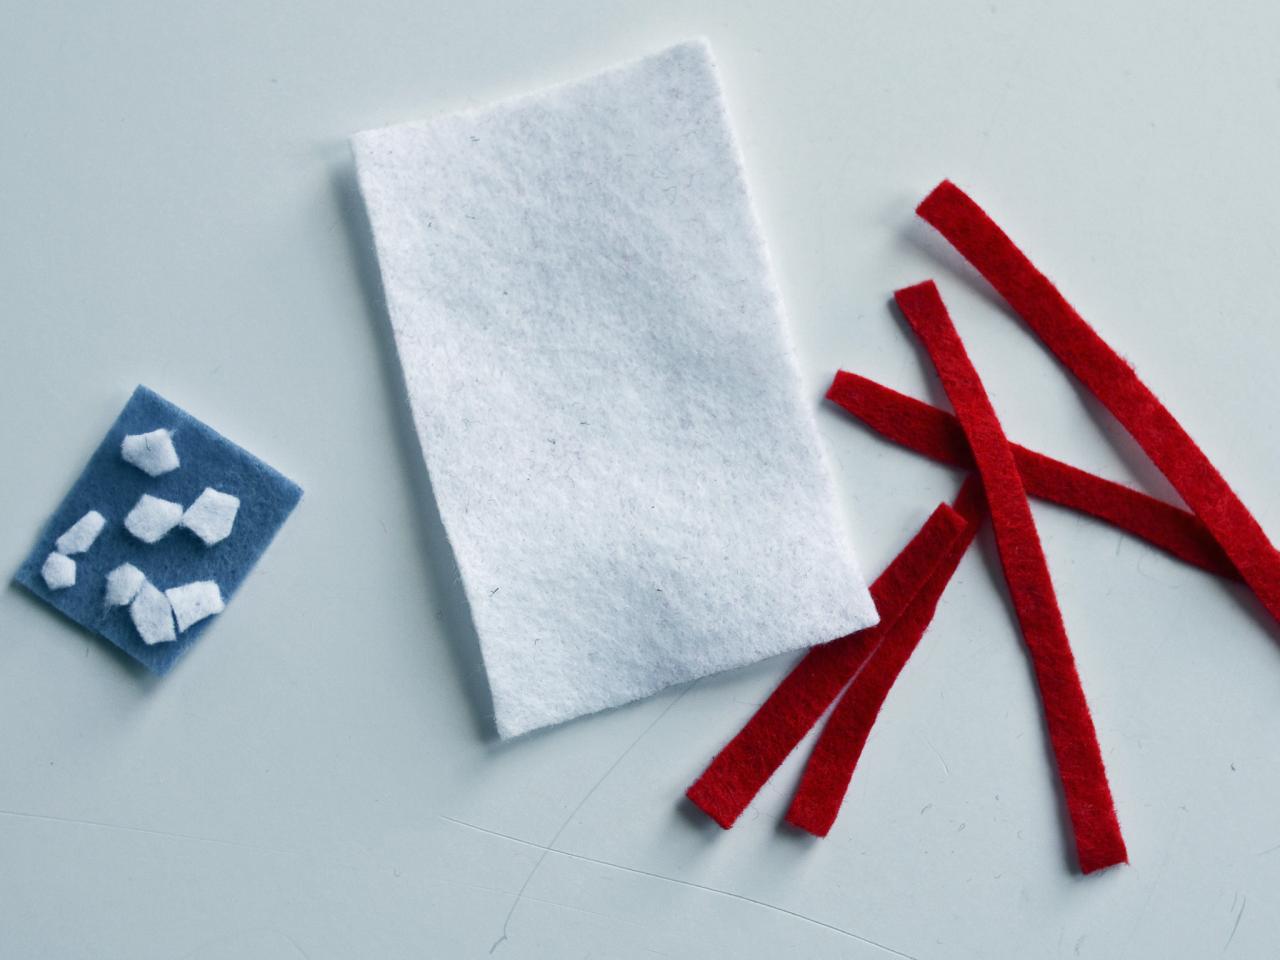
Make Patches
Create patches by cutting then piecing together pieces of felt with fabric glue (Images 1-3). Make flags, stars, chevrons, ribbons or medals — let your imagination go wild.
Make Patches
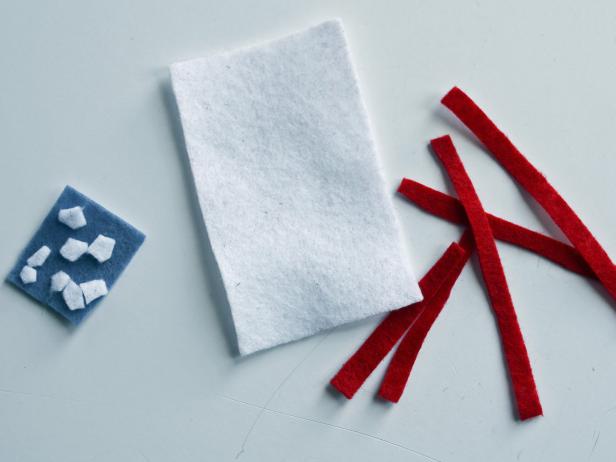
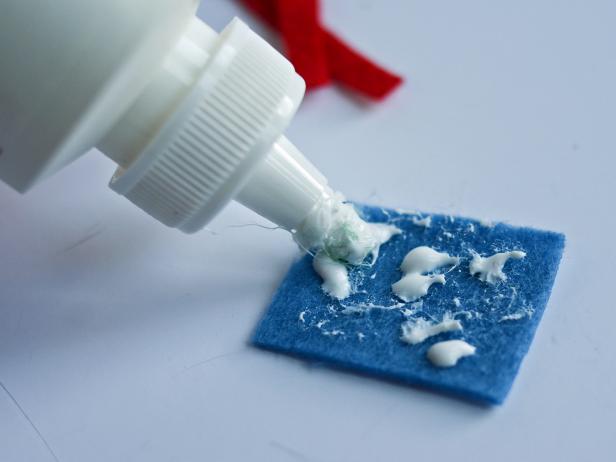
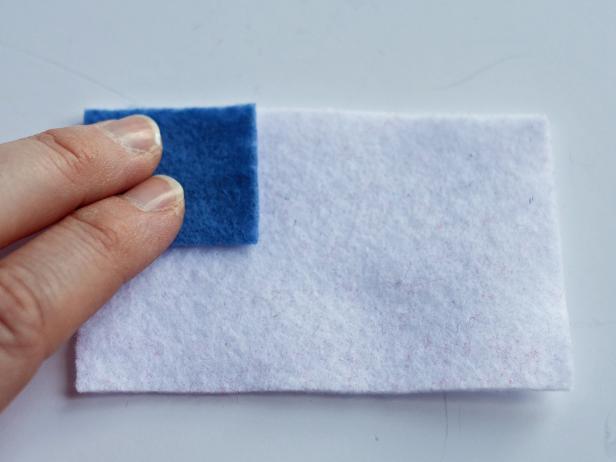
Create patches by cutting then piecing together pieces of felt with fabric glue. Make flags, stars, chevrons, ribbons or medals — let your imagination go wild.
Make Patches
Create patches by cutting then piecing together pieces of felt with fabric glue. Make flags, stars, chevrons, ribbons or medals — let your imagination go wild.
Make Patches
Create patches by cutting then piecing together pieces of felt with fabric glue. Make flags, stars, chevrons, ribbons or medals — let your imagination go wild.
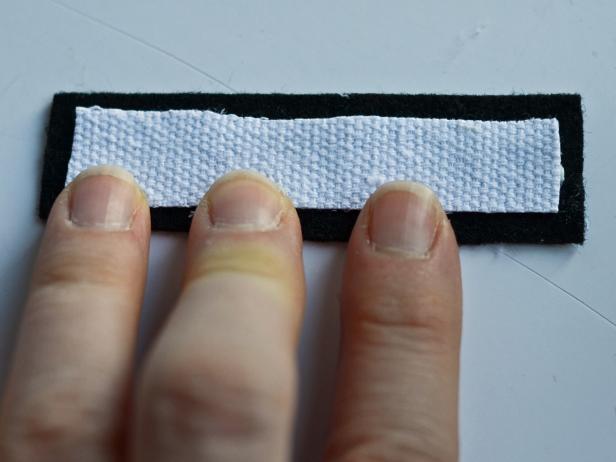
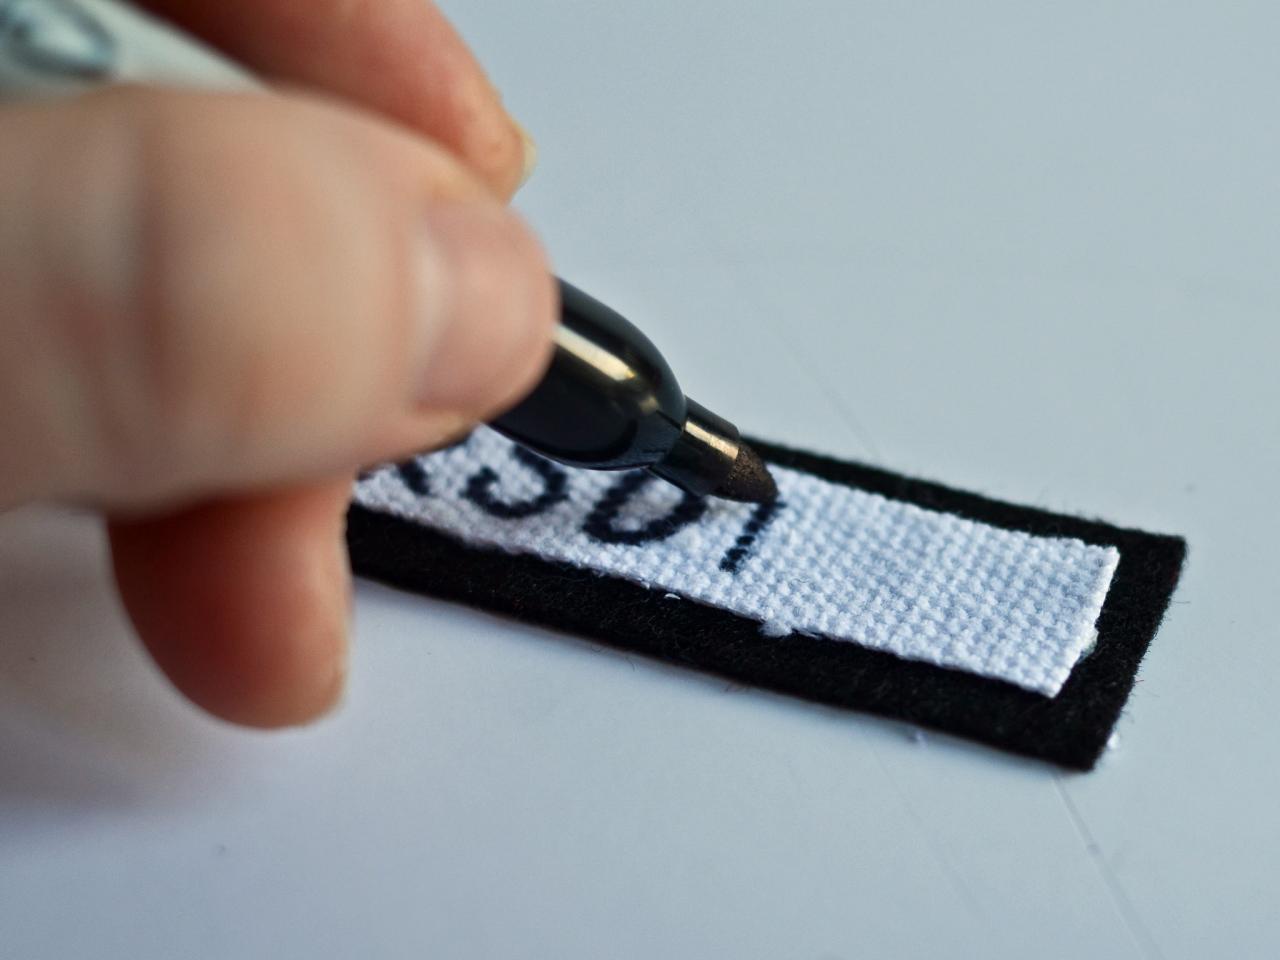
Make Name Badge
Create a name badge by cutting a piece of white twill tape long enough to accommodate child's name. Next, cut a piece of black fabric slightly larger than twill tape piece to frame-out name badge (Image 1). Glue the two pieces together with fabric glue then write child's last name on twill tape with a permanent black marker (Image 2).

Make Name Badge
Create a name badge by cutting a piece of white twill tape long enough to accommodate child's name. Next, cut a piece of black fabric slightly larger than twill tape piece to frame-out name badge.
Make Name Badge
Glue the two pieces together with fabric glue then write child's last name on twill tape with a permanent black marker.
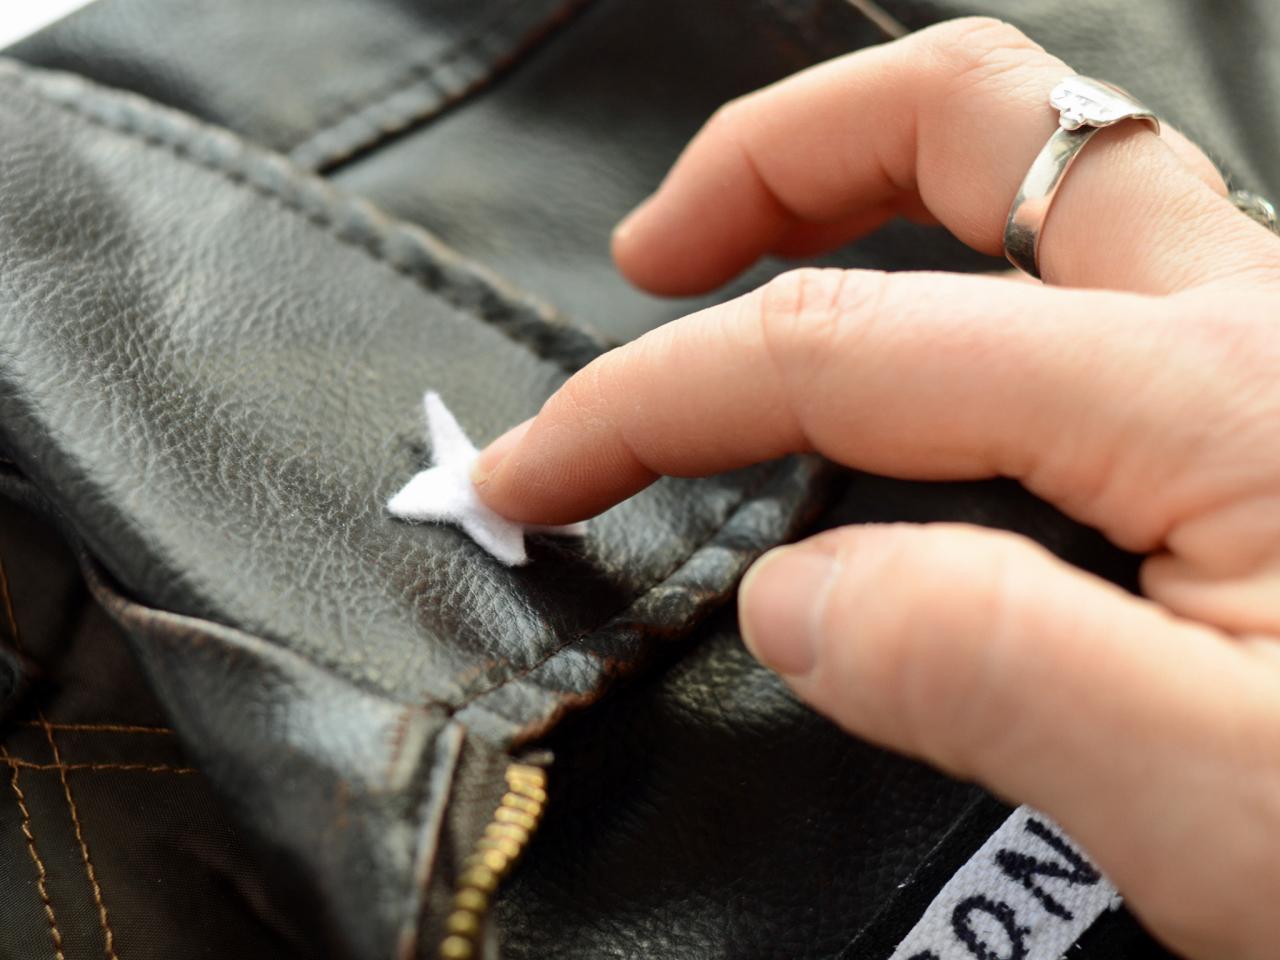
Affix Badges to Jacket
Hand-stitch or use fabric glue or pins to affix patches to jacket in desired locations. Tip: The method chosen to attach patches depends on jacket's material and if they will be attached permanently or temporarily.

Affix Badges to Jacket
Hand-stitch or use fabric glue or pins to affix patches to jacket in desired locations. Tip: The method chosen to attach patches depends on jacket's material and if they will be attached permanently or temporarily.
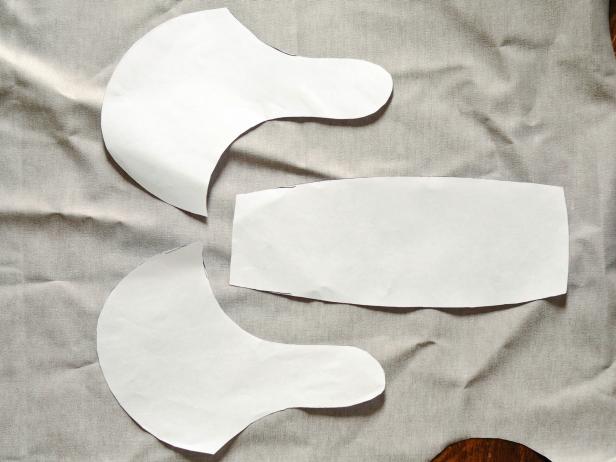
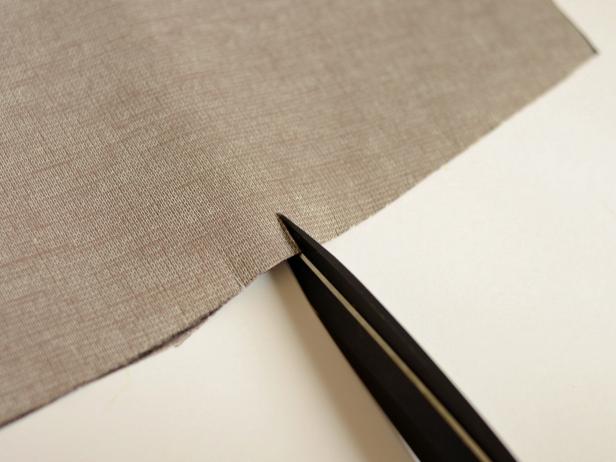
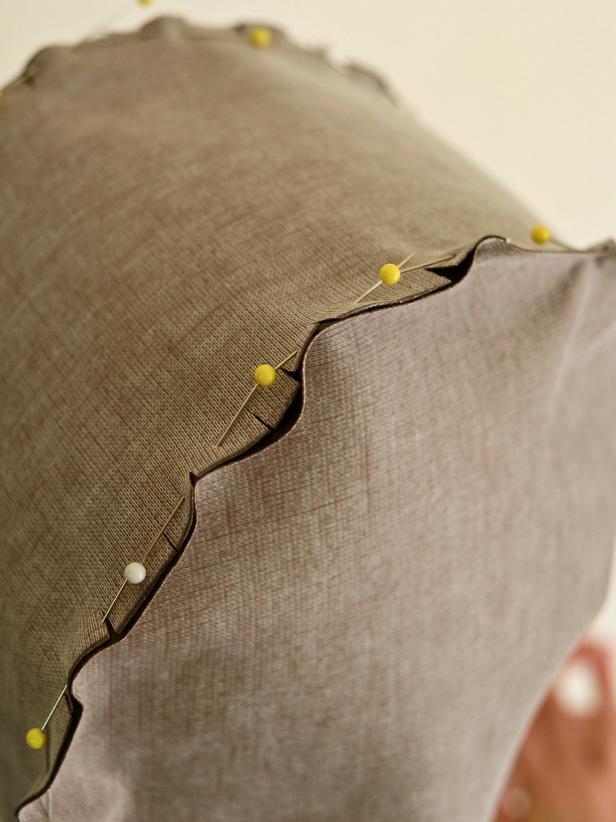
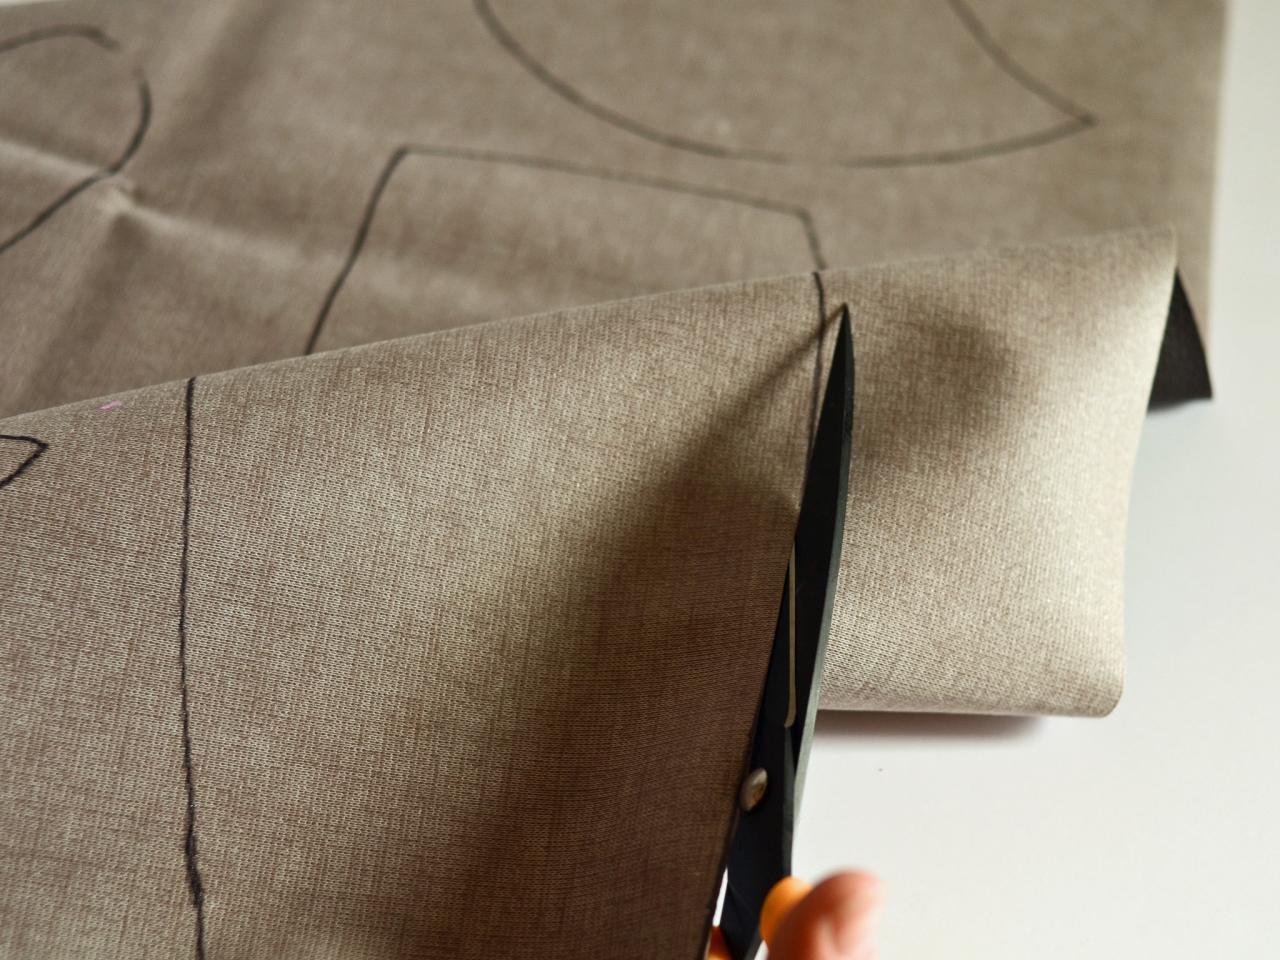
Make Bomber Hat
Make a paper template for hat to fit your child's head. You'll need: one center piece shaped like a rectangle with slightly curved sides and two pieces for the sides with ear flaps (Image 1). It may take a few tries to get the sizing and shape right. Be sure to leave enough room for seam allowances. Once the template comfortably fits your child's head, place the paper pieces on the back side of faux leather fabric and trace with a permanent marker. Cut pieces out with sharp scissors (Image 2), then cut small slits into both sides of center piece where it will meet side pieces (Image 3). This will help the piece curve. Pin right side of pieces together with raw edges facing same direction (Image 4). Try hat on inside-out and make any necessary adjustments. Sew along pin lines, remove pins and trim threads. It may also be necessary to trim seams at front of hat so they don't show. Turn hat right-side out and try on. Pair hat with jacket, scarf, brown or gray pants, brown shoes or boots, and goggles (Image 5). Tip: Welder's goggles look a lot like aviation goggles and can be found for just a few dollars at most hardware stores.

Make Bomber Hat
Make a paper template for hat to fit your child's head. You'll need: one center piece shaped like a rectangle with slightly curved sides and two pieces for the sides with ear flaps. It may take a few tries to get the sizing and shape right. Be sure to leave enough room for seam allowances. Once the template comfortably fits your child's head, place the paper pieces on the back side of faux leather fabric and trace with a permanent marker.
Make Bomber Hat
Cut pieces out with sharp scissors, then cut small slits into both sides of center piece where it will meet side pieces.
Make Bomber Hat
Pin right side of pieces together with raw edges facing same direction (Image 4). Try hat on inside-out and make any necessary adjustments. Sew along pin lines, remove pins and trim threads. It may also be necessary to trim seams at front of hat so they don't show. Turn hat right-side out and try on.
Make a Kid's Pilot Costume for Halloween
Your little one's imagination will take flight in this vintage aviator costume. Embellish everyday clothing with handmade felt patches, then add a custom-made scarf and bomber hat to bring the look together.


