


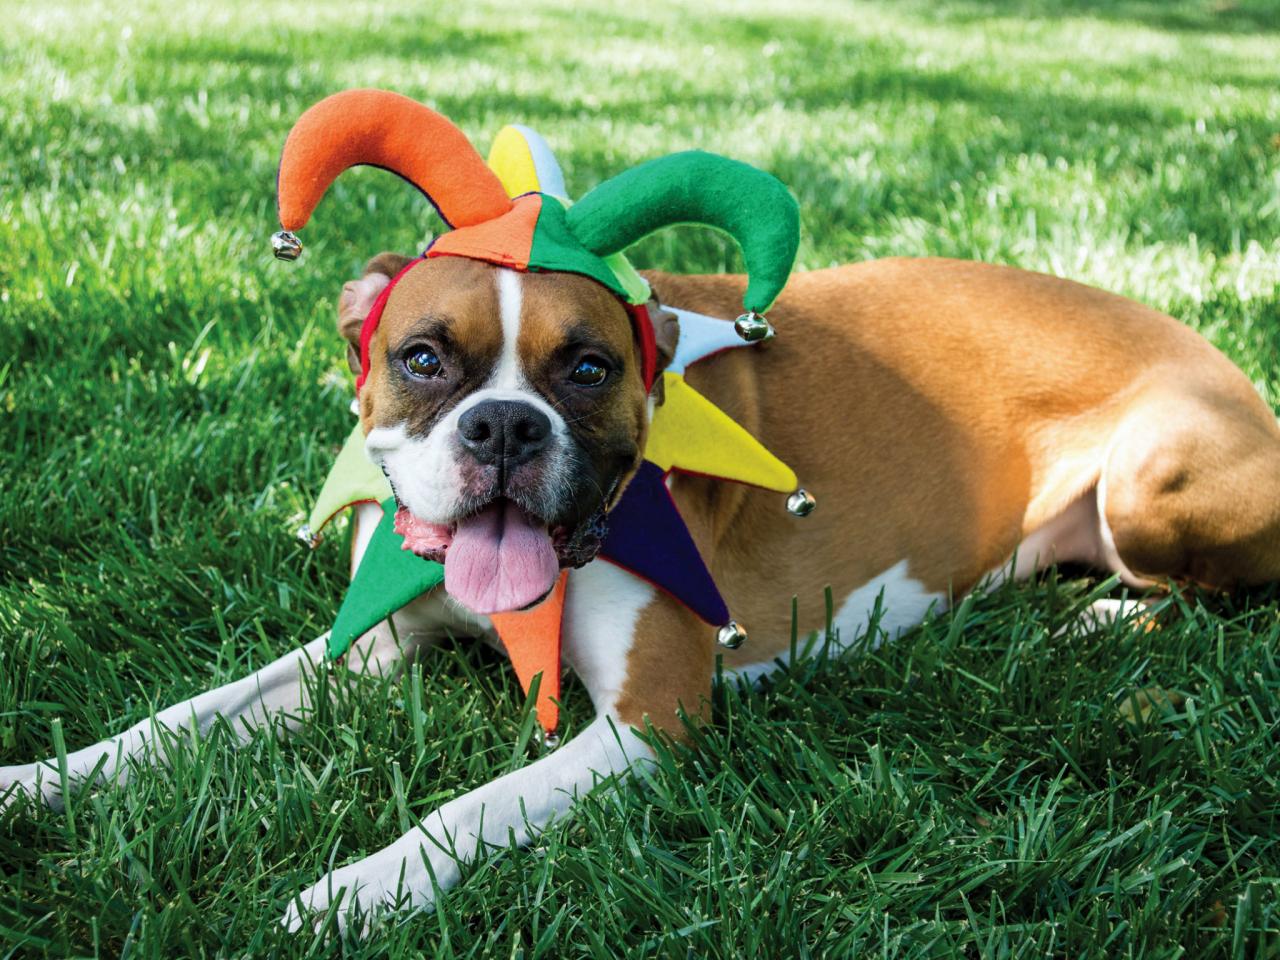
Halloween Pet Costume: Court Jester
This Halloween honor your pet's inner clown with an easy-to-sew felt jester costume. Our free printable templates make stitching up this playful costume a snap.


Note: This fits a dog with a 15-1/2" neck perfectly. To make it bigger, make the tab on the back of the collar slightly longer. To make it smaller, omit one of the points of the collar.
Materials Needed:
- felt in 8 assorted colors
- red felt (to be used as a liner)
- 11 jingle bells
- hook and loop tape (Velcro)
- sewing machine
- red thread
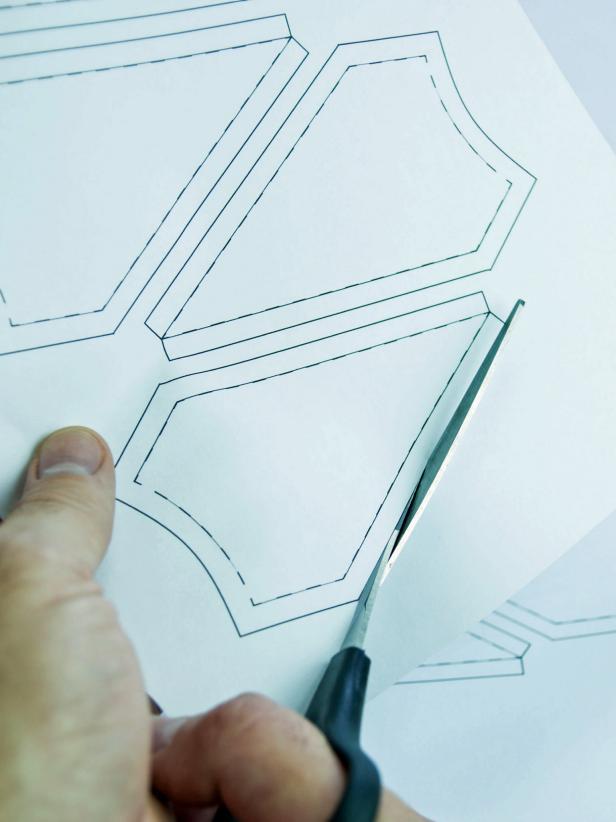
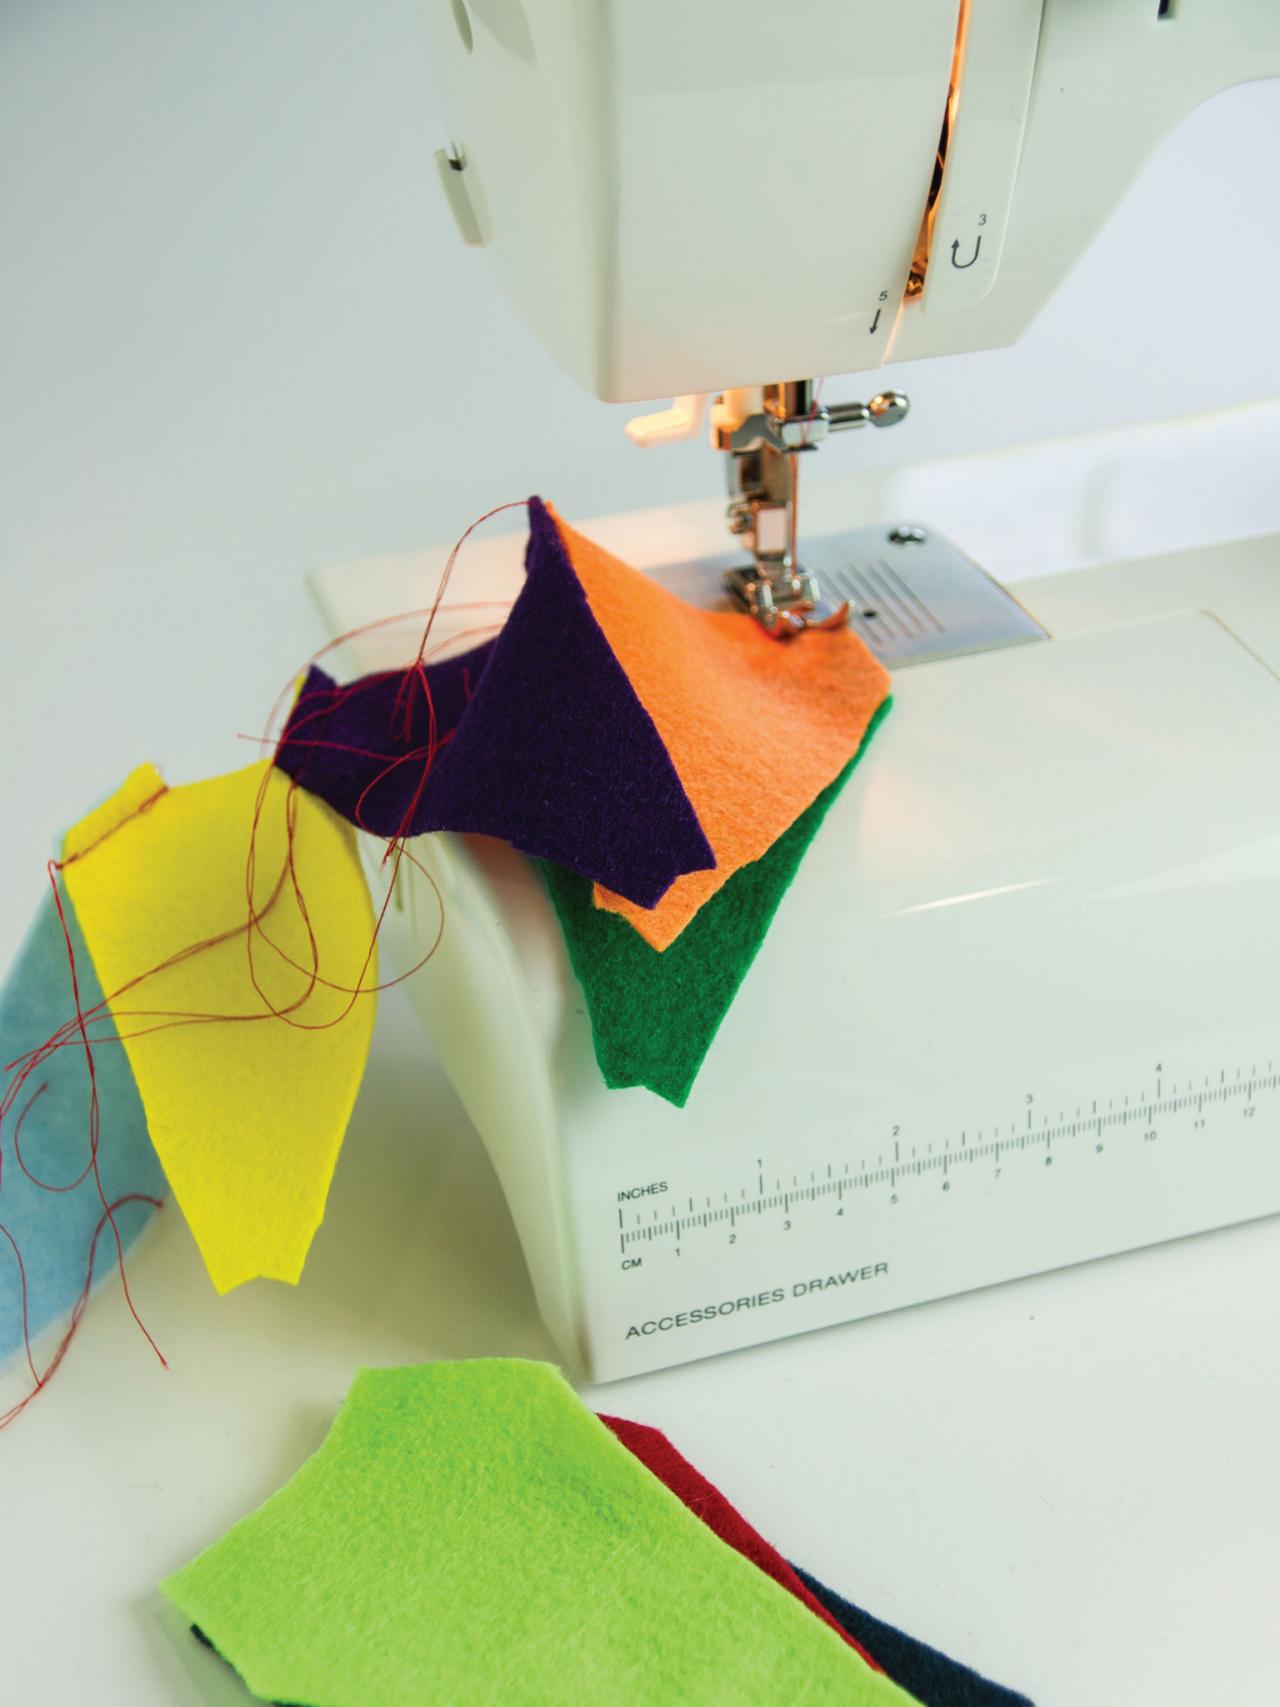
1. Print Templates and Cut Fabric
Print, then cut out, 2 copies of the hat template and 3 copies of the horn template (Image 1). You will need 1 horn and 1 hat piece cut out of each of the 6 felt colors. You will also need 6 hat pieces cut out of the red felt (Image 2).

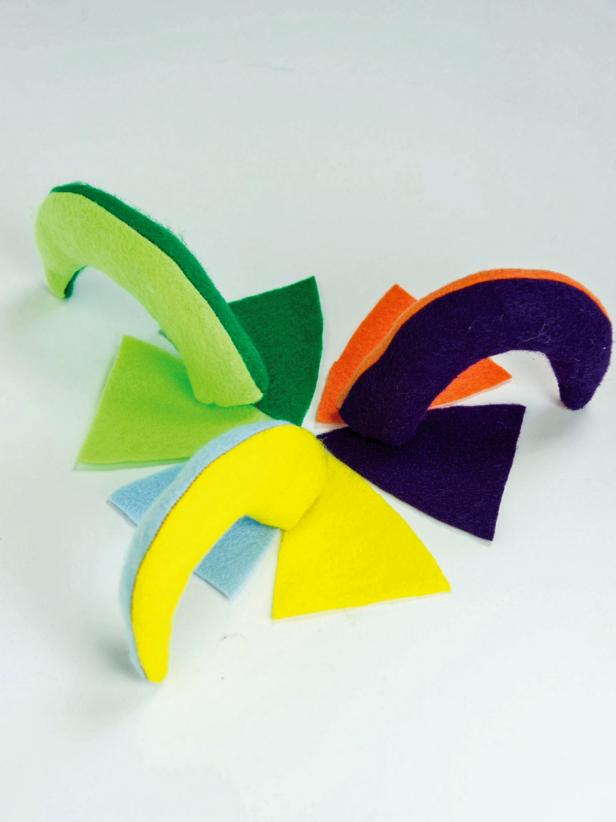
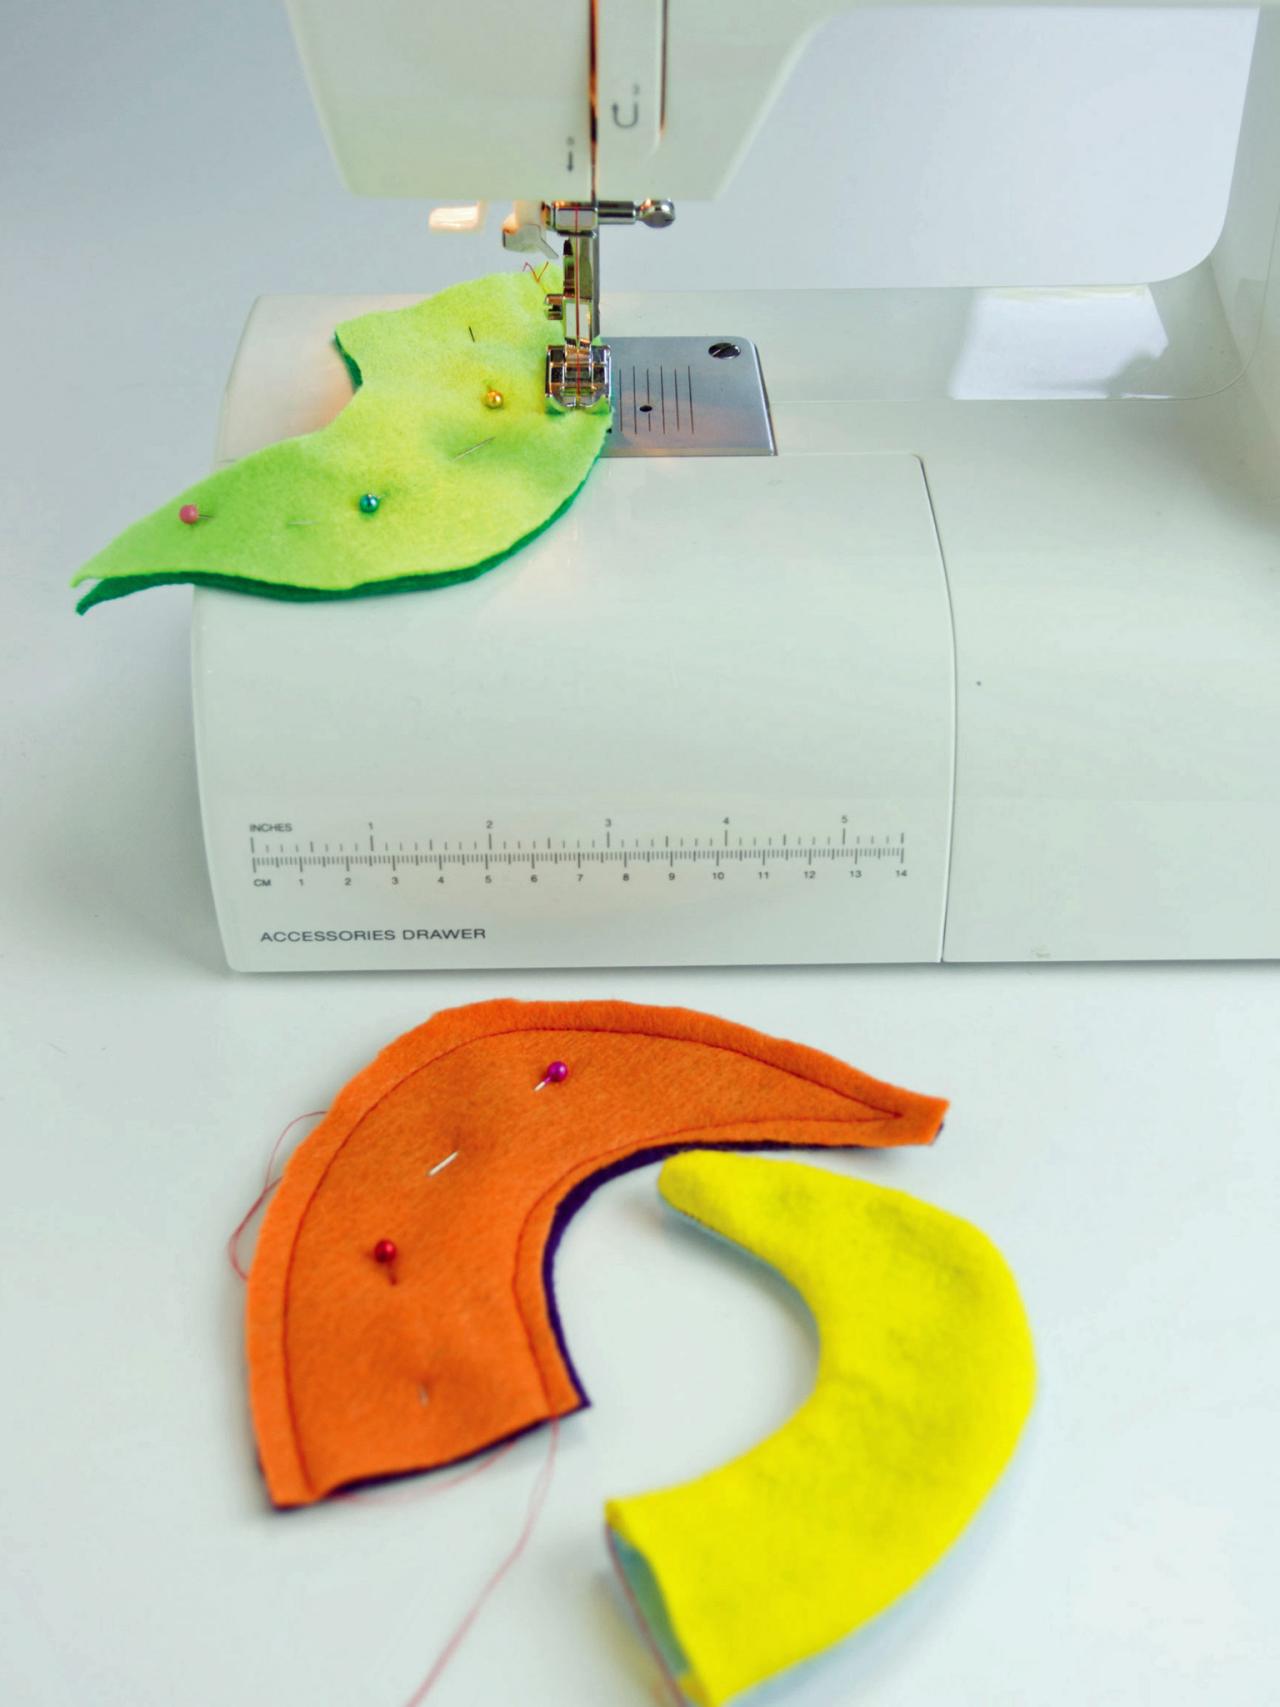
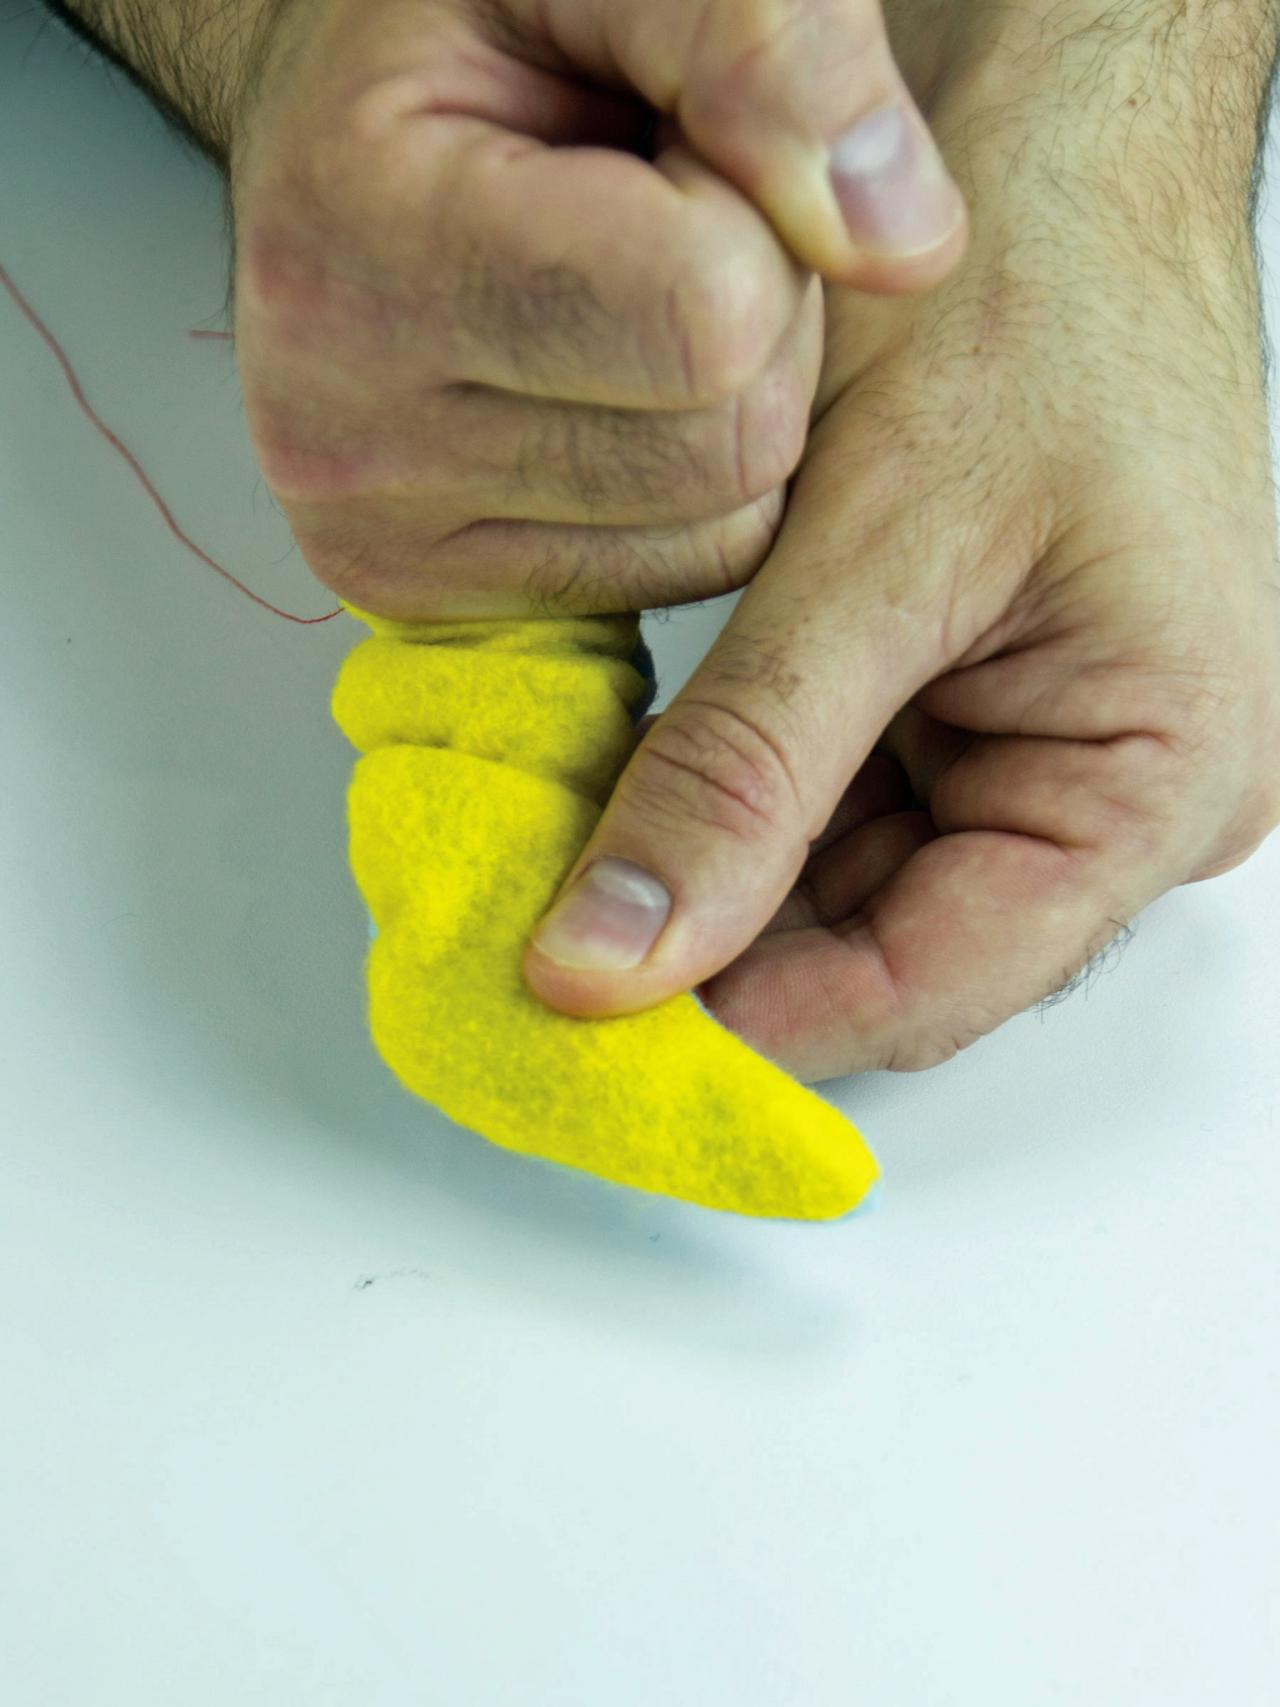
2. Sew the Horns
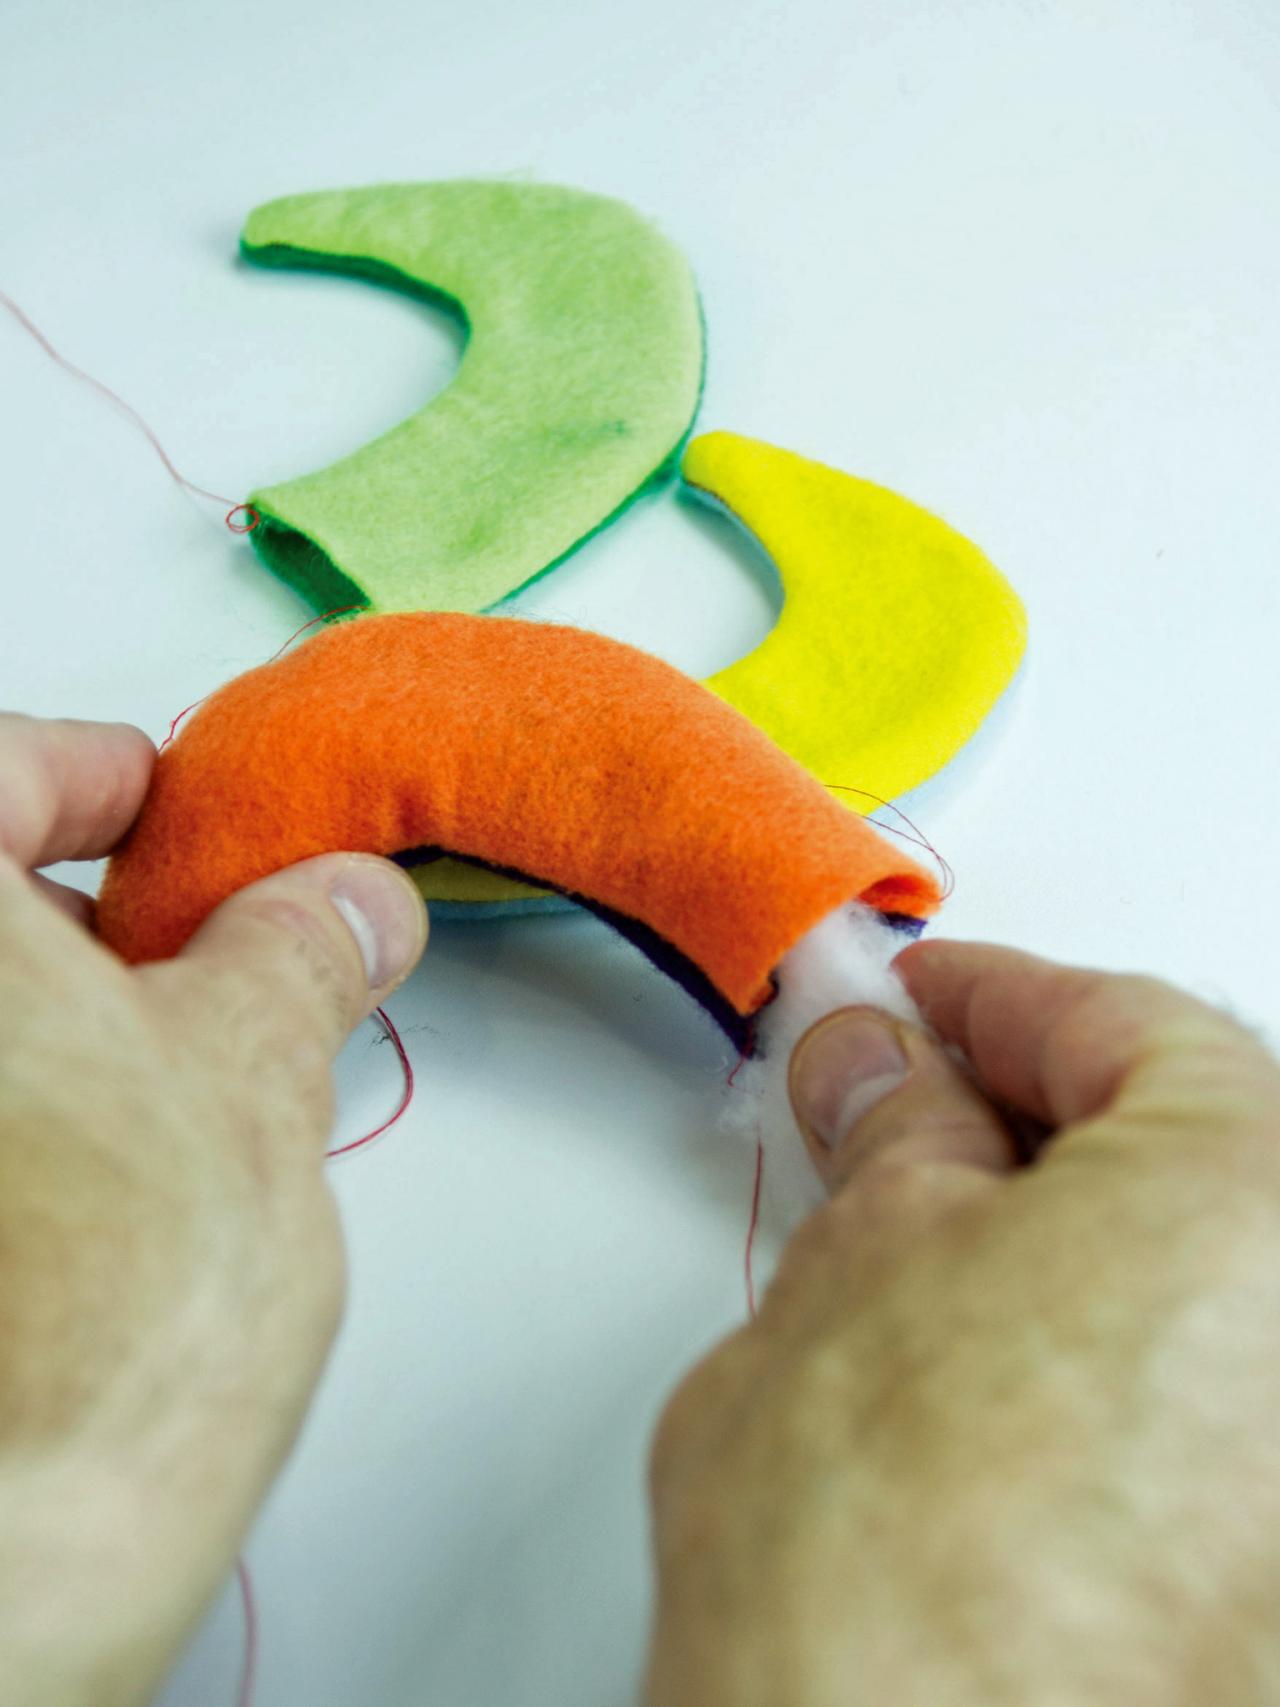
Sew two horn shapes together leaving the bottom open for stuffing (Image 1). Tip: Be sure to choose two different colors that you want next to each other. Remove any stray threads and carefully turn the horn inside out (Image 2). Stuff the horn with fiberfill and set aside (Image 3).


Step 3, Sew two horn shapes.
Sew two horn shapes together with colors you want next to each other on your hat.
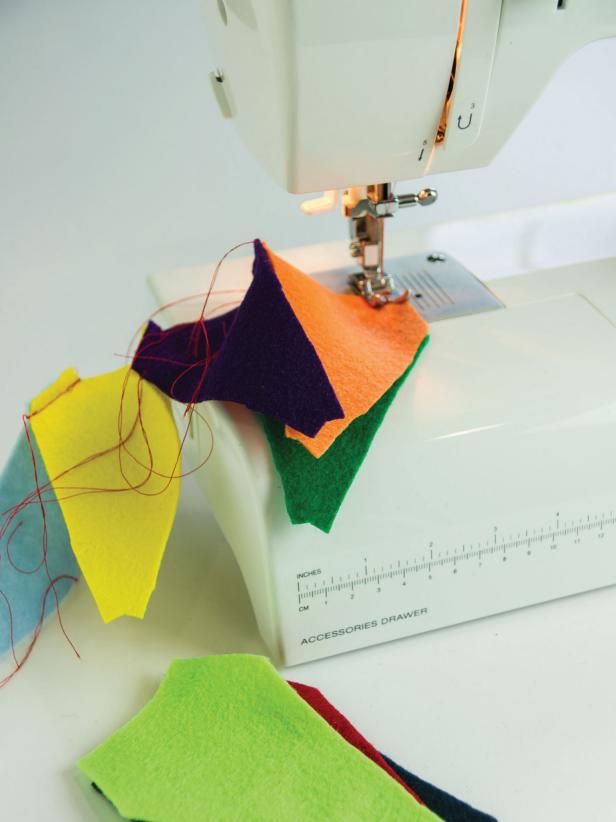
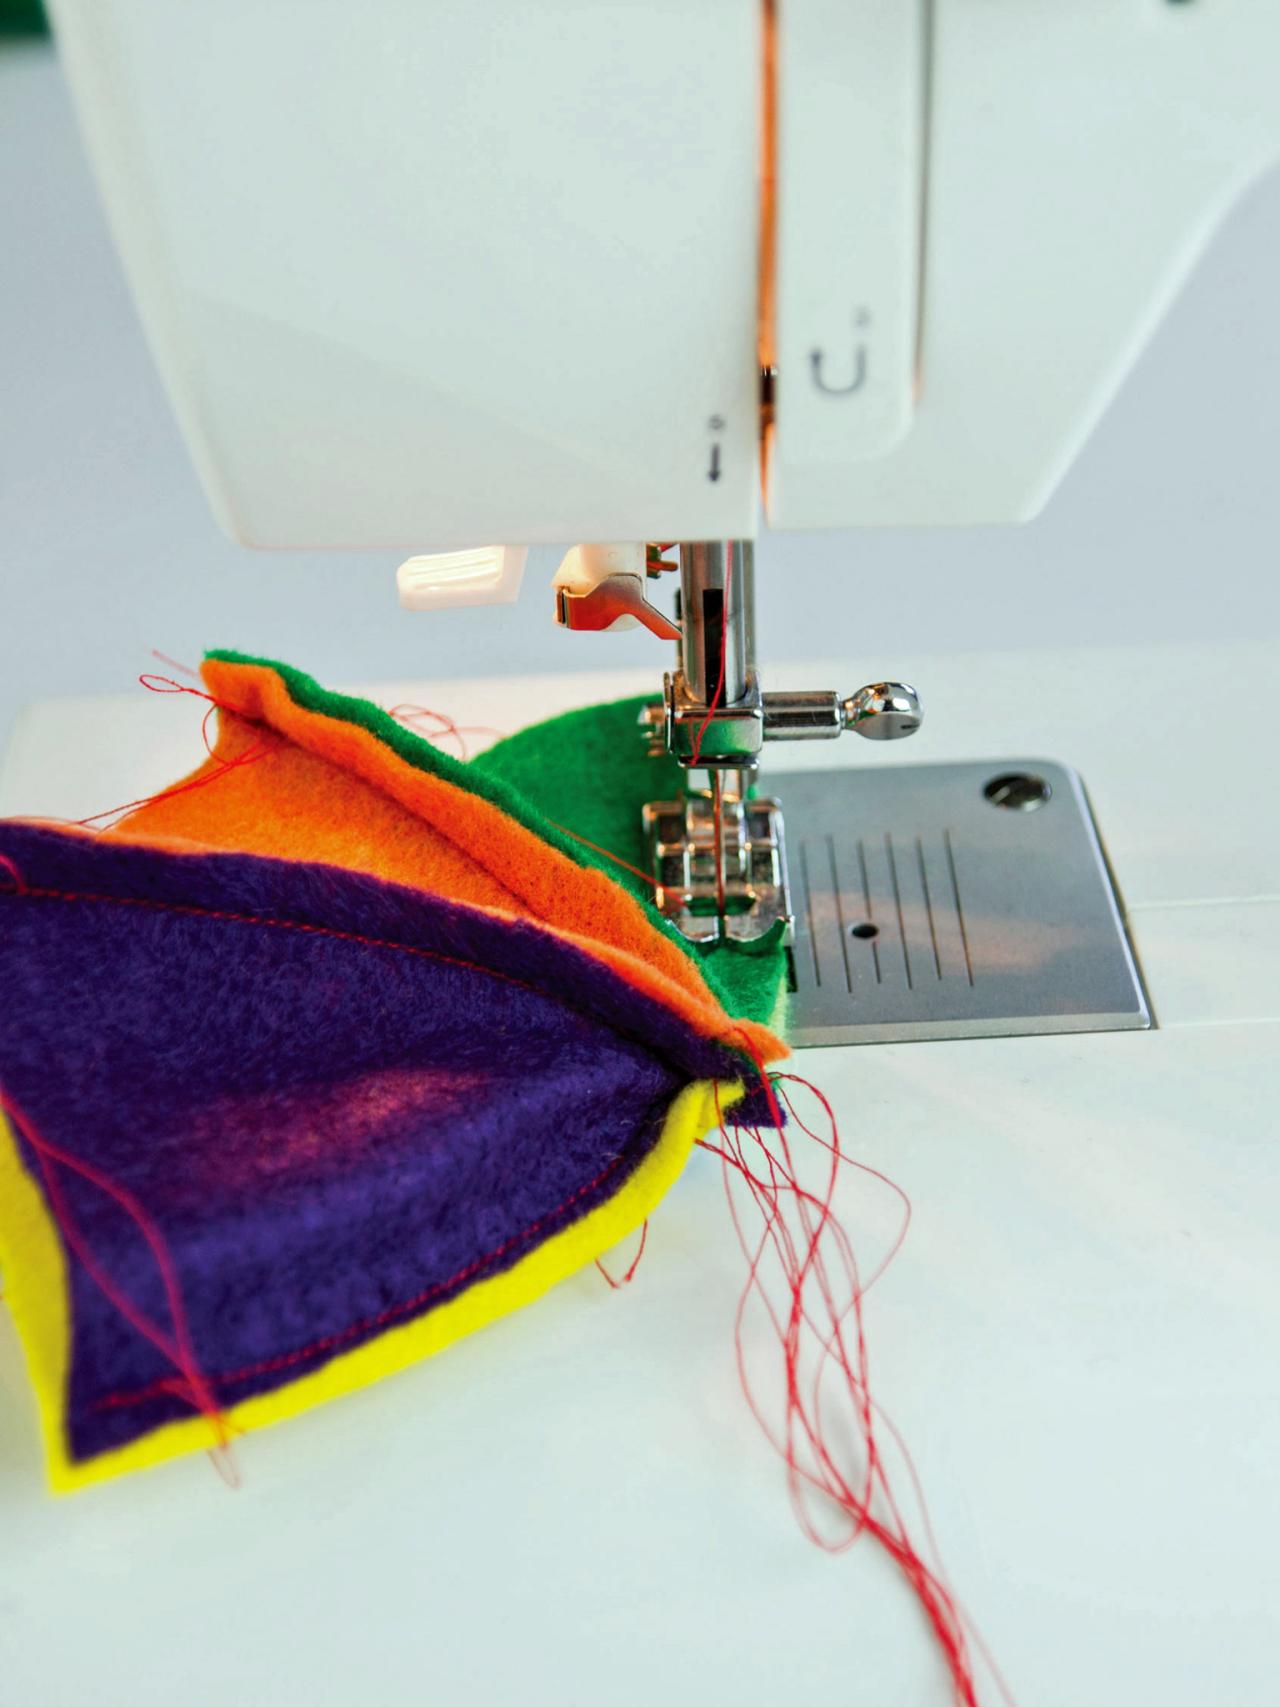
3. Assemble the Hat
Lay the hat pieces out in the color arrangement that matches the horns (Image 1). This will be the outside of the hat. Next, gather and pin the pieces together from the opposite side. Sew each of the sides together to create a bowl shape (Images 2 and 3) Then remove any stray threads. Repeat the bowl shape process with the 6 pieces of red felt that will make up the inside of the hat.

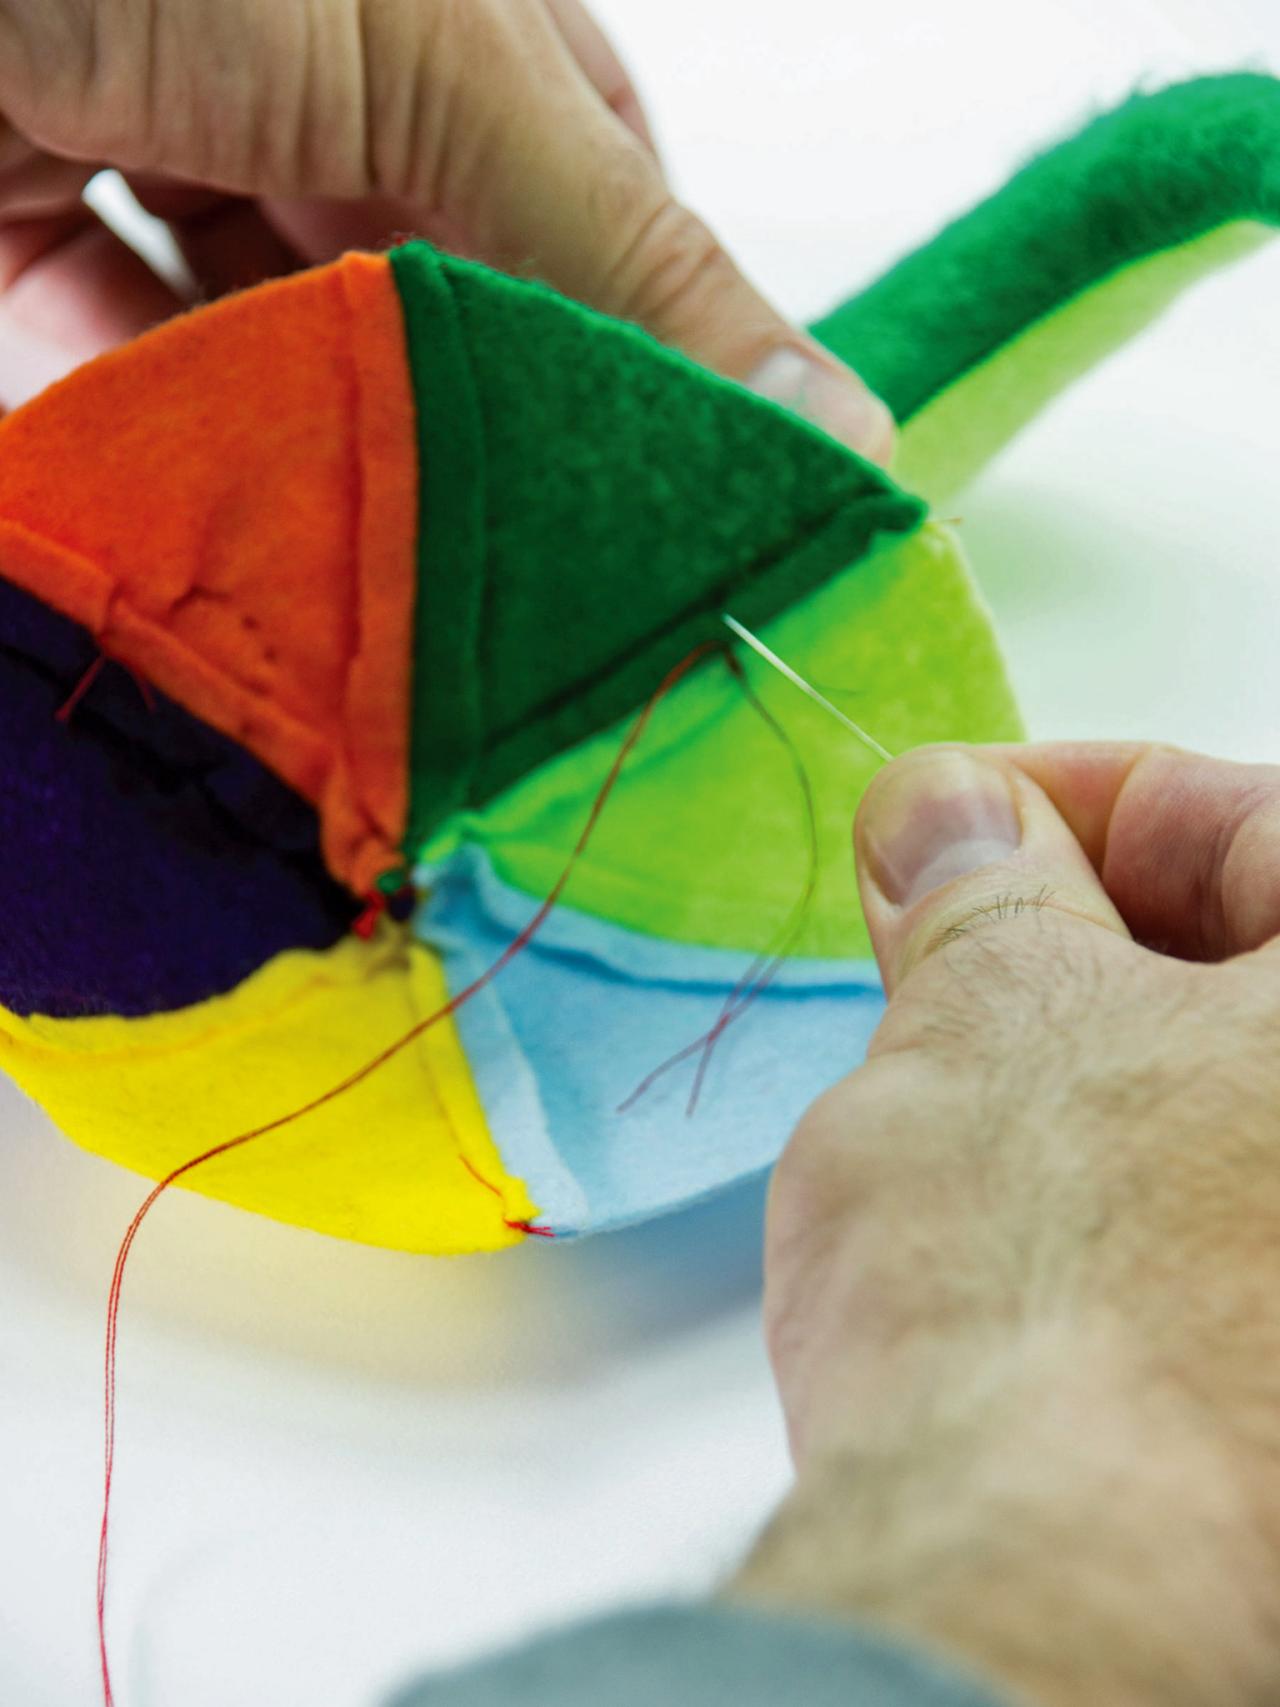
4. Attach the Horns
Hand-sew the horns to the outside of the colorful hat base matching up the colors and seams. Tip: The horn should start about 1-1/2" from the top/center of the hat. Tuck in fabric from the base of the horn as you sew.

Step 10, Sew Horns to Hat
Hand sew the horns to the outside of the colorful hat base matching up the coors and seams.
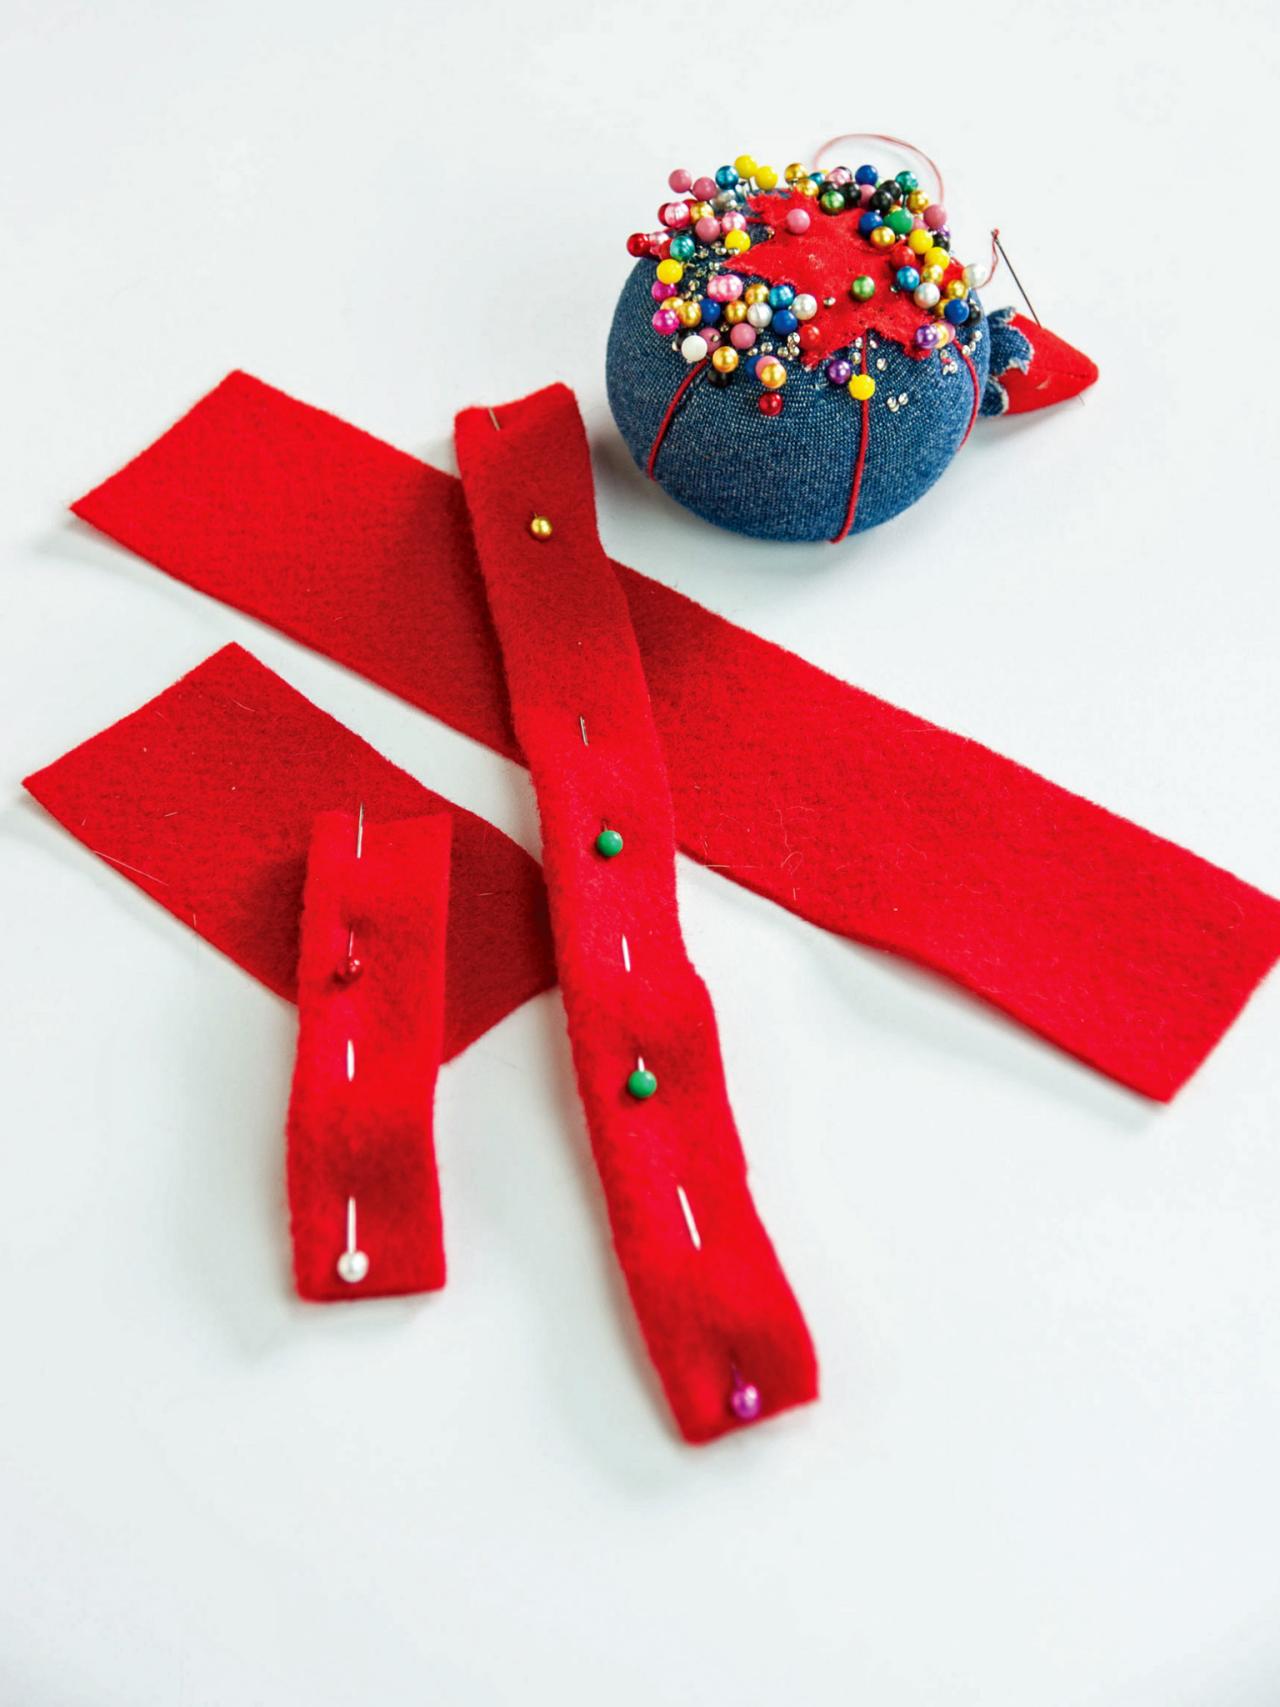
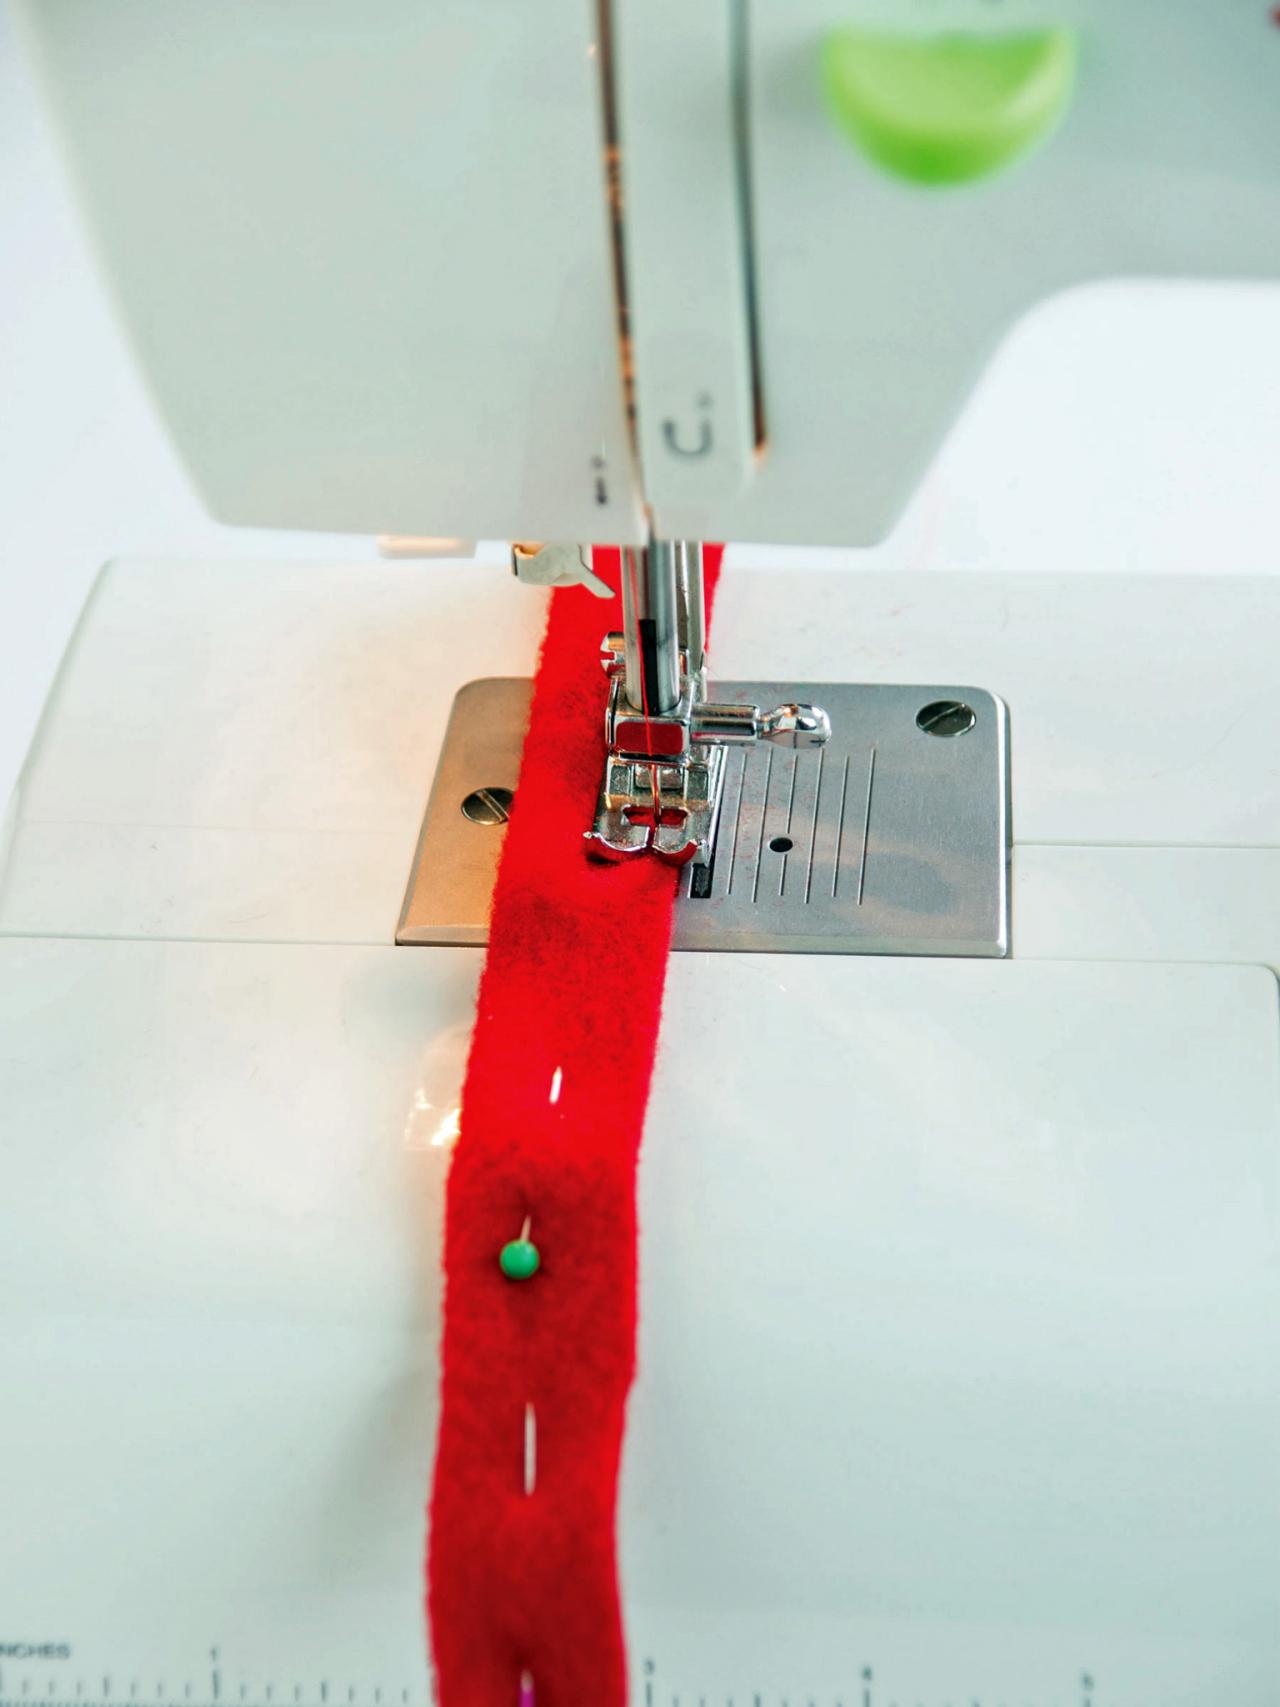
5. Create the Hat and Collar Straps
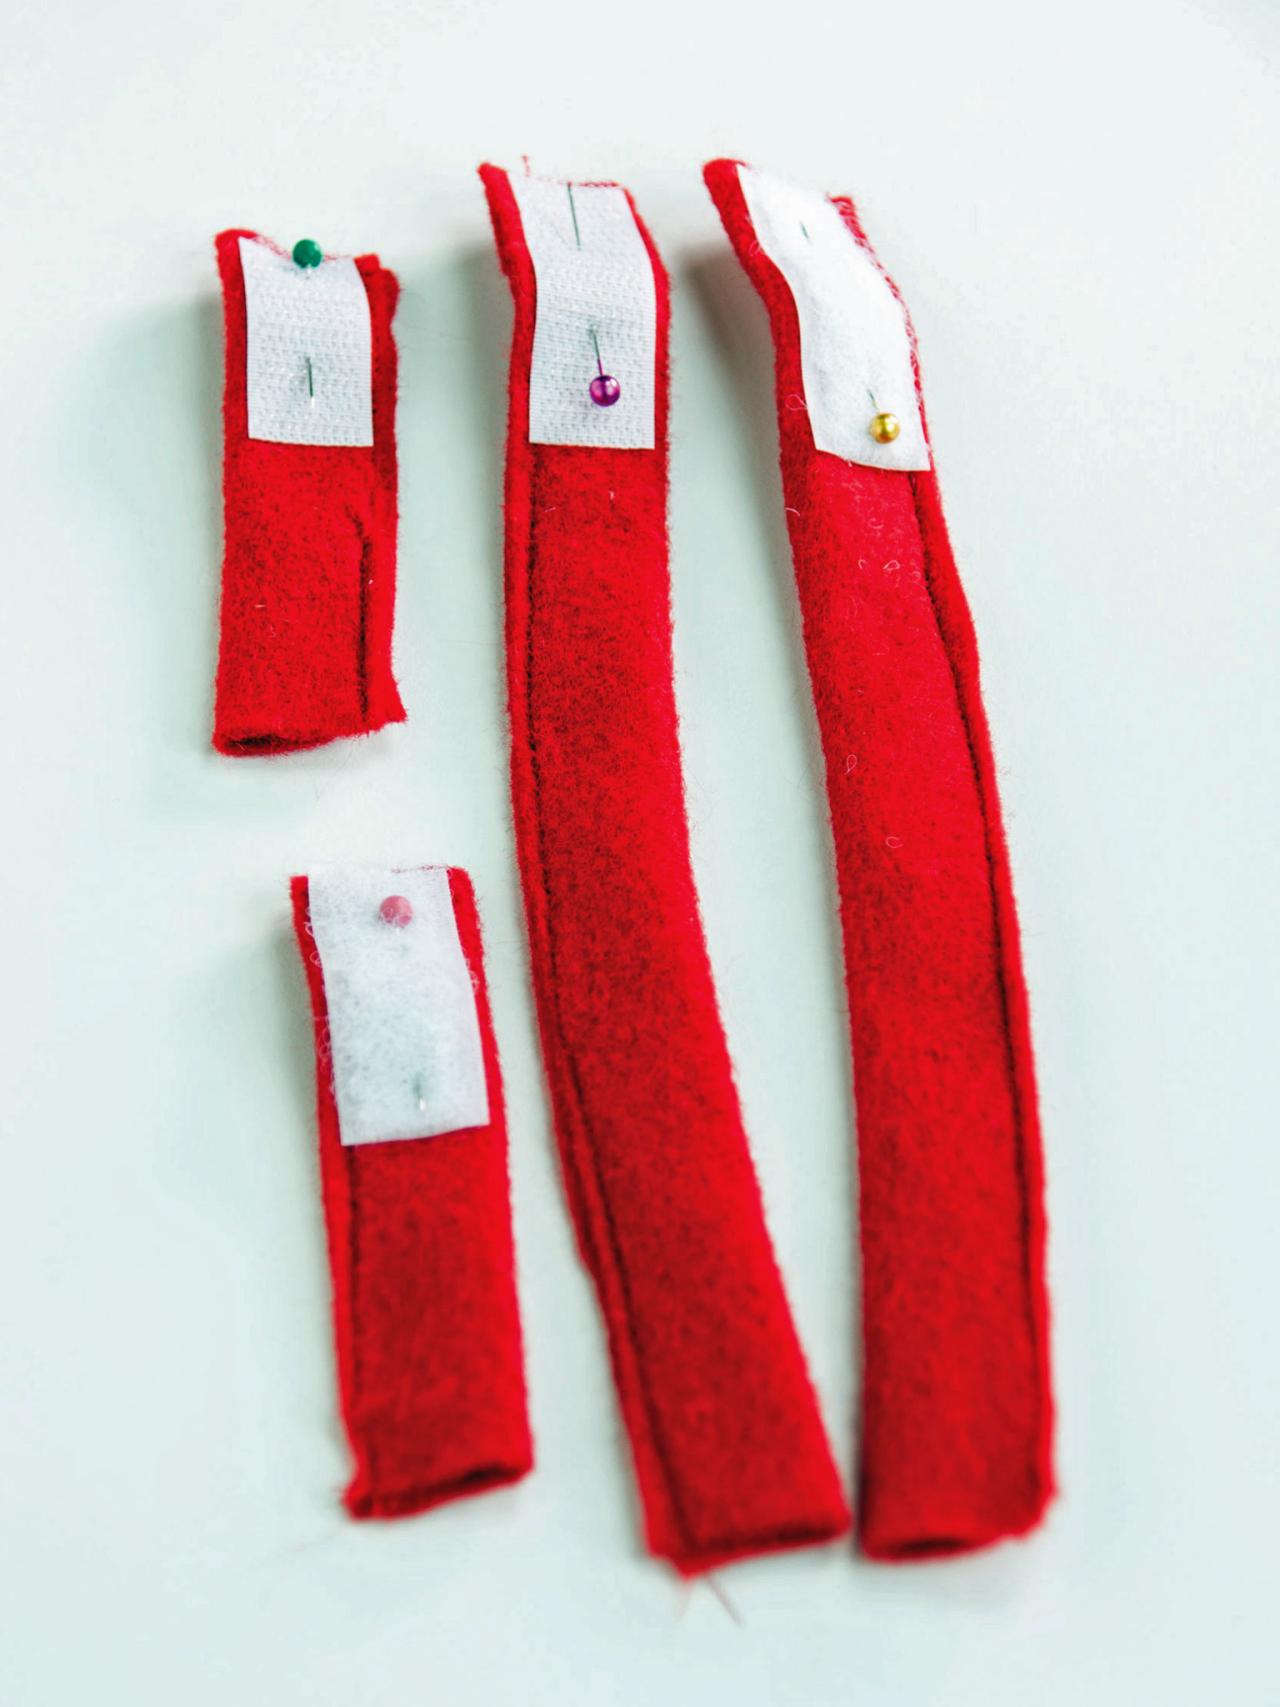
Cut 2 pieces of red felt 1-1/2" wide by 8-1/2" long for the hat straps and 2 pieces that are 1-1/2" wide by 3-1/2" long for the collar straps (Image 1). Fold them in half lengthwise, pin, then sew to create a strap (Image 2). Sew 1" corresponding Velcro pieces onto one end of each of the straps (Image 3).

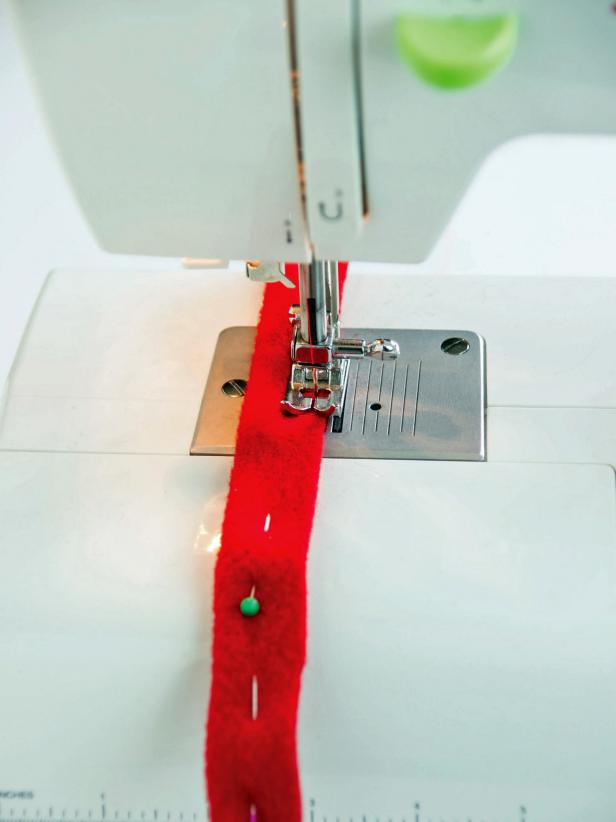

Step 13, Cut and Sew Hook and Loop Tape
Sew 1 inch corresponding hook and loop pieces to the one end of each of the straps.
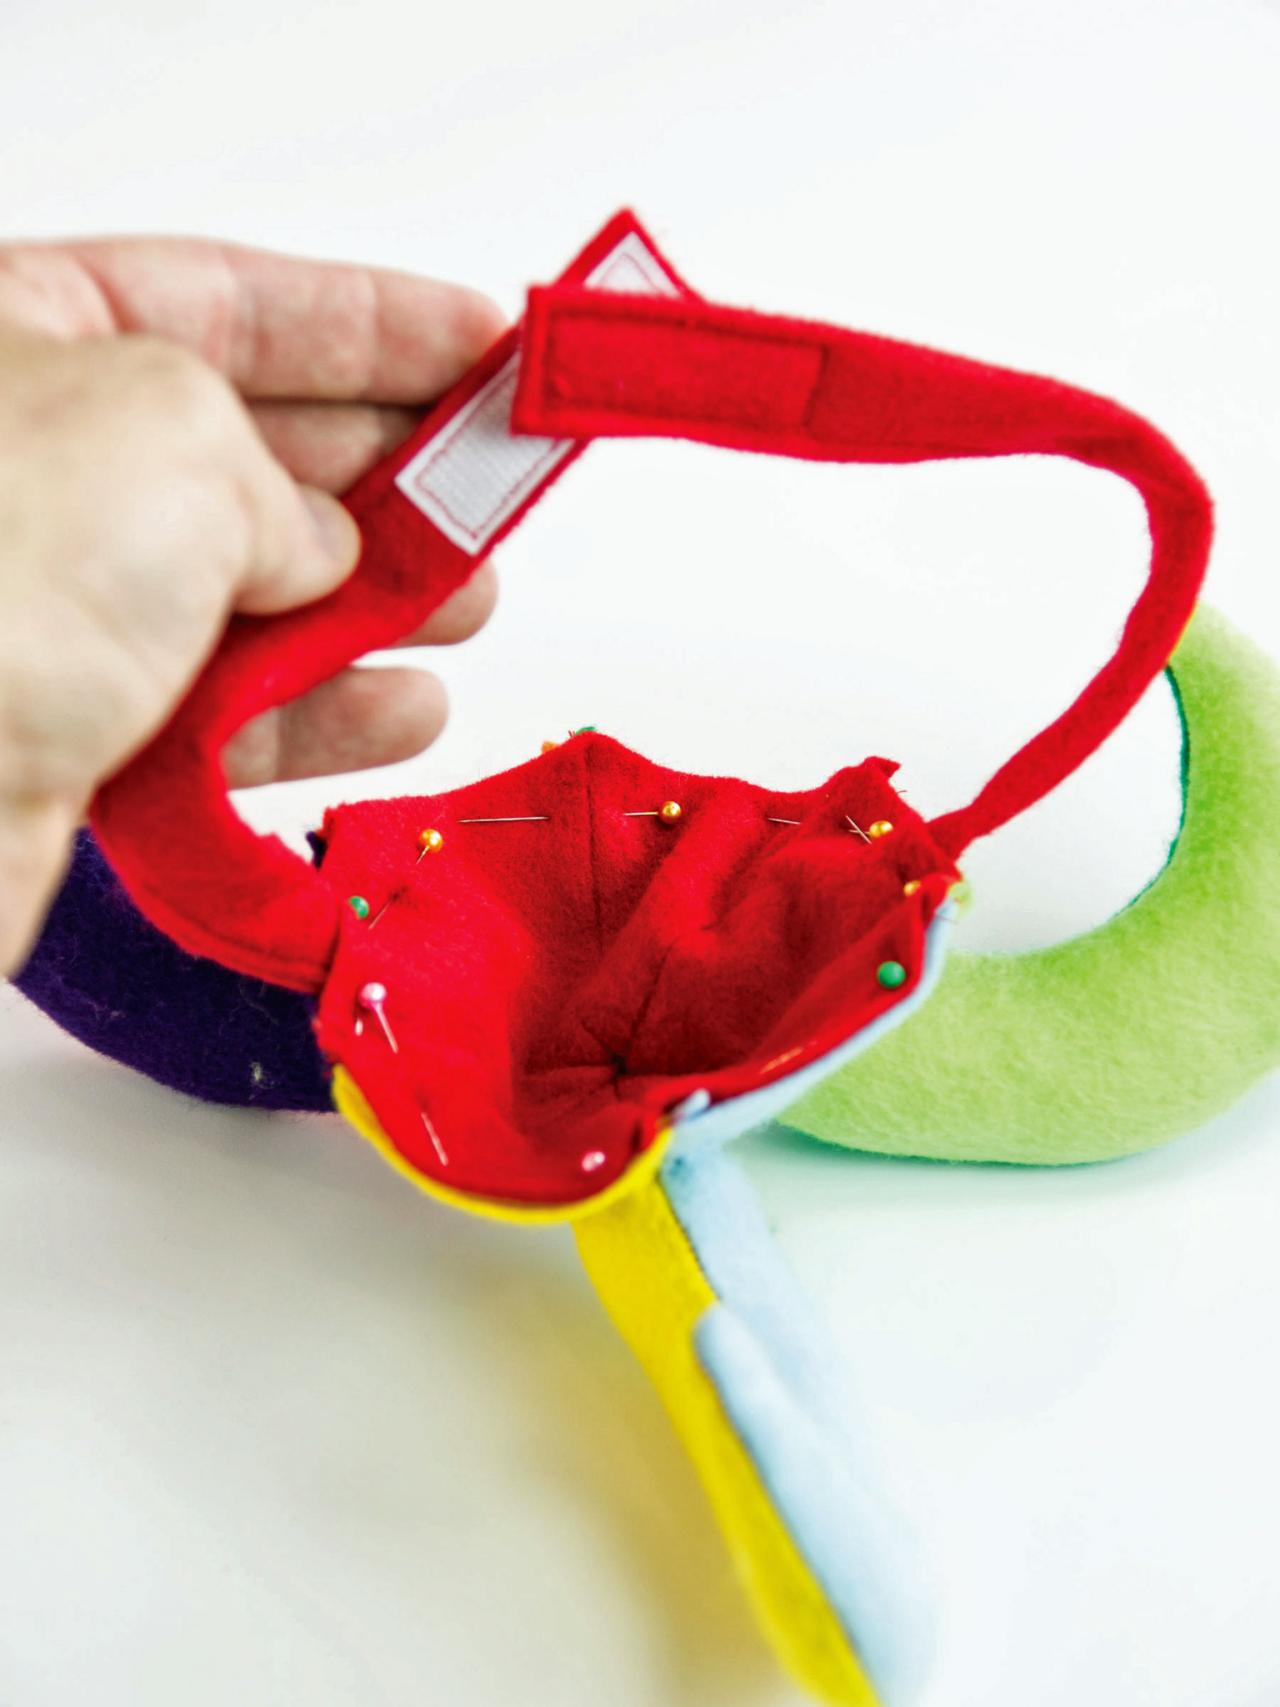
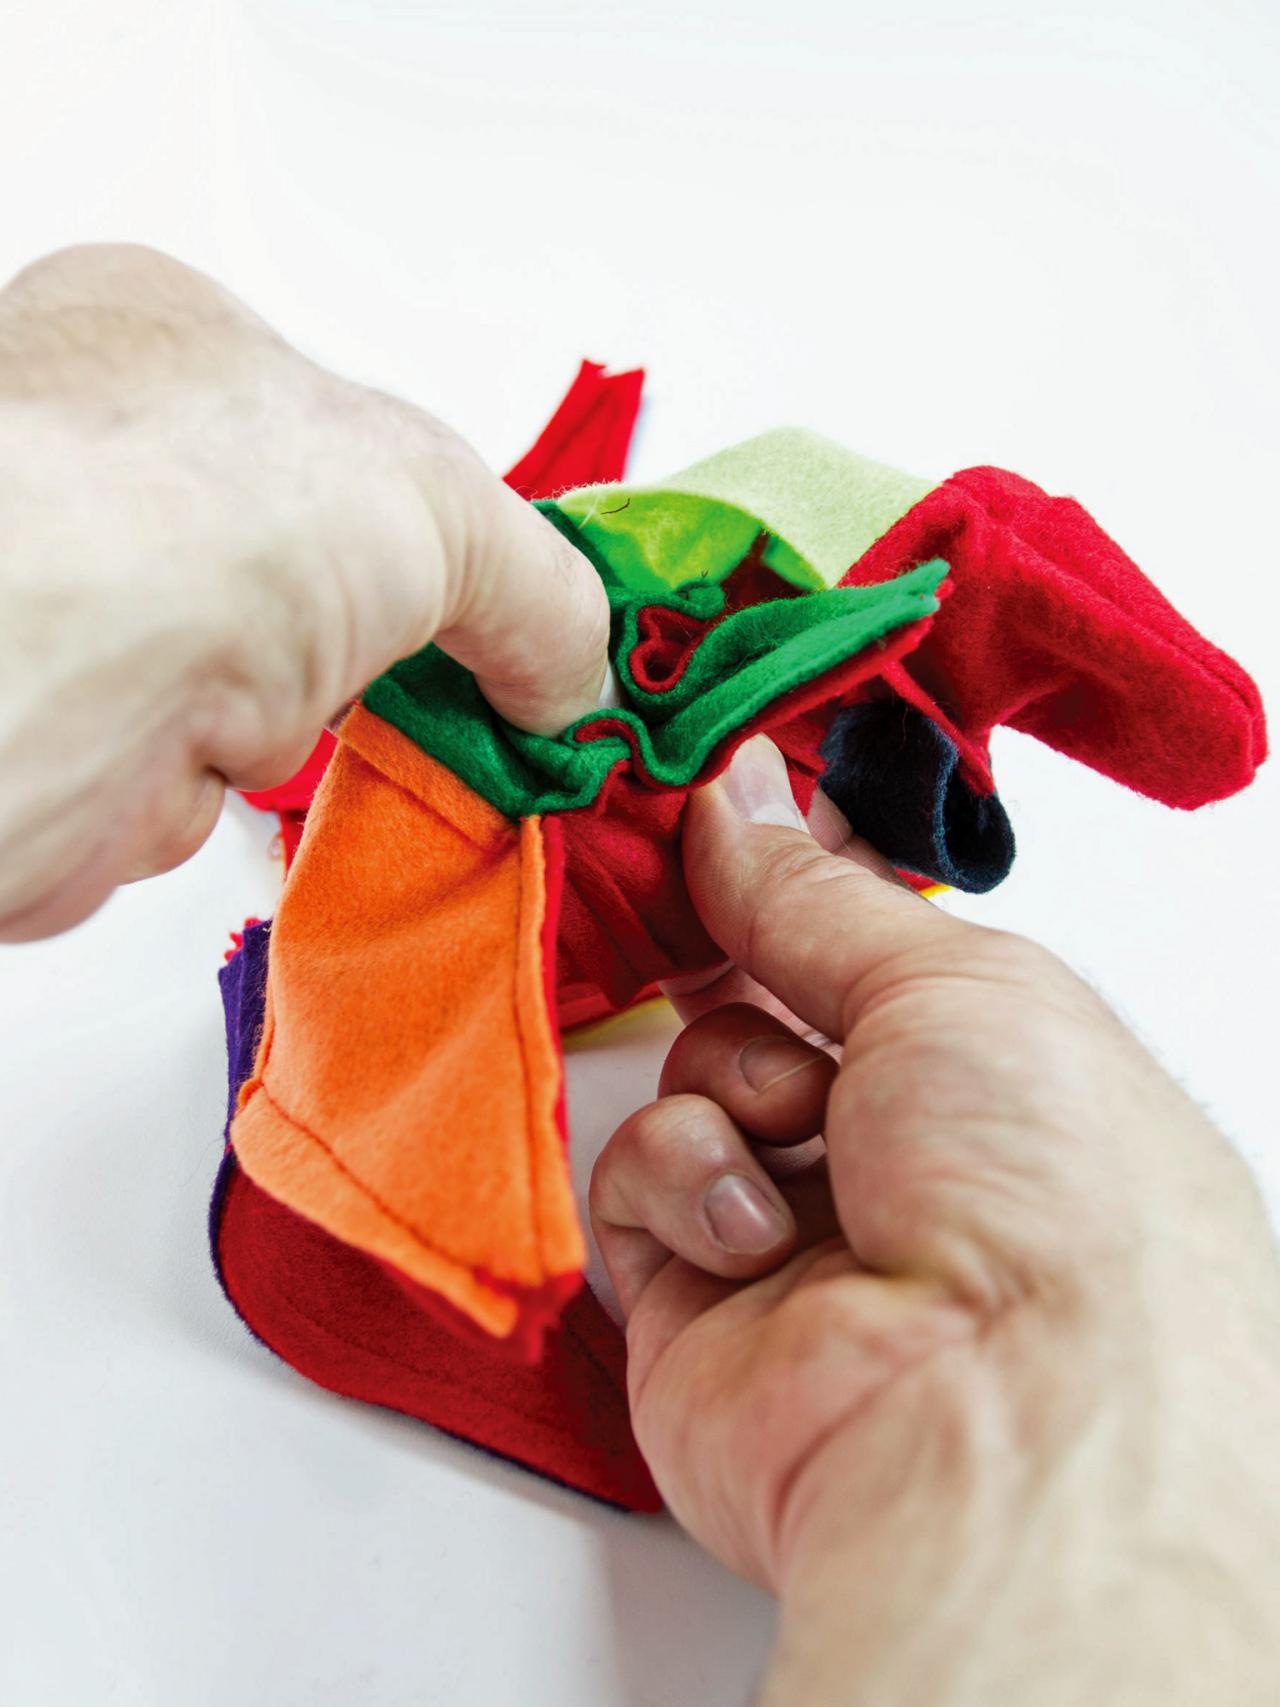
6. Attach Liner and Hat Strap
Place the red bowl shape inside the hat with the seams inside. Insert 1/2" of each strap on either side of the hat and pin in place making sure they are turned correctly so that they fasten together. Pin and carefully sew the two hat pieces and straps together 1/4" from the edge. Cut away any excess fabric and stray threads.

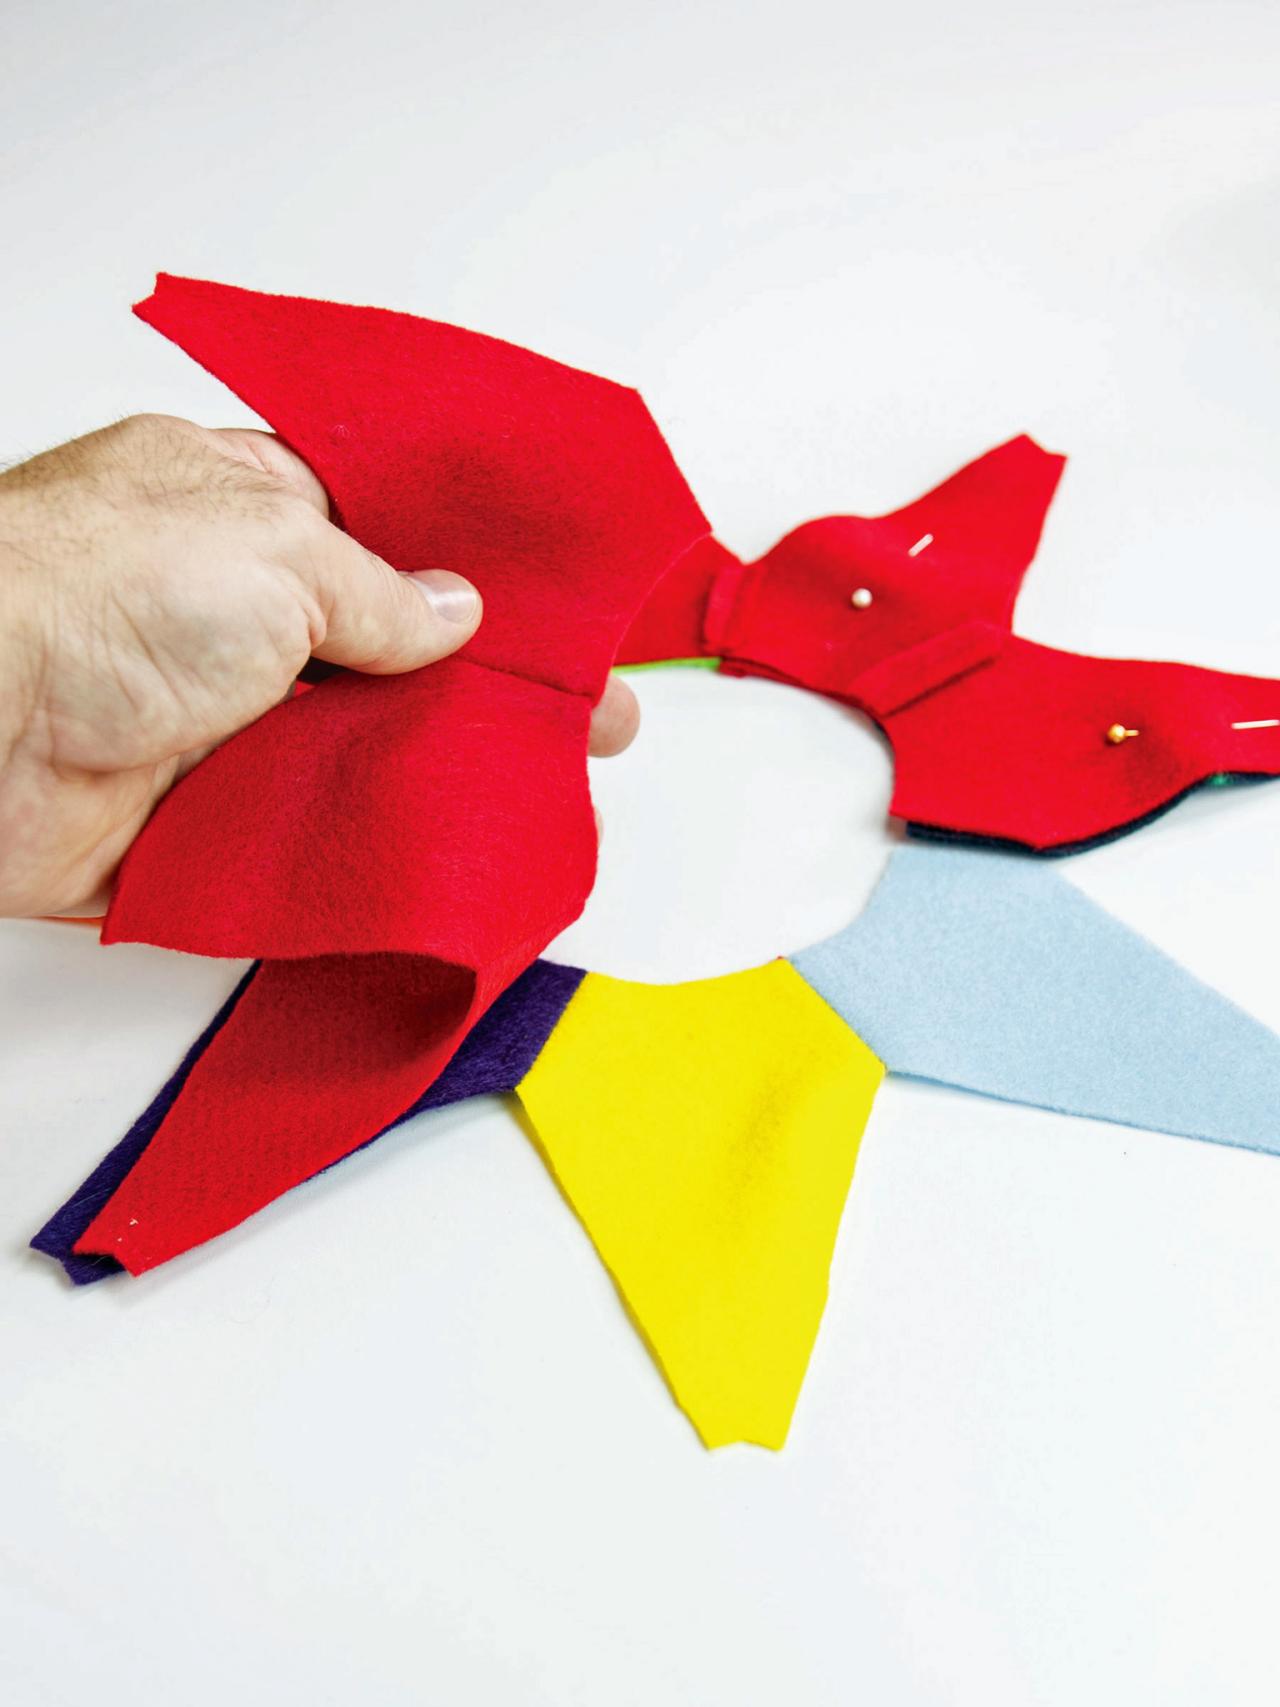
7. Start the Collar
Print four copies of the collar templates and cut them out. Using the templates, cut out the collar's points — you will need one of each of the 8 colors of felt and 8 of the red felt. Pin the sides together in the arrangement you prefer then sew the sides together with the machine leaving the last 2 disconnected. Repeat this process with the red felt. Press the seams flat and open with a warm iron. Place the collar pieces together with the points facing outward and pin them together (Image 1). Sew the two layers together leaving the last two sides disconnected. Next, carefully turn the points inside-out pushing the tip out as much as possible (Image 2), then press the seams flat with a warm iron.


Step 15, Sew Sides of Collar
Cut our the fabric for collar and pin the sides together in the arrangement you prefer. Sew the sides together.
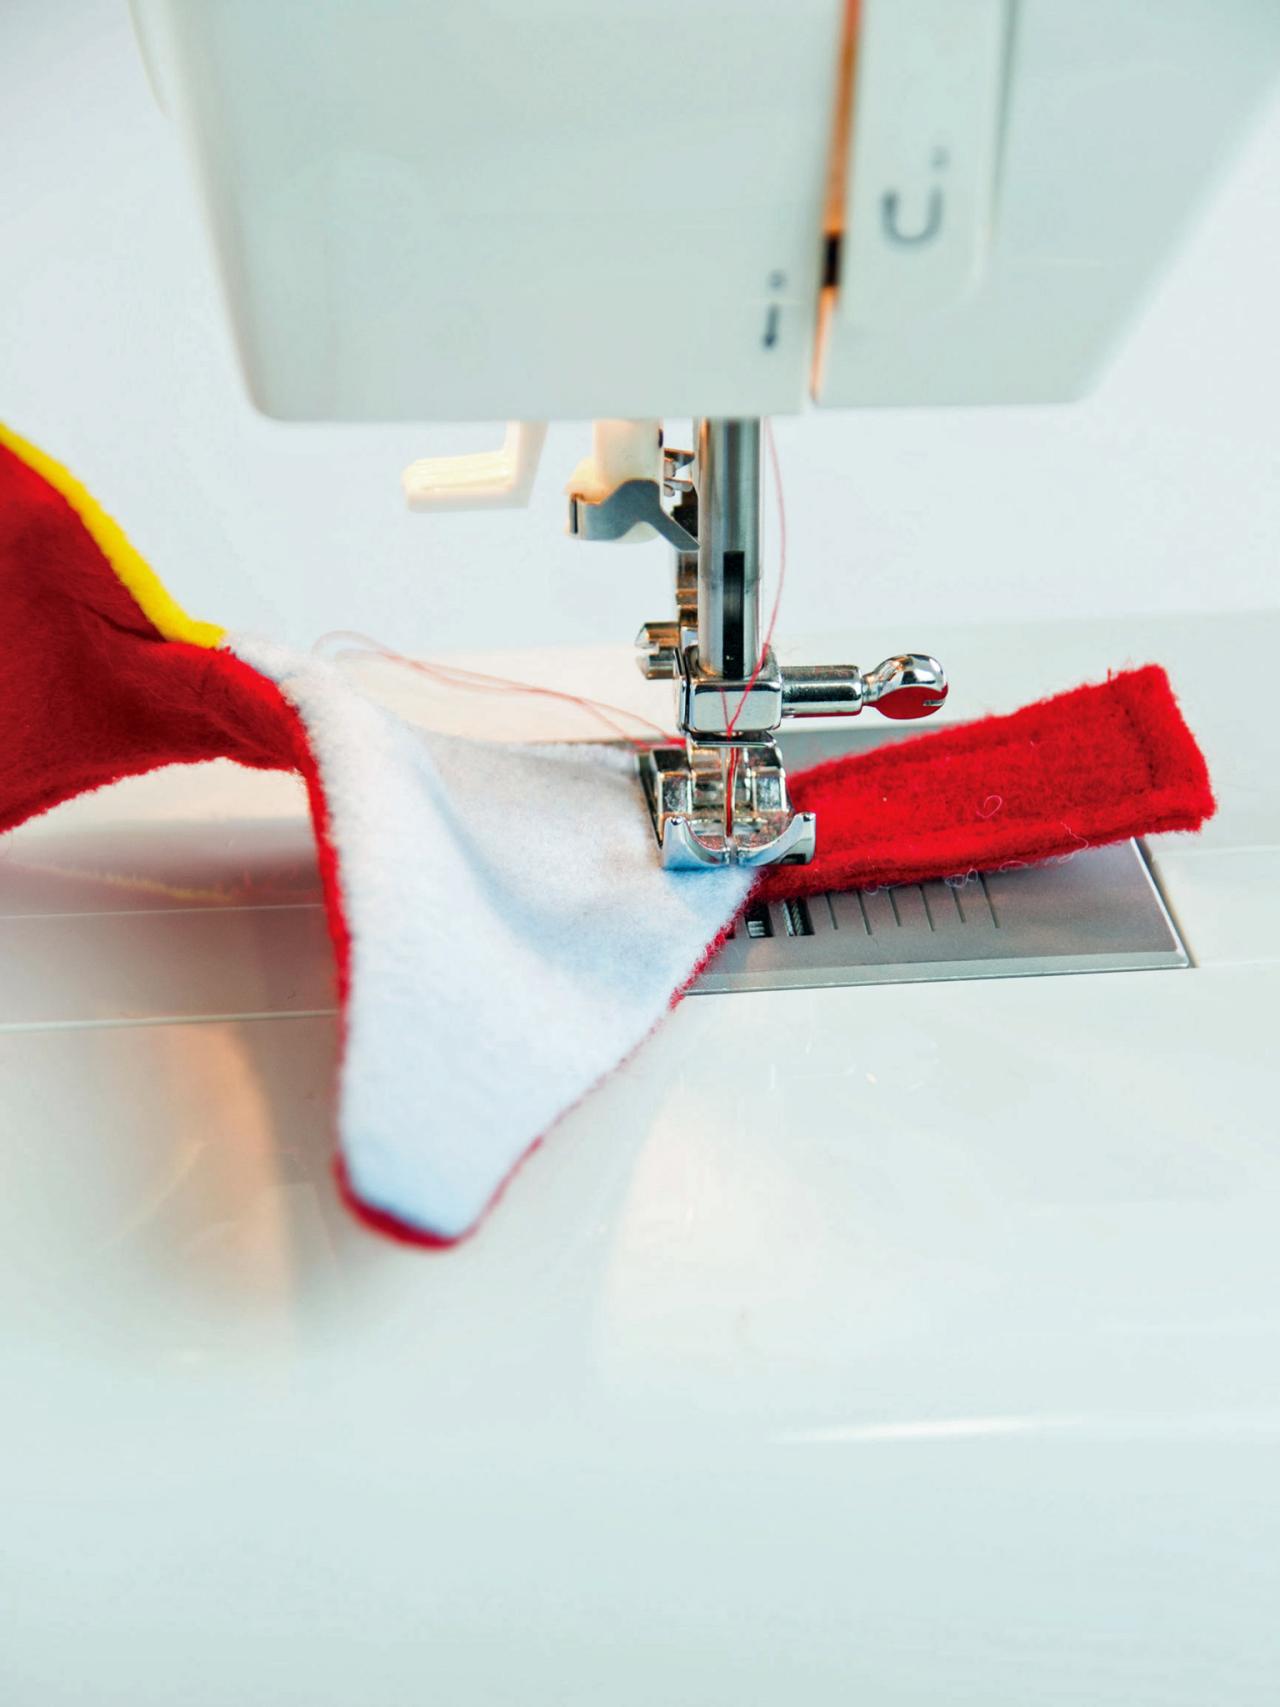
8. Create the Collar Closure
Sew across the top of the circle 1/4" from the edge, stitching the two layers together but still leaving the last two sides open (Image 1). Insert the 3-1/2" red felt and Velcro strips you made earlier into the two ends of the collar that you have left open and sew them in place with back stitching at the beginning and end (Image 2). Remove any stray threads.


Step 18, Sew on Straps
Sew the 3 half inch straps with the hook and loop tape into both openings left on the sides of the last two points.
9. Add Bells
Finally, hand-sew the 11 jingle bells onto the tips of the hat horns and collar points.


