


Jazz Up a Plain Tablecloth With a Colorful No-Sew Patchwork Detail
Time to spice up that boring, bland dining space? Easily turn assorted patches of colorful, patterned fabric into a vibrant Moroccan-inspired tablecloth that’s no-sew, so anyone can make it.

© Rustic White Photography, LLC

Materials Needed
- cotton or linen fabric in various colors and patterns
- base tablecloth in desired size
- fusible adhesive spray
- ironing board and iron
- scissors
- books or frames of various sizes
- fabric glue
- pen or pencil
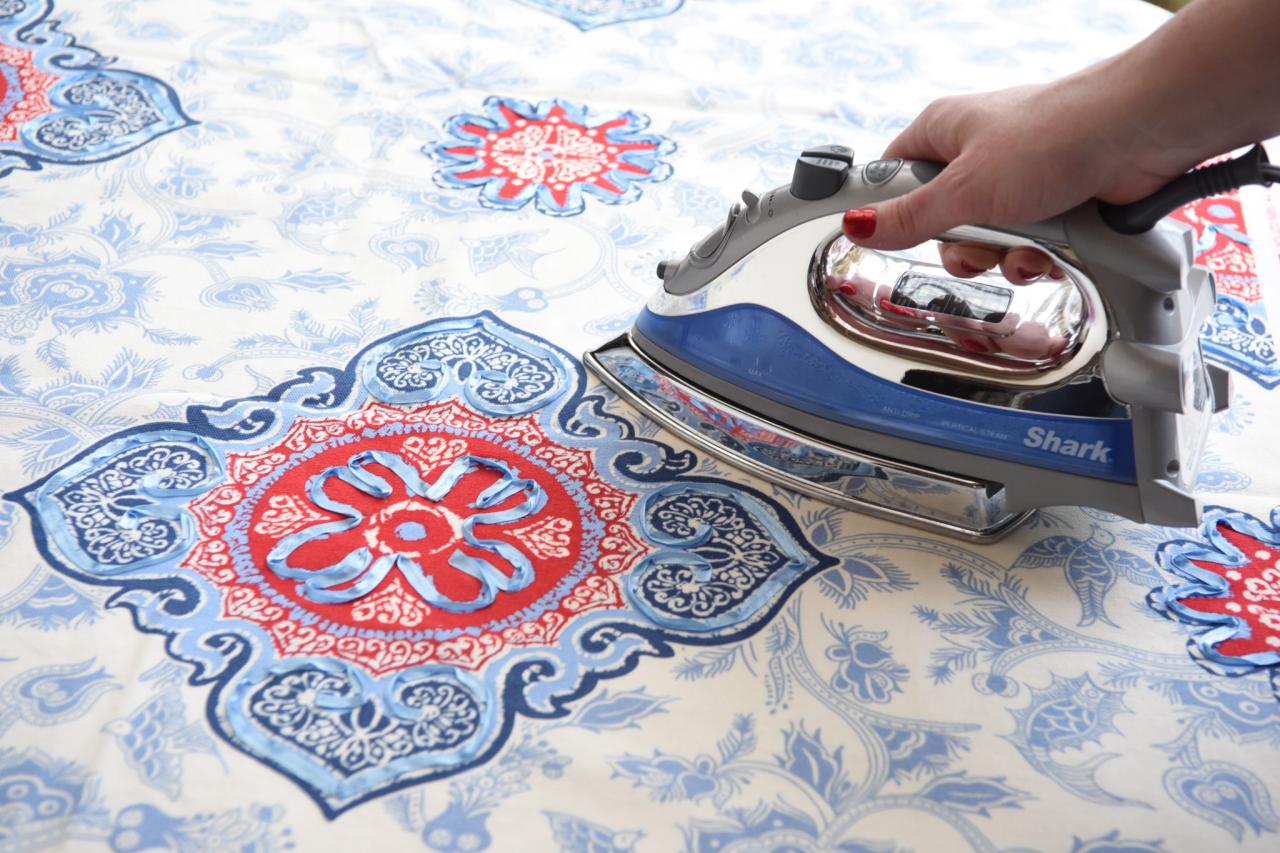
Iron Fabrics
Iron your base tablecloth and patterned fabrics and set aside.

Trace Shapes
To get a nice variety of shapes we used different sized books and other square or rectangular accessories as our templates. Using a pencil, trace around these items onto the backside of the fabric, butting the traced shapes against each other to make the most of your fabric. Tip: Trace several different sizes and shapes onto each fabric pattern.

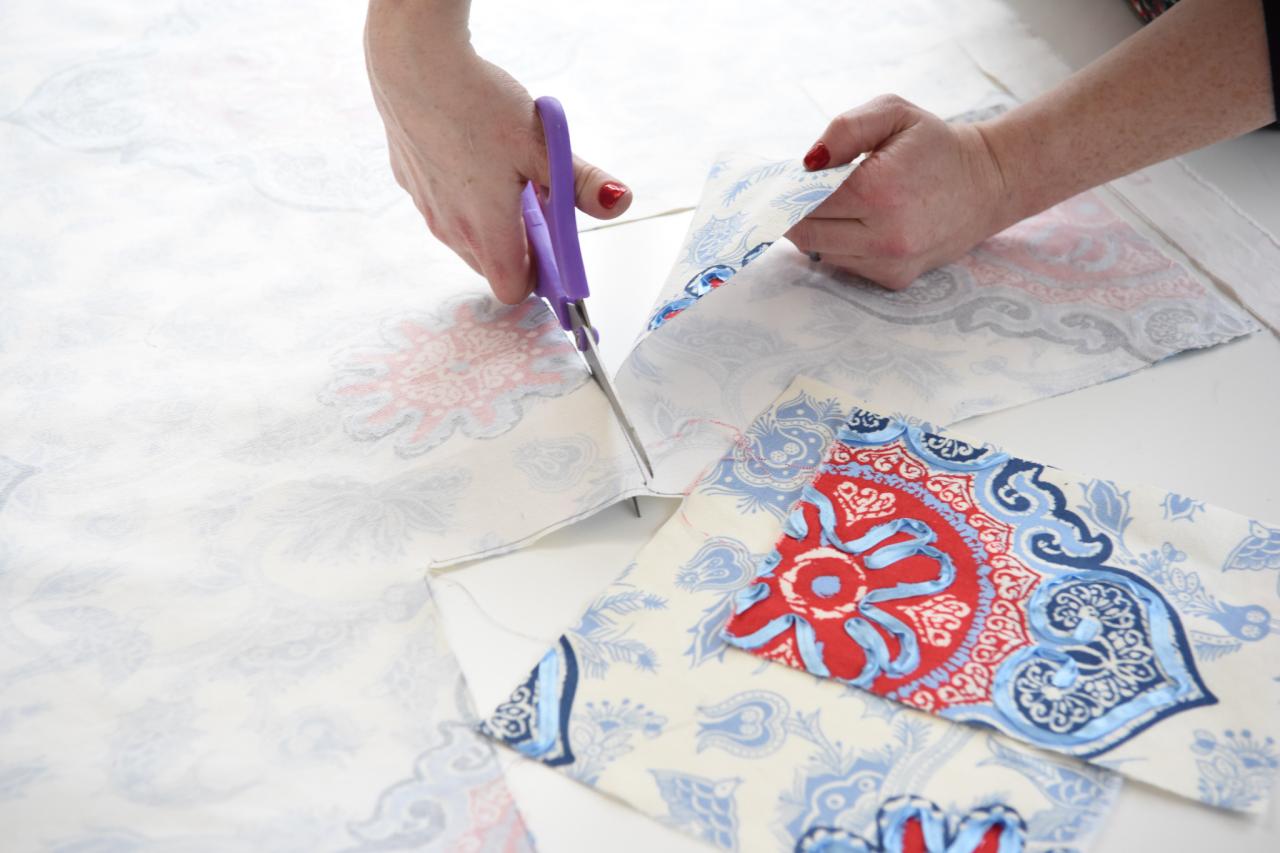
Cut Out Patches
Cut out the various fabric patches using scissors.

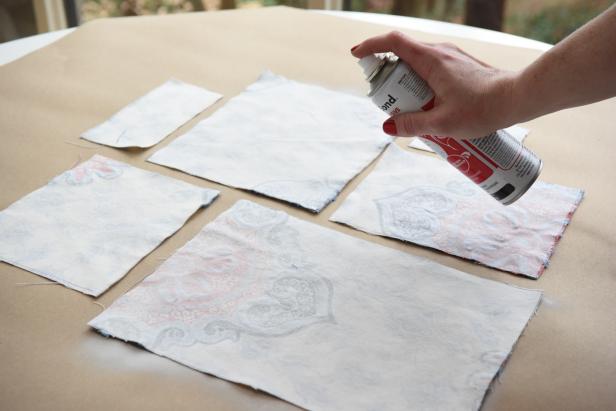
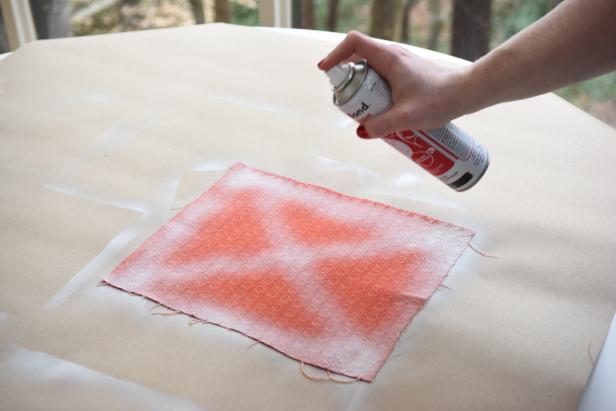
Apply Adhesive
Protect your work surface with a drop cloth or tarp, then top with the fabric patches, placed face down. Next, holding the fusible adhesive can 8-10 inches above the fabric (Image 1), apply adhesive in short bursts, making sure to coat the edges and cross the center in an X (Image 2). Apply adhesive to all fabric patches. Tip: The adhesive is heat triggered so there’s no time limit on this step.
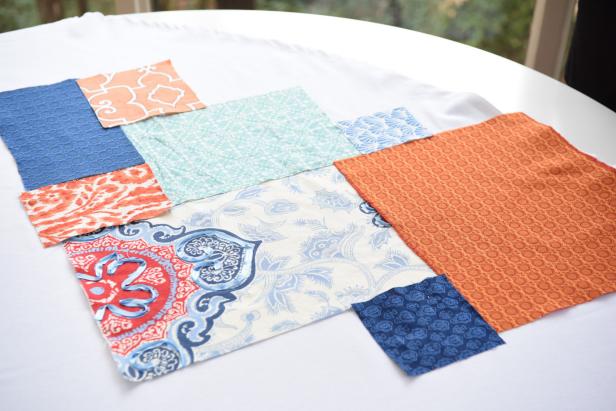
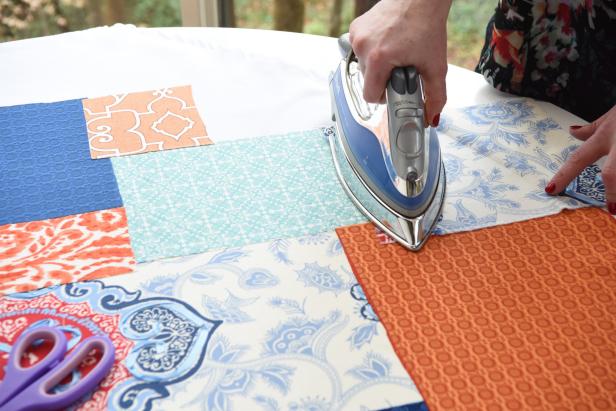
Attach Patches
Place base tablecloth on a flat work surface and, working in small groupings, place patches in a pattern you like (Image A). When you're happy with the color/pattern mix in an area, activate the adhesive, setting the patches in place with a hot dry iron. Do not use steam (Image 2). Repeat these groupings until the tablecloth is completely covered.
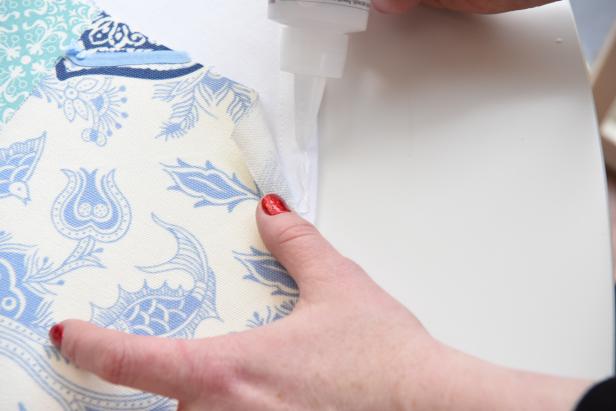
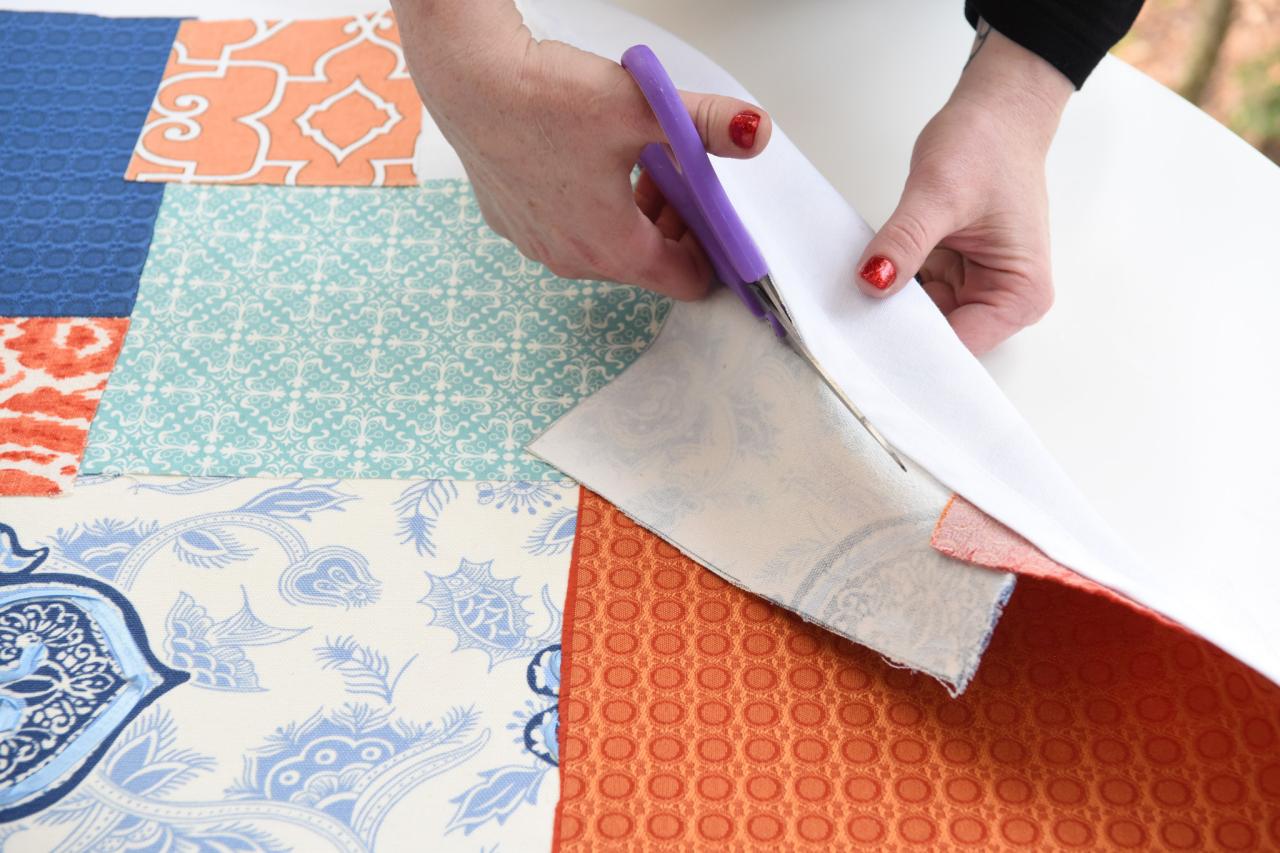
Finish Edge
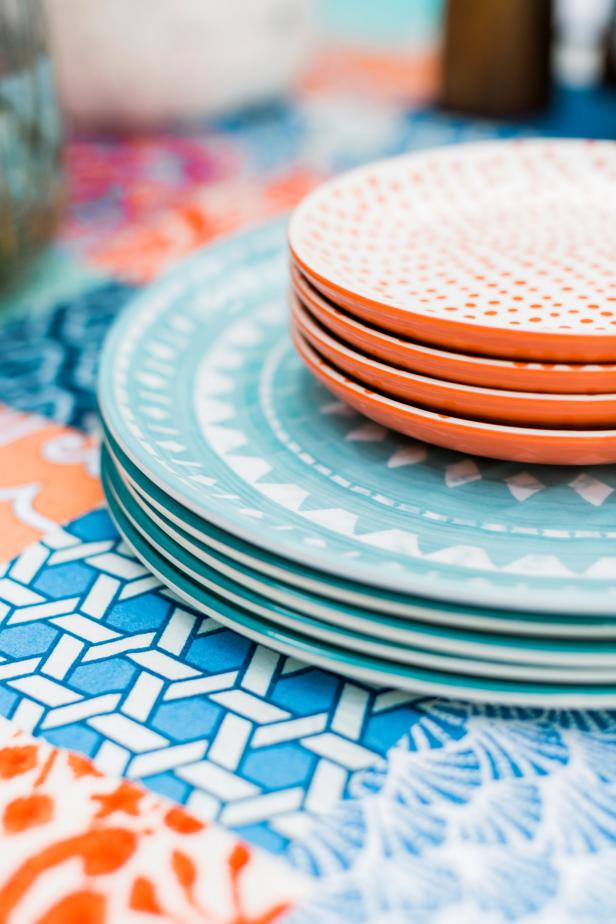
To finish, trim your fabric patch to the edge of the base tablecloth (Image 1). Then, run a bead of fabric glue along the tablecloth's edge and press the fabric patch into place (Image 2). Set the table with plates in coordinating cheery colors for extra oomph (Image 3).

© Rustic White Photography, LLC


