


Easily Monogram Christmas Stockings With This No-Sew Cross Stitch Trick
Whether creating holiday heirlooms for your family or giving as a handmade gift, these personalized stockings look just like the hand-stitched version but come together much quicker and without needle and thread.

No-Sew Monogrammed Christmas Stockings
Whether creating holiday heirlooms for your family or giving as a handmade gift, these personalized stockings look just like the hand-stitched version but come together much quicker and without needle and thread.

Photo by: Derek Trimble; Styling by H. Camille Smith
Derek Trimble; Styling by H. Camille Smith
Materials Needed
- cotton or linen stockings
- iron-on cross stitch monogram pattern
- iron (with cotton setting)
- fabric markers
- upholstery trim
- permanent fabric glue
- painters’ tape
- scissors
- straight pins
- ruler
- pencil or pen
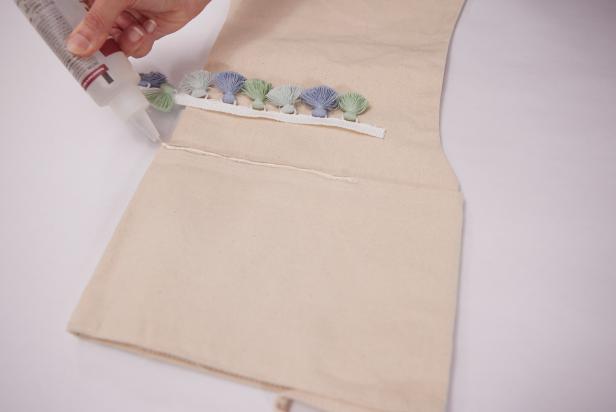
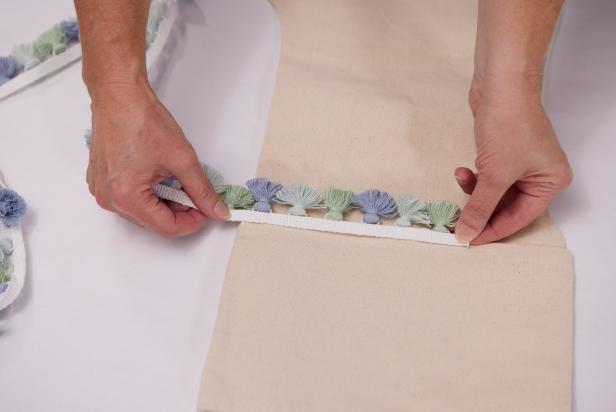
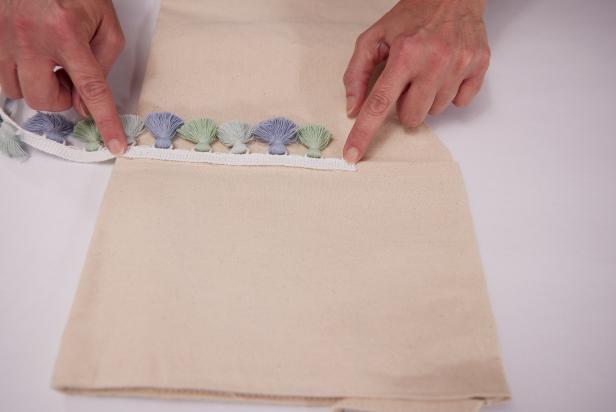
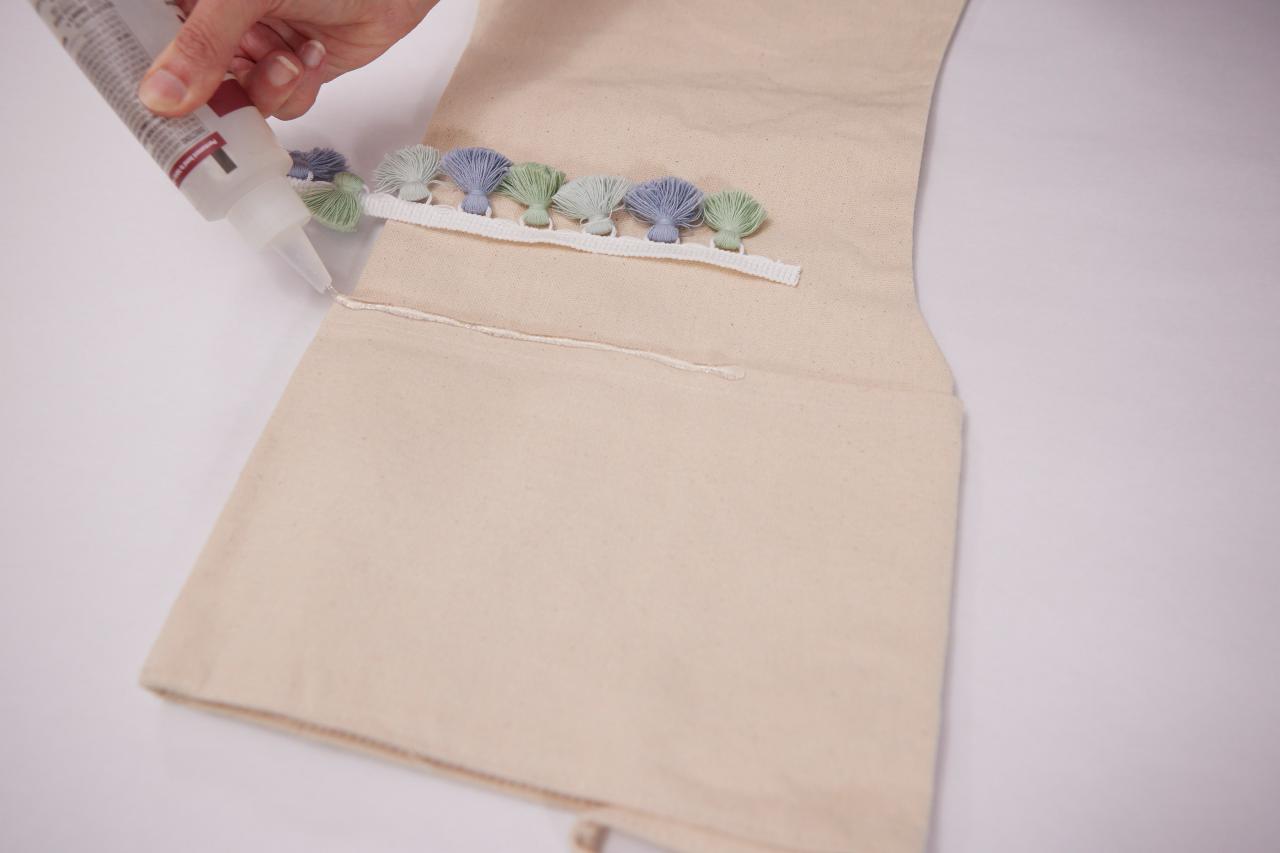
Begin Adding Upholstery Trim
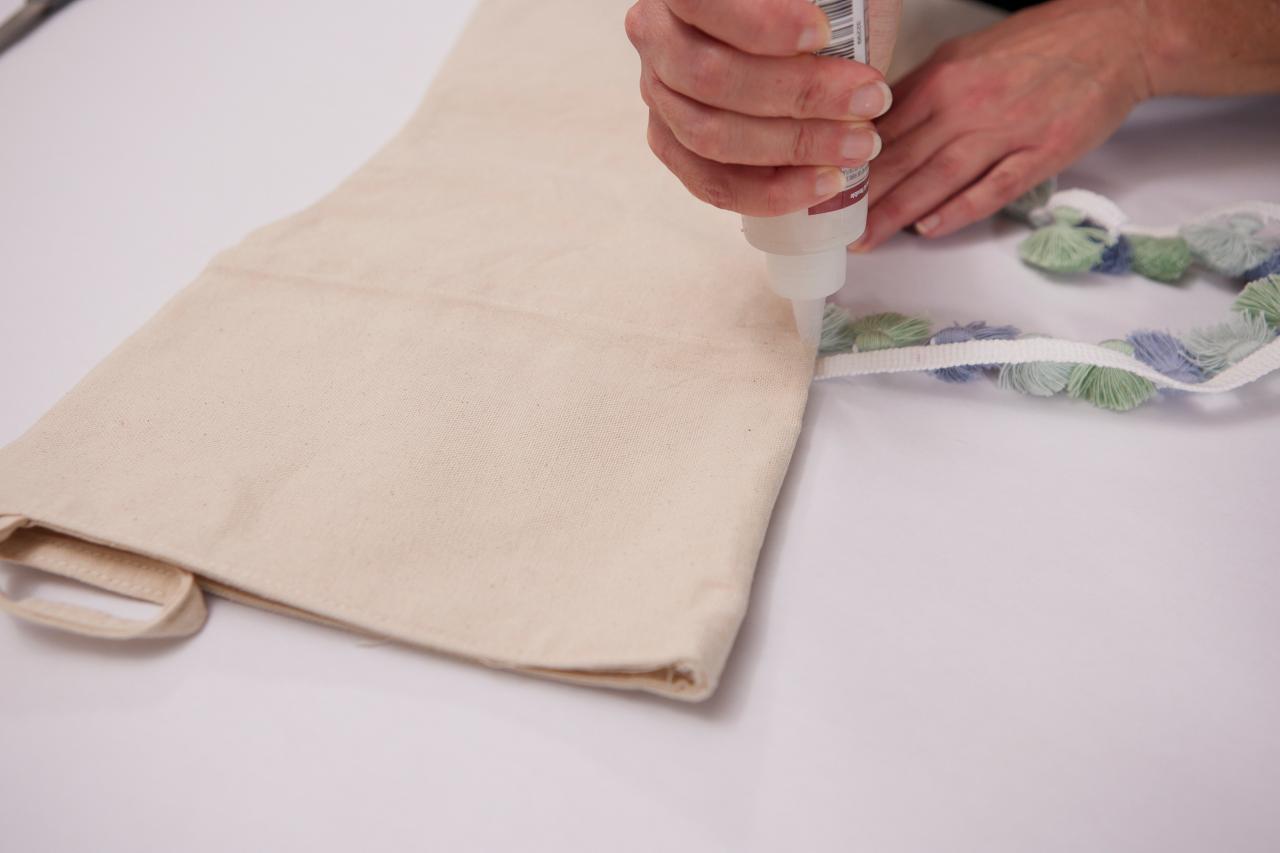
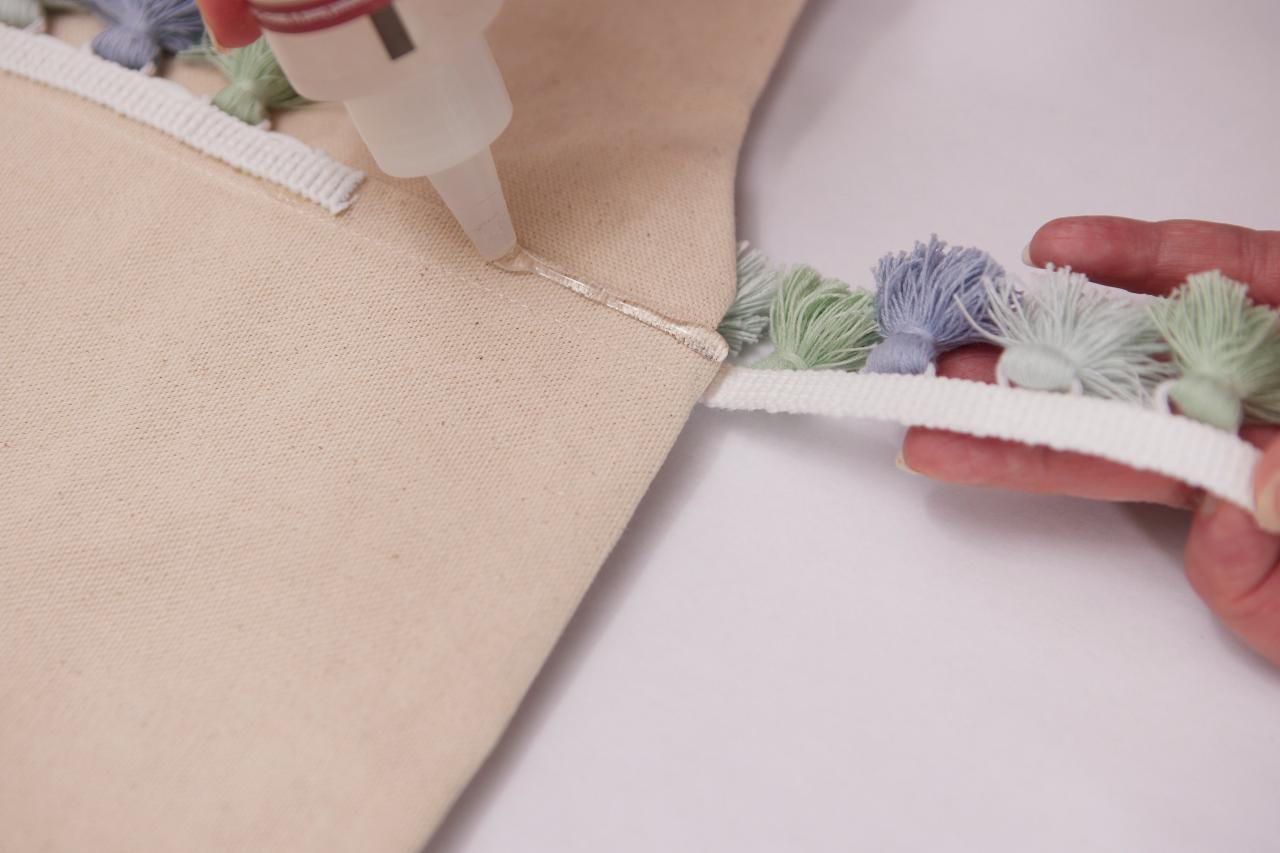
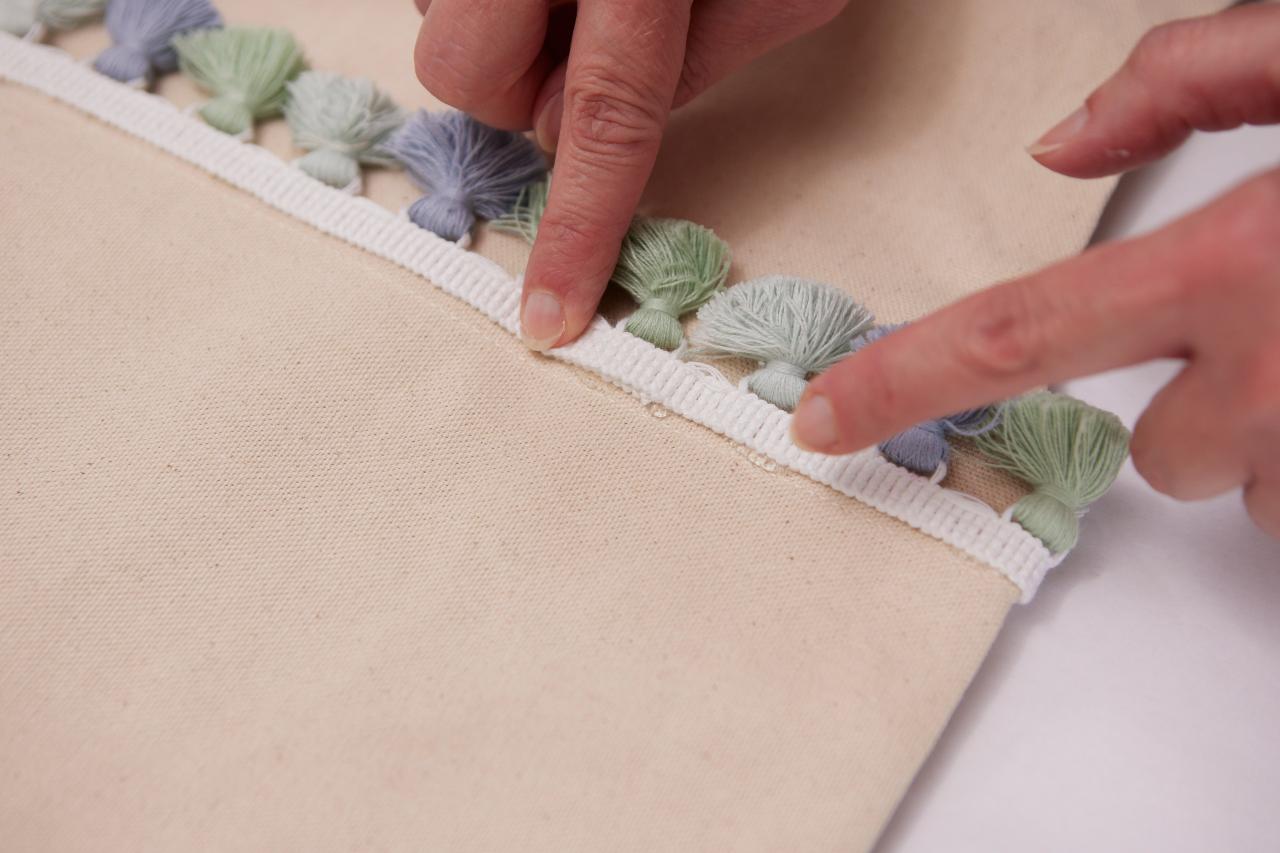
Determine how much trim you need to top each stocking by loosely wrapping the trim around the bottom of the cuff (Image 1), then cutting off excess. Starting on the back of the stocking (so the trim's seam will be hidden), add a line of permanent fabric glue to the bottom of the stocking's cuff (Image 2). Top glue with the upholstery trim (Image 3) and hold in place while glue sets up (Image 4). Note: We used a quick-drying glue so the hold time was only a minute or so.

Derek R. Trimble
Derek R. Trimble
Derek R. Trimble
Derek R. Trimble
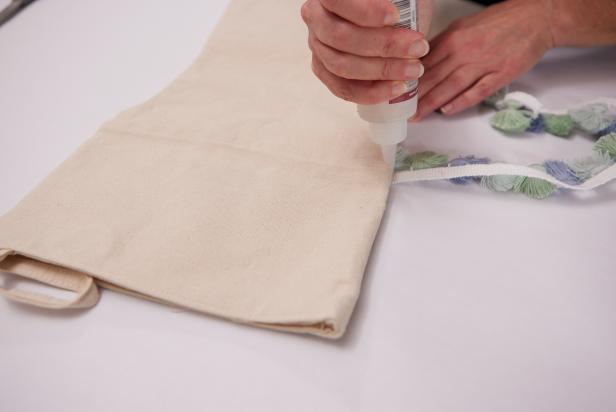
Continue Adding Upholstery Trim
Continue adding small sections of glue, then topping with upholstery trim till the bottom of the cuff is completely covered.
Derek R. Trimble
Create Upholstery Trim Seam
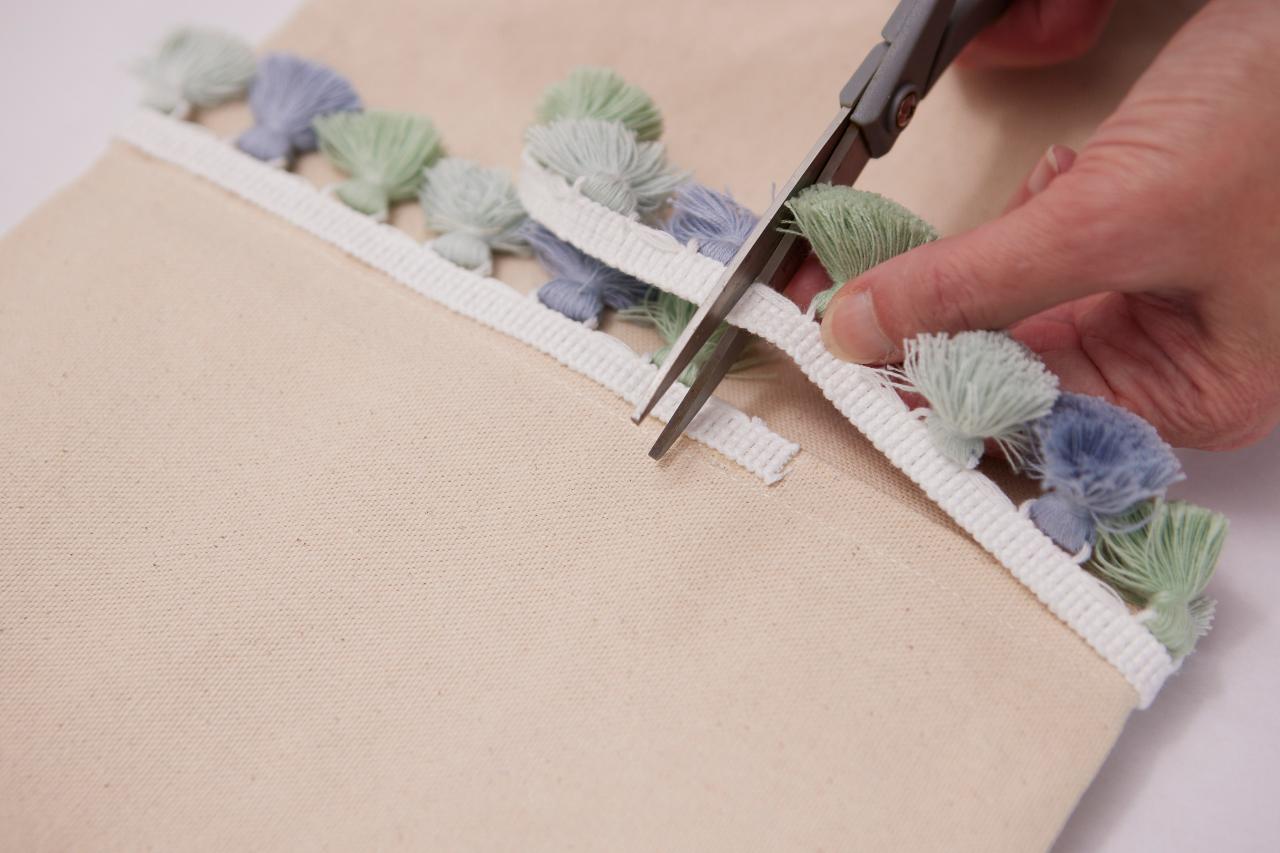
Create a tidy, overlapped seam by cutting off any excess trim (Image 1), including any pom-poms that may overlap, adding a bit of glue (Image 2), then pressing the remaining trim in place (Image 3).

Derek R. Trimble

Derek R. Trimble

Derek R. Trimble
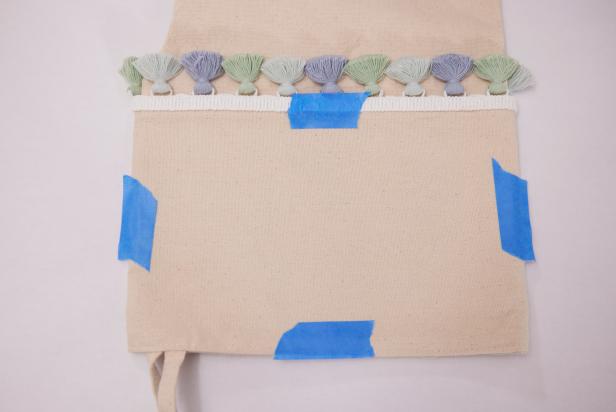
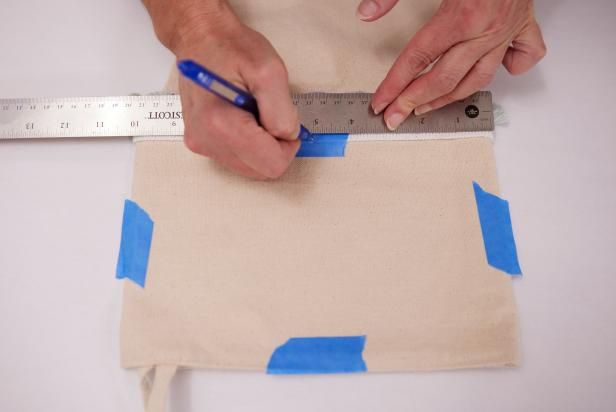
Mark Center of Stocking Cuff
Once glue has fully dried, add small pieces of painters’ tape to the top, bottom, right and left sides of the stocking’s cuff (Image 1). Use a ruler and pen to note each side's center (Image 2). These marks will help you visually position the monogram in the next step.
Derek R. Trimble
Derek R. Trimble
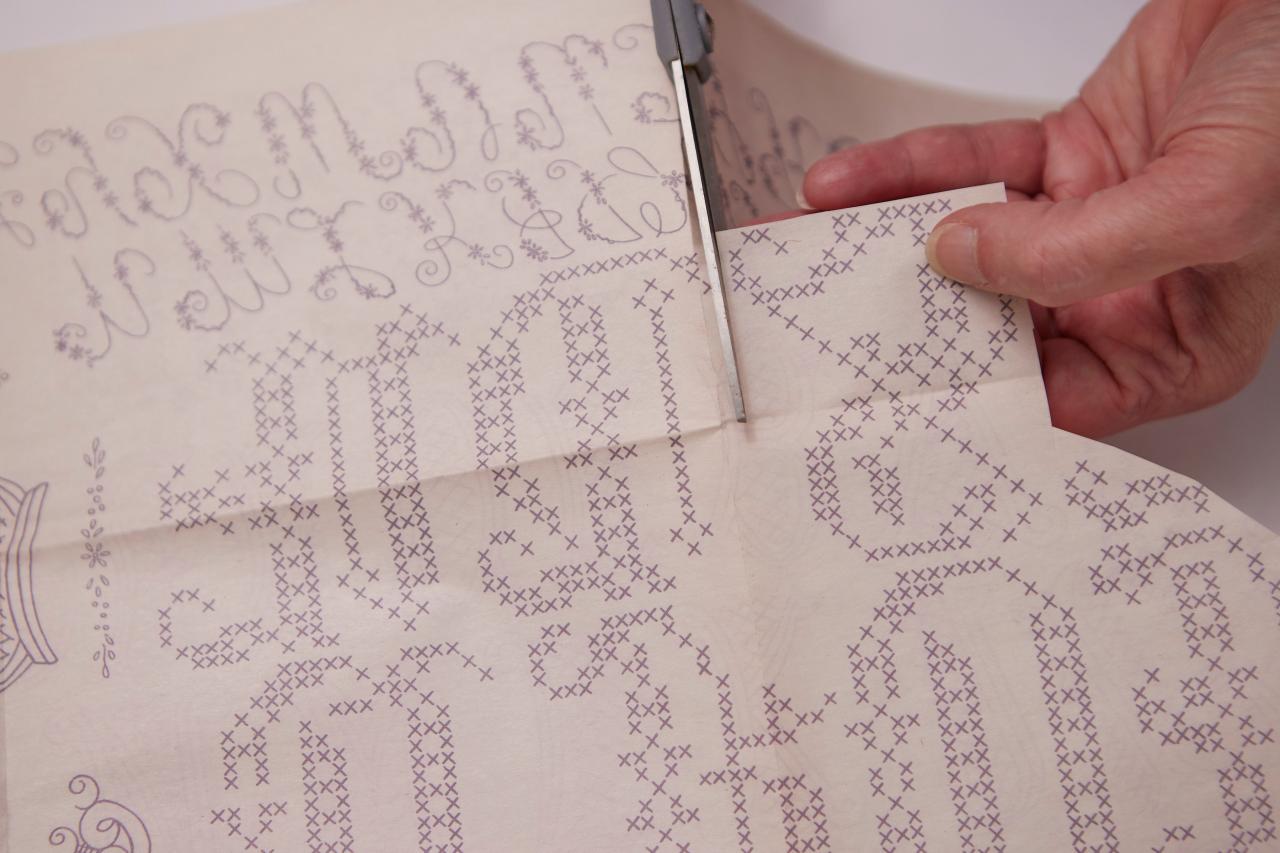
Cut Out Monogram
Using scissors, carefully cut out your chosen initial being sure to cut away all of the surrounding letters.

Derek R. Trimble
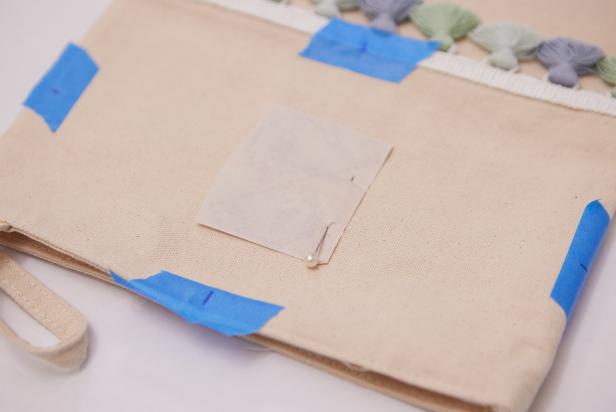
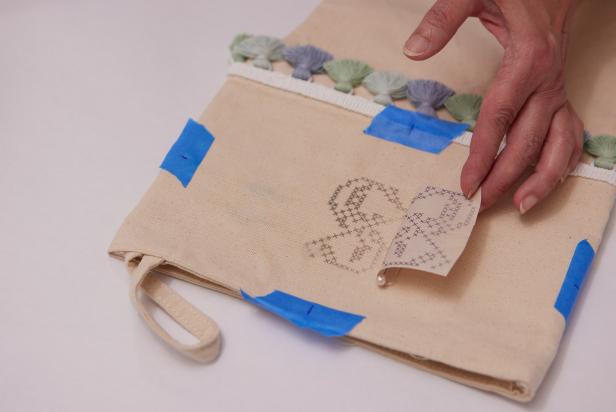
Position Monogram
Place the iron-on monogram, printed-side-down, on the stocking, visually centering it using the marked tape as a guide. To prevent the paper transfer from shifting as you iron, use a pin to hold it in place.
Derek R. Trimble
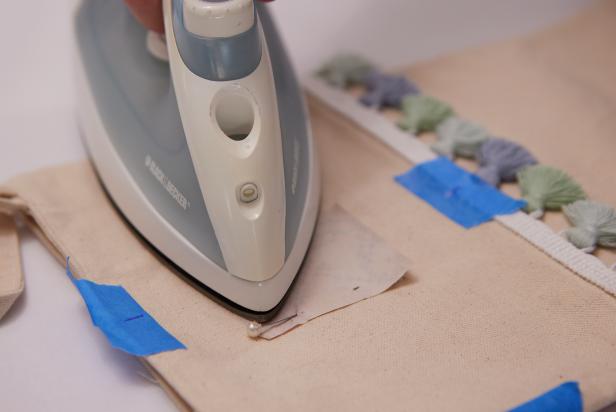
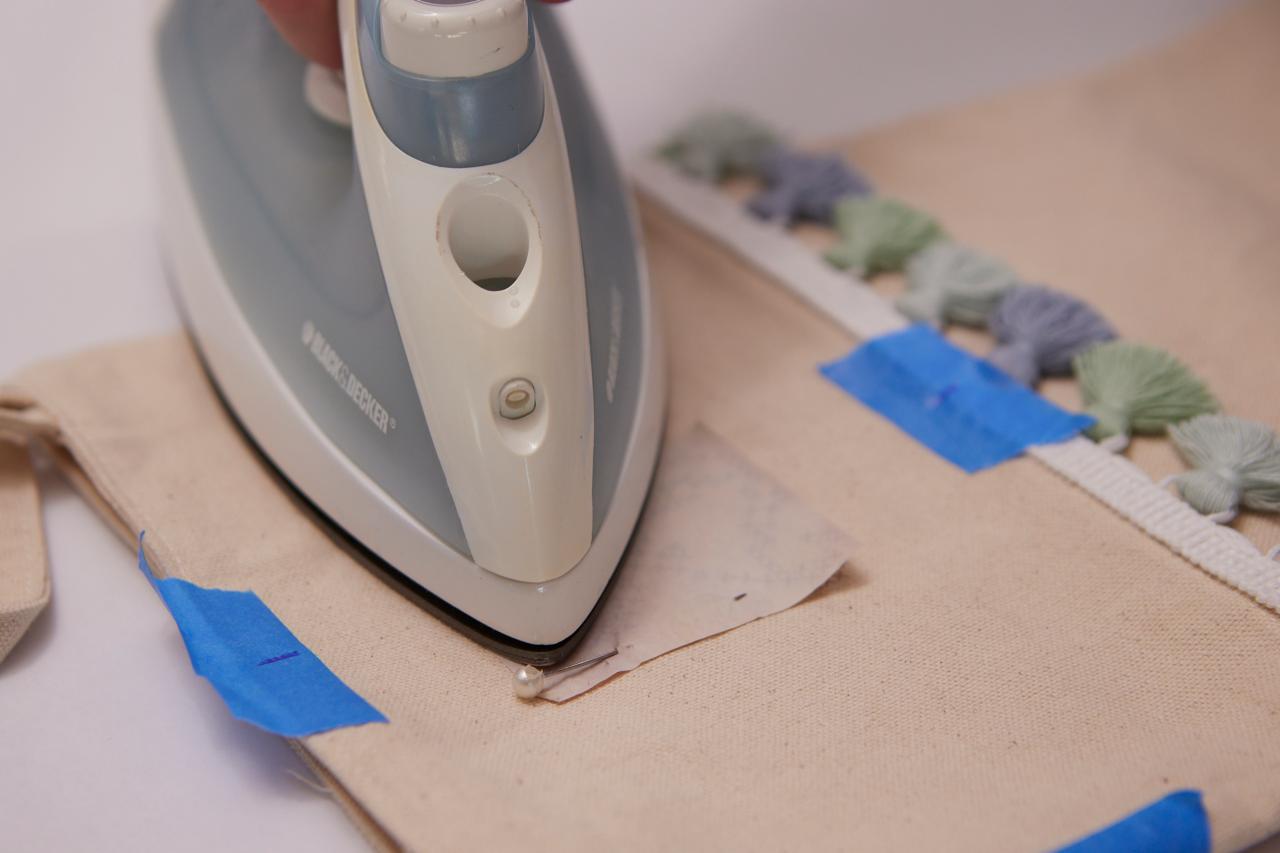
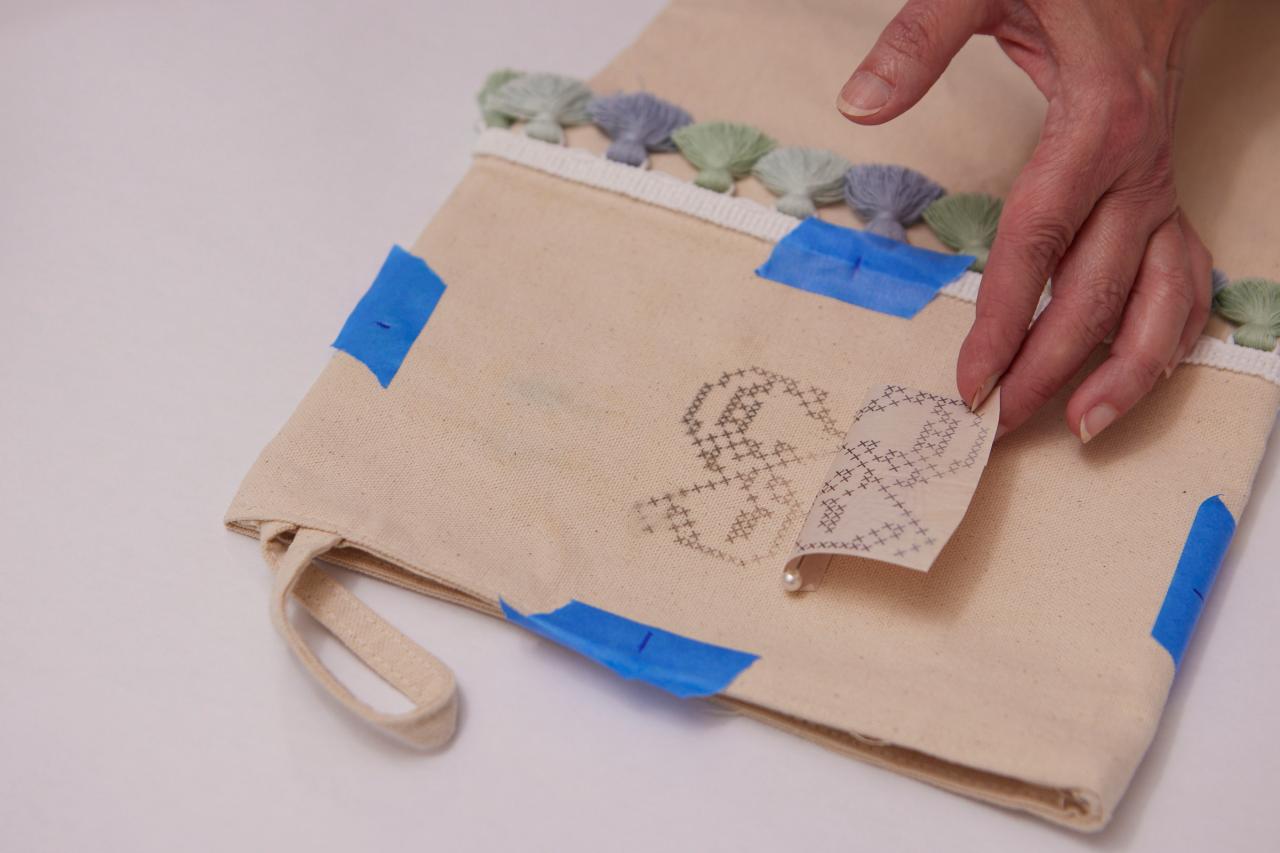
Transfer Monogram
Following manufacturer’s instructions and based on your test run, tips below, heat iron to desired temp. Carefully move iron over pinned-down transfer being careful to evenly heat all areas of the transfer (Image 1). After about a minute, gently lift up the unpinned side of the paper to check on the transfer's progress (Image 2). If necessary, continue ironing till you're happy with how well the design has transferred onto the stocking.
Pro Tip: These transfers work best when ironed onto natural fibers, like linen and cotton, and using a hot iron. Before ironing your chosen initial onto the stocking, be sure to cut out and test one of the transfer paper's test designs to really get a hang of the process and determine how hot your iron should be for your particular fabric.
Derek R. Trimble
Derek R. Trimble
Use Fabric Marker to Fill In Design
Just as you would using a needle and thread to cover all the transferred Xs with embroidery floss when cross stitching, go over each X with a fabric marker in your chosen color. Go slowly and keep your penstrokes consistent, being careful to prevent smudging by allowing the ink to dry before moving your hand over any areas you've already inked. Allow to dry.
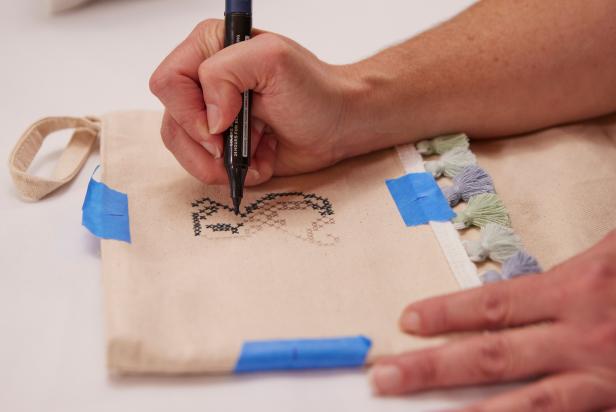
Derek R. Trimble
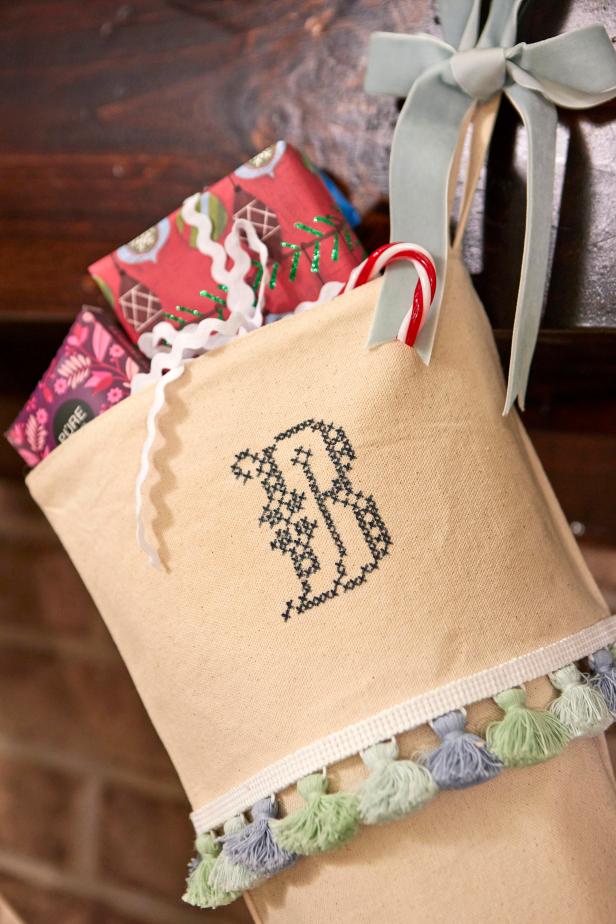
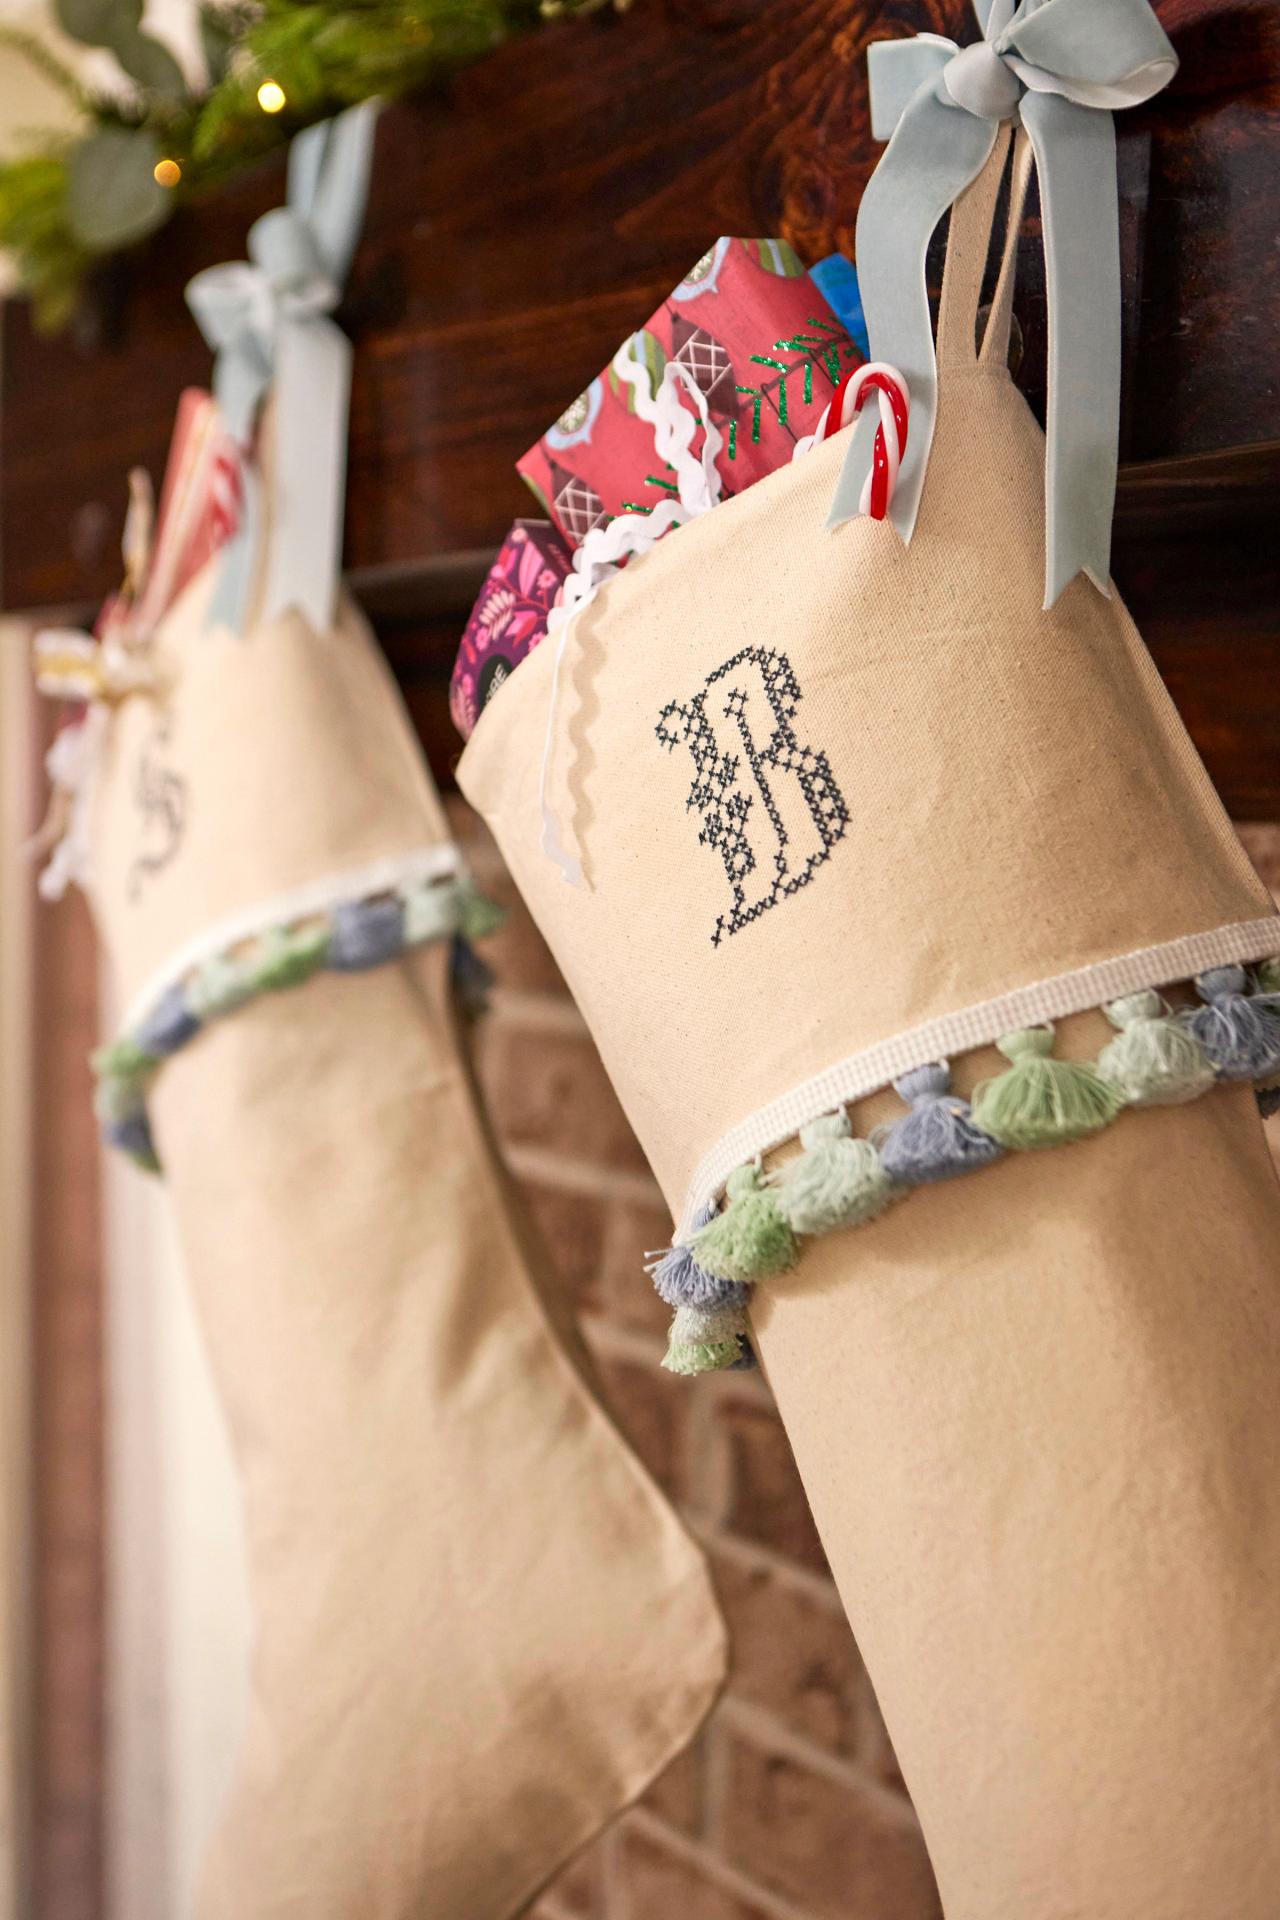
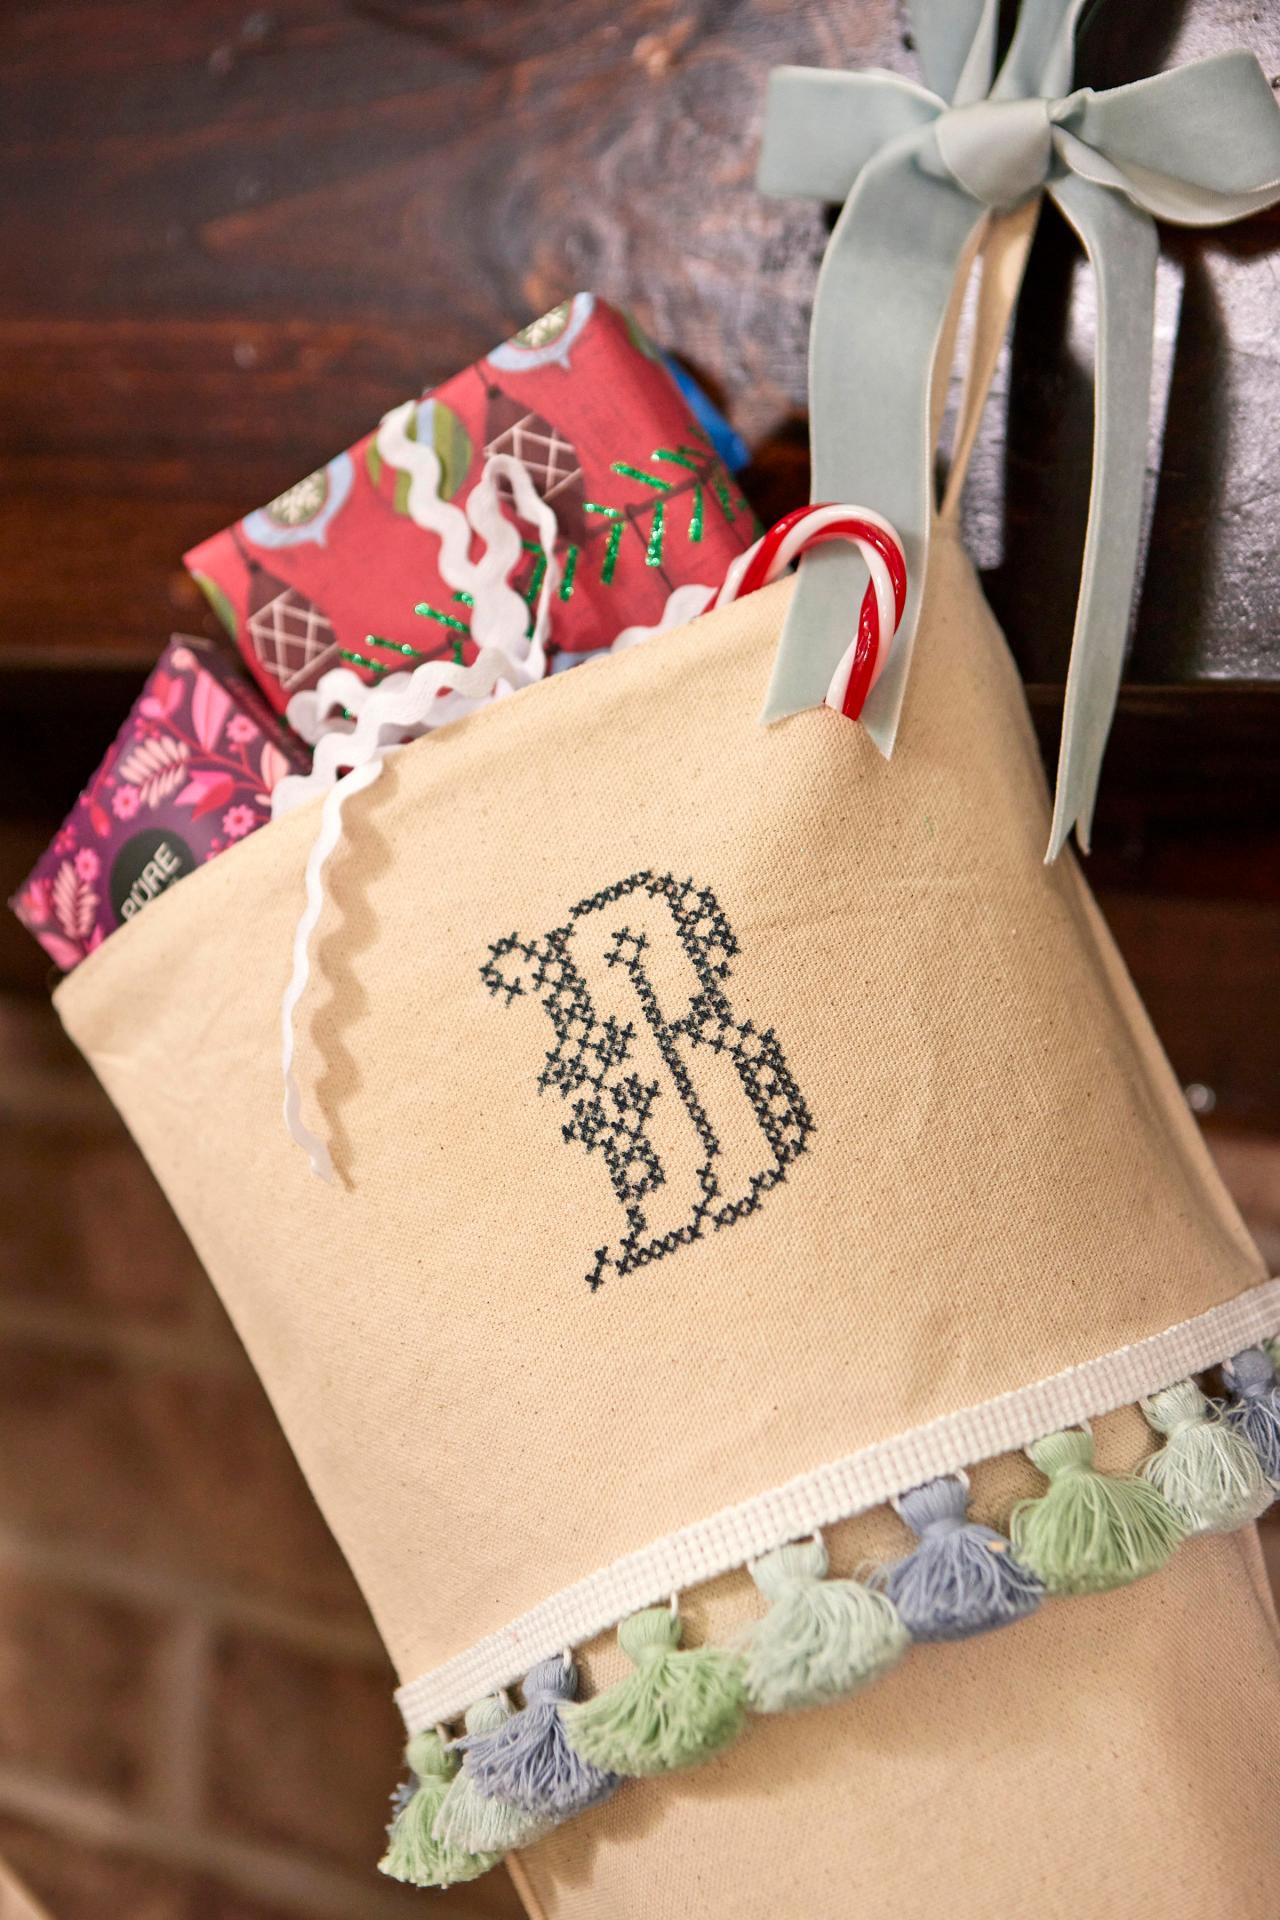
Hang the Finished Stockings
... by the chimey with care. These sweet stockings are beautiful as a grouping (Images 1 and 2) or fill the monogrammed stocking with homemade goodies for a thoughtful, personalized gift (Image 3).
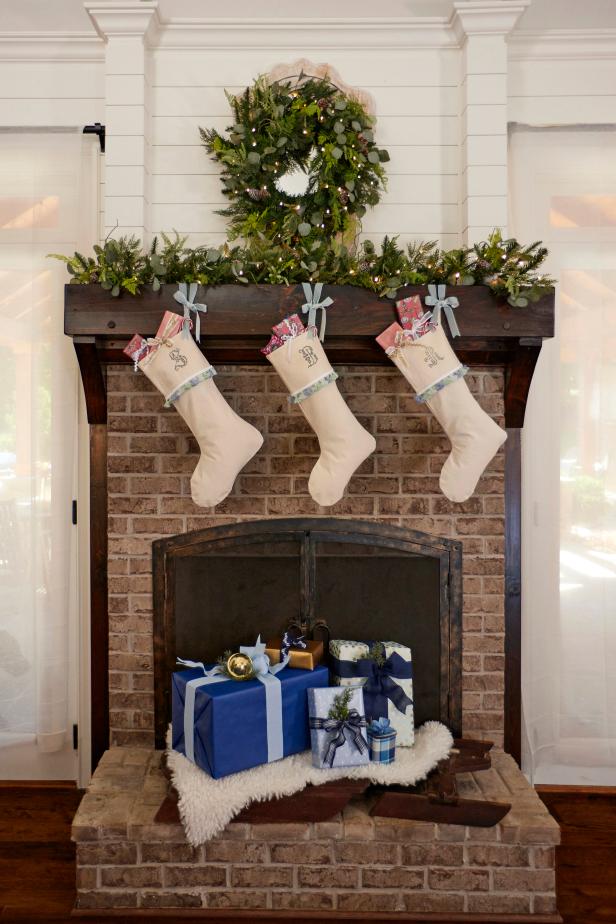
Derek Trimble; Styling by H. Camille Smith
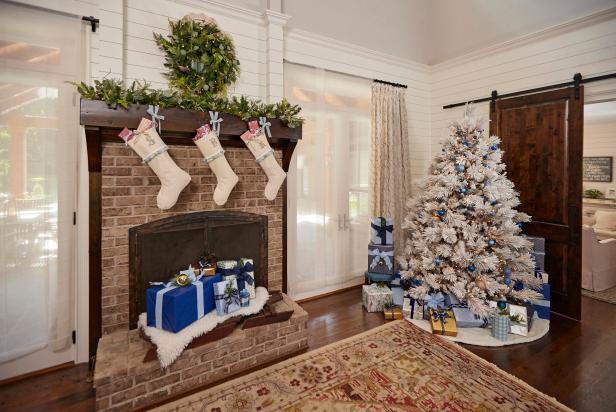
Derek Trimble; Styling by H. Camille Smith
Derek Trimble; Styling by H. Camille Smith
No-Sew Monogrammed Christmas Stockings
Whether creating holiday heirlooms for your family or giving as a handmade gift, these personalized stockings look just like the hand-stitched version but come together much quicker and without needle and thread.
Photo By: Derek Trimble; Styling by H. Camille Smith


