


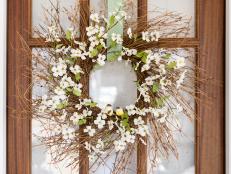
Bird's Nest Spring Wreath
Give your front door a cheery spring makeover with this easy-to-craft wreath that features a DIY bird's nest complete with hand-painted robin's eggs.
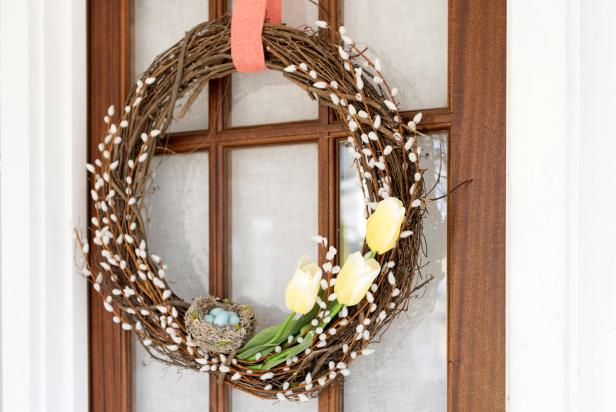

Photo by: Sarah Busby; Styling by H. Camille Smith
Sarah Busby; Styling by H. Camille Smith
Materials Needed
- 24" grapevine wreath
- faux pussywillow branches
- 3 silk tulips
- heavy-duty shears or wire snips
- hot glue gun and glue sticks
- aluminum foil
- Spanish moss
- jute twine
- small wooden eggs
- pale blue craft paint
- mocha brown craft paint
- chip brush
- old toothbrush
- ribbon or wreath hanger
- small bowl (that's the size you want your finished nest to be)
- preserved moss and bark
Attach Pussywillow to Wreath
Using heavy-duty shears or wire cutters, cut faux pussywillow branches into sections that are approximately 12-16 inches long. Starting in the bottom center of the wreath, add hot glue to pussywillow's ends, then attach to wreath form, tucking the glued ends between the grapevine's twists to better secure them. Cover each half of the wreath with pussywillow, overlapping sections as you go and leaving an uncovered area at the top.

Sarah Busby
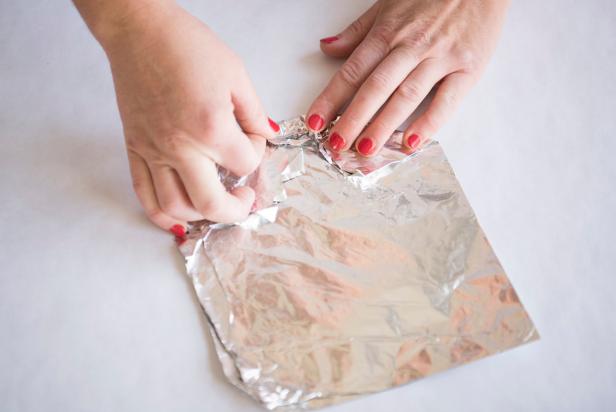
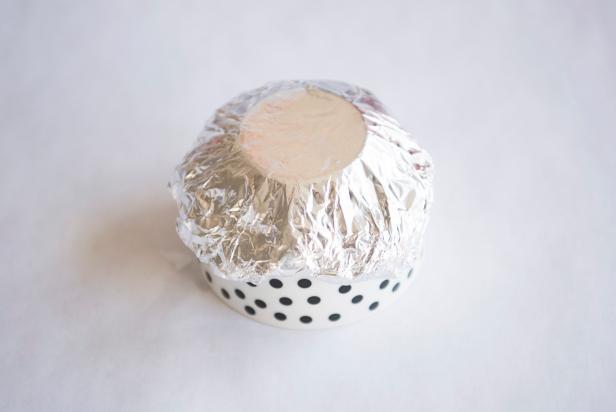
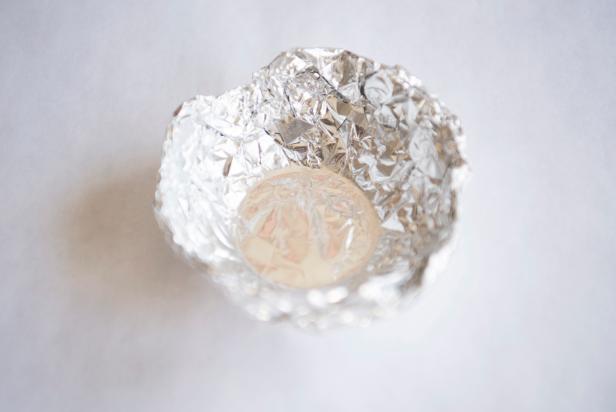
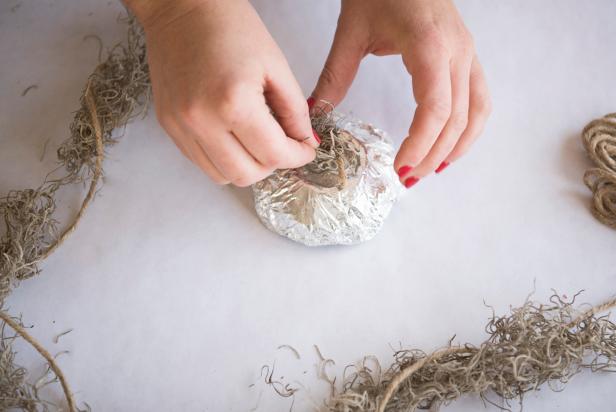
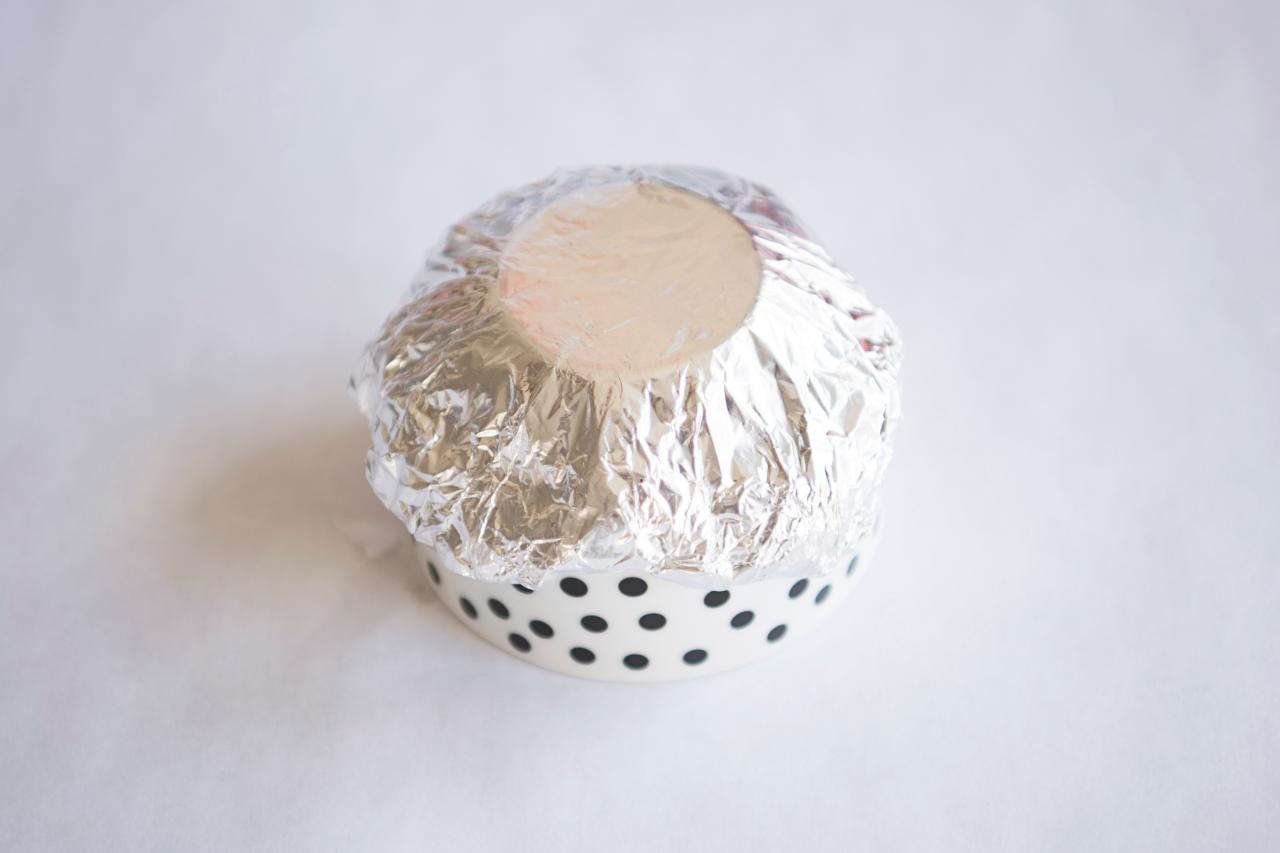
Create Armature for Nest
Fold an approximately foot-square section of aluminum foil in half, then fold and tuck the edges under to create a round shape (Images 1 and 2). Place on the underside of a small bowl to create the nest's rounded shape. Tip: It's not necessary to cover the entire bowl; covering half to two-thirds of the bowl will work (Image 3). You now have a sturdy armature for your nest (Image 4).
Sarah Busby

Sarah Busby
Sarah Busby
Sarah Busby
Twist Spanish Moss and Twine Together
Pull a large amount of Spanish moss out of the bag and form it into a long rope-like shape. Wrap lengths of natural jute twine around the twisted moss to help it hold its shape.

Sarah Busby
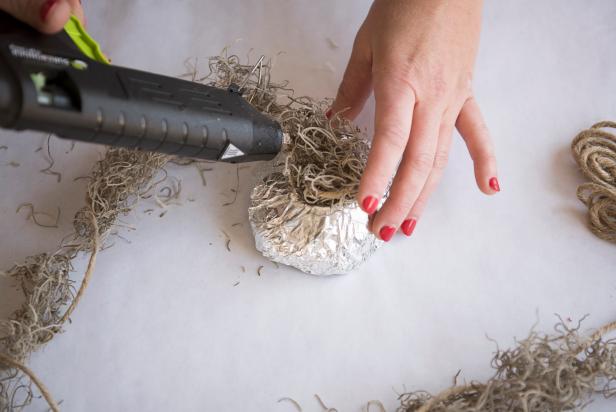
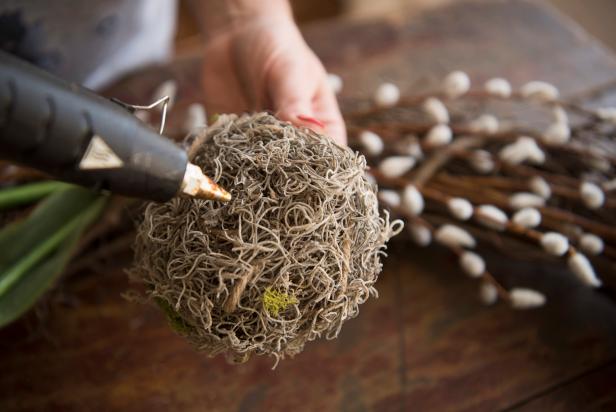
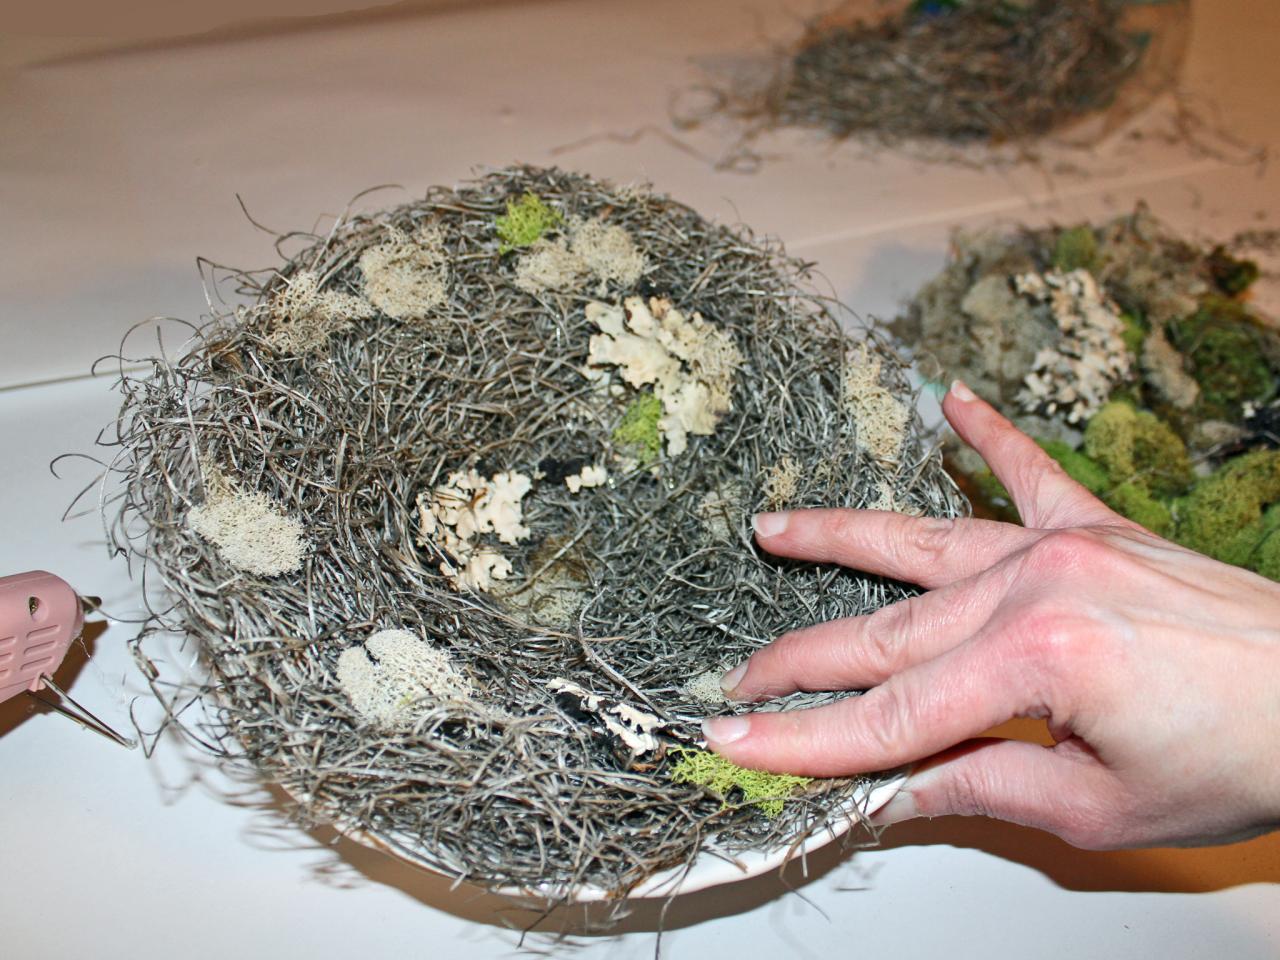
Cover Foil, Inside and Out
Place the armature back on the inverted bowl. Starting in the center of what will be the nest's bottom, apply a large amount of hot glue to the aluminum foil then quickly cover it with the twisted moss-and-twine rope (Image 1). Continue adding hot glue and attaching the moss and twine, pressing it against the bowl to ensure the hot glue is making contact (Image 2). Continue adding moss and twine until the aluminum foil is completely covered, going a bit beyond the foil's top to ensure that none of it will show through. Flip the bowl over, place the nest inside the bowl and repeat the process. Create another moss-and-twine rope, if necessary, and hot-glue this to the interior of the nest until no aluminum foil is visible.
Sarah Busby
Sarah Busby
Add Preserved Moss and Bark
As a finishing touch, attach small pieces of preserved natural moss and bark to the nest's interior and exterior with hot glue.

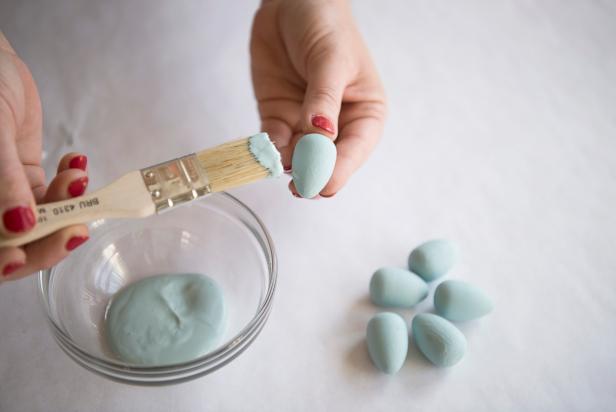
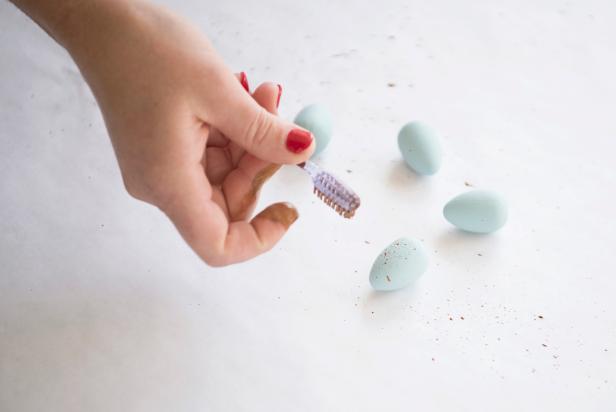
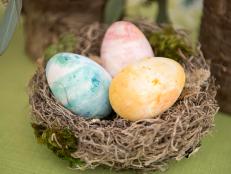
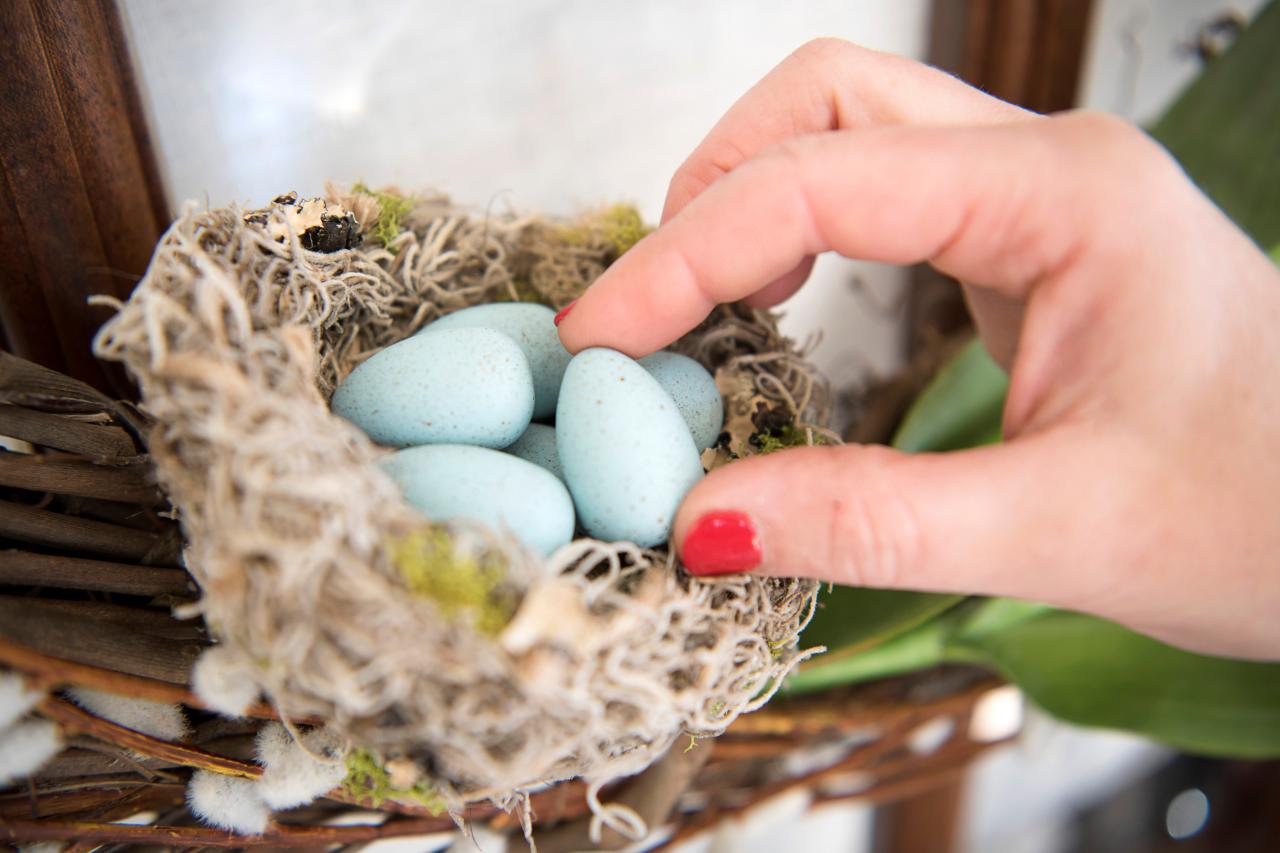
Paint Robin's Eggs
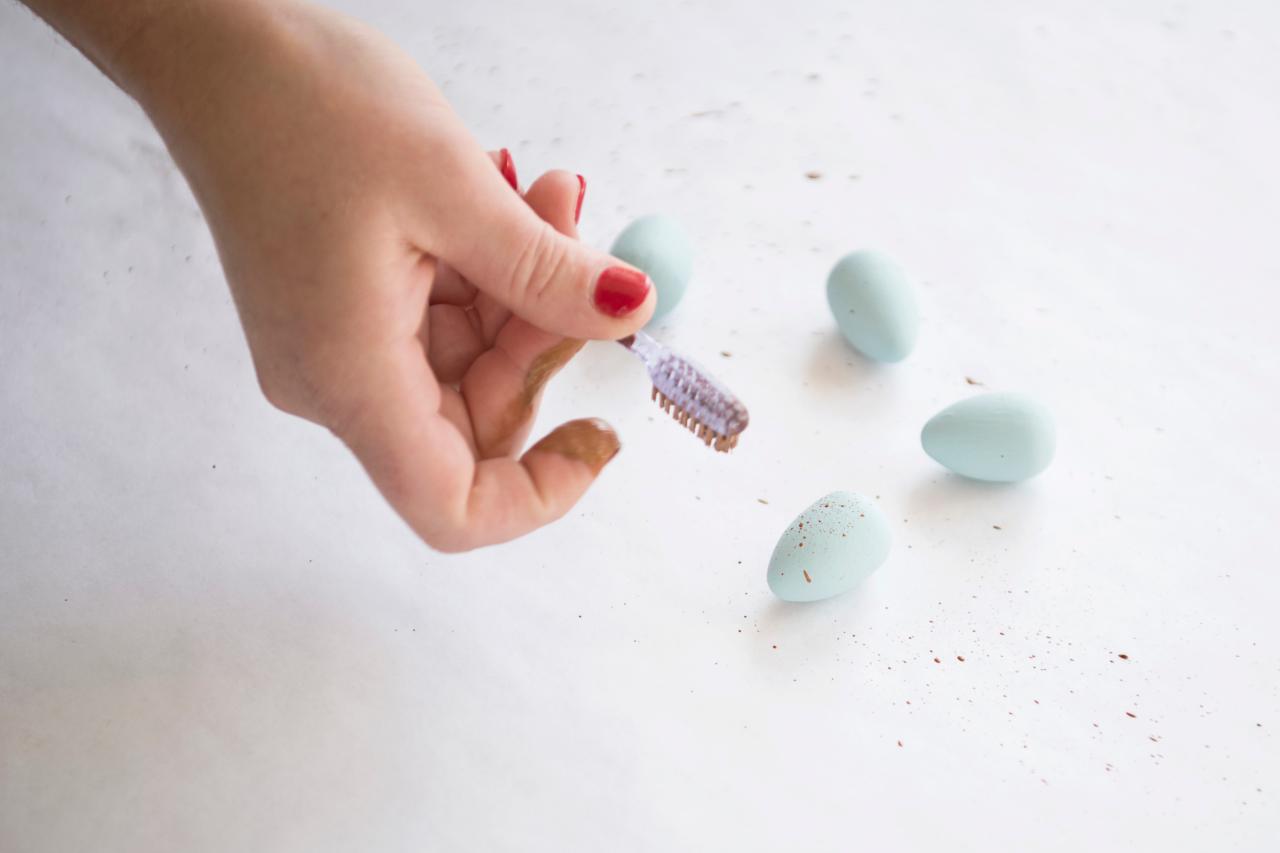
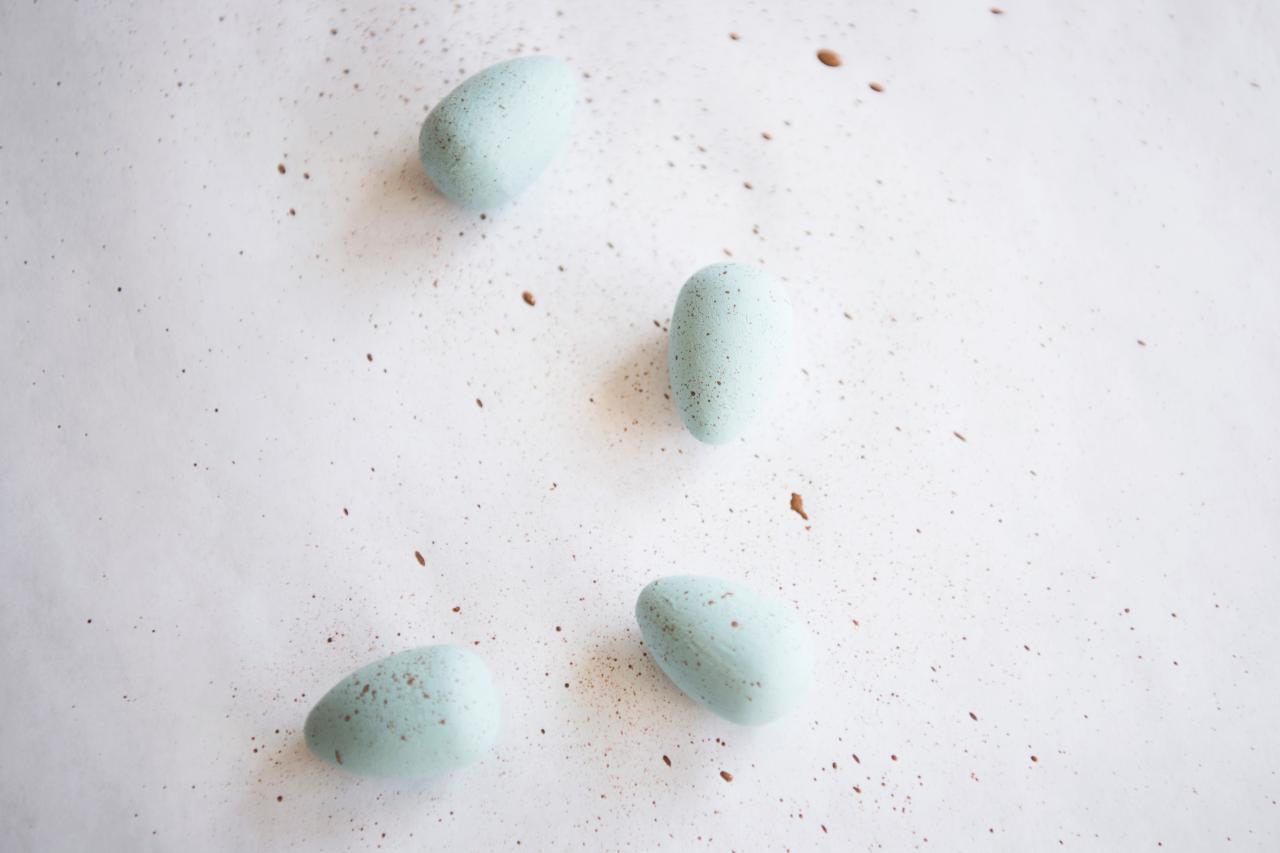
Coat eggs with robin's-egg blue craft paint and allow to dry (Image 1). Lightly sand painted eggs to remove brush strokes and create a smooth surface. Pour a small amount of brown paint onto a plate and mix with 1-2 drops of water to slightly thin it. Dip the end of an old toothbrush into the thinned paint then run your thumb over the brush's tip to add a speckled effect to the eggs (Image 2). Allow speckled eggs to dry (Image 3).
Sarah Busby
Sarah Busby

Sarah Busby
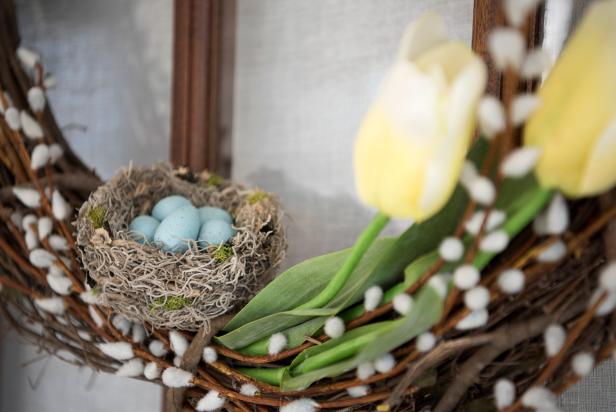
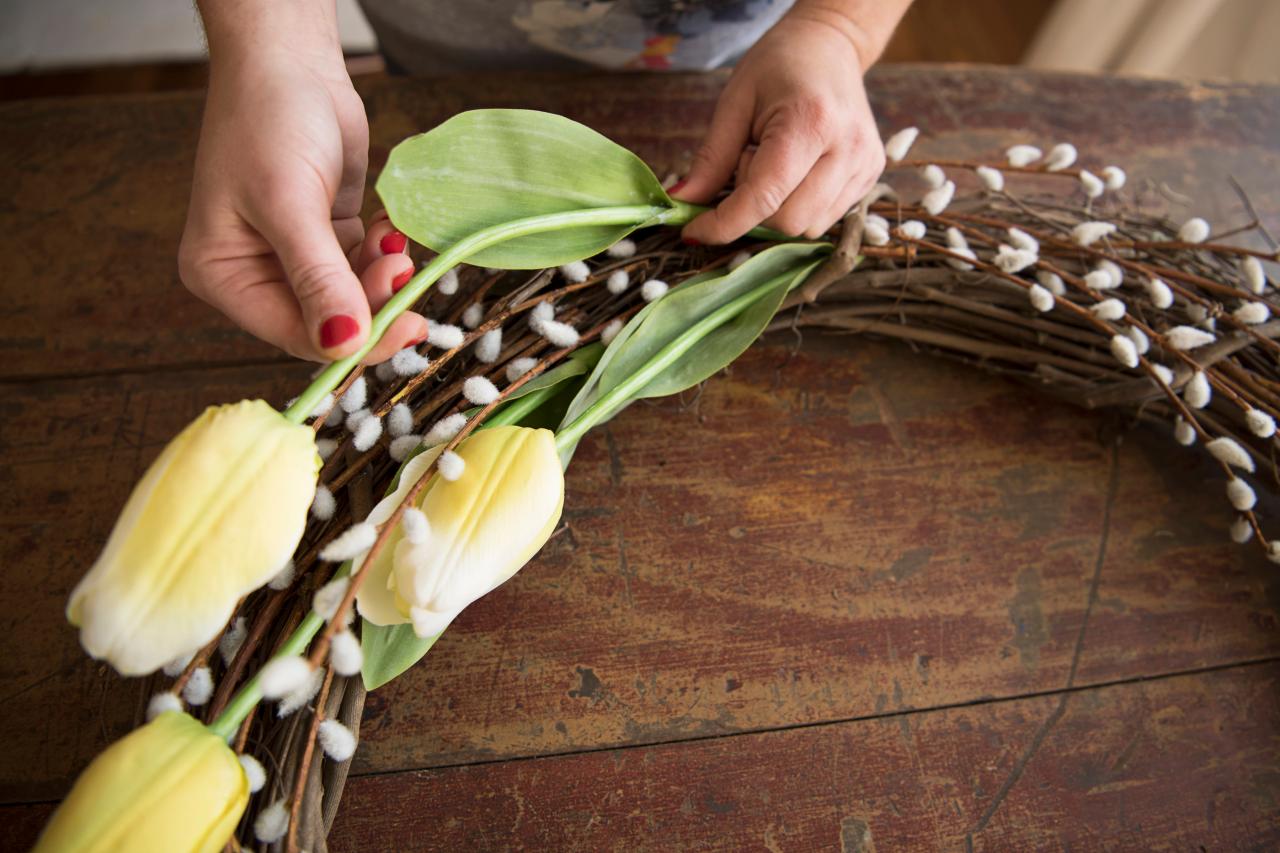
Add Tulips and Nest
Using hot glue, attach a grouping of 3 tulips to one side of the wreath (Image 1), trimming the ends if necessary. Add a small amount of hot glue to the underside of the nest (Image 2) and push into position on the inside of the grapevine wreath (Image 3). Finally, add eggs to the nest, gluing them into position (Image 4).

Sarah Busby
Sarah Busby

Sarah Busby

Sarah Busby
Hang Finished Wreath
Loop decorative ribbon around the top of wreath and hang on front door (Image 1). Tip: If your door has enough clearance at the top, you can just secure the ribbon's ends to the top of the door with a flat tack. Display your completed wreath on a covered porch or indoors to add a cheery touch of spring (Image 2).

Sarah Busby
Sarah Busby; Styling by H. Camille Smith
Photo By: Sarah Busby; Styling by H. Camille Smith


