


Scandinavian-Inspired No-Sew Felt Tree Skirt

Multicolored Felt Christmas Tree Skirt
This year, forgo the usual holiday colors and embrace kicky bright hues and swirling patterns inspired by traditional Scandinavian designs. Felt, yarn and fabric glue are all you need to make this colorful Christmas tree skirt.

Photo by: Marian Parsons
Marian Parsons
Materials Needed:
- 1-1/2 yards white felt
- 1-1/2 yards turquoise felt
- 1/2 yard each of 2-3 complimentary colors of felt
- chalk
- pencil
- length of string
- chunky yarn
- scissors
- fabric/felt glue
- ribbon, sequins, pom-pom trim or other embellishments (optional)
Cut Tree Skirt
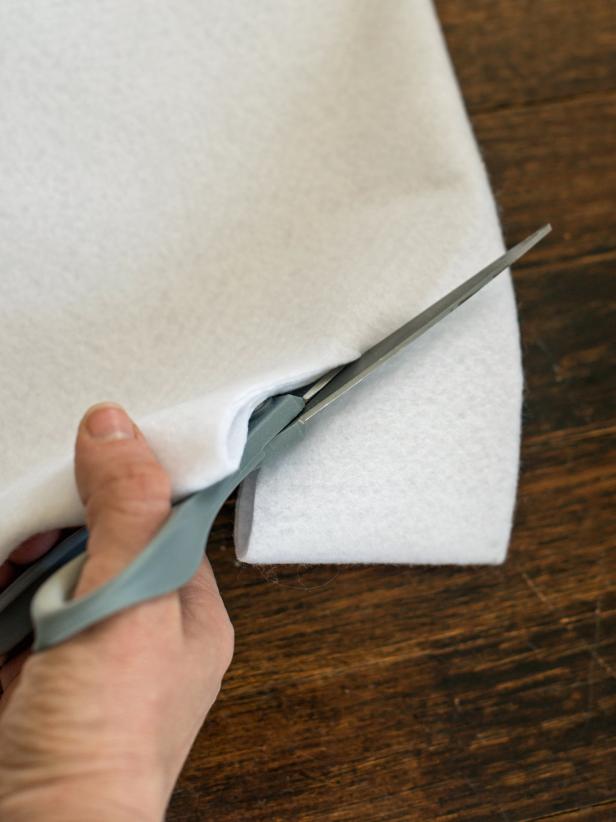
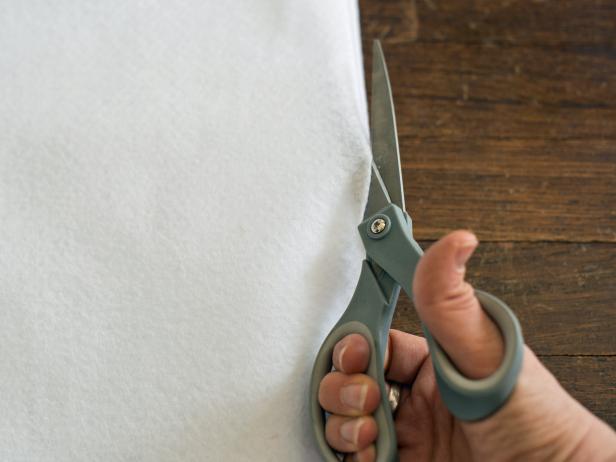
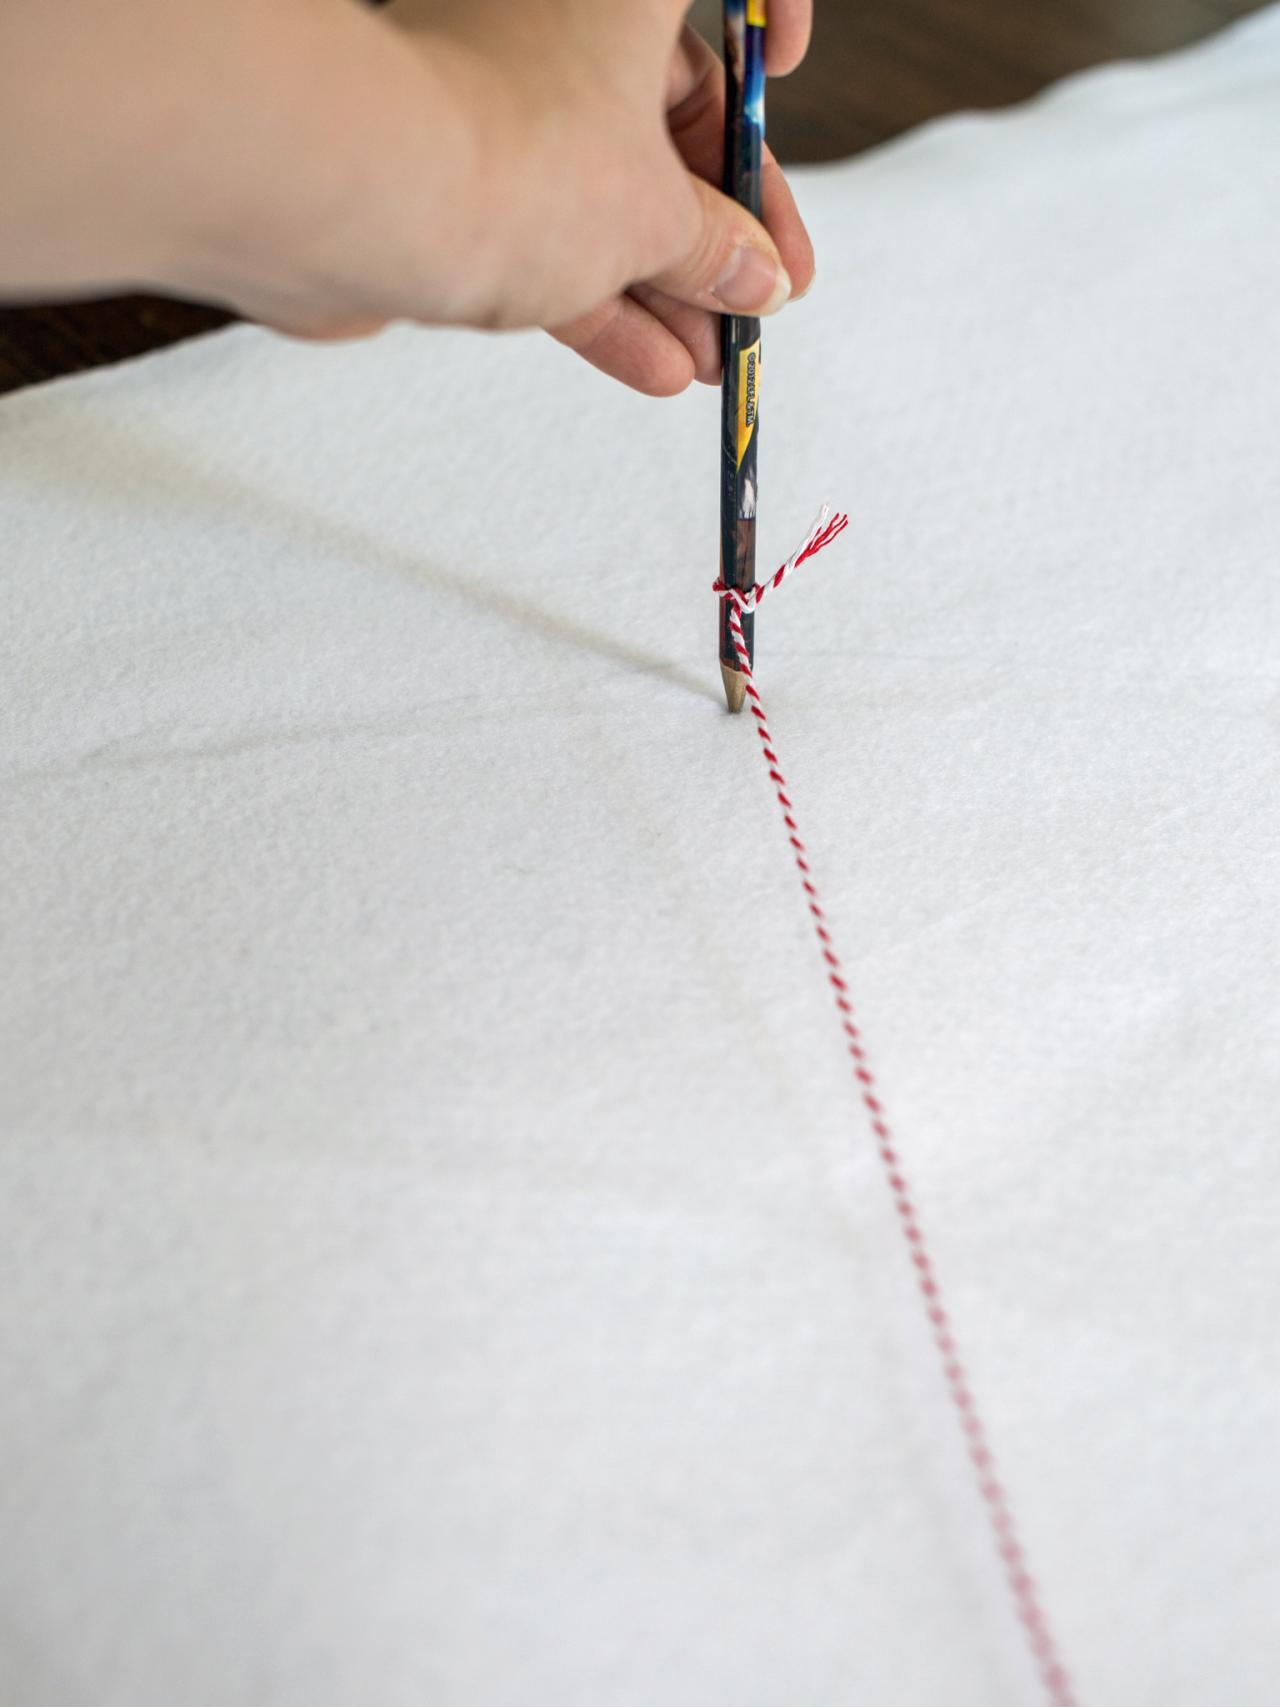
Cut a 48" square out of white felt. Fold felt square in half and then in half again, making a smaller square. Tie length of string around pencil tip then hold (or tack) the end of string in corner where felt folds meet and extend string until tight. Use pencil to trace a quarter circle on felt (Image 1). Cut along pencil line, then cut corner where folds meet in a quarter circle pattern to create a hole for tree trunk (Image 2). When felt is unfolded, it should be a circle with a hole in the middle. Cut a straight slit from outer circle to middle circle to allow for placing skirt around tree (Image 3).

Making and Marking Measurements on White Felt
Cut a 48" square out of white felt for the tree skirt. Fold felt square in half and then in half again, making a smaller square. Tie length of string around pencil tip then hold (or tack) the end of string in corner where felt folds meet and extend string until tight. Use pencil to trace a quarter circle on felt.
Cutting White Felt
Cut along measured pencil line, then cut corner where folds meet in a quarter circle pattern to create a hole in tree skirt for tree trunk.
Cutting White Felt
Cut a straight slit from outer circle to middle circle to allow for placing tree skirt around tree.
Cut Felt Overlay
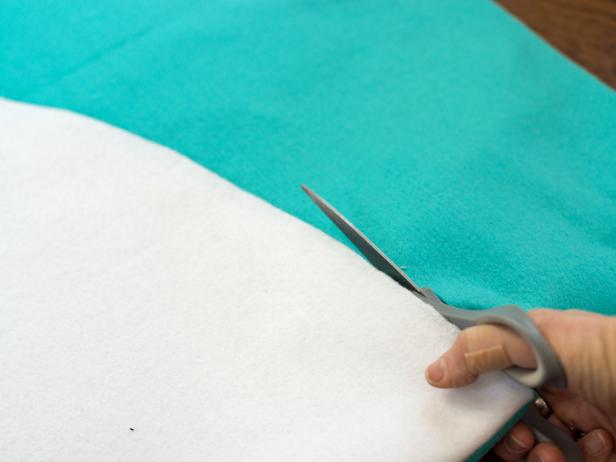
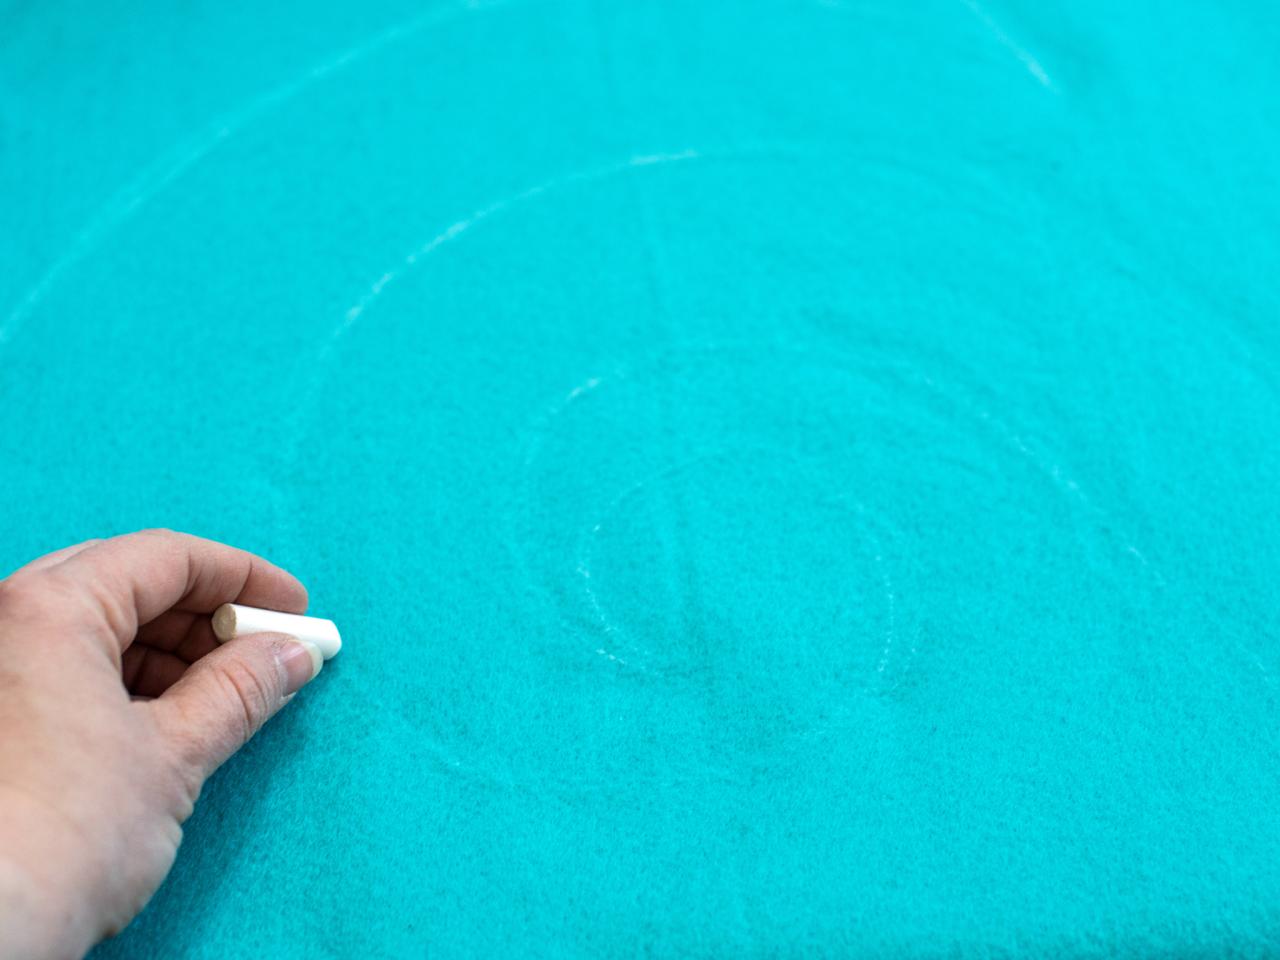
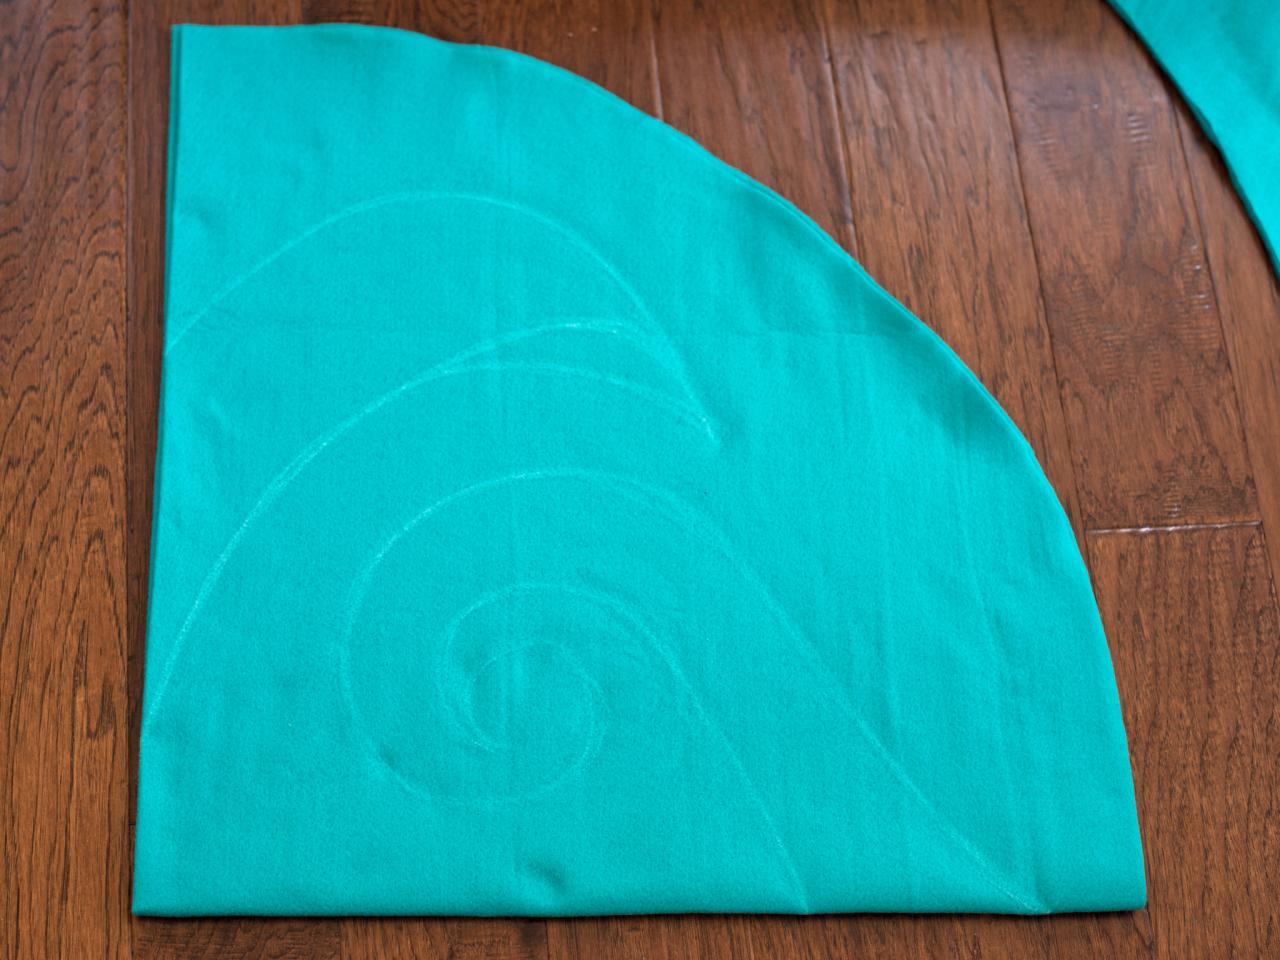
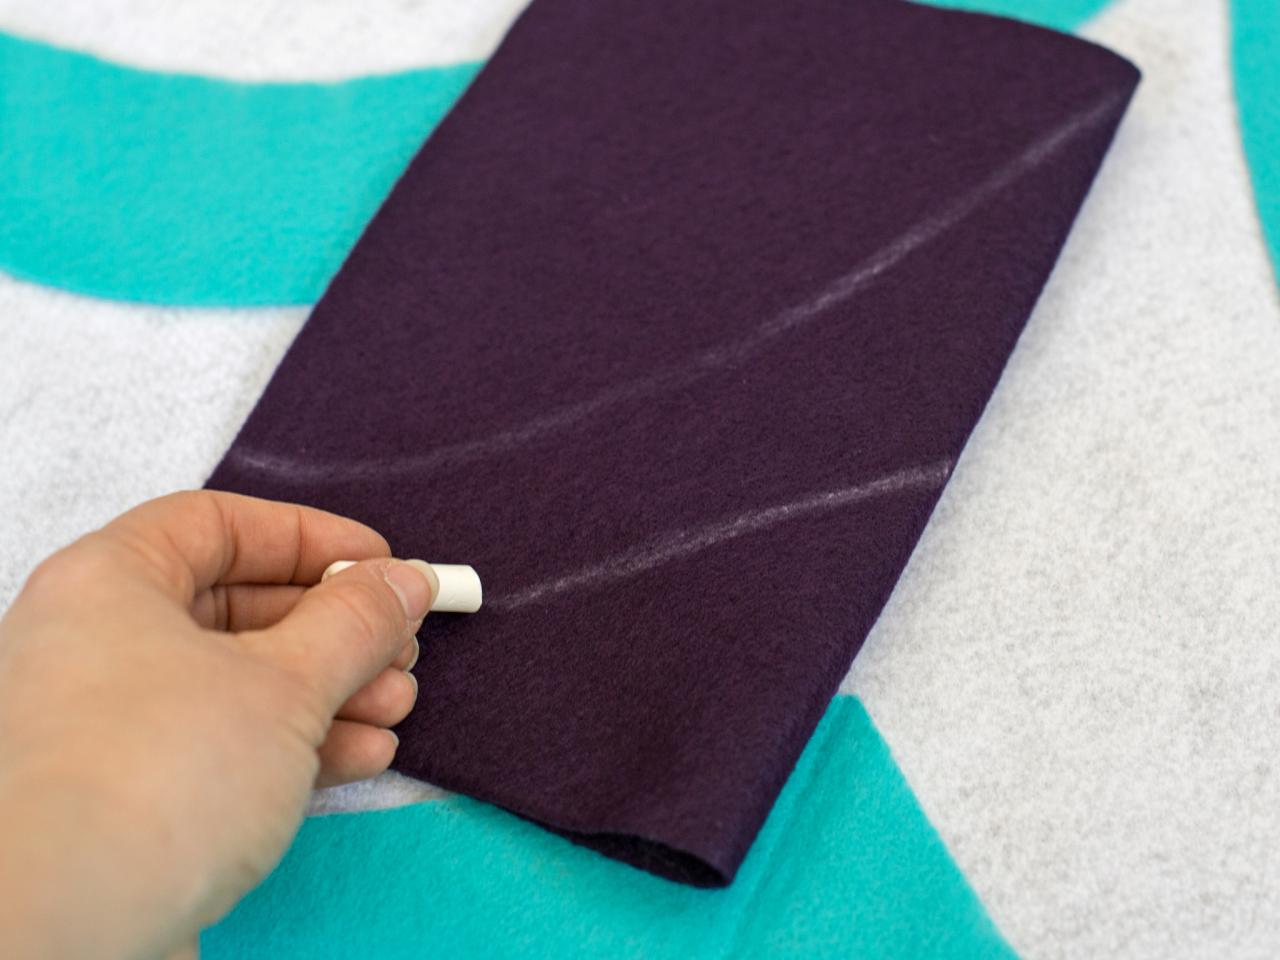
Using white tree skirt as a template, cut turquoise felt in a 48" circle (Image 1). Fold turquoise felt into quarters and sketch a large, simple design in chalk onto felt (Image 2). Note: This design will be cut out as the felt is still folded, creating a symmetrical design, similar to a paper snowflake (Image 3). Cut along chalk lines and unfold felt. Position turquoise felt with cutouts over white felt. Tip: The sketch is with chalk and will not be seen, so don't be nervous about drawing this design freehand. Practice on a large piece of paper prior to sketching on the felt, if desired.


Cutting White and Blue Felt
Using white Christmas tree skirt as a template, cut turquoise felt in a 48" circle.
Sketching Chalk Design Onto Blue Fabric
Fold turquoise felt for tree skirt into quarters and sketch a large, simple design in chalk onto felt.
Design Sketched Onto Blue Felt
Fold turquoise felt into quarters and sketch a large, simple design in chalk onto felt. Note: This design will be cut out as the felt is still folded, creating a symmetrical design, similar to a paper snowflake.
Add Accent Colors
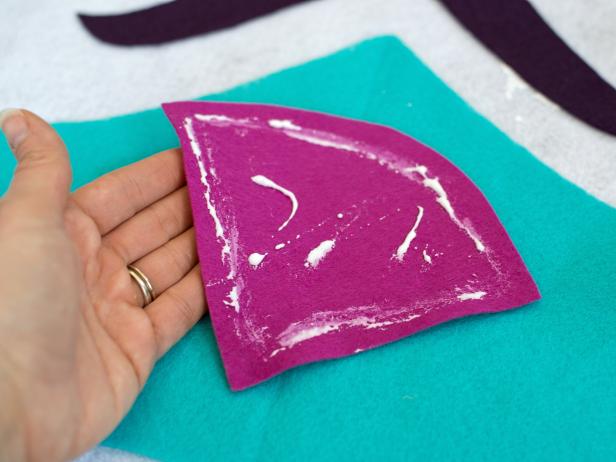
Determine placement for complimentary colors and shapes of felt. Cut piece of felt a little large than desired design, fold in half then chalk half design onto felt and cut to create a symmetrical shape (Image 1). Put felt shape into position (Image 2) and make any necessary adjustments but don't glue the felt down until entire design is completed, so it can be adjusted if necessary. Once design is complete, glue felt pieces in place with fabric/felt glue (Image 3).


Drawing With Chalk On Purple Felt
Determine placement for complimentary colors and shapes of felt for tree skirt. Cut piece of felt a little large than desired design, fold in half then chalk half design onto felt and cut to create a symmetrical shape.
Blue Felt With Cutouts and Shapes
Put felt shapes into position on tree skirt and make any necessary adjustments but don't glue the felt down until entire design is completed, so it can be adjusted if necessary.
Gluing Pink Felt
Once design for tree skirt is complete, glue felt pieces in place with fabric/felt glue.
Attach Yarn
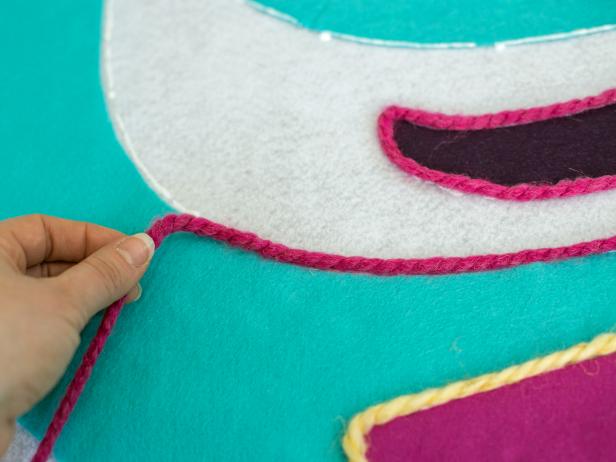
Apply a bead of fabric glue along edges of felt design then top with chunky yarn in coordinating colors (Images 1 and 2). The yarn adds color and texture to the design and hides raw edges of the felt, making the skirt look more polished. Glue on any other trim embellishments like pom-pom trim, beading, sequins, ribbon, etc. Tip: Allow fabric glue to dry completely before moving the skirt.

Outlining Fabric Design in Glue
Apply a bead of fabric glue along edges of tree skirt's felt design then top with chunky yarn in coordinating colors.
Adding Pink Yarn Trim to Felt Design
Apply a bead of fabric glue along edges of felt design then top with chunky yarn in coordinating colors. The yarn adds color and texture to the design and hides raw edges of the felt, making the tree skirt look more polished.
Cut Slit in Skirt
In Step 1, a slit was cut in the white felt tree skirt base before the design was created over it. Now, cut through design, along the previously cut slit, so the skirt can be easily placed around the base of your Christmas tree (Image 1). Trim cut edges with yarn, if desired, or leave as-is and position the slit behind the tree (Image 2).


Marian Parsons
Cutting Multicolored Felt Fabric
In Step 1, a slit was cut in the white felt tree skirt base before the design was created over it. Now, cut through design, along the previously cut slit, so the skirt can be easily placed around the base of your Christmas tree.
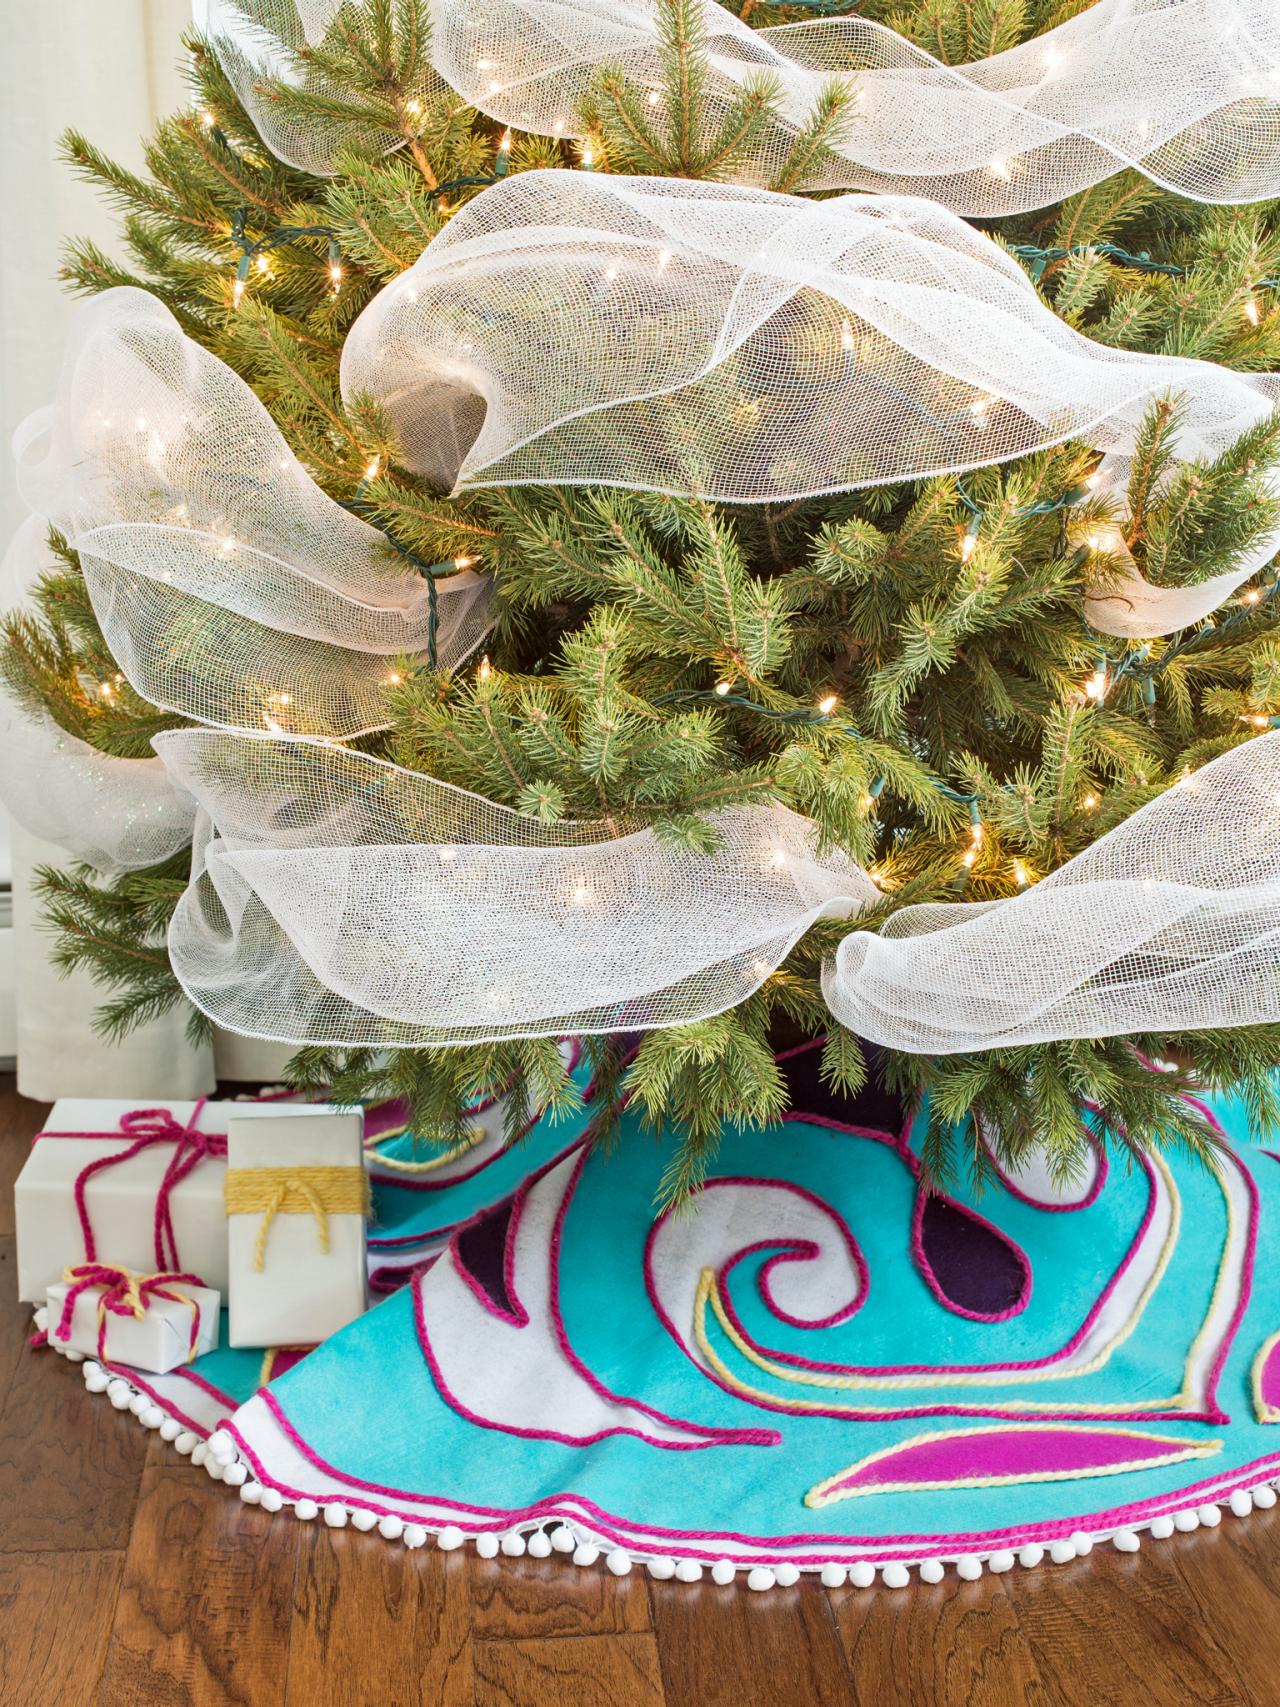
Christmas Tree With Multicolored Scandinavian Tree Skirt
Trim cut edges of tree skirt with yarn, if desired, or leave as-is and position the slit behind the tree.
Photo By: Marian Parsons


