


How to Turn a Stainless Steel Cart Into an Outdoor Kitchen Island
Need more storage and prep space in your outdoor kitchen? See how we transformed an old kitchen cart into a multi-functional, weather-resistant kitchen island on wheels.

Tomas Espinoza Photography
Tools and Materials
- commercial kitchen cart
- 3/4" panel board
- shower curtain
- decoupage
- scissors
- paintbrush
- drill with various bits
- stain + polyurethane combo
- rags
- construction adhesive
- clamps
- washers/bolts
- pliers
- shoe rack
- utensil rail with hooks
Step 1: Choose Cart
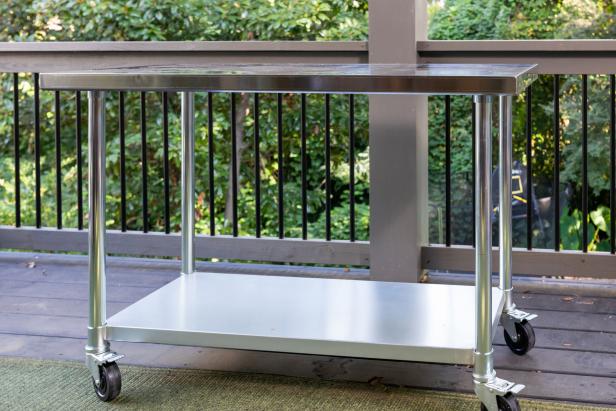
Tomas Espinoza Photography
First, you’ll need to get your hands on an old kitchen cart. We found this stainless commercial version at a reclaimed restaurant supply store for $45. It was deeply discounted thanks to a few dings and scratches. Look for a cart with wheels for maximum versatility and storage potential.
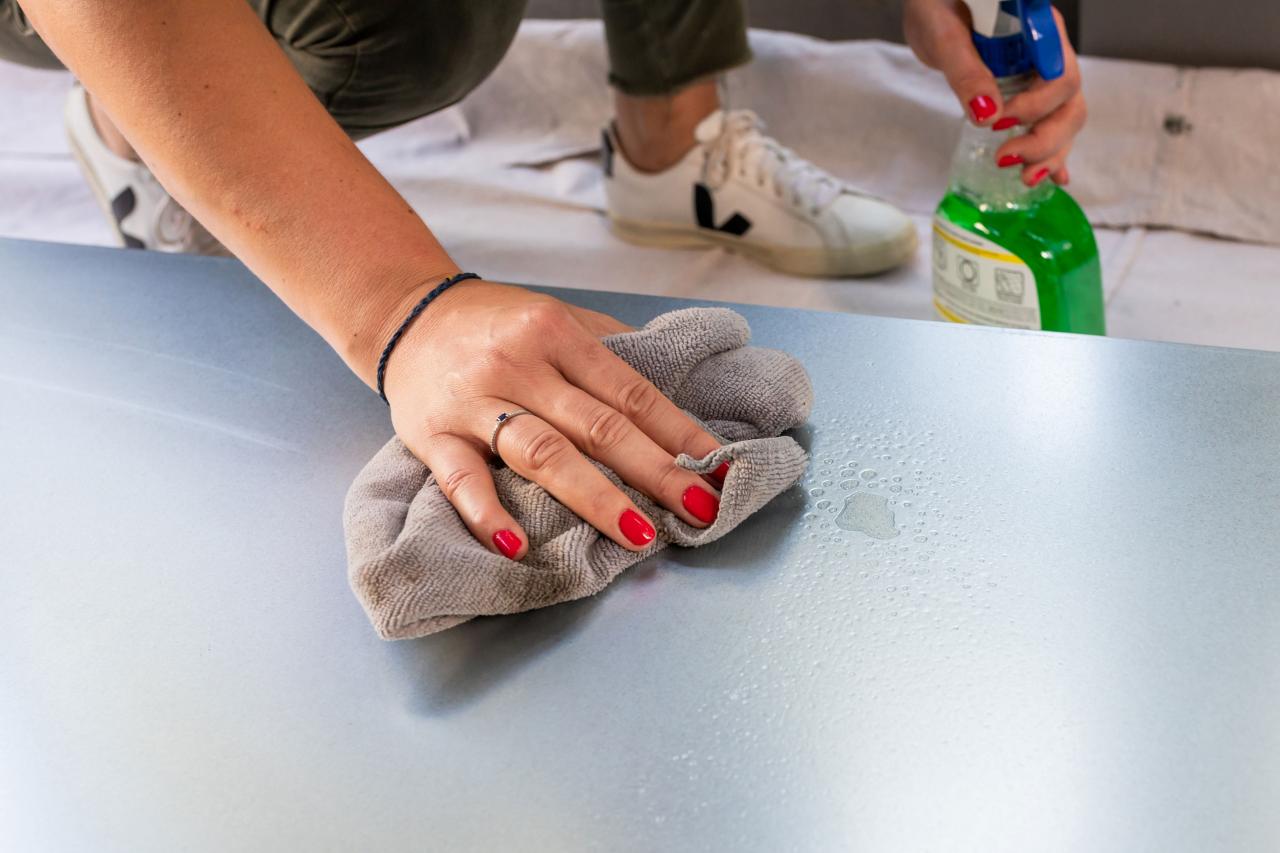
Step 2: Clean It Up

Tomas Espinoza Photography
Our cart had seen better days and needed a deep clean. Use an all-purpose degreasing cleaner to remove grime – spray it on, let it sit for a couple of minutes, then wipe away with a damp rag.
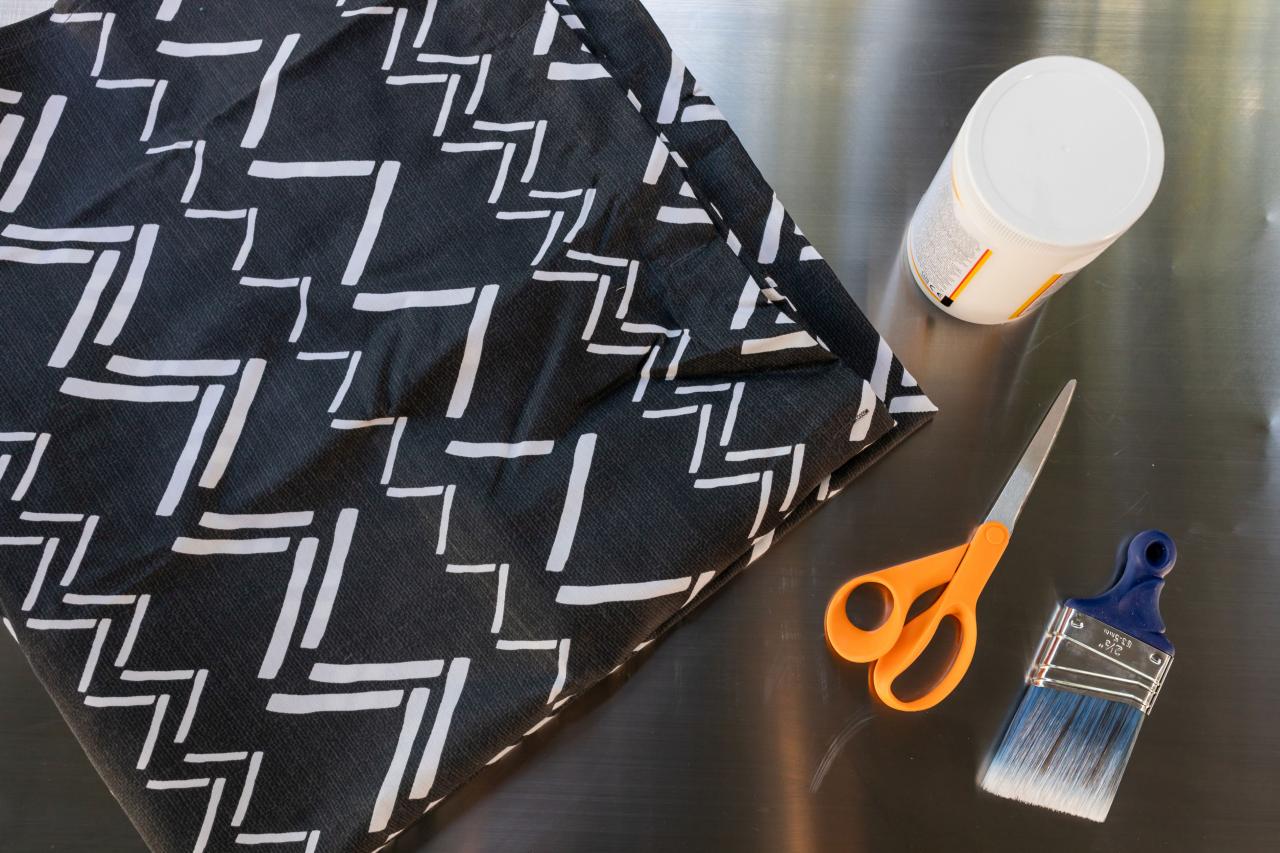
Step 3: Gather Materials

Tomas Espinoza Photography
To take this cart to the next level, we found a graphic, mud-cloth-inspired shower curtain on the clearance table for $3! Even better? It’s mildew and mold resistant, so it’s perfect for outdoor use. The lesson here is, you don’t have to go to the fabric store to score a major deal on cute fabric. With a little decoupage, this will be the ultimate, high-end shelf liner.
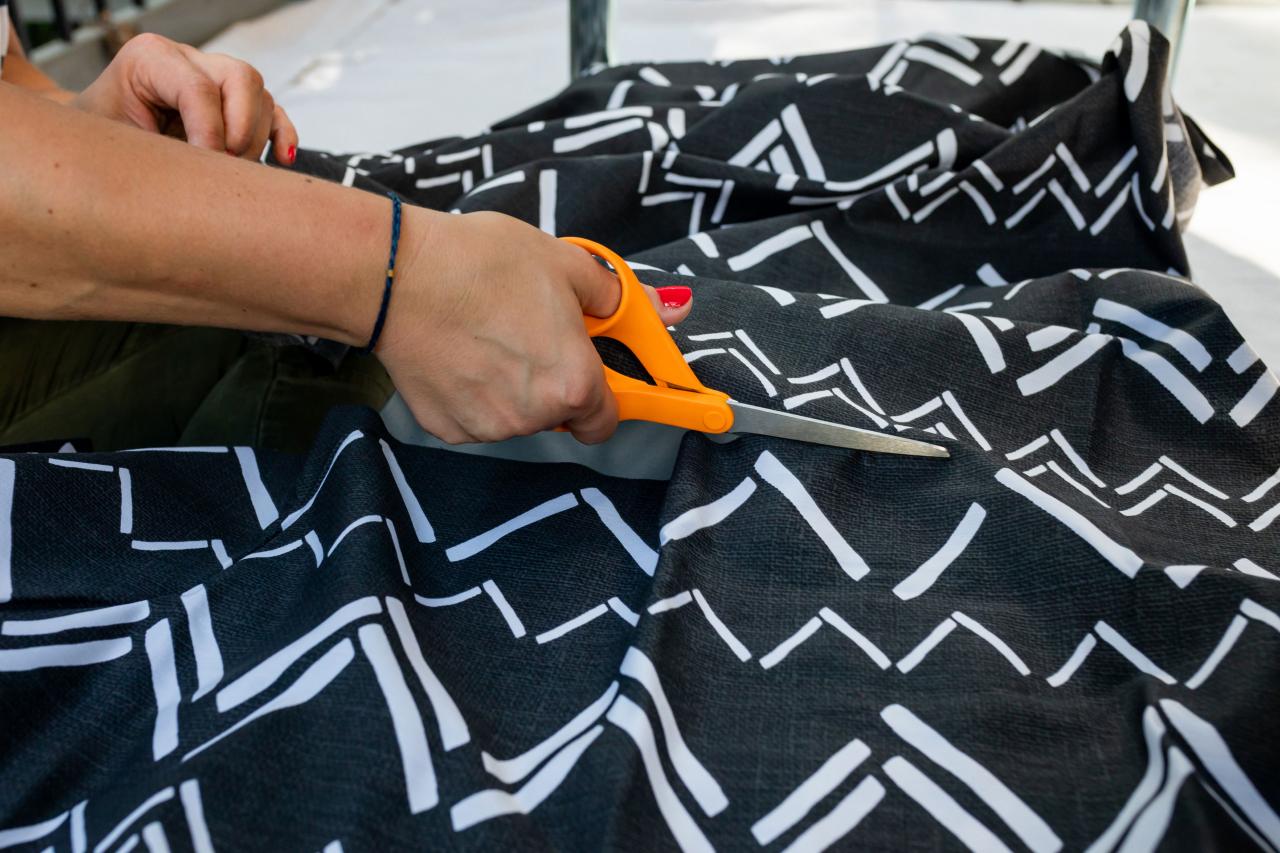
Step 4: Cut Fabric

Tomas Espinoza Photography
When cutting your fabric, leave a few extra inches on all sides to wrap underneath the shelf’s edges. To fine-tune the cut, lay it on the shelf and snip the fabric to notch around legs.
Step 5: Adhere Fabric

Tomas Espinoza Photography
Apply a heavy coat of decoupage medium on the shelf, then position the fabric on the shelf, smoothing down any creases.
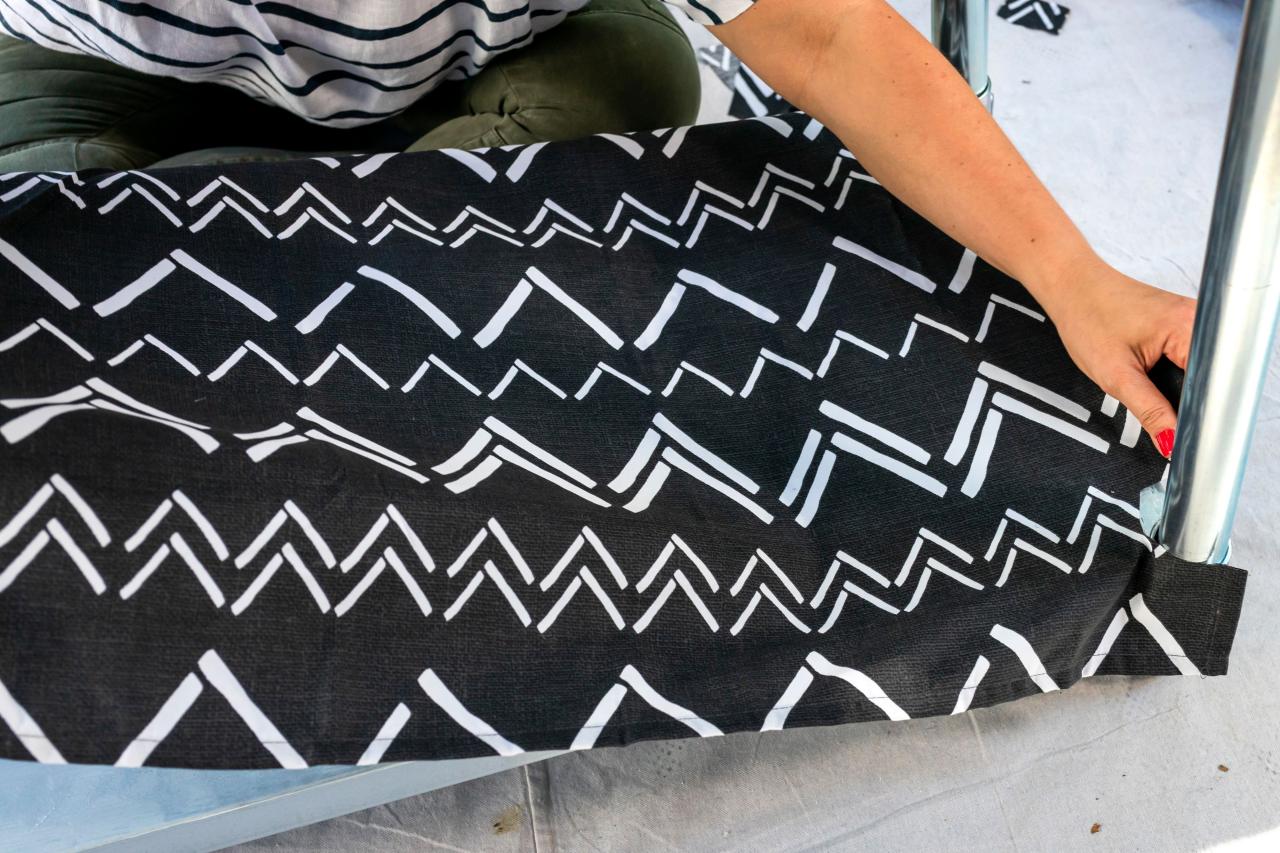
Step 6: Top With Decoupage
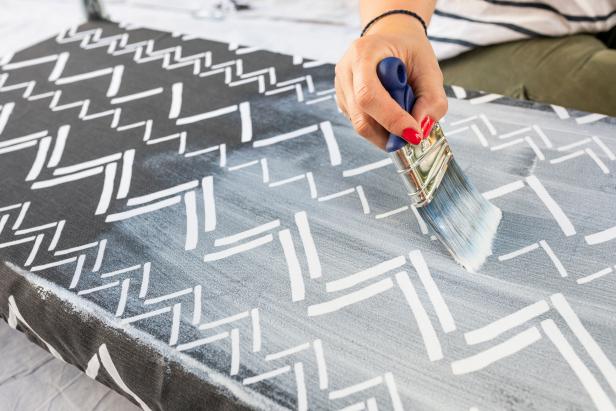
Tomas Espinoza Photography
When the initial layer of decoupage has dried underneath the fabric, apply two more coats on top of the fabric, but let it dry completely in between coats. Decoupage is a great way to boost a fabric's water resistance.
Step 7: Stain Board
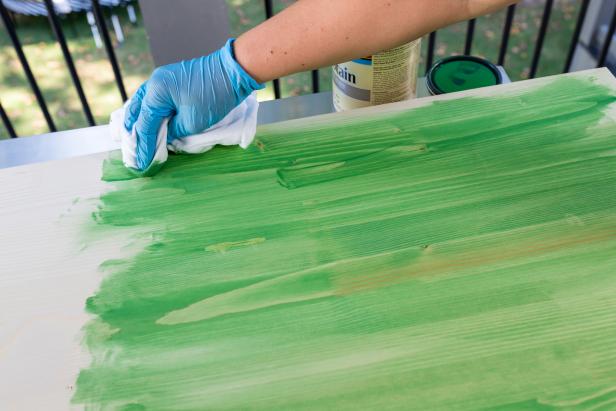
Tomas Espinoza Photography
For the countertop, you’ll need a piece of 3/4-inch or 1-inch thick piece of plywood. A home improvement store should be able to cut it to size. If you're painting the plywood, use a combination primer/paint, and if you're staining the board, use a stain/polyurethane combo. The lively green stain we used is vibrant, plays well with the home’s exterior and complements the surrounding foliage. PRO TIP: When staining porous, unfinished wood like pine or birch, use a pre-stain conditioner for best results.
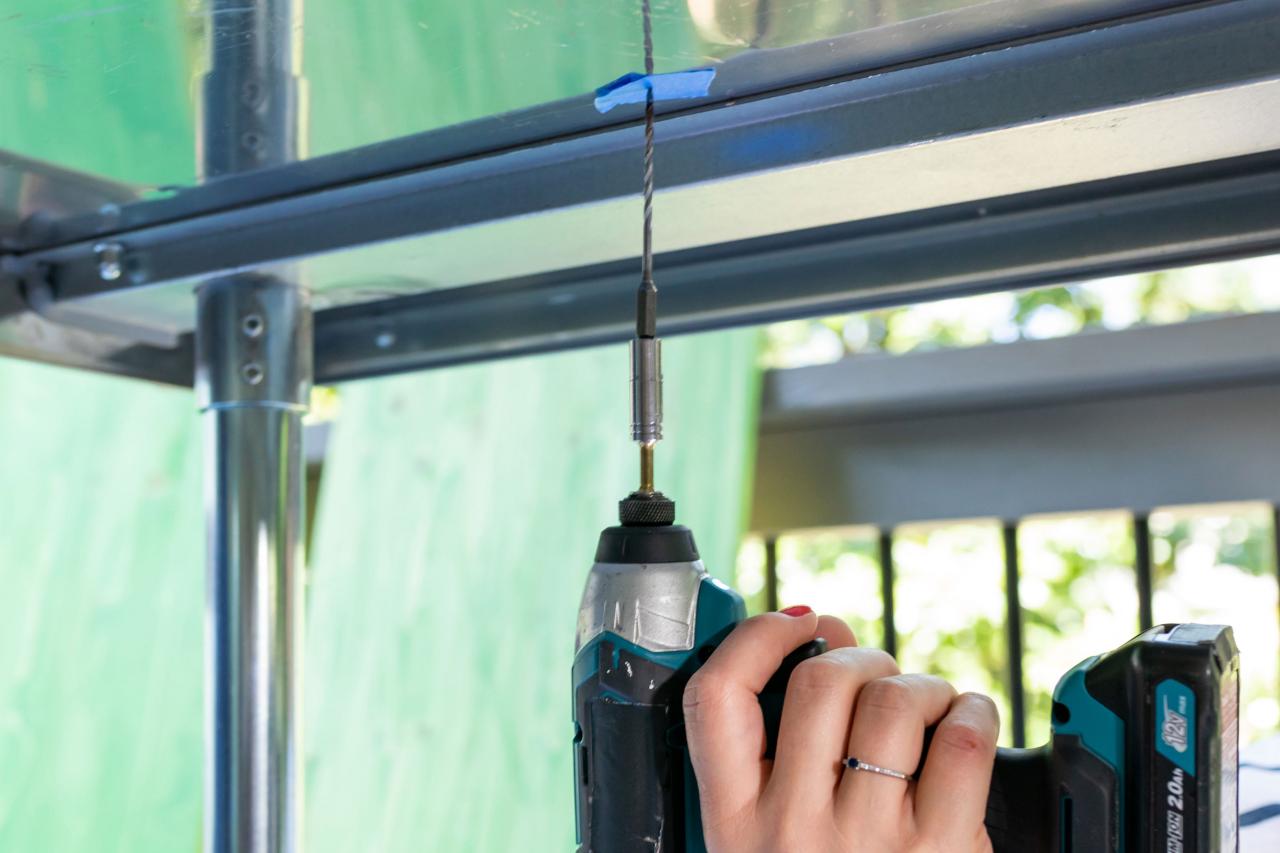
Step 8: Drill Pilot Holes

Tomas Espinoza Photography
Pre-drill holes in the tabletop, use a drill bit designed to bore metal. Then, on the topside, spread a liberal amount of construction adhesive.
Step 9: Clamp Down
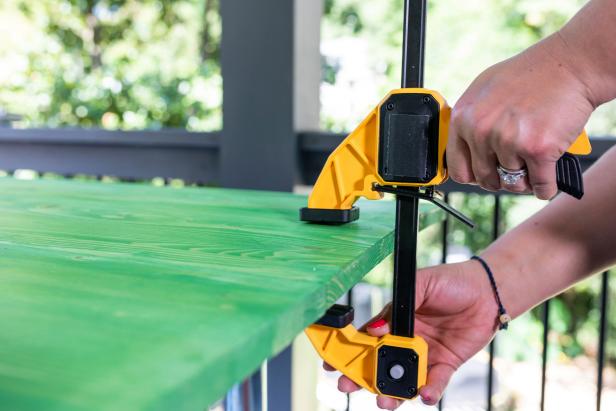
Tomas Espinoza Photography
Lay the wood panel on top, shift to its final position, then use clamps to hold it in place while the adhesive dries. Clamping prevents it from moving while you finish the installation and ensures a tight, secure bond between the metal and wood.
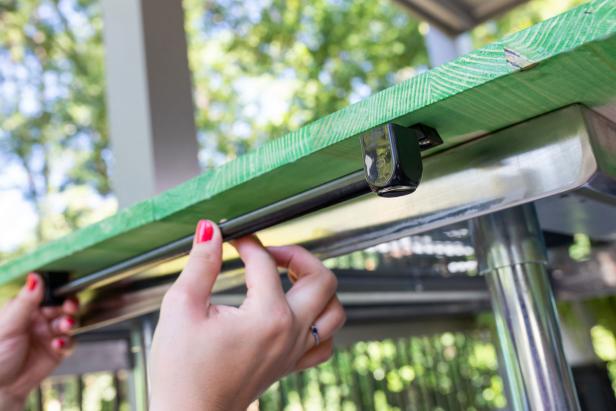
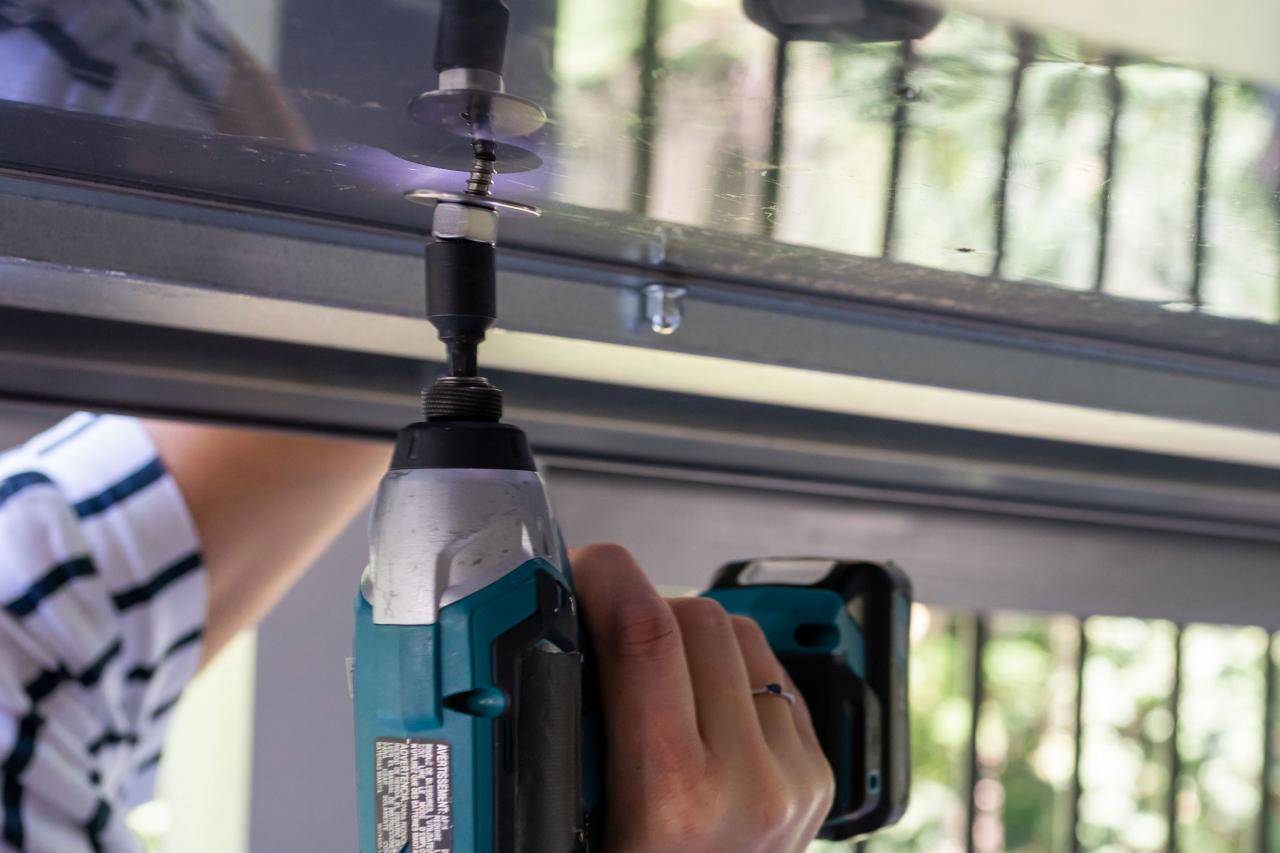
Step 10: Secure With Hardware

Tomas Espinoza Photography
From underneath, secure the wood top to the metal using 1/4 inch bolts. Make sure the hardware is the correct length, before installing to make sure it won’t protrude from the wood top. Place a washer on each bolt, then insert them into the pilot holes. Tighten using a nut-driving bit.
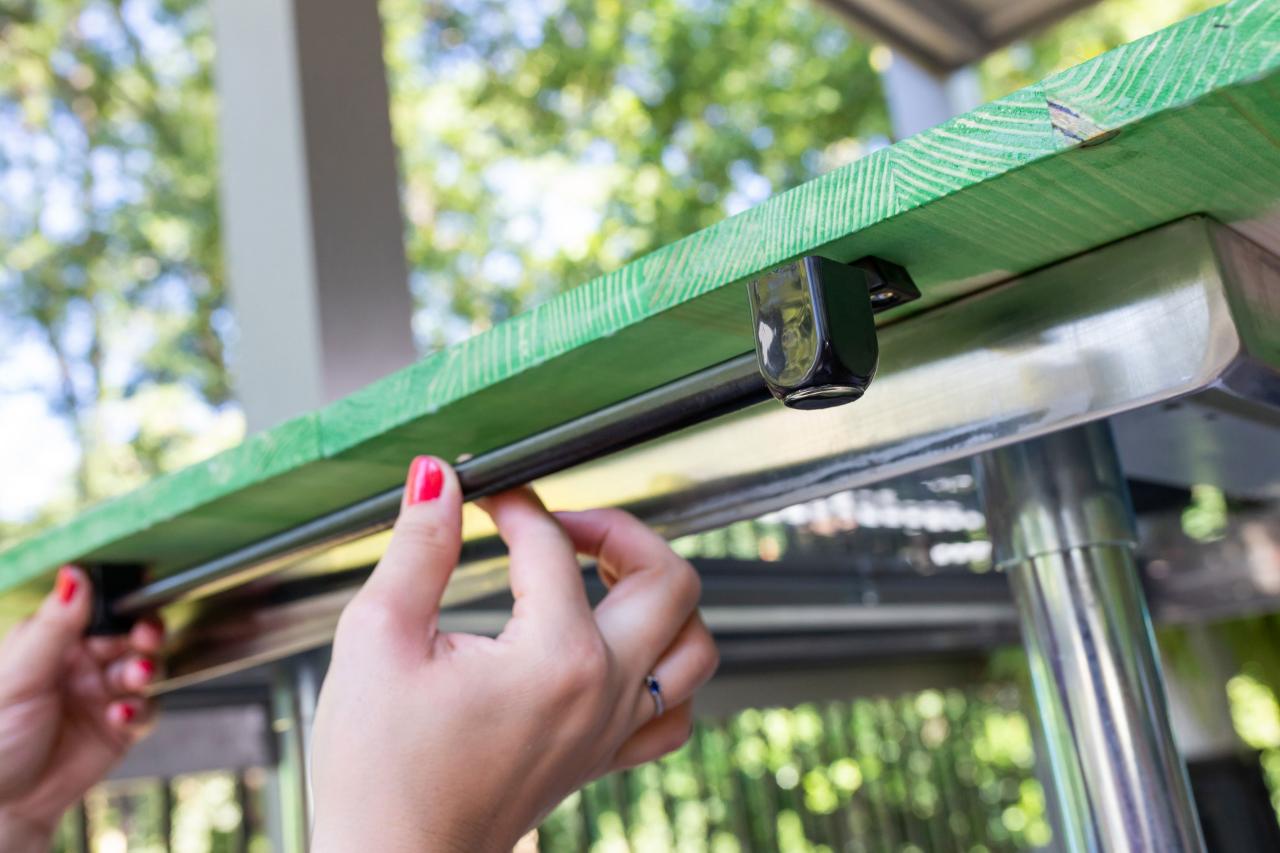
Step 11: Add Utensil Rail
Tomas Espinoza Photography
Standard kitchen utensil rails installed underneath the wood top serve double duty on a kitchen cart. Use them as traditional towel bars, or hang utensils, barbecue tools and additional storage baskets.
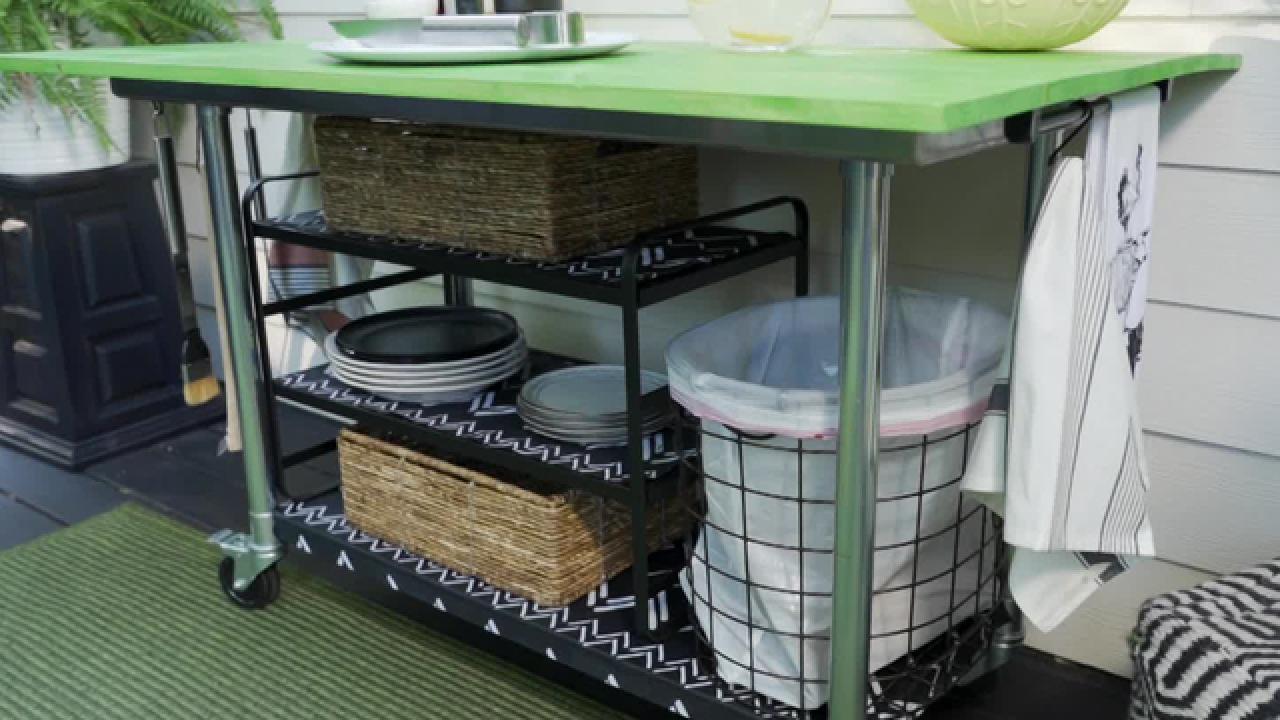
Step 12: Create Levels

Tomas Espinoza Photography
Maximize storage on a cart by creating additional levels underneath the worktop. We updated an old shoe rack with decoupaged fabric to create additional shelving for dishes and barware. A cute wire hamper lined with a garbage bag becomes the perfect spot to drop cans and bottles for recycling.


