


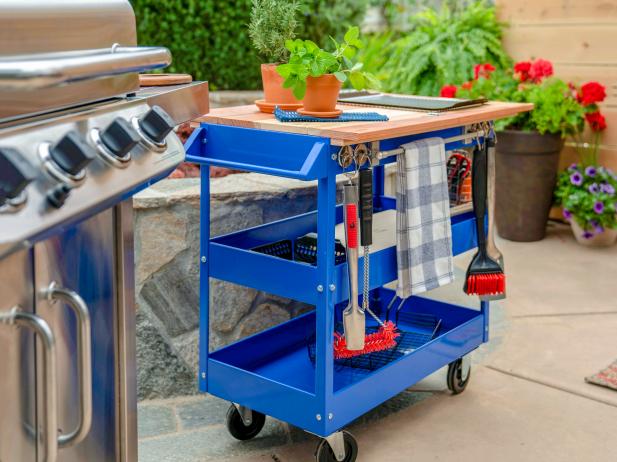
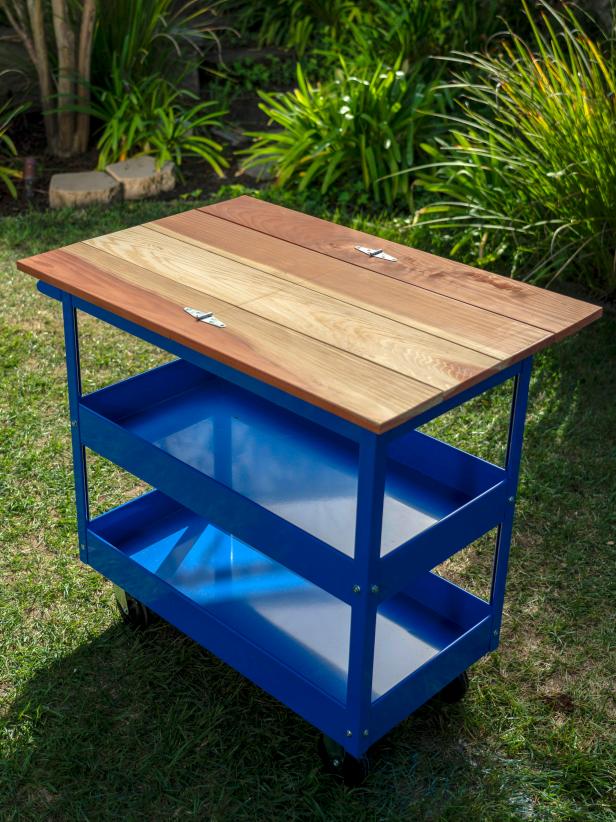
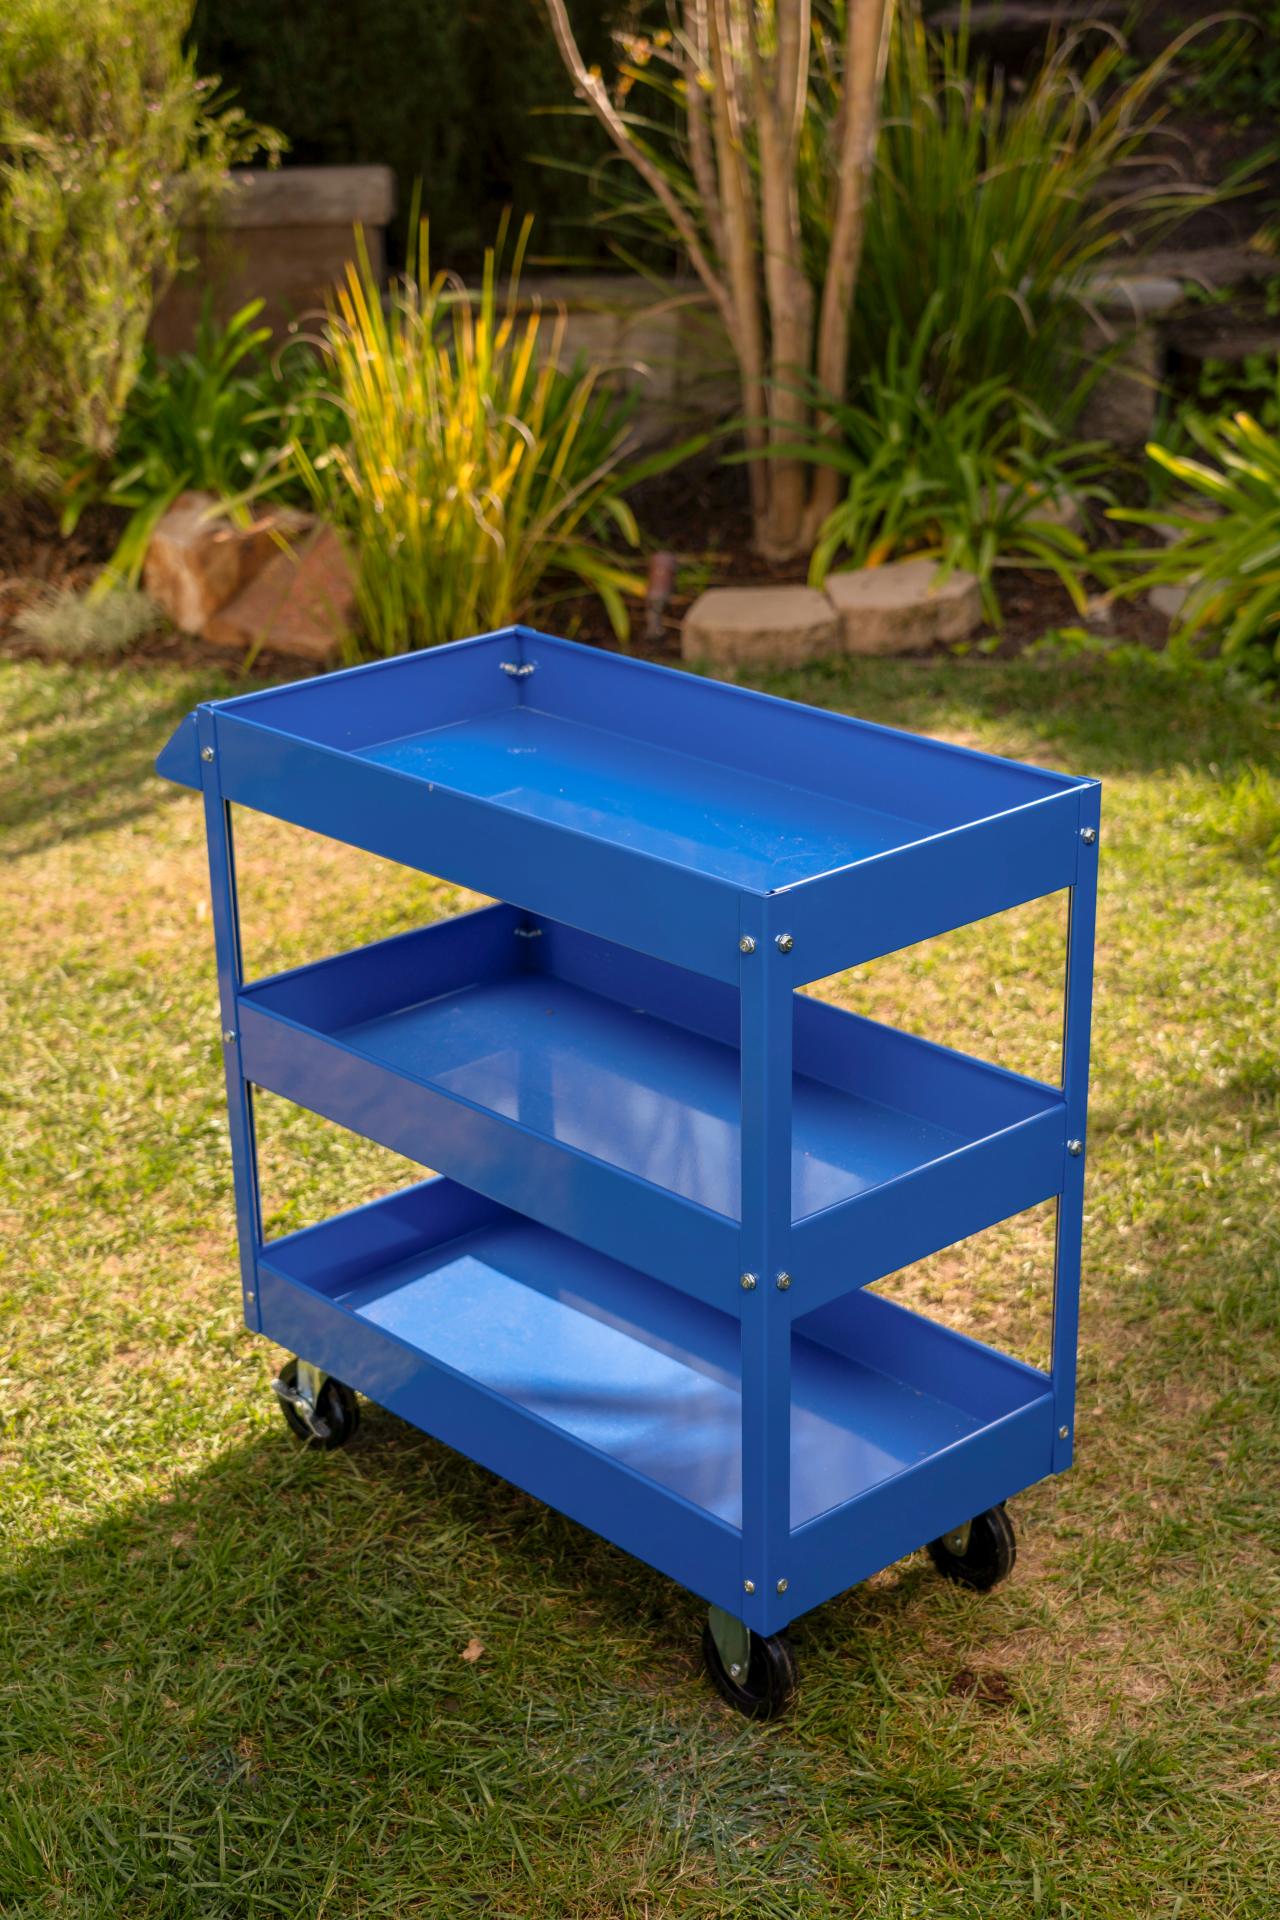
How to Turn a Utility Cart Into a Patio Grill Station
Learn how to trick out a metal cart with a wood top, magnetic hooks and baskets so it can be used as a portable outdoor kitchen island or bar.
Gary Payne
Tools and Materials
- metal utility cart
- (2) 1x6 x 8' redwood or cedar for the tabletop
- (1) 1x2 x 8' redwood or cedar for underside of the tabletop lip
- magnetic hooks
- magnetic towel bar
- metal hanging basket
- polyurethane
- paintbrush
- (2) 2" gate hinges
- drill
- nail gun
- 1" finish nails
- circular saw
- measuring tape
- speed square
- sanding block
- optional: shelf liner
Skill Level: Beginner
Estimated Time: 1/2 day
Estimated Cost: $200
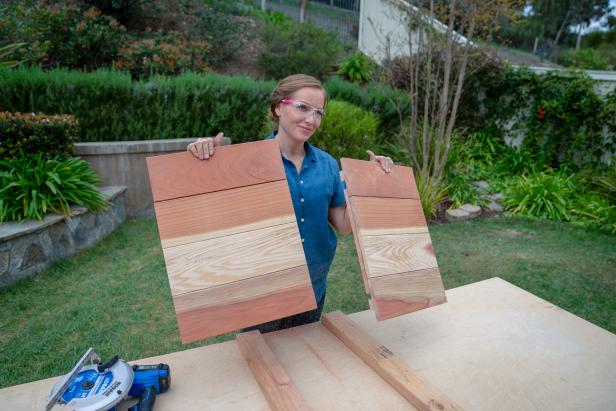
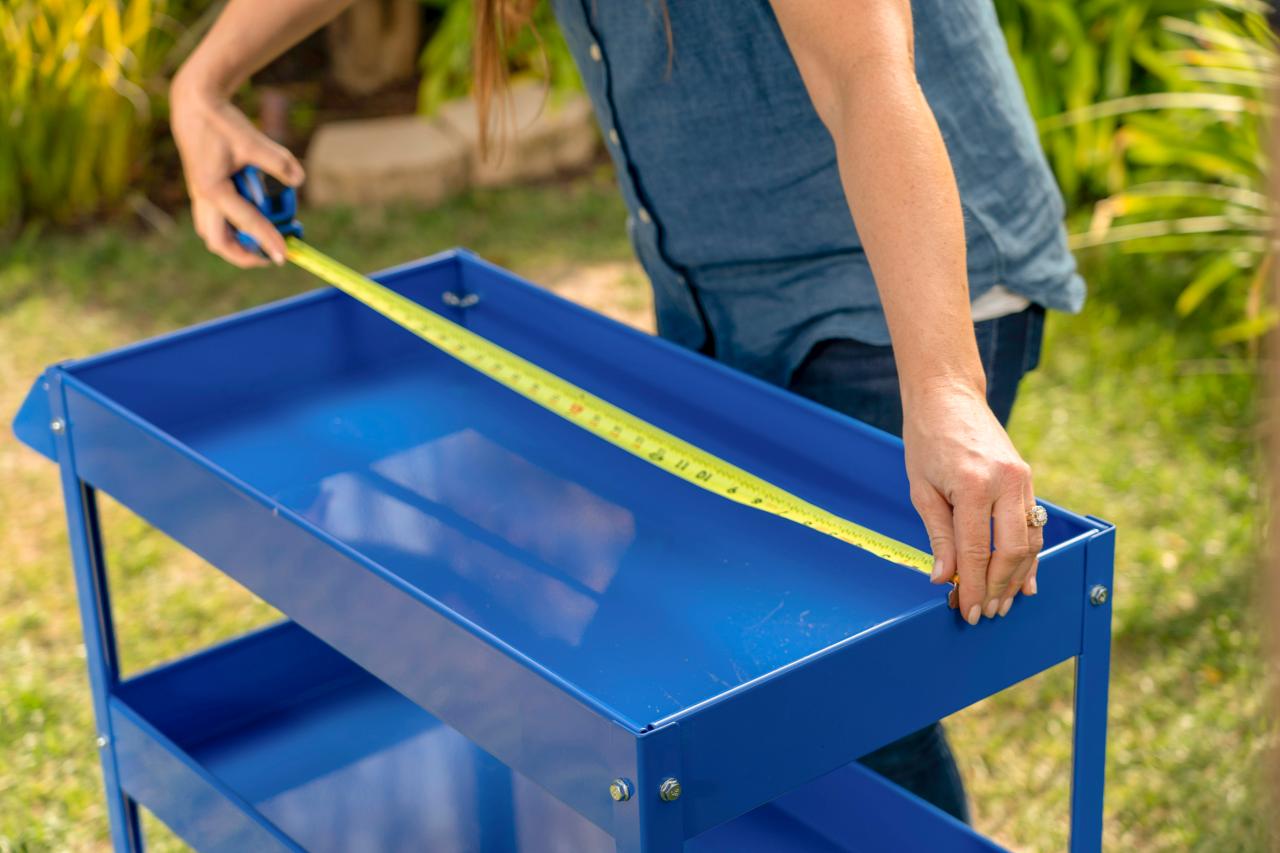
Step 1: Measure for Tabletop

Gary Payne

Gary Payne
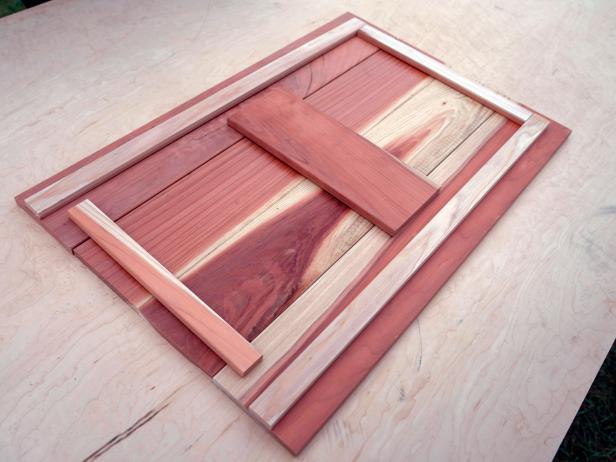
Determine the size of the cart’s wood top. For our tabletop, we cut 1x6s into four 32-1/4” pieces. This length will overlap the top of the cart on three sides; we don’t want an overhang on the side of the cart with the handle.
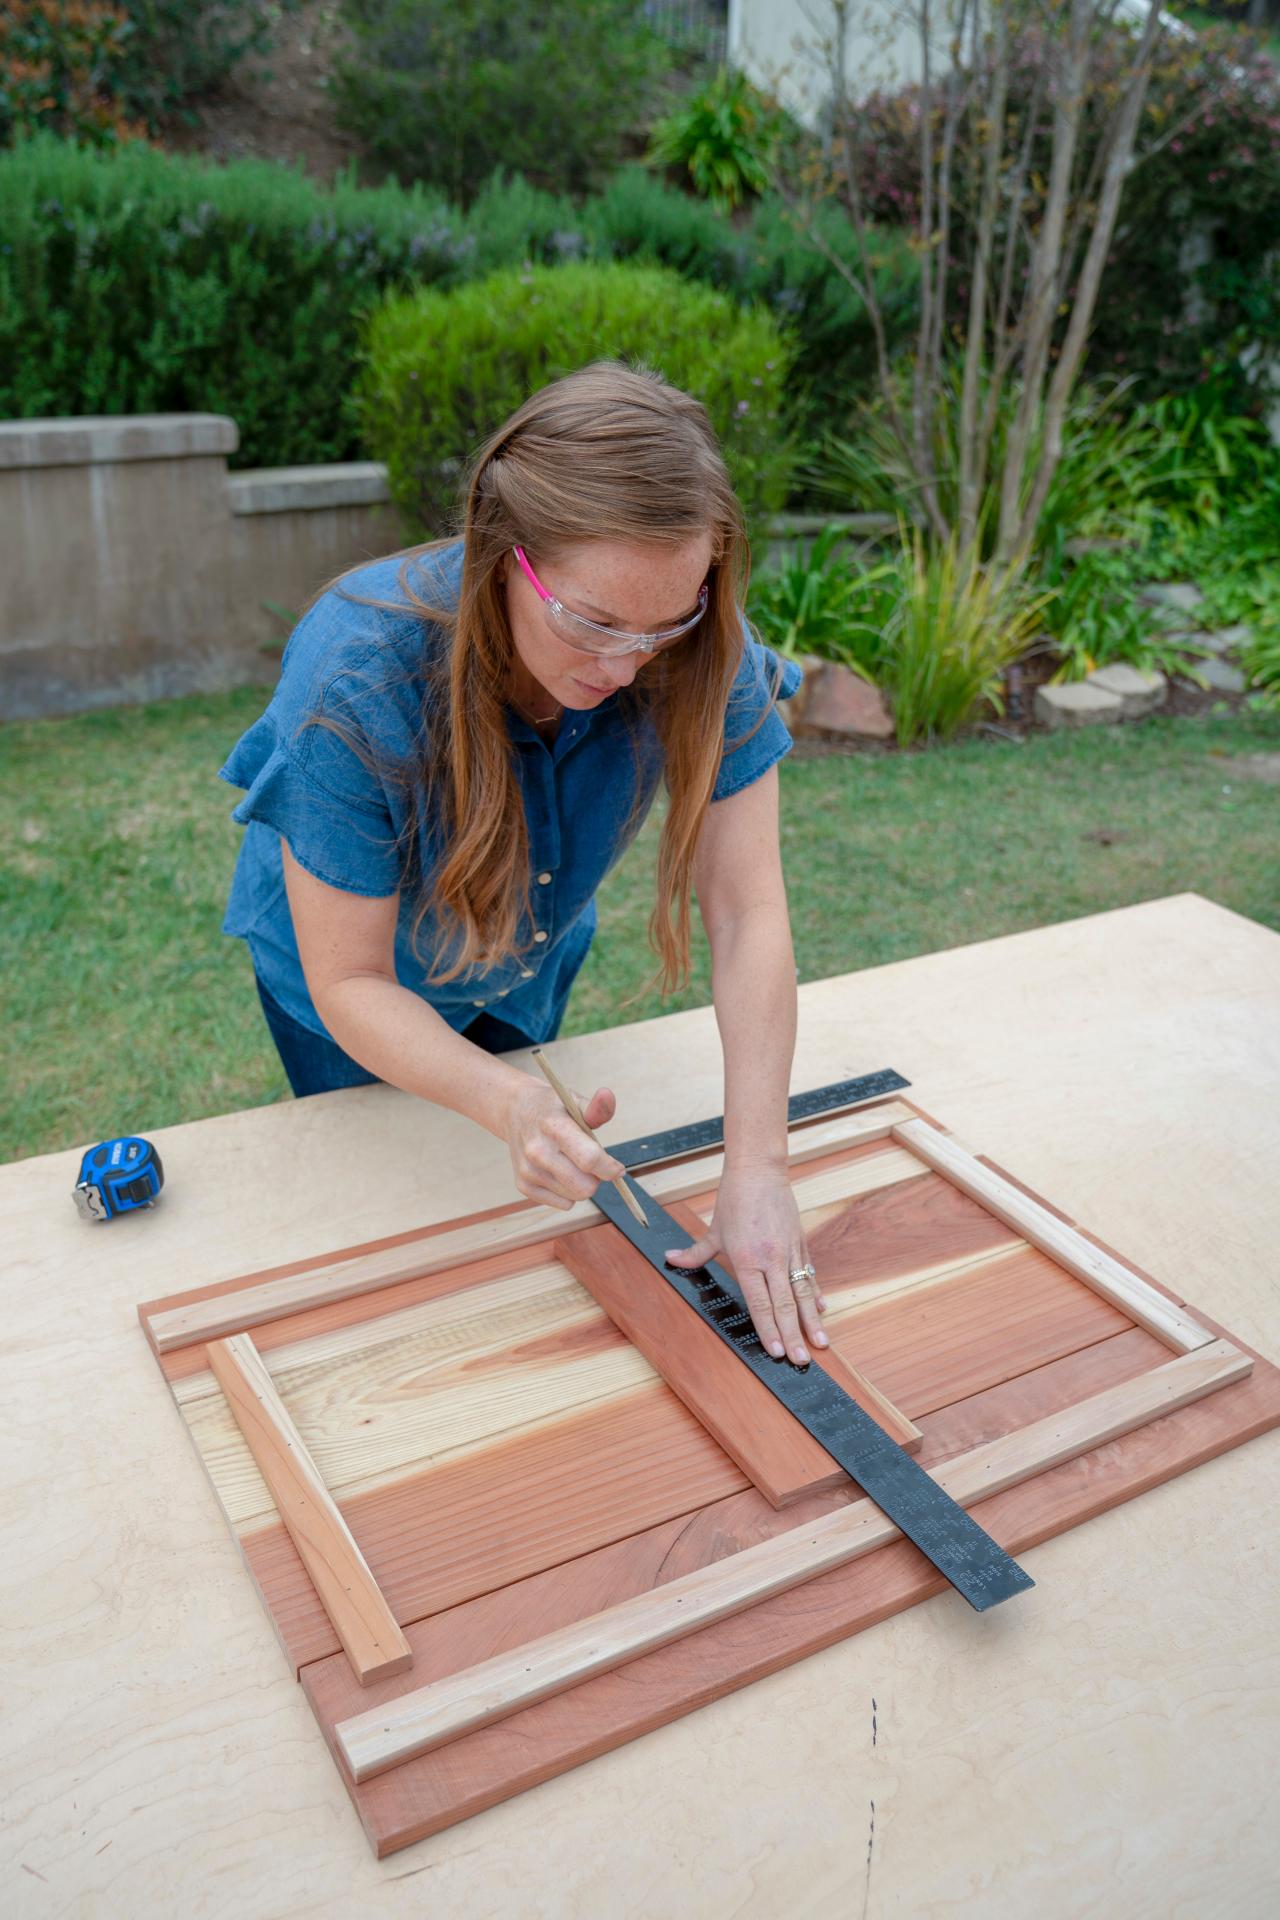
Step 2: Lay Out Lip Pieces
Gary Payne
Add a lip made of 1x2s to the underside of the 1x6s to secure them together, and to hold the tabletop in place when it sits on the cart. To ensure the lip boards are in the right place, use a speed square to line up the 1x6s and make a mark on the underside 1-1/4” from the edge on three sides. (The handle side will be addressed later in this step.) This lip will sit on the outside edge of the cart wall. The two 1x2 pieces for the longer sides will measure 31”. The two end pieces will measure 16-1/8” and 12-3/8”. The shorter board is the handle side of the cart and will fit inside the edge of the cart wall. This board will be inset from the edge 1/2”. In the center of the top, add a 1x6 across the boards leaving a small gap for the cart edge to clear.
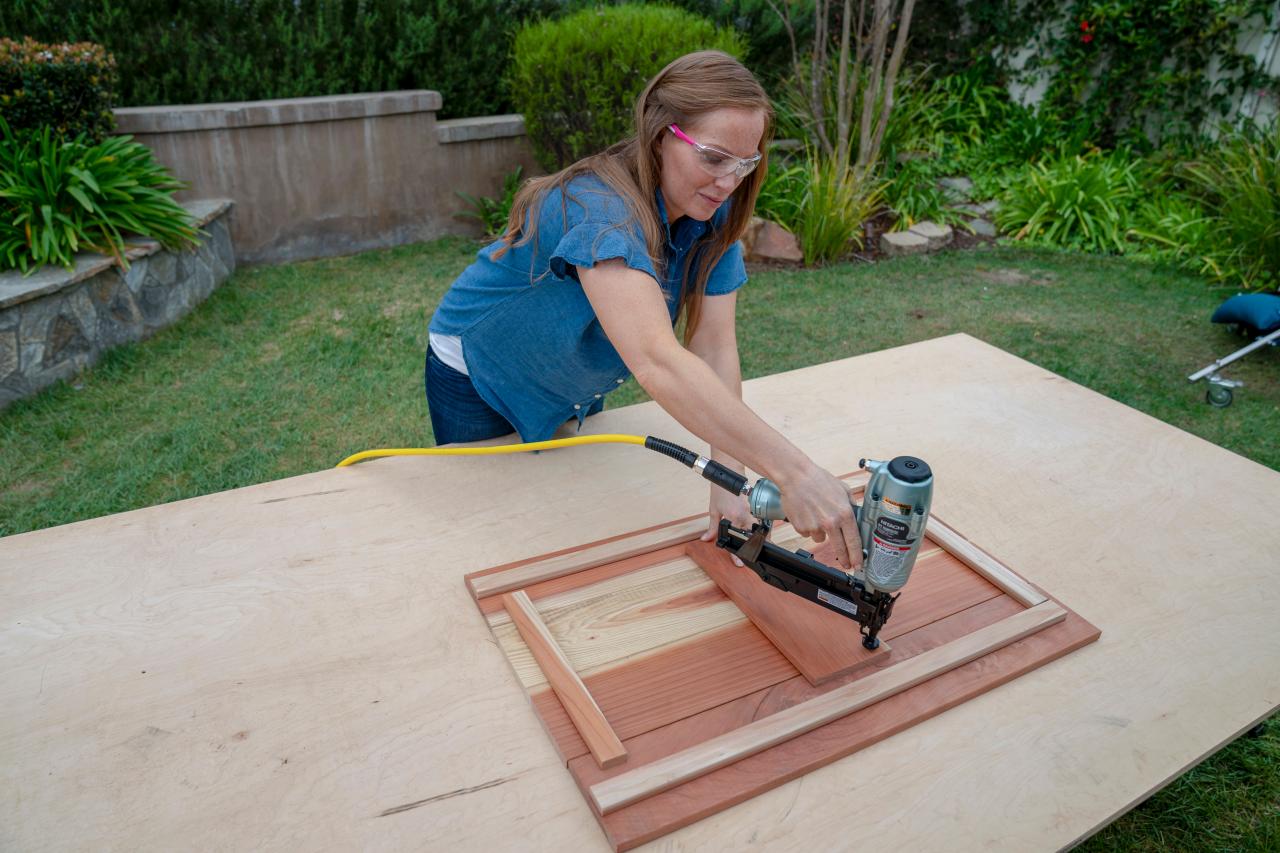
Step 3: Fasten Lip Pieces to Tabletop

Gary Payne

Gary Payne
Gary Payne
Gary Payne
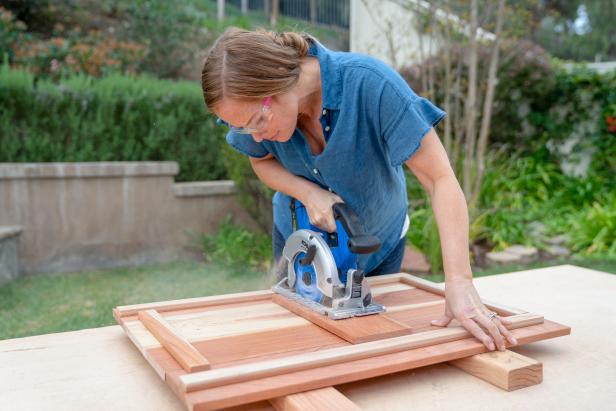
Secure the 1x2s to the 1x6s using 1” finish nails. Make sure not to put nails in the center because you will be cutting the tabletop in half. Mark the center point of the short side of the tabletop on the lip pieces. Set up the tabletop so it is raised and then use a circular saw to cut the top in half.
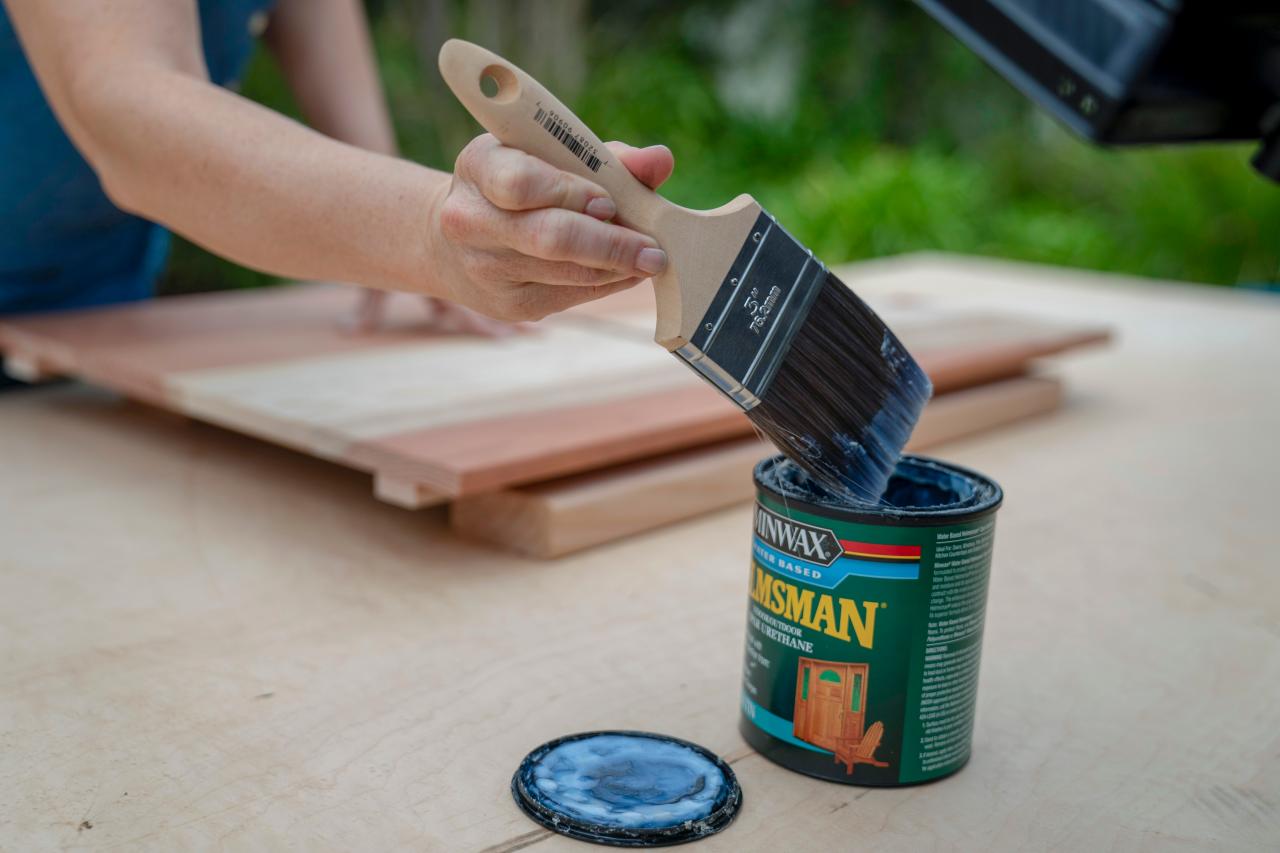
Step 4: Sand and Apply a Sealer

Gary Payne
Use a sanding block to smooth any rough edges. Apply exterior-grade urethane to seal the tabletop. Be sure to seal all sides of the wood to help prevent the wood from warping. Let dry.
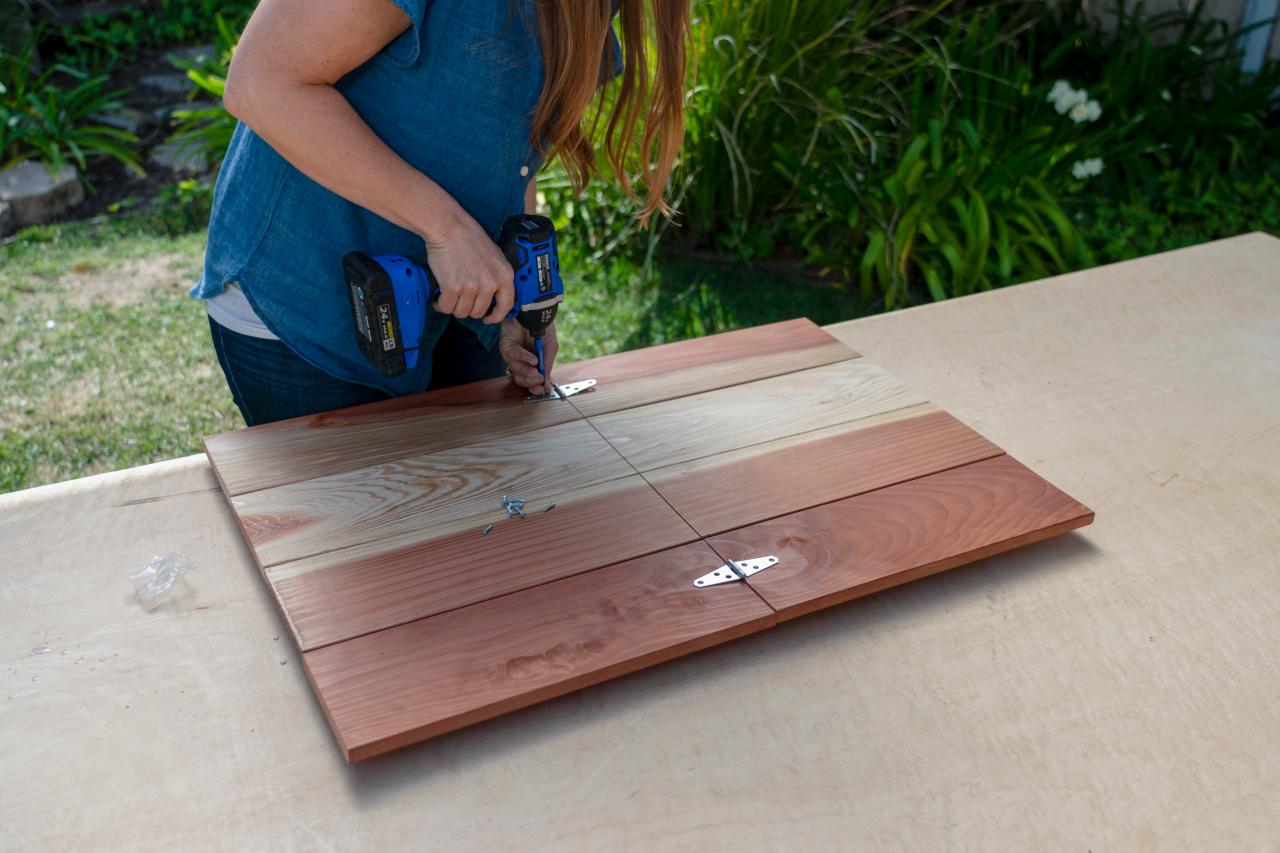
Step 5: Attach Hinges

Gary Payne
Add two hinges to the outside top edges. The hinges will allow access for additional storage underneath the work surface.
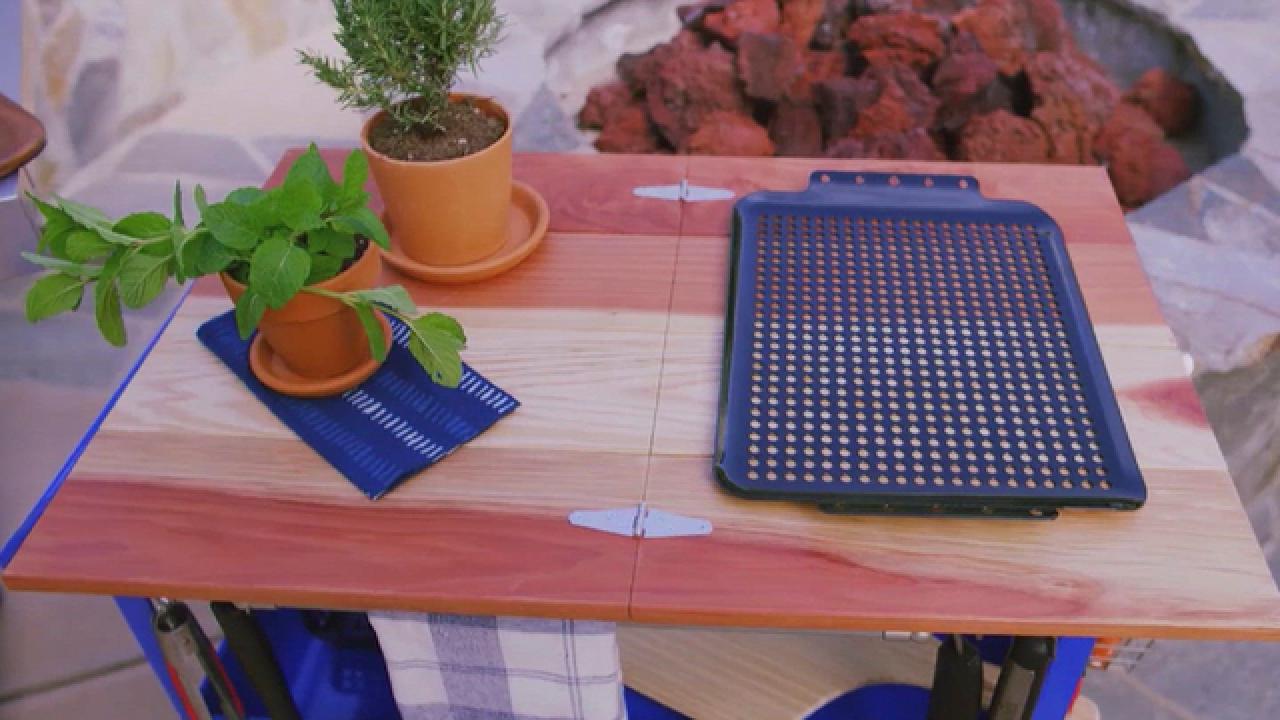
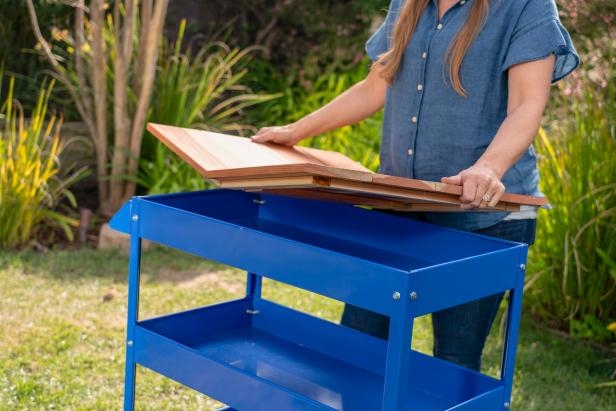
Step 6: Place Tabletop
Gary Payne
Gary Payne
After hinges are in place, set the top onto the cart.
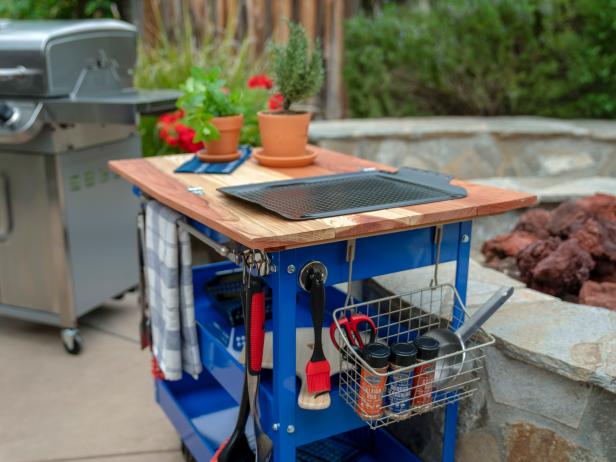
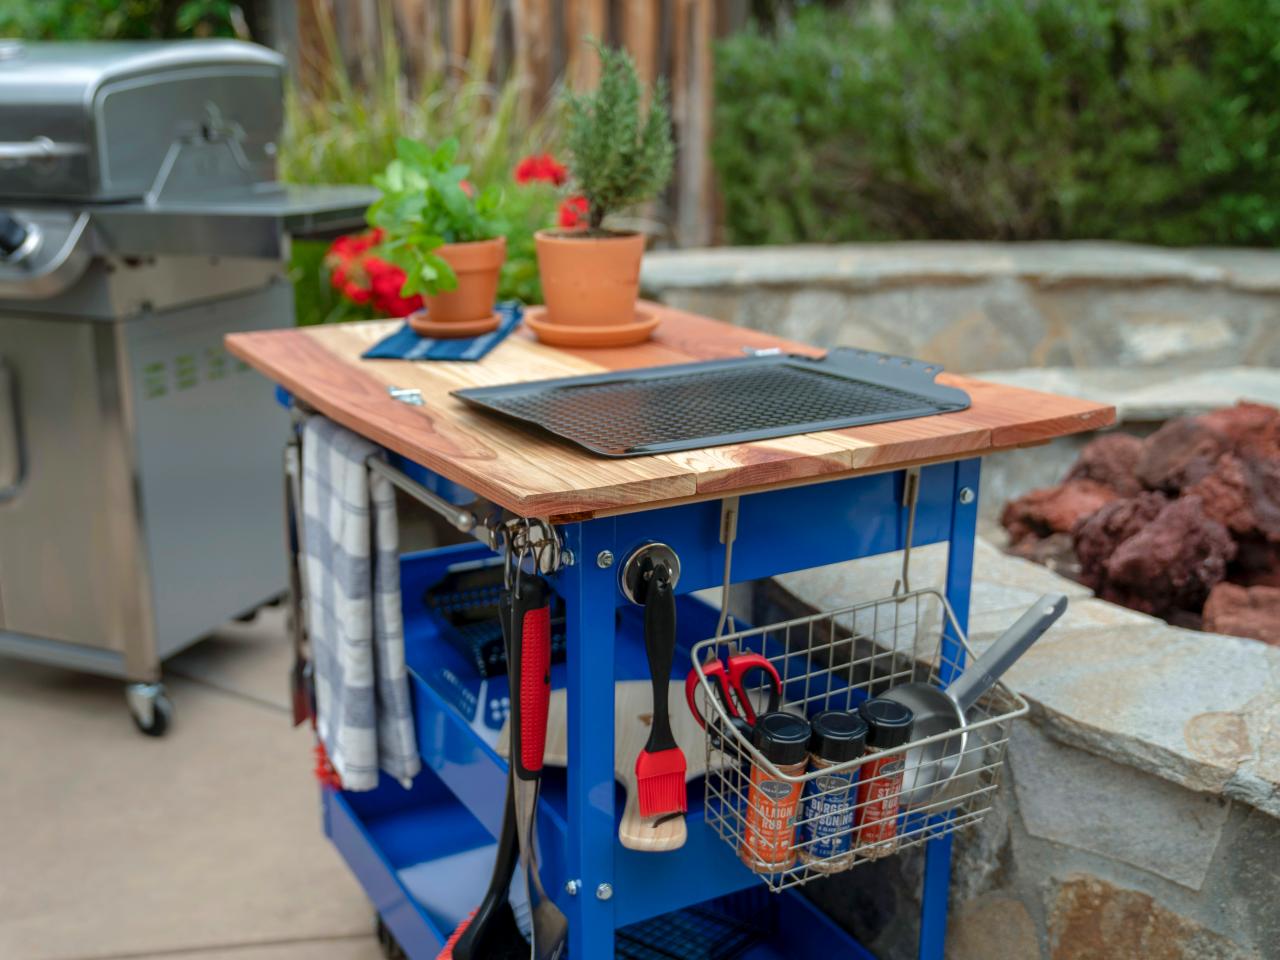
Step 7: Accessorize
Gary Payne
Attach magnetic hooks, magnetic towel bar(s) and baskets for additional storage of grill tools, towels and condiments. Optionally, you can lay a liner on the shelves of the cart.


