


How to Install Timeless Rail-and-Stile Wainscoting
Wainscoting wall treatments are a classic way to add architectural interest to any room. Consisting of horizontal rails and vertical stiles, this relatively easy woodworking project is based on a design found in historic homes, and is sure to lend old-home charm to builder-basic new spaces.

Marian Parsons, Mustard Seed Interiors

Materials Needed
1” x 6” pine boards for horizontal top rail
1” x 4” boards for rails (horizontal pieces) and stiles (vertical pieces)
1” x 2” for top ledge
measuring tape
spirit level
stud finder
chop/miter saw
finishing nail gun and 1-1/4” nails
white trim caulk and caulk gun
wood filler
180-grit sandpaper
primer
trim paint
foam trim paint roller and roller tray
2” angled sash paintbrush
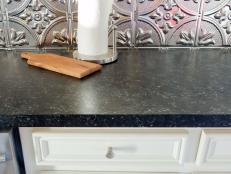
A Note Before Beginning: This treatment is best installed on a baseboard with a flat top. If baseboard tapers at the top, it’s best to replace them prior to installing this style of wainscoting. The trim in this room is simply 1” x 6” pine boards, finished with quarter-round at the base.

How to Install Wainscoting - Before You Begin
A note before beginning: This treatment is best installed on a baseboard with a flat top. If baseboard tapers at the top, it is best to replace them prior to installing this style of wainscoting. The trim in this room is simply 1” x 6” pine boards, finished with ¼ round at the base.
Photo by: Marian Parsons, Mustard Seed Interiors
Marian Parsons, Mustard Seed Interiors
Installing Horizontal Top Rail
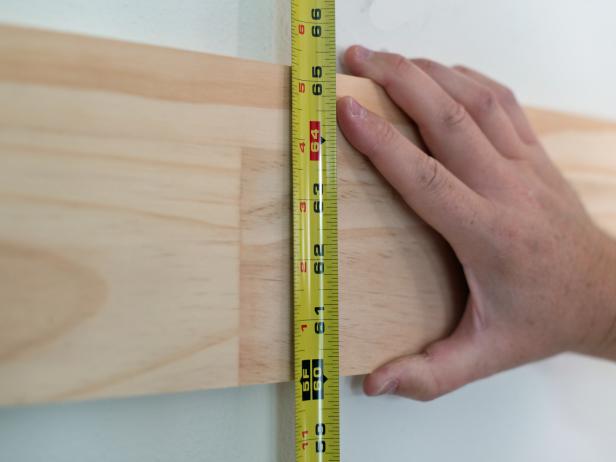
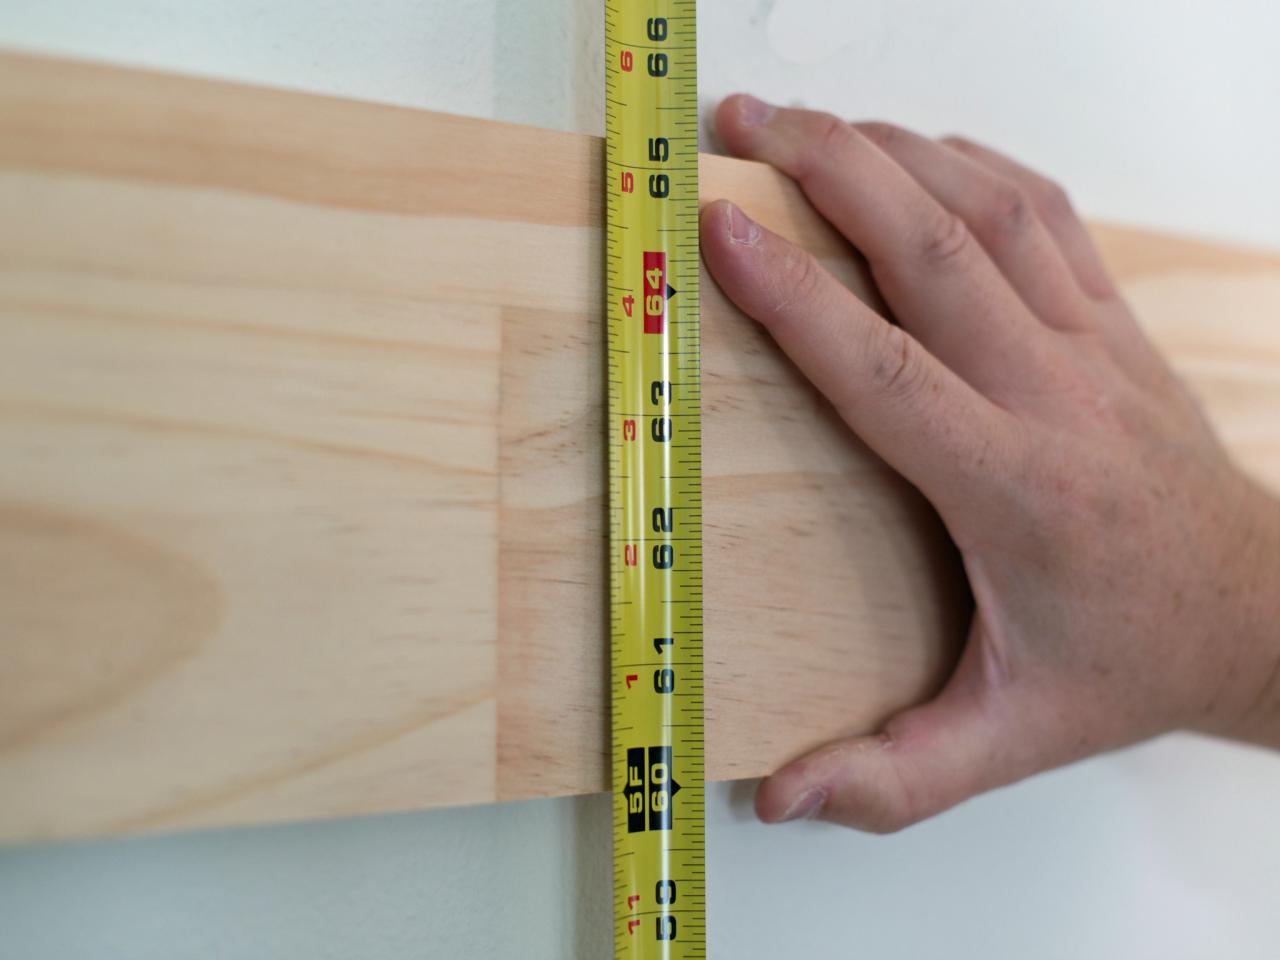
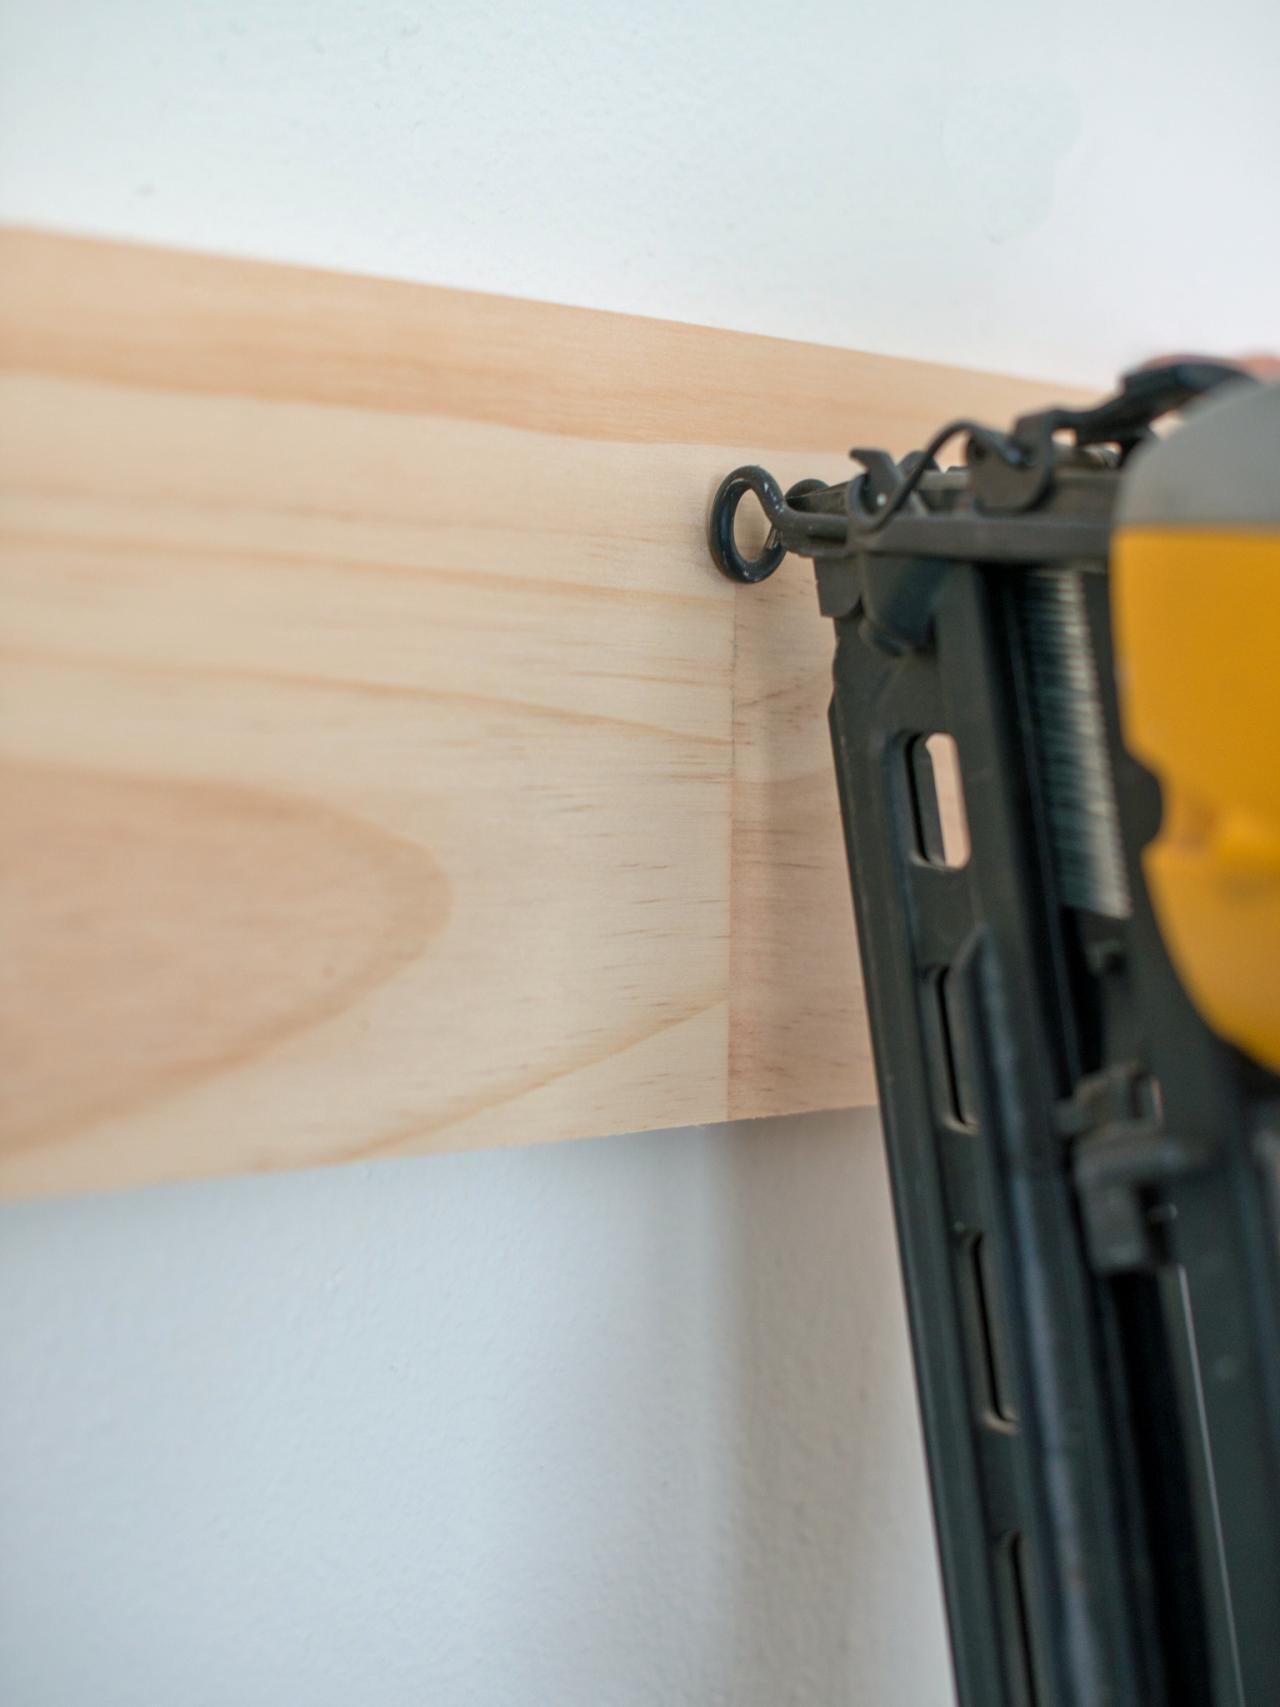
Measure 60” up from the floor with a measuring tape and mark with pencil. This is the height of the bottom of the horizontal top rail (Image 1). Cut 1” x 6” board to proper width for wall. Hold in place, lining bottom edge up with pencil mark. Balance a level on top and adjust until bubble shows board is level. Nail into place with 1-1/4” finish nails (Image 2). Place two nails, one towards top and one towards the bottom of the board, every 10-12”. It’s best if a few nails securing each board are shot into studs. Use a stud finder and mark their location lightly with a pencil while working around the room. Tip: Start on the least visible wall in the room, so your technique can be perfected before working on areas that are focal points.
Marian Parsons, Mustard Seed Interiors

Marian Parsons, Mustard Seed Interiors
How to Install Wainscoting: Step 1: Installing Horizontal Top Rail
Measure 60” up from the floor with a measuring tape and mark with pencil. This is the height of the bottom of the horizontal top rail.
Photo By: Marian Parsons, Mustard Seed Interiors
How to Install Wainscoting: Step 1: Installing Horizontal Top Rail
Cut 1” x 6” board to proper width for wall. Hold in place, lining bottom edge up with pencil mark. Balance a level on top and adjust until bubble shows board is level. Nail into place with 1 ¼” finish nails. Place two nails, one towards top and one towards the bottom of the board, every 10-12”. It is best if a few nails securing each board are shot into studs. Use a stud finder and mark their location lightly with a pencil while working around the room. Tip: Start on the least visible wall in the room, so your technique can be perfected before working on areas that are focal points.
Photo By: Marian Parsons, Mustard Seed Interiors
Install the Stiles
Cut 1” x 4” boards being used for stiles (vertical boards) so they fit between the bottom of the horizontal top rail and top of baseboards. Because not all floors are level and walls plumb, double-check this measurement periodically around the room because they will most likely change. Select a starting point that works best aesthetically for that particular length of wall. It may look best to start from left to right, right to left, or center and work out. Install stiles vertically, every 14”. Use a level before affixing each board to the wall to ensure the stile is plumb. Tip: Cut a scrap piece of wood to 14” long to use as a 'measuring stick' between each stile. This method is quicker and more accurate than using a tape measure each time.

How to Install Wainscoting: Step 2: Install the Stiles
Cut 1” x 4” boards being used for stiles (vertical boards) so it fits between the bottom of the horizontal top rail and top of baseboards. Because not all floors are level and walls plumb, double-check this measurement periodically around the room. It might change! Select a starting point that works best aesthetically for that particular length of wall. It may look best to start from left to right, right to left, or center and work out. Install stiles vertically, every 14”. Use a level before affixing each board to the wall to ensure the stile is plumb. Tip: Cut a scrap piece of wood to 14” long to use as a “measuring stick” between each stile. This method is quicker and more accurate than using a tape measure each time.
Photo by: Marian Parsons, Mustard Seed Interiors
Marian Parsons, Mustard Seed Interiors
Install Rails
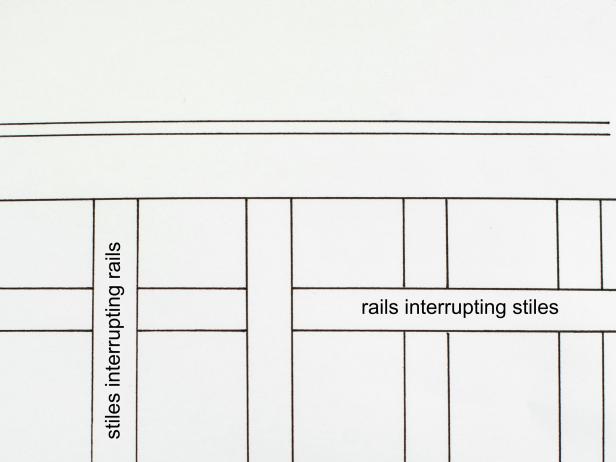
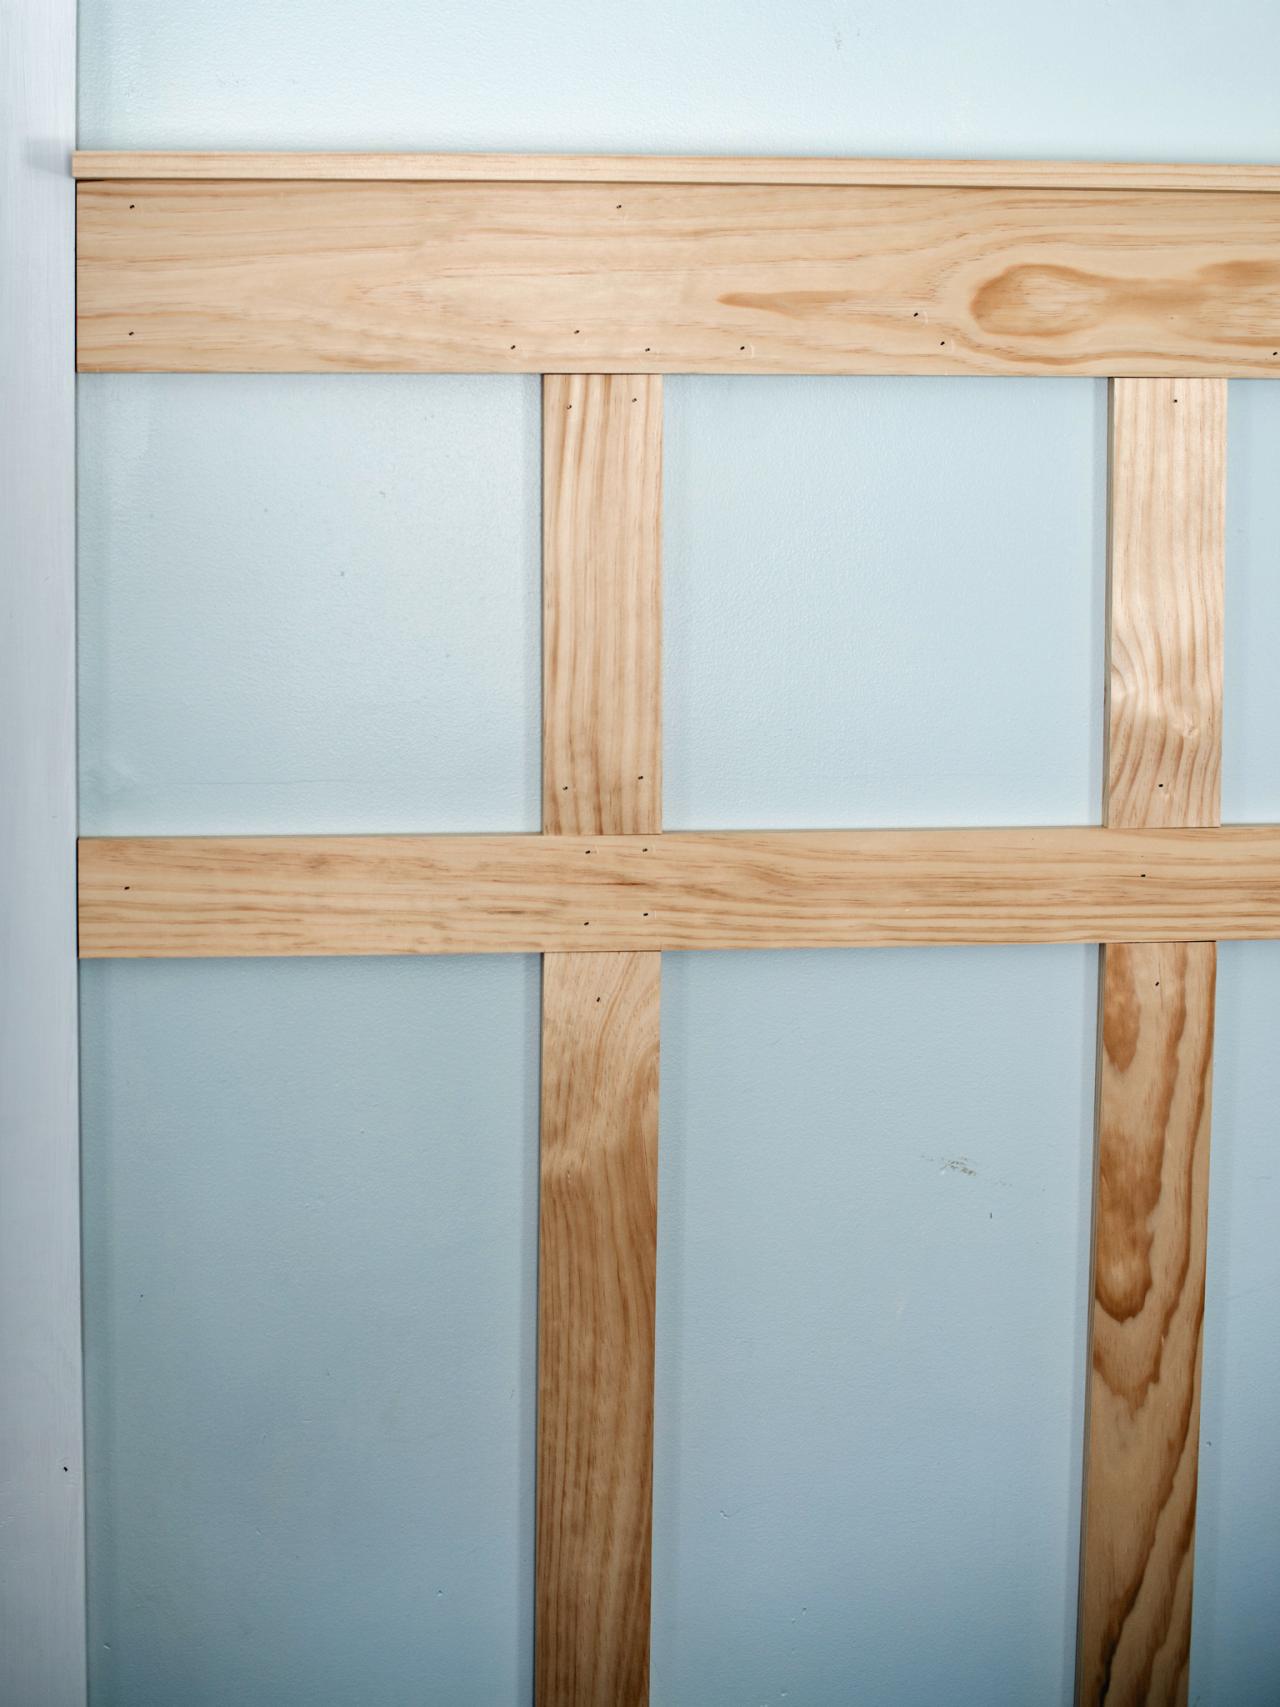
Cut 1” x 4” boards to 14” long to use as rails. Use 14” 'measuring stick' to measure between top rail and lower rail to form a 14” square pattern. Once properly placed and level, nail into place with finishing nails to secure (Image 1). Note: This wainscoting can be installed where the rails interrupt stiles or stiles interrupt the rails. (See diagram, Image 2.) We tried both methods and found it was easiest to have the stiles (vertical) interrupt the rails (horizontal) as described in this tutorial.

Marian Parsons, Mustard Seed Interiors
Marian Parsons, Mustard Seed Interiors
How to Install Wainscoting: Step 3: Install Rails
Cut 1” x 4” boards to 14” long to use as rails. Use 14” “measuring stick” to measure between top rail and lower rail to form a 14” square pattern. Once properly placed and level, nail into place with finishing nails to secure.
Photo By: Marian Parsons, Mustard Seed Interiors
How to Install Wainscoting: Step 3: Install Rails
Note: This wainscoting can be installed where the rails interrupt stiles or stiles interrupt the rails. We tried both methods and found it was easiest to have the stiles interrupt the rails as described in this tutorial.
Photo By: Marian Parsons, Mustard Seed Interiors
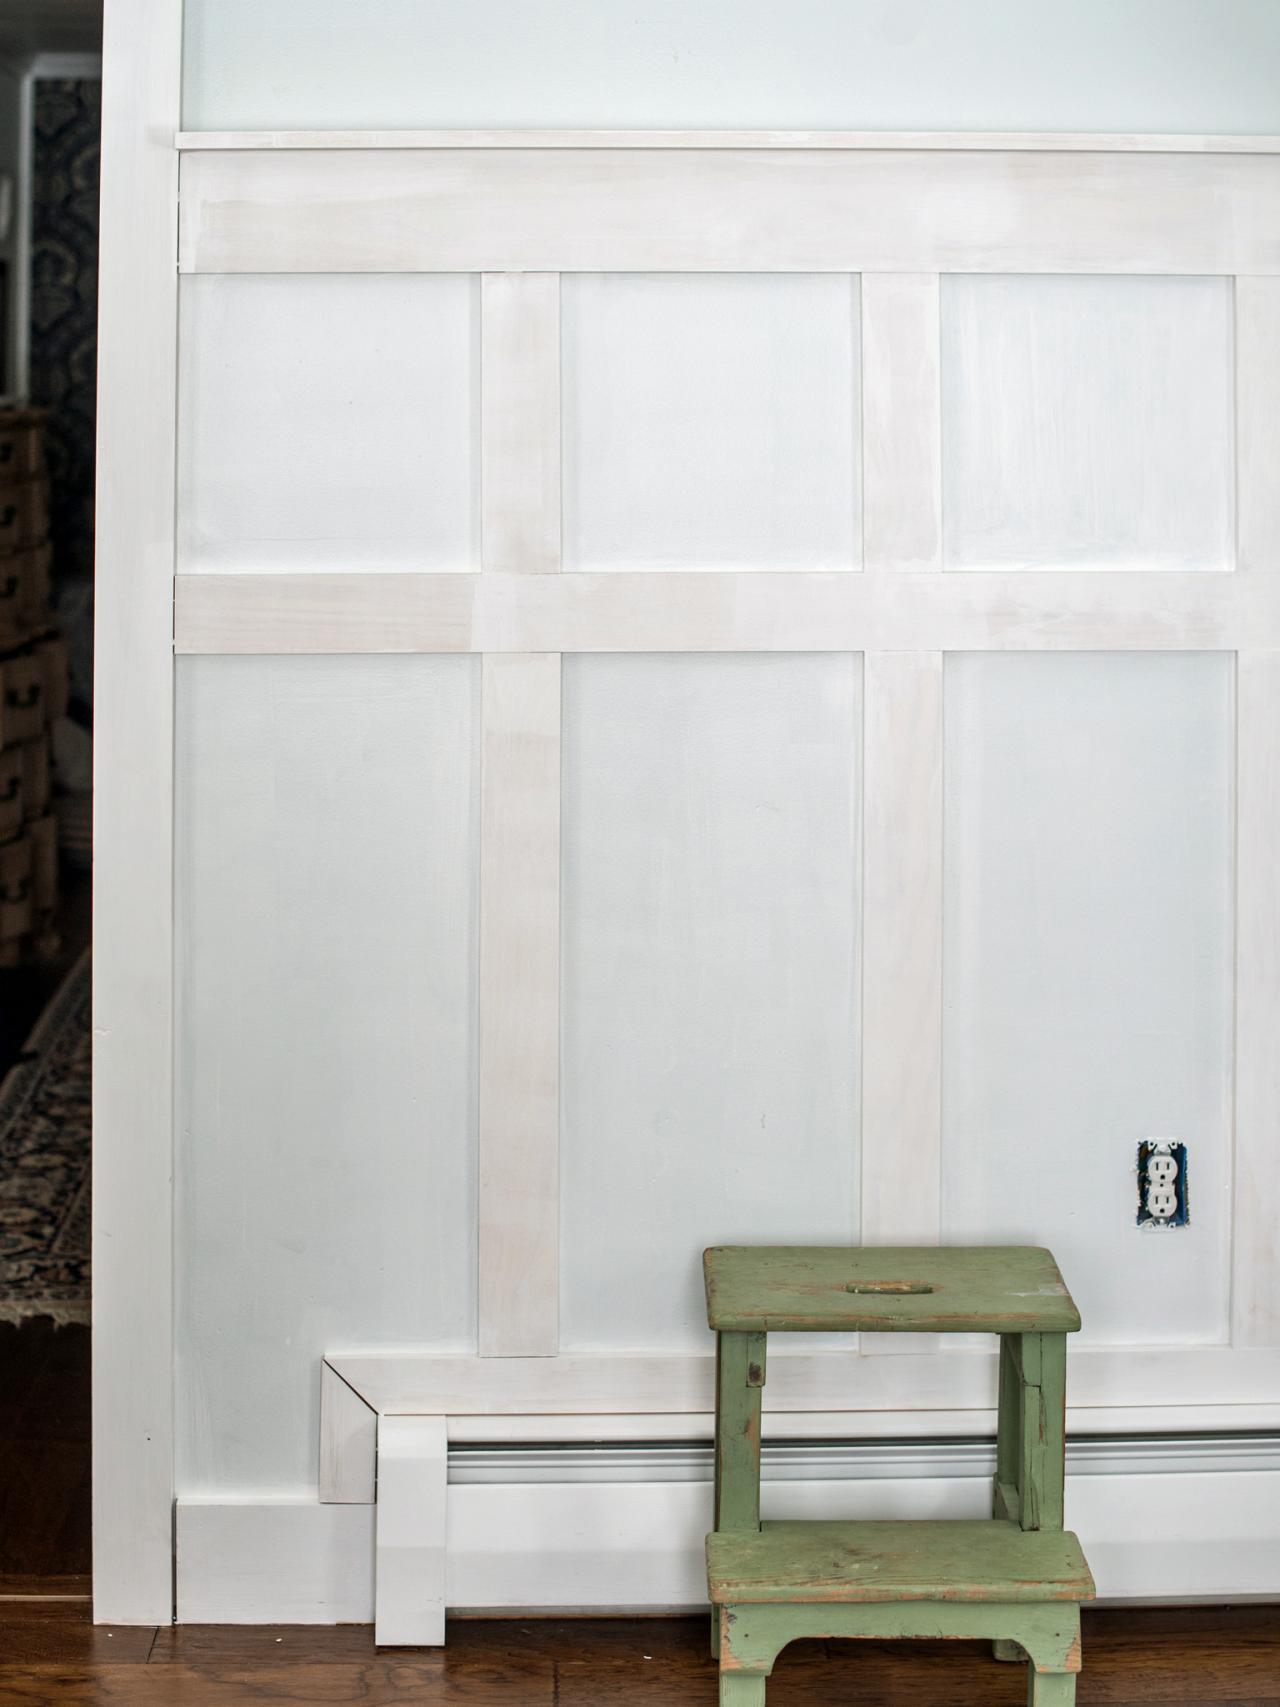
Install Ledge
Cut 1” x 2” pine board to proper measurement on chop/miter saw. Rest on top of horizontal top rail to create a ledge. Nail into place, downward into top rail (Image 1). Note: Where corners meet, wood can be butted together or mitered. (See diagram, Image 2, which is the view from above.) Some adjustments may need to be made around light switches and outlets. Pattern may also be adjusted under windowsills, around built-in pieces, etc. Repeat steps #1-4 around the room until wainscoting is complete (Image 3).

Marian Parsons, Mustard Seed Interiors

Marian Parsons, Mustard Seed Interiors

Marian Parsons, Mustard Seed Interiors
How to Install Wainscoting: Step 4: Install Ledge
Cut 1” x 2” pine board to proper measurement on chop/miter saw. Rest on top of horizontal top rail to create a ledge. Nail into place, downward into top rail.
Photo By: Marian Parsons, Mustard Seed Interiors
How to Install Wainscoting: Step 4: Install Ledge
Where corners meet, wood can be butted together or mitered.
Photo By: Marian Parsons, Mustard Seed Interiors
How to Install Wainscoting: Step 4: Install Ledge
Some adjustments may need to be made around light switches and outlets. Pattern may also be adjusted under windowsills, around built-in pieces, etc. Repeat steps #1-4 around the room until wainscoting is complete.
Photo By: Marian Parsons, Mustard Seed Interiors
Caulk, Fill, Prime and Paint
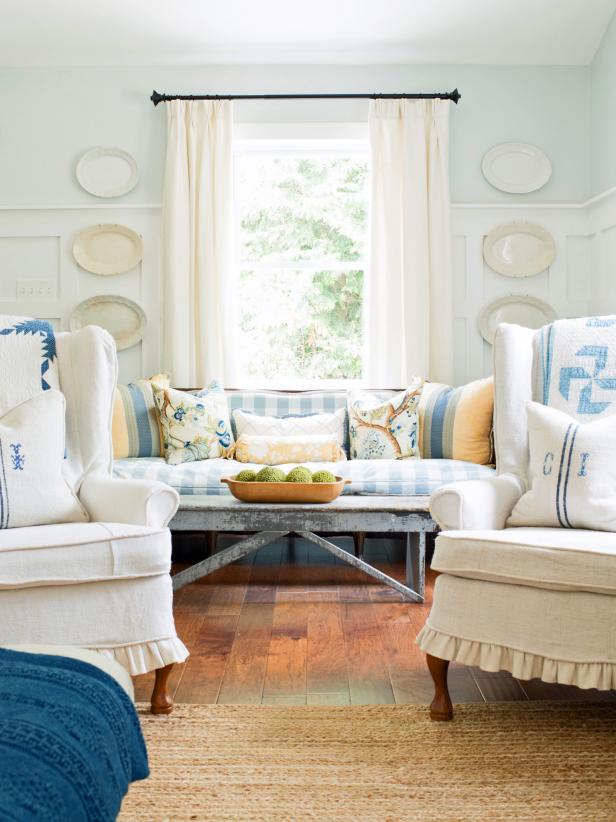
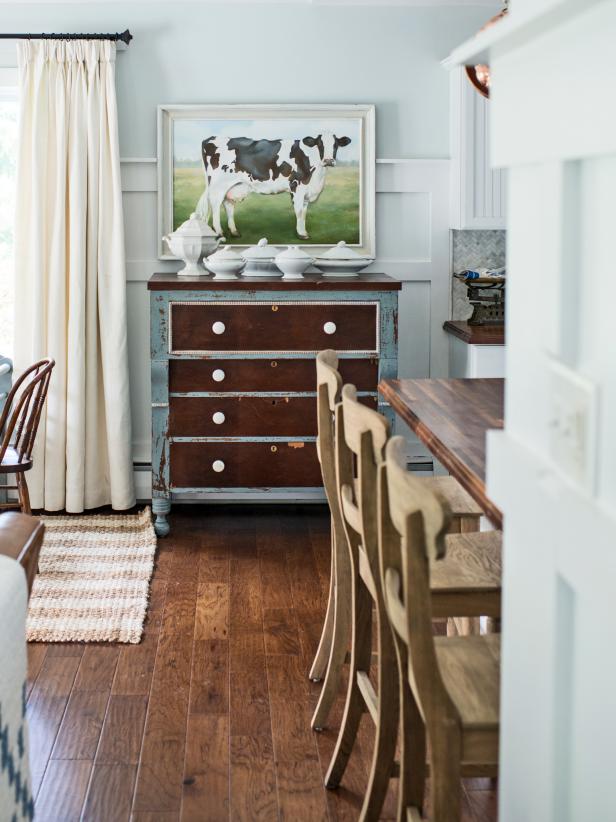
Use paintable trim caulk and a caulk gun to fill cracks and lines where wood pieces meet each other, baseboards, moldings and the wall. Allow caulk to completely dry prior to priming. Fill nail holes with wood filler, working it into each nail hole with a fingertip. Lightly sand filler smooth with 180-grit paper once it's dry. Apply primer to walls and wood using a foam trim roller and 2” angled sash paintbrush (Image 1). Allow primer to completely dry. In the same manner, paint on trim paint in desired color and finish. Allow paint to dry, then enjoy your living room, dining room or foyer's timeless new look (Images 2, 3 and 4).

Marian Parsons, Mustard Seed Interiors
Marian Parsons, Mustard Seed Interiors
Marian Parsons, Mustard Seed Interiors

Marian Parsons, Mustard Seed Interiors
How to Install Wainscoting: Step 5: Caulk, Fill, Prime, and Paint
Use paintable trim caulk and a caulk gun to fill cracks and lines where wood pieces meet each other, baseboards, moldings, and the wall. Allow caulk to completely dry prior to priming. Fill nail holes with wood filler, working it into each nail hole with a fingertip. Lightly sand filler smooth with 180-grit paper once it is dry. Apply primer to walls and wood using a foam trim roller and 2” angled sash paintbrush. Allow primer to completely dry. In the same manner, paint on trim paint in desired color and finish. Allow paint to dry.
Photo By: Marian Parsons, Mustard Seed Interiors
Cottage Living Room with Curtained Window
Hanging curtain rods can be a pain! All of the measuring and levels and the end result might still be off. It’s especially challenging if you’re hanging several rods in one room. An easy-to-make template makes hanging curtain rods quick and stress free.
Photo By: Marian Parsons, Mustard Seed Interiors
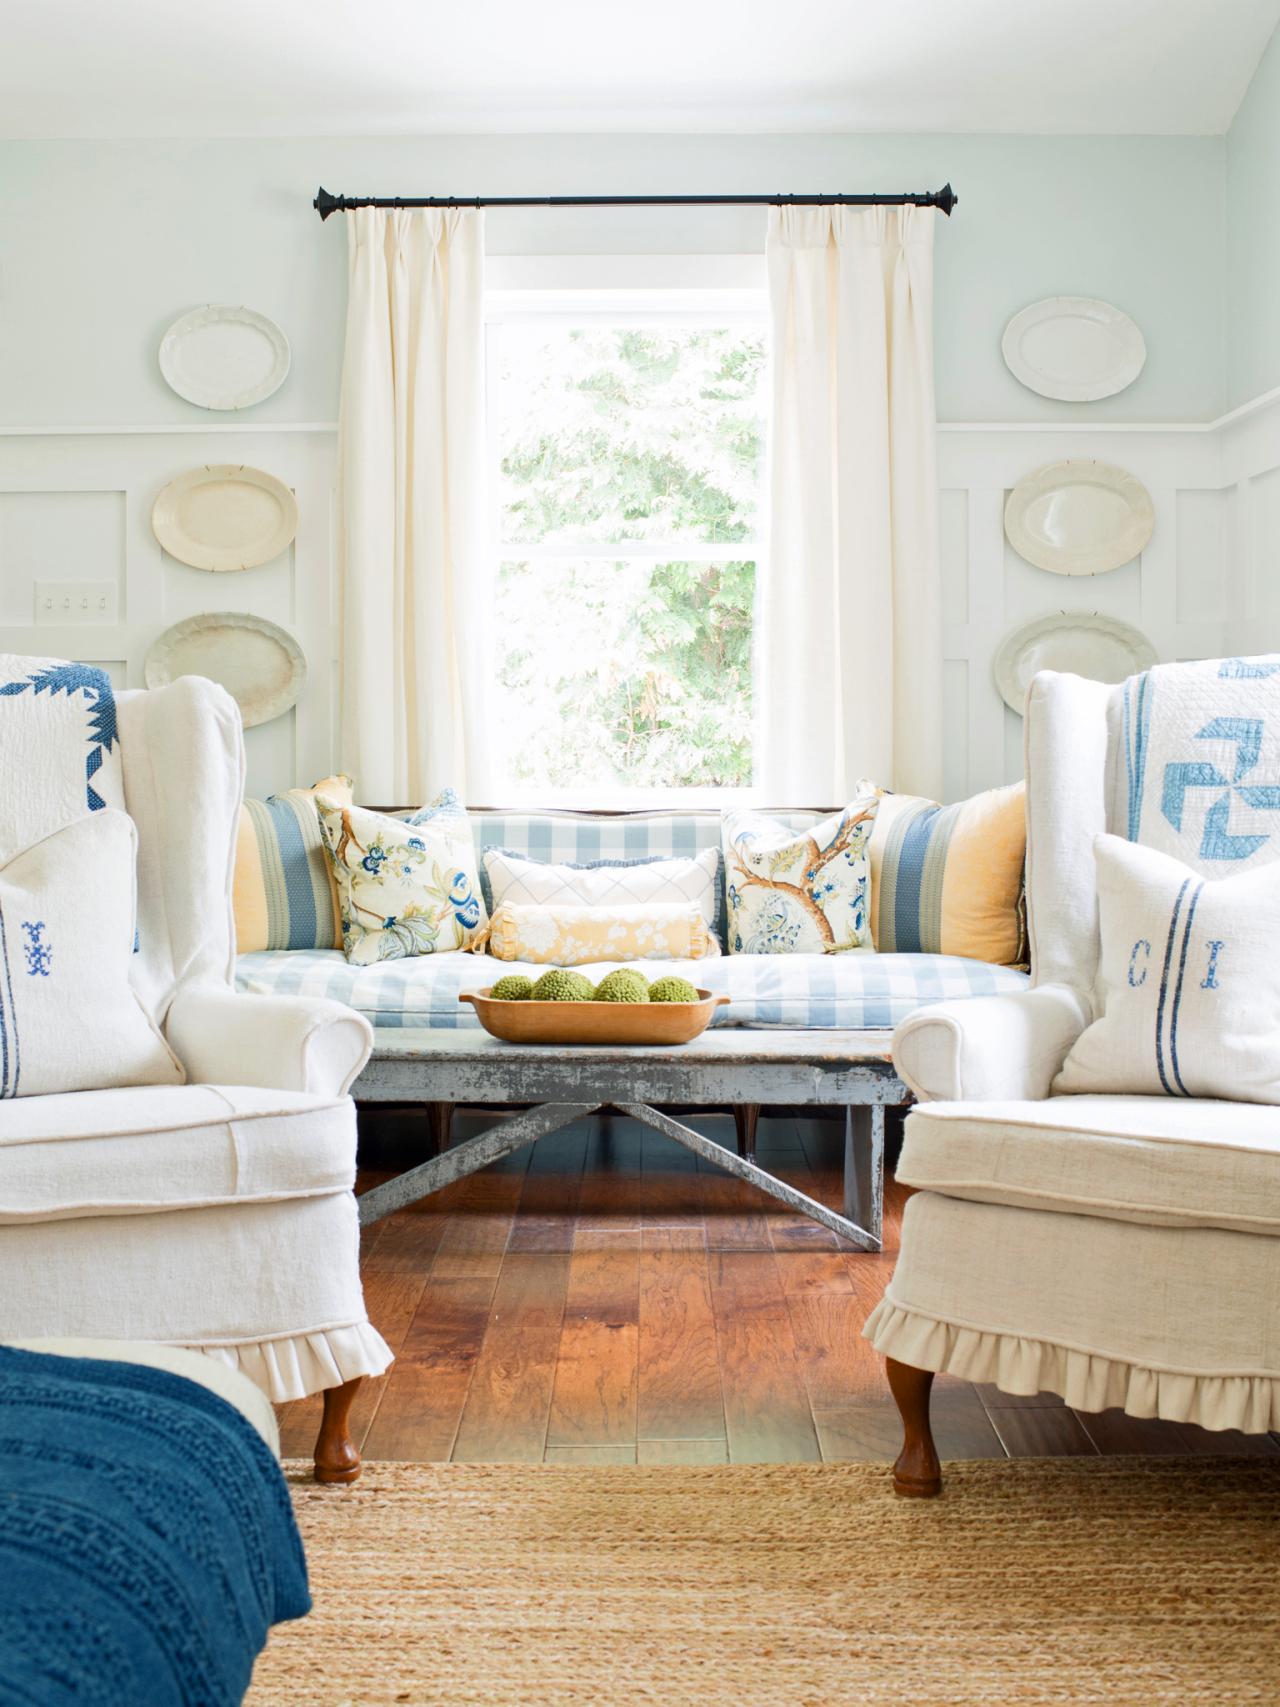
Wainscoting Wall Treatment
Wall treatments that add architectural interest to a room are definitely a trend in home décor. This ¾ wainscoting treatment based on a design found in a historic home, is a relatively easy diy project that will boost the wow factor in any space.
Photo By: Marian Parsons, Mustard Seed Interiors
Wainscoting Wall Treatment
This ¾ wainscoting treatment adds architectural interest to this space.
Photo By: Marian Parsons, Mustard Seed Interiors


